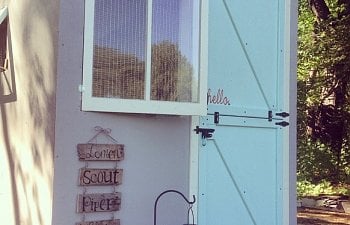
Hello Coop!

Introduction
Say "Hello" to our little coop! I did a TON of research to know what I wanted the chicken coop to be and how to make it work for our needs. My amazing husband, who also happens to be a tradesmen, was able to take my ideas and turn them into this beautiful coop that we both love and are very proud of. Not to mention it's the home of some very happy and spoiled chickens. Our coop was built in the spring and took a little over a month to complete. There was a bit of a time crunch since I brought 6 peeps home in March and they were quickly outgrowing the brooder I had made for them in our office!
General Information
Coop Dimensions: 6'6"L x 8'6"W x 8'6" - 6'6"H (The roof is taller in the front and slopes to the back)
Run Dimensions: 10'8" L x 8' W x 8' - 6' H (The roof is taller in the front and slopes to the back)
Time to Complete: A little over a month (beginning of April - mid May) for coop + 1 month for run
Estimated Cost: $2,000
Number of chickens: 5-6
Paint colors: Sherwin Williams - Intuitive Gray, Tame Teal, and Varsity White
Construction

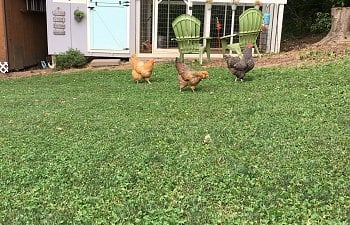
We chose to build the coop in a seldom used corner of our 2 acre property. There was a concrete slab there that the previous owners had used as a dog kennel. We tore down the old kennel fencing and we knew we had the perfect spot for a digging-predator secure run. The spot has proved to be perfect in other ways as well, as it faces east and receives the morning sun. Which is great for warming them up in the winter after chilly nights. It is also backed by a forest, which provides for a cool shady coop and run all summer. Living in the Northeast, these are things that were definitely needed for the chickens.

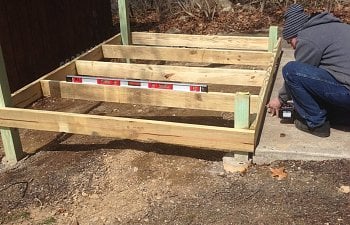
My husband poured concrete to secure the foundation for the corners of the coop.

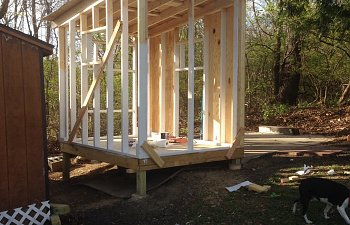
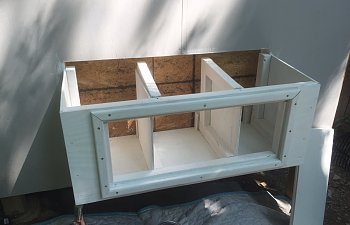
Next, he framed out the base of the coop. As you can see in the pictures, we were building on a bit of a slope. This meant we had to have the coop raised off the ground.


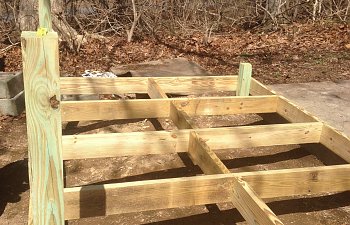
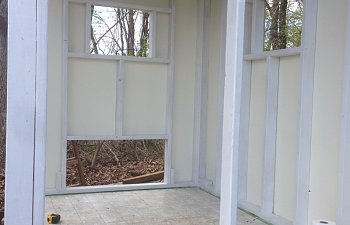
Finished floor supports and installation of plywood sheeting to make solid floor for coop.

We covered the floor with linoleum flooring for easy clean up. This has worked GREAT!

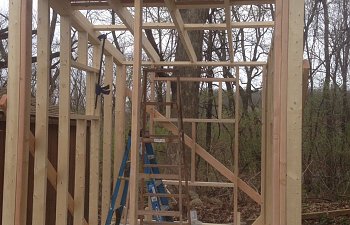
Next, I found these old shed windows on the side of the road. I cleaned them up and replaced the few glass panes that were broken with plexiglass. We needed these before we could do the walls of the coop so that my husband knew what size window space he should make in each wall.

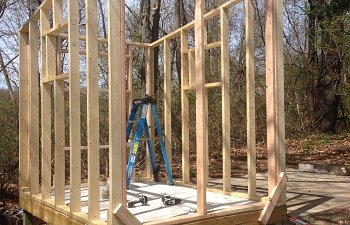
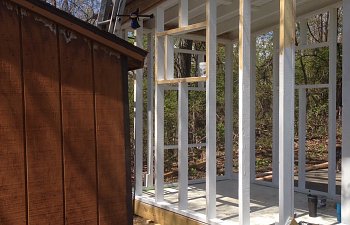
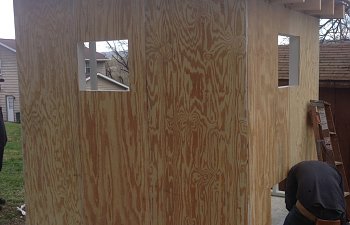
Two identical walls were built for the sides of the coop.
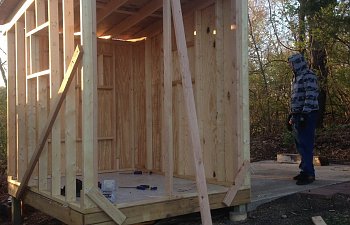
Standing walls of the coop.
Back wall of the coop.
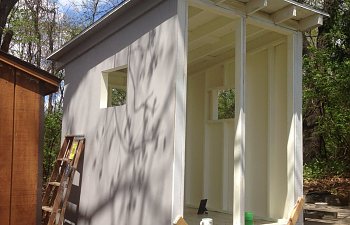
Painting!! So much PAINTING!! We did a glossy white for the inside and the trim to help with clean up.
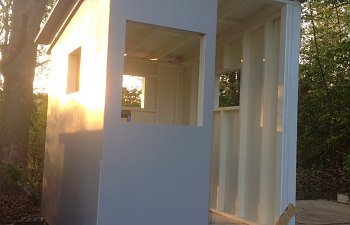
It's getting there! We used plywood sheeting to cover the walls and painted them with outdoor semi-gloss paint. The windows were attached with hinges. The front window swings open like a door. The other three smaller side windows are hinged on the top. I rigged a simple pulley system to open these small side windows. My husband made the dutch door. The unfinished places you see above and below the door in this picture were simply covered in plywood and painted. The roof was covered in tar paper and covered with shingles.
Here you can see some of the pulley system that I rigged. I attached an eye hook to the bottom corner of the hinged window and another one coming down from the roof. Then I strung a nylon cord from the window to the roof and back down to arm's reach. I then attached a boat cleat to the outside wall of the coop. Finally, I strung some washers to the cord. To open and close the window I simply pull the cord and hook the washer on the cleat!
At this point I couldn't wait to start decorating...

...and also get these big birds moved out of our house and into their new coop!


Now that the chickens had moved into the coop it was time to start construction on their nest boxes. They were still too young to be laying so we knew we had some time to keep this part sectioned off with a scrap piece of plywood while we kept working on the back side of the coop. We put 3 nest boxes in for them, but of course, they only use 2 of them.


Here is the completed nest box. I had originally wanted the top to be on a hinge that I could lift to collect eggs. My husband explained to me that it might be tricky and would also allow water to leak in when it rains. He put a hinge on the front to make the door swing down and this has worked perfectly. He also put the same shingles on top of the nest box that he had used on the roof of the coop.
The door on the nest box is kept closed with a simple hook and eye closure.


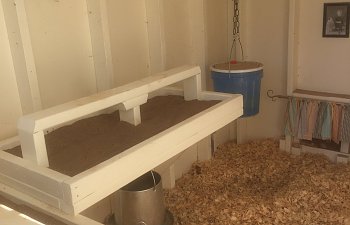
Next we installed the roosts/dropping boards. These are a perfect place for the chickens to roost at night. The boxes are filled with construction grade sand which I can scoop out just like a cat's litter box. This helps to keep the shavings on the floor more clean and the coop generally less stinky. You can also see that we chose to hang the food from under the board.
This is the view when you walk into the front door. The roosts/dropping boards and water bucket are on the left. The nesting boxes with privacy curtains are straight ahead... and of course every coop needs some cute and quirky chicken art!
Finally, it was time to start working on the run. You'll notice the temporary run that I put up for the chickens in these pics which was just plastic fencing. It came down as soon as a more permanent, safer alternative was built.

As previously mentioned, we did choose to build our run on top of an already existent 8'x6' concrete slab. This was a great option to build on to prevent predators from digging into the run. We did fill the run area with construction grade sand to make it more comfortable for the chickens. The bottom framing you see starting to go up in these pics is great at holding in the sand.
Here my husband and father-in-law are adding the roof to the run. We chose to use corrugated metal roofing because of its durability and we liked how it looked.The guys overlapped the edges and screwed them together.


Here you can see the roof is complete. The picture on the left shows before we put up the metal cage walls. The right picture shows after the run was complete. The metal caging was not tall enough to cover from the top to bottom of the walls so he put the wood piece around the middle as a meeting place for the top piece to meet the bottom piece and then of course covered up the raw metal edges with another round of wood trim.
We chose to also add rope lights to our coop and run to encourage our girls to keep laying throughout the colder months. This is an early morning pic after the lights turned on.
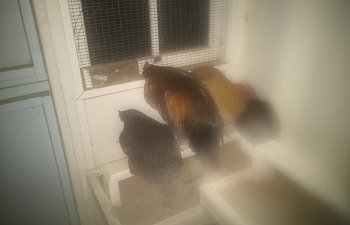
Piper showing off in her new home.
While the coop and run are still in desperate need of some landscaping, the chickens don't seem to mind and it's one of my favorite places to sit and relax.
When I first told my husband that I was getting peeps and that they would need a coop built for them he wasn't too crazy about the idea. In fact, he chose to make the coop so large just in case the "chicken thing" didn't work out, as least we'd have a nice tool shed. Well it's been over 2 years and he loves the coop and the chickens. We built it so that it works for us and our needs and we couldn't be happier. I don't see it being a tool shed anytime soon.
Some of the things that I love and am so glad we included are:
- The large walk-in size. This has made it so easy to get in and tend to the chickens (cleaning, feeding, watering, etc)
- Easy to clean linoleum flooring
- Dropping boards
- Pulleys to open windows and pop-door to run
- I wish there was a smooth transition from coop to outside. When doing a full clean out of the shavings, I have to physically shovel and carry it out. I wish there was a way to simply PUSH the shavings out of the door into a wheelbarrow or bucket, etc.
- Still needs ventilation holes
- I suggest pre-painting as much as you can.
Thank you so much for checking out our coop! Please feel free to ask any questions.


 This coop should really be called "Home Sweet Home" ... Traditional? I know; but this coop actually truly fits that phrase!