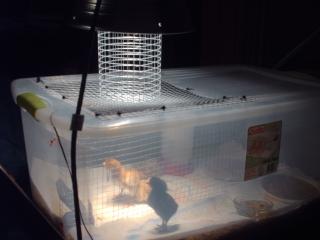
After looking at many brooders this is what we came up with!

We decided a brooder of this style is easy to clean and also easy to make.
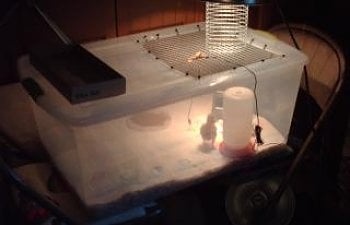
The container was purchased at Walmart and was on sale for $9.00.
My husband then cut a whole in the lid with a jigsaw. Only half of the lid was cut.
He then drilled small holes around the opening in order to zip tie the wire on.
Small square wire ($25.00 a role of about 25 feet) was placed over the whole and then zip tied to the lid.
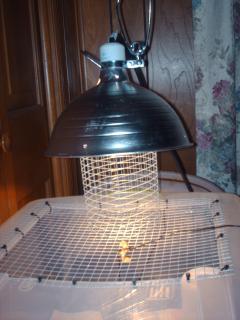
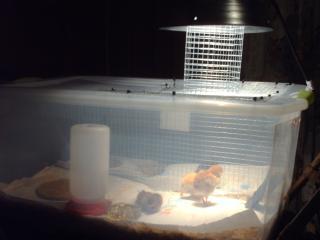
He then used some of the same wire and cut in order to make rings to hold up the brooder light ($12.00 from Lowes, light bulb $3.45 for 2). We started with a 75 watt and then decreased to a 40 watt.
The brooder light simply sits on the ring. He made four different height rings so we could move the light up and down as needed to control the temp.
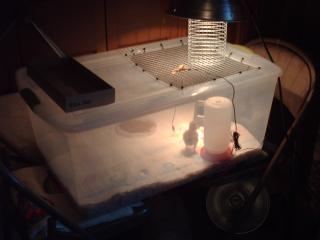
We also found out later that this brooder is easily modified! We had two chicks that were being picked on. My husband drilled four holes on the end of each side. Two holes at the top and to at the bottom right next to each other. We then placed more of the wire, the height of the brooder through the center of the brooder. The wire was tied with regular ole garbage bag ties. We did not divide the brooder in half the other way because we would have chicks not under the light and ones that would not be able to get out of the light.
This also makes it very easy to place back to one large size again, by simply removing the wire.
Having the lid on is also a great idea. We found at about 1 1/2 weeks the chicks started to realize they could jump!
We hope this helps with your decision on a brooder for you and your chicks.
John and Julie Barichivich
Jordan, Brittany and Jessica
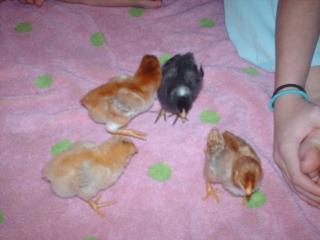
and our 4 lovely chicks!
We decided a brooder of this style is easy to clean and also easy to make.
The container was purchased at Walmart and was on sale for $9.00.
My husband then cut a whole in the lid with a jigsaw. Only half of the lid was cut.
He then drilled small holes around the opening in order to zip tie the wire on.
Small square wire ($25.00 a role of about 25 feet) was placed over the whole and then zip tied to the lid.
He then used some of the same wire and cut in order to make rings to hold up the brooder light ($12.00 from Lowes, light bulb $3.45 for 2). We started with a 75 watt and then decreased to a 40 watt.
The brooder light simply sits on the ring. He made four different height rings so we could move the light up and down as needed to control the temp.
We also found out later that this brooder is easily modified! We had two chicks that were being picked on. My husband drilled four holes on the end of each side. Two holes at the top and to at the bottom right next to each other. We then placed more of the wire, the height of the brooder through the center of the brooder. The wire was tied with regular ole garbage bag ties. We did not divide the brooder in half the other way because we would have chicks not under the light and ones that would not be able to get out of the light.
This also makes it very easy to place back to one large size again, by simply removing the wire.
Having the lid on is also a great idea. We found at about 1 1/2 weeks the chicks started to realize they could jump!
We hope this helps with your decision on a brooder for you and your chicks.
John and Julie Barichivich
Jordan, Brittany and Jessica
and our 4 lovely chicks!