Welcome to Kona*Chicken*Ohana's Coop Page
We just finished our coop. The yard needs a little work now and we still have
to put up some chicken wire or plastic netting on the fence surrounding the yard.
We got lots of ideas from this website and I loved pouring over all of the pictures.
So much great information!
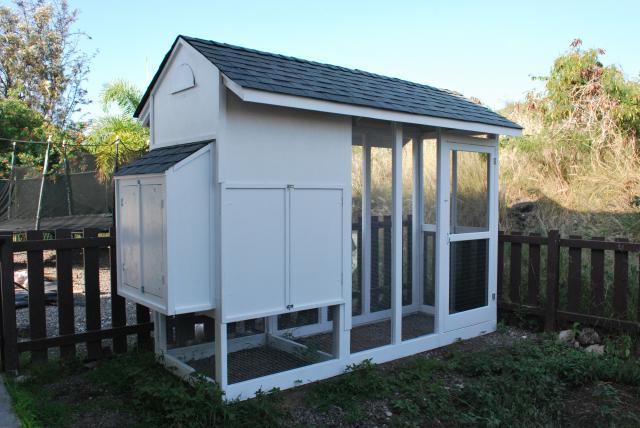
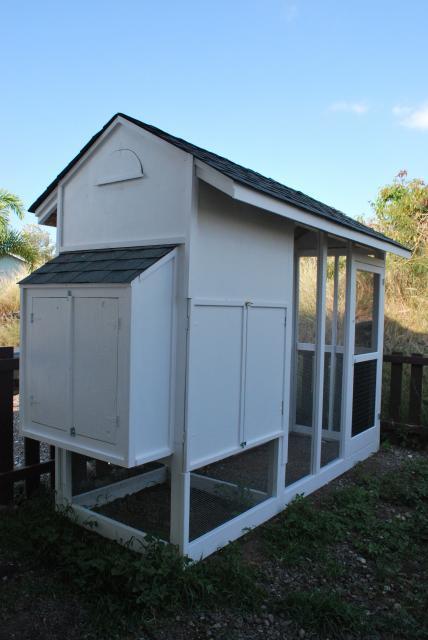
The Chicken Mansion

It all started when I got the Costco Connection magazine in the mail. On the
front cover was the CEO of Foster Farms. The article was all about chickens
and how the business got started, etc. Then I noticed that the neighbor up
the street was selling "farm fresh brown eggs" from their chickens. I
thought hmmm...it might be kind of neat to have our own hens and have fresh eggs.
Maybe the kids could even sell the extra eggs at their lemonade stand.
I mentioned it to my husband and he thought it was interesting, but in actuality he
was really thinking "how much will this cost me in time, energy, and money". He
told me just the other day that he procrastinated in starting the coop to see if
my interest would wane. But the more I researched chickens and read about
the fun and interesting experiences others were having with their chickens,
the interest just grew. So out came the pencil, graph paper and while the
plans were drawn out the list of baby chick names grew and we were on our way....
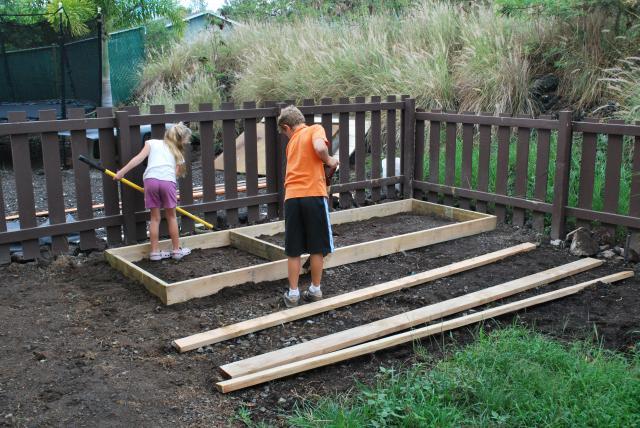
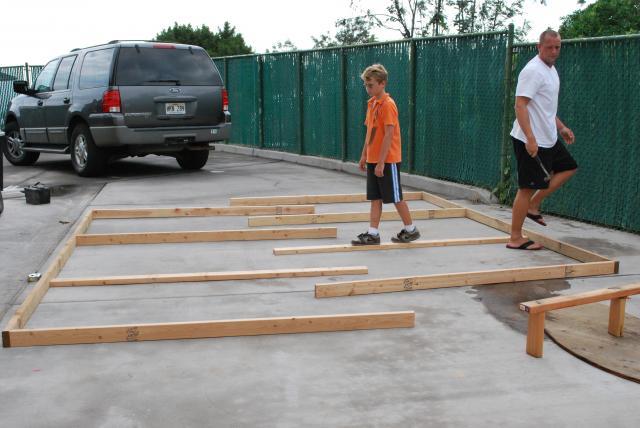
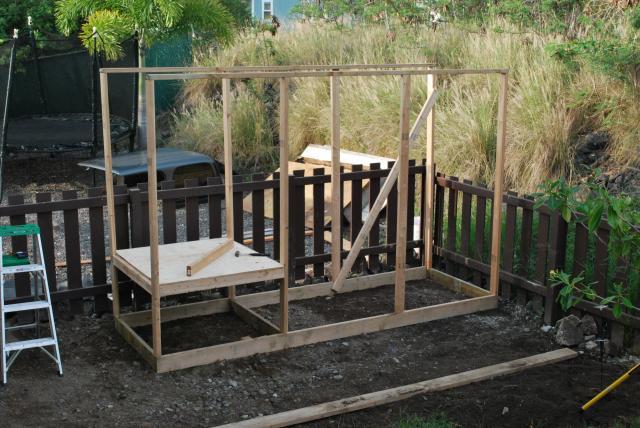
Here's the progression of our project.
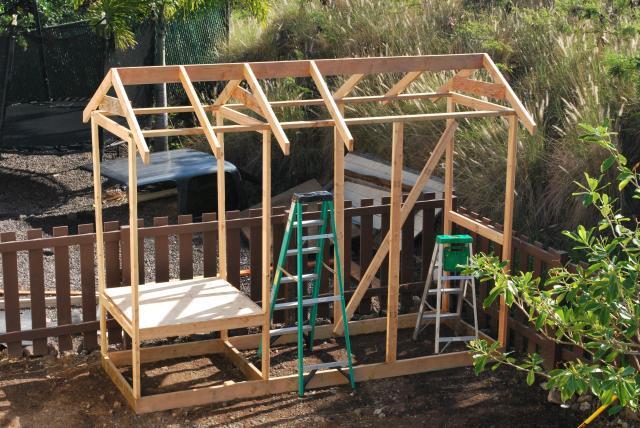
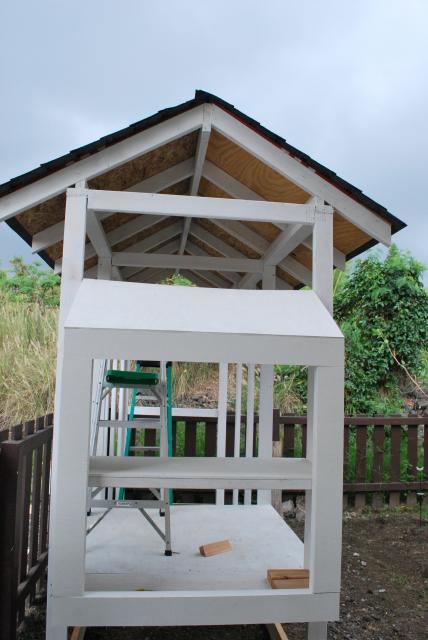
I had everything drawn out on graph paper but my husband had his own plan in mind.
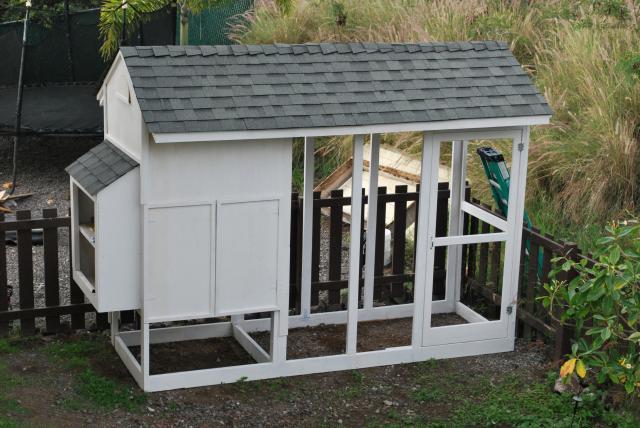
I wanted it to be 12'x6' but in the end it turned out just about how I had envisioned
it with a few different/extra things added. The dimensions are 12'x 4'x 8'(the
walls are 8', not including the roof height). I didn't expect it to be so tall, but
it's really nice to walk into it and have plenty of space.
We used treated 2x6 lumber for the bottom framework
2x4 construction for the walls
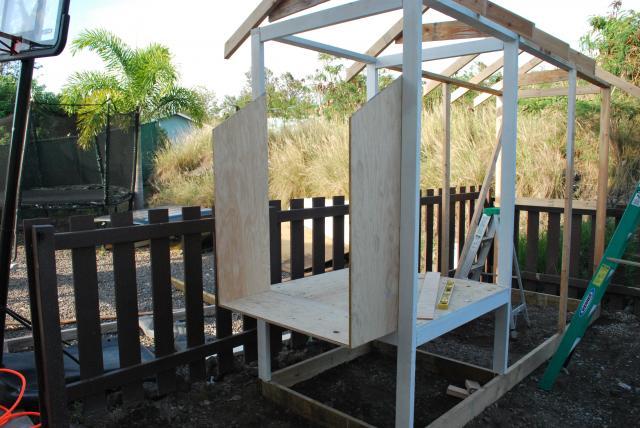
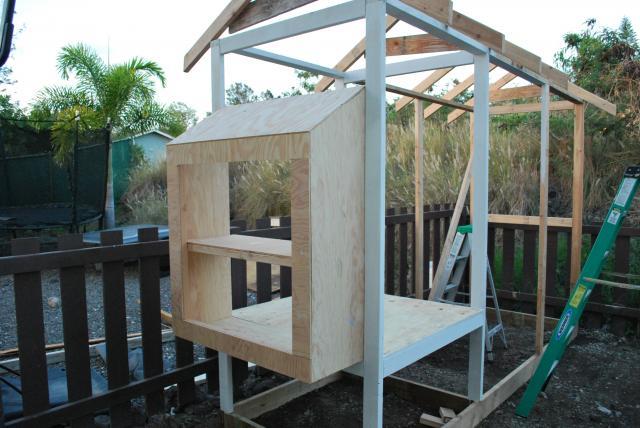
3/4" plywood for the coop floor
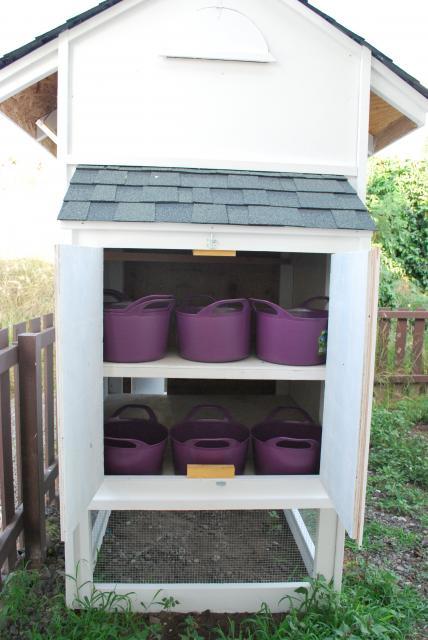
1/2" plywood for the nesting box side walls, 3/4" plywood for the base of nesting box
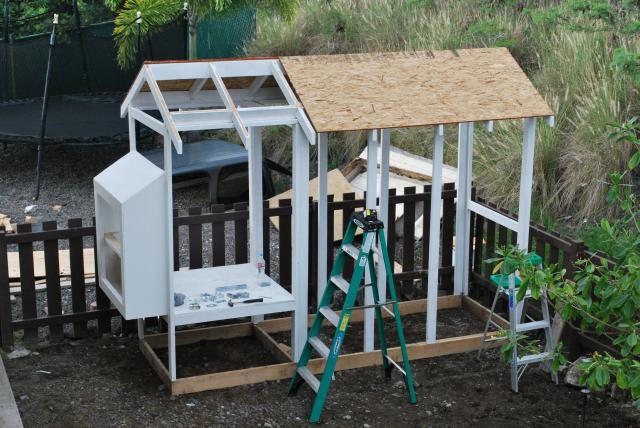
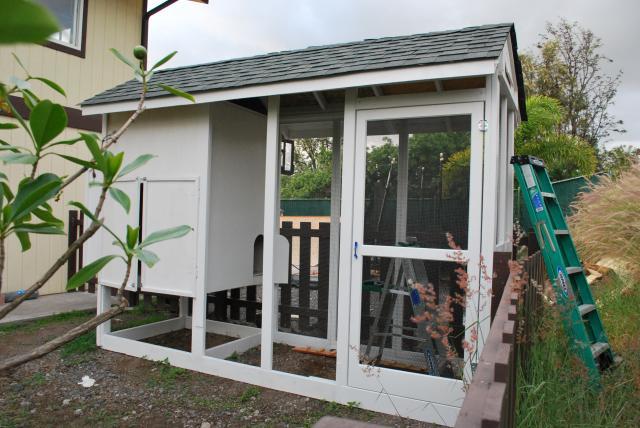
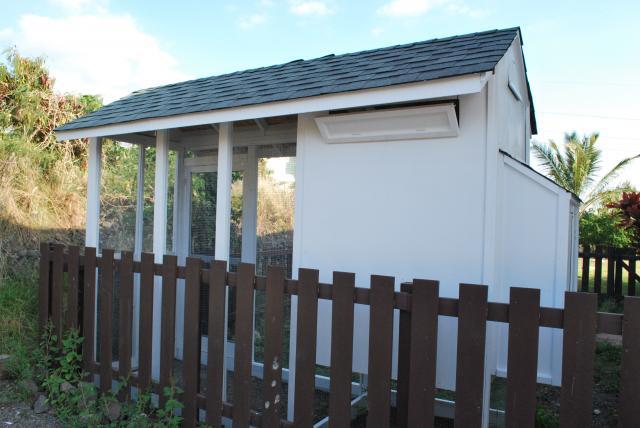
Roofing is done and siding is being put on.
Nesting box doors... I originally wanted them to be horizontal and drop down
but we revised that plan so that our kids could reach in for the eggs more easily.
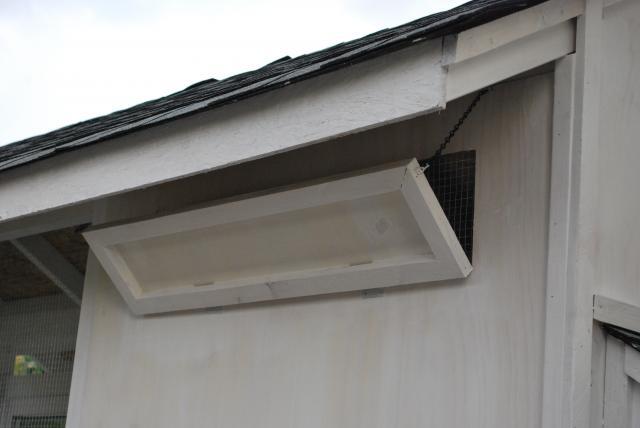
Little half circle ventilation window, covered in 1/2" hardware cloth. We still
have to put the chain on so we can prop it open.
Window for ventilation, opening covered with 1/2" hardware cloth. It will most
likely stay open since the climate is warm year-round.
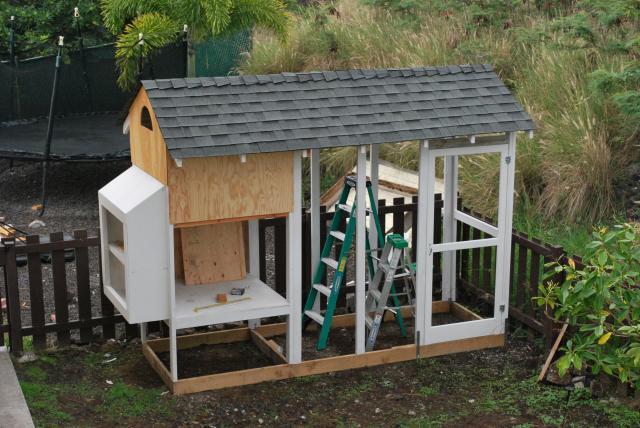
All primed and ready for final exterior paint.
Screen door is in.
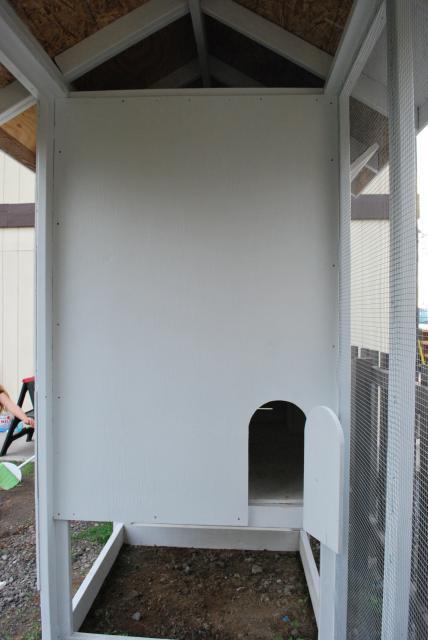
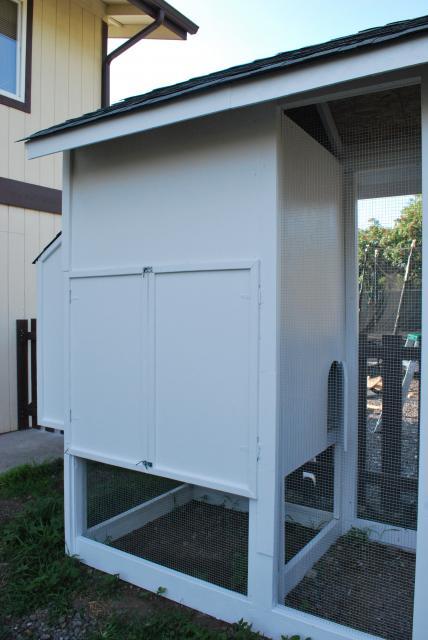
Little chicken door. There will be a ramp leading up to it and a latch to close them in at night.
Hardware cloth is installed.
The feeder and waterer will hang underneath here.
Human access to coop for easy cleaning. We are planning on either using vinyl flooring
or left over tile we have to cover the floor so we can hose it out when necessary.
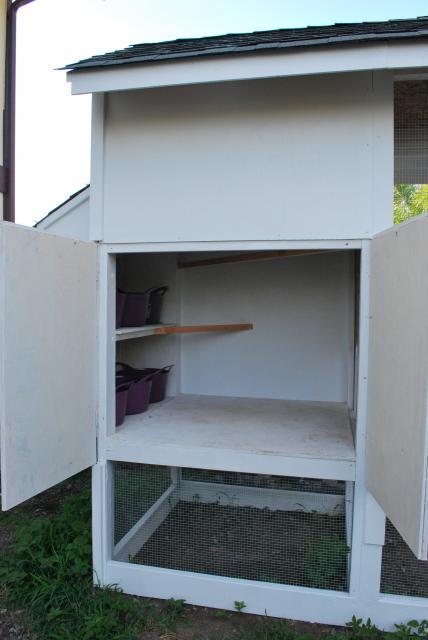
My husband found these containers on clearance. With a little tweaking they will
be easy-to-clean nesting boxes.
With a few final touches we will be ready for the chicks to arrive. They are on
order and are to be shipped on September 22nd. We are really excited!!!
to put up some chicken wire or plastic netting on the fence surrounding the yard.
We got lots of ideas from this website and I loved pouring over all of the pictures.
So much great information!
The Chicken Mansion
It all started when I got the Costco Connection magazine in the mail. On the
front cover was the CEO of Foster Farms. The article was all about chickens
and how the business got started, etc. Then I noticed that the neighbor up
the street was selling "farm fresh brown eggs" from their chickens. I
thought hmmm...it might be kind of neat to have our own hens and have fresh eggs.
Maybe the kids could even sell the extra eggs at their lemonade stand.
I mentioned it to my husband and he thought it was interesting, but in actuality he
was really thinking "how much will this cost me in time, energy, and money". He
told me just the other day that he procrastinated in starting the coop to see if
my interest would wane. But the more I researched chickens and read about
the fun and interesting experiences others were having with their chickens,
the interest just grew. So out came the pencil, graph paper and while the
plans were drawn out the list of baby chick names grew and we were on our way....
Here's the progression of our project.
I had everything drawn out on graph paper but my husband had his own plan in mind.
I wanted it to be 12'x6' but in the end it turned out just about how I had envisioned
it with a few different/extra things added. The dimensions are 12'x 4'x 8'(the
walls are 8', not including the roof height). I didn't expect it to be so tall, but
it's really nice to walk into it and have plenty of space.
We used treated 2x6 lumber for the bottom framework
2x4 construction for the walls
3/4" plywood for the coop floor
1/2" plywood for the nesting box side walls, 3/4" plywood for the base of nesting box
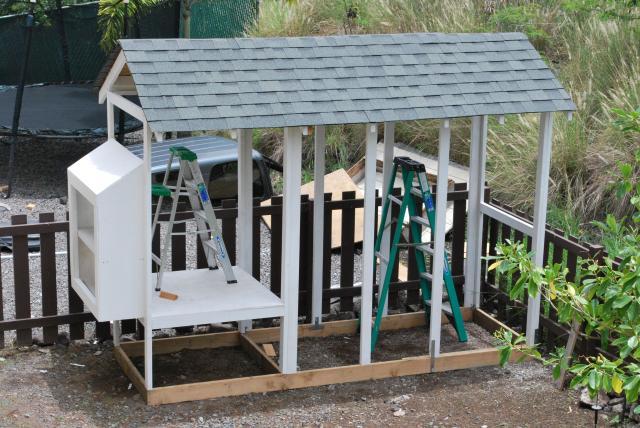
Roofing is done and siding is being put on.
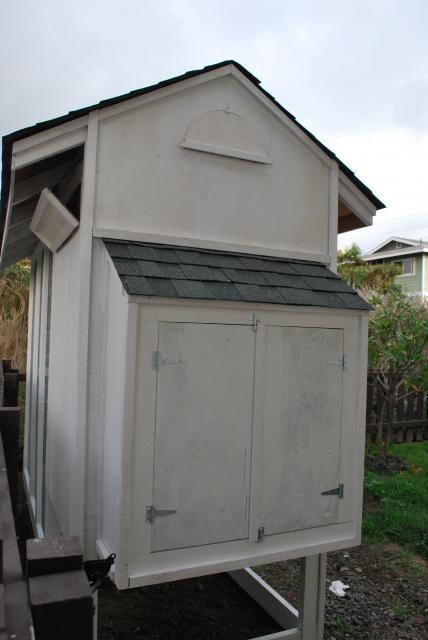
Nesting box doors... I originally wanted them to be horizontal and drop down
but we revised that plan so that our kids could reach in for the eggs more easily.
Little half circle ventilation window, covered in 1/2" hardware cloth. We still
have to put the chain on so we can prop it open.
Window for ventilation, opening covered with 1/2" hardware cloth. It will most
likely stay open since the climate is warm year-round.
All primed and ready for final exterior paint.
Screen door is in.
Little chicken door. There will be a ramp leading up to it and a latch to close them in at night.
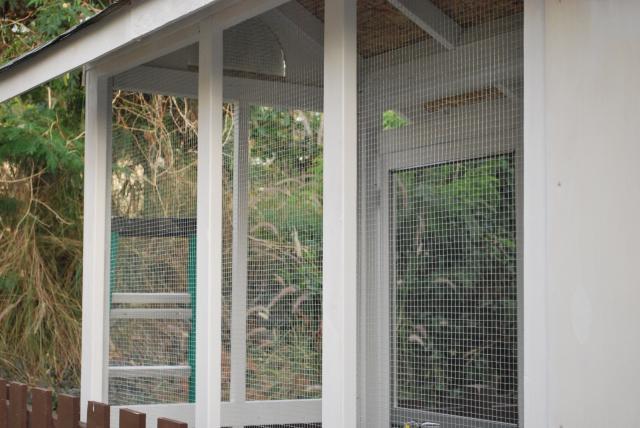
Hardware cloth is installed.
The feeder and waterer will hang underneath here.
Human access to coop for easy cleaning. We are planning on either using vinyl flooring
or left over tile we have to cover the floor so we can hose it out when necessary.
My husband found these containers on clearance. With a little tweaking they will
be easy-to-clean nesting boxes.
With a few final touches we will be ready for the chicks to arrive. They are on
order and are to be shipped on September 22nd. We are really excited!!!
