The Reedy Chicken Coop

I have always wanted chickens. I am not sure why. I have never had chickens, and am not sure if I have ever touched a chicken that still had its feathers. I just know I always wanted chickens. My lovely wife was not so thrilled about the idea, but I figured she would eventually come around. After all, she finally married me!
(No chicken reference there, I think.)
So I decided one day while at the local feed store to build a chicken coop. I had too since I had just purchased 6 baby Rhode Island Reds. You have to buy six per city ordnance. I have been told that is to keep people from buying them as gag gifts or as cute Easter decorations, only to have them tossed in the woods after the purchaser realizes that they are actually living creatures with very specific needs. So, with chicks in hand, and feed in bag, I set out for home, to build, um, well, something. I handed the box of chicks to my beautiful bride, and she looked at me with an obvious question in her big blue eyes –
“why is the box peeping?”
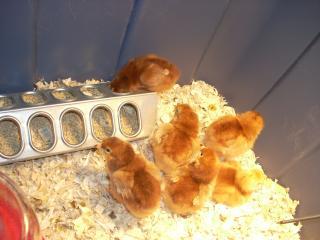
Here are the babies the day I got them.
So, now to the coop! I had studied the three R’s in school, but I knew nothing of the three C’s - chicks, chickens, coops. I drew some plans out after browsing BYC's wide variety of coop pages. I realized that it had to be rather small, and it had to look decent, or no amount of free eggs could convince the neighbors to not complain about the existence of my little “brock” group. Anyway, I decided on a simple design...one of my own. Of course, I give credit to many previous coop builders here on BYC as I took inspiration from numerous sources.
According to city ordnance, we can have poultry here in town, but they cannot free range. I decided on using regular pine, as I did not know what my budget would be, and I did not want to use treated wood. I figured I would paint the whole thing using latex paint, which should help with bugs and rot, and will not make the girls sick. I used a lot of 2x4s and 2x2s. I wanted to paint it red and white, but the only red paint I had was enamel, so I had to make sure that the red parts were not accessible to the ladies.
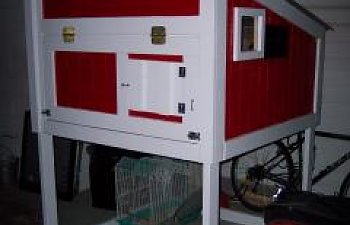
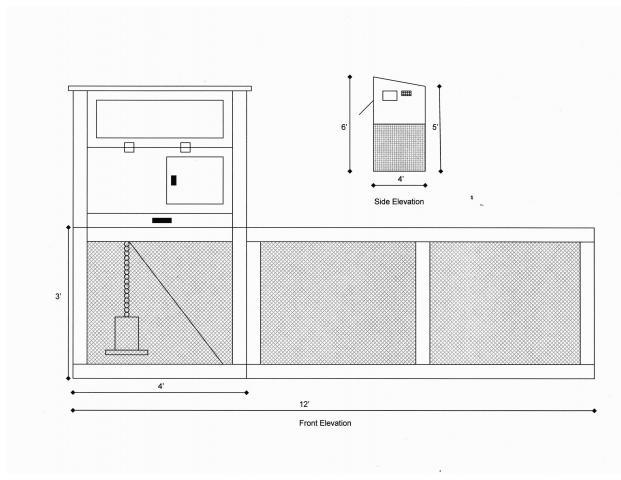
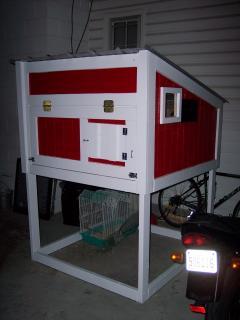
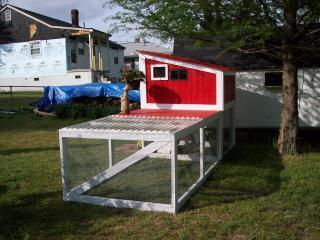
Here are the plans I used. They changed as the coop came together and as I saw that one thing would work and another would not.I actually started with a 6'x6' footprint for the enclosed portion, but I scaled down to 4'x4'. This is what it ended up looking like.
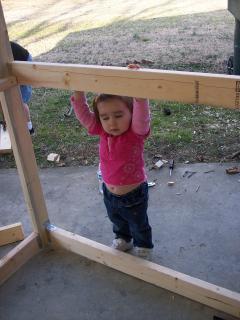
As you can see below, the utterly confused look on my face speaks volumes as I try to figure out how it was all going to work out. 
I have always wanted chickens. I am not sure why. I have never had chickens, and am not sure if I have ever touched a chicken that still had its feathers. I just know I always wanted chickens. My lovely wife was not so thrilled about the idea, but I figured she would eventually come around. After all, she finally married me!
(No chicken reference there, I think.)
So I decided one day while at the local feed store to build a chicken coop. I had too since I had just purchased 6 baby Rhode Island Reds. You have to buy six per city ordnance. I have been told that is to keep people from buying them as gag gifts or as cute Easter decorations, only to have them tossed in the woods after the purchaser realizes that they are actually living creatures with very specific needs. So, with chicks in hand, and feed in bag, I set out for home, to build, um, well, something. I handed the box of chicks to my beautiful bride, and she looked at me with an obvious question in her big blue eyes –
“why is the box peeping?”
Here are the babies the day I got them.
So, now to the coop! I had studied the three R’s in school, but I knew nothing of the three C’s - chicks, chickens, coops. I drew some plans out after browsing BYC's wide variety of coop pages. I realized that it had to be rather small, and it had to look decent, or no amount of free eggs could convince the neighbors to not complain about the existence of my little “brock” group. Anyway, I decided on a simple design...one of my own. Of course, I give credit to many previous coop builders here on BYC as I took inspiration from numerous sources.
According to city ordnance, we can have poultry here in town, but they cannot free range. I decided on using regular pine, as I did not know what my budget would be, and I did not want to use treated wood. I figured I would paint the whole thing using latex paint, which should help with bugs and rot, and will not make the girls sick. I used a lot of 2x4s and 2x2s. I wanted to paint it red and white, but the only red paint I had was enamel, so I had to make sure that the red parts were not accessible to the ladies.
Here are the plans I used. They changed as the coop came together and as I saw that one thing would work and another would not.I actually started with a 6'x6' footprint for the enclosed portion, but I scaled down to 4'x4'. This is what it ended up looking like.
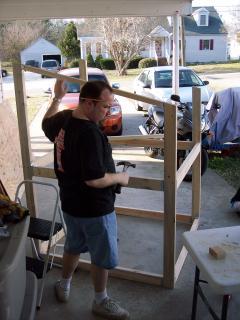
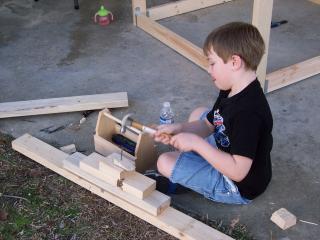
My children finally joined me outside and helped with holding nails and such. My son got his first blood blister from hitting his index finger with the hammer (the sign of any true builder). I discovered that my lovely wife was taking pictures, so I hurriedly donned my favorite "Bass Pro Shops" hat to cover up my thinning hairline. I used a lot of metal connectors to put things together instead of just screwing things together. Not sure what is better, but it worked pretty well. (Yes, I am still nailing the same piece, and I am not sure what my son was building...)

The coop became an obsession. I worked into the night - until my spousal unit came and forced me to put down the hammer. She said the neighbors called and complained about the noise - but I knew better - she was already jealous of my brood. No eggs for her, I'll tell you that much!
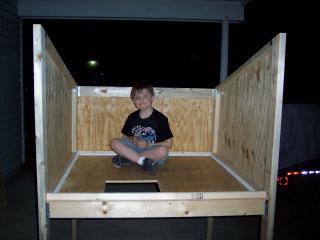
As you can see, I decided to put the chicken entrance on the floor. Again, just sort of decided to do it, but as with everything else, the girls figired it out pretty quick. At night they move right up the ramp and settle down together.
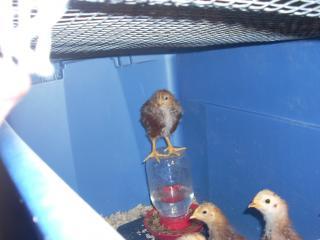
I knew I had to keep working. My babies were getting restless in their small enclosure. They even started having small gatherings to discuss how best to break out. I caught them red-handed as the ring-leader was stirring up the revolution up on her little “soap box.” Notice the surprised look on the others!
3 weeks and a couple hundred dollars later (ugh – so much for “all the free eggs you can eat!”) I had reached the point where I was ready to wire up the bottom and put on some finishing touches. A window and a couple vents went on the sides.
I realized that the girls were growing pretty quick and I needed to get them outside as soon as possible. The feathers were in, and the weather getting warmer, and so it was time!
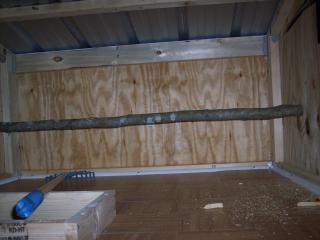
My father-in-law found a nice stick for me, and I put that in - and then built a box around the bottom opening to try this "deep litter method" thing I had been reading about. I really was not interested in having to constantly change the bedding. The rake was found at the local mega-mart for $5 - I figured it was the perfect thing for mixing up the bedding.
Now, the trick was...how do we move it? It was pretty darn heavy. It was probably a site for the neighbors to see as my wife and I worked and worked to get this monster moved to the back yard. We finally made it though! (My back still hurts.) I wish I had a video of that.
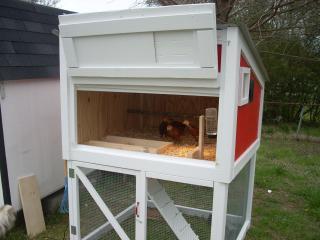
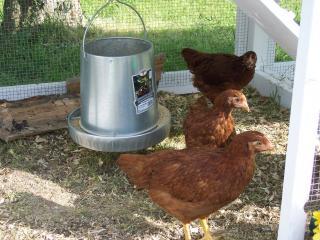
The first day we put the girls into their new home, they seemed curious, but a bit nervous. Oh, I raised them on critter type water bottles. I got tired of seeing the poo in their water. It took them all of 10 seconds to figure it out. I built a small holder so it could go inside of the coop for when they are closed in. I also kept the light in there, as it was still getting pretty cold at night.

As you can see above, the ramp is a bit steep. The girls sort of tumbled down for a time and had a hard time getting up, but until I put the run together, there was nothing I could do. They did figure it out though, and when the run did go on, I was able to adjust it a bit so it is not as steep. Now they go up and down all the time!
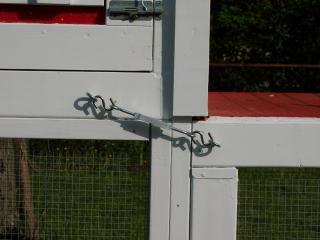
Oh, if you look at the big flip up door, you will see that I had some hooks to lock it. This did not work out well, so I changed them to the slider type of locks. They worked out much better. Also, if you notice on the right side of the door looking at it, you'll see a larger hook. That goes in the corresponding loop on the top right to keep the door open.
So, now the girls are happily inside their new home, and seem happy enough.
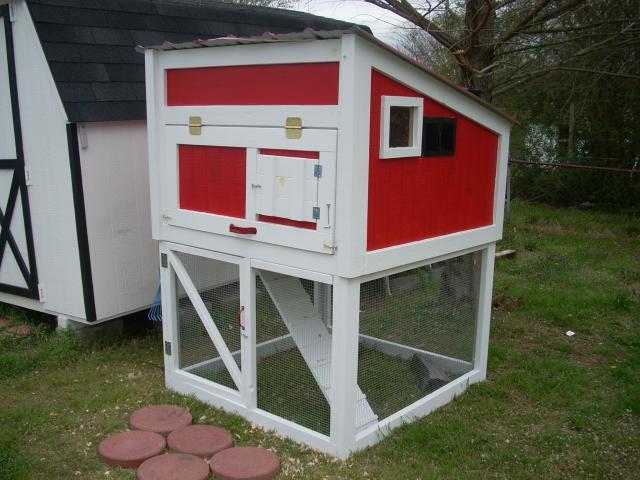
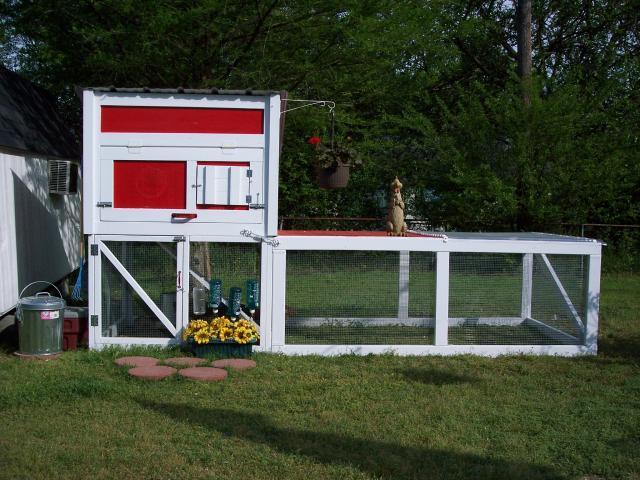
I finished the run this past weekend, as seen below:
I used the leftover siding stuff as half the roof and then got some more of the plastic roofing to make a sunny rain shelter.
Here are the girls now...much older and really beautiful!
I still have a while before we reach egg-time...I can't wait!
I still have a while before we reach egg-time...I can't wait!
Here is a picture of the egg door. I look forward to building a couple nesting boxes.

I figured out a great way to connect the run to the main coop. I wanted something I could move, but was not a tractor. So, I built this in two parts that can be taken apart and moved individually. The connectors keep the two parts together very tightly.
So, here it is...my answer to Michelangelo's "David." My own little masterpiece.
Okay, so it's just a coop - but, it's ours, and best of all - we built it together.
So what would I change or add?
I have to admit, I built this as I went, and so, I probably used more nails and screws than what was needed. I am not a builder. I have a shed and I have my tools, but I truly do not know what I am doing! It is pretty heavy due to the fact that I kept adding wood to make things look better or fit better. I will build some nesting boxes here in the next couple weeks, and I am actually looking forward to that. I think I would have created a door on the back side of the top part (as my father-in-law suggessted - a suggestion I ignored - "I'm building this darn-it!) That would have made it a bit easier to clean the inside, but I can get the shavings out with a small shovel, so it works out okay. Other than that, bigger is always and would have been better if I had the room for it!
I hope you like our little coop. I had a blast building it, and am having more fun watching the girls grow up. I can’t wait to see our first eggs!
Thanks to everyone on BYC for the help and advice.
You have, and I am certain will continue to be, great!
Be blessed!
-The Reedys
(C28 - Not of this world...)
Thanks to everyone on BYC for the help and advice.
You have, and I am certain will continue to be, great!
Be blessed!
-The Reedys
(C28 - Not of this world...)