For nearly three decades I've harbored a secret desire to raise two or three urban chickens. And finaly, just recently, I began sketching possible coops, researching how they might be built, and thought maybe in 2012 I might finally get my wish. On Mother's Day 2011 my very cool husband shocked me by saying "Let's go buy whatever you need!" Wow!
So for the past 10 days, weather permitting, we've been converting my sketches into reality. Each morning we dive in -- look at what we discussed the night before -- modify our plans as needed -- and start measuring, cutting, drilling, digging, shopping for more supplies, etc. It's really surprising how many changes we've made, and more surprising how darned much work this is. A simple little chicken coop really isn't! Making the coop and run predator proof is far more involved than I would ever have imagined, and by far the most complicated part of the project.
_________________________________________
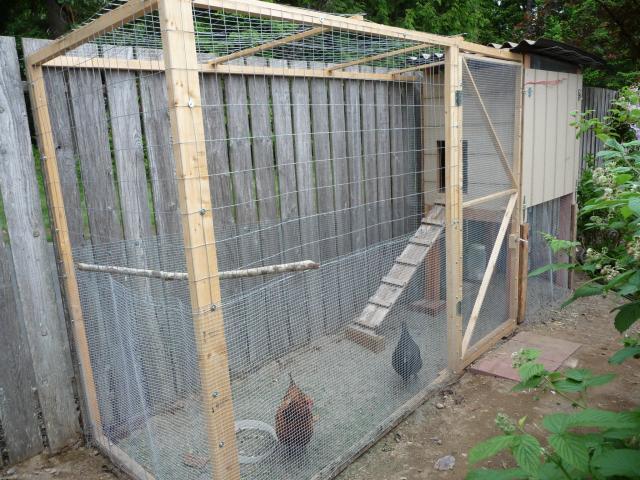
Further down is the Whole Story, but to save you a little time I'm inserting a picture of what the coop looks like today, 2 years down the road. The light colored section on the left is the original coop. The darker half, on the right, was added this winter and will be painted to match when the weather warms up. The addition just increased the floor space so I could add a couple of hens. I moved the nest box so it's no longer underneath the perch -- yippee -- no more poo in the nest box! Overall, it's 3' x 7'. I can still reach every inch of the interior for cleaning and maintenance.
So for the past 10 days, weather permitting, we've been converting my sketches into reality. Each morning we dive in -- look at what we discussed the night before -- modify our plans as needed -- and start measuring, cutting, drilling, digging, shopping for more supplies, etc. It's really surprising how many changes we've made, and more surprising how darned much work this is. A simple little chicken coop really isn't! Making the coop and run predator proof is far more involved than I would ever have imagined, and by far the most complicated part of the project.
_________________________________________
Further down is the Whole Story, but to save you a little time I'm inserting a picture of what the coop looks like today, 2 years down the road. The light colored section on the left is the original coop. The darker half, on the right, was added this winter and will be painted to match when the weather warms up. The addition just increased the floor space so I could add a couple of hens. I moved the nest box so it's no longer underneath the perch -- yippee -- no more poo in the nest box! Overall, it's 3' x 7'. I can still reach every inch of the interior for cleaning and maintenance.

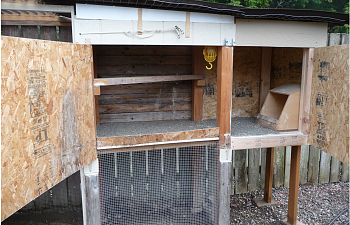
With the doors open you can get a better idea of the arrangement.
If the coop had been designed and built to this size and shape right from the beginning I would have sloped the roof more and added rain gutters. It doesn't look like it in the picture but it slopes to the right, but I'd like to have more. It would also have been easier and cheaper to have used only one piece of roofing. But that's life, and it works. The rain runs away from the pen, the coop, and me.
__________________________________________________________________
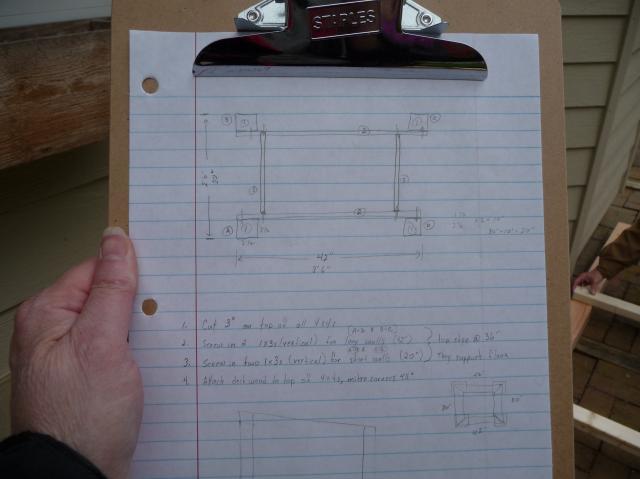
It all started so innocently with some of my notes:
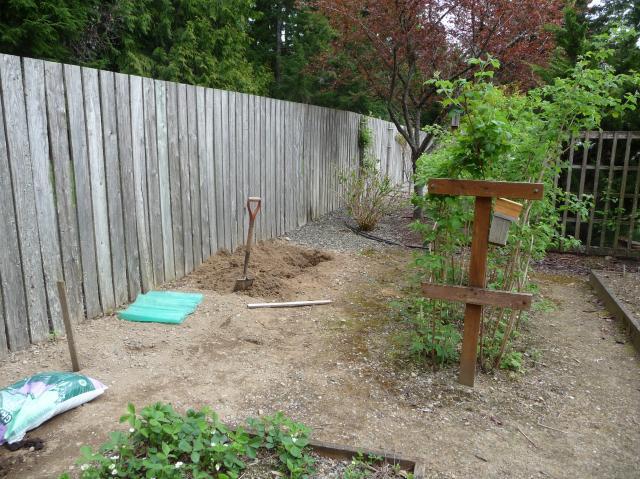
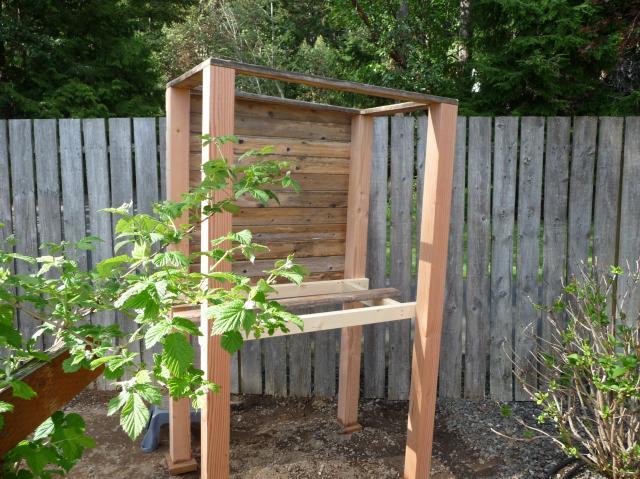
It all has to fit between the raspberries, the fence, the plum tree, and the tomatoes. So I have about 12' by 3.5'. Every inch has to be used wisely. Unfortunately I'd just planted several new dahlias in that spot a couple of weeks ago which now had to be moved! And so began days and days of digging dirt!!!
It all has to fit between the raspberries, the fence, the plum tree, and the tomatoes. So I have about 12' by 3.5'. Every inch has to be used wisely. Unfortunately I'd just planted several new dahlias in that spot a couple of weeks ago which now had to be moved! And so began days and days of digging dirt!!!
Deciding to use reclaimed cedar decking, I scrubbed the boards and dried them in what little sun we had.
(Over the next few months the boards shrank as they dried out, leaving gaps in the back wall of the coop.)
(Over the next few months the boards shrank as they dried out, leaving gaps in the back wall of the coop.)

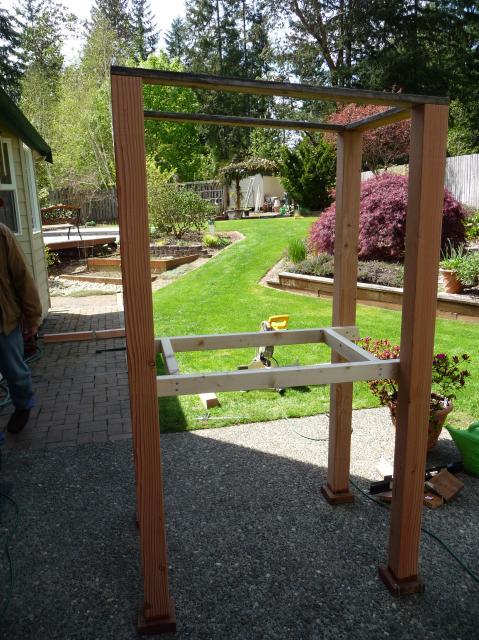
We used 4x4 corner posts and sturdied it with a framework of the old decking boards on the top. To protect the 4x4s from soil exposure and minimize the use of treated lumber, we put a pad of 2" treated lumber at the base of each leg.
The 2x3s are the support for the floor, it's 3' up from the ground, a nice height for being able to reach inside to clean. We chose this arrangement so the 2x3s can be screwed securely into the corner posts and the cross pieces without using metal braces. Another option would have been to toe-nail the 2x3s to the corner posts. Later, we found that it would have been advantageous to have the 2x3s flush with the outer edges of the 4x4s. Oh well!
Because of space limitations there won't be an external nest box, we'll build one that sets inside on the floor. It'll be a little snug inside, but it's workable. The floor measures 3' x 4'.
Because of space limitations there won't be an external nest box, we'll build one that sets inside on the floor. It'll be a little snug inside, but it's workable. The floor measures 3' x 4'.

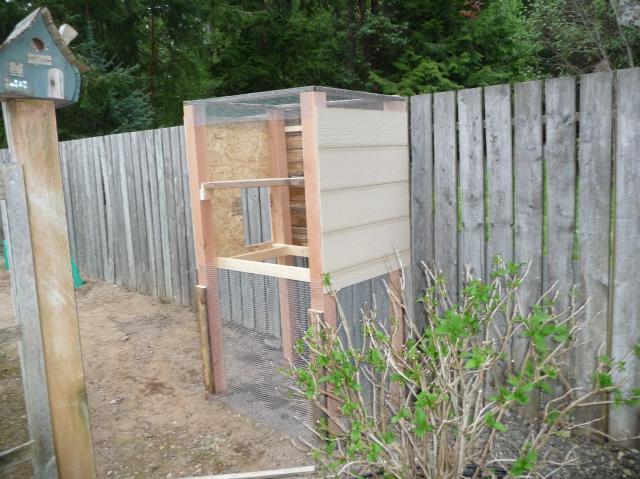
Once the frame of the coop was secure enough to move we put it in place in the garden. The recycled deck boards were cut to length and secured to the back with screws. The very top board will be removeable for air circulation. I left the top 3" open on all four sides and covered the openings with 1/4" hardware cloth. Since staples are easy to pull out, I used screws and washers to secure the hardware cloth every few inches.
Another advantage of using the decking on the back wall is that 1 sheet of siding was sufficient for the other 3 sides. I had the folks at Lowes do the major cuts at the store. It made it easier to carry, and less work at home. In the picture below you can see the hardware cloth at the top of each wall. Since it's attached to the interior surface I later screwed wood strips to the bottom (sharp) edges of the wire to protect the birds faces.
Although I dried the decking boards before using them, they shrank as they continued to dry out, leaving gaps. Because they're on the back wall against the fence it hasn't been a problem, but I wish I'd been able to dry them thoroughly before I used them.
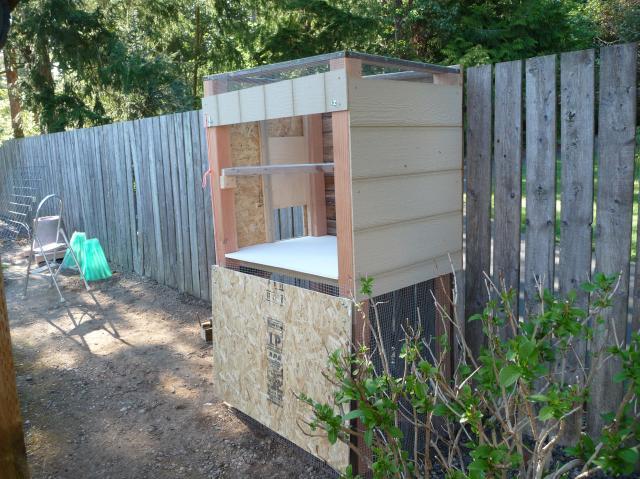
Below the siding I attached 1/2" hardware cloth. At the corners I screwed on more of the decking to stop predators from grabbing the wire to pull it off. So the run and the coop have a 3' high band of 1/2" hardware cloth.
Although I dried the decking boards before using them, they shrank as they continued to dry out, leaving gaps. Because they're on the back wall against the fence it hasn't been a problem, but I wish I'd been able to dry them thoroughly before I used them.
Below the siding I attached 1/2" hardware cloth. At the corners I screwed on more of the decking to stop predators from grabbing the wire to pull it off. So the run and the coop have a 3' high band of 1/2" hardware cloth.
The front door is hinged at the bottom so it opens completely for access to the coop. There's a latch on both corners to secure it. The perch is a 2x4 that's inset diagonally. It's 18" above the floor and I can lift it out when I need to. The inside of the coop is a little more than 3' high.
It's been a year now, and I love this little coop. If I were to do it over, I'd make the big front door in 2 pieces that are hinged on the sides, like cabinet doors. The single large door is a bit cumbersome and I have to step back out of the way when I open it.
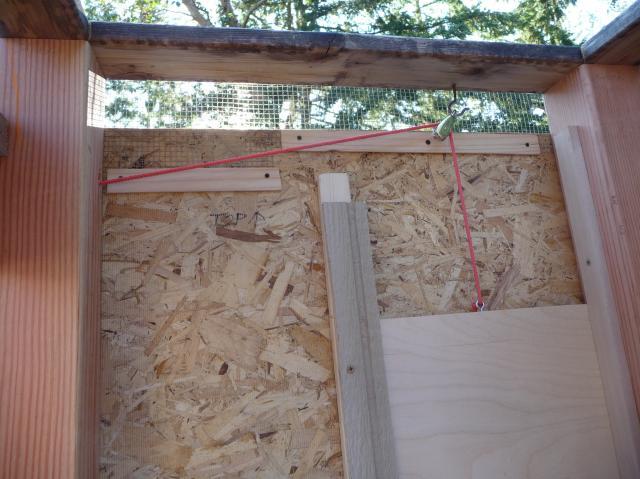
You can see that the pop door is mounted, too. If you look closely you'll see a bright pink rope hanging down the left front corner post. It runs through a hole in the post, through a small pulley, and down to an eye inserted in the top of the pop door. Using the rope we can open and close it without reaching into the coop. There's a cup hook above the big door where we secure the rope to hold the door open. The narrow boards on each side of the door are guides. It also drops down below the deck of the floor so it can't be pryed open from the outside.
It's been a year now, and I love this little coop. If I were to do it over, I'd make the big front door in 2 pieces that are hinged on the sides, like cabinet doors. The single large door is a bit cumbersome and I have to step back out of the way when I open it.
You can see that the pop door is mounted, too. If you look closely you'll see a bright pink rope hanging down the left front corner post. It runs through a hole in the post, through a small pulley, and down to an eye inserted in the top of the pop door. Using the rope we can open and close it without reaching into the coop. There's a cup hook above the big door where we secure the rope to hold the door open. The narrow boards on each side of the door are guides. It also drops down below the deck of the floor so it can't be pryed open from the outside.
Under the soil in the run, about 3" deep, there's a layer of heavy 2x4 fencing. I bent it up at the edge of the run and wired it to the hardware cloth every few inches.
There's a lid of the same material, even underneath the roofing; and a skirt of about 16" on the outside perimeter. We put large paving blocks in front of the door, too, to prevent digging. Nothing short of sasquatch is getting inside this pen!
______________________________
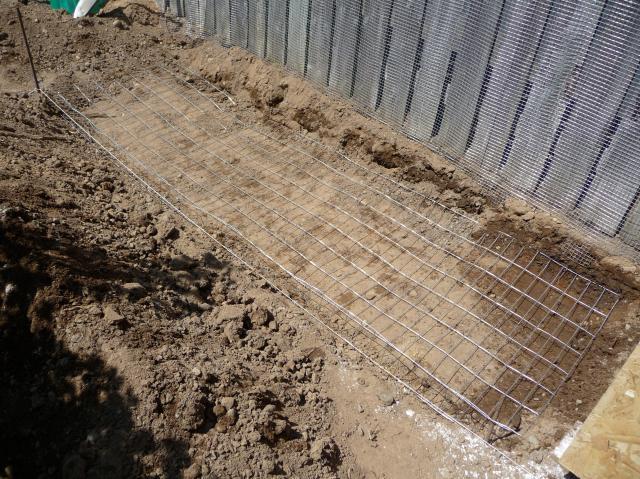
So here's what it looks like at the end. You can see where I screwed the 1/2" hardware cloth directly into the fence boards. On the remaining sides I used heavier gauge 2x4 fencing for the 3 feet above the 1/2" stuff. It's overlapped and tied with heavy wire every few inches. I overlapped the wire so that the top edge of the 1/2" hardware cloth is inside the coop. This way a predator (on the outside) can't grab hold of that top edge and pull down, ripping the fence apart.
Where the coop doesn't quite reach the fence boards I secured more wire.
I used more of the reclaimed deck boards for the ladder. It was a bit steep so I put a piece of old 4x4 under it. To keep the block from shifting, I drilled two holes into it and inserted 12" pieces of old re-bar that are pounded into the ground. It's so nice to be able to use what's on hand instead of having to buy new.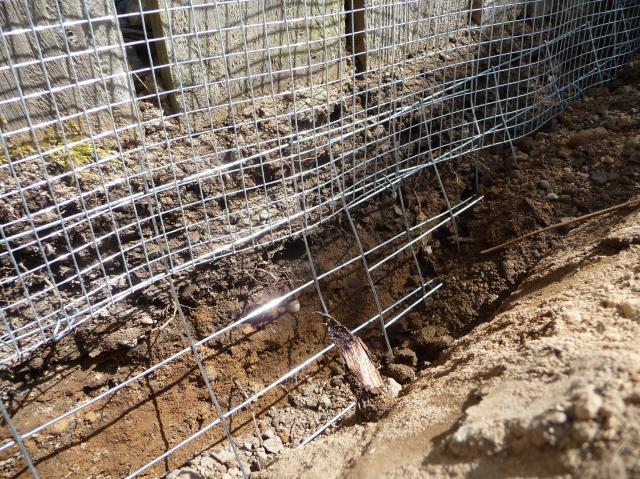
There's a lid of the same material, even underneath the roofing; and a skirt of about 16" on the outside perimeter. We put large paving blocks in front of the door, too, to prevent digging. Nothing short of sasquatch is getting inside this pen!
______________________________
So here's what it looks like at the end. You can see where I screwed the 1/2" hardware cloth directly into the fence boards. On the remaining sides I used heavier gauge 2x4 fencing for the 3 feet above the 1/2" stuff. It's overlapped and tied with heavy wire every few inches. I overlapped the wire so that the top edge of the 1/2" hardware cloth is inside the coop. This way a predator (on the outside) can't grab hold of that top edge and pull down, ripping the fence apart.
Where the coop doesn't quite reach the fence boards I secured more wire.
And here are Pearl and Ginger getting used to their new home amongst the tomatoes,
raspberries, strawberries, and the the plum tree!
____________________________________
About A Year Later
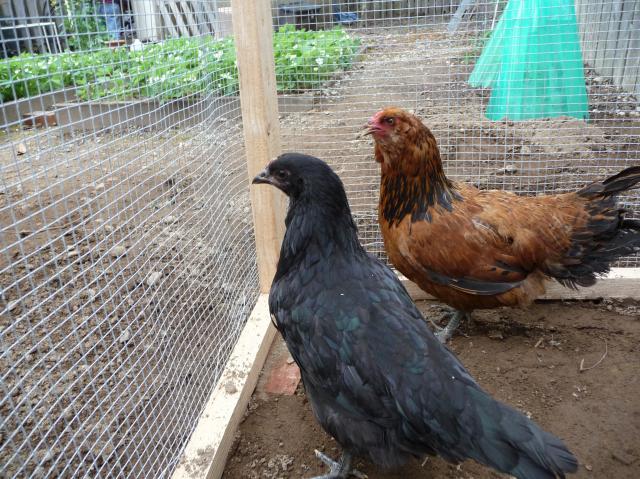
We love our chickens and their little chicken coop. We've learned a lot and we've made a few modifications. In July we added a third pullet, a Black Copper Marans named Ruby. So now we have the Easter Egger named Ginger, a Black Australorp named Black Pearl, and Ruby.
More Space Please
The first thing we learned is that I felt sorry for them being inside their run even though it was at least 10 square feet per bird. They were just too cramped for my liking. We let them out to roam the yard (supervised) which took a lot of time and attention that we didn't really have every day. I constructed a round "play pen" from extra wire and topped it with bird net so they'd have access to various parts of the lawn and garden, but that wasn't convenient either. Eventually we fenced off a section of the yard that was just dirt with a few lilac bushes.
The Good, The Bad, and the Ugly
They had access to a section of ground under the deck which they loved. I guess it felt cozy and protected, and they ran there if they ever felt threatened or saw a large bird fly over. We have haws and eagles, so it was a very good thing! They built themselves a dust bath under the chimney overhang which has been a total hoot! But the constantly found ways to escape! For weeks we'd wait and watch to discover their latest escape route -- it became a game! Eventually the neighbor's dog, an old golden retriever began to dig under the fence. It was only a matter of time before he got into our yard, or the chickens got into his yard. So we screened off that border, too. There was one other - serious - drawback to this extra playground. We had to personally escort the girls back and forth from their secure coop/run to the playground whenever someone wanted to lay an egg! Since they vary widely in their egg laying schedule we had to keep constant watch for a hen pacing nervously at the gate or trying desperately to find a way out!
So we've finally enlarged their run by about 50% and will soon create a new playground alongside -- under the apple tree. Their world is again being defined by fruit!
Two Years Later
The coop got bigger, the pen was enlarged a second time, and I'm up to four or five chickens. The watering system is now a 5-gallon bucket fitted with nipples. It's very easy to clean, and there aren't any pipes to worry about cleaning. The entire pen is covered with translucent smokey corrugated 'plastic' panels which keeps things pretty dry unless the wind blows the rain in.