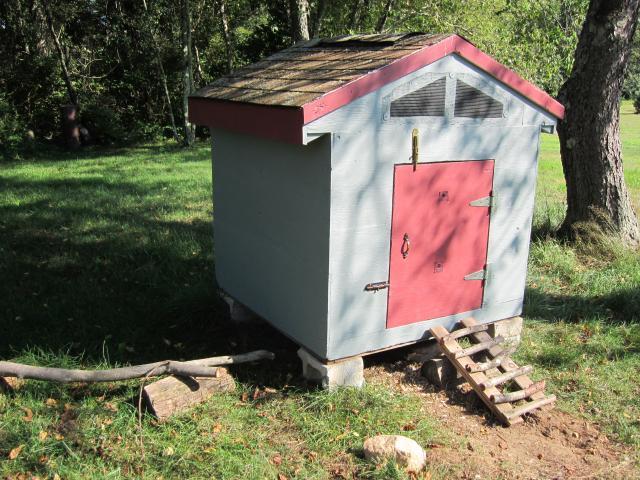
My Hodge-Podge Coop (or, Turning a Doghouse into a Chickenhouse for $30)

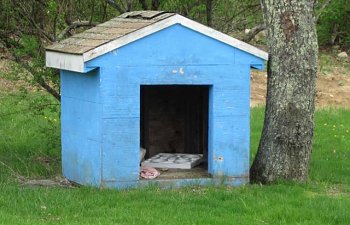
A dirty old doghouse full of trash.
I had two objectives in mind for a coop: protect chickens from predators and ensure a well-ventilated but draftless environment. I originally drew up some plans but they were cost-prohibitive. For a while we didn't think we'd be getting chickens at all this year, if that's what it would cost. It occurred to me there was another way, however: I could wing it with what I had lying around and could buy for cheap. In addition to the doghouse, the previous owners of my house left behind assorted bits of lumber, cans of old paint, and some hardware. Surely I could wrestle a coop out of it all somehow.
These were seriously my second-shot plans. (I originally was going to make the door larger than the opening; I later decided to fit it into the doorway instead.)
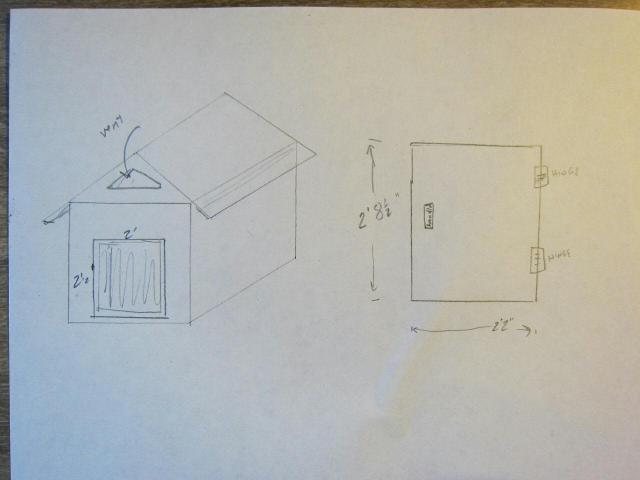
Put on a door, add some vents. Not fancy, but effective. Also necessary was going to be a roost of some sort, and if I could swing it, a nesting box would be grand.
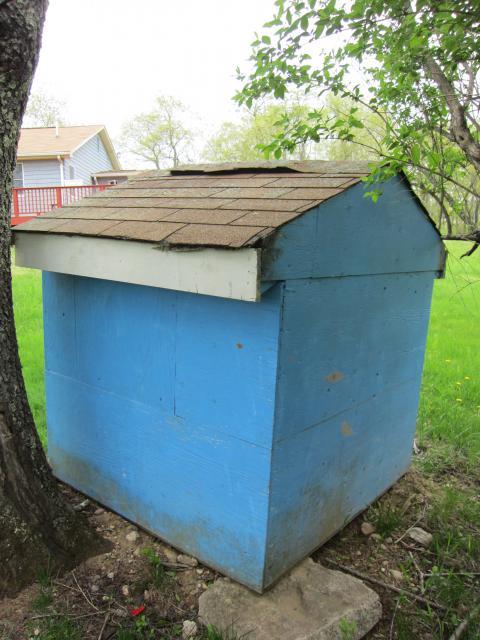
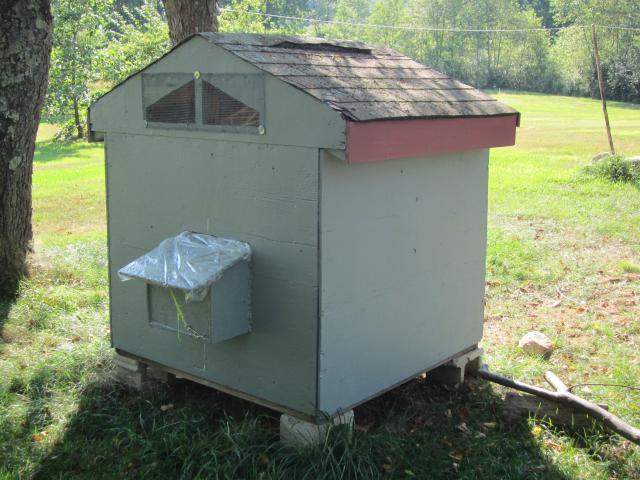
First, with some help I put the heavy old doghouse where I wanted my chicken coop, resting it on top of some cinder blocks we found in the woods.

I did make a few purchases, totalling about $30, for the project.
Consumables I bought
- 3'x5' 1/4"-grid hardware cloth ($12, Home Depot)
- washers ($11, Home Depot & Ace Hardware)
- 7/8" screws ($6, Home Depot)
- a handle and two latches ($0.30, Habitat for Humanity ReStore) [though I later found a handle and two latches in the basement!]
- 2 pieces of 12" x 48" plywood ($1.01, Home Depot, cull pile)
- 1 1" x 3" x 3' piece of wood ($0.51, Home Depot, cull pile)
- 1 2" x 4" x 3' piece of wood ($0.51, Home Depot, cull pile)
Consumables used which I had on hand- 4 hinges
- 2'x 3' piece of plywood
- ~ 4' of 2"x 4" lumber
- ~ 12' of 1"x 2" lumber
- 2 1/2" screws
- two colors of paint
- staples
- tree branches (~2" diameter")
- piece of split firewood
- dog clip
- 2 eyehooks
- chicken wire
- string/yarn
- caulking
Tools I used - jigsaw
- power drill
- hammer
- screwdriver
- measuring tape
- wire cutters
- paint brush
- caulking gun
- broom
- staple gun
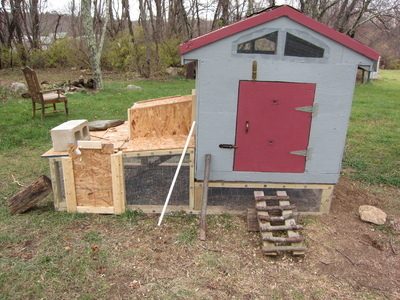
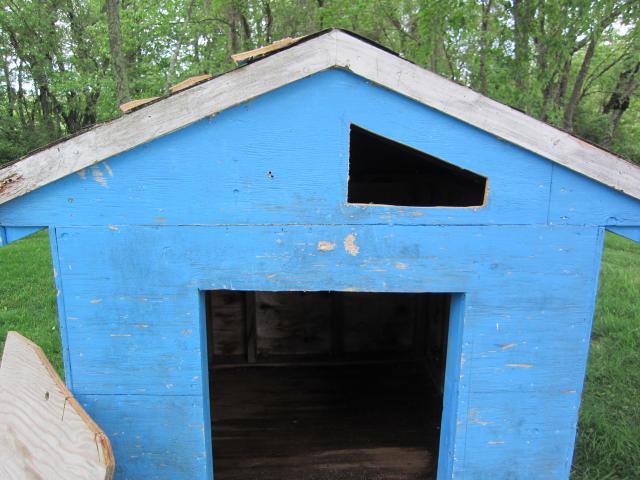
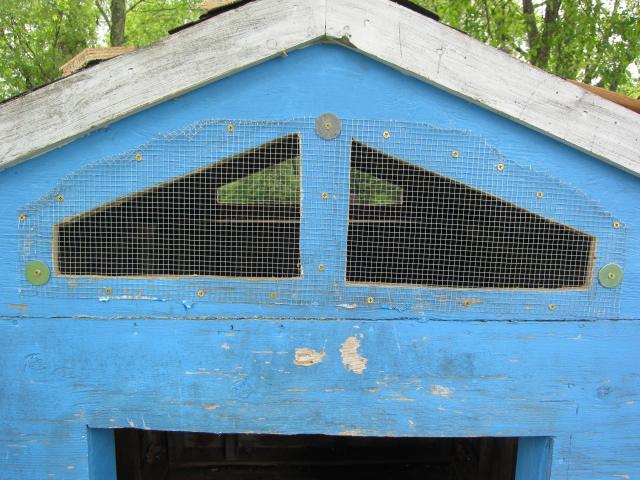
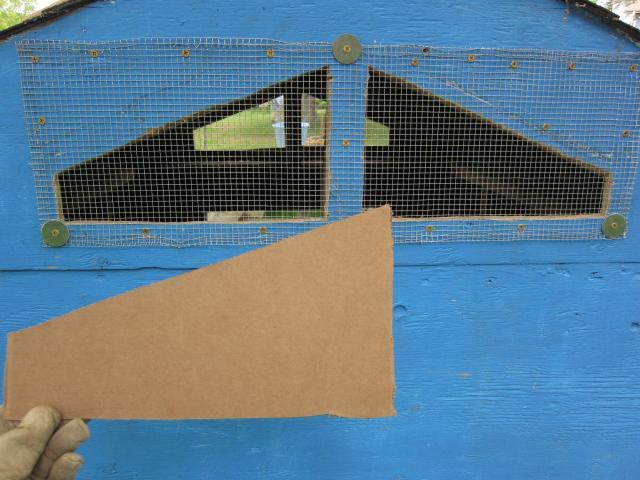
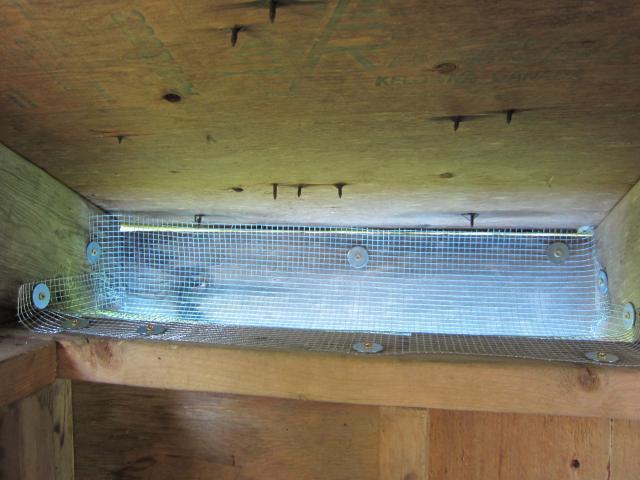
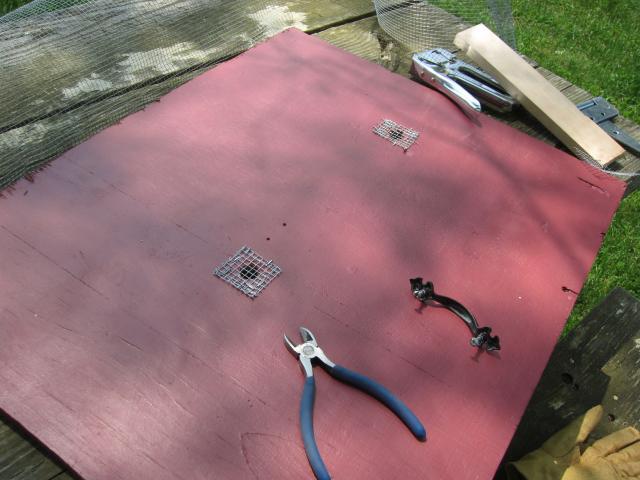
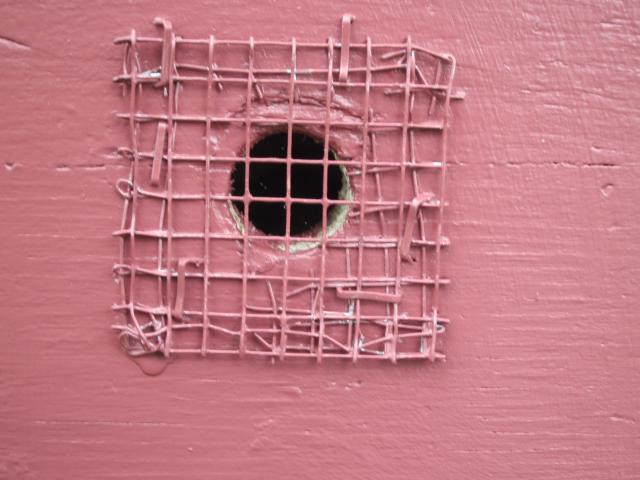
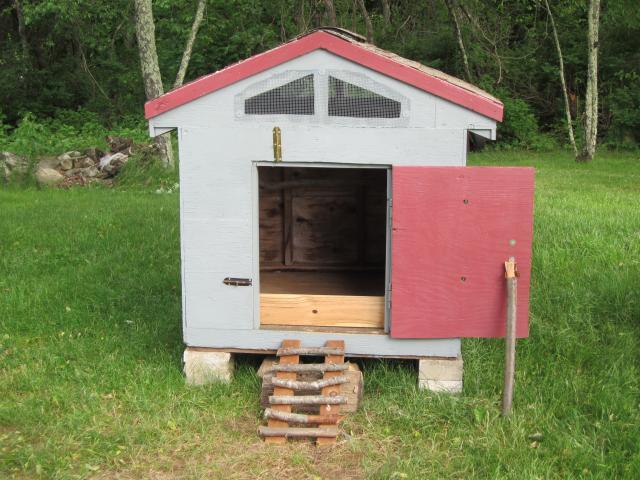
After cleaning the doghouse, I used a jigsaw to cut vents in the front and back, around the apex of the frame. I free handed the first hole to fit between the supports of the house, then made a cardboard cut-out in that size to mark out the remaining vents, to get the same size and shape. I secured a piece of hardware cloth over each vent. At the time I only had six washers, so I divided them between the two vents. Luckily my screwheads were large enough to hold the mesh. I bent the edges of the screening over backwards to hide the sharp edges. For the front vent I had to shape the screening to a triangle-like shape but on the back I had room to just use a rectangle.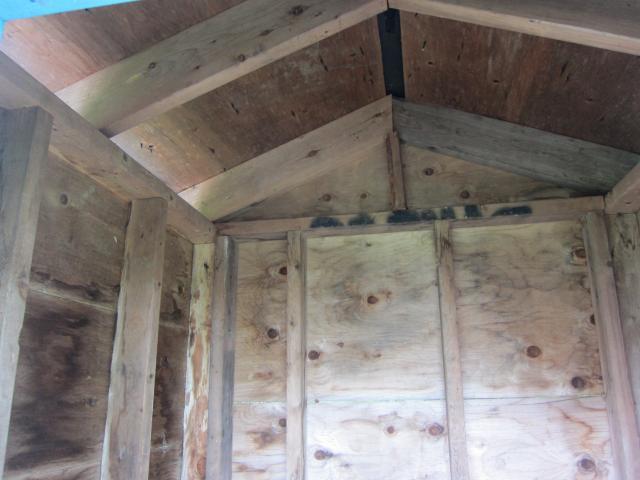
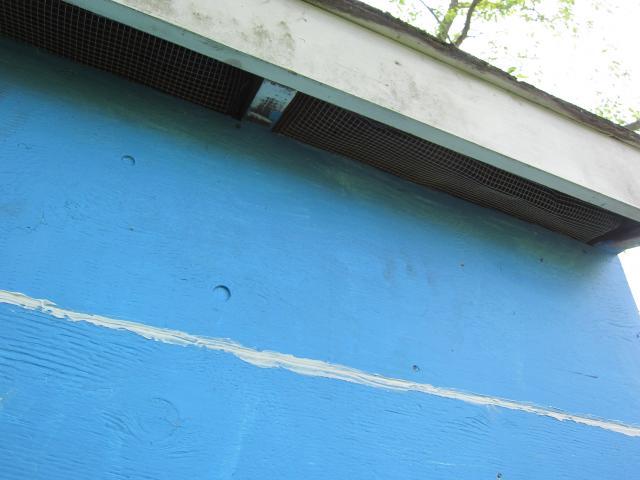
The eaves were already open, providing more ventilation. I secured them with hardware cloth too.
Late in the coop-building process, I stapled a piece of chicken wire to the rafters to prevent chickens from meeting the shingle nails poking down through the roof. The piece of chicken wire I had didn't cover the entire roof so I wove some yarn in a tight mesh over the remaining area, stapling it to the rafters as I had the chicken wire.
There were gaps between the side boards which would allow drafts right on my birds, so I caulked them. I pressed the tip of the caulking tube against the gap as I ran the caulking gun along, and the caulking was forced into the gaps. This worked better than I expected, actually, and gave me a smooth flush fill. I also used the caulking to fill a small knot hole in one of the boards. At first the caulk resisted being painted, but a couple coats did cover it. I hadn't planned on painting the coop, but there were several cans of paint in the basement, and halfway through theproject I decided paint would make the coop last longer, not to mention look better. It would've been much easier to paint before attaching the cloth over the vents, but that's building by the seat of your pants for you. The paint in the basement turned out to be the colors of my house, so my coop is a little version of the my house.
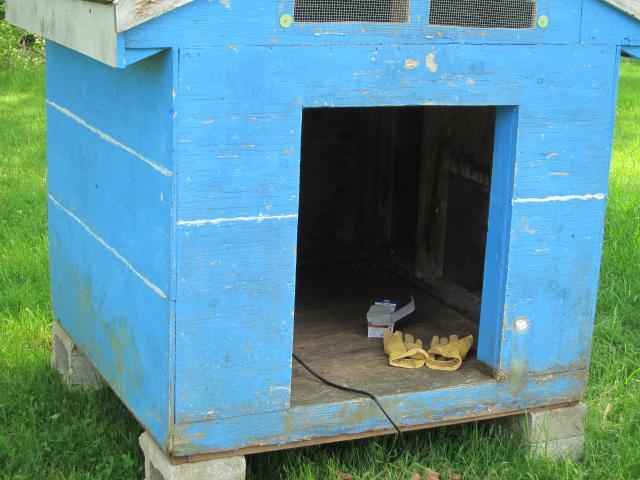
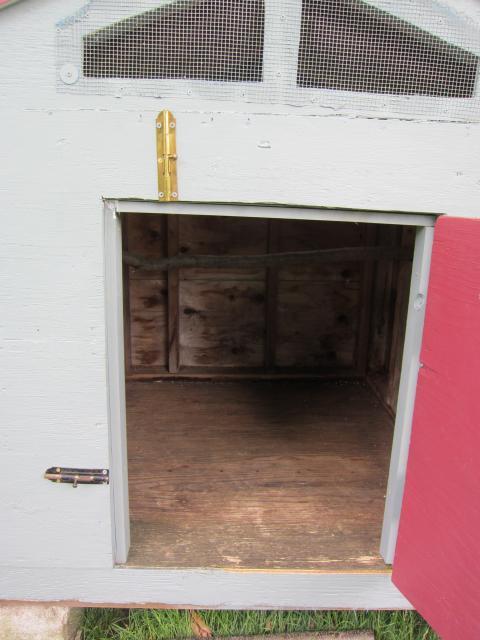
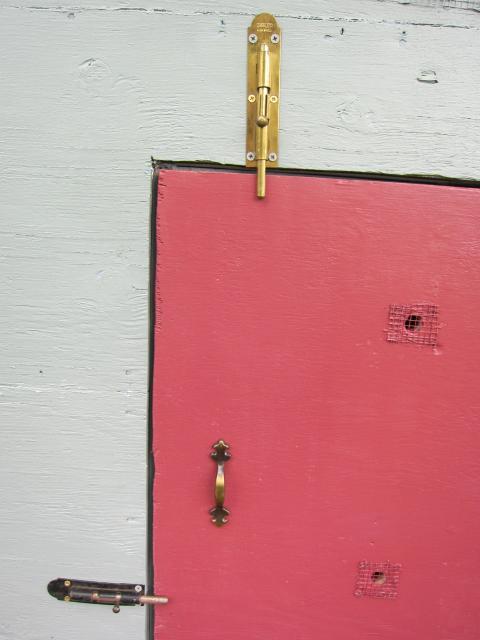
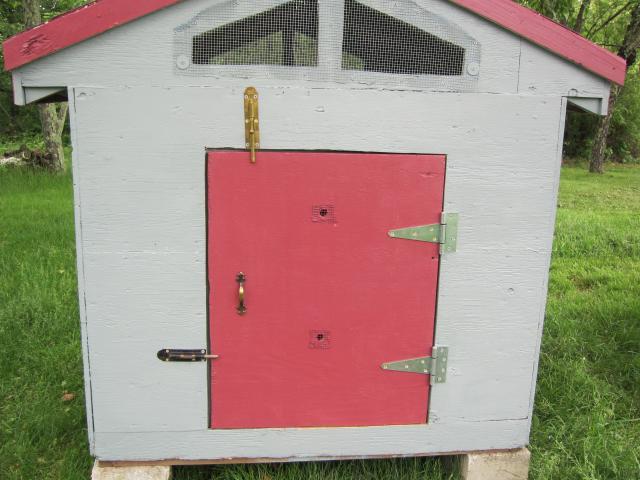
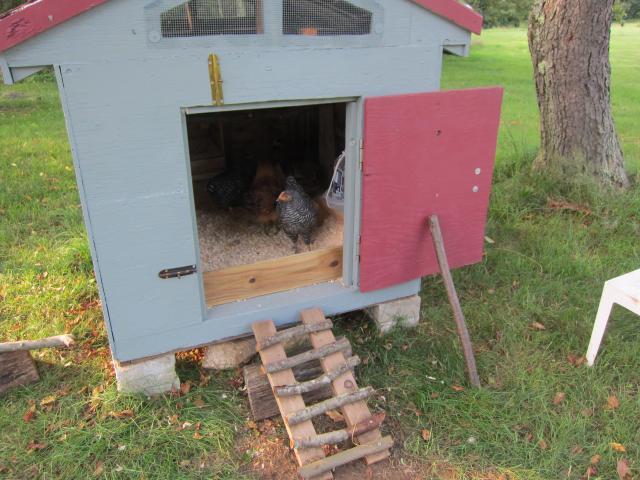
For the door, I found a piece of plywood in the basement which was just bigger than the doghouse door. I cut it down to fit and painted it.
There were two small holes in the door and being paranoid, I stapled scraps of hardware cloth over them. Come cool weather, I'll staple some clear plastic over the holes.
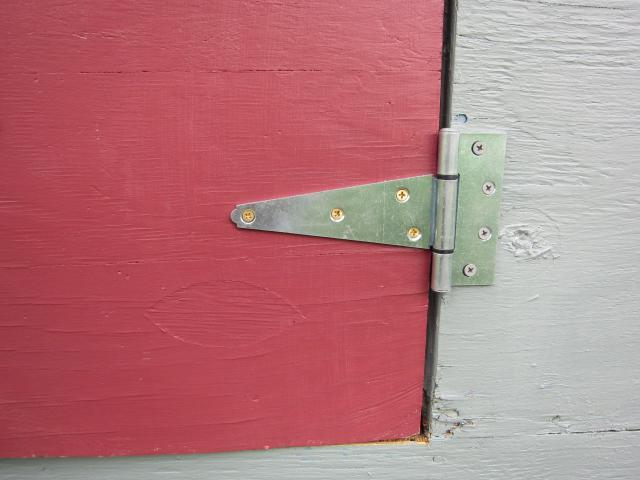
I found these large, perfect hinges in my possession, much to my surprise. I don't remember why I had them, but they were exactly what I wanted. I had picked up some ten-cent hinges at a second store that would have worked otherwise. The golden screws are 7/8" long, the grey ones 2 1/2". I used longer screws where they were going into a stud and shorter screws where they were being secured only to the plywood.
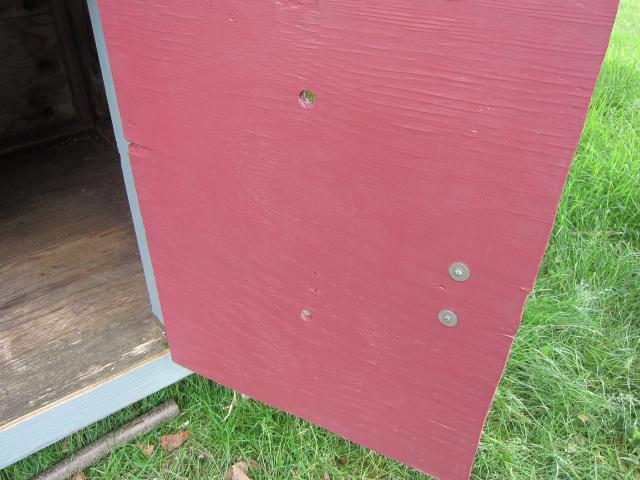
To attach the handle I drilled shallow holes in the front of the door to push the handle into; I drilled screw-sized holes through those all the way to let the screws in from the back, and I used washers to secure the screws against the wood.
I screwed 1" x 2" boards in the top and sides of the doorway to act as a frame, caulking a gap where one board was a bit short. I used two side-locking latches, one from above and one from the side, to keep the door closed. They are very tight when the door is closed. The door is about 2' 6" tall and 2' wide.
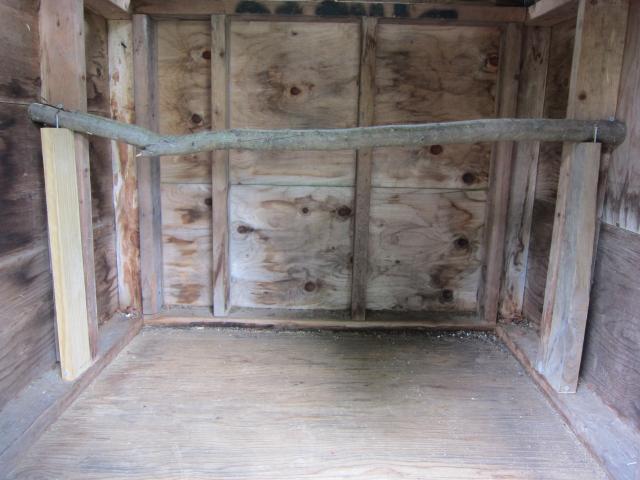
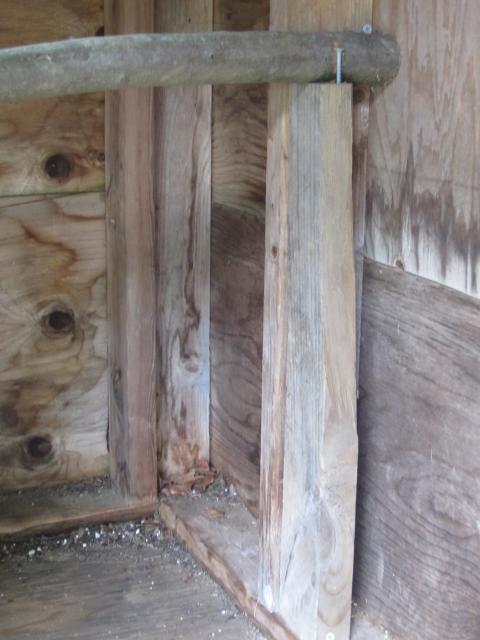
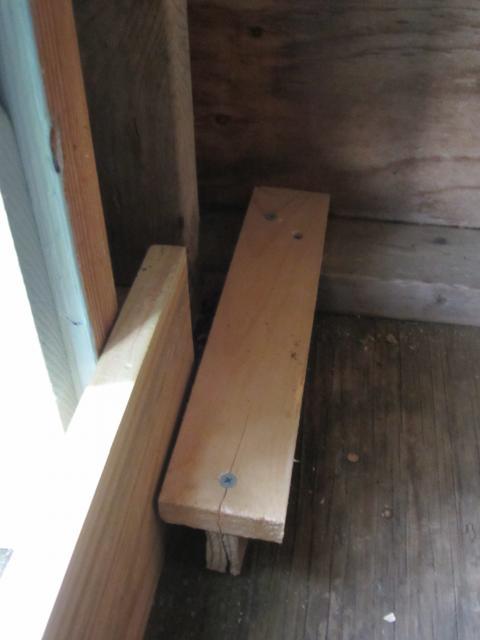
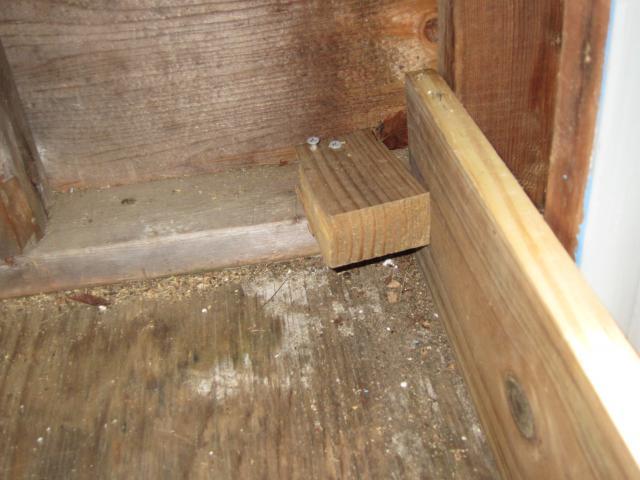
I needed a board across the bottom of the door to prevent bedding from falling out. Luckily the day I decided I needed such a board, we found one in the shed. I screwed some scraps of wood to either side of the coop inside, creating a slot for the board to rest in. The board slides up so I can remove it to clean the coop out thoroughly once in a while.
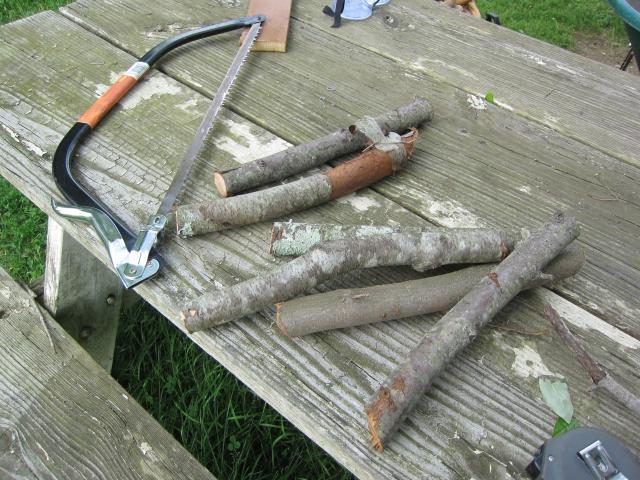
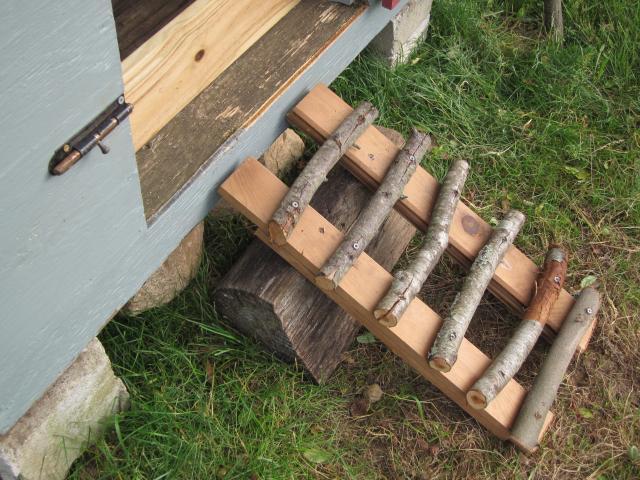
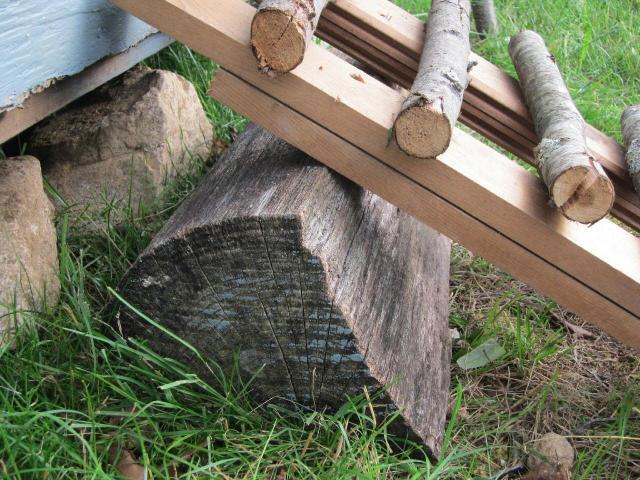
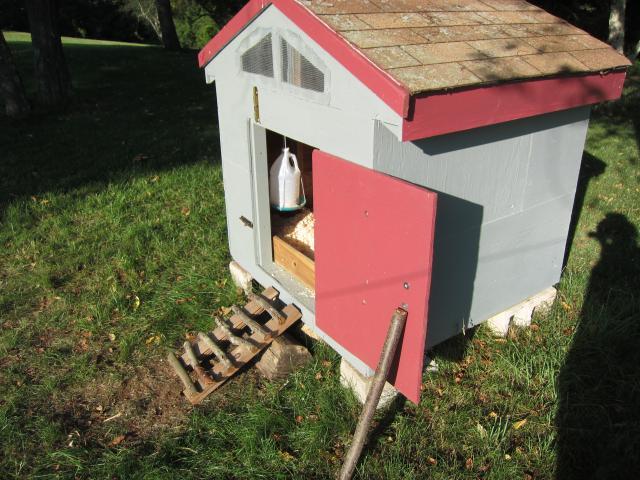
Though the coop's not very high, I wanted a ramp to the door. Again skimping on materials since my stash was running low, I took a long piece of inch-thick wood wall paneling and doubled it up to make a 2"x 4", to accommodate the long screws I had. I screwed some short branch chunks to it. It's not a traditional ramp- more of a ladder- but it works well enough. I screwed the ramp to an old piece of firewood. The ramp's secure but I can move it out of my way easily with one hand.
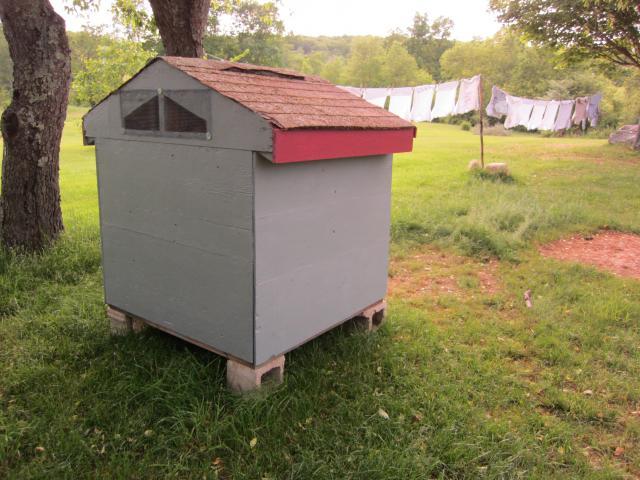
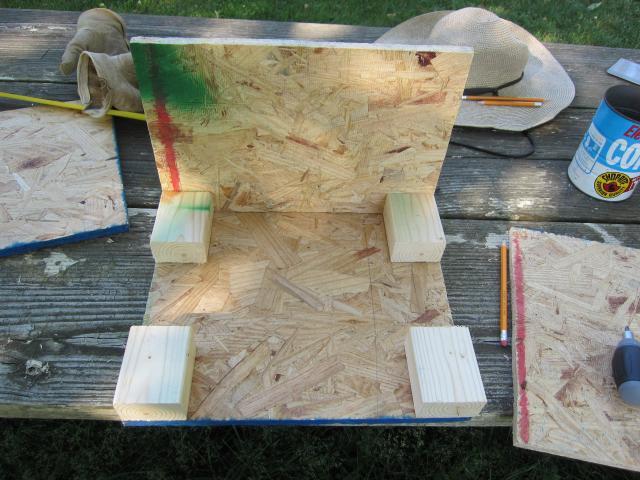
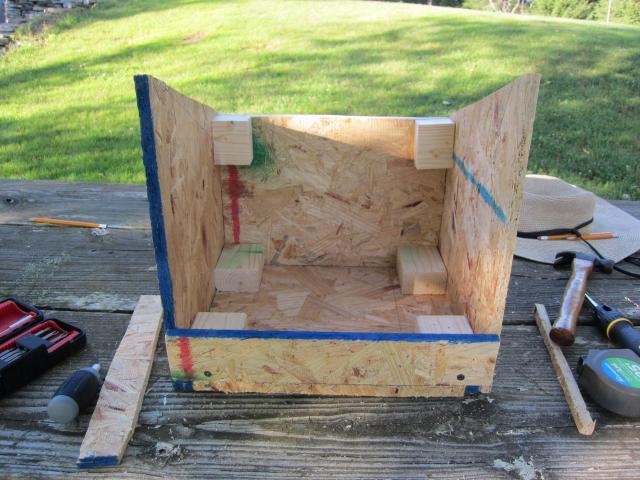
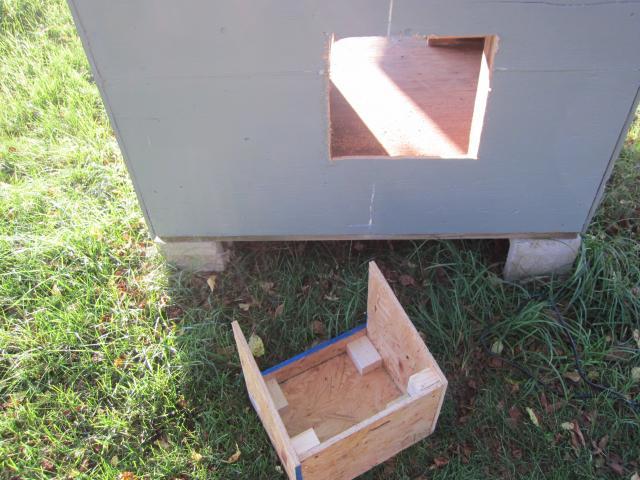
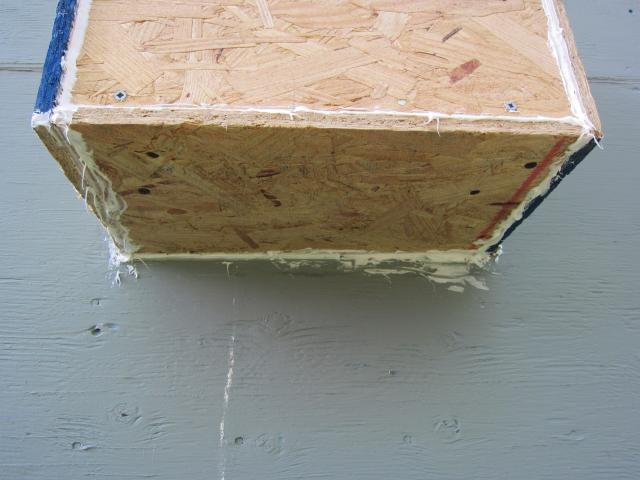
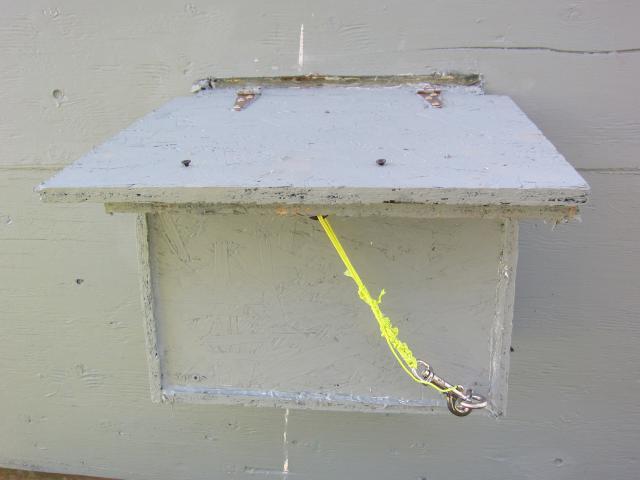
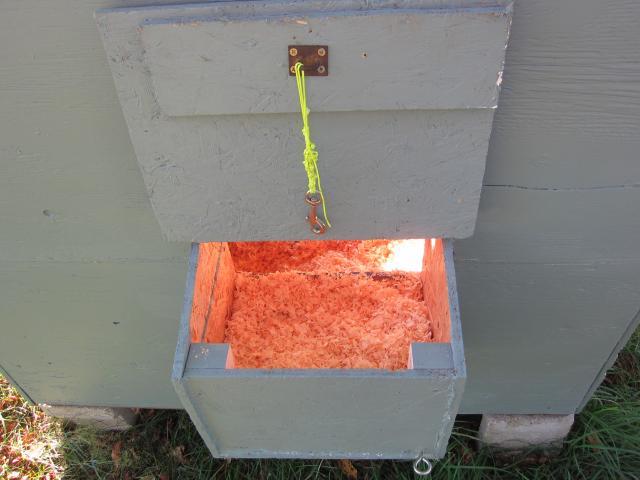
The best place to situate a nesting box on this coop was the back though unfortunately it's not the most private location. The gap between the studs there was 14.5", so I made the nesting box 14.5" wide. Because the plywood I bought was 12" wide, that became the depth of the box. The height of the box at the front is about 14" and closer to 10" in the back. I used small blocks of wood to anchor the plywood together, driving the screws in from the outside into the wood blocks and being careful not to cross screws from different directions.

I tilted the top of the box, perhaps a little too aggressively, to encourage water to run off the top.
Later I would add another strip of wood across the bottom from of the box, to make it deeper and more inviting to the hens. The depth also helps keep the shavings from being flung out while the hens burrow around in there.
I used my jigsaw to cut a hole in the back of the coop large enough to slide the nesting box in from the outside. It would have been better if I could have cut a smaller hole and slid the box in from the inside, but the rear of the box was just over 14.5" and so it didn't fit between the studs. I also cut a 14.5" piece of 2x4 and screwed it horizontally between the studs, at the bottom of the hole, for extra support.
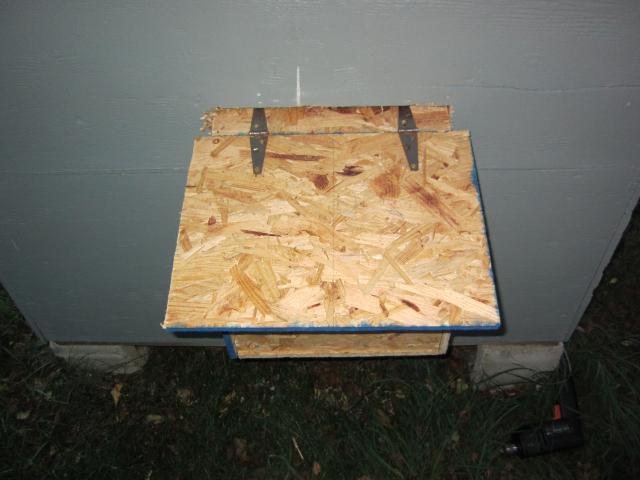
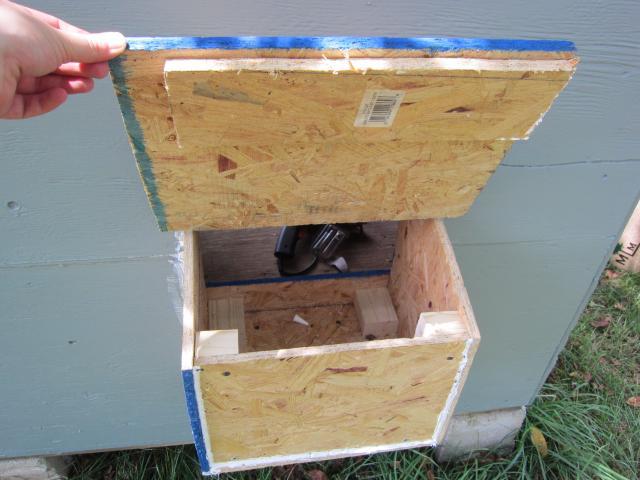
I screwed the bottom front of the nesting box to the 2x4 piece I installed, as well as the sides of the box into the existing studs. For the top, I nailed a piece of plywood over the nesting box, sliding it through the hole so it covered the inside section of the box and stuck a couple inches out the back. I also nailed a small overhang in front of the box on the top, as a marginal privacy shield, from the perspective of the nearby roost.

I caulked all the seams from the outside (and got into a disagreement with my caulking gun at this point, as the mess gives evidence to).
I cut a piece of plywood for the lid of the nesting box, making it two inches longer on the sides and three inches longer on the bottom edge. This discourages rainwater from getting into the box under the lid, cuts down on drafts, and makes for a generous handle. I used two hinges to attach the lid to the top of the nesting box I'd just nailed on. To further reduce drafts, I screwed a scrap of plywood to the underside of the lid; this covers the gap between the back of the nesting box and the lid. I also thoroughly caulked the gap between the top of the box and the side of the coop. No nighttime February drafts for my hens.
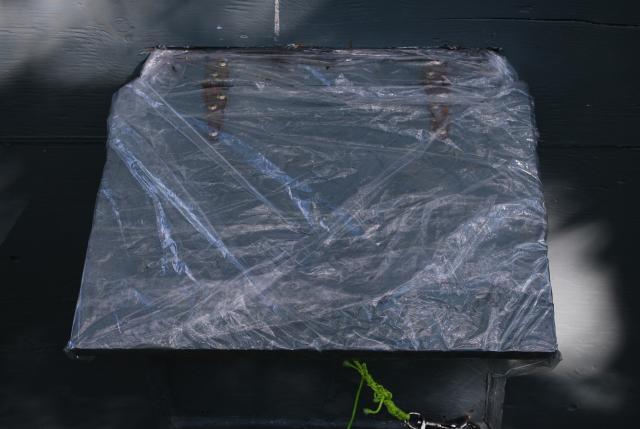
I went back later and stapled a piece of flexible plastic packaging over the lid of the nesting box, to protect it from water damage and to prevent water getting into the nesting box in the crack between the lid and the top of the box. Shingles, which we do have, would have looked nicer but the lid was nowhere thick enough to accommodate roofing nails and the plastic was much more lightweight, practical and easy. Slashes in the underside of the plastic at the bottom end were necessary to allow any trapped water to escape.
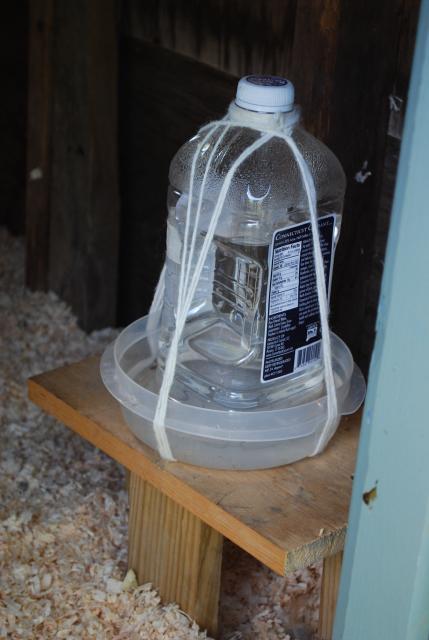
I knew I wanted about six inches of bedding in the coop, so I made a sturdy little three-legged table that would hold the chickens' waterer well above that level.
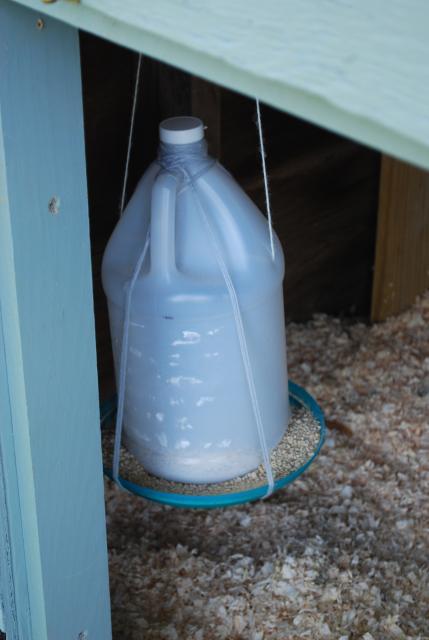
I hung the feeder from a piece of scrap plywood screwed to a support in the coop, with a small metal hook screwed to it.
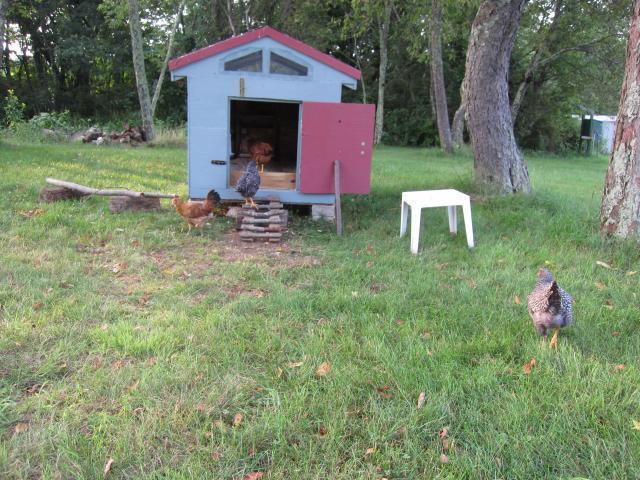
That's how I made a doghouse into a quick, free-range chickenhouse on the cheap.
If I had the thing to do over, I'd've painted before putting the vents in and been more careful to build my nest box square. There were several instances in which I'd finish a piece then discover more appropriate materials (mostly different screws) as we cleaned out the basement, so having knowledge of what I had to work with before assembling the coop would've helped too. Of course, some of the material didn't come into my life until partway through the game: for example, the piece of chicken wire and the sturdy yellow string actually came with my chickens. The hens hung out in my bathroom while I polished off their coop.
In the end I spent about $30 on the coop and $40 on the hens, plus $15 for bedding and feed. This was much more my budget than the designs I first drew up for the coop, which could've run up to $200.
Thanks for reading!
~~~~~~~~~~~~~~~~~~~~~~~~~~~~~~~~~~~~~~~~~~~~~~~~~~~~~
Update December 2011: As budget allowed and need required, we have added a chicken tractor and an outdoors section to our chicken containment system.