Evolution of a Chicken Tractor
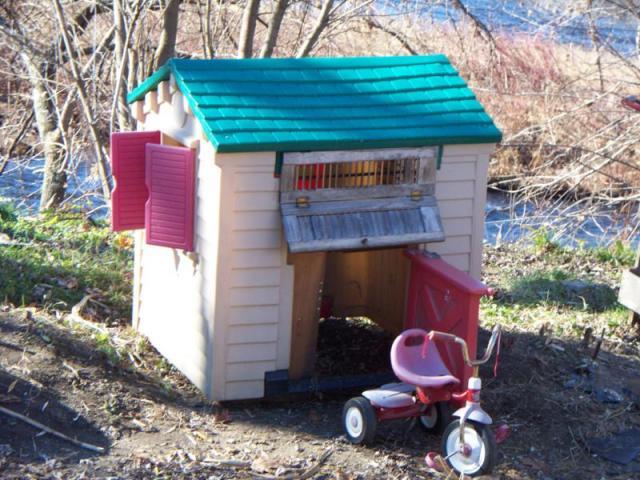
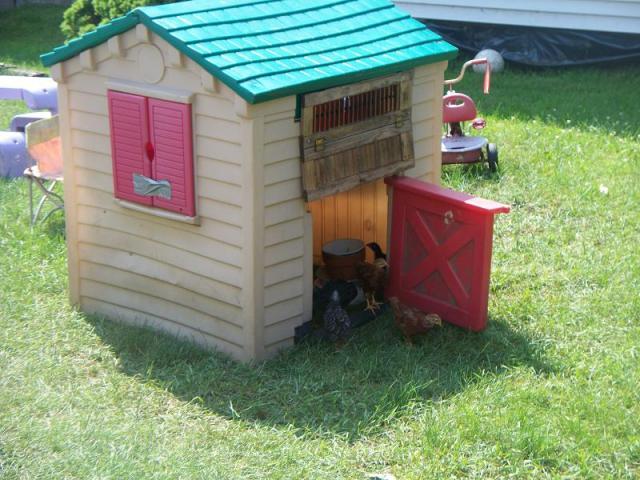
Once the toddlers moved up to their deluxe penthouse play set on the East side we could renovate the dollhouse in true slum lord fashion. Screwed the roof down, two used deck spindles for roosts, netting in widows and old wood shutter over door and voilà! A starter house for 6. The feeder was old flower pot with holes drilled along bottom sides on top of old pie pan. Dish on top to keep the chicks from using it as a toilet. Water dish was another old pie pan and large plastic jar (family size mayonnaise) with holes drilled on bottom sides and large holes on bottom for filling with H2O.
Materials List for 4X8 tractor:
5- 2x3 by 8', 7- 2x2 by 8', 1/2 sheet 1/2" plywood (had one laying around), netting (I used plastic poultry), screws, 2- carriage bolts, washers, 2- lock nuts, 2 hinges and 2 bolt latches, 1/2 pint lacquer. Oh! and 2 wheels; mine were taken from an old baby carriage.
The key is to pre-drill holes prior to screwing as the small wood will split. Use the 2x3's along bottom and again for frame of coop base. A center horizontal support to aid in rigidity in run is needed and the top will also aid in supporting net/wire as the bottom will dual as an attachment for the ladder so it is permanently attached to tractor. Use a deck stain for longevity of tractor and apply before attaching wire (or use pressure treated lumber). I had plenty deck stain and some linoleum tiles laying about, used lacquer on plywood prior to linoleum. The linoleum eventually failed due to weathering before finished coop was done. Still have that impervious lacquer sealant though
")
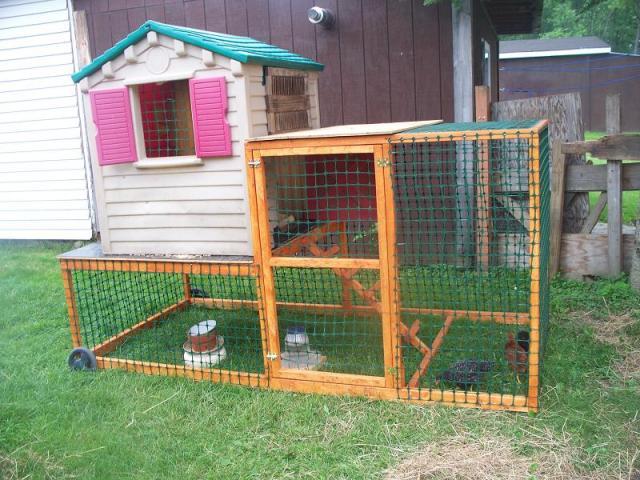
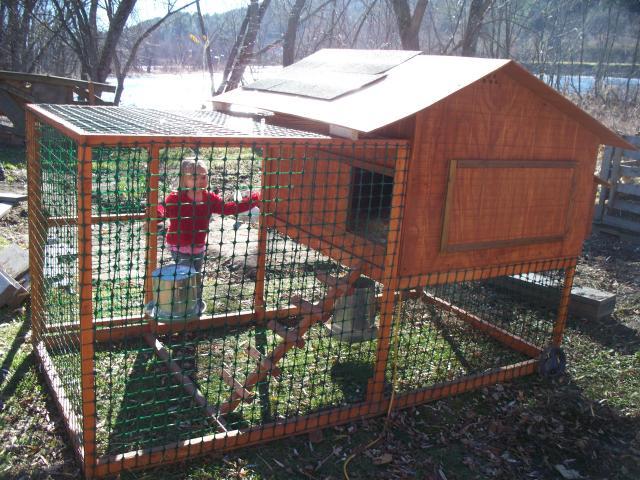
This setup was easy to make, easy to move about the yard and total cost to me was $68. They only had 50 ft rolls of netting so have 25 ft left over too. Course the plywood, stain and wheels I already had. I do recommend stronger wheels. These have been warping and collapsing over the months. Have my eye on the back wheels of the tricycle.
Materials for 4x4 Wood Coop:
3- 3/8" 4x8 sheets of your choice siding (I used 4" groove plantanium exterior), 7- 2x2 by 8', 2- Pressure treated lattice trim cap/connectors, 2 or 3' length 3" PVC, 3" cap, 3 to 2" reducer, 90 deg 2" elbow, 22.5 deg 2" elbow, 3- hinges, screws, electric timer and small drywall light (clamp with metal hood). Tacks and shingles, and green direct to plastic spray can optional. Total cost to me as Stain was on hand was $140.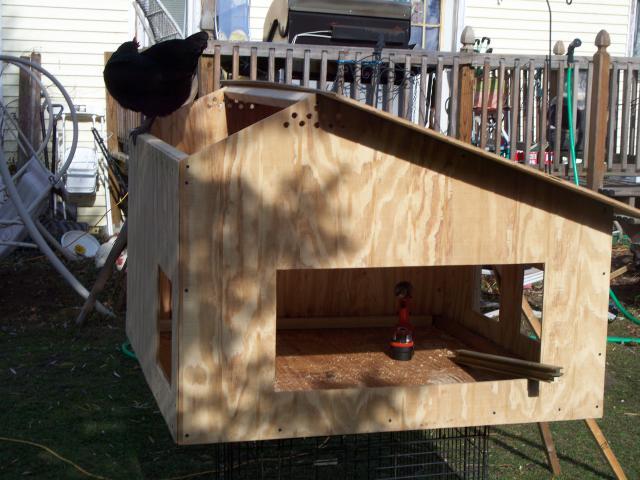
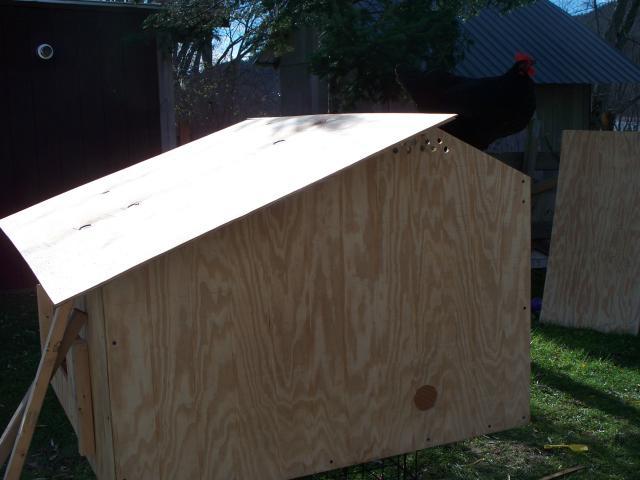
As this is for a tractor balloon framing is what was done for less weight. Small structures such as this will carry load on walls without traditional house framing. The 2x2" was used for nailer (something to screw to), lateral support, bottom cleat and roosting poles. All cutting to walls is done prior to assembling. The floor is not attached. It was used to align bottom cleats 1/2" up so the walls overhung the floor and hold it in place. Precision cutting of 2x2's is not necessary when used as nailer or corners braces. The 4x4 plywood floor was cut 1" on 2 sides to allow walls to overhang and be flush with tractor. My roof design/dimension was determined by the one bundle of shingles purchased and wanted it to overhang onto the run roof. The roof slope should be between 4:12 and 6:12 for proper venting of eave to gable. The vent area on each eave should equal total gable vent area. Allowing for 3 mile wind a MINIMUM of 1 square inch (each eave and total gable vent) per chicken is required, no wind (1 mile per hour) allowance is 2.5 square inches per chicken MINIMUM. The formula with this roof slop is 4.7(0.5*# of chickens)/MPH of windward side.
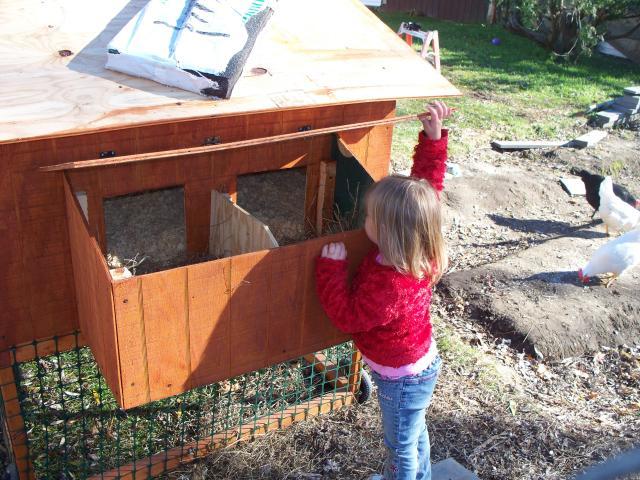
Stained with nesting box attached, scrap pieces used as divider and bottom. Also for doors.
These pressure treated lattice caps worked great for sliding doors. The end piece/handle had to be carefully pre-drilled and screwed but the end result was surprisingly nice looking and easy to slide. Here you see my overhanging roof didn't quit make the run top. Oh well, I cut another piece of 2x2, stained it and roof sits on that without fear of warping over winter. Also drilled hole in floor corner for extension cord access. In pic is temporary waterer, soon to be heated waterer hanging in same place and have 13w energy star light on timer.
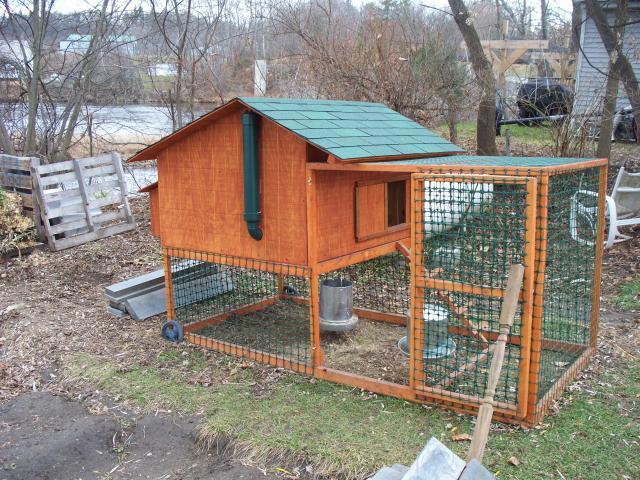
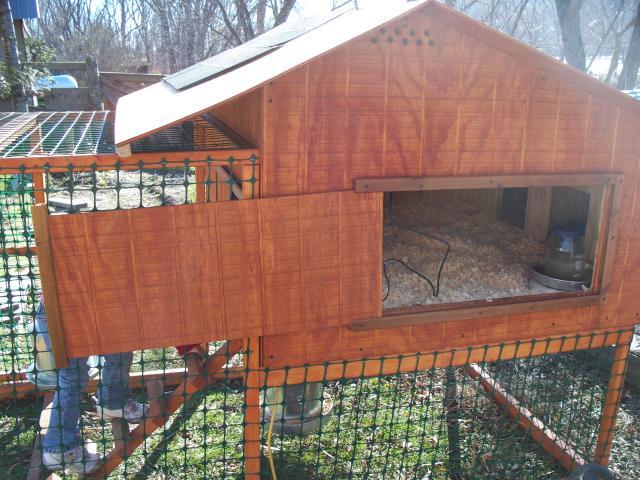
Here you see the PVC feeder (painted green) and the sliding coop door. Vertical ends of door are attached to door for trimming/handle. The panel is what slides in the top and bottom lattice cap/connectors. I used them as they were cheap and easy (cost 1.85 each for a 8 ft length), rabbit cutting a trim board would work just as well but I don't have a table saw.
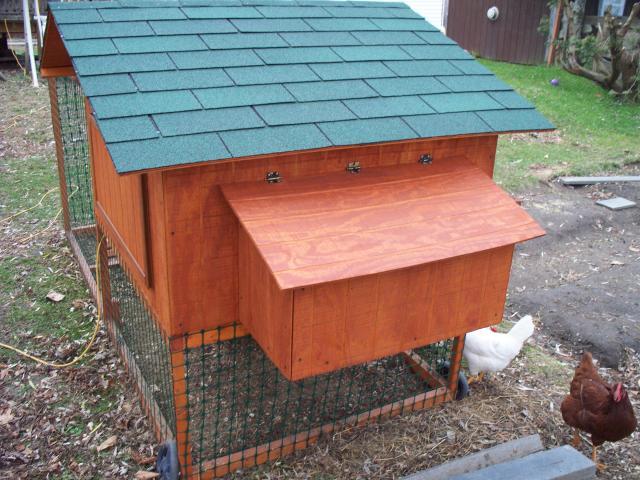
The Shingles were an aesthetic extra that adds 30 LBS and $25, and are tricky to attach with 3/4 inch cut tacks...so far have held up in 25 mile wind storm. Nailer's and short roof tacks were used so the inside of coop was not a porcupine. The roof could have easily been turned over and stained like the back nesting box lid. The coop, floor and added roof support on run are all gravity attached. The system can be taken apart on a whim and still moves assembled fairly well. Needs better wheels and two folks if on a hill so the coop doesn't slide off.
What I'd change is making the coop taller. This would allow a taller access door that would be very helpful! I purchased the 3 gallon heated waterer to find it does not neatly go in and out of the door. This coop was compact. Planning so roosting birds didn't drop into water or feed led to a cross for roosting poles. From top of access door to roof is plenty of room for chicken to roost but a higher structure would make for a bigger door. The other thing is I'd put the feeder and access on opposite sides than I have so the water area was not in front of coop/run door. Before heater waterer was added the water inside would freeze over within an hour of opening the coop. All openings to this coop are 4" up to allow for 3-4" of pine shavings. A taller coop would allow for more shavings too.
And I still have my eyes on those tricycle tires....