The Kansas Chicken Cottage

After a couple of months of browsing the BYC site and getting lots of ideas from everyone, I finally made my start. Buying some supplies! Temperatures are reaching 106 degrees, so I'm only working the early morning hours and late evening. I bought treated 4X4X8 for the main posts the coop will sit on. Got treated 2X6X8 to frame out the base. The 80 lbs bags of cement will be divided into 40 lbs per post.

July 24, 2011 Sunday
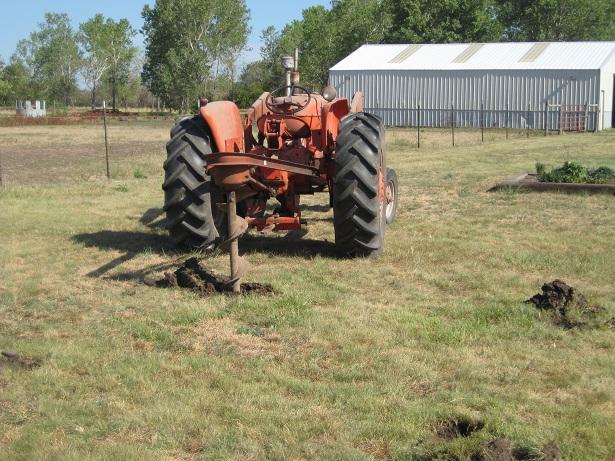
Next comes figuring out the location of the coop and digging the holes for the posts. Because of the lack of rain, and high temperatures, our ground is much more akin to cement than to soil. I soaked the spots for the holes over night. Even at that, our auger on the tractor was only able to go down about a foot and a half. Not quite deep enough. Our goal is 3 feet, so I can put 40 lbs of cement in each hole for the 4X4X8 posts. Soaking the holes again and then hopefully I'll be in business.
July 25, 2011 Monday
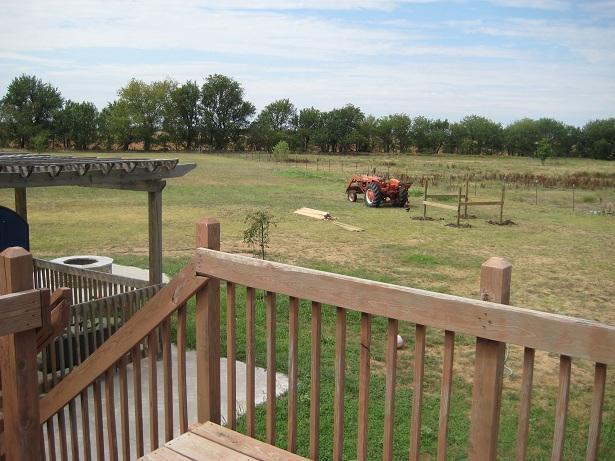
The picture below shows the area we picked to put our coop on. Right now, the posts shown are level and ready to have cement put in. We used 4X4X8 treated lumber and dug the hole 3 feet deep and are using 40lbs of cement for each hole. We have very cold winters and lots of wind, so it's necessary to go this deep. My husband and I spent a lot of time leveling the posts upright and measuring off with the tape measurer to get them exactly even in a 8X8 square. This is put directly in the blazing sun and as you can see, not a tree in sight nearby! So, I'll be planting vines, trees and shrubs when we get to that point. We put the cement in tonight and let it sit until tomorrow.
July 26, 2011 Tuesday
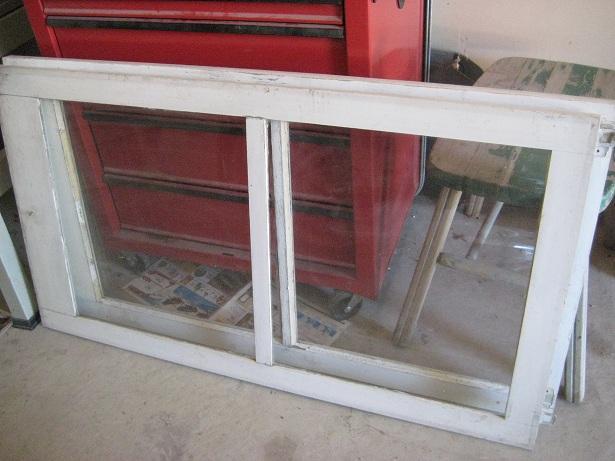
Today I went to 'Habitat's ReStore' and found some old window sashes and I even picked up some handles for the doors and windows. That was such a fun place to browse around in! I spent a lot of time looking at everything. I bought two windows.. hopefully that should be just what I want. If I think about it some more... I might run back and buy another one. We'll see. There were plenty of sashes there, so no worries about them disappearing. The windows were $5 a piece and the door handles were 50 cents a piece. Lots of unique stuff there to choose from! They had hinges for $1, but I didn't buy them yet as I wasn't sure exactly how I wanted to mount them (piano hinge, possibly?) There were no piano hinges there. That might mean another trip to Lowes, instead.
And here below are the door handles I picked up at the Habitat's ReStore. Interesting, no? 70's throw backs, for sure! But I think they will add some flair to the doors I have planned! And the price was great! 50 cents a piece! I'll be heading back if I need anymore. I think my favorite is the round disc with the 3D knob that sticks out of it. Can't really miss that one.
") The matching handles are for the doors that will swing out from each other (like french doors) and I wanted them to be similar since they will be side by side. It didn't really matter for the others and I thought it would be fun to be a bit different.
The matching handles are for the doors that will swing out from each other (like french doors) and I wanted them to be similar since they will be side by side. It didn't really matter for the others and I thought it would be fun to be a bit different.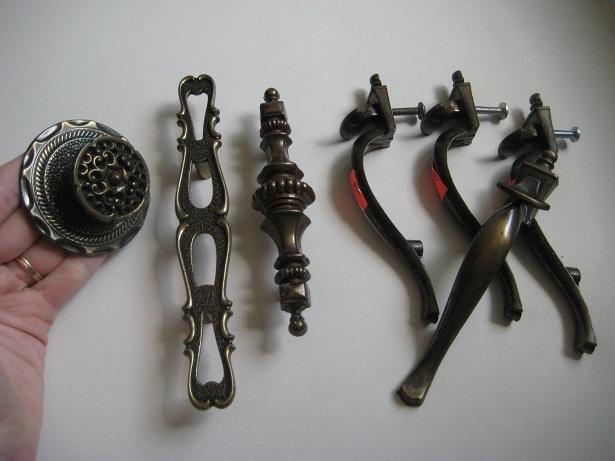
Since it's too darned hot to do anything outside right now (it's 104 and rising...) I took a picture of my temporary set up of Seymore, my teenaged turkey. I have a mister on him during the day to help keep him cooled down and the black cloth is to keep the western sun off of him, too. Yes, I only have ONE bird right now. That is because he was an un-planned pre...er, well, I found him along the side of a highway. Honestly! People I guess, will dump anything out in the country. He was a teeny tiny downy ball of white fluff back then. And he (or she??) has been growing! Seymore is quite attached to me now, and follows right at my heels and loves to be picked up and held. He is also counting down the days to when I finally get him (or her?) some 'coop mates'.

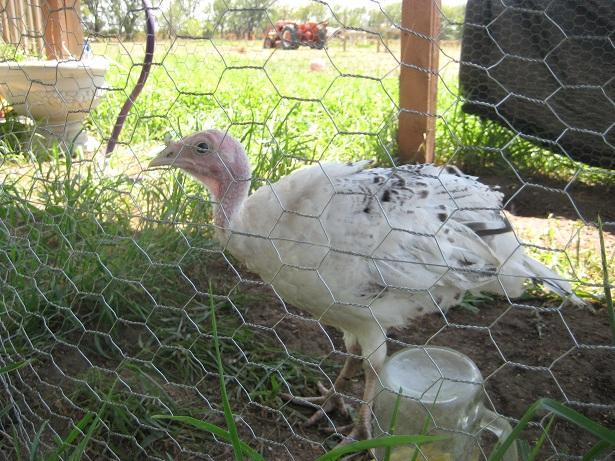
Picture Above: I was told on the BYC.com Turkey thread that Seymore is likely a 'Royal Palm' breed and probably a hen.
July 27th, 2011 Wednesday
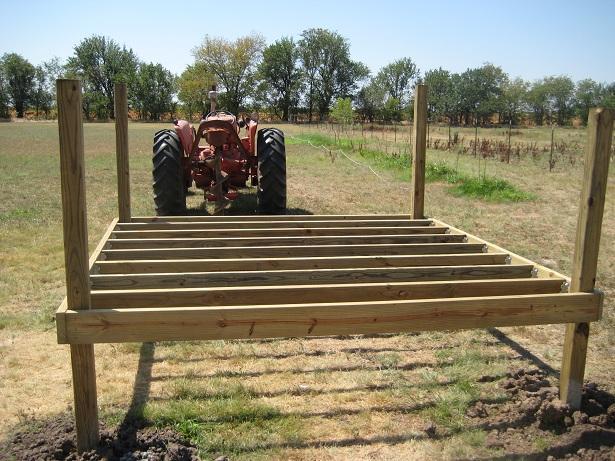
Okay, this morning it started out at 83 degrees and I got the 2X6's put up on the posts level. Now, just saying that, it seems like that was an easy deal, right? No way. I did those suckers all by myself and had to use firewood to prop up one end while I clamped the other and then went back and forth until I had the right height and was level. I'm embarassed to mention that I had to re-do my first board 3 times. UGH. I'm VERY glad I'm using screws, I backed them out, readjusted and rescrewed that poor board over and over. It's finally right and then the other boards went up pretty fast. I only had to make 2 cuts on the other boards and I only had to call my husband 3 times on the phone to ask him how to use the skill saw. (one of those calls was "how do I turn it on?!") I'll have to call him back and tell him I still have all my fingers, I think he was kind of worried.
Then I screwed in all the metal hangers that the treated 2X4 lumber slides into. Should be a breeze, right? Putting the hangers on was the easy part.. then I tried to slide down a couple of boards. Now I realize my posts that I set were off by a 1/4 of an inch, because each 2X4 is 1/4 inch too long! So I'll be shaving off those boards. But by now, it's 98 degrees and rising and too hot for me to want to do that right now. Our high today should reach 111, so work my is done for now.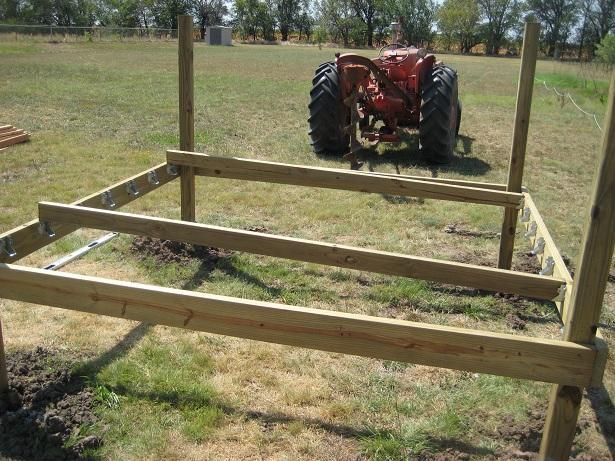
July 28, 2011 Thursday
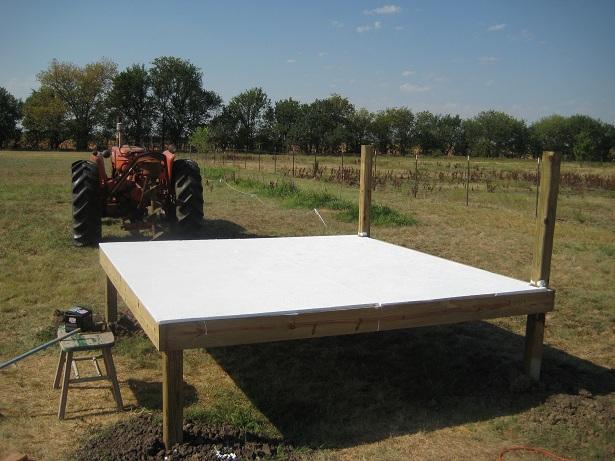
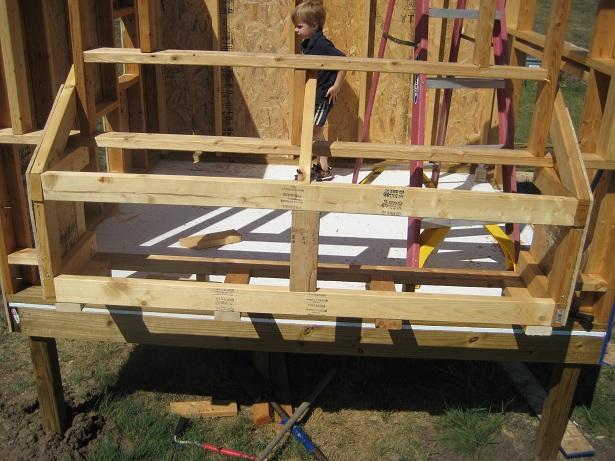
Here is my progress so far this morning! I had to make a trip into Lowes and wasted a good part of the cooler morning air. I got subflooring and more treated 2X4X8 lumber. I bought the 3/4" 4X8ft subflooring. And WOW is it heavy! I had to use my kid's little red wagon and shift a side on to it and then slowly drag it on the wagon and haul it up into the garage. From there, I still could not lift it and had to do a lot of shifting and shuffling and moving around it to get it on the saw horses. This would have made a great video for 'America's Funniest Viedo's' for sure. I am dying of heat and sweating my bootie off. How does ANYone work in this heat?? I also bought Glidden Porch Paint at Walmart this morning, it was $20.77 a gallon, so I didn't think that was too bad. I am going to paint both sides of the subfloor with two coats front and back. OH! One more thing I learned yesterday, do NOT screw in your 2X4 metal hangers ahead of time thinking you are saving time. Oh, no, no, no! I thought the metal would line up with the top of the board I was screwing it into... but not so! Apparently, you need to put your 2X4 board in the metal hanger and then hold them together while you line it up so it's level with the base you are screwing into. All of my boards were too high up! I had to go back and unscrew (thank goodness for screws!!!) and lower the hangers down. Everything looks and fits perfectly now. I'll post a picture below.
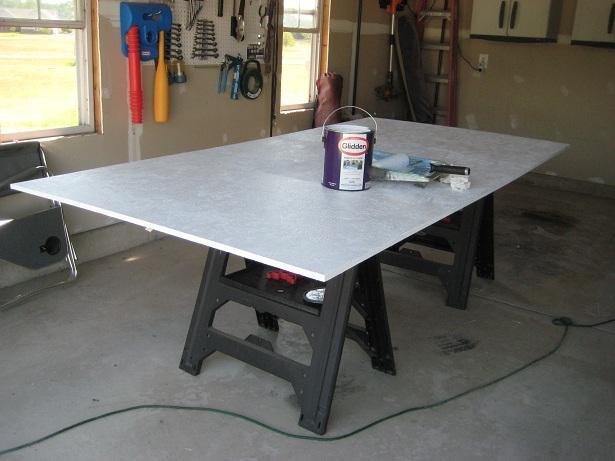
Picture Above: All the 2X4X8's all level and ready for the subfloor!
July 29, 2011 Friday
This morning I got up early to beat the heat and I think I accomplished quite a bit. I got most of the subfloor on and screwed down into place. There is about a 3 inch strip along the right hand side that needs to get cut and put down. But it's already too hot to do that. I did paint the top of it this morning as well with the porch paint. Looks like I'll need to buy one more gallon to put the second coat on the floor and for the inside when it goes up. I also cut out the notches in the subfloor so that it would slide around the posts that are going to stay. The other two posts I cut off last night to make it level so I can put my wall directly over that spot. Then I made the remaining two posts level with each other as I will be framing out the utility space on that side to store tools, etc.
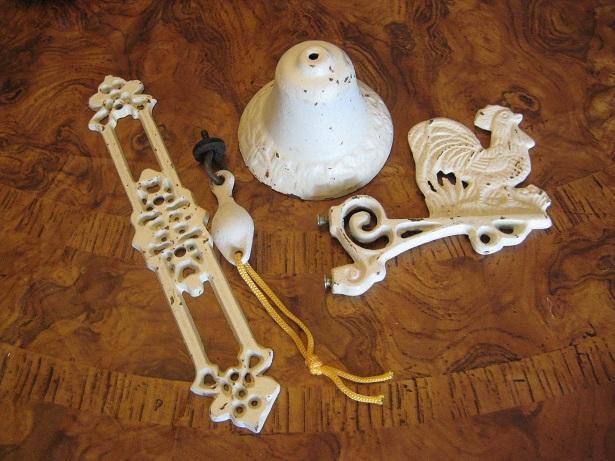
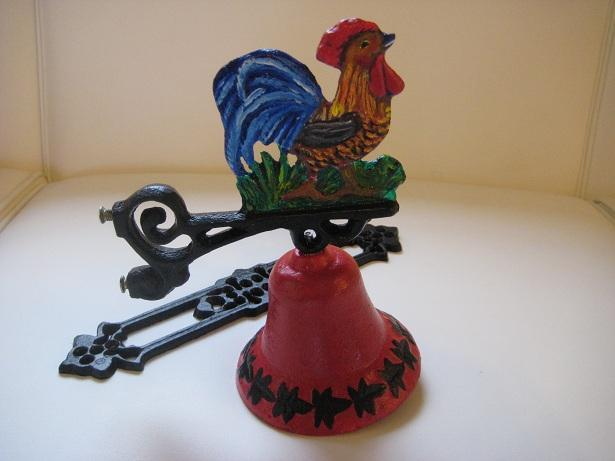
Also accomplished Friday during the day while it was too hot to work: I saw this 'Rooster Dinner Bell' on someone else's coop and I loved it! They hung their's up in the original white paint that it came in. It's supposed to look Shabby Chic. They told me they bought theirs on eBay and so I hunted it down and bought the same one, too! However, I really liked the idea of painting it up and making it bright and happy with color. Painting is a bit of a hobby of mine, anyway. So the dinner bell under went a paint job!
July 30, 2011 Saturday
This morning the framing of the walls commenced! I decided to tackle the most difficult wall (IMO). The nest box wall. It has both the nest box that will extend out from the wall and a window above it. I'm taking a mini break at the moment, as I'm hot and tired and have run into a problem. I need to put a screw in a tight spot and can't wedge my drill into it. So, I'm thinking. I'm sure I'll get it figured out, though. (ETA: my husband came out and showed me how to 'toenail' a screw in sideways! YAY!) I still haven't cut the vertical boards to support the long horizontal boards. But it's getting there. It's taking a lot longer than I thought! I figured one wall would be done and over with this morning. HA! I love how I continue to over estimate my own abilities. I have had to re-cut boards, re-do spaces... and of course, the morning would not be complete without dropping a nice heavy 2X4 on my foot. I now have a bruise and a bit of a limp.

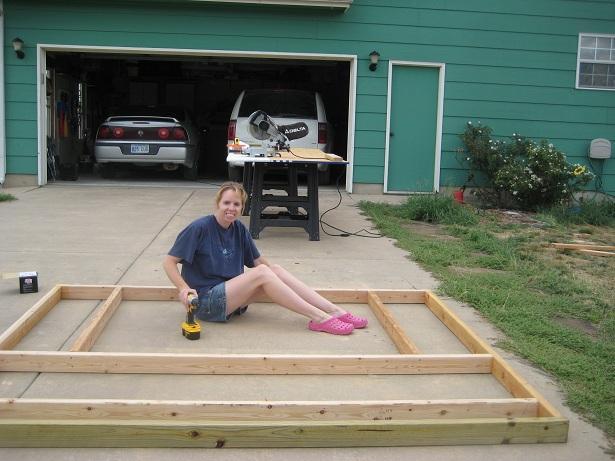
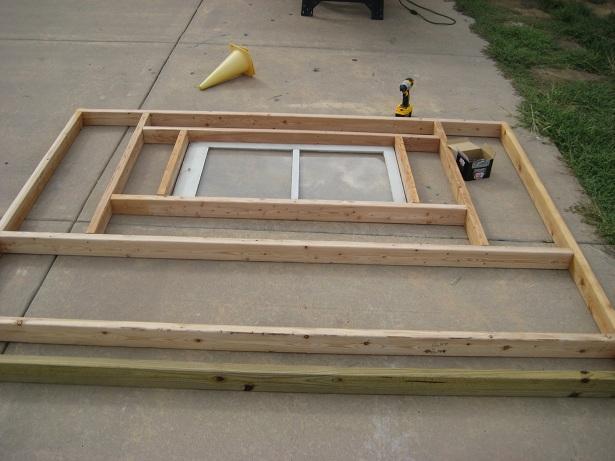
Oops! That is embarassing, disregard my un-cut lawn. I have neglected mowing duties since I have started on the coop! Okay, picture below shows how I am framing out my wall to fit in the window. I'm giving a bit of room on each side so I can shim it later on for a better fit. I don't want to be too tight, and I'm planning on a window sill, as well in those dimensions. The nesting boxes will be directly below the window. That will be framed up next! The window will be removed and stored for the rest of the framing. I put the window in to measure center and get the boards put in around it to look right.
August 2nd, 2011 Tuesday
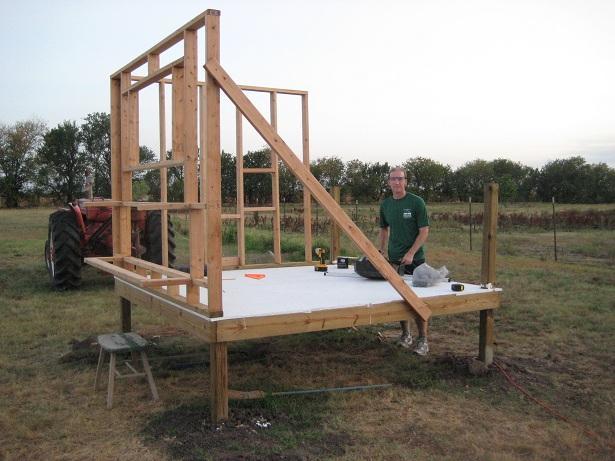
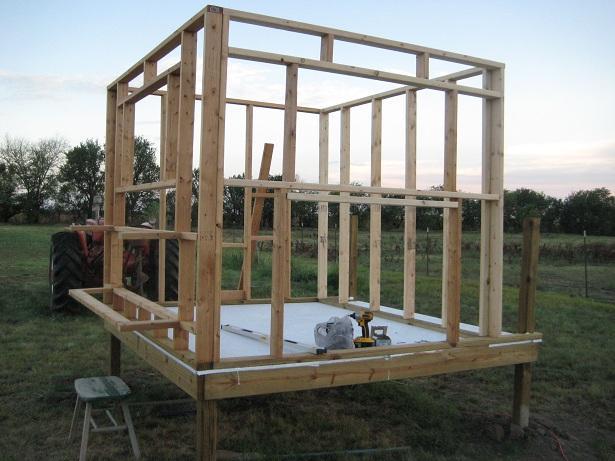
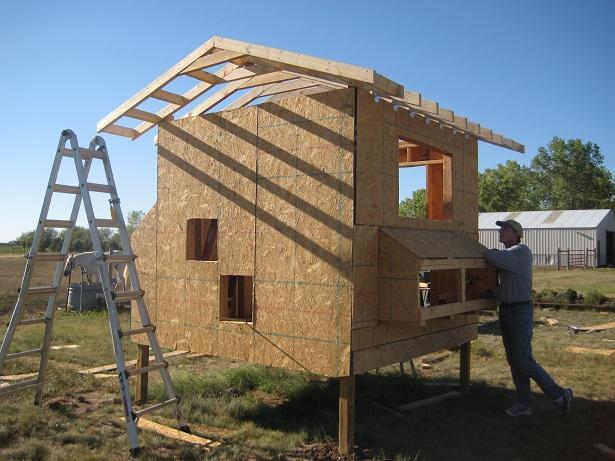
Finally a couple of the walls are up! I am not Super Woman, so my dear husband (pictured below) helped me lift the walls into place. So excited to see it coming together! The coop is actually starting to look like something! I spent yesterday framing walls (so no need to post more about that). I'll spend tomorrow framing out the wall that will have the second window and the people door. We'll see how far I can get. Today's temperature (home reading here in the shade) hit 114. There just wasn't much I could do outside today until the sun was nearly set. Disappointing how hot these days have been. I just can't get much done when it is this hot.
August 7th, 2011 Sunday
The last few days have been spent measuring and more framing up. But it's been so hot that I haven't gotten much done. Not to mention I had some time to sit around and think about it and noticed some mistakes and had to pull apart one of my walls and re-do it. Also- I took the day off for my birthday and decided not to do any work at all! So that was a nice break. But I've been back at it again and trying to get it done. I got one more wall finished and put up on the coop base. Here is a picture of my progress to show for the last few days. Not much... but slowly getting there. Garlic, my gelding is to the right of the coop- he is very curious as to what is going on over there. He keeps switching from active curiosity with putting his head over the fence and talking to me or going back to "pretending" to graze near the fence so he can keep an eye on things.
He's the only one who cares- the other horses are far off in the back of the pasture. Okay, so about the new wall facing the camera- it is framed out for a window on top and the 'people' doors under the window. It is not full sized doors- they are 4 feet wide by 3 feet tall. Big enough to duck into, but that's about it. But it will work to get into the coop to clean it out. And I'm able to stand up inside the coop easily, so there will be a lot of room to get in and work in there. 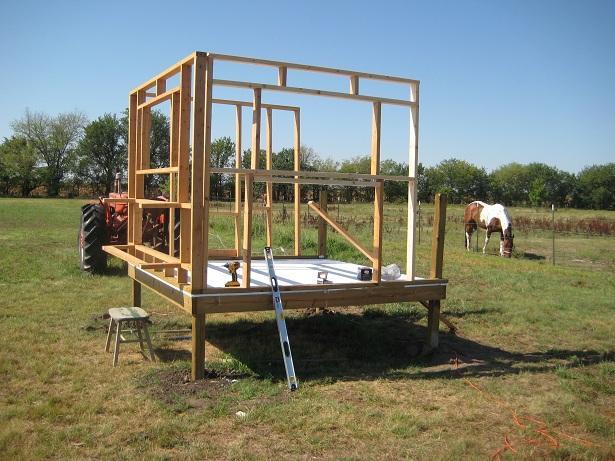
And now later on Sunday evening..... A fourth wall is up!! It is the last full wall! The only thing left to do is put up the little "lean to" side where the posts are sticking up and finish the nest boxes. Speaking of nest boxes- I ripped down what I had put up. I decided the design was not strong enough. I have already cut new wood and put up the start of the boxes. I will post the process of the build for the new boxes tomorrow! So excited! VERY close to putting up the plywood now! This picture shows the orginal thought I had for the wood to come out for the boxes. I have since taken this down. I think I will also be adding some more support in the walls too tomorrow before covering them up.Picture Below:
August 8th, 2011 Monday
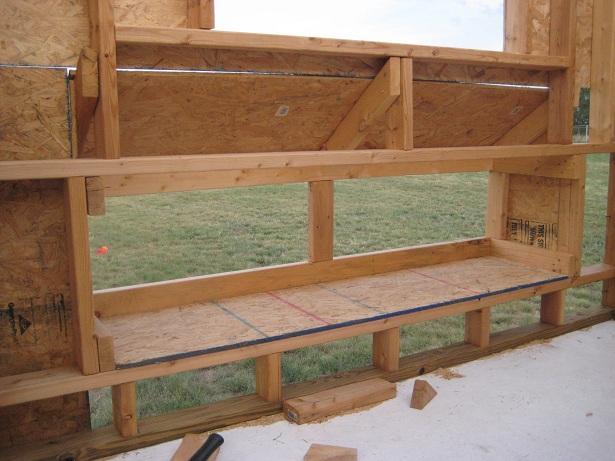
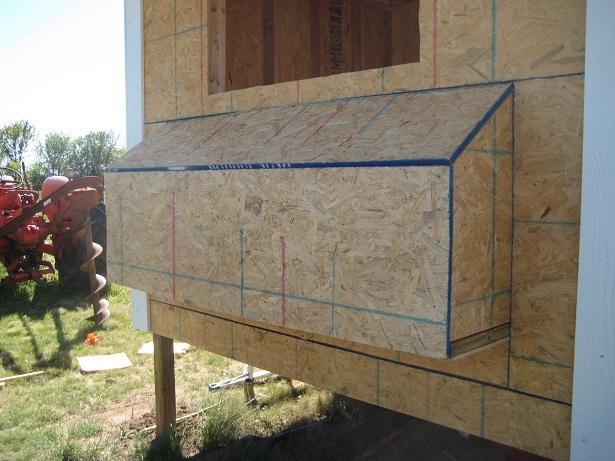
I tore down the nest box I had previously framed up because it was flimsy and wobbly and it really bothered me. I just didn't want to start out with anything that wasn't going to hold up in our Kansas wind and harsh weather. I thought and thought about it and finally turned the wood and attached to the inside of the opening and Wah-La! A solid nest box that I can practically hang off of! Yay! Below is the picture of the new nest box that I framed up with 2X4's this morning. I'm going to add the top part that will come off at an angle... but I must do some more thinking! ha! I don't know how to figure out the angles and before I go tearing through a bunch of wood, I'm going to do some figuring first.
Once I get it done, I'll explain the angles I came up with. This thing is really starting to come together and feel really solid.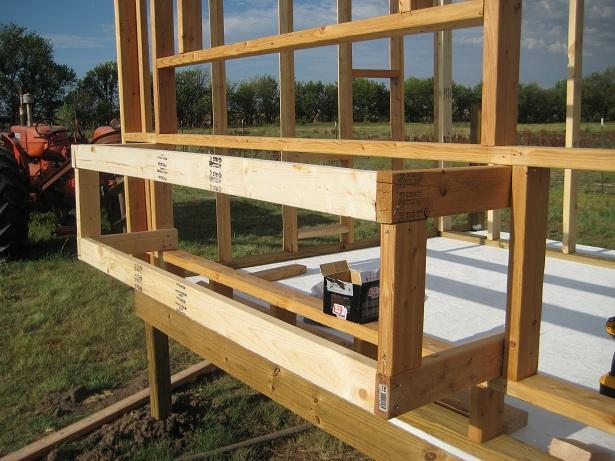
August 9th, 2011 Tuesday
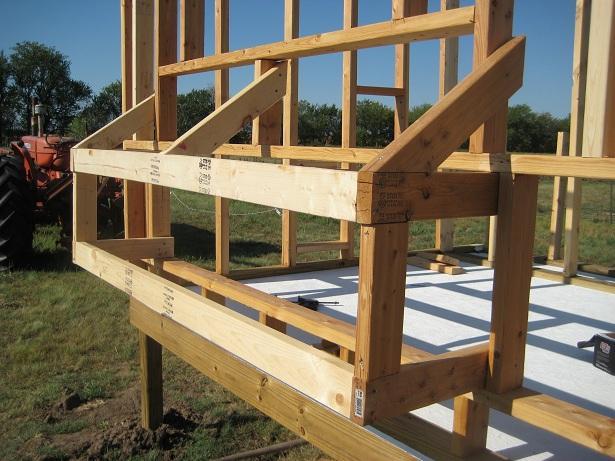
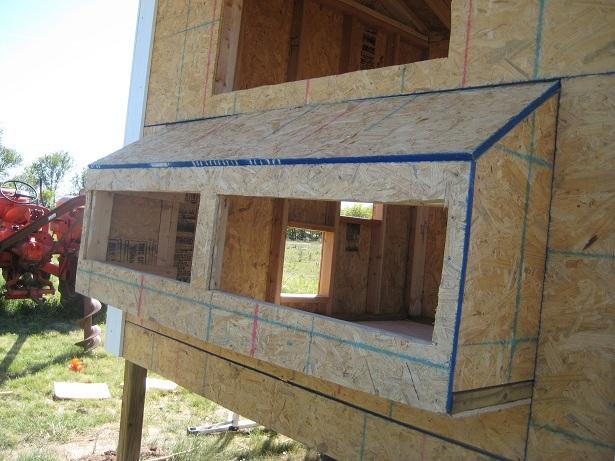
This morning I put up the braces for the roof of the nest box. I took the advice of other's on the BYC.com and took a board, laid it next to the box at the angle I wanted and drew a line across it. Then cut that line and then put it back on and then drew across the top for my next angle cut so that it can be screwed into the wall. It doesn't really look like it in the picture- but the braces meet up into the wall and I made then a little shorter so that they would not interfer with putting on the plywood on the inside. The picture I took almost makes it look like the braces go well into the inside of the coop- but they don't. You can see on the last brace at the far left of the picture that nothing is sticking out. Anyway, I'm pleased with the way they came out and I think it's going to be a great pitch for the roof!
August 13th, 2011 Saturday
Working on putting up the plywood on the outside of the frame. My DH had to help me hold up the pieces and I used a pneumatic nail gun to put them on.

August 14th, 2011 Sunday
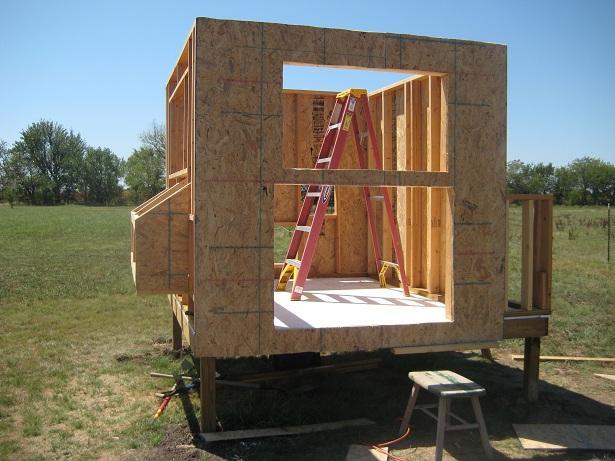
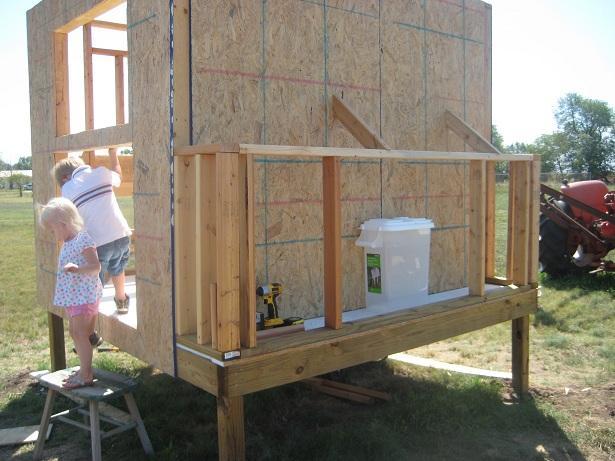
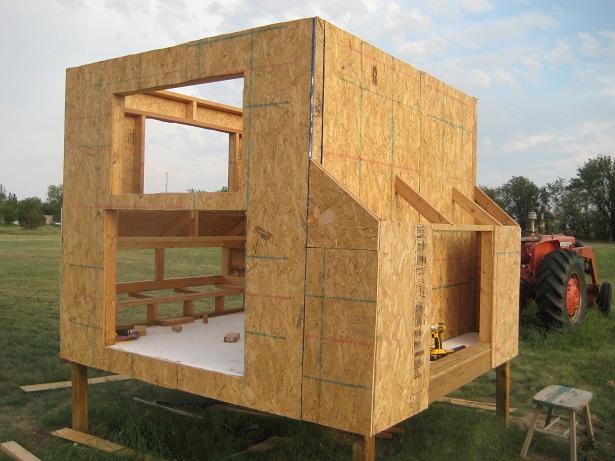
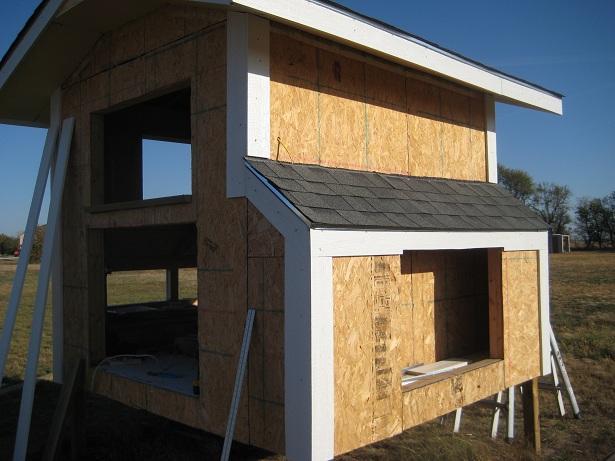
Put up more plywood this morning in large solid pieces and then simply cut out the holes. These are 4X8 sheets of plywood and then I just cut off the excess. At the bottom of the coop on the right hand side- you can see a board that was screwed into the bottom so that the board could rest on it and be level and give me a chance to screw in the plywood... I'll unscrew it later. This is the front side - facing the camera is the window on top and the clean-out door opening below. To the right is the little knee wall I have created that will be a storage area. It's not very large, but should be big enough to hold a few tools, etc. The large 4X4 posts that were sticking out of the ground were cut off so this wall could be built over it.
Okay the picture is the nest box showing the studs (or as I was calling them braces earlier) at the bottom of the box. These will support the plywood I'll screw down to create the floor. They are toenailed in on the main frame and then simply screwed in under the box which makes it level. I added the stud in the middle of the front of the box for the two doors I am planning on putting in.below
August 15, 2011 Monday
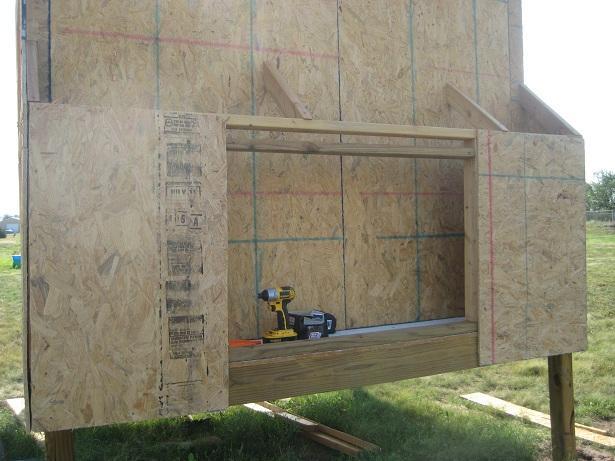
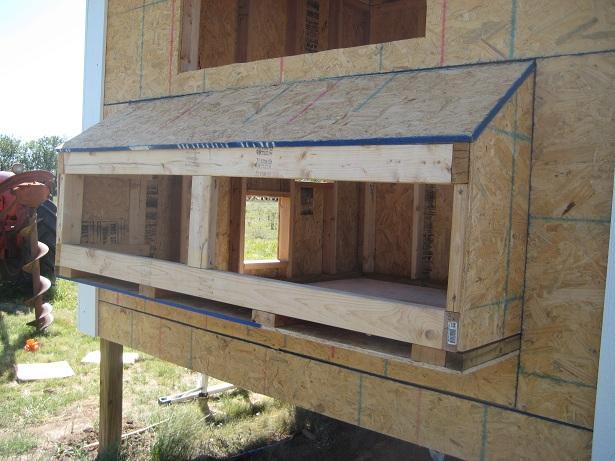
This is the storage area of the coop. I went to Lowes yesterday and found a feed storage container in the birdhouse/feed section of the store. This container has one side of the top that flips open.. it also has a spout on that same side, so you can choose to lift and pour out feed, or open up the larger section and scoop it out. Even better- this narrow container holds 40 lbs of feed and FITS into my space!! I'm going to go back to Lowes and buy another one so I can store more feed and make it easier on me in the winter! As you can see, I cut off the 4X4 posts that were sticking up from the ground. I cut them down level and then placed this wall over them. I started to put the slanted roof beams on, but it was getting hot and I was getting tired. The roof beams are screwed into the studs- even though you can see them, I made sure they were not just hanging onto the plywood only. More of those roof supports have already been cut and will be put up tonight. Also not shown- but I cut and put the roof on the nest box this morning.
August 28th, 2011 Sunday
I haven't gotten a whole lot done since my last post, but it's been really hot and with school starting, very busy around here! Anyway, here is what is done so far! Basically I'm putting up more plywood on the outside and finishing framing the storage area. I am using 2 inch screws to put the plywood on. I tried out the pneumatic nailer, but didn't like it. Went back and screwed everything in. To cut out the window holes- I'm putting up a solid sheet of plywood right over the top of the window hole. Then I drill in a nice big hole into the area to be cut out, and use a hack saw to cut out the holes. It cuts through it like butter. Ignore the scrap plywood pieces that are litering my yard every where. I've made a mess of our lawn. Can't wait till this part is done and I can pick it up. But for now, I don't want to miss the opportunity to use even the smallest scrap if I need it for something.

And a close up of the nest box framing before I added the floor in it. Second picture is the plywood floor in the nest box. I measured out the dimensions the floor needed, and used a pencil to draw it out on the plywood and then used my circular saw to cut it out. Then I used 2 inch screws to secure it to the floor studs. And yes- I see the gaps in the plywood too! But I'm going to be covering this entire coop with siding later on.
") BELOW:
BELOW: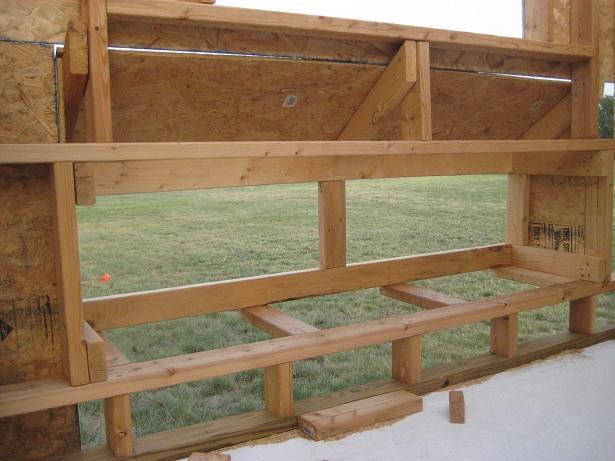
August 30, 2011 Friday
Storage Area: I added a 2X4 in the door opening because I realized I forgot to add this earlier... there would be no room to put in a door - it would have hit the roof. I put the board in 3 inches lower to give some room, and the second picture shows that I have already put plywood over it. Nice opening now for a double door into the storage area.

September 3, 2011 Saturday
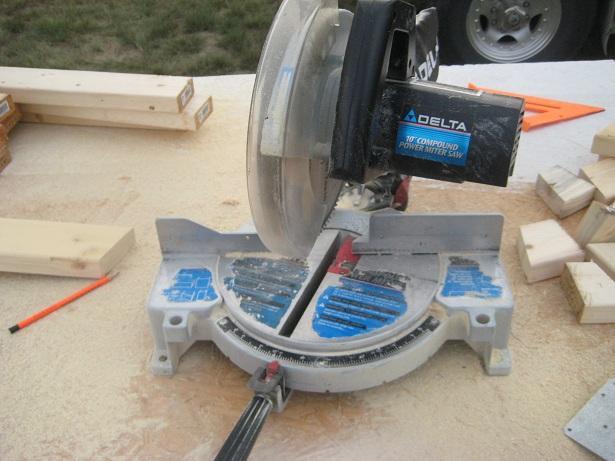
Finally working on the roof trusses! I know nothing about roofs! So I did an internet search on roof trusses and decided I wanted to try to go for a 'vaulted ceiling' on the inside, which would mean the trusses would either not have a cross brace or it would have one, but higher up. I wanted a cross brace higher up to make sure the trusses still maintained some strength. I didn't want a very high peaked roof either, so we decided to go with a 20 degree angle or a 5:1 ratio. We don't have to worry about snow loads here, so the pitch of the roof really wasn't a big worry for us. So to cut the trusses, I moved my miter saw to the 20 degree mark and cut the end off. Then we decided how much of an over hang we wanted off the coop. My husband and I basically held up the length of wood to the midway point on the coop and then marked a line and cut that end off at a 20 degree cut also. So BOTH ends are cut with the 20 degree cuts. That way, the end cut is perfectly vertical to the coop.
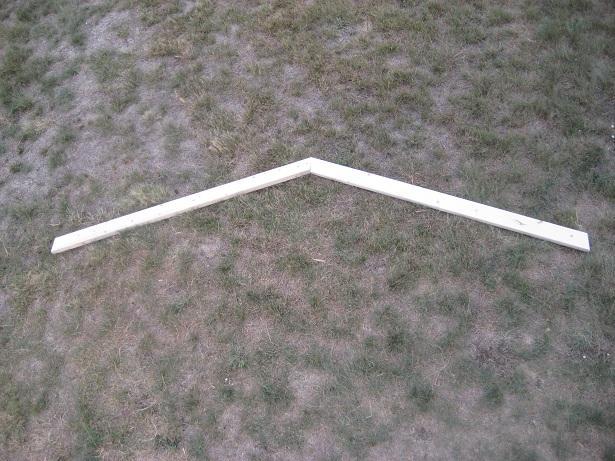
Okay, so THEN... how to get the right angle for the cross brace in the truss? I simply layed down a piece of wood under the truss and lined it up to where it looked center. Then I marked my angles on the piece of board. I cut the angles with my circular saw and then double checked that it was right. Then I used that angle cut board as a template- and simply drew those lines onto all the other boards I needed to cut and it went pretty fast that way. The picture below shows my template board that I used to trace for the others, and then cutting those boards with my circular saw clamped down onto my saw-horse table. Just cut on the lines!

September, 5, 2011 Monday (it was Labor Day...har, har)
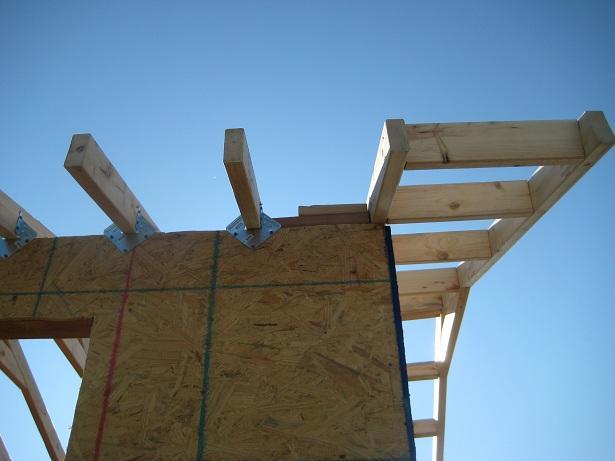
We put the trusses up! I bought hurricane clips from Lowes and we used those to install all of the trusses. We measured for center on the trusses and marked the ends. That way all we had to do was line up the end mark of the truss to the side of the coop and we had center. Ours was 15 1/4 inches from the end of the truss to where it hit the side of the coop. My husband held the truss up and I screwed the sides in. First picture shows the hurricane clips in action. We discovered we could not use the hurricane clips on the end truss that sits on the coop. So instead, we screwed in a couple of 2X4 boards that we then screwed the truss into- and it's very stable that way.
I also cut 14 inch pieces of wood to create an overhang and suspend a truss out from the coop. Did this on either end. Both ends used 10 boards cut at 14 inches and screwed into the ends of the last truss on the coop. Then we used clamps to hold the suspended truss up and screw it into the boards we had already screwed on. It feels pretty secure!
(BELOW: hurricane clips)

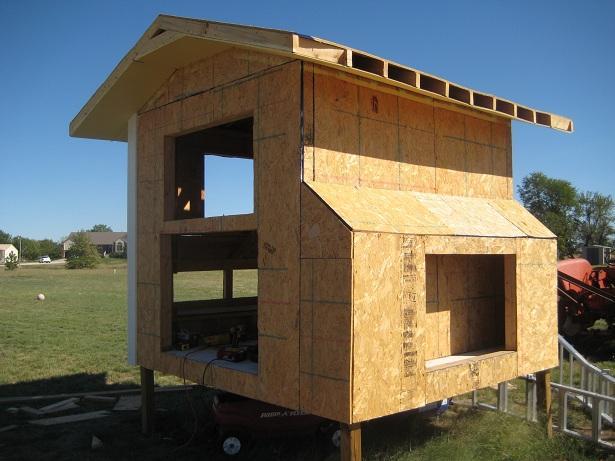
And here is the BACK side of the coop that faces South. Showing the pop door opening, the overhang of the roof trusses and a vent/window to the left of the pop door. I don't have many pictures of the back end, since at this point, there isn't anything too interesting going on back there. But I did want to get a good shot of how the front and the back have the same trusses coming off of them. Next to do... is board up the front space with plywood it created under the trusses. A vent will go in on either end up under the roof as well.... stay tuned!(Picture Below)
September 11, 2011
We got the plywood on the roof. There is still a couple of spots where we need to take a saw and cut it off even with the trusses, but that will be easy compared to hauling the wood on the roof. Heavy!! And heights freak me out a bit- so I didn't like being up that high putting in screws. I have to admit, I coaxed my husband into doing most of the scary height work on the ladder. I handed up screws and gave him a helping hand when needed. I'd rather stick to the ground.
So what's next? I am planning to buy Ondura roofing material from Lowes (that is corrugated tar material that looks like metal, but isn't) and put that up next. 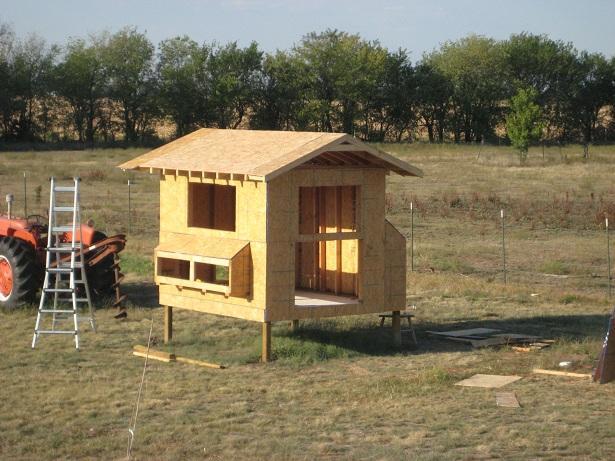
September 25, 2011 Sunday
Okay, so we've been working away at the coop when we can- doing small things. We did start the facia board on the underside of the eaves and it's now been painted. We are at the point where we need to do the roof and put up siding and then we can work on all the finishing details. My husband has stepped in and really given me a hand now, because there is just BIG stuff I can't handle on my own! But I feel pretty proud I've done the majority of the work myself. One more thought to add... We were reading online reviews of the Ondura roofing material. Turns out a lot of people have problems with it cracking, or in the summer it heats up and starts to degrade. Also, people have crushed it under their weight walking on it later for repairs. And lastly, people have said that the nail holes they hammered in to install the Ondura has caused tearing and cracking and larger holes resulting in leaking and water damage. Because of these reviews, we've decided to nix the Ondura idea and will be putting up composite asphault roofing.
First up- is a picture of the nest box and the process of closing it up so that we can put siding and roofing on it this week. The next pictures will tell the story of being closed up and ready to go. I cut out a sheet of plywood that fit over the face of the box, then screwed it in, and then cut out the box openings.
Next is a picture of the storage area on the West side of the coop. It is ready for roofing and siding as well. Then I can start work on the doors! We had a rain storm and the plywood on the storage roof area got soaked and warped a bit. It has dryed out now and despite it being a bit warped, I think it will be just fine. Going to just roof over it and take every precaution to caulk and get everything covered well with the siding. In this picture, you can also see the facia board that we've put under the eaves- next will be the boards that cover up the rafter ends.
October 8th, 2011 Saturday
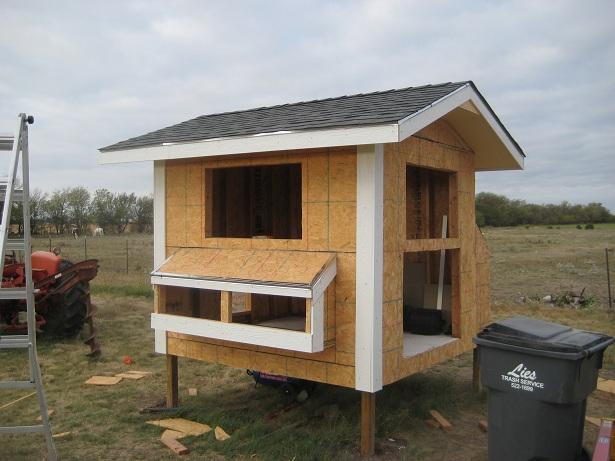
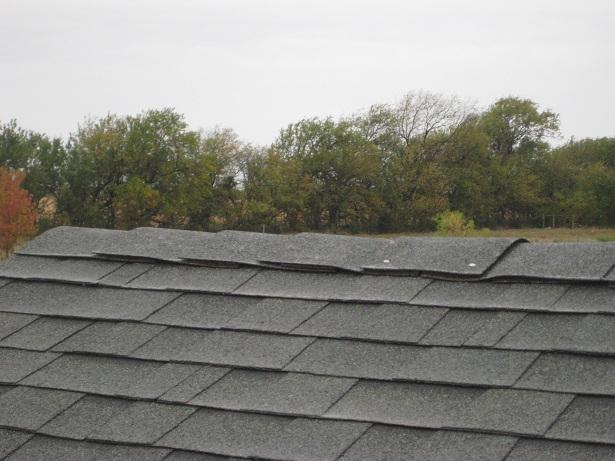
Okay, a lot more work has been accomplished, so I'm going to post the pictures that show what I've been working on! I have finished the main roof with shingles bought from Lowes and a Rdge Cap. I also roofed over the nest box and have been working on putting the trim around the openings! BTW- the trick to putting the Rdge cap on the roof to finish it up is to start it from both ends and the leading wind side gets the majority of caps going that direction.. then the other side only gets a few and they meet up in the middle. I cut apart a cap (took off the laminated end) and then used that to cap between the two pieces that met up together! I will finish with caulking roof tar to cover the 4 exposed nails on the last cap to further waterproof it.
First picture (BELOW) shows the roof I finished. Look closely and you can see my ridge cap. Also- another note is that the first row of shingles is started UPSIDE DOWN-with the grooves facing up instead of down. Then, the next row, which is put directly on TOP of the first row is put on the correct way with the grooves facing down. This double layer of shingles on the bottom row will start off your roof. Make sure all of your seams are staggered! Use a utility knife to cut the shingles, and it's easiest if you cut them from the BACK side (flip the shingle over and that way you'll get a better, smoother cut).
Picture shows the Ridge Cap. You can see how I started the caps from opposite directions and then cut off the laminated part of the cap and nailed it over the two pieces that butted up next to each other. BTW, the final cap I nailed on top is covering up the laminated end pieces on both caps that meet in the middle.BELOW:
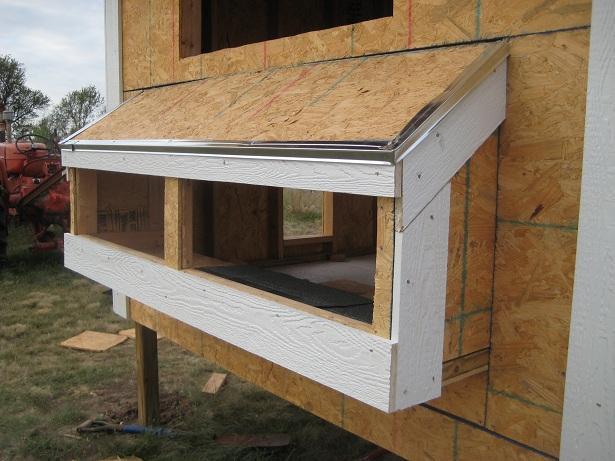
This picture shows how I installed the trim around the top of the nest box first. Then I cut my metal roofing flashing to fit around it and nailed it down on the inside of the flashing ridge. I used tin snips to cut the ONLY the top of the corner and then bent the bottom around. (Don't cut the bottom of your flashing) You can kind of see in the picture how the bottom of the flashing just is bent and the top is overlapped because of the cut. After this, staple on your tar paper (roofing felt) and start your bottom row of shingles as I described above with a double layer. BELOW:
Picture Shows the finished roofing on the nest box! It really was pretty easy to do. I have already finished up the trim around the box, so I'll have to post a picture of that soon, but it started raining on me and I loaded up my tools and ran for the house. Next on my "To Do" list is to finish the trim around all openings-- the windows and doors. Oh, and I need to roof the utility storage side, and I'll post pics of that when I get to it.
BELOW: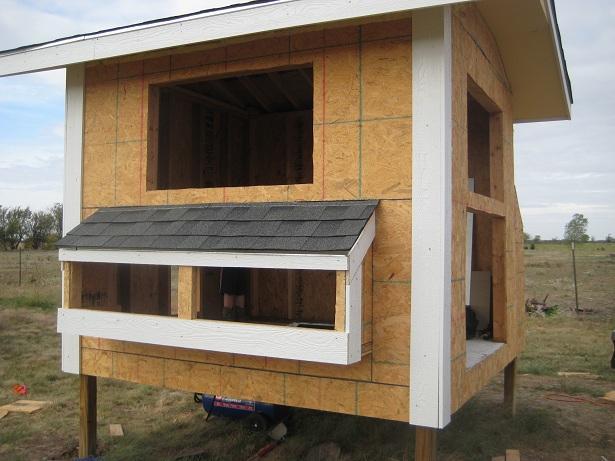
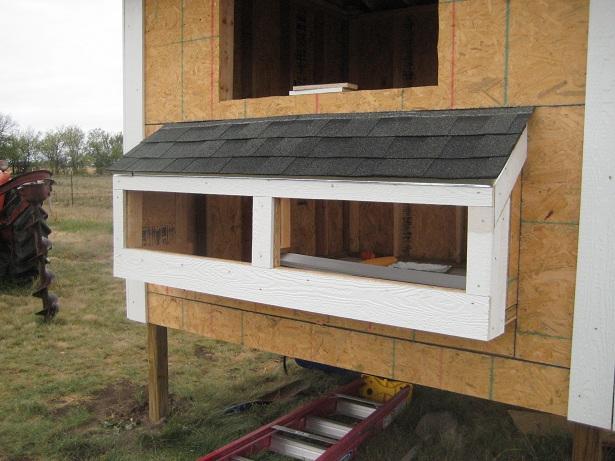
Trim all installed on nest box. (it quit raining for a bit, so I ran back out to get this pic)BELOW:
One more thing to mention! I got my shipment of baby chicks from Meyer Hatchery in on Wednesday (Oct 5th, 2011). They are so cute and fun to hold! I took a funny picture of a couple of them. I bought Silver Laced Wynadottes, Plymouth Barred Rocks, and White Crested Black Polish. (also, I bought some silkies locally that I put in brooder with them as they are only a week older). Here is a picture of a couple of my WCB Polish! Don't they look like they are having a conversation? So cute! So now, more reason to get this coop done ASAP!

October 24th, 2011 Monday
Well, I've been plugging along and have gotten a few more things done lately. It's starting to get cooler now. I got the roof shingled over the storage side of the coop. I also made doors for the nest boxes. I made the door frames out of pressure treated lumber, so I have to wait for it to dry out and then I can paint it. Hopefully in a couple of weeks.
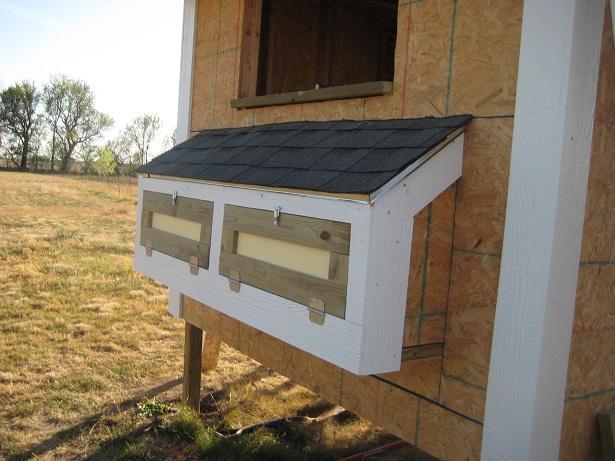
(BELOW) shows the new roof over the storage side. Doors are next!
(BELOW) shows the doors closed and locked. Can't wait to paint it when the wood dries.
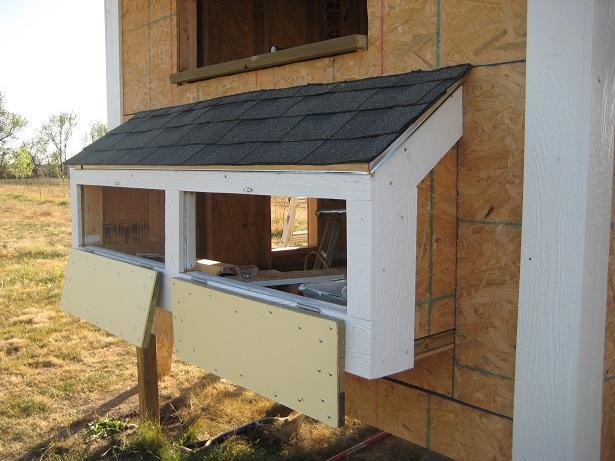
(BELOW) just shows how the doors drop completely down for easy access to the nest box.
October 31st, 2011 Monday (It's Halloween today!)
Yes, I did do a lot of work on the coop today despite the ghoulish holiday!
Both windows have been installed and the main doors on the front of the coop are now on! Although, I still need to mount the hardware on the doors, like the handles and locks. I also got most of the walls put up on the inside of the coop. I will post pictures of that later.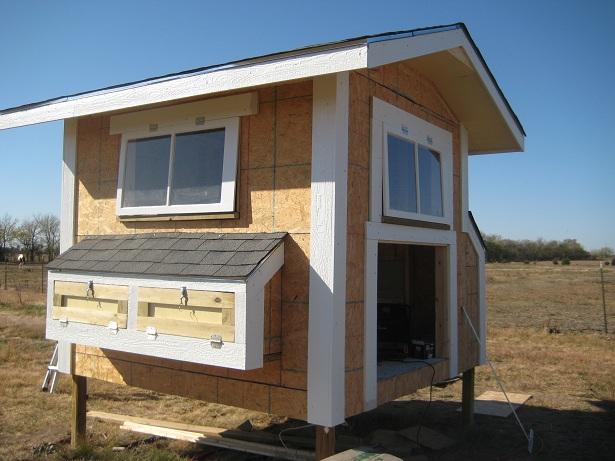
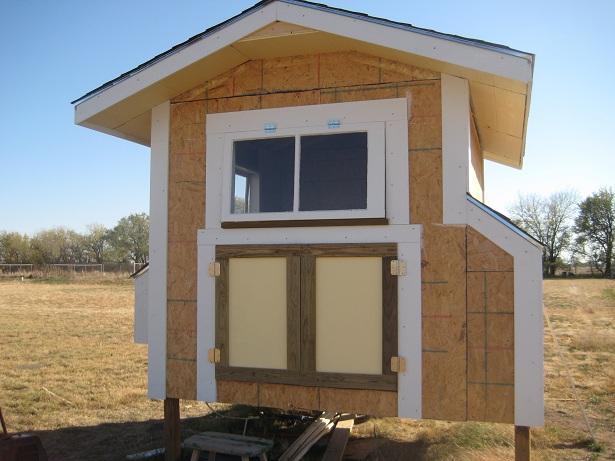
November 5th, Saturday 2011
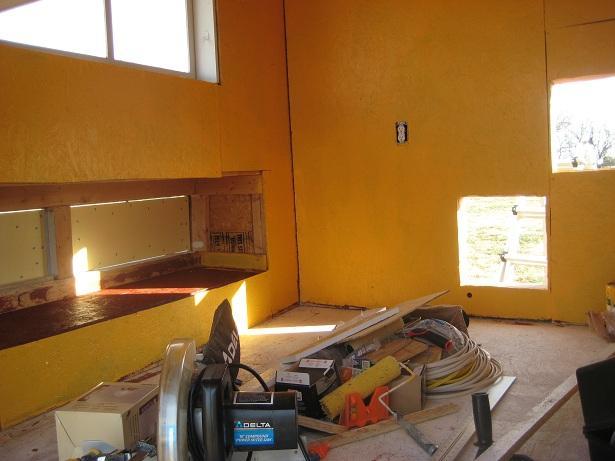
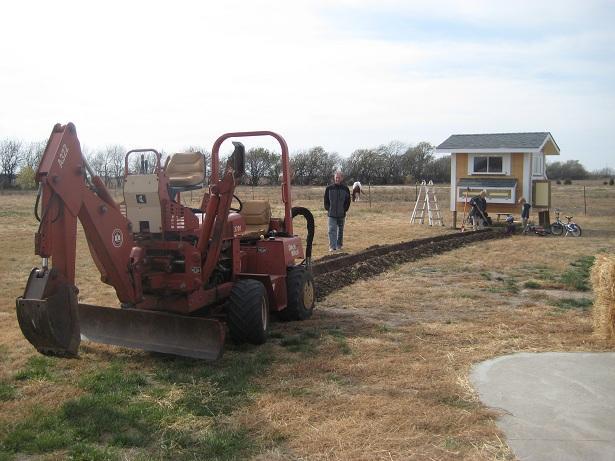
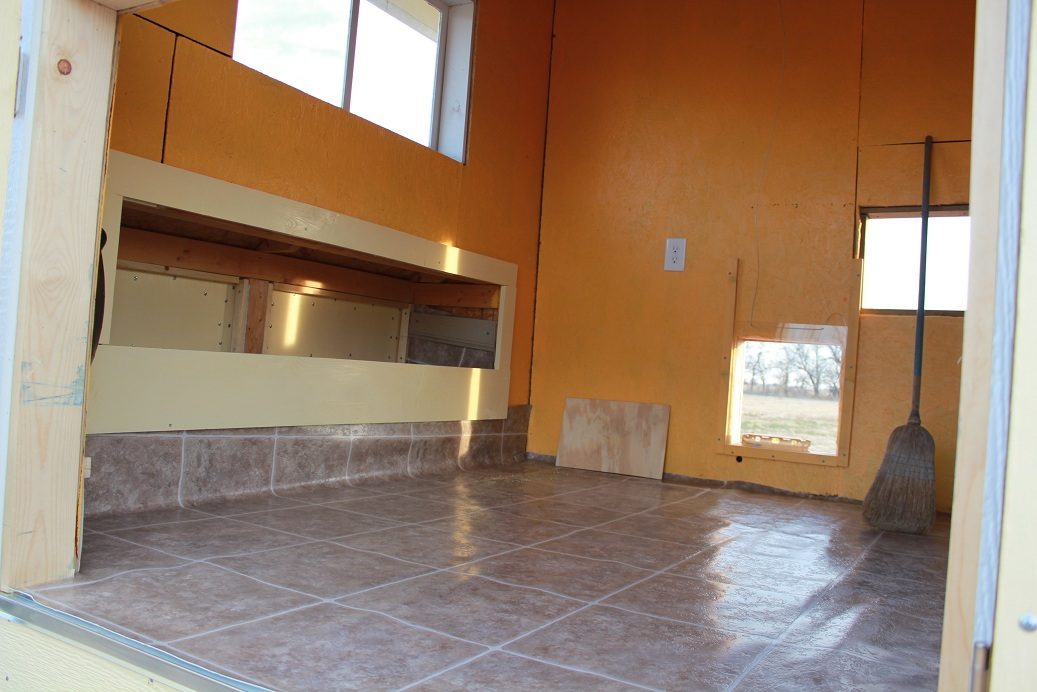
Wow, it's kind of sad I'm into November now and I'm STILL working on my coop. Sigh. Ah well.. I do have progress! I finished up putting in all the walls on the inside and painted them a cheerful yellow/orange color. This picture shows that I still have yet to trim out the nest box doors from the inside and to trim out the nest box it's self! But soon, I hope that will be done! The second picture is the electric line being trenched from the house to the coop! YAY! Now our lights and heat lamp will work and I can plug in the cookie tin water heater for the winter. Our neighbor is a plumber and he owns this trenching machine, so we lucked out!
November 6th, Sunday 2011
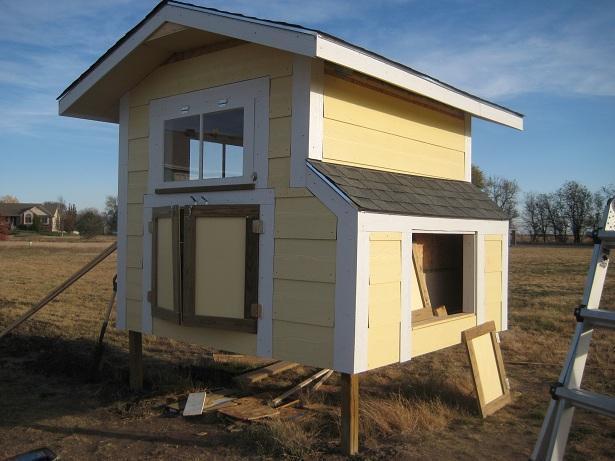
We started on the siding! We are using pre-primered masonite siding. We went ahead and put two coats of our 'CornSilk' yellow paint (from Walmart Glidden colors) on the siding before we cut it and nailed it on. Started laying the siding on with the bottom row and overlapping working our way up the walls of the coop. At least this way, we don't have to paint, and if we do, it's just to touch it up! (Trying to make our lives easier at this point! LOL!) We only have two sides nearly done... two more sides to go!
November 12, 2011 Saturday
I worked on the inside of the coop and got the pull system for the pop door in place (I'll post pictures of that soon!). I have vinyl layed down and the nest box framed out. I cut the dividers for the box, but then painted them and they are still wet. I also have the door for the vent, but I can't find the hinges I bought! Looks like I'll be buying them again tomorrow. It could be next year before I find the first ones I bought.
 I ran the vinyl flooring up into the nest boxes to make it easier to clean them out and instead of cutting off my vinyl at the floor, I just ran it up the wall because that is the side the roosts are going to be! And I figure when the girls all poop on the wall, this should be easier to clean off.
 The first picture shows the framed in nest boxes and the pop door-- and YES the clear plexi glass door is in place, but it's difficult to see. The wire is pulled through it, but I haven't attached it yet. The door next to the pop door- and sort of above it is a vent door for that wall- and it is the door that I can't find the hinges too. That door has been painted and is ready to go on. Sigh.
Picture BELOW--- Shows the vinyl I ran up the wall. The roosts are going along that side. I need one more tack strip to screw in along the vinyl on that side and I'm done with the flooring.

December 16th, 2011
Okay, it's been a while since I've updated this page and I've got a lot more to show!
The rest of this work has been done in early December.
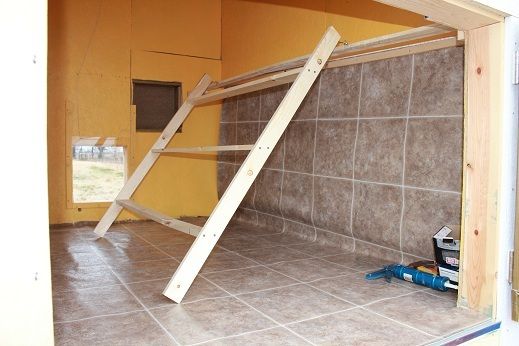
ABOVE: I installed a roost the entire length of the coop and then built a ladder roost to accmodate chickens lower on the pecking order and for my silkies which can't fly up to the higher roost. In fact, even though the lowest rung is very low, they still prefer to sleep in a pile on the floor. Maybe that will change, we'll see.
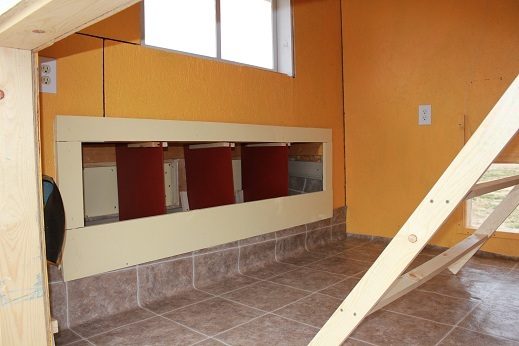
Picture ABOVE: The nest box was framed out and I then added in light weight dividers that I can remove for cleaning if really necessary. Other wise, I think I can scoop them out because of the vinyl in them.
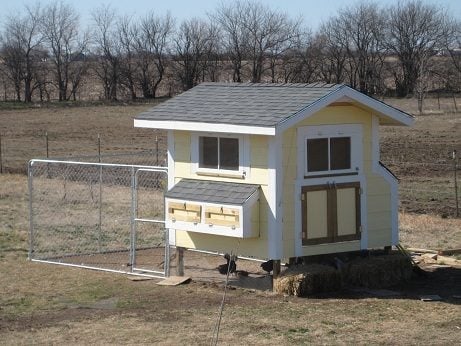
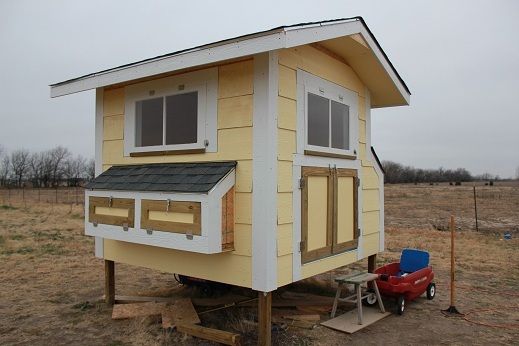
Picture BELOW: Shows the coop as it was before I added a temporary run on the back. I ran out of time before winter hit, and I bought dog panels (chain link) that I hooked onto the back for their run. I now need to show pictures of my pop door and the cable I use to open and close it. But if you look closely below, you can see the cable coming out of the top of the coop under the eave on the left side.
March 9th, 2012
Not much progress from what I did in the Fall. I ran out of time to finish my coop on the outside. I thought I had plenty of time to build a run, etc, etc. I really over estimated timing on this project. SO, here is a picture of what it looks like now. I ended up running to Orscheln's and buying 3 dog panels to put up for a temporary run off the back side. It had a tarp over it for the winter, but all the storms shredded it. I took it off. The dog panels are 12 foot long and the short end on the back side is 10ft long and they are 6 foot high. No one can fly over it.