Here's my coop, some of the contruction of and a few extra pics of some inovations I'm using.
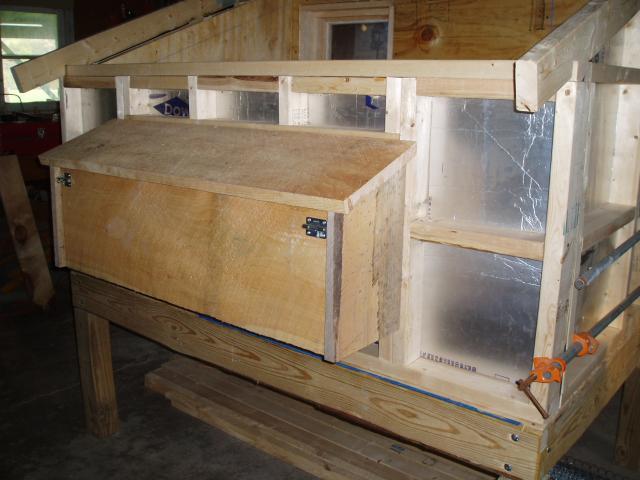
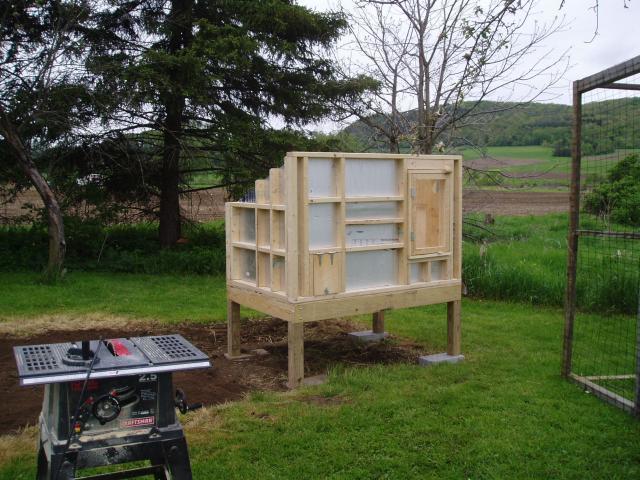
I built my coop kinda like a modular type home. All constructed separate, the base, rafters and each wall framed, adding interior sheathing and rigid insulating inside the garage. Then moved it all outside to the site for assembly.

The base was placed on blocks, all leveled. Linolium was tacked down to the base and then the walls were secured to the base.
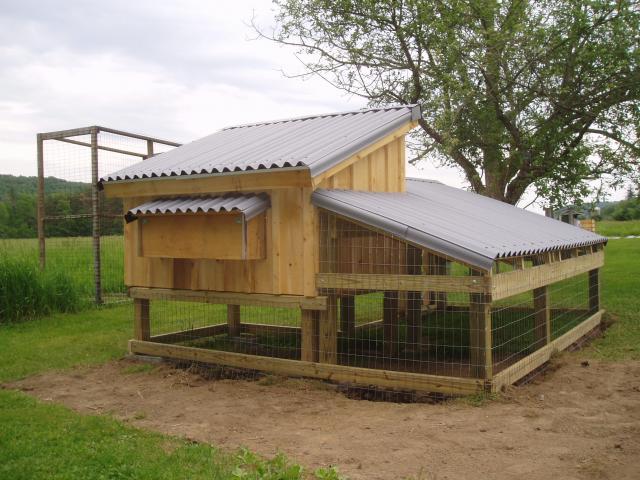
Outside sheathing, rough cut batt and board, was added and all is trimmed out. Rafters in place and roof sheathing were also added. Initially I was going to shingle the roof so drip edge was added and tar papered as usual. Plans change later...
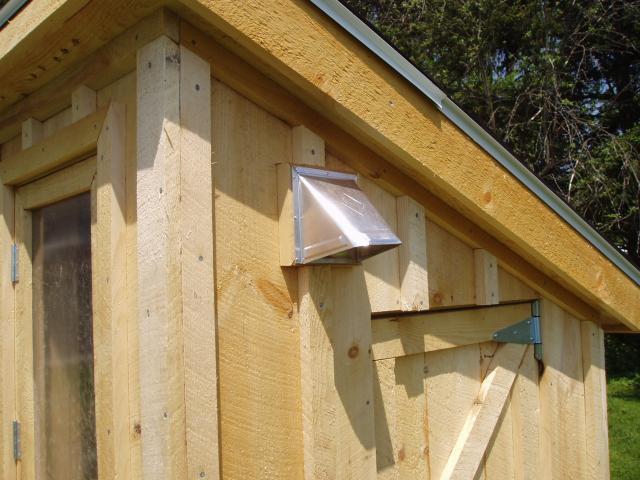
Dryer vent in place to work with an exhaust fan, experimental ventilation???
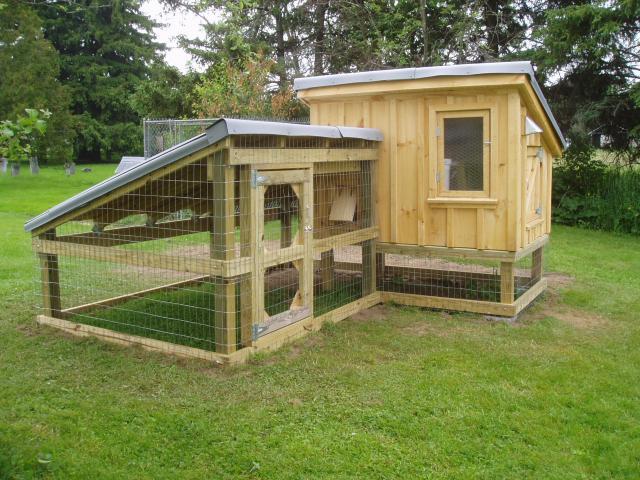
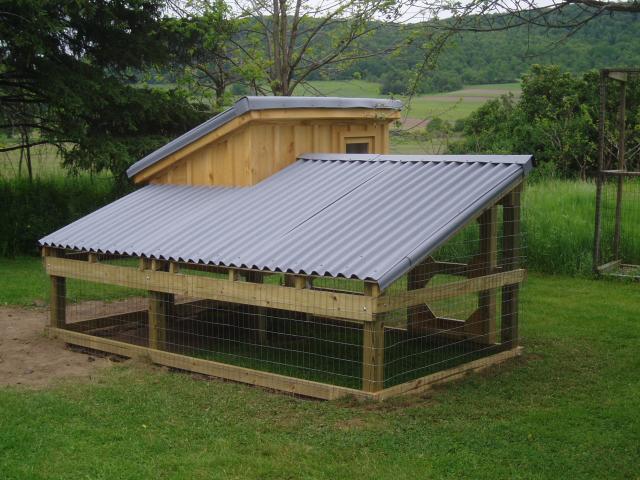
Run was added. We get severe winters then normally so the coop and run is well pitched to shed snow. This type of roofing was a change in plans instead of shingles. note: The window faces south to take advantage to a low winter sun. Coop roof is pitched to the north and the run to the west, to fend off the weather.
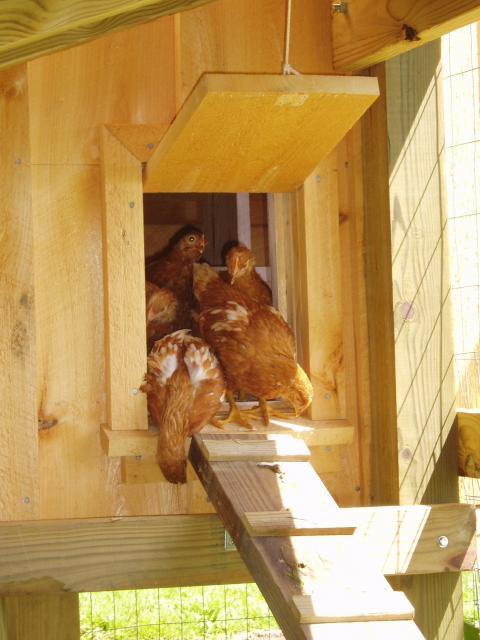
Screen door in place, nice addition to improve ventilation.
I designed the run to wrap around the coop to fend off the weather again and to keep the pop door undercover.
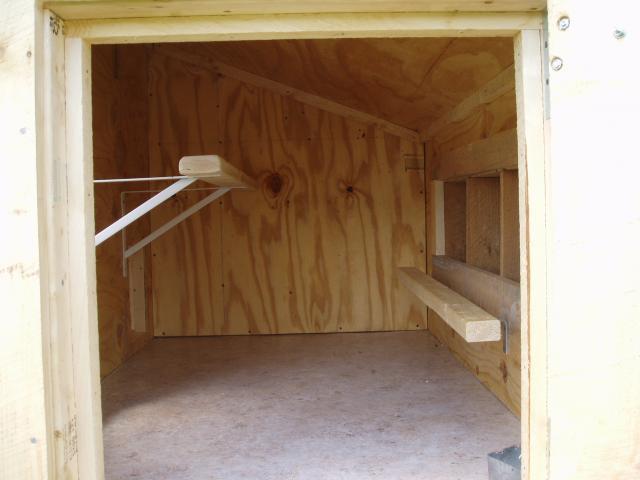
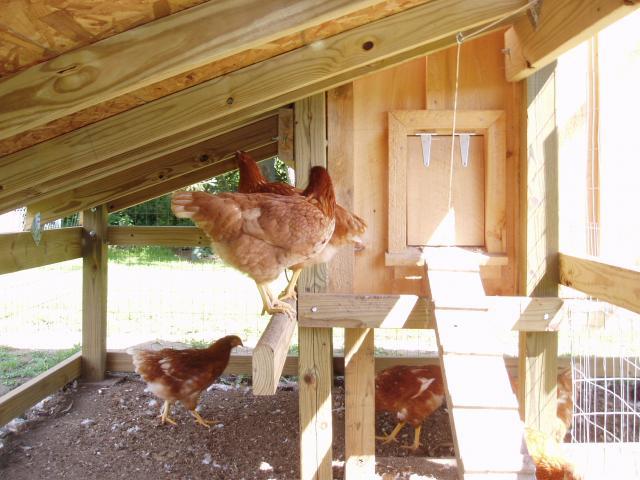
Roost in placed, 2x4 on flat side to help the birds to keep feet warmer this winter. The 2x3 perch is just to help them ease into the nesting boxes.
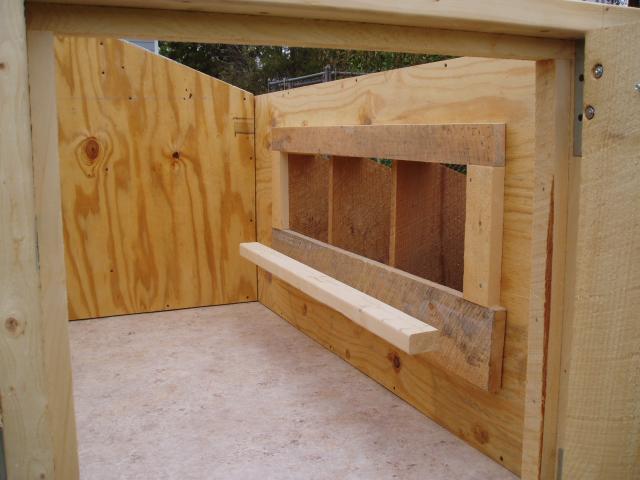
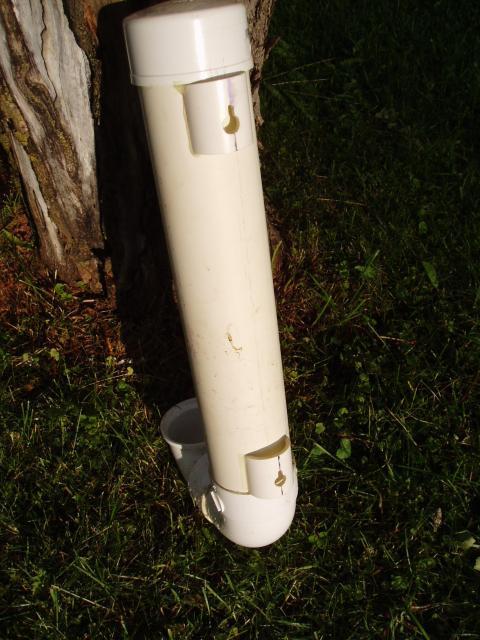
My space saving feeder...I did modified it a little from other examples on here. Two fill tubes at each end to hold more feed and to keep the holes full easier. Hung it by a couple of screws for easy removal for cleaning and used 3"to 4" coupler as a funnel for easier filling.The tube with the holes is not glued in place, it can be rotated to face the holes as needed or to removed the tube and replace with another tube with some other configuration.
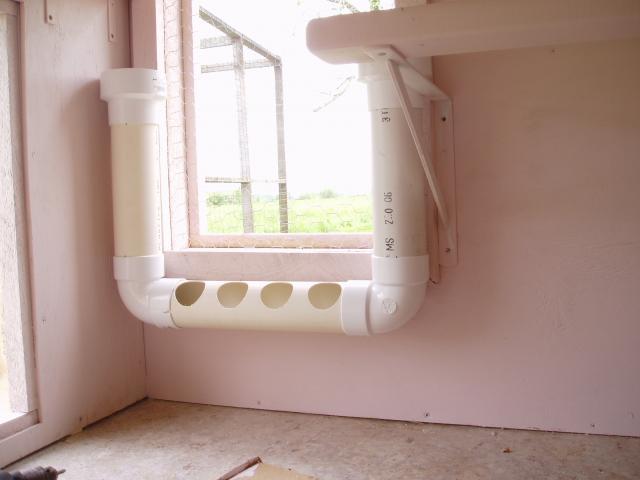
Space saving waterer...The waterer joints are sealed, Atmosphere pressure prevents the water from running out. The cap kinda acts simular as your thumb on the top of a straw. You have to hold it horizonal to fill. The keyhole system makes it easier to take it down than bungies, wire, etc.
My ramp is on a hinge to raise it up out of way while cleaning the run.
Pop door is opened outside of the run by a string threaded through eye bolts. note: The run roost is positioned away from the sides to avoid predators. Also too small for all the birds to roost at once to discourage them from roosting in the run at night, which hasn't been a problem.
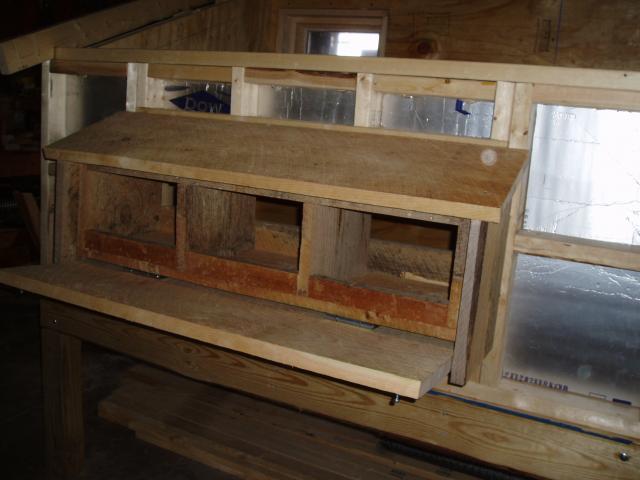
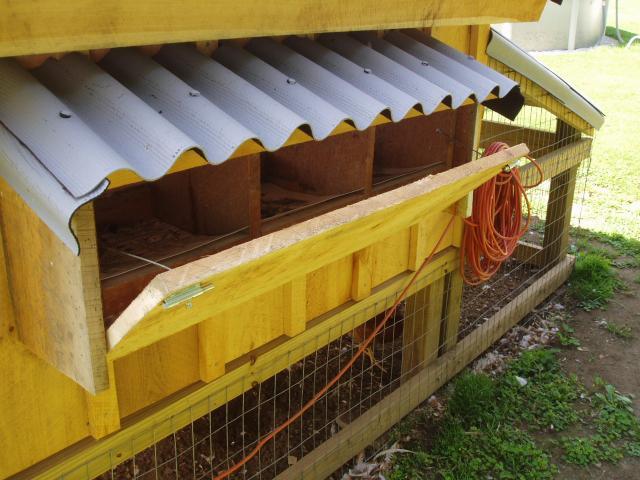
Nesting boxes outside access door.
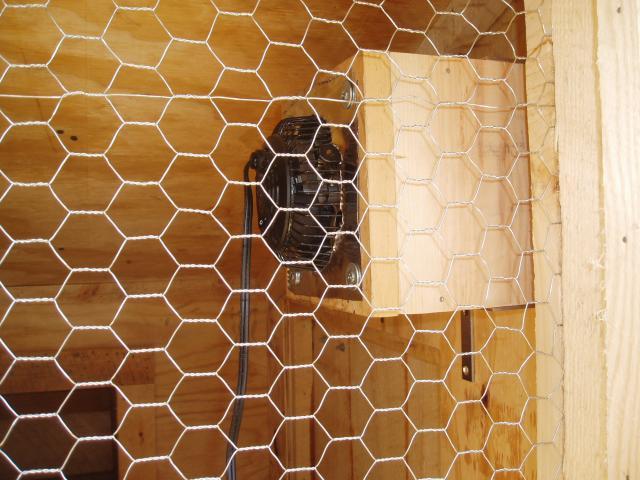
Exhaust fan, no problems so far, effectiveness still to be determined??? This winter should put it to the test.
I have been using the "Deep Litter Method", DE as needed and stir it up once a week with no problems, odor or otherwise.
I placed straw in the nesting boxes, they except it well. I received my first egg 08-19-09, found right in a nesting box.
I also have plywood panels that will be placed on the north and west sides of the run to keep the snow at bay to provide the birds more outside time this winter.
Any questions please feel free to contact me...
I also would greatly appreciate constructive criticism or advice on anything posted here.
Everything is subject to change, Thank You
I built my coop kinda like a modular type home. All constructed separate, the base, rafters and each wall framed, adding interior sheathing and rigid insulating inside the garage. Then moved it all outside to the site for assembly.
The base was placed on blocks, all leveled. Linolium was tacked down to the base and then the walls were secured to the base.

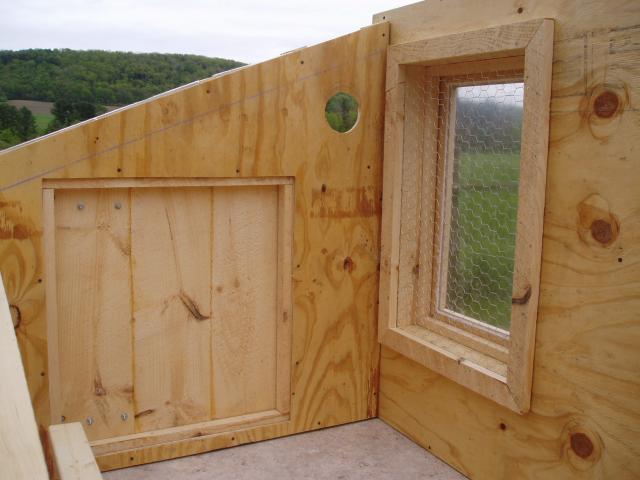
Outside sheathing, rough cut batt and board, was added and all is trimmed out. Rafters in place and roof sheathing were also added. Initially I was going to shingle the roof so drip edge was added and tar papered as usual. Plans change later...

Dryer vent in place to work with an exhaust fan, experimental ventilation???
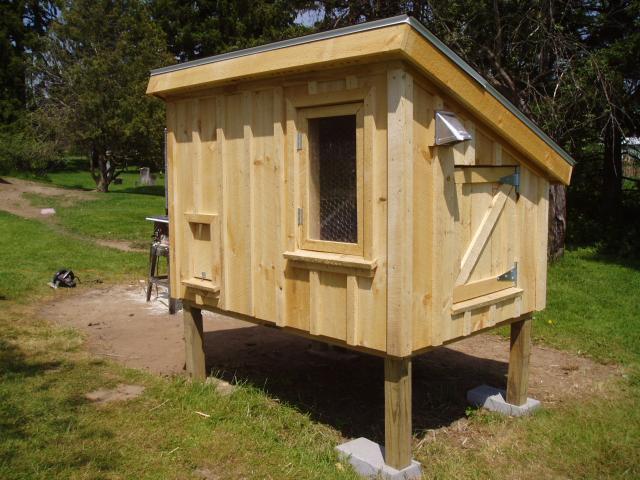
Run was added. We get severe winters then normally so the coop and run is well pitched to shed snow. This type of roofing was a change in plans instead of shingles. note: The window faces south to take advantage to a low winter sun. Coop roof is pitched to the north and the run to the west, to fend off the weather.
Screen door in place, nice addition to improve ventilation.

I designed the run to wrap around the coop to fend off the weather again and to keep the pop door undercover.
Roost in placed, 2x4 on flat side to help the birds to keep feet warmer this winter. The 2x3 perch is just to help them ease into the nesting boxes.
My space saving feeder...I did modified it a little from other examples on here. Two fill tubes at each end to hold more feed and to keep the holes full easier. Hung it by a couple of screws for easy removal for cleaning and used 3"to 4" coupler as a funnel for easier filling.The tube with the holes is not glued in place, it can be rotated to face the holes as needed or to removed the tube and replace with another tube with some other configuration.
Space saving waterer...The waterer joints are sealed, Atmosphere pressure prevents the water from running out. The cap kinda acts simular as your thumb on the top of a straw. You have to hold it horizonal to fill. The keyhole system makes it easier to take it down than bungies, wire, etc.

My ramp is on a hinge to raise it up out of way while cleaning the run.
Pop door is opened outside of the run by a string threaded through eye bolts. note: The run roost is positioned away from the sides to avoid predators. Also too small for all the birds to roost at once to discourage them from roosting in the run at night, which hasn't been a problem.

Nesting boxes outside access door.
Exhaust fan, no problems so far, effectiveness still to be determined??? This winter should put it to the test.
I have been using the "Deep Litter Method", DE as needed and stir it up once a week with no problems, odor or otherwise.
I placed straw in the nesting boxes, they except it well. I received my first egg 08-19-09, found right in a nesting box.
I also have plywood panels that will be placed on the north and west sides of the run to keep the snow at bay to provide the birds more outside time this winter.
Any questions please feel free to contact me...
I also would greatly appreciate constructive criticism or advice on anything posted here.
Everything is subject to change, Thank You

")