Kruer Bantam Coop

The Kruer Bantam Coop began as a simple project coop. I had the summer off and free time on my hands. My husband brought home a bunch of scrap 2 x 4s from work. So I decided to try my hand at coop building, just a small one that I could sell on CL at the end of summer. My husband is the carpenter of the family, but I have a little skill with tools, and am always game for a project. Plus I knew that DH would answer any technical questions I might have, and lend some muscle when needed.
Murphy's Law came into play of course, and between sweltering, humid summer days and getting a new great dane puppy in July, the coop that I'd started was put on hold. By winter 2010/2011, I'd put so much time and effort into this little coop that I decided to just keep it for some little bantams of my own to be purchased Spring 2011.
Getting started: I loosely based my design on trictle's coop page: https://www.backyardchickens.com/web/viewblog.php?id=49209
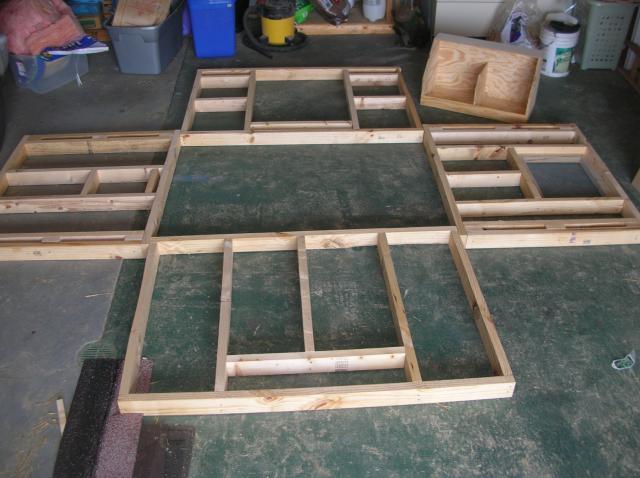
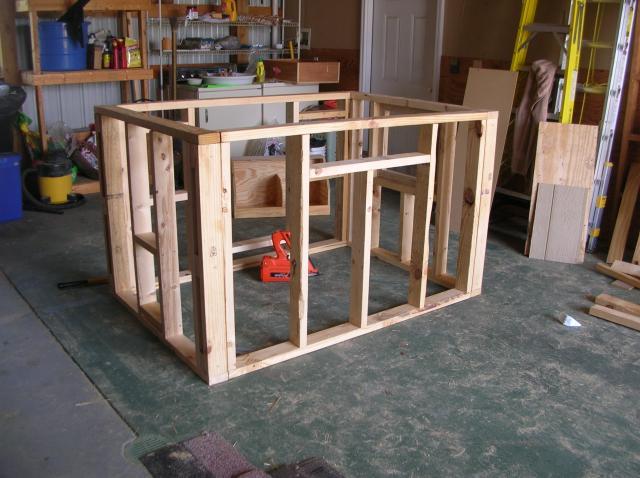
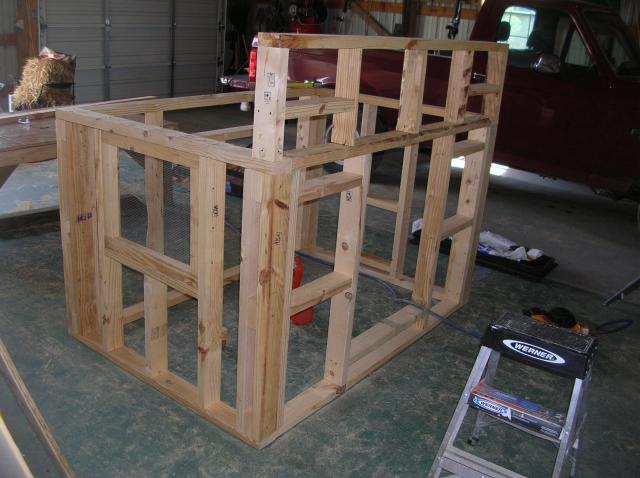
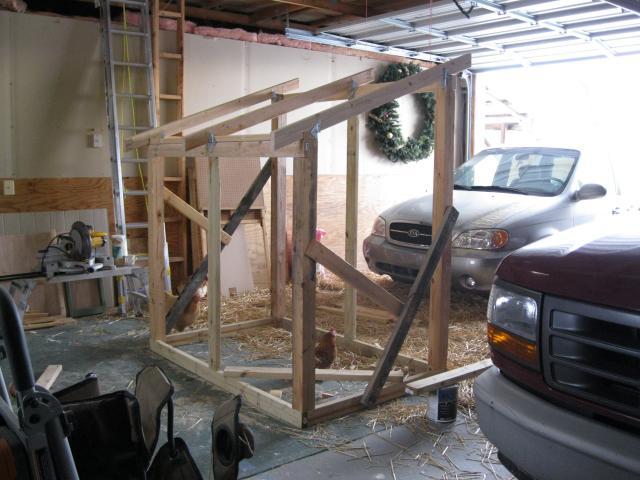
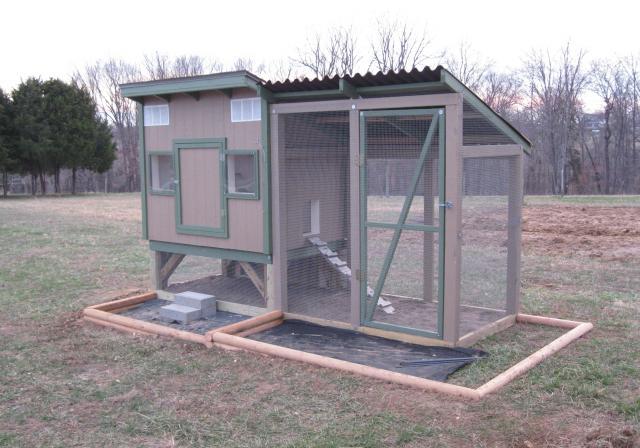
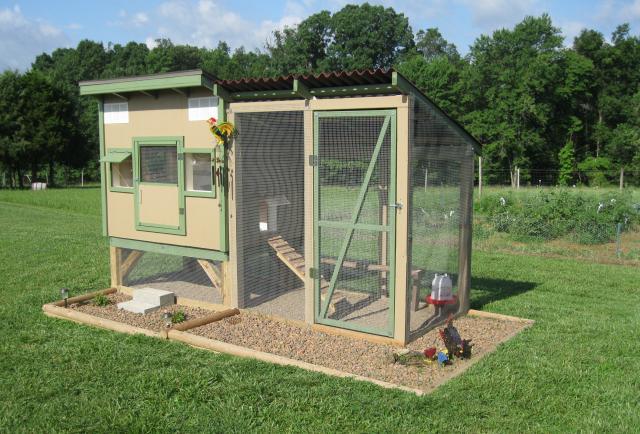
1. I wanted a minimum of 16 sq. ft. of indoor floor space, and had planned to insulate (which eats up that space quickly), so planned for a 4 ft. x 5 ft. x 40 in. height coop. I also knew I wanted something that would fit in the back of a pick-up truck (for when I sold it). So I framed my walls and laid them out the way I wanted them.
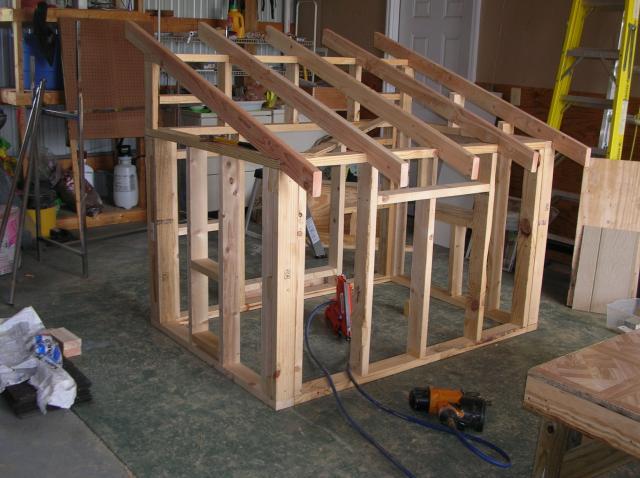
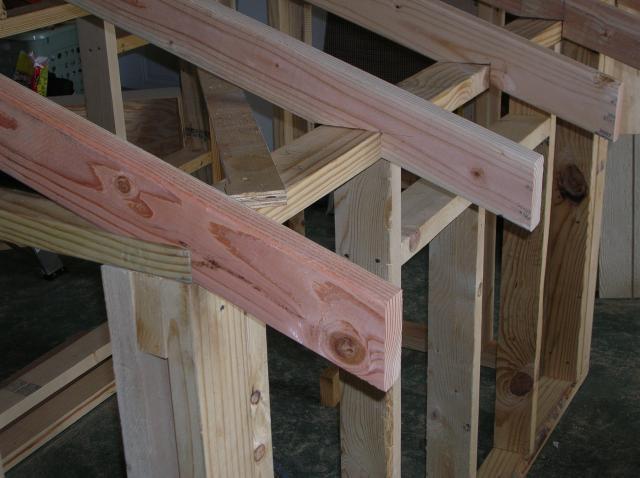
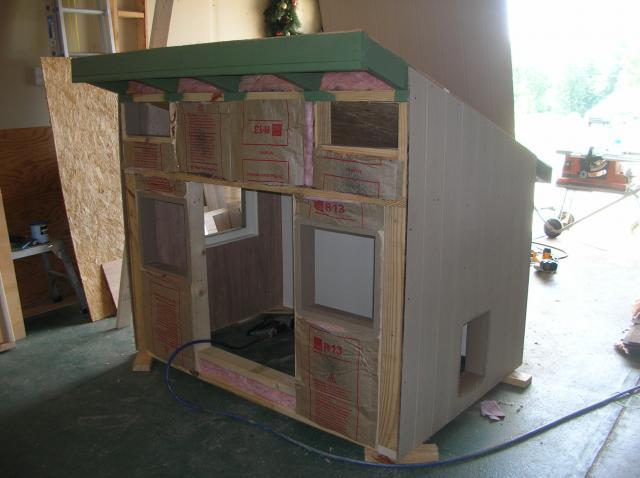
2. I'd originally planned for a gable style roof. But my confidence (and skill) was lacking, so I opted for a simple slanted type roof instead. I built up the front end (so rain would run toward the back) and then put my rafters up. DH showed me how to do birdmouth cuts. Mine aren't pretty, but they're serviceable. And it helped knowing that most of my goofs would soon be covered up...lol. All of the lumber up to this point (except for the rafters themselves) was free/scrap.
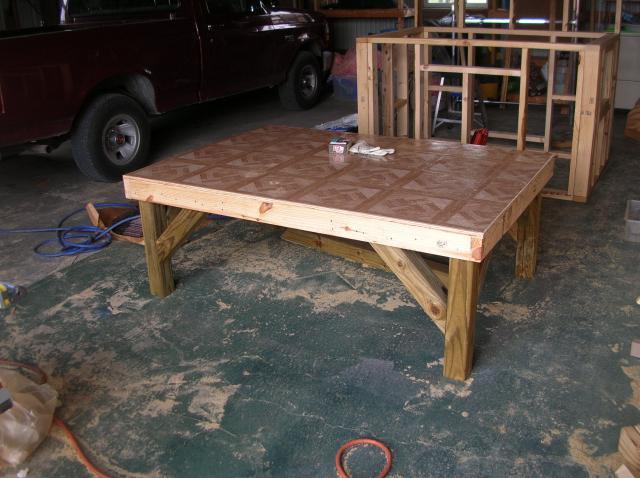
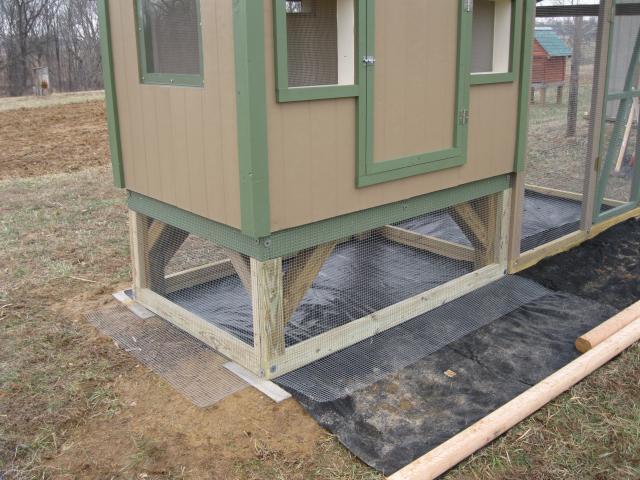
3. Because the coop is short, I built a platform for it to sit on. This will also serve to give the chickens a covered area to hang out when the weather is 'fowl'. The platform materials were free/scrap, except for the sticky tiles I put on top. I will never use sticky tiles again; roll vinyl flooring is the way to go.
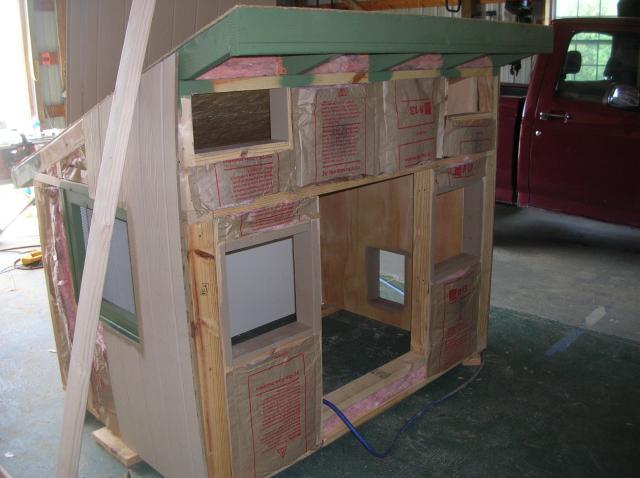
4. Insulation and siding (faux T1-11) were next. I bought some used/scrap insulation from a Salvation Army store for $2.00, but still had to buy one roll. Paint and trim came next. I had some left over paint from my last coop, but still had to buy a quart of green.
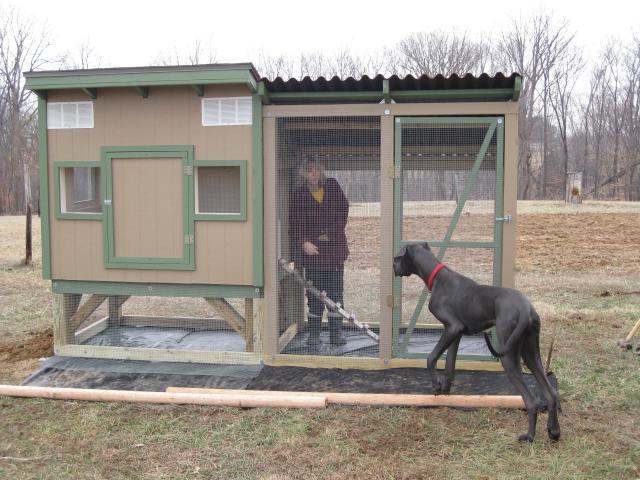
5. Shingles were $6 a bundle from Salvation Army, so that's what went on the roof (over half inch plywood). DH gave me a quick lesson on how to properly lay out shingles, and I needed his help with trimming them (that stuff is TOUGH!). Time to get this thing out of my bay of the garage!! The platform was easy for DH and me to carry; The housing was a pain; it weighed a bloody ton! Between DH, my son, and me, we were able to get it onto a trailer, roll it outside, and shove it up on the platform with only a hernia or two between us.
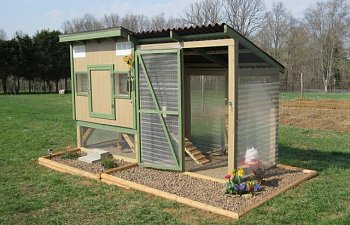
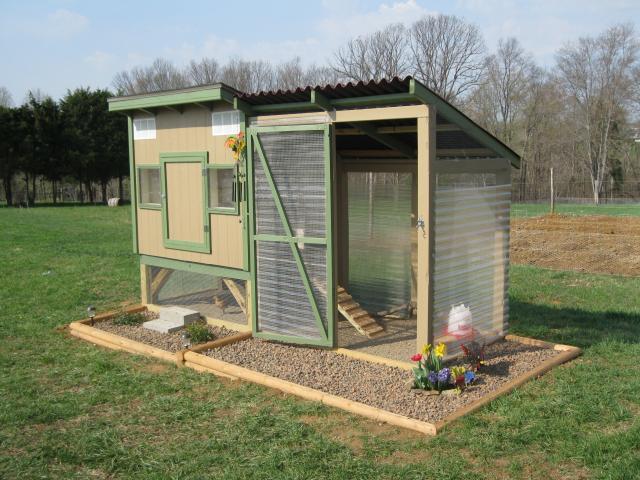
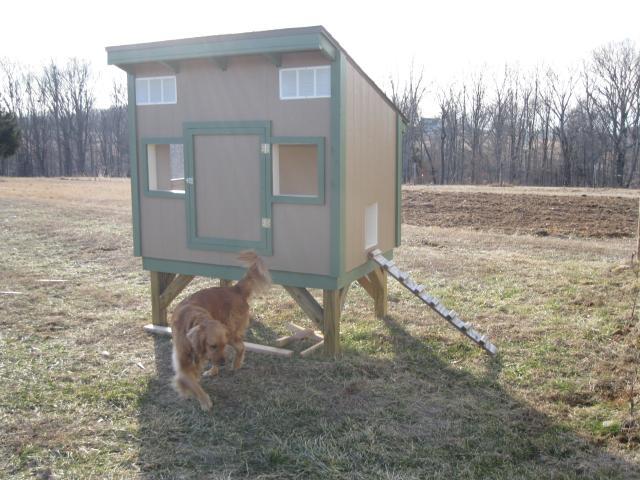
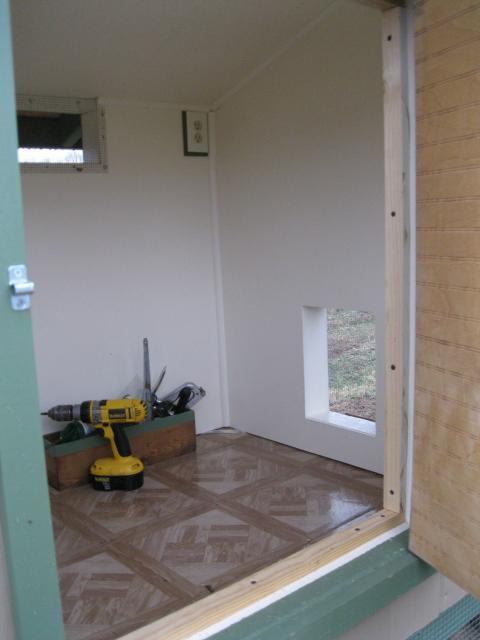
6. Once outside, a door was built and installed, and hardware cloth was nailed up over ventilation and window openings. Lexan will go up over the windows in winter time.
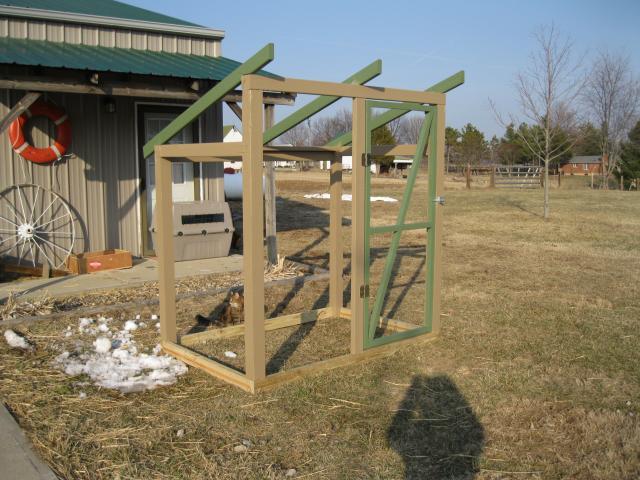
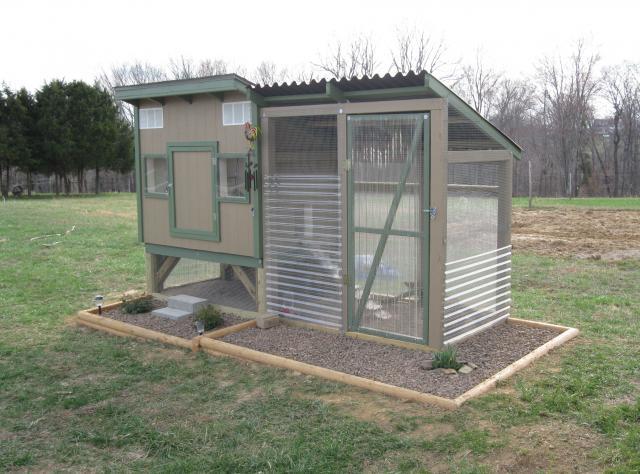
7. The run was next, started this January. I planned for it to butt up against the existing housing. It's only 4 ft. wide x 6 ft. long, but with the space beneath the housing (which will be wired in too), it allows for a little over 40 sq. ft. of run space. The 4x4 main posts we had on hand, but I had to buy the rest of the run lumber. It's treated 2 x 4s. By this point, I just wanted things done, so we bought two sheets of some kind of roofing from Home Depot. It's almost like some kind of thick, pressed tar paper material???
8. After the run was butted up against the coop housing, I boxed in the base, wired the front and side, and boarded up the back, including a removable panel so that I can access underneath for cleaning. The run will hold rock and sand to promote drainage and easy cleaning. Diesel thinking "That's no banty!"
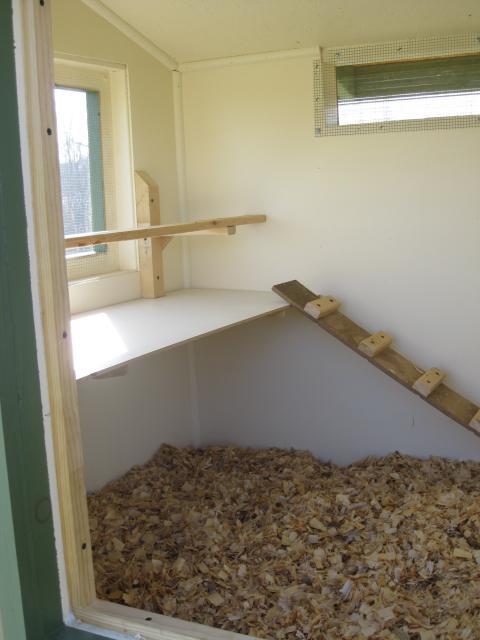
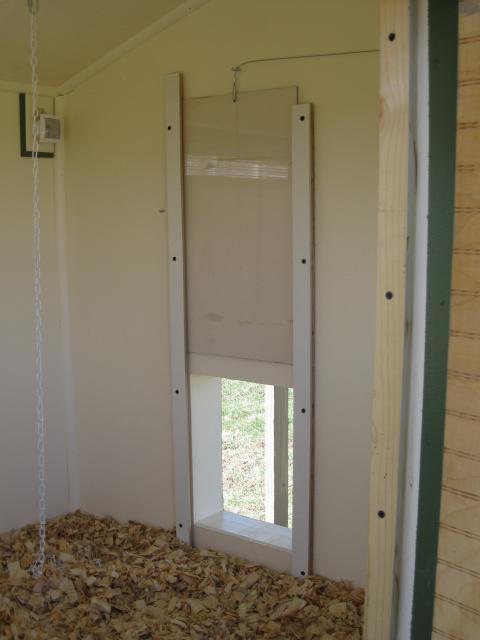
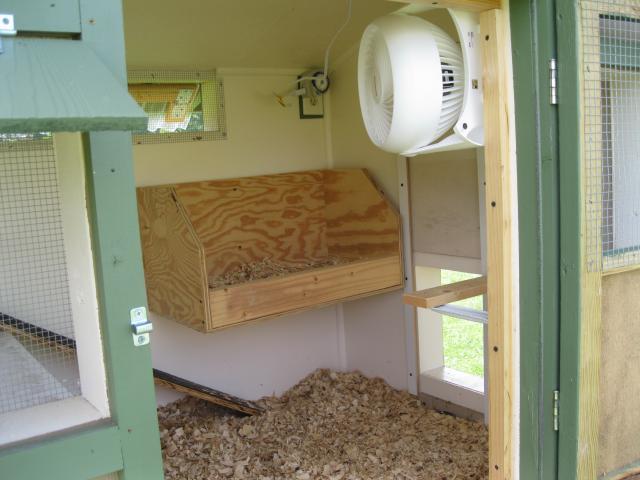
9. The roost and dropping board are in. I did a track/sliding door that can be opened/lowered from outside the coop. The nest boxes are ready, but I probably won't install them for some time. Things I have yet to complete are: removable awnings over windows, calking around certain areas, and landscaping.
Things I like about my coop: It has lots of ventilation! I love that the run is covered-it'll be really easy to winterize the run (I hate shoveling snow!). Even though it's a small coop, I managed a dropping board
June Bug and Dixie thinks this little coop is "just right." Hate to tell them that they have limited guest privileges...lol
** Things I would do differently: If I try another one, I want it to be an all inclusive coop - run and housing together. And I'd do a gable roof because it just looks nicer. I'd find or buy a vinyl remnant rather than sticky tiles for the flooring.
Got the landscape timbers set and leveled. Now for a few plants and some decorative rock...
Nest boxes added and temp. summer door installed:
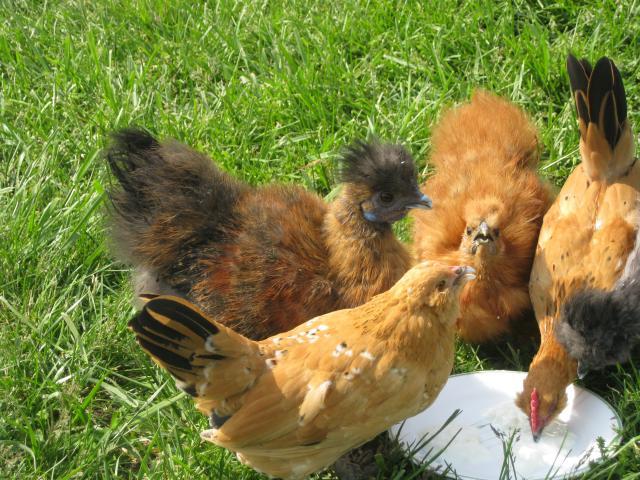
Here are my bantam babies that I received on Feb. 23, 2011.
And then DH goes to TS and brings back two of these (we later discovered that they were d'uccles:
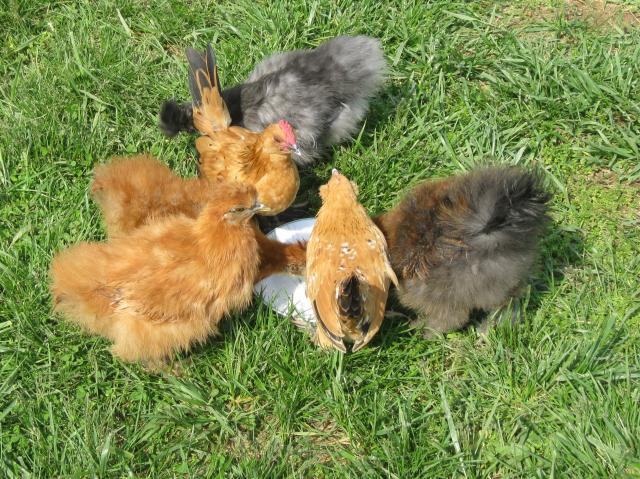
So now we have six bantams - and with less than 18 sq. ft of indoor space, the coop was designed for FOUR.
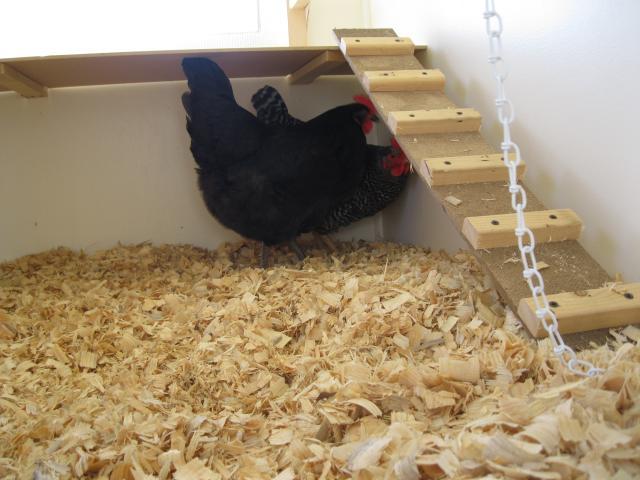
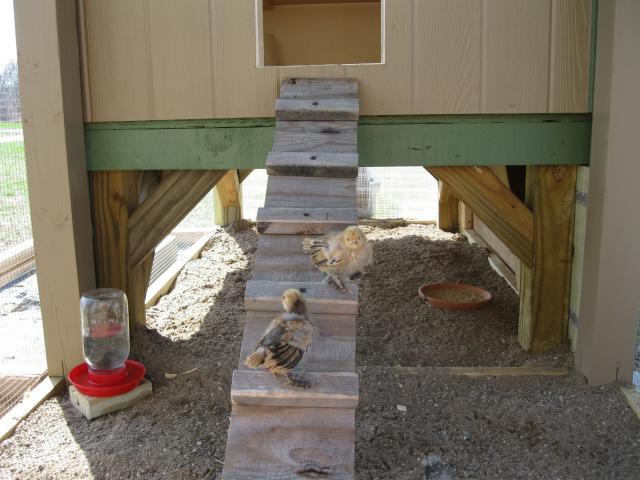
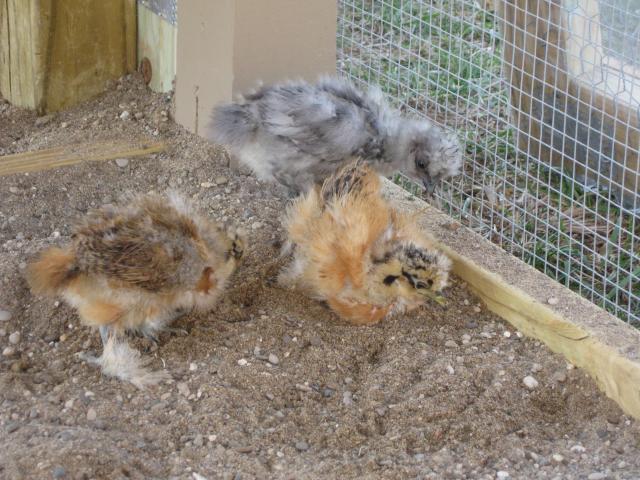
The gang hanging out in their new digs:
Getting bigger (and prettier): By 3 or 4 weeks, it was easy to tell that one of the d'uccle chicks was going from Catalina to Hank. by around 10 weeks, it also became clear that Fawn (the partridge silkie) was going to be a Fonzie. I LOVED Fonzie!! He was quirky and beautiful and hilarious... But one rooster is plenty enough for a small flock, so Hank went to my brother's 'big girl' flock of hens (and is quite happy there), and Fonzie (along with the lighter red silkie pullet Sunshine) went to a fellow BYCer. So I was left with three.
Tinkerbell, Honey, and Joy (around 18 weeks):
The Kruer Bantam Coop began as a simple project coop. I had the summer off and free time on my hands. My husband brought home a bunch of scrap 2 x 4s from work. So I decided to try my hand at coop building, just a small one that I could sell on CL at the end of summer. My husband is the carpenter of the family, but I have a little skill with tools, and am always game for a project. Plus I knew that DH would answer any technical questions I might have, and lend some muscle when needed.
Murphy's Law came into play of course, and between sweltering, humid summer days and getting a new great dane puppy in July, the coop that I'd started was put on hold. By winter 2010/2011, I'd put so much time and effort into this little coop that I decided to just keep it for some little bantams of my own to be purchased Spring 2011.
Getting started: I loosely based my design on trictle's coop page: https://www.backyardchickens.com/web/viewblog.php?id=49209
1. I wanted a minimum of 16 sq. ft. of indoor floor space, and had planned to insulate (which eats up that space quickly), so planned for a 4 ft. x 5 ft. x 40 in. height coop. I also knew I wanted something that would fit in the back of a pick-up truck (for when I sold it). So I framed my walls and laid them out the way I wanted them.
2. I'd originally planned for a gable style roof. But my confidence (and skill) was lacking, so I opted for a simple slanted type roof instead. I built up the front end (so rain would run toward the back) and then put my rafters up. DH showed me how to do birdmouth cuts. Mine aren't pretty, but they're serviceable. And it helped knowing that most of my goofs would soon be covered up...lol. All of the lumber up to this point (except for the rafters themselves) was free/scrap.
3. Because the coop is short, I built a platform for it to sit on. This will also serve to give the chickens a covered area to hang out when the weather is 'fowl'. The platform materials were free/scrap, except for the sticky tiles I put on top. I will never use sticky tiles again; roll vinyl flooring is the way to go.
4. Insulation and siding (faux T1-11) were next. I bought some used/scrap insulation from a Salvation Army store for $2.00, but still had to buy one roll. Paint and trim came next. I had some left over paint from my last coop, but still had to buy a quart of green.
5. Shingles were $6 a bundle from Salvation Army, so that's what went on the roof (over half inch plywood). DH gave me a quick lesson on how to properly lay out shingles, and I needed his help with trimming them (that stuff is TOUGH!). Time to get this thing out of my bay of the garage!! The platform was easy for DH and me to carry; The housing was a pain; it weighed a bloody ton! Between DH, my son, and me, we were able to get it onto a trailer, roll it outside, and shove it up on the platform with only a hernia or two between us.
6. Once outside, a door was built and installed, and hardware cloth was nailed up over ventilation and window openings. Lexan will go up over the windows in winter time.
7. The run was next, started this January. I planned for it to butt up against the existing housing. It's only 4 ft. wide x 6 ft. long, but with the space beneath the housing (which will be wired in too), it allows for a little over 40 sq. ft. of run space. The 4x4 main posts we had on hand, but I had to buy the rest of the run lumber. It's treated 2 x 4s. By this point, I just wanted things done, so we bought two sheets of some kind of roofing from Home Depot. It's almost like some kind of thick, pressed tar paper material???
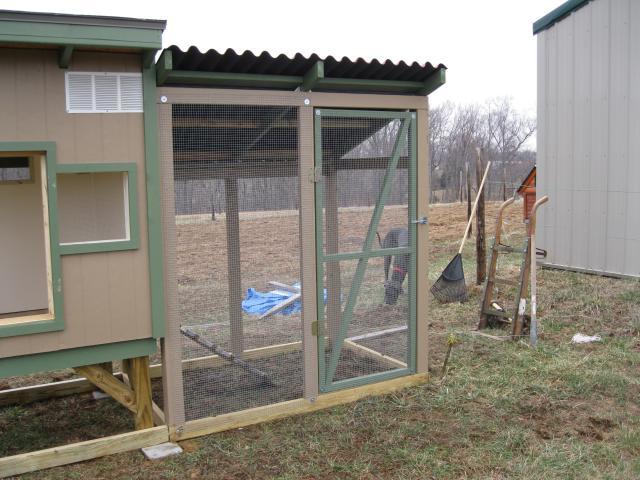
8. After the run was butted up against the coop housing, I boxed in the base, wired the front and side, and boarded up the back, including a removable panel so that I can access underneath for cleaning. The run will hold rock and sand to promote drainage and easy cleaning. Diesel thinking "That's no banty!"
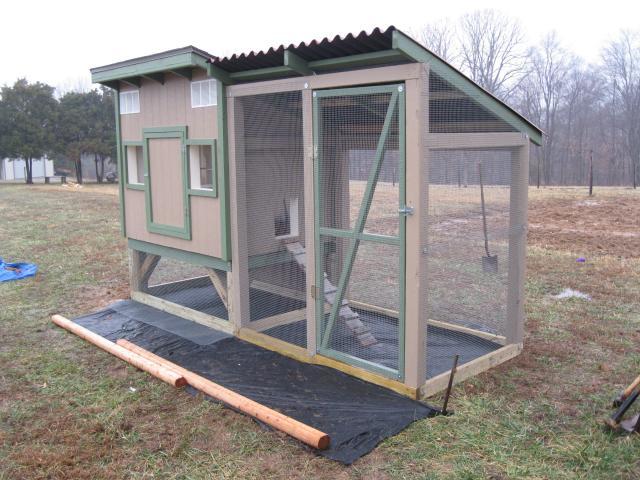
9. The roost and dropping board are in. I did a track/sliding door that can be opened/lowered from outside the coop. The nest boxes are ready, but I probably won't install them for some time. Things I have yet to complete are: removable awnings over windows, calking around certain areas, and landscaping.
Things I like about my coop: It has lots of ventilation! I love that the run is covered-it'll be really easy to winterize the run (I hate shoveling snow!). Even though it's a small coop, I managed a dropping board

June Bug and Dixie thinks this little coop is "just right." Hate to tell them that they have limited guest privileges...lol
** Things I would do differently: If I try another one, I want it to be an all inclusive coop - run and housing together. And I'd do a gable roof because it just looks nicer. I'd find or buy a vinyl remnant rather than sticky tiles for the flooring.
Got the landscape timbers set and leveled. Now for a few plants and some decorative rock...
Nest boxes added and temp. summer door installed:
Here are my bantam babies that I received on Feb. 23, 2011.
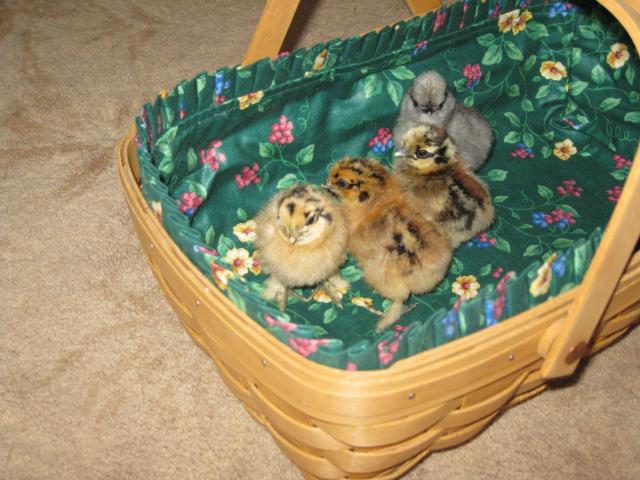
And then DH goes to TS and brings back two of these (we later discovered that they were d'uccles:

So now we have six bantams - and with less than 18 sq. ft of indoor space, the coop was designed for FOUR.
The gang hanging out in their new digs:
Getting bigger (and prettier): By 3 or 4 weeks, it was easy to tell that one of the d'uccle chicks was going from Catalina to Hank. by around 10 weeks, it also became clear that Fawn (the partridge silkie) was going to be a Fonzie. I LOVED Fonzie!! He was quirky and beautiful and hilarious... But one rooster is plenty enough for a small flock, so Hank went to my brother's 'big girl' flock of hens (and is quite happy there), and Fonzie (along with the lighter red silkie pullet Sunshine) went to a fellow BYCer. So I was left with three.
Tinkerbell, Honey, and Joy (around 18 weeks):