My A Frame Chicken Tractor/ Coop / Ark

Last year I got 3 chicks. I built the small chicken tractor.
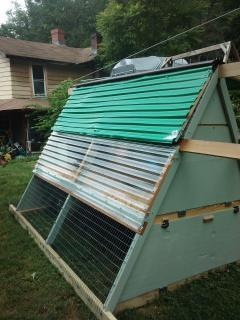
Then I learned chicken math. LOL. So... I went in search of a larger coop. I searched here and other places. I combined the ideas from several Arks.
Much thanks to The Southern Agrarian. I liked much of his design, plus he has awesome instructions for building it.
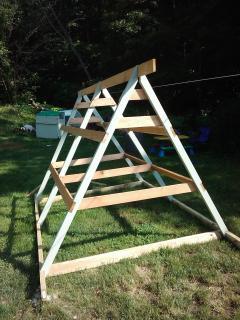
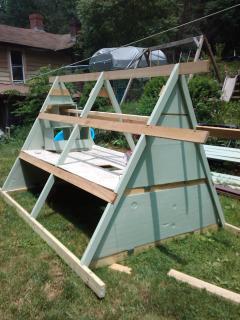
I used white pine 2 x4's for the uprights and 1 x 4 cedar for the runners. I used 10' cedar for the runners to use as handles. I didnt cut the center notches until I cut all others and dry fitted it on my 6' x 8' treated lumber base frame, but I used 10' 2x4's so I could have a 1' overhang on each end to put wheels on.. After I dry fitted all the frame pieces together, I marked where an uncut 4' x 8' piece of plywood would fit. Then I marked that and cut it. I also put my cross braces between the center braces, instead of over them.
The long braces are all spaced on 24" centers so the wire and Tuftex panels fit without cutting them. I centered the 10' bottom and top pieces. The bottom for wheels and the top to hang a water bucket or flowers from.
Look at the pic and notice there is no lower gusset in the center section. This is so I could put my roost across the lower gussets.
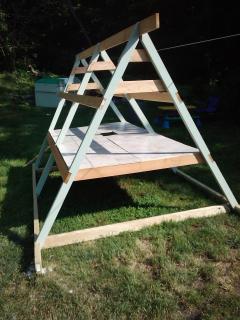
I used all 3/8" plywood on it, to keep the weigt down.
I took my sheet for the floor and split it down the center, so I had 2 2' x 8' pieces. This makes it easier to put in and also lets the water drain when you clean it. I got a 6x8 piece of vinyl flooring and glued it to the floor pieces. This makes it a breeze to clean, trust me! I also put a frame around the opening with scrap wood to keep the wood chips in.
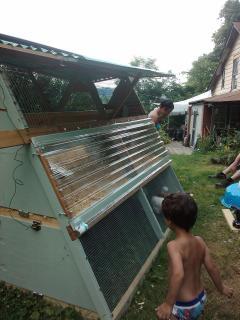
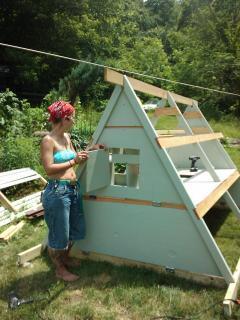
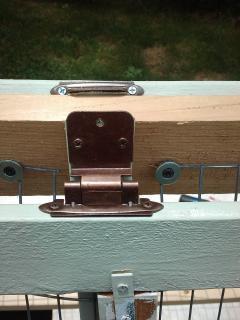
Then I cut my 3 pieces for each end. These were a little tricky. Don't assume if it fits on one end, it will also fit on the other end. I had my DD Hold the plywood in place whie I got inside and traced. The 2 large pieces are on hinges. The top small piece is just screwed into place. The center pieces are screwed shut, but if I do need to open it, it's just a matter of taking out 2 screws. The bottom pieces are kept shut with window locks. I got most of my hardware at the the second hand construction store. I built my nest boxes out of scrap plywood and used a 2x3 as my roost. As you can see, I didn't measure and my roost goes through the top nest box, but my girls don't mind, they use it anyways.
The center piece where the nest boxes are, I just plunge cut a door for gathering eggs. It is centered between the 3 nests. The back of the nests have the same 3" pieces across the bottoms and an open back.
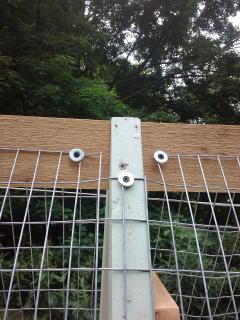
I put my 1 x 2 galvanized wire on with 1 1/4" screws and washers that I got at Tractor Supply by the pound. I love that place! Put wire across the top and bottom. Leave the center section open, that is your access for cleaning.
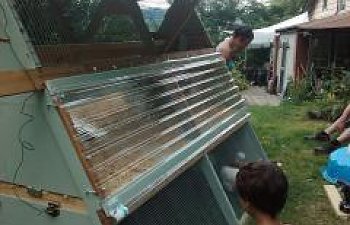
I used a piece of aluminum roof cap (that I got at Lowes for $5 because it was dented) for the very top. It took a little bending but it worked. It is attached to the top frame before the Tuftex.
I built 4 2' x 8' frames with cornerbraces for the tuftex panels to go on. You really don't need those expensive screws they sell for it, just use a long screw and a washer, and don't tighten it to far.
I used cabinet hinges to attach the top panels ( they were only$.25 at Construction junction!)
I put the center panels on with 2 hooks and eyes on each side. (8 total) And it was done!
Then I learned chicken math. LOL. So... I went in search of a larger coop. I searched here and other places. I combined the ideas from several Arks.
Much thanks to The Southern Agrarian. I liked much of his design, plus he has awesome instructions for building it.
I used white pine 2 x4's for the uprights and 1 x 4 cedar for the runners. I used 10' cedar for the runners to use as handles. I didnt cut the center notches until I cut all others and dry fitted it on my 6' x 8' treated lumber base frame, but I used 10' 2x4's so I could have a 1' overhang on each end to put wheels on.. After I dry fitted all the frame pieces together, I marked where an uncut 4' x 8' piece of plywood would fit. Then I marked that and cut it. I also put my cross braces between the center braces, instead of over them.
The long braces are all spaced on 24" centers so the wire and Tuftex panels fit without cutting them. I centered the 10' bottom and top pieces. The bottom for wheels and the top to hang a water bucket or flowers from.
Look at the pic and notice there is no lower gusset in the center section. This is so I could put my roost across the lower gussets.
I used all 3/8" plywood on it, to keep the weigt down.
I took my sheet for the floor and split it down the center, so I had 2 2' x 8' pieces. This makes it easier to put in and also lets the water drain when you clean it. I got a 6x8 piece of vinyl flooring and glued it to the floor pieces. This makes it a breeze to clean, trust me! I also put a frame around the opening with scrap wood to keep the wood chips in.
Then I cut my 3 pieces for each end. These were a little tricky. Don't assume if it fits on one end, it will also fit on the other end. I had my DD Hold the plywood in place whie I got inside and traced. The 2 large pieces are on hinges. The top small piece is just screwed into place. The center pieces are screwed shut, but if I do need to open it, it's just a matter of taking out 2 screws. The bottom pieces are kept shut with window locks. I got most of my hardware at the the second hand construction store. I built my nest boxes out of scrap plywood and used a 2x3 as my roost. As you can see, I didn't measure and my roost goes through the top nest box, but my girls don't mind, they use it anyways.
The center piece where the nest boxes are, I just plunge cut a door for gathering eggs. It is centered between the 3 nests. The back of the nests have the same 3" pieces across the bottoms and an open back.
I put my 1 x 2 galvanized wire on with 1 1/4" screws and washers that I got at Tractor Supply by the pound. I love that place! Put wire across the top and bottom. Leave the center section open, that is your access for cleaning.
I used a piece of aluminum roof cap (that I got at Lowes for $5 because it was dented) for the very top. It took a little bending but it worked. It is attached to the top frame before the Tuftex.
I built 4 2' x 8' frames with cornerbraces for the tuftex panels to go on. You really don't need those expensive screws they sell for it, just use a long screw and a washer, and don't tighten it to far.
I used cabinet hinges to attach the top panels ( they were only$.25 at Construction junction!)
I put the center panels on with 2 hooks and eyes on each side. (8 total) And it was done!

I primed and painted all the white wood before cutting the touched up before assembly. I got all my hardware from the second hand construction store. I think it cost me about $250 total. The panels are about $20 each.
I used 2 1/2 sheets of plywood.
2 10' 2x4 treated
2 6' 2x4 treated
2 8 1x4 cedar
3 10' 1x4 cedar
1 2x3
7 1x3 furring strips
Misc. scrap lumber.
Screws in various lengths, from 1/2" to 3".
Hinges and latches.
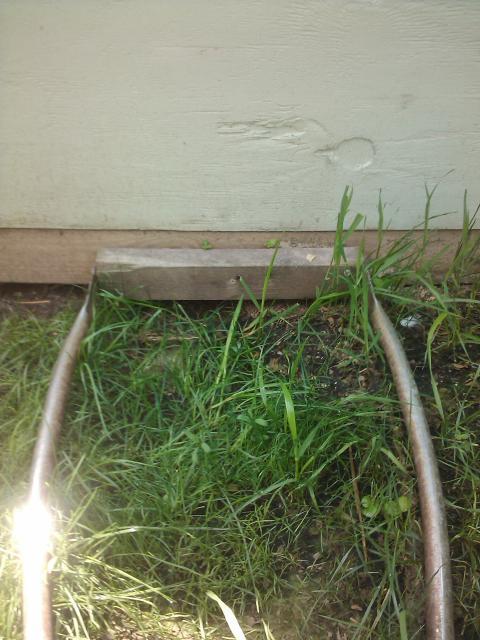
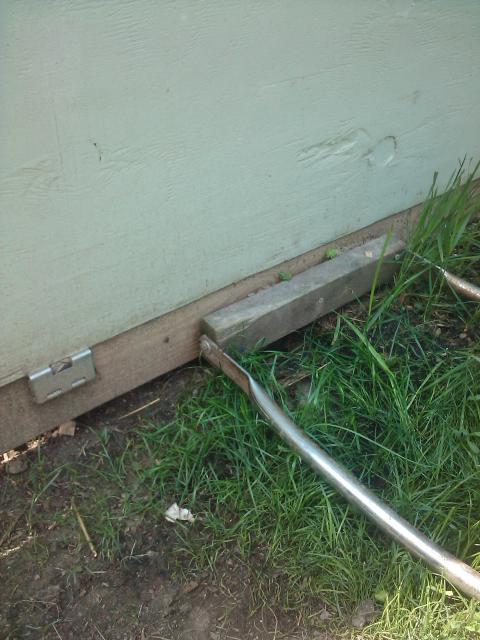
I put lawn mower wheels on it but it was to heavy and they flattened, but it still rolls.
I also took an old lawnmower handle, screwed it to a piece of 2x4 and screwed that to the bottom end. That really makes it much easier to move.
It has been in use now for nearly a year. I have had some warping around the egg door because it was thin plywood and I have had to reinforce the door hinges with some scrap wood and longer screws. It has withstood the winter well (I am in SW PA) and the girls have been happy in it all winter. I have had eggs all winter.
Changes: I would use larger wheels on it! Otherwise, we love it!
The Tuftex is tough! I have a pygmy goat that bounces off of it and hasn't hurt it!
I used 2 1/2 sheets of plywood.
2 10' 2x4 treated
2 6' 2x4 treated
2 8 1x4 cedar
3 10' 1x4 cedar
1 2x3
7 1x3 furring strips
Misc. scrap lumber.
Screws in various lengths, from 1/2" to 3".
Hinges and latches.
I put lawn mower wheels on it but it was to heavy and they flattened, but it still rolls.
I also took an old lawnmower handle, screwed it to a piece of 2x4 and screwed that to the bottom end. That really makes it much easier to move.
It has been in use now for nearly a year. I have had some warping around the egg door because it was thin plywood and I have had to reinforce the door hinges with some scrap wood and longer screws. It has withstood the winter well (I am in SW PA) and the girls have been happy in it all winter. I have had eggs all winter.
Changes: I would use larger wheels on it! Otherwise, we love it!
The Tuftex is tough! I have a pygmy goat that bounces off of it and hasn't hurt it!
I have since added larger wheels and a lawn mower handle to pull it. Wayyyy easier!
The handle is screwed to the ends of the 2x4. Make the 2x4 however wide your handle is. I think mine was 16" or 18".
Then screw the 2x4 to the end of the coop. I used 2 1/2" screws. This way, if I want to pull it the other way, it's only a matter of unscrewing/rescrewing a couple screws.
I also upgraded my wheels.
This is what happened to the lawnmower wheels...
It's hard to see in the pic, but the upper left side is smashed and twisted.
Then screw the 2x4 to the end of the coop. I used 2 1/2" screws. This way, if I want to pull it the other way, it's only a matter of unscrewing/rescrewing a couple screws.
I also upgraded my wheels.
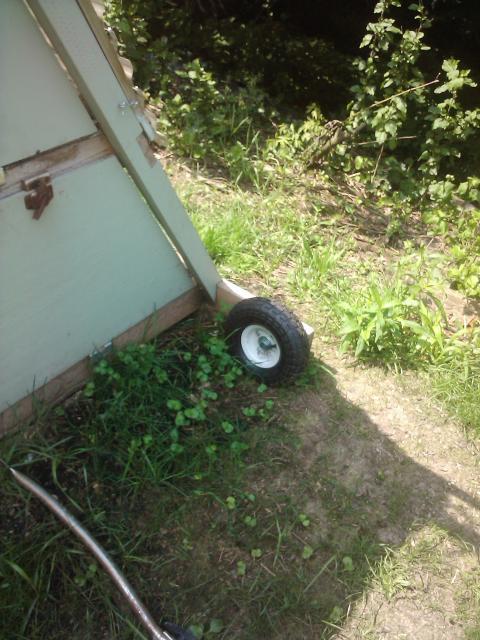
This is what happened to the lawnmower wheels...

It's hard to see in the pic, but the upper left side is smashed and twisted.