Thanks for visiting. | ||||||||||
| ||||||||||
|

| I started by finding a good location away from the house, so as to keep the smells somewhat at bay. In this picture, I laid out cynder blocks, and actually dug down a bit to make it all level. (not shown) | I was able to recycle most of the lumber for the coop after dismantling one of the floors in my barn that we don't use. The 2x8's were 16' and we ripped them down and got 4 8' 2x4's out of each board. I saved some money by doing this. |

| 
|
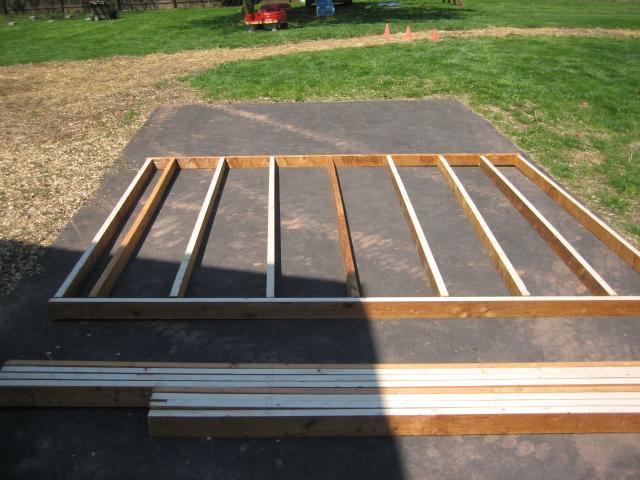
| After spending about an hour ripping the 2x8's we had enough to begin laying out the floor. As an afterthought, I should have used pressure treated lumber. | |
| 
|
| We then moved the floor down and laid it on top of the cynder blocks. After that, the walls began going up. | And another wall... |

| 
|
| Had the building inspector come out to take a look. | After working in 92 degree heat, in about 4 hours, we had all four walls up and installed an old window from our farm house. |

| 
|
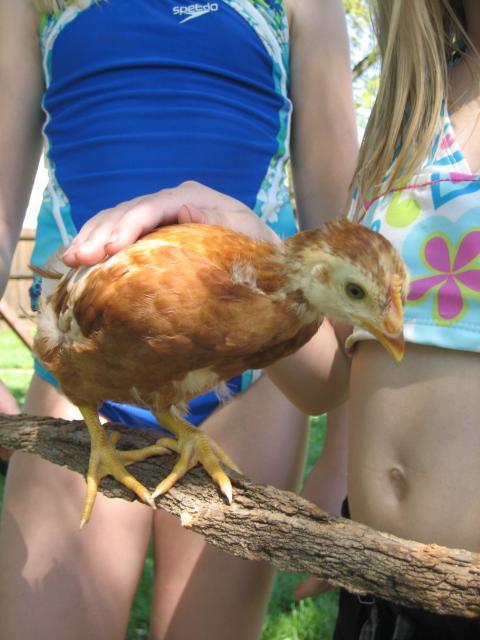
| The chickens keep getting bigger | |
| 
|
| We ended up having to go to Lowes to buy more 2x4's, needed about 50 more. | |

| 
|
| The next day, we began building the trusses... | then putting them up.... By the way, that's my boy Henry from Harrisburg. He came out to join the fun. |

| 
|
| After about an hour, we were almost there. | We lined them up and made sure it was all level and even. |

| 
|
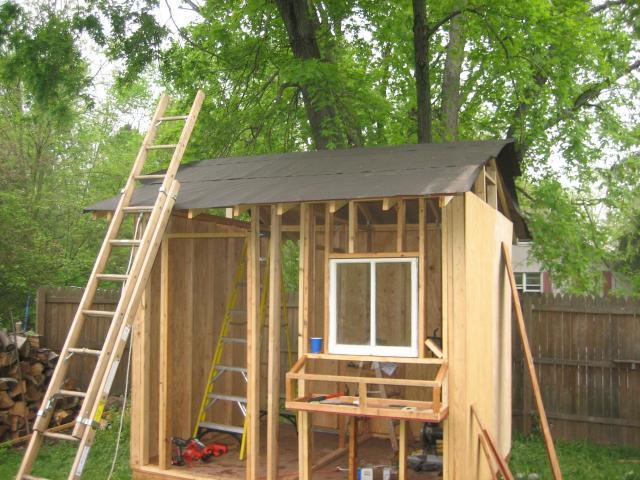
| Here, my neighbor is putting the sheeting on the roof. | We also were able to get 3 sides done with T-111. Things are starting to take shape. You can see the nice overhang we are going to have. |

| 
|
| I was able to get the nest box framed. I wanted it to be exterior so it's easy to get the eggs without having to go inside the coop. | I also framed out each gable to where we will have vents, that I can open and close. I want the ability for the chicks to be happy. |

| 
|
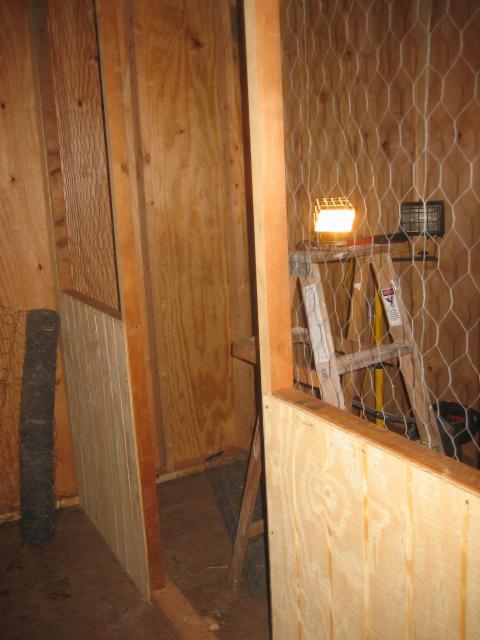
| Got the tar paper on before it started to rain... again | Got the interior wall is up with chicken wire |
| 
|
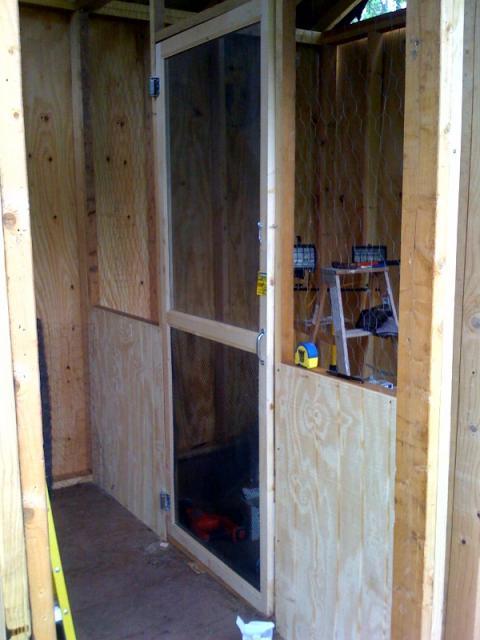
| Added wire to the top. Not sure if I need to go all the way to the rafters? | Got a door for $5 at Lowes. $6 for hardware, $11 door for the interior. This saved me the headache of building my own door. |

| 
|
| I'm in a hurry to get the coop done, now that the chickens are outgrowing their box in the basement. | Finally got the nest box sheeted in with the T111. |

| 
|
| Added a screen for the vent in both gabel ends. I will later fabricate some sort of door to be able to open and close it. | Rigged up a simple chicken door. |

| 
|
| Easy enough for our 6 year old to open. | Added some trim around the opening |

| 
|
| Finished putting the T111 on the gable ends. | Got the front side sheeted in with the T111 |
| 
|
| Adding the hinges to the door. I bought a core door from Lowes for $19, liquid nailed the T111 to it, then added 1X3 across the front to attach the hinge to.. | Triming up the T111 around the door |

| 
|
| Hung the door | Chickens first night in the coop |

| 
|
Making sure they are happy | Hanging out on a recylced arbor |

| 
|
| Hung the watering can | Wendy checking them out |

| 
|
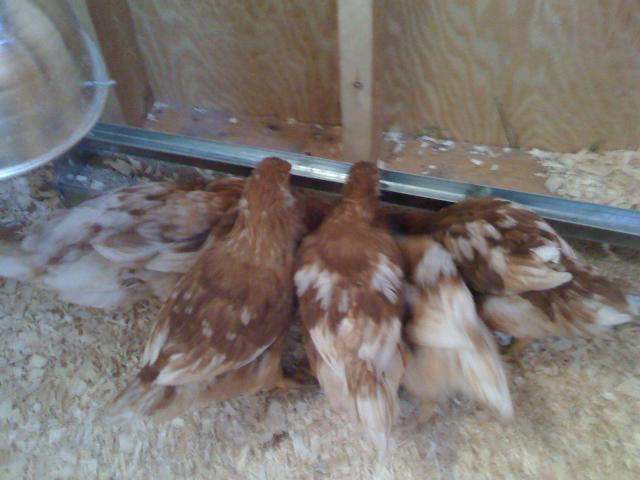
| Added a work bench to the supply area | Here they are eating away |

| 
|
| Added trim around window | Added a sconce light |

| 
|
| The brass piano hinge for the nest box | Tie off for the door rope |

| 
|
| Adding the drip edge to the roof | My dad who just turned 75 last week helping me out with the roof. Considering that he was a roofer for over 55 years, i don't think I had any other choice. |

| 
|
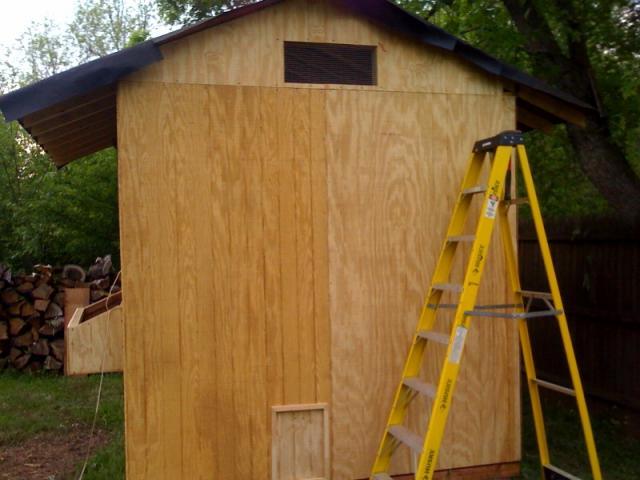
| The clean look for the gable end | The roof is finally complete. |

| 
|
Chickens are getting bigger | Framing out for the soffit |

| 
|
Adding the J-channel | Soffit is in. This will allow for good air flow. |

| 
|
Fixed the nest box | |

| 
|
Adding trim to the coop | The coop has it's first coat of stain |

| 
|
Then we started to put the fencing together for the run | Had the help of Julia, Wendy and mom. |

| 
|
Wendy stiching the chicken wire together | Katie checking out the progress |
.jpg)
| .jpg)
|
Here the 3 broilers we got. Going to be the first time with these guys, who we named, breakfast, lunch and dinner. | The coop is almost done. Still have to build the gate, add the bird netting to the top of the pen and one more coat of stain. |

| 
|
Finished by putting the bird netting over the outside pen, Also made and hung the vent doors at the gable ends. | Added the gate and done. With the exception of finishing the chicken wire around the base of the whole unit and pen, plus I still have to add the dividers in the nest box and some day add electric for lights and so on. |

| 
|
Here I built a brooder box so that when we have chicks that don't get along with the larger chickens, they'll at least be out in the coop. | Here it is in the coop. I left it unattached, so I can easily remove it when needed. |

| 
|
I bought a feeder box used for rabbit pens, cut a slot out in the brooder box and this has worked excellent so that the food doesn't get wasted from them dirting it up and so on. | Here are my 3 broiler chicks, growing very quickly. Update: They're names were Breakfast, Lunch and Dinner. |

| 
|
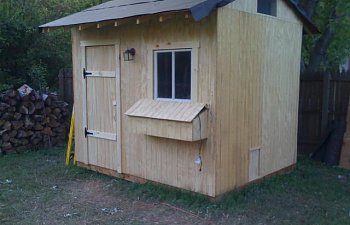
The coop is complete, almost... The chickens like their new home and so do the family. It took about a month of work every night and on the weekends to complete it. It ended up costing more money than expected, about a $1000.00. Though, to buy a shed this size from Lowes or Homedepot would have cost twice as much and we would have still needed to make renovations that would have cost even more. So at the end of the day, I'm quite pleased with how it came out, considering that I work on computers all day and am not a builder. I couldn't have done this without the help of the following people:
| |
Updates | |
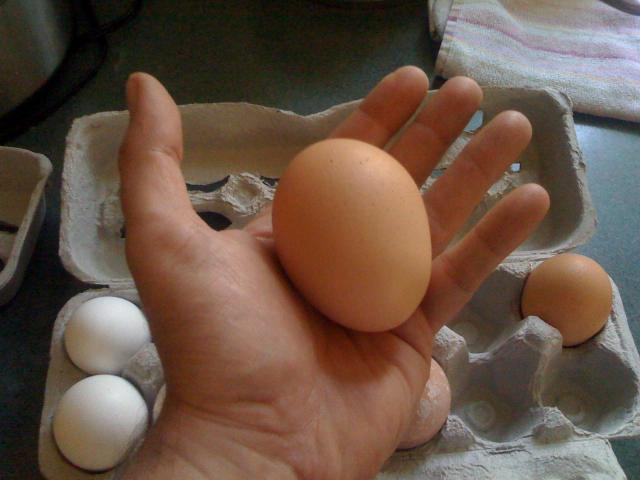
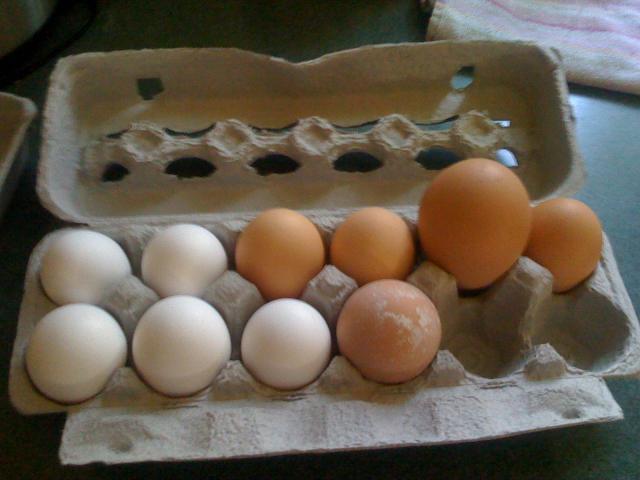
MONSTER EGG pic added 4/20/10 | MONSTER EGG comparrison pic added 4/20/10 |
| 
|
Our vegetable garden in front of the coop. pic added 4/20/10 | |

|
|
We just got six new chicks, 3 Australorps and 3 Ameraucana's on May 11, 2010 This one is the Ameraucana | This one is a Australorps |

| 
|
| |
Please email me if you have any questions about the coop or if you just want to comment on it. Thanks for visiting. |
My initial plans Click to download pdf version |

|