My Chicken Experience
The Building Of The Newtronical Nesting Ground
Ok, so I decided to get some guinneys to keep watch over the three goats that I have recently purchased. I aquired the goats to help me with eliminating the brush that has grown up along the creek behind the house. I have seen more snakes this year then in any other year and can contribute that to the brush growing wildly along the creek. After doing some research, I found that I would have to coop up the guinneys for 4 to 6 weeks so they know where their home is and they wont fly away. I thought if I needed to build a coop for them, I might as well build a coop for a couple hens so I could enjoy the harvest of fresh eggs for breakfast. And this is how the journey started...
The first thing I did was begin to build the coop.
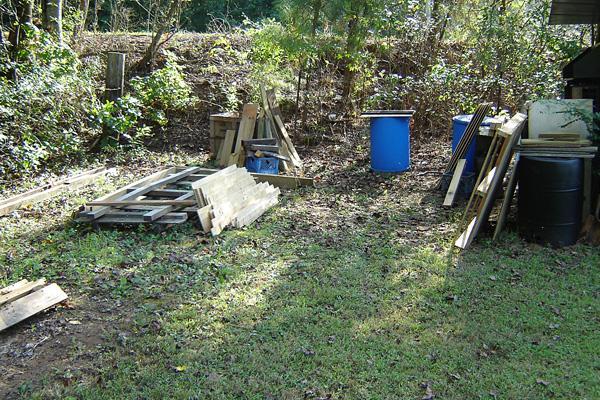
This is my "woodshop" where I will be doing most of the building during this project.
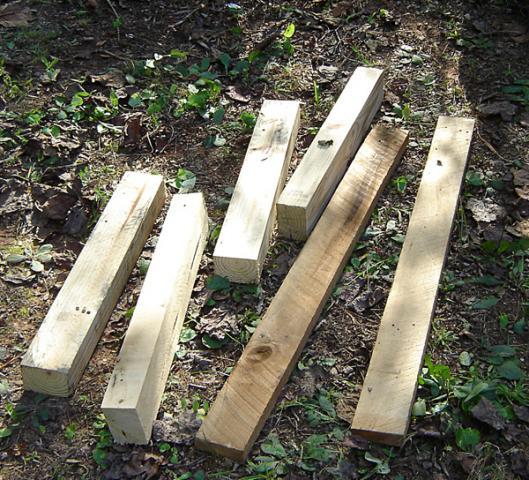
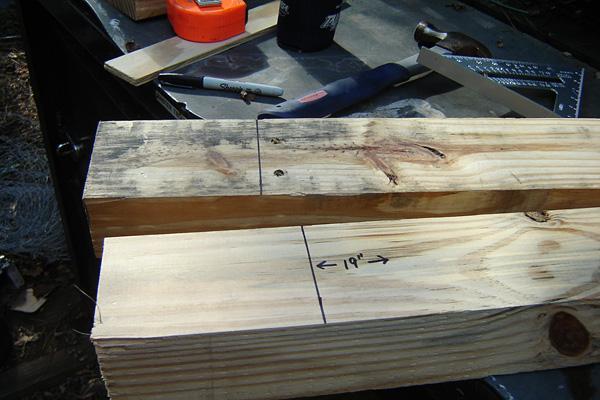
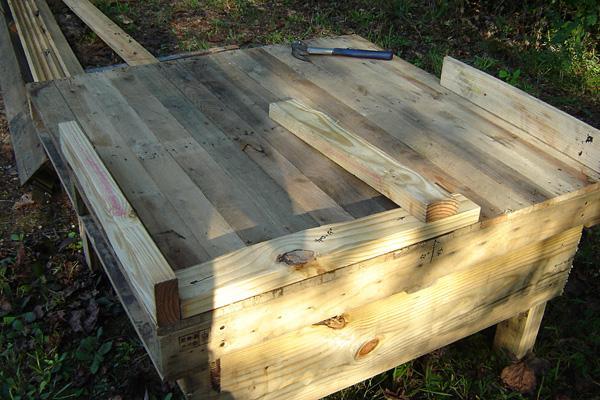
These are the first boards that I cut. They will serve as the legs for the base of the coop. All of the wood that was used for this project has come from pallets that were going to be discarded at my place of employment so I snatched them up and made good use of them. The legs I cut at 19" so there would be plenty of room for the hens to go under the coop if they wanted to get out of the sun or rain. A trick I picked up from BYC.

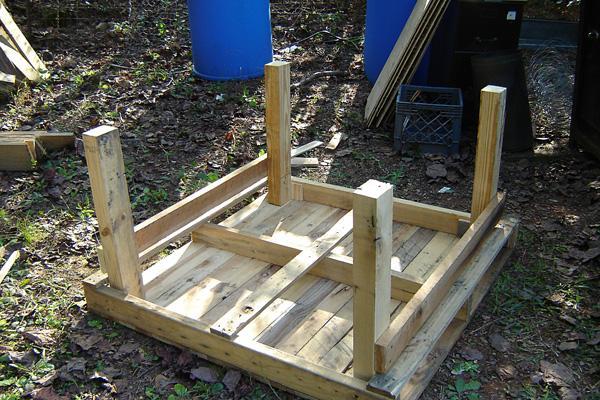
Once I had the four legs cut and the two pieces that would join them together, I nailed them to the pallet I also aquired from work that was going to be discarded. This would be the "base" of my coop and serve as the floor of the coop where I will eventually mount the roost and install the waterer and feeder. I nailed these pieces together but would eventually come back with 3" deck screws and screw them in as well to sturdy up the base.
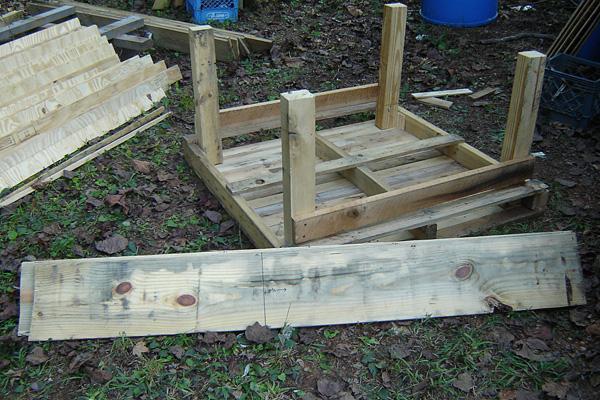
The next two boards went on opposite ends of the first two boards to give the base more durability. I used a wider board for its strength. Please keep in mind that these boards were all aquired from work and I will not be listing the nominal sizes of the boards or their lengths. This was the forst time I have built a coop and it was a build as I go kind of thing. The 2nd set of boards were near 8" wide. I was not satisfied with shoring up the base and was ready to flip it over on its right side.
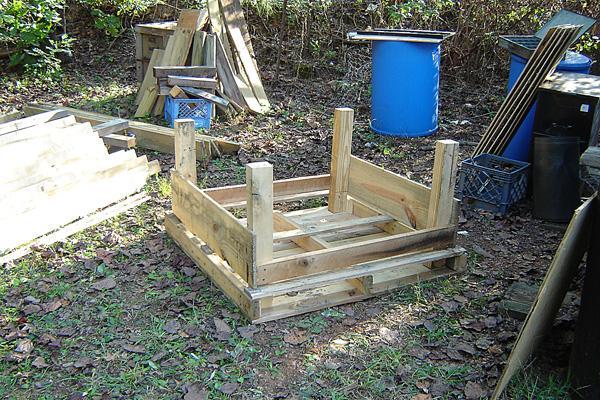
With the base now sitting upright, I could now start working on constructing the walls for the coop. I wanted the nestboxes to go on the right side of the coop and the front door was going to go on the left side. I would start building on the right side of the coop. I used 2 x 4" that were used for pallet making at my place of employment. Ihad a bunch of them that were left over from cuts off of 8' boards so it made it easy for me to construct with little cutting myself.
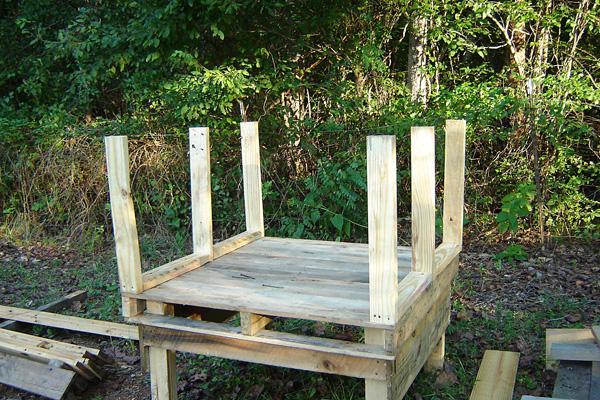
Now I am starting to put the walls up. I cut 6 - 2 x 4's the same length and four of another length to screw in between the 6 upright boards. Once I got these boards screwed in, I screwed a deck board (cut to length) on top of both sides to shore them up and two deck boards (cut to length) for the front and rear of the coop. Wow, I have walls.

I then added 2 x 4's to the right side of the coop around the height I was expecting the nestboxes to be. This would give me more support on that side and give me something to attach to when I started heading in that direction. Oooops, goat alert! The three girls are closing in for an inspection.
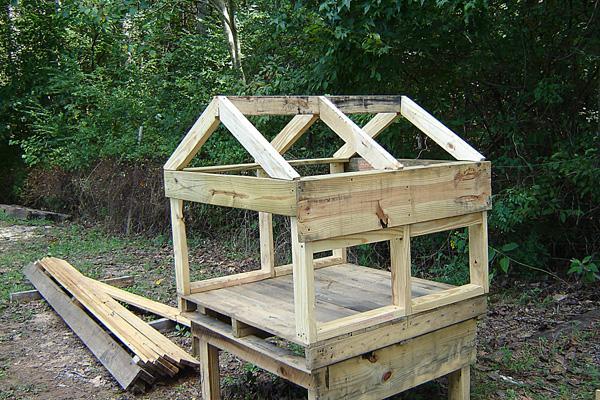

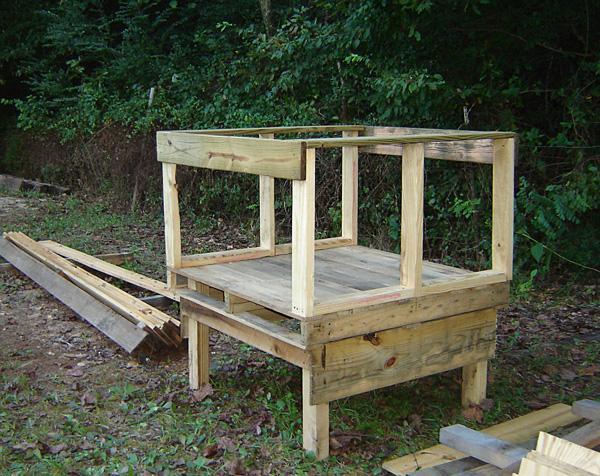
OK, so now I have the sides up and I can start working on my roof. I hate cutting angles yet I so wanted a roof like this so I sucked it up and made the cuts. I cut all the boards at one time and screwed them together before I installed them onto the coop. Once I screwed them to the coop, I came along and added another wider board to the nestbox side of the coop. Again for more support and something to screw to when I get to that point of this project. Then I came along in Step 13 and started adding the boards opposite of the nest boxes. These boards are Grade B pineboard that my neighbor gave me. He has a mill and this was some of the wood he did not want and would have been discarded if I did not want it so I gladfully took them.
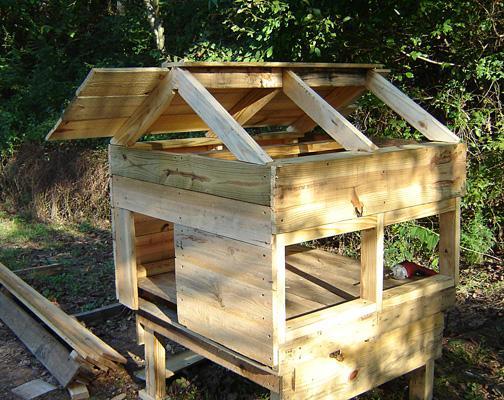

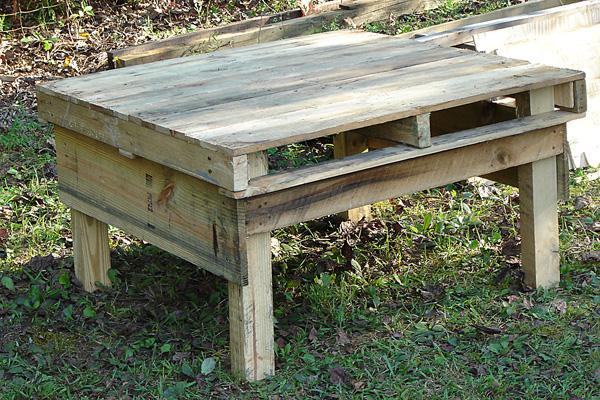
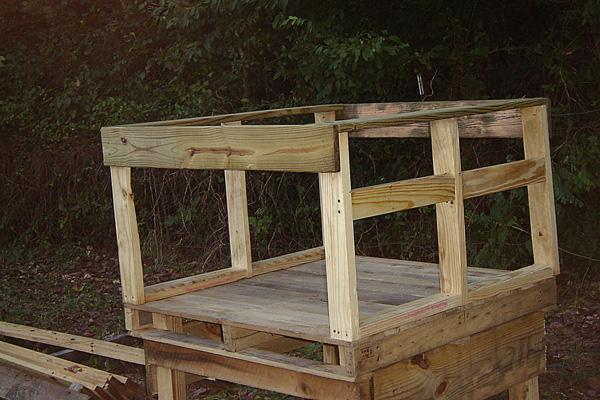
Now I am starting to put the roof on. I used crate boards recieved from work and the roof and 1/4" plywood on the front and back. I tried to keep this as simple as possible because this is a build as you go type of coop and I wanted to make sure that whatever I did could be reversed if I decided to do something different to it. So far it has worked great.

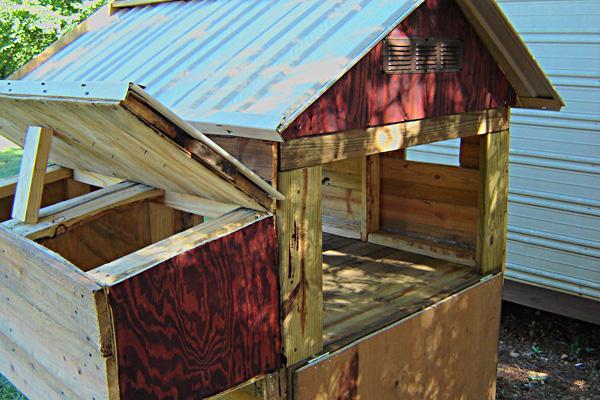
All the wood is now up on the roof and Step Seventeen shows a picture of the rear of the coop. The plan is to have this open with a hindged door that swings down for ease of cleaning.
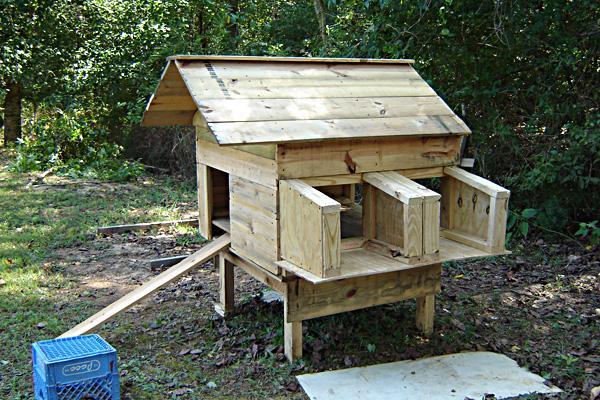
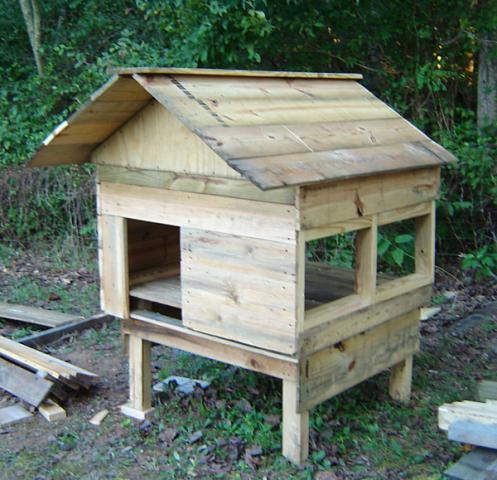
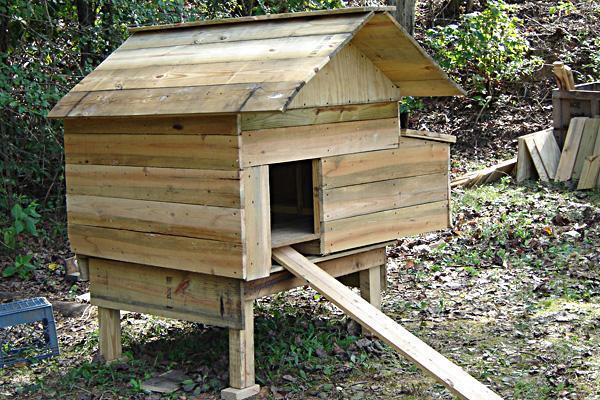
Now I am starting to add the nestboxes. In Step Eightteen, you can see my Nubian Goat attacking the browse on the fence. I used 2 x 4's and 1/4" plywood for the construction of the nestboxes. The top I built at a slant so the rain could run off and the top will be hindged for ease to accessing egg collection. The plank coming out of the front door of the coop is just there for cosmetic purposes. I wanted to get a "feel" for how the ramp wil look.
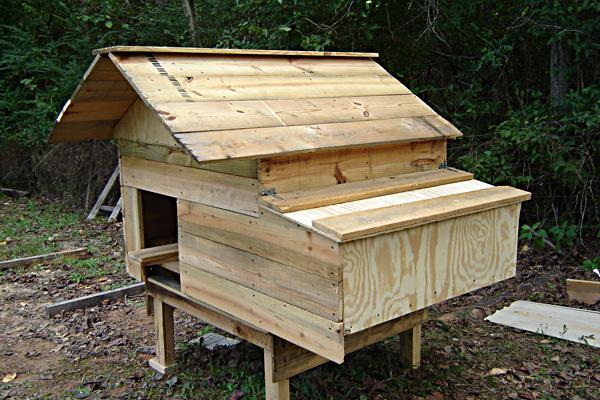
I removed the boards I had previously on the front and replaced them with boards that extended through to the nestboxes. I used 1/4" plywood to close up the nestboxes and attached the lid to it. In Step 21, This is the latest shot looking at the right side of the coop. I will add unused skirting that I have laying around to the roof of the coop and nestboxes. I was going to paint it but opted not to because I am liking the rustic look. I have the front and back doors to add as well and then I move inside to furnish it.

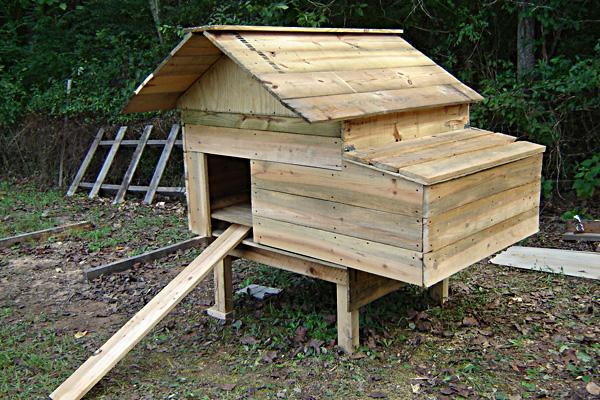
The next shots are of the back and of the left side of the coop.


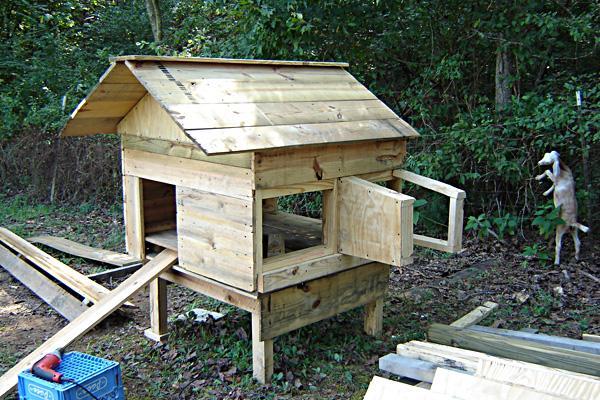
In Step 24 - The vents were added to both the front and back of the coop. I purchased these for under $2.00 at Lowes and they were easy to install. Step 25 shows the back door of the coop.


Step 26 shows the back door of the coop in the "Down" position. I made the door in this fasion for ease of cleaning. In Step 27, I haave added windows to the left side of the coop. This is so the nest boxes can be viewed to see if there are any surprises before lifting the lid on the boxes. I have also added a stand for a flower pot. This is just for decorative purposes.
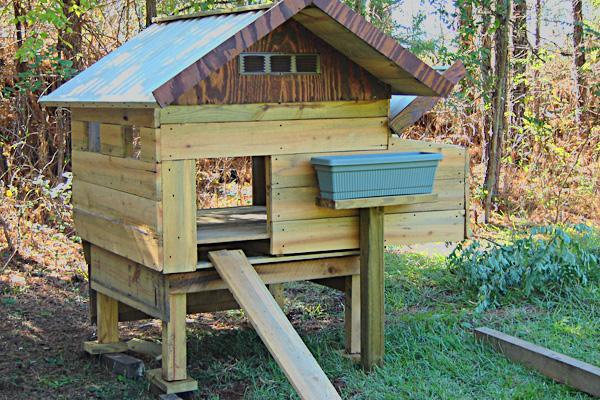
In Steps 28 & 29, stain and a clear finish has been added to the coop. This coop is almost done.
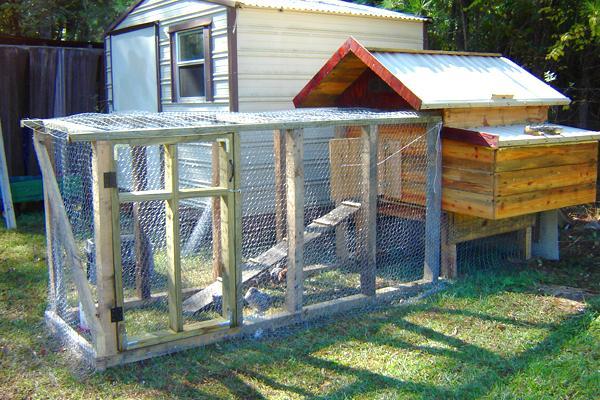
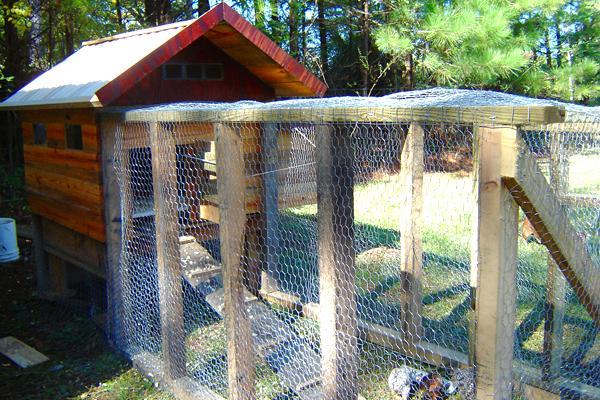
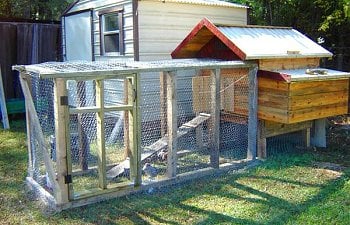
Finished with the run. Didnt take step by step pics of this but it was a pretty basic build. I doubled up the chicken wire and used 1 x 2 welded wire on top of the run for added security. I will add hardware cloth to the bottom of the run later for added protection but I am hoping that the doubled up chicken wire will be enough until then.
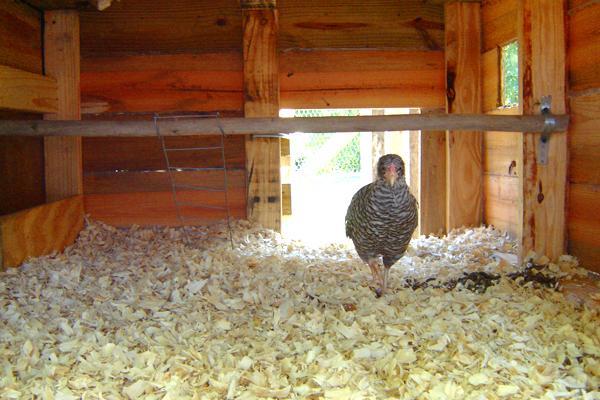
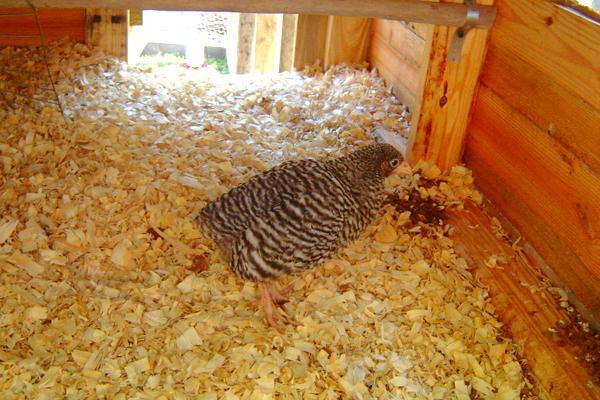
Here is a couple of pics of one of the Dominiques I have inside the coop. You can see the roost in the leftside picturewhich I placed in between the two windows on the right side of the coop. I have pine shavings down but will convert to using sand in the coop once I have depleted all the pine shavings I have purchased prior to reading about the benefits of using sand in the coop.
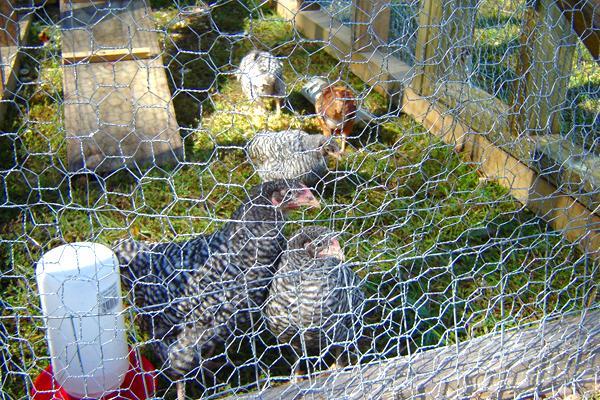
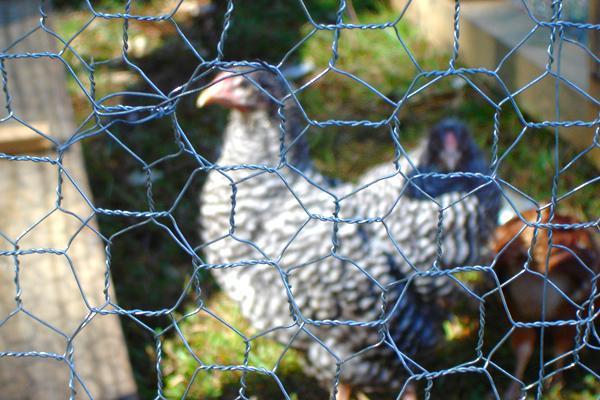
This is a couple pics of my Dominique Pullets. I have 4 of them and 1 Rhode Island Red.