I have been working on this coop for a few weeks. A lot of other stuff going on. Plus, I knew the chicks wouldn't be ready for a while. This turned into a fun and idea provoking project (as you will see in the following pics). Pics and explanations to follow.
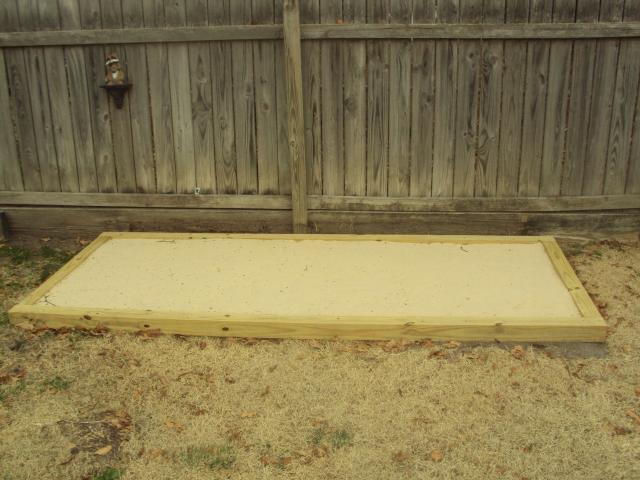
First of all, I decided to put this coop on rebar secured, treated 4x4's. I laid down landscape cloth and then 1/2" hardware cloth then filled the space up with play sand.

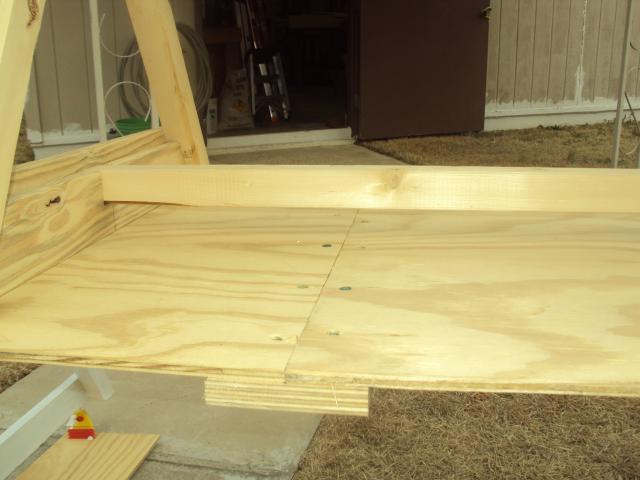
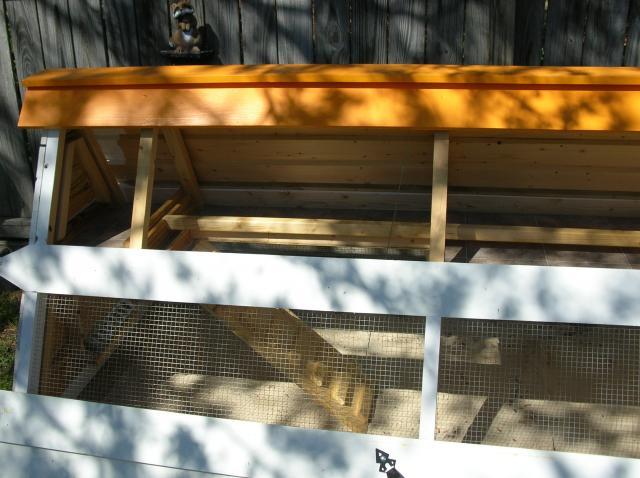
I decided to build the coop 10 ft long which required some creativity with the floor board. I just added 2 feet and used a 1by 6 screwed and glued. Very solid. I also spaced the middle floor supports so that they would be symmetrical.
The rest of the basic build went as planned. I painted the basic structure before the 1/2" hardware cloth went on. I also put linoleum down.
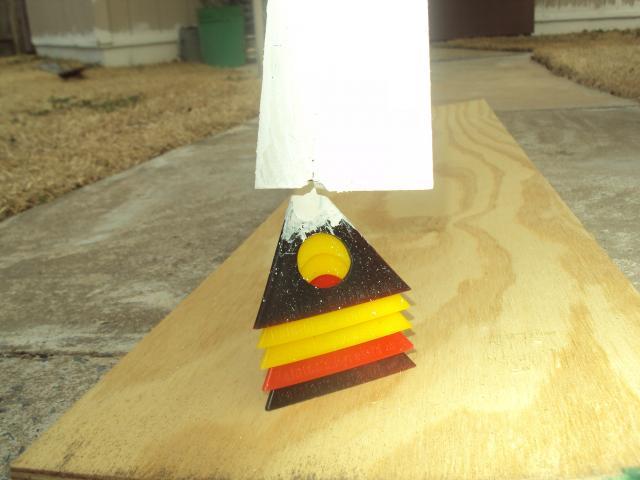
These painting pyramids are great.
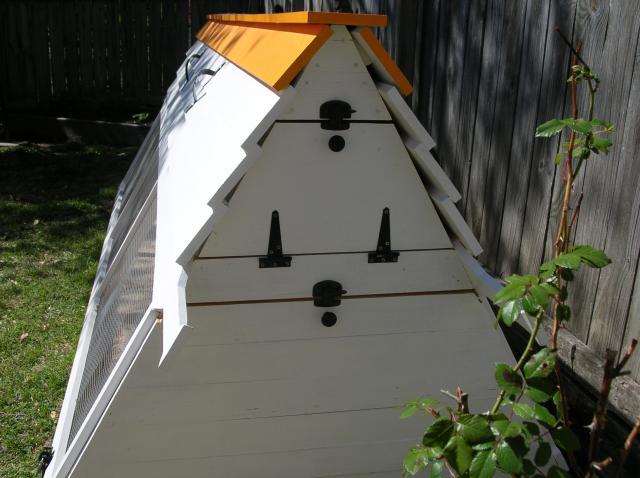
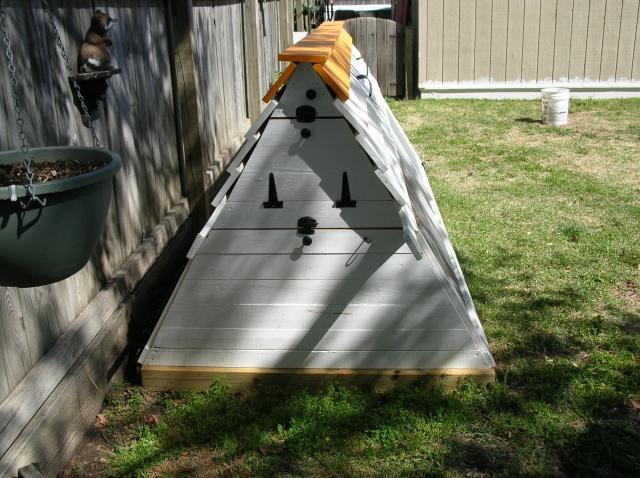
For the egg doors, I used black hinges and black window closures. I also used a window closure on the bottom access door.
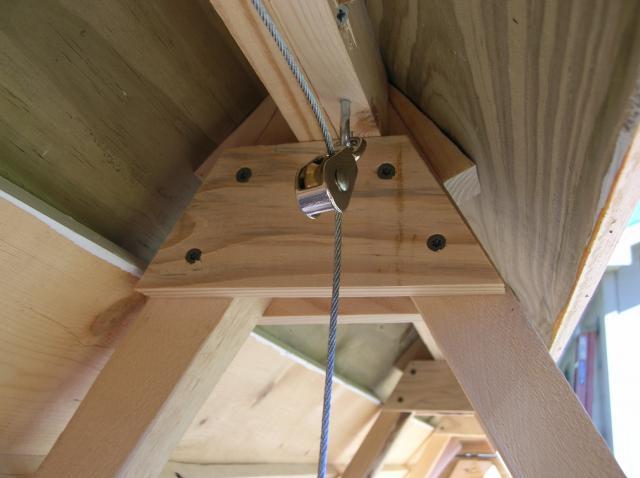
I ran the cable for the ramp up to 1 pulley then straight out. I attached a knob to the end and a J hook to the permanent board to secure the ramp in the up position.
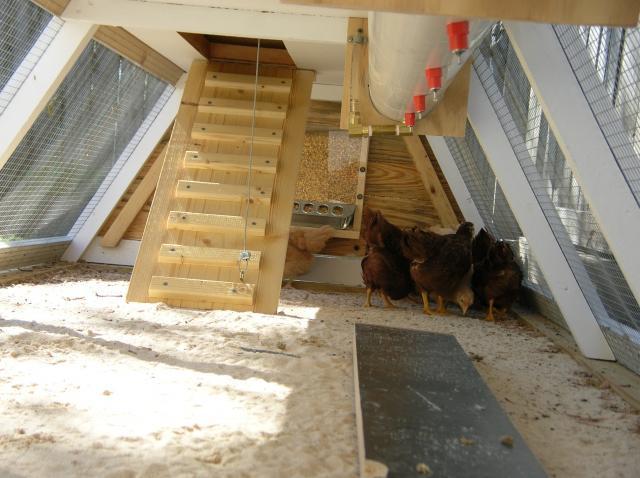
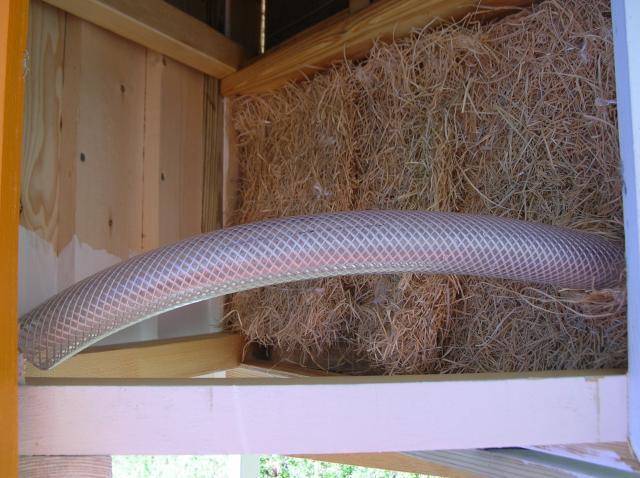
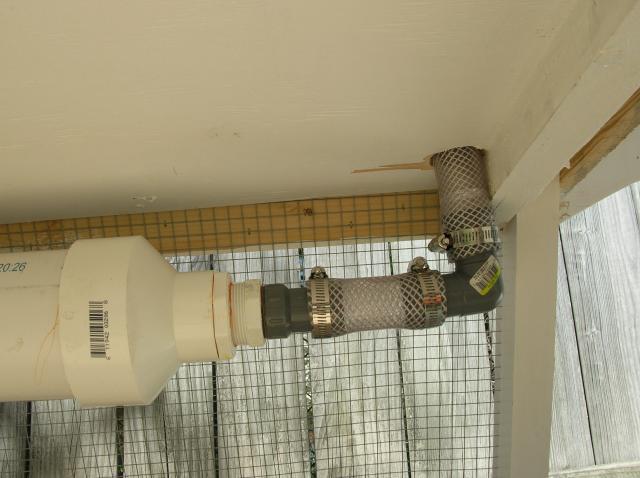
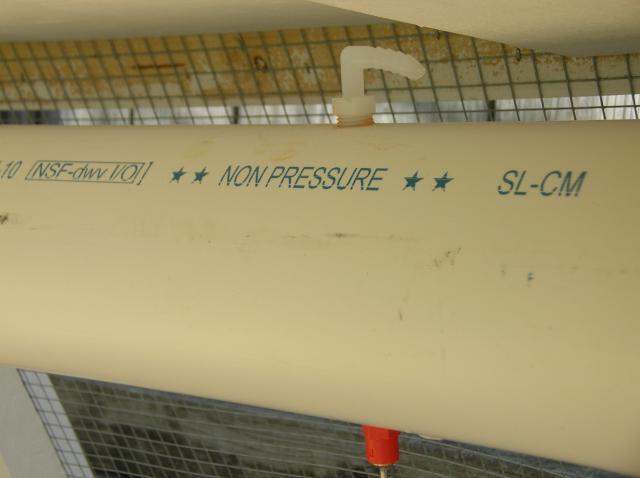
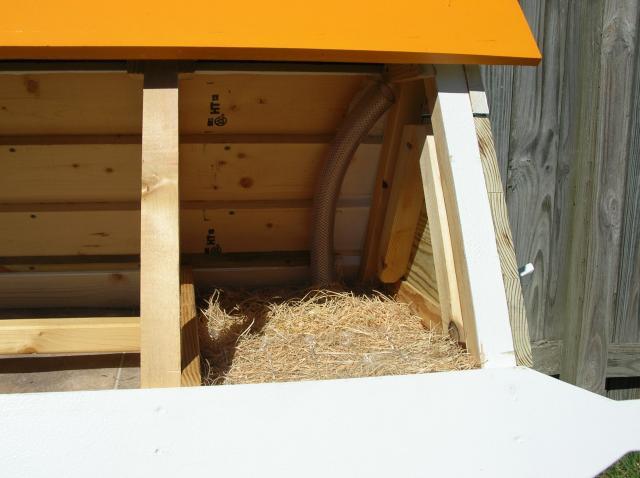
I wanted to make it easier to provide water so I came with this design. 4 feet of 4" pvc pipe then reduced to 1 1/2" clear reinforced poly tubing with a cap. The poly tubing goes through a 1 3/4" hole I drilled in the corner of one of the nest boxes. When it is time to fill, I just slide the removable side down (extra handle installed) just enough to expose the nest box, pull the tube out and fill up. There is a water level monitoring tube at the opposite end and a check valve air vent on top. I then put 4 chicken nipples in. For clean out, I pop the end cap off, flush the tube into a 5 gallon bucket. That's it. The chickens took to the nipples in a matter of a couple of hours.
Sorry...sideways picture of the water fill tube. It now has a cap on it.
Air vent check valve
Water level monitoring tube. The level in the clear tube will match the level in the PVC pipe.
Next, I wanted to make feeding easier, so I built feeders into both sides. Just open the window lock, open the door slightly and refill. Got that idea from someone else.
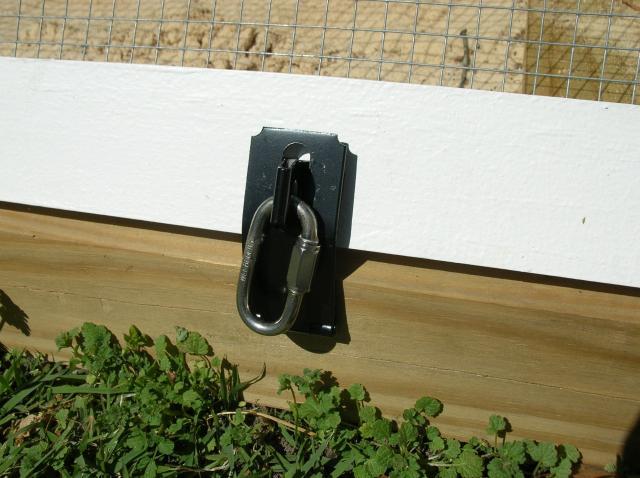
Next, I needed to secure the coop, so I added a lock hasp with a carabiner to opposite sides.
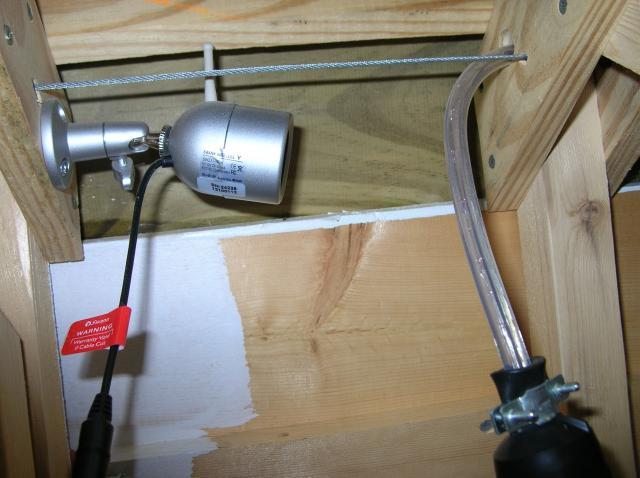
Then I added some rope lighting down the center of the ceiling plates and a wireless camera (how cool this thing is). I put a shallow depth outlet mounted as tight into the ceiling as possible. It is out of the way. The light can be controlled by remote control. The pulley and rope light do not interfere with each other.
I added 1x6 PVC board trimmed to 1 1/2" to fit over the lower supports to cover the wire for neater look. The inside and ramp has 2 coats of boiled linseed oil. All other wood was primed (2 coats) and then painted. Should last a long time.
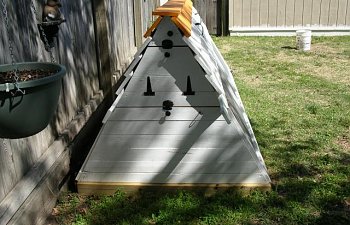
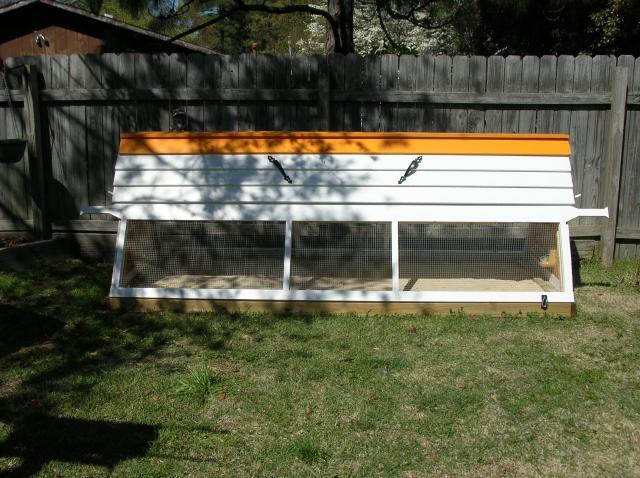
These plans were easy to follow, yet adaptable. The sides with the handles just slide/pull out for easy access to the roost area. I had fun building this coop and have already had 3-4 people show an interest in me building one for them.
Nest boxes are at each end and are 12 x 20 inches
I have 5 RIR and 4 Buff Orpingtons that are enjoying their new home.
I hope you enjoyed the tour. PM me if you have any questions or comments.
Dan
First of all, I decided to put this coop on rebar secured, treated 4x4's. I laid down landscape cloth and then 1/2" hardware cloth then filled the space up with play sand.
I decided to build the coop 10 ft long which required some creativity with the floor board. I just added 2 feet and used a 1by 6 screwed and glued. Very solid. I also spaced the middle floor supports so that they would be symmetrical.
The rest of the basic build went as planned. I painted the basic structure before the 1/2" hardware cloth went on. I also put linoleum down.
These painting pyramids are great.


For the egg doors, I used black hinges and black window closures. I also used a window closure on the bottom access door.
I ran the cable for the ramp up to 1 pulley then straight out. I attached a knob to the end and a J hook to the permanent board to secure the ramp in the up position.
I wanted to make it easier to provide water so I came with this design. 4 feet of 4" pvc pipe then reduced to 1 1/2" clear reinforced poly tubing with a cap. The poly tubing goes through a 1 3/4" hole I drilled in the corner of one of the nest boxes. When it is time to fill, I just slide the removable side down (extra handle installed) just enough to expose the nest box, pull the tube out and fill up. There is a water level monitoring tube at the opposite end and a check valve air vent on top. I then put 4 chicken nipples in. For clean out, I pop the end cap off, flush the tube into a 5 gallon bucket. That's it. The chickens took to the nipples in a matter of a couple of hours.
Sorry...sideways picture of the water fill tube. It now has a cap on it.

Air vent check valve
Water level monitoring tube. The level in the clear tube will match the level in the PVC pipe.

Next, I wanted to make feeding easier, so I built feeders into both sides. Just open the window lock, open the door slightly and refill. Got that idea from someone else.

Next, I needed to secure the coop, so I added a lock hasp with a carabiner to opposite sides.
Then I added some rope lighting down the center of the ceiling plates and a wireless camera (how cool this thing is). I put a shallow depth outlet mounted as tight into the ceiling as possible. It is out of the way. The light can be controlled by remote control. The pulley and rope light do not interfere with each other.

I added 1x6 PVC board trimmed to 1 1/2" to fit over the lower supports to cover the wire for neater look. The inside and ramp has 2 coats of boiled linseed oil. All other wood was primed (2 coats) and then painted. Should last a long time.
These plans were easy to follow, yet adaptable. The sides with the handles just slide/pull out for easy access to the roost area. I had fun building this coop and have already had 3-4 people show an interest in me building one for them.
Nest boxes are at each end and are 12 x 20 inches
I have 5 RIR and 4 Buff Orpingtons that are enjoying their new home.
I hope you enjoyed the tour. PM me if you have any questions or comments.
Dan