Detroit Chicken Coop
I didn't grow up on a farm, I grew up in Ann Arbor and moved to Detroit in 2006.
The plan for my chicken coop was to have it contained inside my detached garage behind my house, with a run outside of the garage. This way I could build it for less money (since I would build into the corner) and it would be easy to maintain in the cold long Michigan winters.
Below are some very rough drawling of what I wanted my chicken coop to look like:


I was able to find a bunch of 4 foot 2x4's for really cheap from a recycle reuse center. Originally I was planning on making the coop 4ft x4ft, but decided to opt for a larger coop of 6ft x 4ft. Since bigger is better ]")

This is the location in the garage we plan on building the coop.

Here is my Dear loving boyfriend helping me out since I was having some issues. ( I was using nails that were to short is what we figured out)

Heres is the floor in the corner, with the flooring on it. The Flooring is that sticker type floor that comes in 12" by 12" squares, I was able to find some that was only 30 cents a square.

We build the frame planning to use the two garage walls as part of it, I might try to do this some how differently if I were to do it all over again, since it was hard to attach these to the garage at first. I think it could have been easier with a little more planning.
As you can see we also raised the coop off of the ground, this will make it easier to clean, and off the cold cement. I plan on insulating the coop since Michigan has some cold winters.

Nesting Box


We ended up adding a window here instead to let in light, we also cut away that board blocking the window, I don't know why anyone would cover up a window like that.


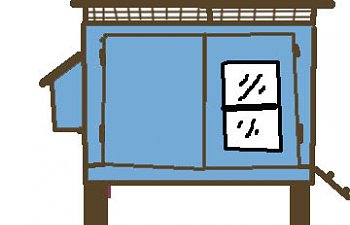
Chicken Pop Door
Originally I wanted to have a sliding door that opened from the inside, (like in Seachicks coop) but that seemed to be to hard...and complicated so we made this door instead. Which I love, the colors match out house.


See it Matches!


In 2009 we decided to make the run larger. The run is now 12 feet by 18 feet.

We used a closet bar for one of the roost which you can see my boyfriend installing in the above picture
My loving boyfriend was nice enough to put on long pants and a long sleeve shirt in the hot heat and humidity of Michigan summer to put up insulation for the chicken coop. And then we put scrap left over 1/4 plywood over it.

Putting in the finishing touches before the bedding goes down.

This is the very first picture I took of the girls in their new coop, just hours after I brought them home.


Things I Would Change
Even though I JUST finished my coop I can think of a few things I would be differently if I had to do it all over again:
1. I would make a formal plan, with sketches and measurements all drawn out. This would have saved us a few head aches.
2. I think I would have a guillotine style door since it would be easer to close and open form outside the coop, and could keep draft out better.
3. I would have planned for the Deep Litter method, making the door hight off the ground so pine shaving don't end up all over the run.

New additions