My Homemade Incubator contest page,
Introducing, MechaChicken- The Iron Hen, My Homemade Incubator,
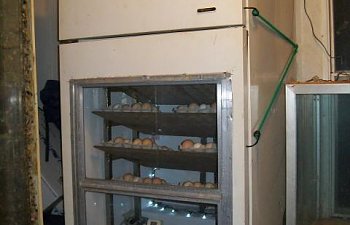
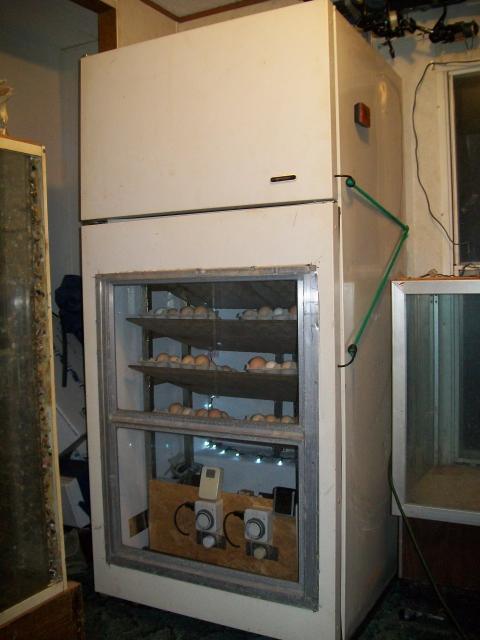
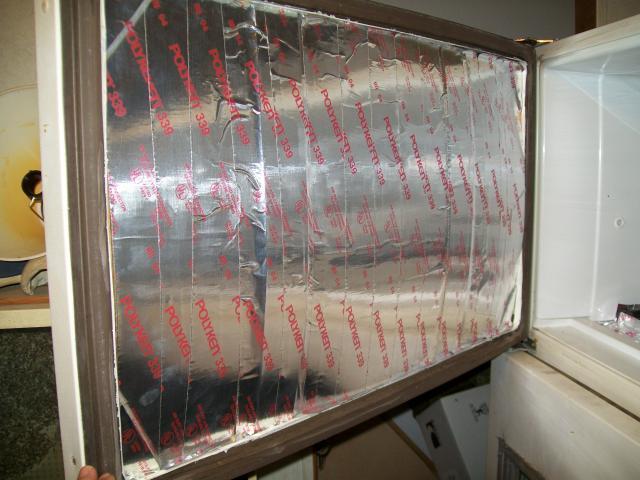
It's my first attempt to build an incubator and an automatic egg turner so here are the photos showing the progression from start to finish, And an update on the first hatch, I am calling it a sucess with 3 eggs hatched I at least know it does work, I had a few bugs that had to be worked out during the hatch that I believe caused the majority of the eggs to fail I will be fixing and changing a few things and posting pic's as I get them done. Started with this old refrigerator I salvaged it needed a serious cleaning, I removed the doors and cut the plastic insides out of them with an angle grinder and a 1/8" blade then removed a large section of the metal in the lower door to fit an aluminum framed window into it that I sealed up with silicone, the upper door I left the insulation in it and covered it over with masonite and metallic duct tape to reflect heat back inside the compartment. One thing I will do is insulate around the window in the lower door for the second run.

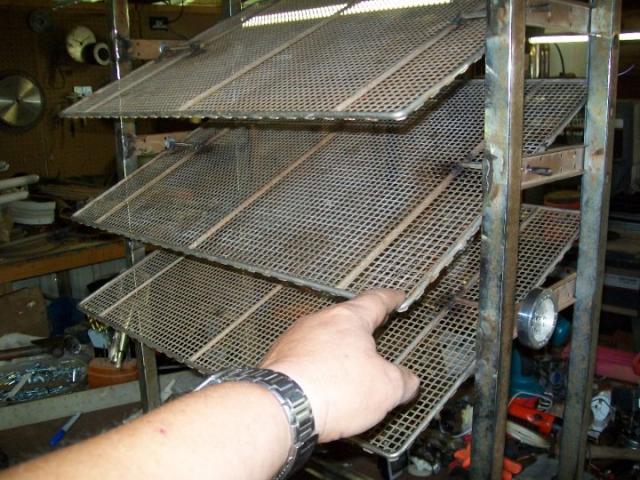
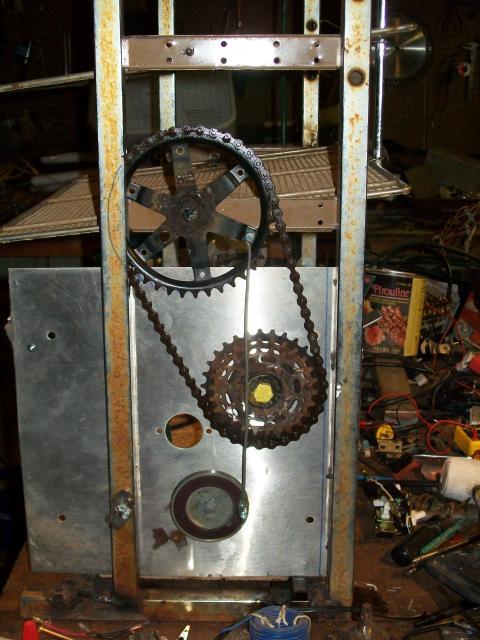
Used 4 old poofing trays mounted upside down in the frame I built from some scrap metal. The motor you see I ended up burning up so had to go to plan-B and used a BBQ Rotisserie motor I got from an old broken grill I'd been given it actually worked out much better because I was able to wire the limit switches to work as I intended them to when I set them in place. This was bug #1 I rewired it several days into the hatch to use them and when I did the weld broke on the sprocket and I had to rush the turner to the shop and reweld it stronger it won't be breaking again
The Completed Automatic Egg Turner
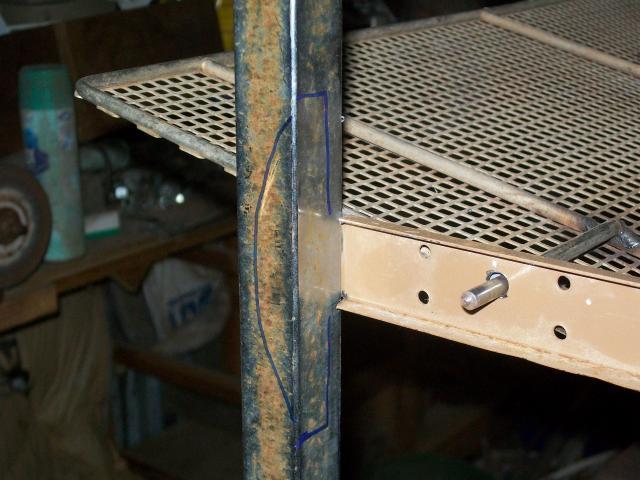
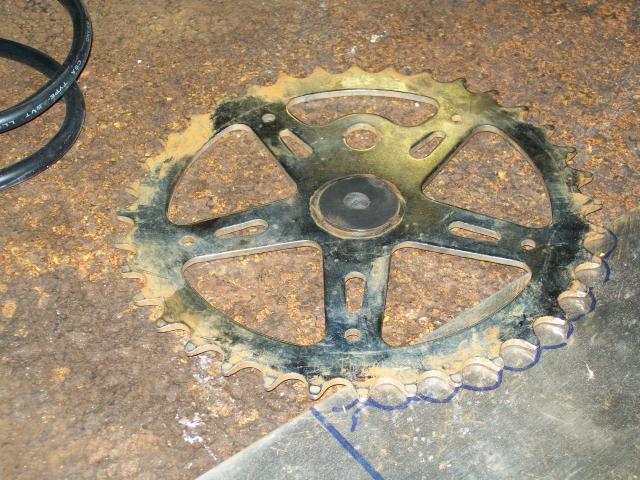
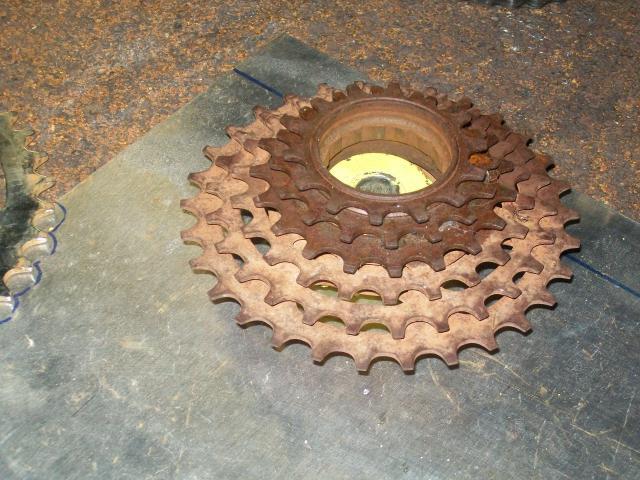
Side view the sprockets from a donated 12 speed bike (thanks Dan) gives the motion stability and keeps it from stressing the pin where it's welded to it, Update it didn't help so much LOL I removed the chain when it broke and the second sprocket cut a slit in the pin and wedged a shear pin into the slot then braised it in place joining the sprocket and shear pin to the pin attached to the tray it's very strong now and shouldn't fail again.
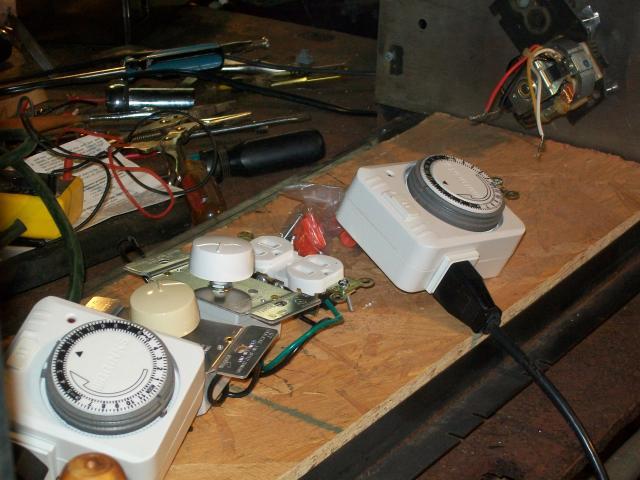
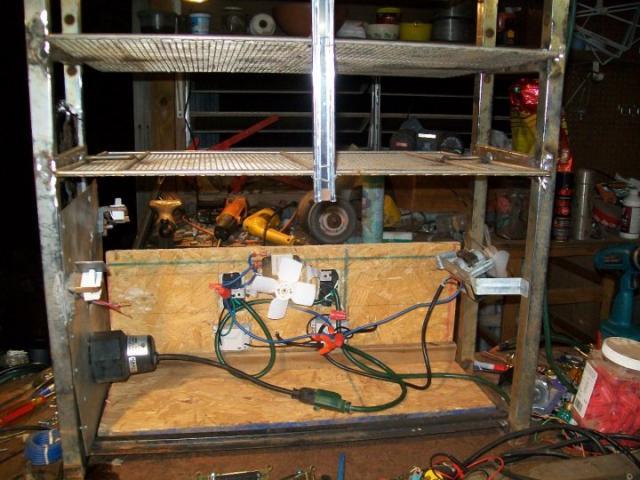
The heart of the egg turner, the power cord is ran through the square tubing at he front right of this pic, when it comes time for lockdown I'll just kill power to the motor and use a 5" high rectangle of wire to keep hatching chicks on the trays, I have a few days left to build these and will add pic's as I get them in place. On the left you can see two stop switches not yet wired in I need to figure out how to use them I know what I want them to do but haven't figured out how yet,
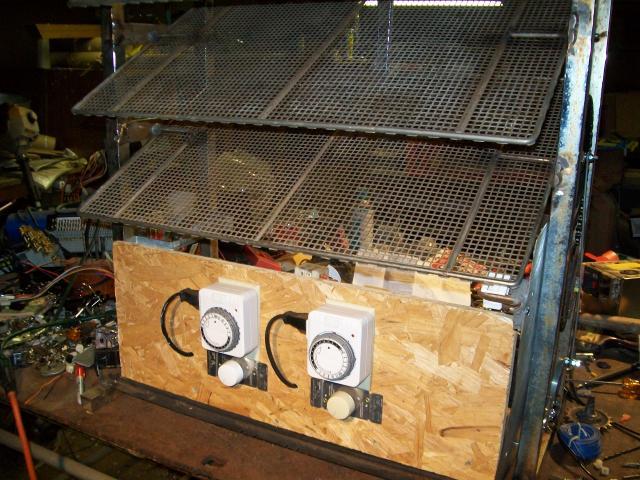
Update: I have figured out how to stop the trays after just one rotation each way I had installed two switches to stop the trays one on each side but had trouble getting them to do what I had wanted them to do, they would either not stop the trays from tilting back and forth of they would stop it and then not start again the key was running a jumper from one switch to the other and then to the motor with both timers suppling power to just one switch each the negitive wire and the ground go straight to the motor, The timers are set to come on at Midnight & noon and the other at 6pm & 6am thus every 6 hours the motor can come on and tilt the trays till it hits the limit switch and stops power to the motor 6 hours later the other timer comes on and sends the trays the other direction, so no more scrambled eggs LOL
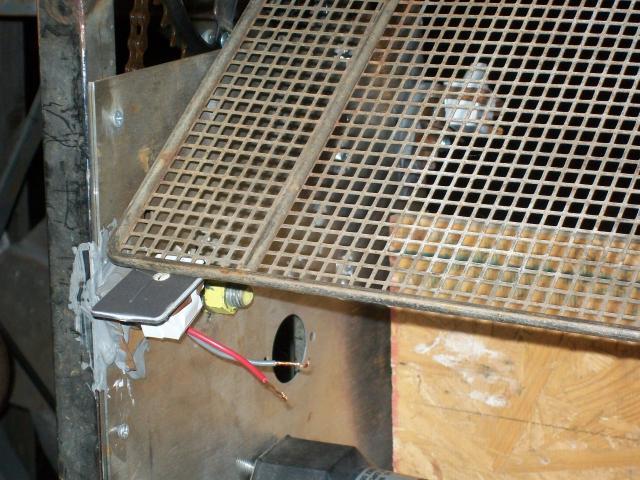
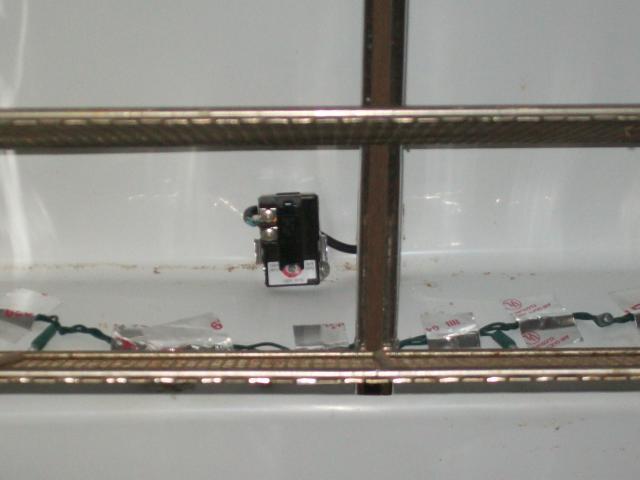
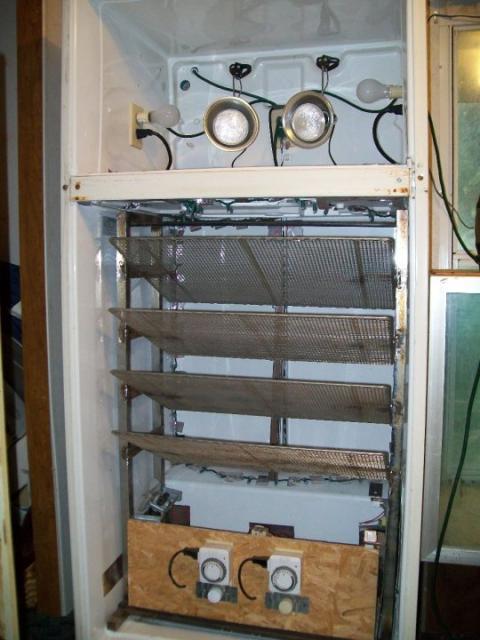
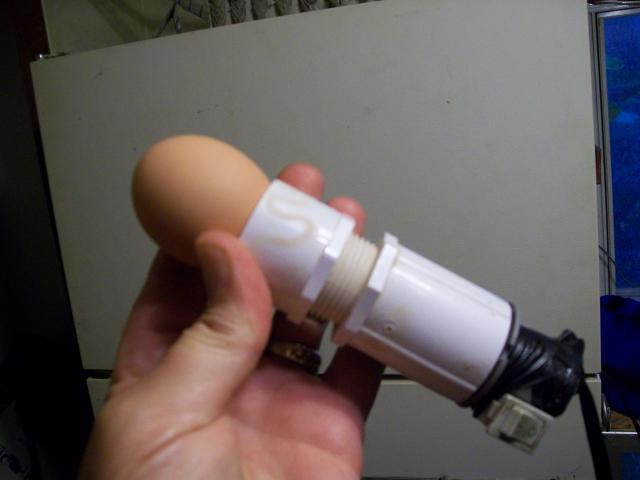
I used a water heater thermostat to control heat, placed about a third of the way up from the bottom, in the largest air space in the compartment.
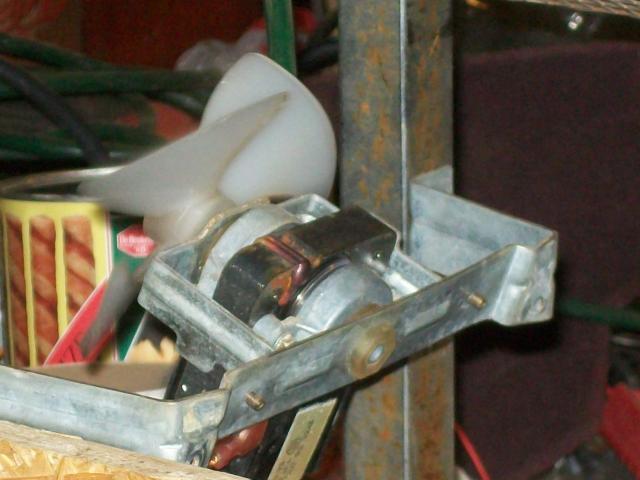
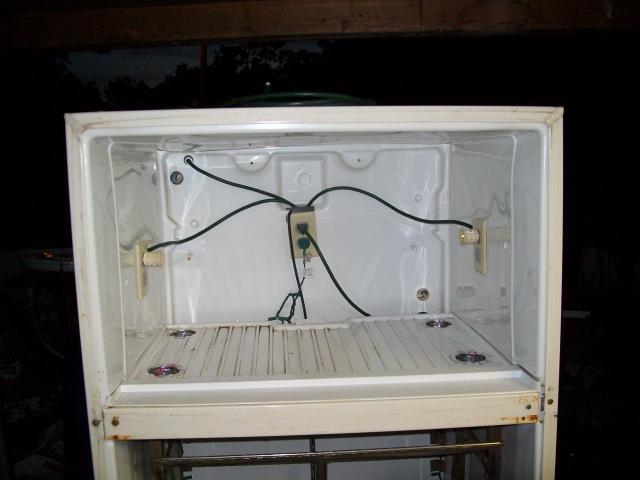
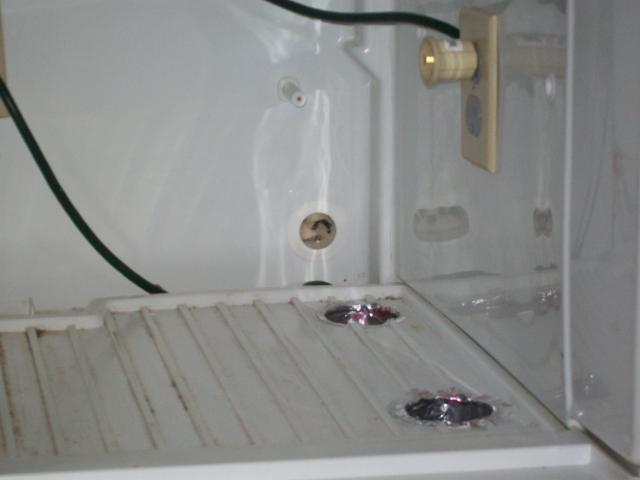
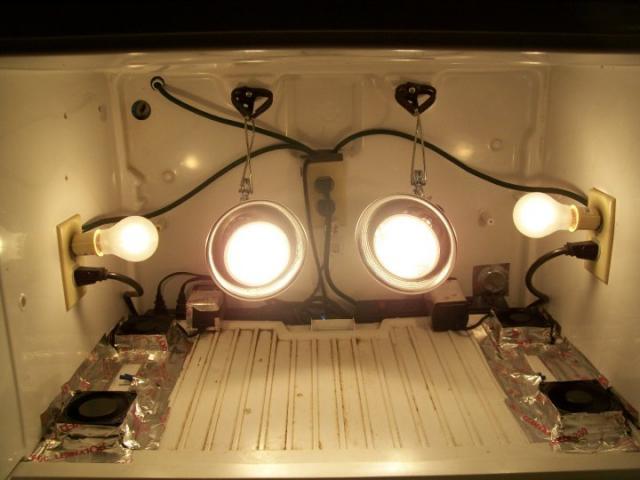
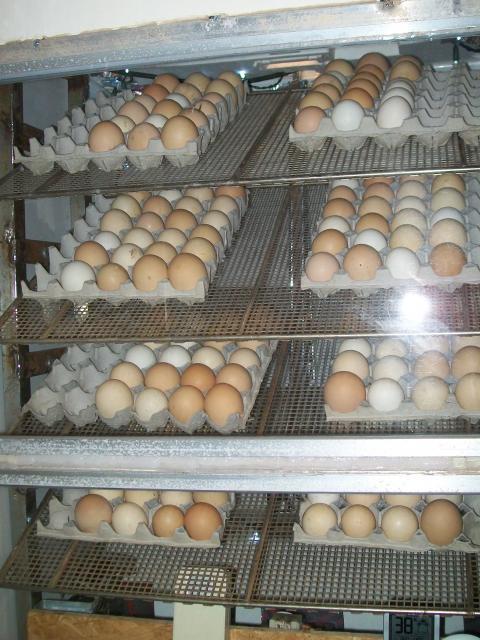
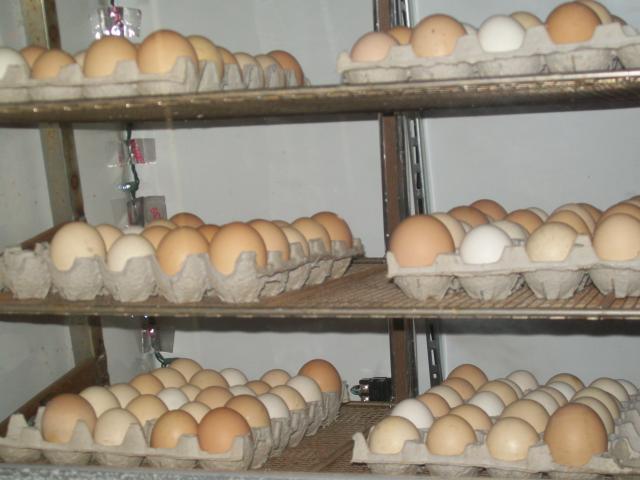
Power in is at top left, the duplex receptacle at the back is live and powers the egg turner and the LED Christmas lights I used to illuminate the lower compartment, nice cool bluish light to view the eggs, The two side receptacles are controlled by the thermostat and will have two 60 watt bulbs, two 75 watt spot lights and two 12volt power adapters running two each computer fan motors to blow the heated air down through four holes lined with metallic duct tape. I went with all four bulbs as it heated up quickly and gets the heat where it should be faster and doesn't over heat the upper compartment, I may add something to retain heat such as bricks in this area not sure yet.
Test run with power it really does seem to work well, All that's left is to attach the doors and add the indicator light on the outside of the heater area so I know when the fans and lights are on
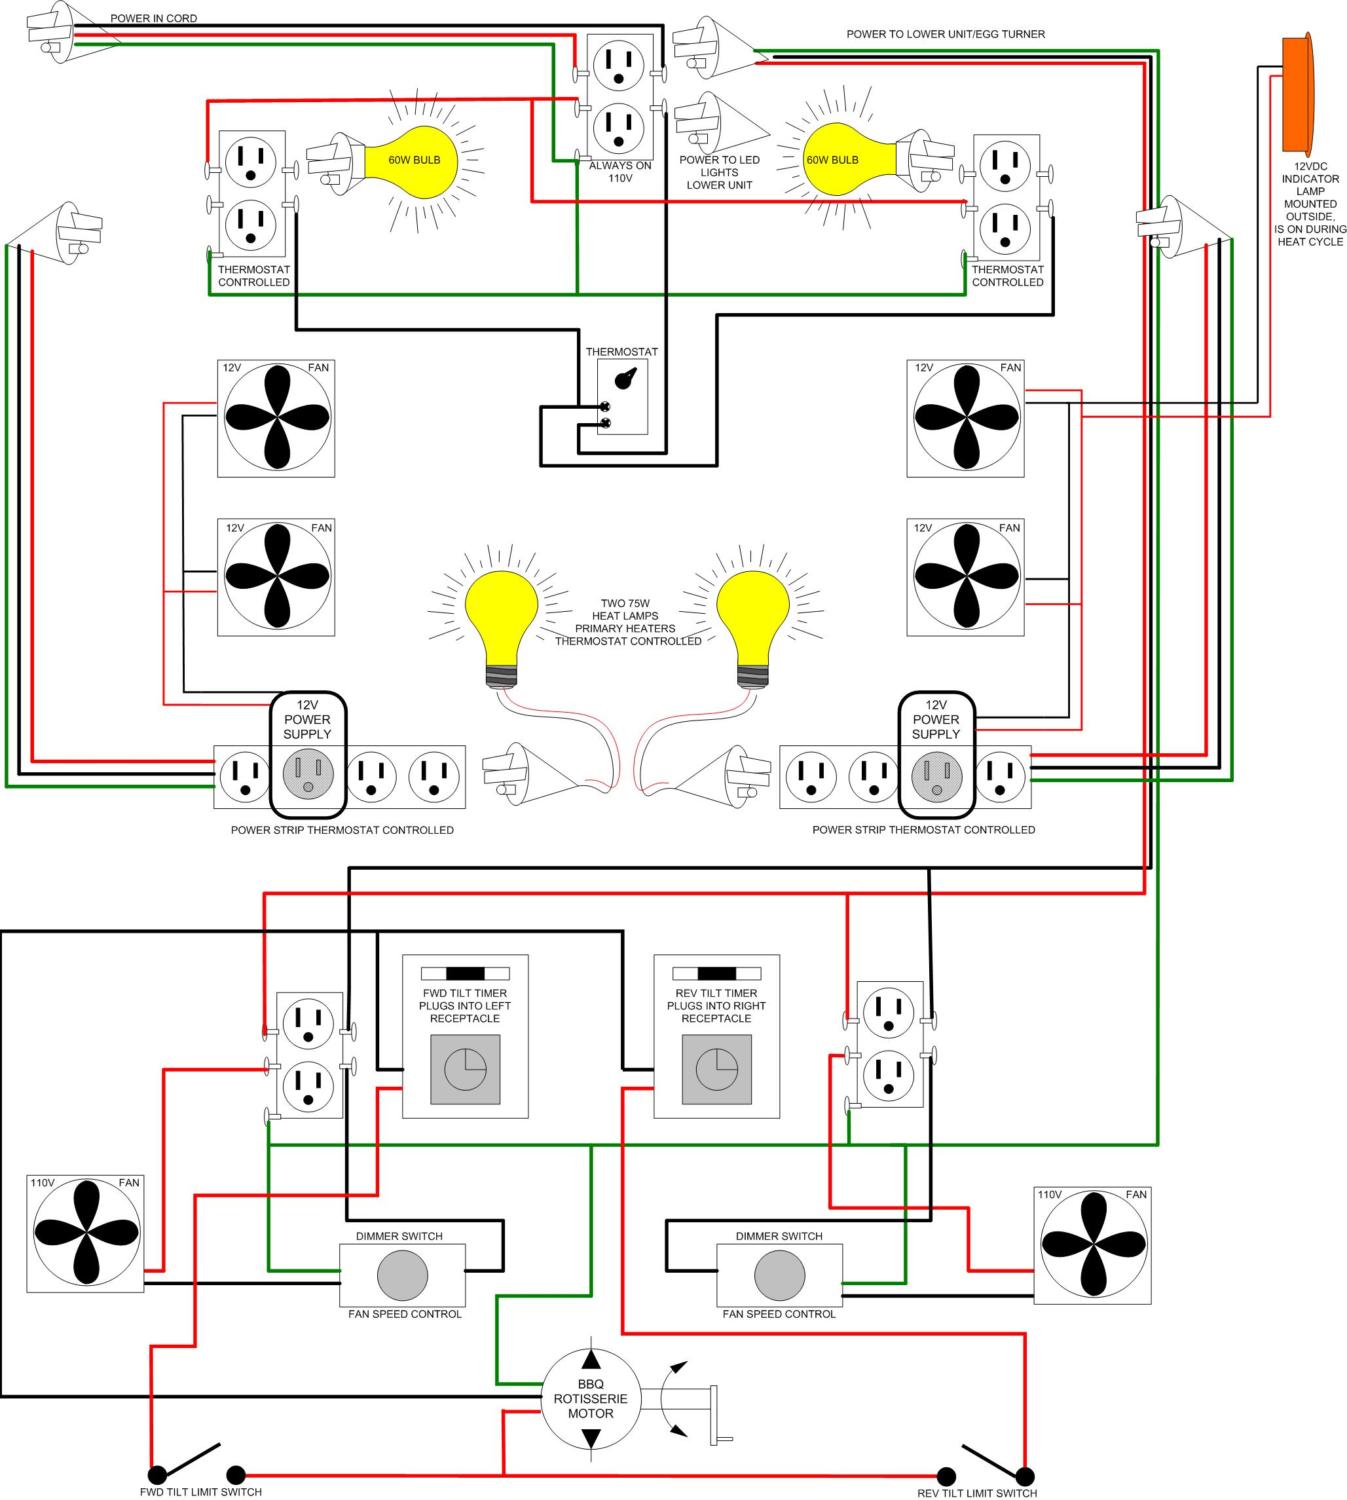
I made this wiring diagram (Originally) in paint after the project was completed, Throughout the building the plans were in my head and everything was made to fit the needs as it progressed, I hope the diagram makes sense and is helpful for anyone wanting to build one of their own. This is the new version I made since the old one was distorted and I lost the file to replace it, I hope this is helpful..
The completed project My very first attempt and building an Incubator and an Automatic Egg Turner") I tested it for 2 days tweaking the temp and humidity and added the eggs on 6-21-10 so we will see in about 21 days if it was a successful attempt. I built and egg Candler it's made from some PVC connectors I had and a auto headlight bulb, It has about a six foot cord so it's easy to use and different angles and tied into the 12v side of the system. The white box sitting on top of the timer on the left is a remote thermometer I can see what the temp is and the swing for the day from my desk in the next room, However it didn't match the Hygrometer/Thermometer and so I picked up an old stand by and turns out the $8. Dollar one was the more accurate one so I can put the remote back out in the yard and just know I have to subtract 4 degrees from it.
I tested it for 2 days tweaking the temp and humidity and added the eggs on 6-21-10 so we will see in about 21 days if it was a successful attempt. I built and egg Candler it's made from some PVC connectors I had and a auto headlight bulb, It has about a six foot cord so it's easy to use and different angles and tied into the 12v side of the system. The white box sitting on top of the timer on the left is a remote thermometer I can see what the temp is and the swing for the day from my desk in the next room, However it didn't match the Hygrometer/Thermometer and so I picked up an old stand by and turns out the $8. Dollar one was the more accurate one so I can put the remote back out in the yard and just know I have to subtract 4 degrees from it.
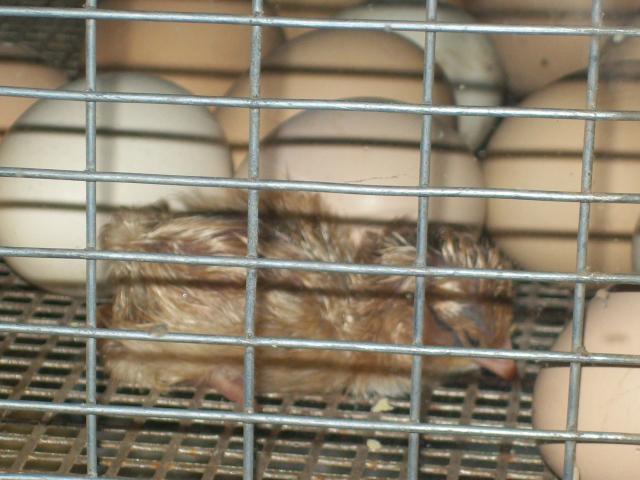
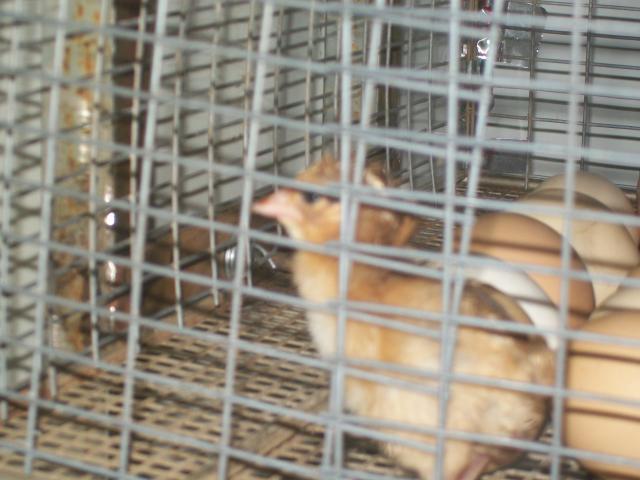
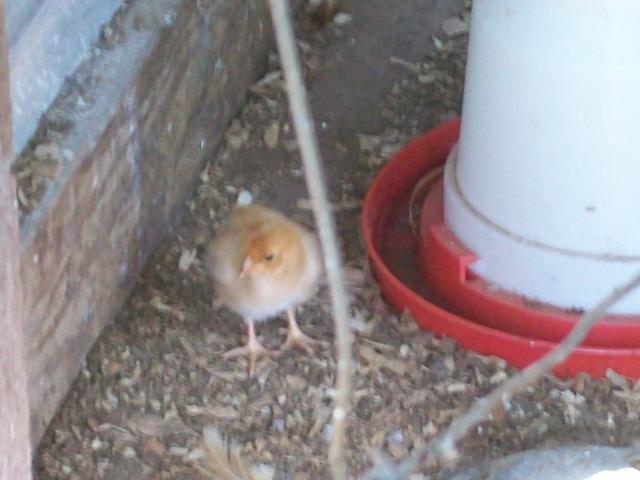
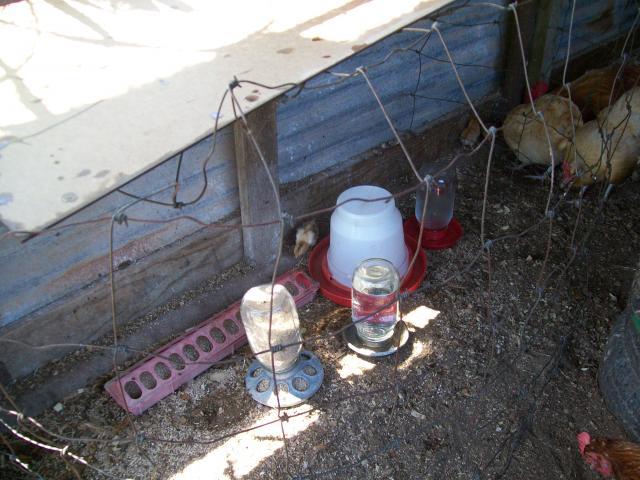
Here's a few pic's of the first hatch I had a broody hen that had lost all her eggs to a snake and I replaced them with some from the incubator and she hatched one, I got 2 more from the Iron Hen so rather than place them in a brooder I gave them to her to raise and so far she is doing great. She is a great Mom I had several bugs to work out during the incubation and I believe that was the cause for so many of the eggs to fail that and a lot of the eggs I had collected to go in were starting to get quite old by the time I finished it. I'm very happy with 3 eggs hatching I know that the Iron Hen does work and with the bugs I fixed I'm sure I will have a much better rate the next run which starts sometime this week.
Note the Hygromoter is at 70% but I tested it and it's 6 points off so they humidity is about right for lockdown I will be adding a tube from the outside to add water to the container in the bottom without opening the door, I used a 3-1/2"x3-1/2" X 5" tall set in the bottom right in front of the center fan it kept the humidity right around 50%. On day 18 for lockdown to increase humidity I formed a tent with a wire hanger and draped a sock over it and sat it in the container to wick water out of the container it's right in front of the fan and brings the humidity up perfectlyto right at 75% but till I added the tube the door had to be opened to fill it.
I'll add more pic's as I learn and make changes for whatever the Iron hen needs to be the best Homemade Incubator she can be
Introducing, MechaChicken- The Iron Hen, My Homemade Incubator,
It's my first attempt to build an incubator and an automatic egg turner so here are the photos showing the progression from start to finish, And an update on the first hatch, I am calling it a sucess with 3 eggs hatched I at least know it does work, I had a few bugs that had to be worked out during the hatch that I believe caused the majority of the eggs to fail I will be fixing and changing a few things and posting pic's as I get them done. Started with this old refrigerator I salvaged it needed a serious cleaning, I removed the doors and cut the plastic insides out of them with an angle grinder and a 1/8" blade then removed a large section of the metal in the lower door to fit an aluminum framed window into it that I sealed up with silicone, the upper door I left the insulation in it and covered it over with masonite and metallic duct tape to reflect heat back inside the compartment. One thing I will do is insulate around the window in the lower door for the second run.
Used 4 old poofing trays mounted upside down in the frame I built from some scrap metal. The motor you see I ended up burning up so had to go to plan-B and used a BBQ Rotisserie motor I got from an old broken grill I'd been given it actually worked out much better because I was able to wire the limit switches to work as I intended them to when I set them in place. This was bug #1 I rewired it several days into the hatch to use them and when I did the weld broke on the sprocket and I had to rush the turner to the shop and reweld it stronger it won't be breaking again
The Completed Automatic Egg Turner
Side view the sprockets from a donated 12 speed bike (thanks Dan) gives the motion stability and keeps it from stressing the pin where it's welded to it, Update it didn't help so much LOL I removed the chain when it broke and the second sprocket cut a slit in the pin and wedged a shear pin into the slot then braised it in place joining the sprocket and shear pin to the pin attached to the tray it's very strong now and shouldn't fail again.
The heart of the egg turner, the power cord is ran through the square tubing at he front right of this pic, when it comes time for lockdown I'll just kill power to the motor and use a 5" high rectangle of wire to keep hatching chicks on the trays, I have a few days left to build these and will add pic's as I get them in place. On the left you can see two stop switches not yet wired in I need to figure out how to use them I know what I want them to do but haven't figured out how yet,
Update: I have figured out how to stop the trays after just one rotation each way I had installed two switches to stop the trays one on each side but had trouble getting them to do what I had wanted them to do, they would either not stop the trays from tilting back and forth of they would stop it and then not start again the key was running a jumper from one switch to the other and then to the motor with both timers suppling power to just one switch each the negitive wire and the ground go straight to the motor, The timers are set to come on at Midnight & noon and the other at 6pm & 6am thus every 6 hours the motor can come on and tilt the trays till it hits the limit switch and stops power to the motor 6 hours later the other timer comes on and sends the trays the other direction, so no more scrambled eggs LOL

I used a water heater thermostat to control heat, placed about a third of the way up from the bottom, in the largest air space in the compartment.
Power in is at top left, the duplex receptacle at the back is live and powers the egg turner and the LED Christmas lights I used to illuminate the lower compartment, nice cool bluish light to view the eggs, The two side receptacles are controlled by the thermostat and will have two 60 watt bulbs, two 75 watt spot lights and two 12volt power adapters running two each computer fan motors to blow the heated air down through four holes lined with metallic duct tape. I went with all four bulbs as it heated up quickly and gets the heat where it should be faster and doesn't over heat the upper compartment, I may add something to retain heat such as bricks in this area not sure yet.
Test run with power it really does seem to work well, All that's left is to attach the doors and add the indicator light on the outside of the heater area so I know when the fans and lights are on
I made this wiring diagram (Originally) in paint after the project was completed, Throughout the building the plans were in my head and everything was made to fit the needs as it progressed, I hope the diagram makes sense and is helpful for anyone wanting to build one of their own. This is the new version I made since the old one was distorted and I lost the file to replace it, I hope this is helpful..
The completed project My very first attempt and building an Incubator and an Automatic Egg Turner
I tested it for 2 days tweaking the temp and humidity and added the eggs on 6-21-10 so we will see in about 21 days if it was a successful attempt. I built and egg Candler it's made from some PVC connectors I had and a auto headlight bulb, It has about a six foot cord so it's easy to use and different angles and tied into the 12v side of the system. The white box sitting on top of the timer on the left is a remote thermometer I can see what the temp is and the swing for the day from my desk in the next room, However it didn't match the Hygrometer/Thermometer and so I picked up an old stand by and turns out the $8. Dollar one was the more accurate one so I can put the remote back out in the yard and just know I have to subtract 4 degrees from it.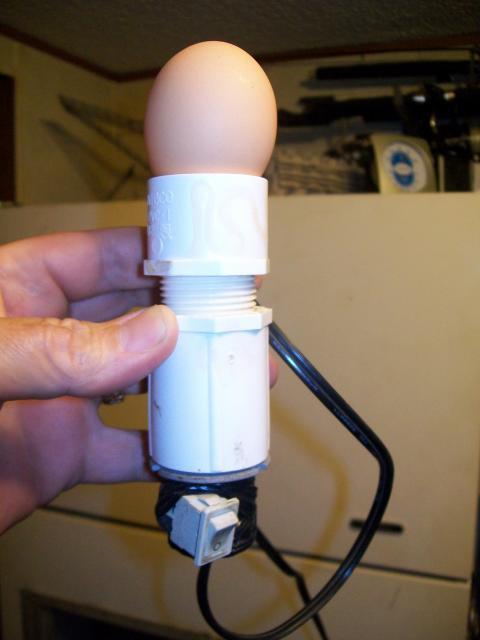

Here's a few pic's of the first hatch I had a broody hen that had lost all her eggs to a snake and I replaced them with some from the incubator and she hatched one, I got 2 more from the Iron Hen so rather than place them in a brooder I gave them to her to raise and so far she is doing great. She is a great Mom
I had several bugs to work out during the incubation and I believe that was the cause for so many of the eggs to fail that and a lot of the eggs I had collected to go in were starting to get quite old by the time I finished it. I'm very happy with 3 eggs hatching I know that the Iron Hen does work and with the bugs I fixed I'm sure I will have a much better rate the next run which starts sometime this week.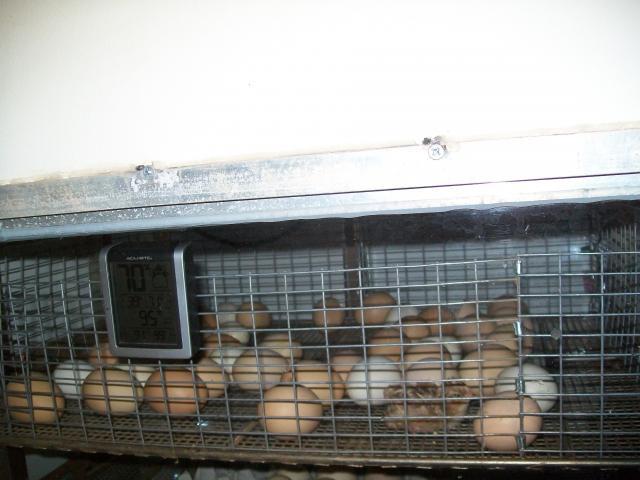
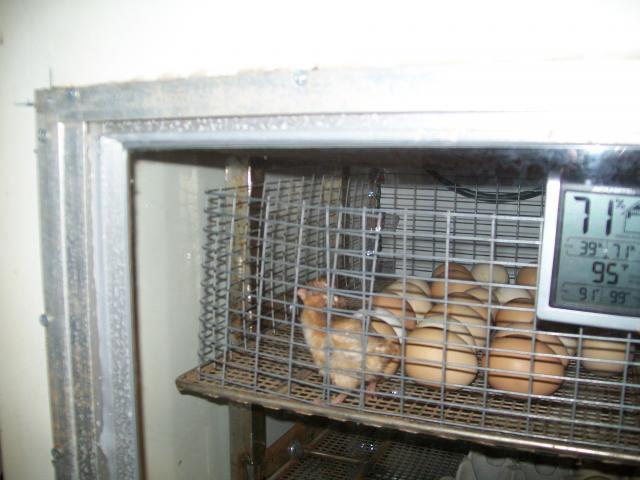

Note the Hygromoter is at 70% but I tested it and it's 6 points off so they humidity is about right for lockdown I will be adding a tube from the outside to add water to the container in the bottom without opening the door, I used a 3-1/2"x3-1/2" X 5" tall set in the bottom right in front of the center fan it kept the humidity right around 50%. On day 18 for lockdown to increase humidity I formed a tent with a wire hanger and draped a sock over it and sat it in the container to wick water out of the container it's right in front of the fan and brings the humidity up perfectlyto right at 75% but till I added the tube the door had to be opened to fill it.
I'll add more pic's as I learn and make changes for whatever the Iron hen needs to be the best Homemade Incubator she can be