Chicken Palace of the North....or as my relatives like to call it...The Chicken Taj Mahal!
I hadn't raised any chickens since I was a kid (when my dad used to order COPIOUS amounts and broilers, tell us what to do, and leave for work!) so I thought
that I needed to try it again and maybe enjoy it a little more. I am solely doing meat chickens right now, due to time constraints with other obligations, but I plan to add
some nesting boxes later on so that I can add some layers to my repertoire. We have a few acres but our landscape is perched on a hill, so I had to build it down below the house.
Fortunately, this puts it right next to the garden, so that I can compost the manure and add it to our poor soil in our region to increase the nitrogen...gotta love that chicken poop!
My main goal is to be able to house 200-250 fryers during each cycle and do 2-3 cycles a year. Large for a household operation, but miniscule when I get to see what the BIG boys are doing. But, as a nurse, I have limited time to donate to the project, so I have to be realistic, and even 200 can be tough sometimes.
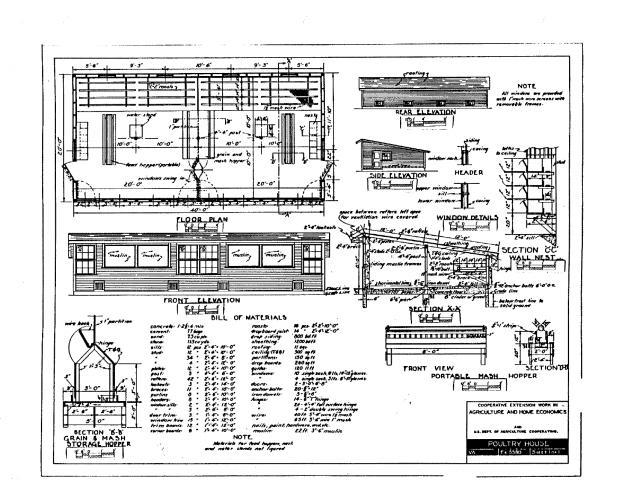
I did a lot of research on various university websites and found a link on NDSU's website for various chicken house plans that were as old as the sun. None of them were "Exactly" what
I wanted but I took the "look" of this design and modified it with a few various items to be discussed later. These plans are for a 20x40 coop, and I did't have that much space so I had to resize my plans for a 16x32 coop, but the overall concept of my coop was VERY similar to this.

I had a lot of things going my way as far as available materials go.
A. I had purchased about a 100 10' treated 6x6 posts for a large landscaping job I did in the past and had about 15 left over...so that was already taken care of.
B. A friend who moved had left a pallet of shingles that he needed used up and gave them to me...as I had done a LOT of work helping him move.
C. Another friend let me tear down an old barn that was falling down on his place so that I could salvage the barn wood. Priceless cuz I simply love the barnwood look.
D. Had buku fasteners left over from doing a large remodel years ago, and they were simply collecting rust, so this was a way to put them to good use.
E. A neighbor had a stack of plywood and 2x6's that were rotting away as he nixed plans to do a remodel and he sold the lumber to me at 1/2 price.
F. I happened to hit a buried 220 line that went from the house to the pump (not located since it is a private line). Although I was mad I hit it, it turns out to be a blessing because I have power to the coop, just needed to add a breaker box, which I found at another friends junkyard.
G. Used Craigslist to find some windows. Happened to find a contractor who was moving and needed to unload some excess inventory (he couldn't return cuz they are oddball sizes) and I got all the windows
for $150 bucks. Quite a steal in my opinion.
One thing that I DID not have in my favor was the WEATHER. It rained like the jungle throughout the entire duration of the project, making it seem like an eternity to finish. But finally it is done and pictures follow.
So..I kinda used my available materials and the plan from NDSU to come up with my "personalized" Chicken coop of the North. I decided to do a pole barn, given the footprint was too large to do a framed floor, and I simply couldn't justify too much concrete for a footing.
1. Getting it out of the ground. Setting posts by yourself is a major PIA in case you are wondering. Don't do it the hard way like me, buy some beer and invite the neighbors over!
2. Getting the basic structure framed.
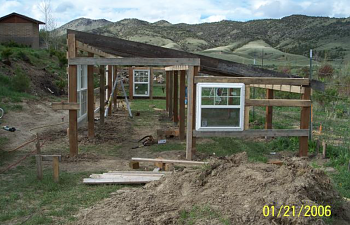
3. Notice my fancy dancy Craigslist Windows!
4. View from the side that I will enter the coop from.
5. I was going to cheese out and not add an overhang above the windows. I decided that I really liked that look and if I didn't do it now it would never happen in the future.
6. Getting a little barnwood siding on the lower half. This worked out pretty well because I didn't have enough barnwood to side the entire structure and I wanted to use a little bit of cedar to match our house. I decided to opt out of using a normal door, because I HATE cleaning chicken coops, and I figured heck, I'll just do a double door and my mini skid steer can fit in there. I can use it to do the majority of the cleaning and only have the fine touchup left over to do by hand. And besides..who doesn't enjoy the look of barn doors. Whether I will color them, stain them, or simply age them is still a matter of debate...which I have little say in!")
7. Exterior is finished and this is the view from the house essentially.
8. View from the side opposite of the entrance.
I am currently building an outdoor enclosure attached to this side. When It is finished (which I'll be lucky if it's anytime soon given the fact that I decided to plant WaYYYY too big of a garden) I will take pictures and submit.
I don't have any pictures of the back yet, but it is solid with vents, very similar to the NDSU plans. I'll try and take some and update this when I have a chance to do so. The only thing I'm working on currently is wiring.
I just started a matching brooder building albiet in a MUCH smaller scale. I am building it on skids so I can keep chicks up by the house and then sled them down to the coop when they are ready to go in. I will post pics of it when finished. The garden is killing my time right now, so I barely have time to make my "chicken coop" page let along photograph.
This truly has been a pleasure doing, and I'm sure I'll find many things that I need to change as time goes on. I sure appreciate this website because so much information can be had.
I hadn't raised any chickens since I was a kid (when my dad used to order COPIOUS amounts and broilers, tell us what to do, and leave for work!) so I thought
that I needed to try it again and maybe enjoy it a little more. I am solely doing meat chickens right now, due to time constraints with other obligations, but I plan to add
some nesting boxes later on so that I can add some layers to my repertoire. We have a few acres but our landscape is perched on a hill, so I had to build it down below the house.
Fortunately, this puts it right next to the garden, so that I can compost the manure and add it to our poor soil in our region to increase the nitrogen...gotta love that chicken poop!
My main goal is to be able to house 200-250 fryers during each cycle and do 2-3 cycles a year. Large for a household operation, but miniscule when I get to see what the BIG boys are doing. But, as a nurse, I have limited time to donate to the project, so I have to be realistic, and even 200 can be tough sometimes.
I did a lot of research on various university websites and found a link on NDSU's website for various chicken house plans that were as old as the sun. None of them were "Exactly" what
I wanted but I took the "look" of this design and modified it with a few various items to be discussed later. These plans are for a 20x40 coop, and I did't have that much space so I had to resize my plans for a 16x32 coop, but the overall concept of my coop was VERY similar to this.
I had a lot of things going my way as far as available materials go.
A. I had purchased about a 100 10' treated 6x6 posts for a large landscaping job I did in the past and had about 15 left over...so that was already taken care of.
B. A friend who moved had left a pallet of shingles that he needed used up and gave them to me...as I had done a LOT of work helping him move.
C. Another friend let me tear down an old barn that was falling down on his place so that I could salvage the barn wood. Priceless cuz I simply love the barnwood look.
D. Had buku fasteners left over from doing a large remodel years ago, and they were simply collecting rust, so this was a way to put them to good use.
E. A neighbor had a stack of plywood and 2x6's that were rotting away as he nixed plans to do a remodel and he sold the lumber to me at 1/2 price.
F. I happened to hit a buried 220 line that went from the house to the pump (not located since it is a private line). Although I was mad I hit it, it turns out to be a blessing because I have power to the coop, just needed to add a breaker box, which I found at another friends junkyard.
G. Used Craigslist to find some windows. Happened to find a contractor who was moving and needed to unload some excess inventory (he couldn't return cuz they are oddball sizes) and I got all the windows
for $150 bucks. Quite a steal in my opinion.
One thing that I DID not have in my favor was the WEATHER. It rained like the jungle throughout the entire duration of the project, making it seem like an eternity to finish. But finally it is done and pictures follow.
So..I kinda used my available materials and the plan from NDSU to come up with my "personalized" Chicken coop of the North. I decided to do a pole barn, given the footprint was too large to do a framed floor, and I simply couldn't justify too much concrete for a footing.
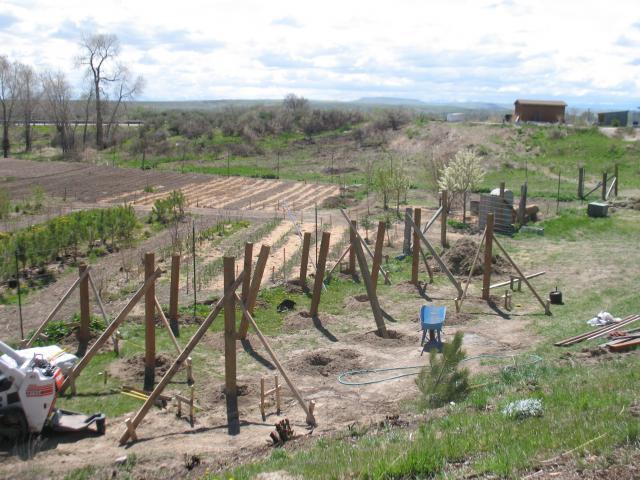
1. Getting it out of the ground. Setting posts by yourself is a major PIA in case you are wondering. Don't do it the hard way like me, buy some beer and invite the neighbors over!
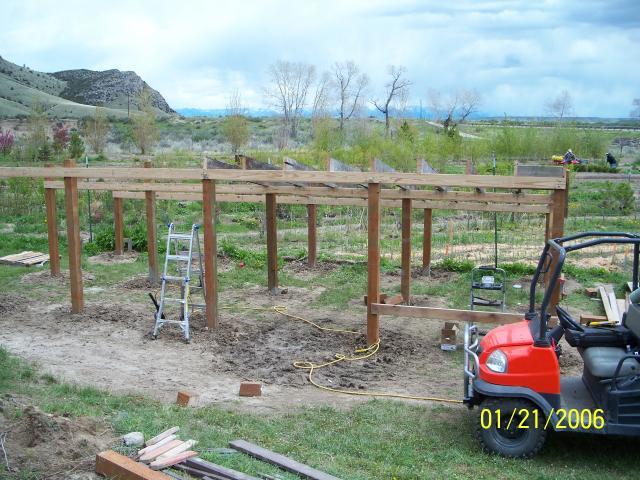
2. Getting the basic structure framed.
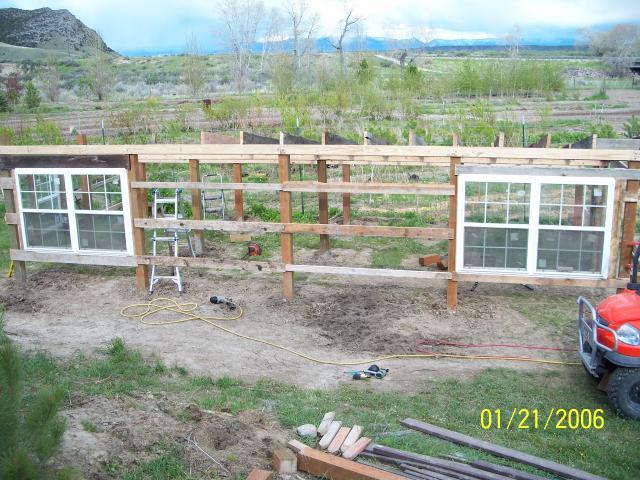
3. Notice my fancy dancy Craigslist Windows!
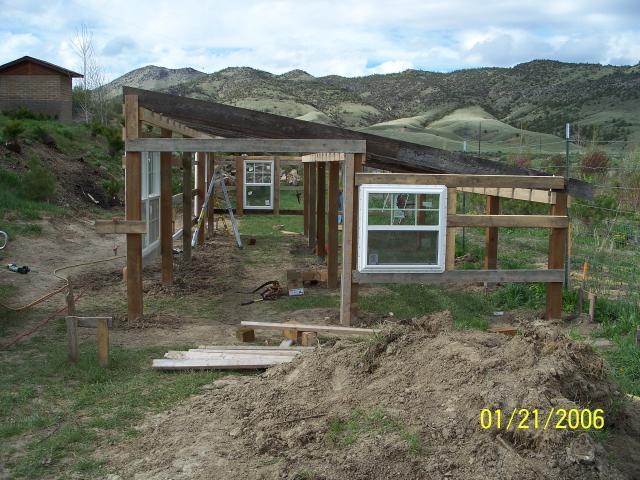
4. View from the side that I will enter the coop from.
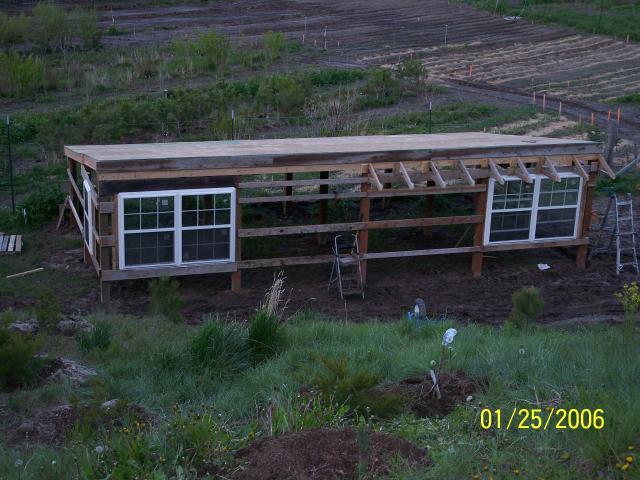
5. I was going to cheese out and not add an overhang above the windows. I decided that I really liked that look and if I didn't do it now it would never happen in the future.
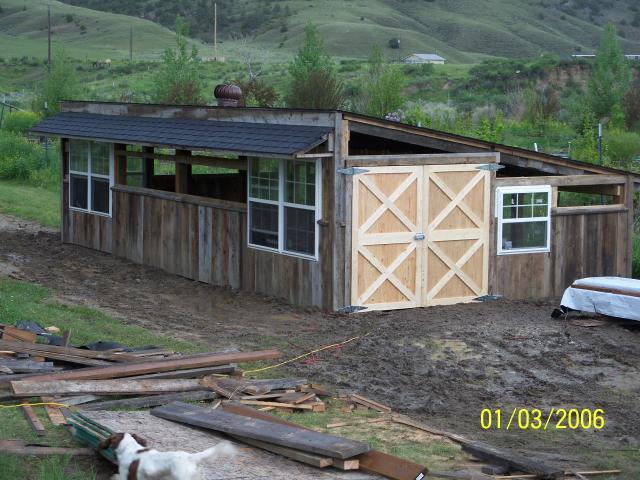
6. Getting a little barnwood siding on the lower half. This worked out pretty well because I didn't have enough barnwood to side the entire structure and I wanted to use a little bit of cedar to match our house. I decided to opt out of using a normal door, because I HATE cleaning chicken coops, and I figured heck, I'll just do a double door and my mini skid steer can fit in there. I can use it to do the majority of the cleaning and only have the fine touchup left over to do by hand. And besides..who doesn't enjoy the look of barn doors. Whether I will color them, stain them, or simply age them is still a matter of debate...which I have little say in!
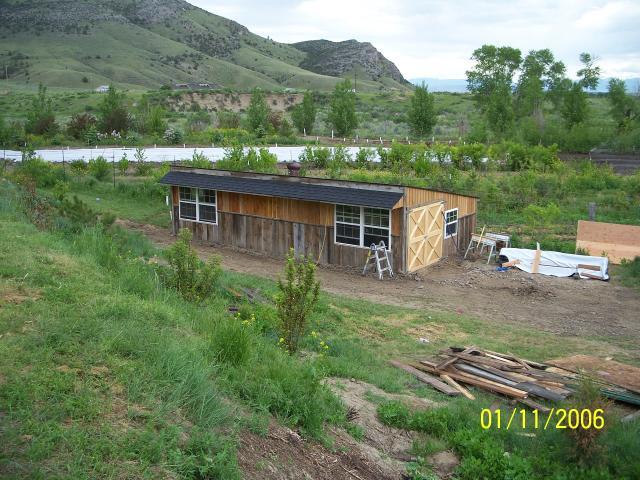
7. Exterior is finished and this is the view from the house essentially.
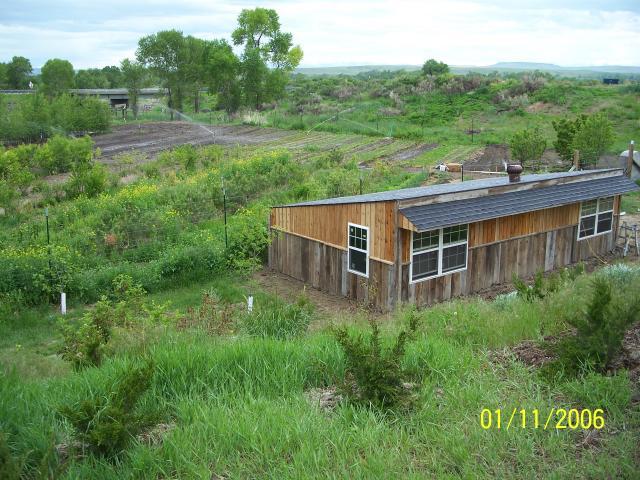
8. View from the side opposite of the entrance.
I am currently building an outdoor enclosure attached to this side. When It is finished (which I'll be lucky if it's anytime soon given the fact that I decided to plant WaYYYY too big of a garden) I will take pictures and submit.
I don't have any pictures of the back yet, but it is solid with vents, very similar to the NDSU plans. I'll try and take some and update this when I have a chance to do so. The only thing I'm working on currently is wiring.
I just started a matching brooder building albiet in a MUCH smaller scale. I am building it on skids so I can keep chicks up by the house and then sled them down to the coop when they are ready to go in. I will post pics of it when finished. The garden is killing my time right now, so I barely have time to make my "chicken coop" page let along photograph.
This truly has been a pleasure doing, and I'm sure I'll find many things that I need to change as time goes on. I sure appreciate this website because so much information can be had.