My Homemade Feeder
Background:
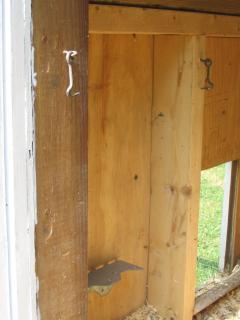
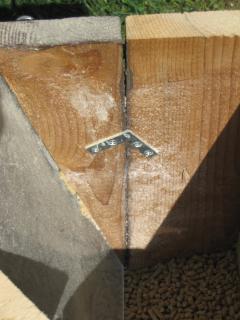
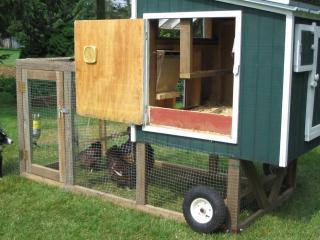
After my husband and his friend built our beautiful tractor-style coop and run, my hubby must have run out of steam because he just kept forgetting about building a feeder. I was getting tired of using my regular birdfeeder as a chicken feeder, so I finally took matters into my own hands. I wanted to have the feeder inside the coop and wanted to use the recessed space between the wall beams to limit the amount of space it would take away from the interior. (See the space to be filled in the picture on the right) I also wanted it to be removable for easy filling, to be able to see when it needed to be refilled like my regular bird feeders, and wanted it to hold as much feed as space allowed. The wall beams were about 14 1/2" apart and I wanted the top to be near the top of the wall with the bottom being at the right height for feeding. This ended up meaning that the feeder could be no taller or wider than 14". I looked around and saw some good ideas, but nothing quite was right so the following is what I came up with.
Supplies:
Scrap wood (form over function, after all nobody really sees it but the chickens)
1/8" plexiglass
2 hook&eye units
1 shelf bracket
2 corner braces
about 25 screws
wood glue
saw, screwdriver, drill
Cut the pieces:
The top and back are made from scrap pieces of ¼ " plywood.
The top measures 11 ½ " x 4 ½".
The back measures 11 ½" x 13 ¾"
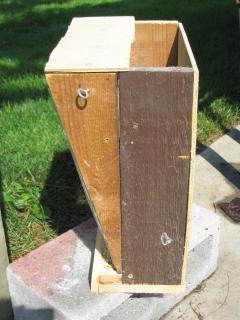
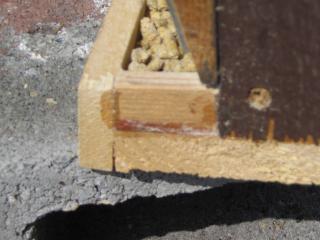
The two pieces of each side are held together by a corner brace (again something that was just lying around in the garage). Connect so that the corner brace will be on the interior of the feeder when finished, as in the photos.
Rectangular sidepieces measure 12 ¾" x 4".
Triangular sidepieces measure 12" x 4" and were then cut in half from corner to corner diagonally. Don't worry about the angle, it is irrelevant. See the photos if my written description isn't clear.
The bottom consists of scrap wood also. It is a 5 ½ x 11 ½" piece of ¾" thick wood.
The rails on the feeder trough are made from scrap ½" thick trim wood.
The front rail measures 1 ½ x 11 ½".
The two side rail pieces measure 1 ½ x ¾".
I first assembled the each side by attaching the triangular piece to the rectangular piece using the corner braces. I use pellets so wasn't worried about small gaps, but you could also put wood glue in to seal the crack between the pieces.
The front rail was then screwed into place. I glued the two side rails in place since they were too small to bother screwing. Be generous with the glue. See photo on right.
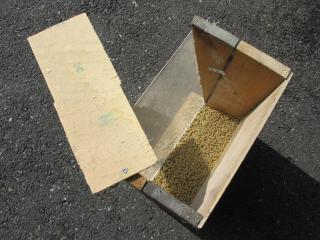
The Plexiglas front:
The front piece is made from 1/8" plexiglass and measures 11 ½ x 12".
So far, everything I had used was stuff already lying around our garage.
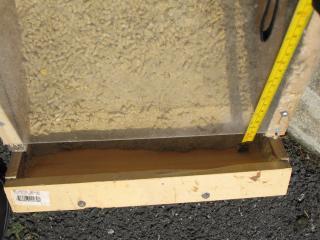
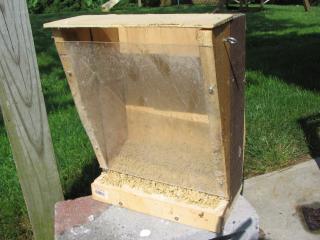
Unfortunately, I did not have any Plexiglas so I made a trip to Lowe's. Be sure to ask if they have any remnant pieces so you don't have to pay for a bigger sheet and get the thinnest remnant piece they have. I had them cut the size I wanted so I didn't have to fool with doing it myself. ( I think the price was around $8). You do not want to screw right into the Plexiglas - predrill the screw holes first to avoid splitting it. Position the Plexiglas piece so that it is a little above the rails. This will vary depending on what feed you use, but mine was placed about ½" above the rails or 1 ¾" above the bottom of the feeder as in the photo on right. Be careful putting the screws in - too tight will cause the Plexiglas to crack like mine did. Fortunately, it didn't crack the whole way through and I didn't have to buy a second piece. You could probably make this section out of plywood, too, but then you wouldn't be able to see when the feed is getting low.
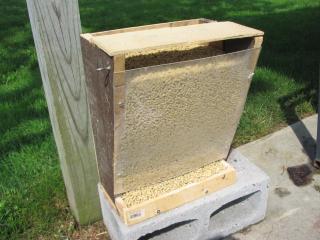
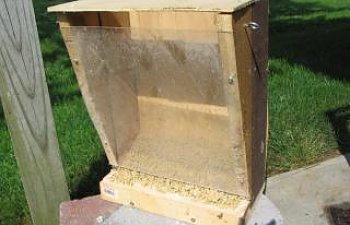
Filled the feeder and it was ready to use.
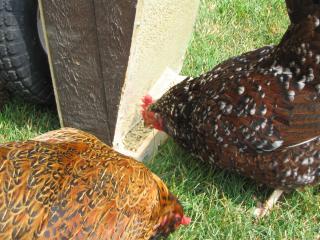
I haven't actually weighed how much feed fits in, but believe it to be about 10-12 lbs. Anyway, it holds enough for our 4 hens for at least a week.
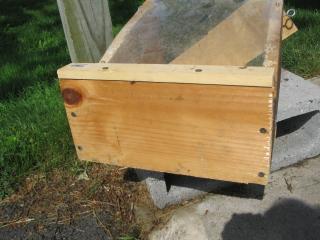
I went with form over function. It may not be beautiful, but my hens don't seem to mind. Final installation in the photo on right.
I almost forgot! The shelf bracket I used worked, but the feeder still wobbled and I was afraid that some overeager eater would tip it onto herself. I used two hook & eye sets, one on each side, to secure the feeder to the wall. See the closeup below and the photo on the right near the top of the page.

I hope this helps give others an idea of how to better use that wasted space in the wall of the coop!