Our adventure started in March of 2010, when I finally got up the nerve to order 6 chicks from a local hatchery. I had wanted cickens for years, but it always seemed to be too much to take on, but after visiting this forum, I felt I had enough information to take the plunge!
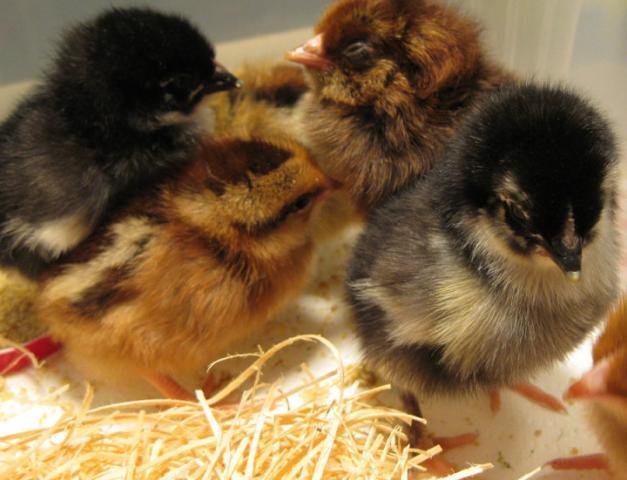
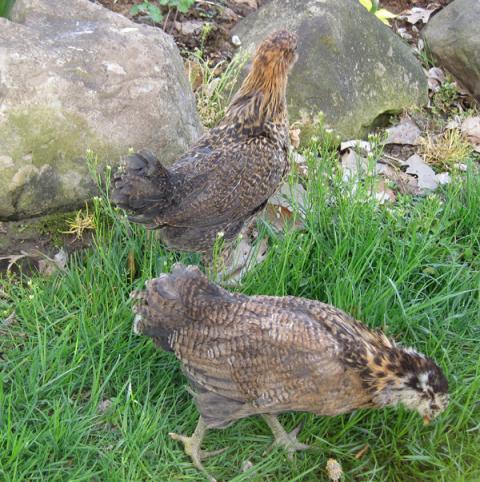
I ordered 2 Welsummers, 2 Easter Eggers and 2 Black Copper Marans, which I later found out I was lucky to get. We set up a brooder, and I drove to Meyer Hatchery (1 hour away) to pick up the chicks- they were so cute!

A couple of weeks later, when they were growing so fast, I got kind of creative and took pictures of them in my light box!
So they grew, and grew and 3 brooders later, we moved them out to the garage into the Rubbermaid trash holder, while my hubbie worked on the chicken coop. Well, he never does anything half way, and came up with a great plan for the coop. He started on it the middle of April, and the chickens went in the first part of June, after he had enclosed the run area. The shingles went on the end of July, and there are just a few more touches and some landscaping to get it finished, but the chickens really love it!
We back up against a huge national park, and have lots of predators, so we did our best to make it as secure as possible, thanks to the tips here, we tried to incorporate everything into this one structure!
We (and I use that term loosely) built a raise platform, it is built on a slight hill. The dimensions are 6 x 8. $ x 4 posts, with 2 x 6 joists, and then 2/4 plywood flooring. We did not use treated, because of some concerns I had read, but maybe we should have. Time will tell.....
After covering the platform with glued down linoleum, the walls went up.
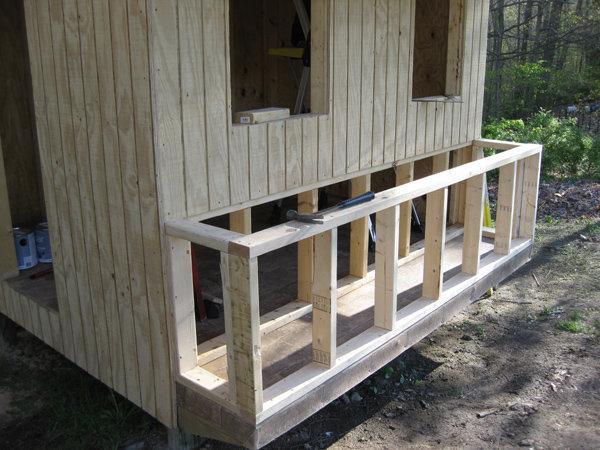
There are 3 windows- two in the front and one in the back, ventilation on both ends will be added in later. The open lower front area will be the nesting boxes- he built two lids so they wouldn't be so heavy.
All the framing is finished, the main door is on the left side of the building. The chicken door will be on the right.
The roof trusses are in place, and there are extra-long overhangs to keep everything as dry as possible. The front overhang is approx. 12" past the front of the nesting boxes., Hopefully this will keep the snow off the nestbox lids in the winter.
Siding is on- we used T-11 siding.
Roof sheathing is on- we used 1/2", trying to keep this project somewhat in budget ( or at least down to twice what we had initially estimated)! The framing for the nest boxes is finished,
Some painting done, and ready to finish off the nesting boxes! The windows are storm windows we found at Lowe's, they were framed in and then covered with 1/2" hardware cloth.
The nesting boxes are enclosed, we had to put off the partitions until later, and concentrate on enclosing the run area- it is "L" shaped, and is about 12 x 12 feet.
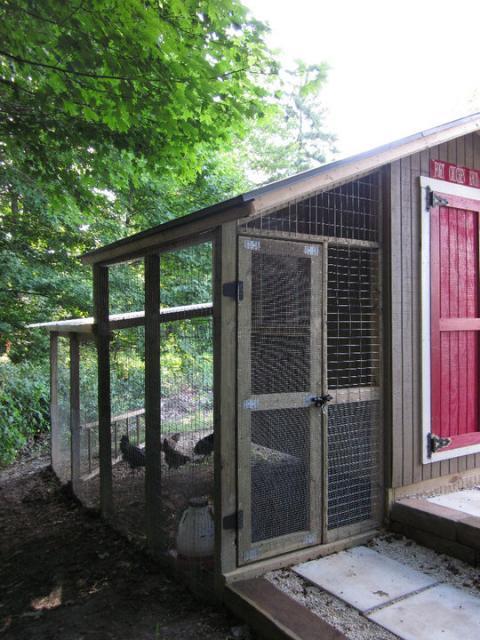
We put plastic roofing on the run, I wanted to go with metal, but this is what was readily available- it installed pretty easily, and seems to keep most of the water out of the run. We are having some problems because it is on a hill, the water runs through the run, we will address drainage issues this fall.The wire fencing is the 2 x 4, and there is a 2"' apron of the same running all around the perimeter of the run. We have carabiners on every latch, and hardware cloth over the windows.
The run wraps around the back of the coop, and the door is on the same side as themain door into the coop- making use of the roof overhang, this is the driest area in the run. We did some landscaping, as the area was so muddy from all the rain we have had in Ohio, it was a mess!
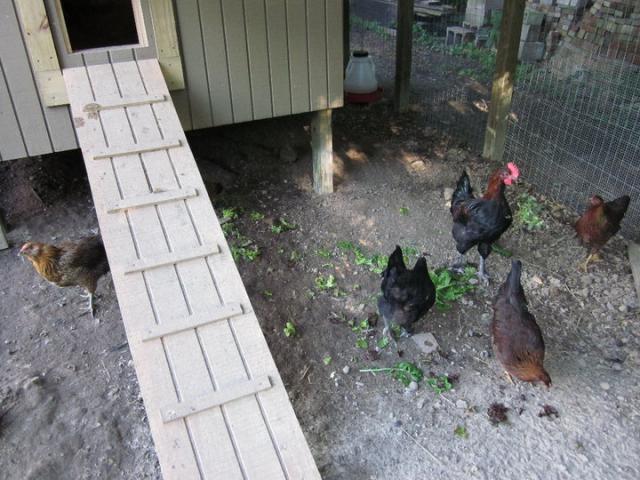
The chickens exploring their new area- it did have grass in it for one day, we added 5 bags of sand, and it really ehlped with the mud.
As you can see, my hubbie takes chicken security very seriously! We put them in the coop, and went on vacation for 2 weeks, with the neighbor boy (who has had chickens his whole life) looking after them- got back and they were much, much larger and all in good shape! When we got back, we started free ranging them, and it took one outing for them to figure out to go back into the coop when it got dark (about 8:15 here in Ohio). Now, they have settled into a routine, and even the neighbors say they love them! Shoot me an email if you want any info/details on the coop contruction, or anything else!
Building:
2 4x4x12, 8 bags of Quickcrete
2 sheets 3/4" plywood (untreated, I would do treated if I could do-over)
50 (give or take) 2 x 4 x 12's
8 sheets T-11 siding (tongue and groove)
5 sheets 1/2" plywood (for roof, we used leftover for the nestboxes and the poop board)
4 bundles of shingles )(discounted from Lowe's- $5.00 a bundle)
3 storm windows
6-8 1 x 4 x 12 for the trim- door, pop door and windows
4 heavy duty hinges, and 2 latches- nest boxes
2 heavy duty hinges and 1 latch for door
Enclosure:
9 4 x 4 x 12
18 bags of Quickcrete (I got the wrong kind, but we used it anyways since it was unloaded already)
2 48" x 50' rolla of wleded 2 x 4" wire fencing (2 times around the enclosure and then 24" as an apron)
1 36" x 75' roll of 1/2" hardware cloth (for around the bottom of the enclosure and the windows- we do have some left over)
Heavy staples
3 pieces of plastic roofing- 3 x 12 sections
We are bargain hunters by nature- but most of the materials were new for this project- ask at your Lowe's if they discount bundles of shingles that are open, we bought a cheap remnant of linoleum, and the windows were clearanced at $15.00 each.
I ordered 2 Welsummers, 2 Easter Eggers and 2 Black Copper Marans, which I later found out I was lucky to get. We set up a brooder, and I drove to Meyer Hatchery (1 hour away) to pick up the chicks- they were so cute!


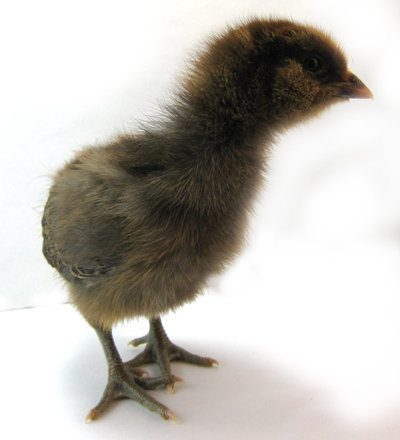
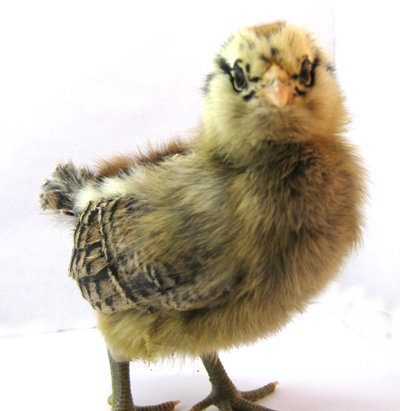
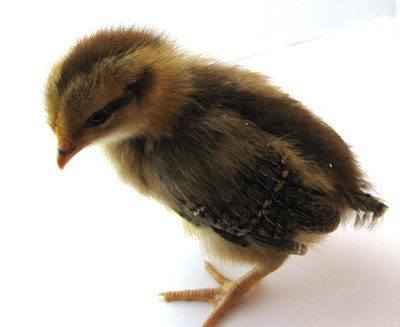
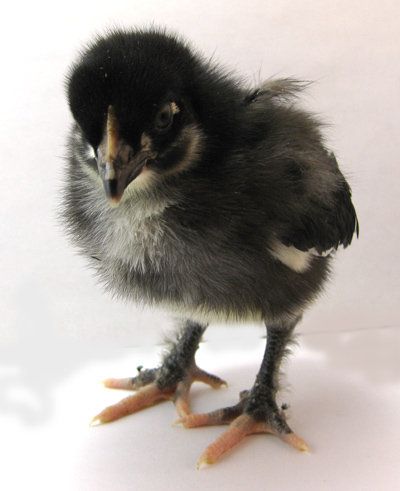
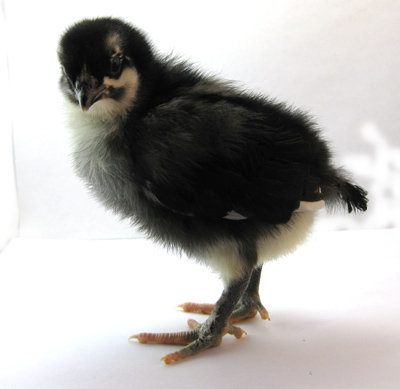
A couple of weeks later, when they were growing so fast, I got kind of creative and took pictures of them in my light box!

So they grew, and grew and 3 brooders later, we moved them out to the garage into the Rubbermaid trash holder, while my hubbie worked on the chicken coop. Well, he never does anything half way, and came up with a great plan for the coop. He started on it the middle of April, and the chickens went in the first part of June, after he had enclosed the run area. The shingles went on the end of July, and there are just a few more touches and some landscaping to get it finished, but the chickens really love it!
We back up against a huge national park, and have lots of predators, so we did our best to make it as secure as possible, thanks to the tips here, we tried to incorporate everything into this one structure!
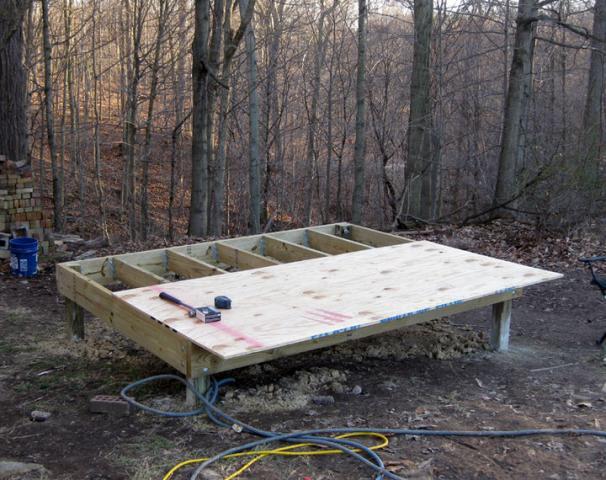
We (and I use that term loosely) built a raise platform, it is built on a slight hill. The dimensions are 6 x 8. $ x 4 posts, with 2 x 6 joists, and then 2/4 plywood flooring. We did not use treated, because of some concerns I had read, but maybe we should have. Time will tell.....
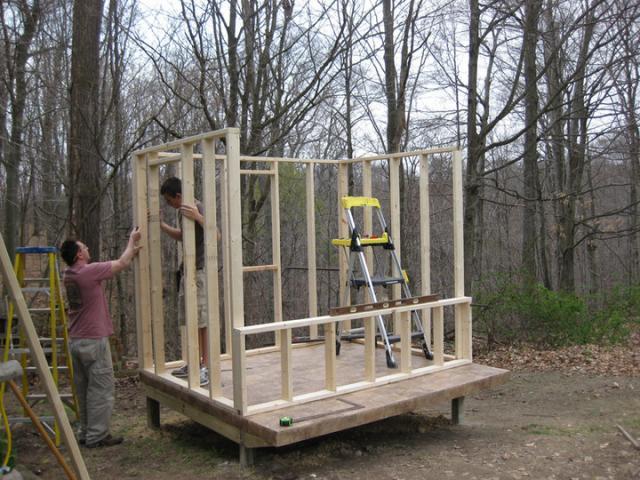
After covering the platform with glued down linoleum, the walls went up.
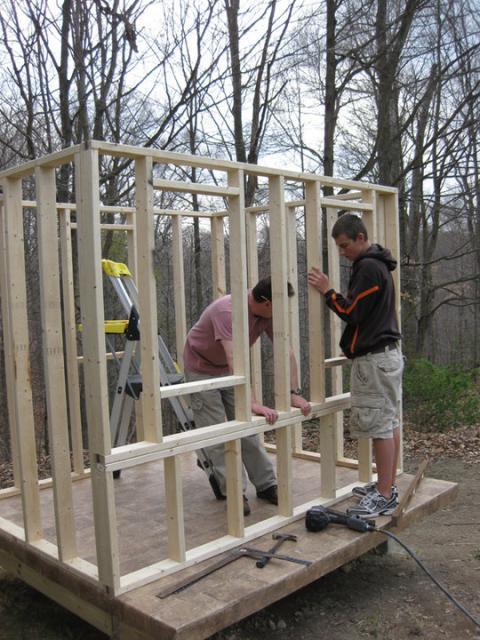
There are 3 windows- two in the front and one in the back, ventilation on both ends will be added in later. The open lower front area will be the nesting boxes- he built two lids so they wouldn't be so heavy.

All the framing is finished, the main door is on the left side of the building. The chicken door will be on the right.
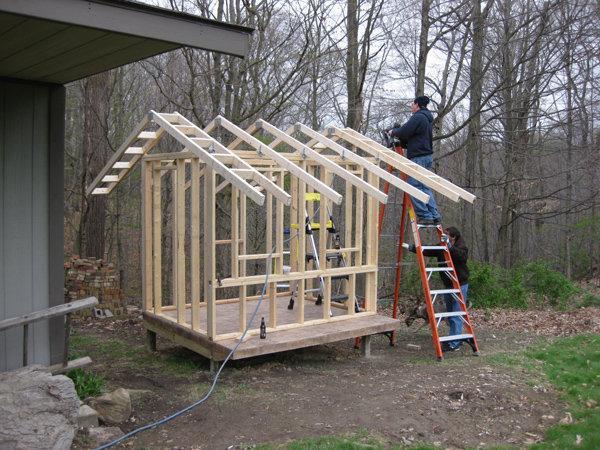
The roof trusses are in place, and there are extra-long overhangs to keep everything as dry as possible. The front overhang is approx. 12" past the front of the nesting boxes., Hopefully this will keep the snow off the nestbox lids in the winter.
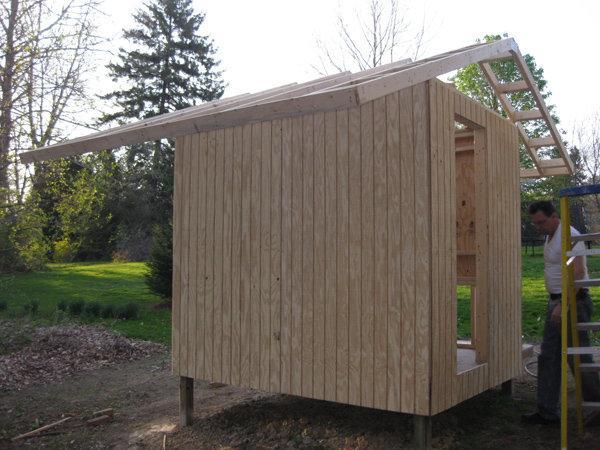
Siding is on- we used T-11 siding.
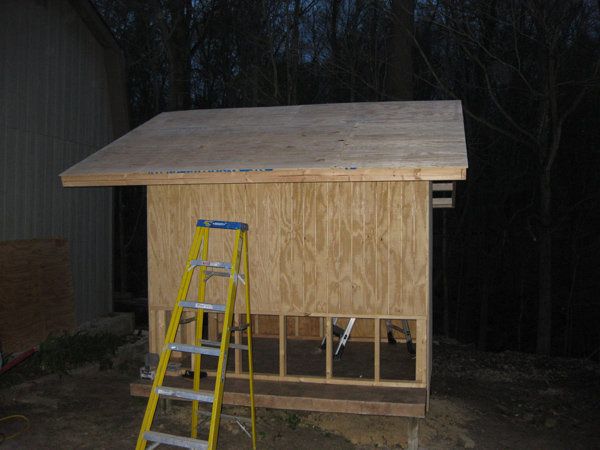
Roof sheathing is on- we used 1/2", trying to keep this project somewhat in budget ( or at least down to twice what we had initially estimated)! The framing for the nest boxes is finished,
Some painting done, and ready to finish off the nesting boxes! The windows are storm windows we found at Lowe's, they were framed in and then covered with 1/2" hardware cloth.
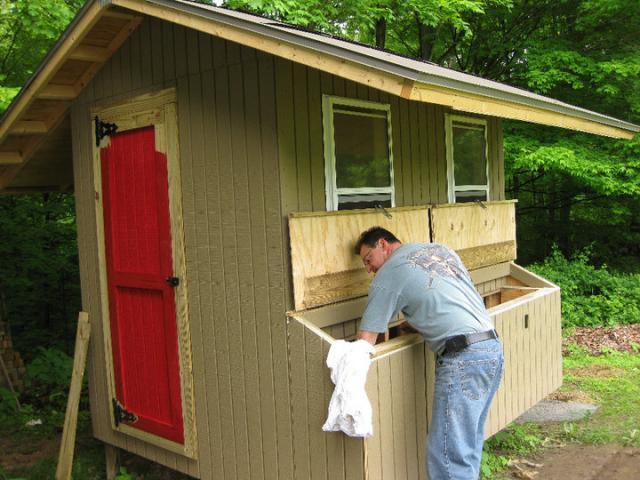
The nesting boxes are enclosed, we had to put off the partitions until later, and concentrate on enclosing the run area- it is "L" shaped, and is about 12 x 12 feet.
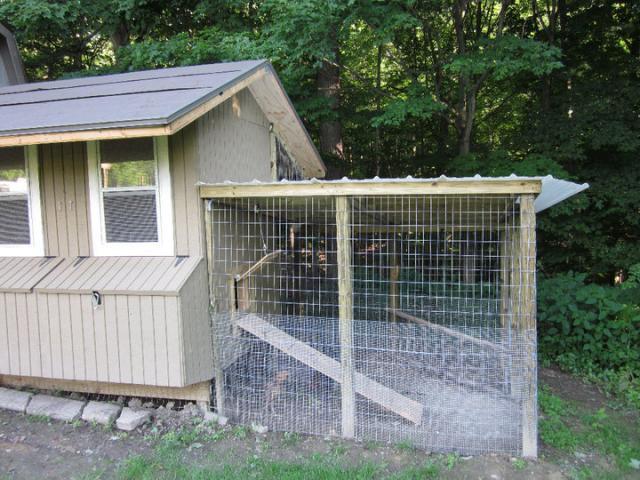
We put plastic roofing on the run, I wanted to go with metal, but this is what was readily available- it installed pretty easily, and seems to keep most of the water out of the run. We are having some problems because it is on a hill, the water runs through the run, we will address drainage issues this fall.The wire fencing is the 2 x 4, and there is a 2"' apron of the same running all around the perimeter of the run. We have carabiners on every latch, and hardware cloth over the windows.
The run wraps around the back of the coop, and the door is on the same side as themain door into the coop- making use of the roof overhang, this is the driest area in the run. We did some landscaping, as the area was so muddy from all the rain we have had in Ohio, it was a mess!
The chickens exploring their new area- it did have grass in it for one day, we added 5 bags of sand, and it really ehlped with the mud.

As you can see, my hubbie takes chicken security very seriously! We put them in the coop, and went on vacation for 2 weeks, with the neighbor boy (who has had chickens his whole life) looking after them- got back and they were much, much larger and all in good shape! When we got back, we started free ranging them, and it took one outing for them to figure out to go back into the coop when it got dark (about 8:15 here in Ohio). Now, they have settled into a routine, and even the neighbors say they love them! Shoot me an email if you want any info/details on the coop contruction, or anything else!
Building:
2 4x4x12, 8 bags of Quickcrete
2 sheets 3/4" plywood (untreated, I would do treated if I could do-over)
50 (give or take) 2 x 4 x 12's
8 sheets T-11 siding (tongue and groove)
5 sheets 1/2" plywood (for roof, we used leftover for the nestboxes and the poop board)
4 bundles of shingles )(discounted from Lowe's- $5.00 a bundle)
3 storm windows
6-8 1 x 4 x 12 for the trim- door, pop door and windows
4 heavy duty hinges, and 2 latches- nest boxes
2 heavy duty hinges and 1 latch for door
Enclosure:
9 4 x 4 x 12
18 bags of Quickcrete (I got the wrong kind, but we used it anyways since it was unloaded already)
2 48" x 50' rolla of wleded 2 x 4" wire fencing (2 times around the enclosure and then 24" as an apron)
1 36" x 75' roll of 1/2" hardware cloth (for around the bottom of the enclosure and the windows- we do have some left over)
Heavy staples
3 pieces of plastic roofing- 3 x 12 sections
We are bargain hunters by nature- but most of the materials were new for this project- ask at your Lowe's if they discount bundles of shingles that are open, we bought a cheap remnant of linoleum, and the windows were clearanced at $15.00 each.
