Tentatively Chez Ethel and Esther (maybe the names will not suit them...)
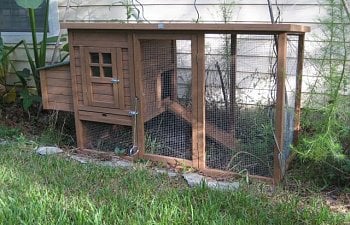
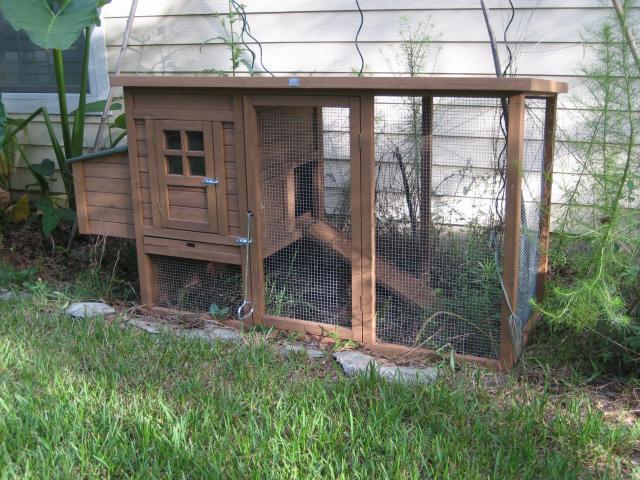
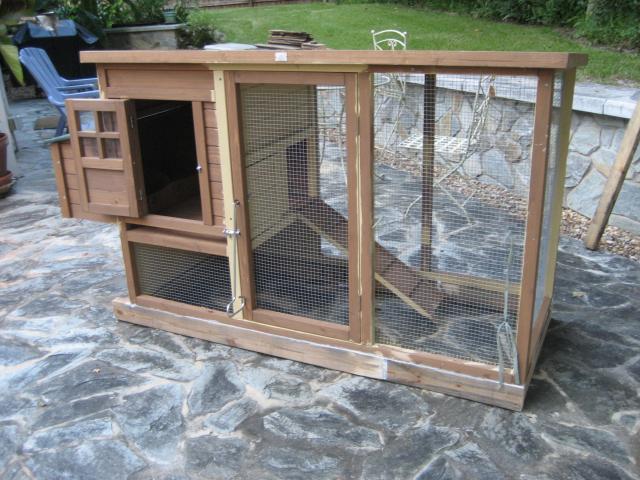
Purchased Comfy Pet model CP 047 from Ebay. Covered area inside is ~12 1/2 sq ft. My chicken book recommends 4 sq ft per chicken if outside access provided so we are within that limit but boy does it look small!!

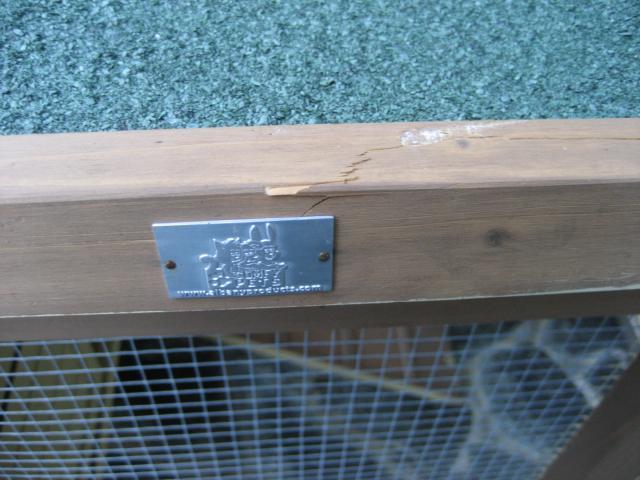
Took a little over 1 hour to assemble. The seller on Ebay noted that there were no returns allowed for minor cosmetic dings or scratches in the wood, so I decided to overlook them. Even though they did make me unhappy.
Example
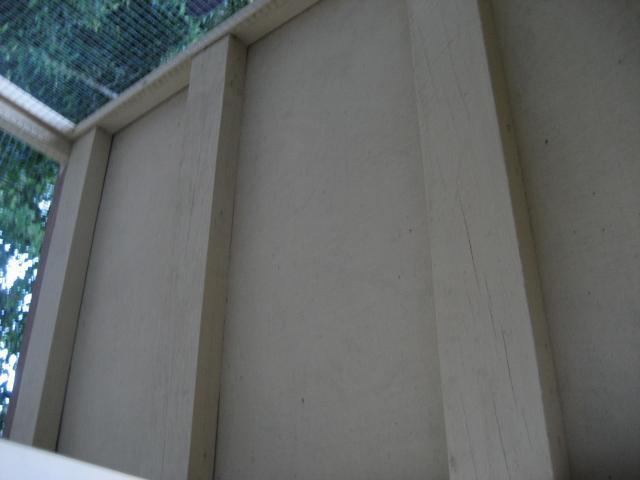
About 2 weeks after the coop was assembled, I noticed the ceiling had cracked and buckled in one place and would not be forced back up. This also made me unhappy. At the advice of many smart BYC folk, we shored up the inside with some repurposed 1"x3"s from some scavenged pallets. Then I started painting with some leftover trim paint from our house.
Next, we, as in I, used another pallet to make a sled to which we will attach the wheels to make a tractor! Unfortunately, this pallet was 1"x3 1/2" and I did not measure nor notice before I attached. So I had to do a little finagling to make pieces for the ends. A super friendly associate at Lowe's helped me choose the screws after I explained I was attaching pine to very soft wood. I did not know there was such a thing as SELF DRILLING SCREWS!! The associate asked me how I could get eggs without a rooster, and when I told him I was going to ask if he was a city boy, but thought better of it, I made a new friend. I also told him he CAN have chickens in town, so I'm spreading the word.
Here's the coop after the sled was screwed on. I also glued it so we flipped it over afterwards to help everything stick. Plus I put caulk in all the cracks around the bottom too. Probably pointless, but it will look nicer when I paint it and that will me make happy.
Tonight, the wheels! ZOOM ZOOM!!
It has been raining A TON, so it's been very hard to get in time to paint but we're almost done!!
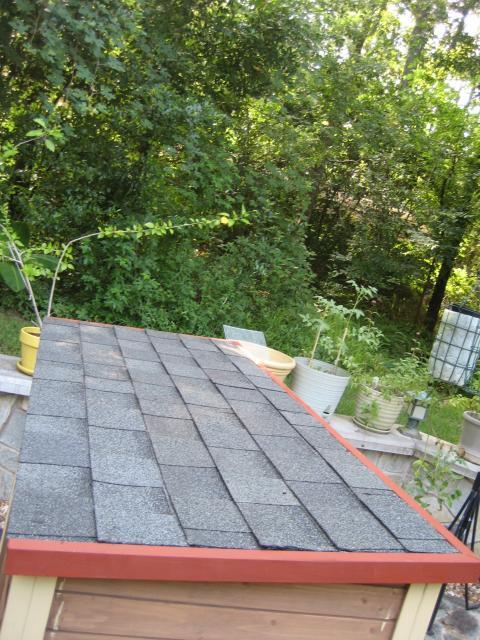
First, I added roofing shingles that were leftover in the garage. They are extremely heavy. Of course, the first one I tried to nail down, I got a crack in the ceiling of the coop where I had not reinforced. So I had to put another 1" x 3" up there too.
Completed roof
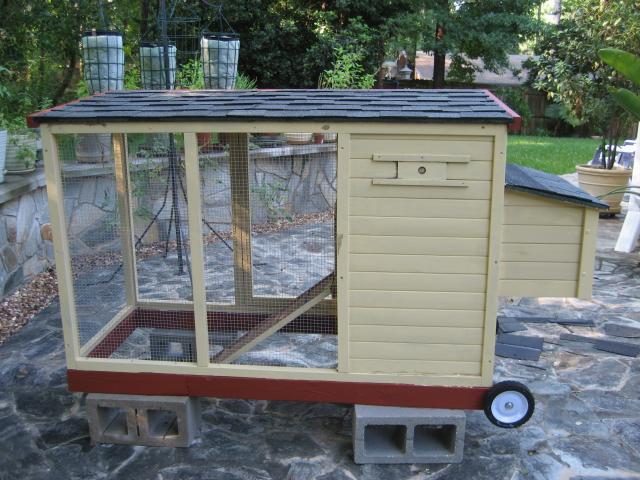
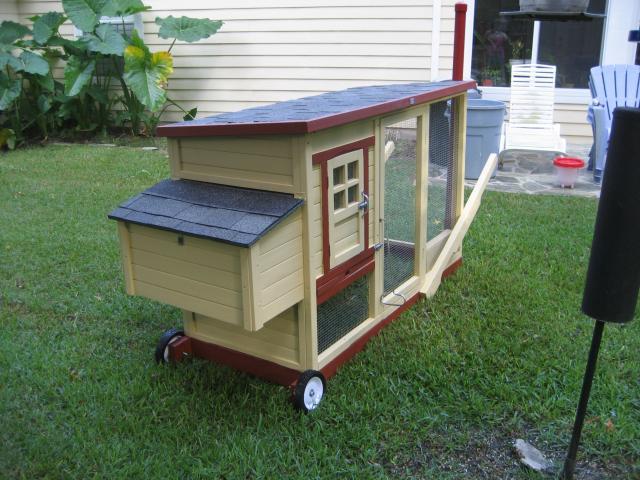
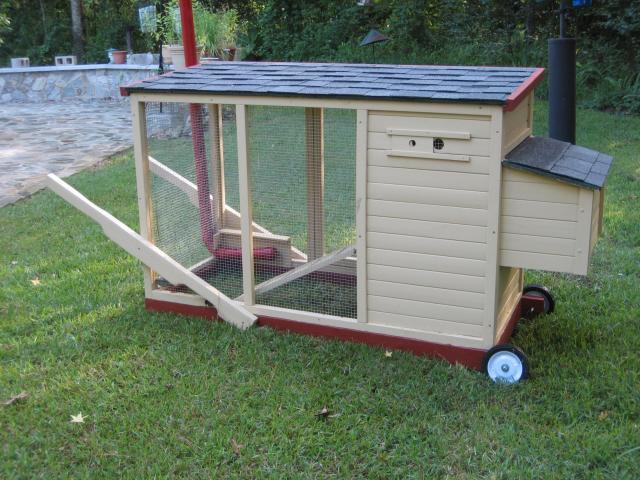
Here is what the coop now looks like with the new roof and mostly painted!!
One of the mistakes that I have made was getting a little crazy with the silicone caulk. I used white bathroom caulk (leftovers!) around the bottom between the base of the coop and the sled. When I ran out, I started filling in holes and gaps with the silicone caulk (also leftover). Note to self - you can't paint over it
It ran over the edges on the roof, and the paint is a little bubbly there. You can also see the bare spots where I plugged holes and rubbed over deeper cracks with it. I believe I can scrape some of it off eventually and paint over but should have painted first. Too late now!
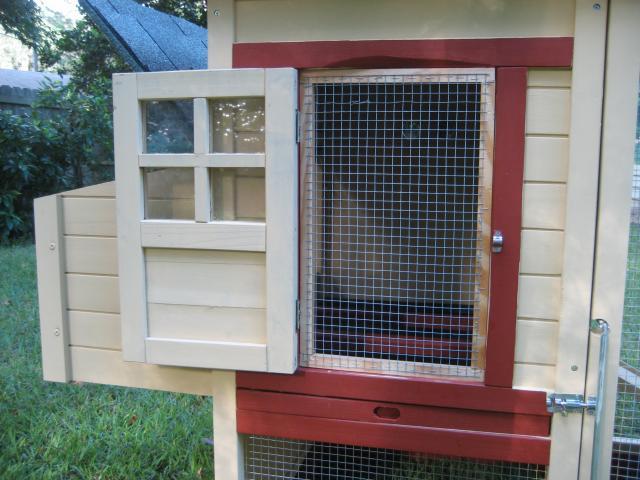
There is still some painting to do on the inside. I'm also going to put a screen door pull on the coop door, which is sticking now. I'm not sure if it's warping due to the rain, paint, or being open too much but it's hard to open. I'm also going to make a screen door for the inside to increase the ventilation. I will have a hook to hold the door open, and then hooks on the inside to hold the screen in. Have not started that yet! Last, we're going to make some kind of handles for the lighter end - so we can lift it like a wheelbarrow. I hope it's not too heavy - might end up that we have to scrap the whole moving around idea. Long term plan is an additional run off the big door but have yet to formulate the plan for that.
We bought a hanging waterer this weekend along with some PVC pipe to make a feeder. I'm trying to figure out the least intrusive place to put the feeder to utilize as little of the room as possible.
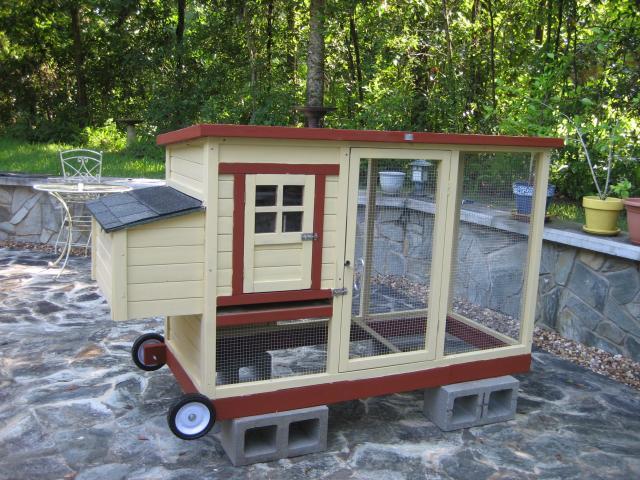
Whooo Whooo....Climb aboard!! After I finished painting and putting on the feeder, I decided it kinda looks like a little train. And the colors are kinda close to Hogwarts' Gryffindor! So the girls will now have Gryffindor names!
Last night was very hot. I closed the girls in at dusk. When I went to peak at them about 1 hour later, they were both panting!!
I opened the door to the house, so they got more of a breeze. The ventilation is not very good - only 2 little holes, still I thought it had cooled down enough. Hubby thought they would just go outside if they were hot...but I didn't think so. Went back again around 10pm and just one was panting, but decided to put the screen door on and open the main door. It's NOT secure!! Lay awake all night long hoping nothing tried to rattle the door. Awakened around 135am by a ROOSTER CROWING!! Ran out to investigate - nothing. Heard it again 10 minutes later, and realized it must have been a noise from the computer that came from a new web site I visited to keep track of WOOT-OFFS. The site crows every time a new item appears. Something not right, and figured it downloaded a crummy piece of software to make my computer crow in the middle of the night but unable to locate a file. NOW it's kind of funny but on the first night of chicken-dom, it was scary!
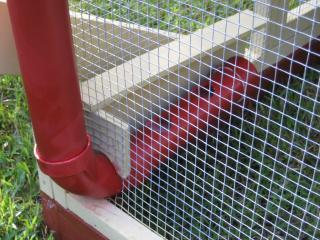
The feed tube!! When I first installed it, it was titled downward but I had to remove it to install my little rainguard. Now, it appears to be going uphill. I need to figure out how to make gravity do its job again. Since it's going a little uphill now, when I see the crumble looking low, I jiggle the pipe back and forth. It makes a thunking sound on the wood, and the girls immediately run over and start eating! It's so cute
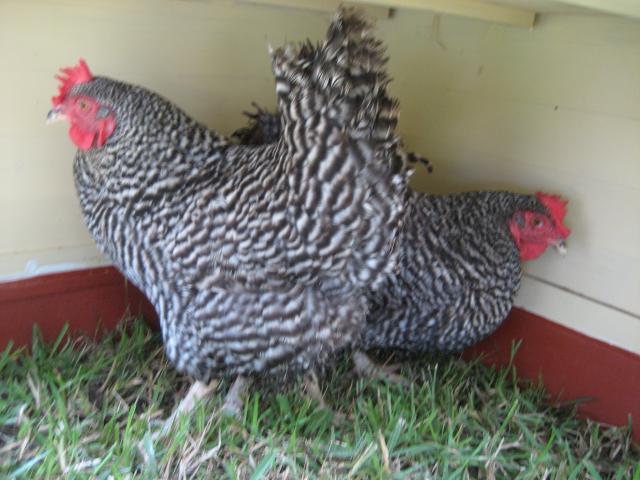
Ta-da!! Meet Hermione and Ginny Weasley! We choose the Hermione chicken by watching to see who the bossy one was! Hermione's comb is smaller and stands up straight. Ginny's comb flops over to the left.
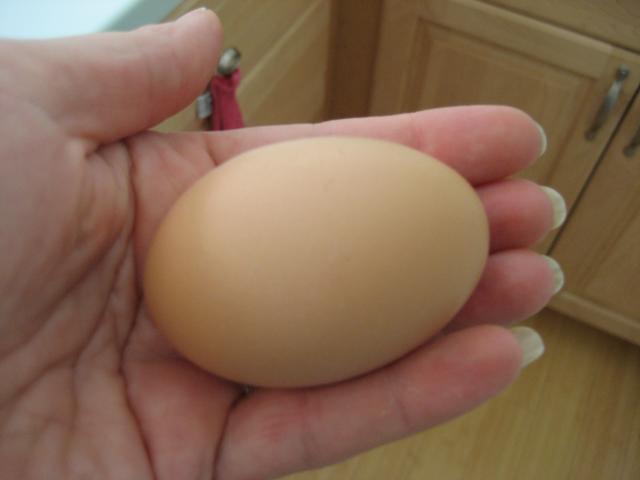
This morning, Hermione was very vocal in her displeasure at being kept pent up in this little house, so we opened up the main door and penned them in with our doggie fence. Hermione continued to fuss for a considerable amount of time and went in and out of the house numerous times before she became very quiet! She was in the nest box for about 20 minutes before we got our first egg. It's beautiful!!
Today's project is to put hinges on top of the screen door. It's currently held on with 4 screen-door type latches and can be shaken off with a few persistent wiggles. I'm going to hinge the top and secure the bottom with the latches. During cooler months, I will push the screen inside, and latch it to the top of the inside of the coop. The mini-door I will latch open permanently during hot months. Hopefully it won't warp and drop down and no longer close. It was a monster to get it back into the frame after I painted. You get what you pay for!
Purchased Comfy Pet model CP 047 from Ebay. Covered area inside is ~12 1/2 sq ft. My chicken book recommends 4 sq ft per chicken if outside access provided so we are within that limit but boy does it look small!!
Took a little over 1 hour to assemble. The seller on Ebay noted that there were no returns allowed for minor cosmetic dings or scratches in the wood, so I decided to overlook them. Even though they did make me unhappy.
Example
About 2 weeks after the coop was assembled, I noticed the ceiling had cracked and buckled in one place and would not be forced back up. This also made me unhappy. At the advice of many smart BYC folk, we shored up the inside with some repurposed 1"x3"s from some scavenged pallets. Then I started painting with some leftover trim paint from our house.
Next, we, as in I, used another pallet to make a sled to which we will attach the wheels to make a tractor! Unfortunately, this pallet was 1"x3 1/2" and I did not measure nor notice before I attached. So I had to do a little finagling to make pieces for the ends. A super friendly associate at Lowe's helped me choose the screws after I explained I was attaching pine to very soft wood. I did not know there was such a thing as SELF DRILLING SCREWS!! The associate asked me how I could get eggs without a rooster, and when I told him I was going to ask if he was a city boy, but thought better of it, I made a new friend. I also told him he CAN have chickens in town, so I'm spreading the word.
Here's the coop after the sled was screwed on. I also glued it so we flipped it over afterwards to help everything stick. Plus I put caulk in all the cracks around the bottom too. Probably pointless, but it will look nicer when I paint it and that will me make happy.
Tonight, the wheels! ZOOM ZOOM!!
It has been raining A TON, so it's been very hard to get in time to paint but we're almost done!!
First, I added roofing shingles that were leftover in the garage. They are extremely heavy. Of course, the first one I tried to nail down, I got a crack in the ceiling of the coop where I had not reinforced. So I had to put another 1" x 3" up there too.

Completed roof
Here is what the coop now looks like with the new roof and mostly painted!!
One of the mistakes that I have made was getting a little crazy with the silicone caulk. I used white bathroom caulk (leftovers!) around the bottom between the base of the coop and the sled. When I ran out, I started filling in holes and gaps with the silicone caulk (also leftover). Note to self - you can't paint over it
It ran over the edges on the roof, and the paint is a little bubbly there. You can also see the bare spots where I plugged holes and rubbed over deeper cracks with it. I believe I can scrape some of it off eventually and paint over but should have painted first. Too late now!
There is still some painting to do on the inside. I'm also going to put a screen door pull on the coop door, which is sticking now. I'm not sure if it's warping due to the rain, paint, or being open too much but it's hard to open. I'm also going to make a screen door for the inside to increase the ventilation. I will have a hook to hold the door open, and then hooks on the inside to hold the screen in. Have not started that yet! Last, we're going to make some kind of handles for the lighter end - so we can lift it like a wheelbarrow. I hope it's not too heavy
- might end up that we have to scrap the whole moving around idea. Long term plan is an additional run off the big door but have yet to formulate the plan for that.We bought a hanging waterer this weekend along with some PVC pipe to make a feeder. I'm trying to figure out the least intrusive place to put the feeder to utilize as little of the room as possible.
Whooo Whooo....Climb aboard!! After I finished painting and putting on the feeder, I decided it kinda looks like a little train. And the colors are kinda close to Hogwarts' Gryffindor! So the girls will now have Gryffindor names!
Last night was very hot. I closed the girls in at dusk. When I went to peak at them about 1 hour later, they were both panting!!

I opened the door to the house, so they got more of a breeze. The ventilation is not very good - only 2 little holes, still I thought it had cooled down enough. Hubby thought they would just go outside if they were hot...but I didn't think so. Went back again around 10pm and just one was panting, but decided to put the screen door on and open the main door. It's NOT secure!! Lay awake all night long hoping nothing tried to rattle the door. Awakened around 135am by a ROOSTER CROWING!! Ran out to investigate - nothing. Heard it again 10 minutes later, and realized it must have been a noise from the computer that came from a new web site I visited to keep track of WOOT-OFFS.
The site crows every time a new item appears. Something not right, and figured it downloaded a crummy piece of software to make my computer crow in the middle of the night but unable to locate a file. NOW it's kind of funny but on the first night of chicken-dom, it was scary!The feed tube!! When I first installed it, it was titled downward but I had to remove it to install my little rainguard. Now, it appears to be going uphill. I need to figure out how to make gravity do its job again. Since it's going a little uphill now, when I see the crumble looking low, I jiggle the pipe back and forth. It makes a thunking sound on the wood, and the girls immediately run over and start eating! It's so cute
Ta-da!! Meet Hermione and Ginny Weasley! We choose the Hermione chicken by watching to see who the bossy one was! Hermione's comb is smaller and stands up straight. Ginny's comb flops over to the left.
This morning, Hermione was very vocal in her displeasure at being kept pent up in this little house, so we opened up the main door and penned them in with our doggie fence. Hermione continued to fuss for a considerable amount of time and went in and out of the house numerous times before she became very quiet! She was in the nest box for about 20 minutes before we got our first egg. It's beautiful!!
Today's project is to put hinges on top of the screen door. It's currently held on with 4 screen-door type latches and can be shaken off with a few persistent wiggles. I'm going to hinge the top and secure the bottom with the latches. During cooler months, I will push the screen inside, and latch it to the top of the inside of the coop. The mini-door I will latch open permanently during hot months. Hopefully it won't warp and drop down and no longer close. It was a monster to get it back into the frame after I painted. You get what you pay for!