HomeMade Chicken Feeder

When I first built my coop I threw together a heap of junk and made a super ugly but incredibly functional - space saving chicken feeder. You can see it (in all it's hideous glory) here: FrankenFeeder!
The feeder functioned great for a few years, but it got to the point (especially after the addition of a few more chickens and ducks) that I was filling this narrow feeder way too often. I believe the FrankenFeeder held about 1/3 of a bag of feed. I was looking for something that could hold at least a whole bag of feed. Taking some very rough measurements of a bag of feed I ended up at about 2300 cubic inches of feed per bag.
After looking at some great designs in the chicken coop forum I decided to give it a try myself. I drew up some rough plans on a piece of paper and targeted about 2500 cubic inches of capacity.
I gathered up a bunch of scrap wood, my brad / staple gun, and began my build.
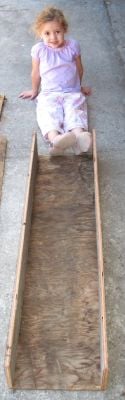
First I cut 4 pieces of ply wood. Two were 12" x 43" and the other two were 6" x 43". I joined the two narrow boards to one of the longer boards seen in the picture below (with my little helper Alana).
It was about at this point that I realized that I could have cut out the "L Shape" of the feeder from larger boards. I like my method better because it involved less cutting and allowed me to fine tune the design of the tray using different pieces of scrap wood.
The next step was to add the bottom and an angled piece of wood at the bottom of the feeder to direct every last morsel of chicken feed to the bottom front of the feeder. I used an old kitchen cabinet door for these. I cut a 45 degree edge on the angled board to help keep feed from getting stuck.
Next I added the front and sides of the feed "tray". Since my table saw was already angled I decided to angle the front lip of the tray. This allowed me to have the front top of the tray angled away from the feeder. I cut the sides to match the new angled tray design.
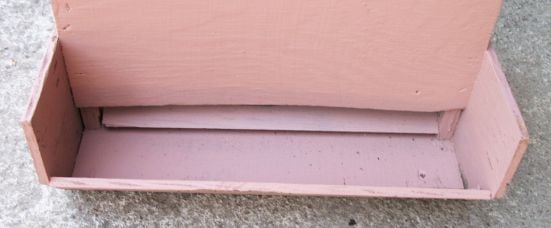
Now that the tray was complete I needed to decide how much space to give the feed. I knew the gap in the bottom couldn't be higher than the front lip of the tray, but I wanted enough space so the feed wouldn't get plugged up. I left a gap of about an inch, lightly tacked the front on and poured some feed in... it was PERFECT! I finished construction with a bunch of staples to the front.
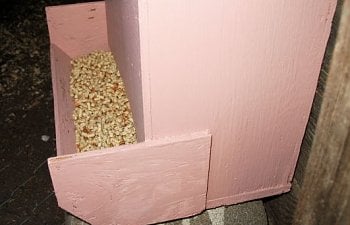
Now, to paint or not to paint? Well, I've got cans and cans of mis - mixed paint from the home center so I grabbed a color and go to painting. Here it is painted and a close up of the gap / space in the front:
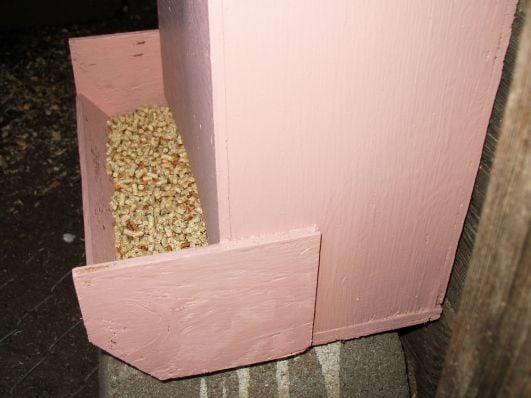
And with feed inside:
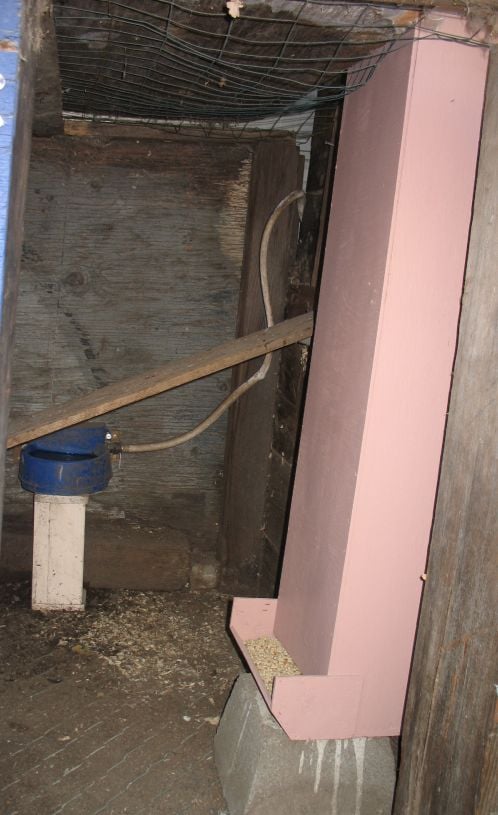
Finally, here it is in the run portion of my coop. You can see that the top of the feeder extends out of the top of the run so I can simply add feed from the top without having to open / go inside the run. (oh... you can see my auto waterer in the back).
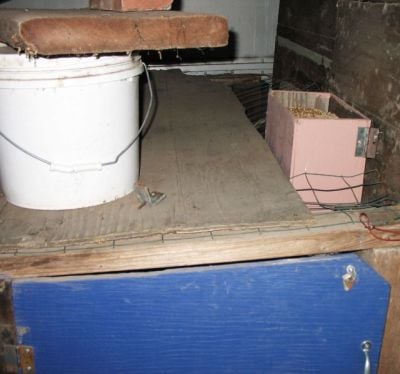
Here is where I refill it (from the top).
Once I get around to building my dream coop (nice design, painted, etc.) I believe this feeder will be a good addition. By my caluclation it holds about 2580 cubic inches of feed.
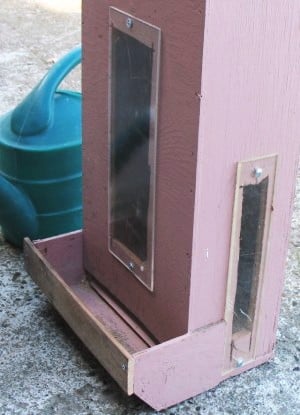
Update: I was getting frustrated not being able to see the exact level of the feed as it got to the bottom so I added some plexi glass windows:
When I first built my coop I threw together a heap of junk and made a super ugly but incredibly functional - space saving chicken feeder. You can see it (in all it's hideous glory) here: FrankenFeeder!
The feeder functioned great for a few years, but it got to the point (especially after the addition of a few more chickens and ducks) that I was filling this narrow feeder way too often. I believe the FrankenFeeder held about 1/3 of a bag of feed. I was looking for something that could hold at least a whole bag of feed. Taking some very rough measurements of a bag of feed I ended up at about 2300 cubic inches of feed per bag.
After looking at some great designs in the chicken coop forum I decided to give it a try myself. I drew up some rough plans on a piece of paper and targeted about 2500 cubic inches of capacity.
I gathered up a bunch of scrap wood, my brad / staple gun, and began my build.
First I cut 4 pieces of ply wood. Two were 12" x 43" and the other two were 6" x 43". I joined the two narrow boards to one of the longer boards seen in the picture below (with my little helper Alana).
The next step was to add the bottom and an angled piece of wood at the bottom of the feeder to direct every last morsel of chicken feed to the bottom front of the feeder. I used an old kitchen cabinet door for these. I cut a 45 degree edge on the angled board to help keep feed from getting stuck.
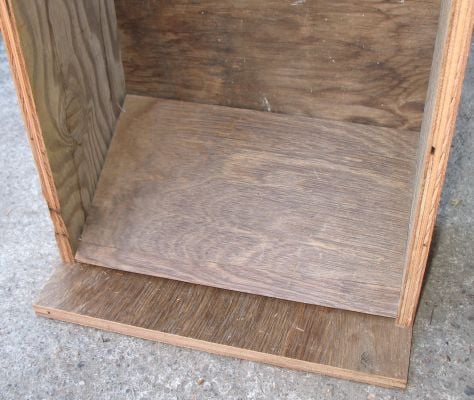
Next I added the front and sides of the feed "tray". Since my table saw was already angled I decided to angle the front lip of the tray. This allowed me to have the front top of the tray angled away from the feeder. I cut the sides to match the new angled tray design.

Now that the tray was complete I needed to decide how much space to give the feed. I knew the gap in the bottom couldn't be higher than the front lip of the tray, but I wanted enough space so the feed wouldn't get plugged up. I left a gap of about an inch, lightly tacked the front on and poured some feed in... it was PERFECT! I finished construction with a bunch of staples to the front.
Now, to paint or not to paint? Well, I've got cans and cans of mis - mixed paint from the home center so I grabbed a color and go to painting. Here it is painted and a close up of the gap / space in the front:
And with feed inside:
Finally, here it is in the run portion of my coop. You can see that the top of the feeder extends out of the top of the run so I can simply add feed from the top without having to open / go inside the run. (oh... you can see my auto waterer in the back).
Here is where I refill it (from the top).
Once I get around to building my dream coop (nice design, painted, etc.) I believe this feeder will be a good addition. By my caluclation it holds about 2580 cubic inches of feed.
Update: I was getting frustrated not being able to see the exact level of the feed as it got to the bottom so I added some plexi glass windows: