Here is the page dedicated to our building of the Blue Cube Chicken Coop. We haven't thought of a final name yet, so we're just giving it a literal one for now.
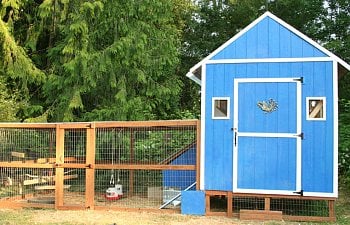
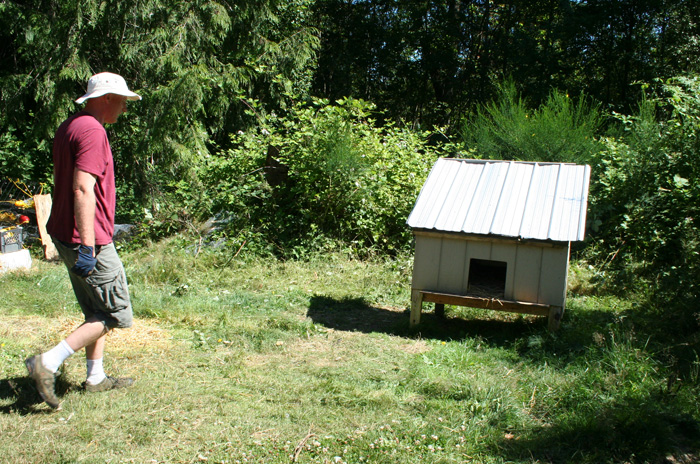
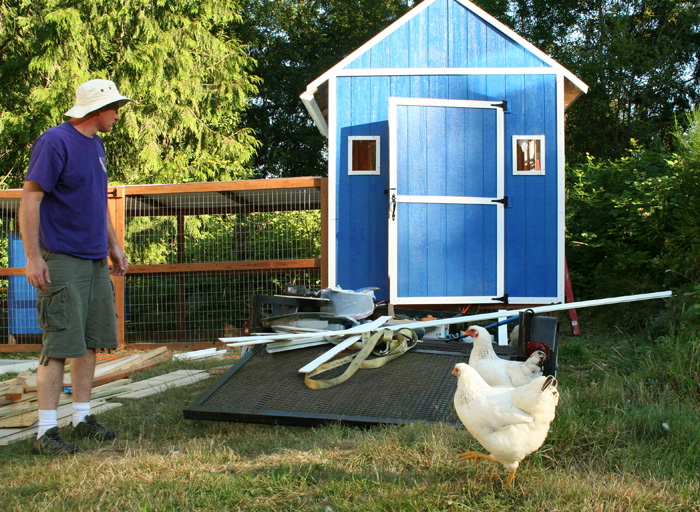
Here is the final product.

After several weeks of research, comparing prices and ideas, reading chicken books, reading the BYC forum, planning and designing, we came up with the simple shed design, an 8 x 8 x 8 shed, with a real shingled roof on top, with 3 sides made up of nice windows which we recycled. We did our best to combine the usage of new lumber with old scrap lumber and recycled materials wherever we could find and use them. This way, we could save some money, but also help with the environment.
For our build, these we our objectives.
Here is the final product.
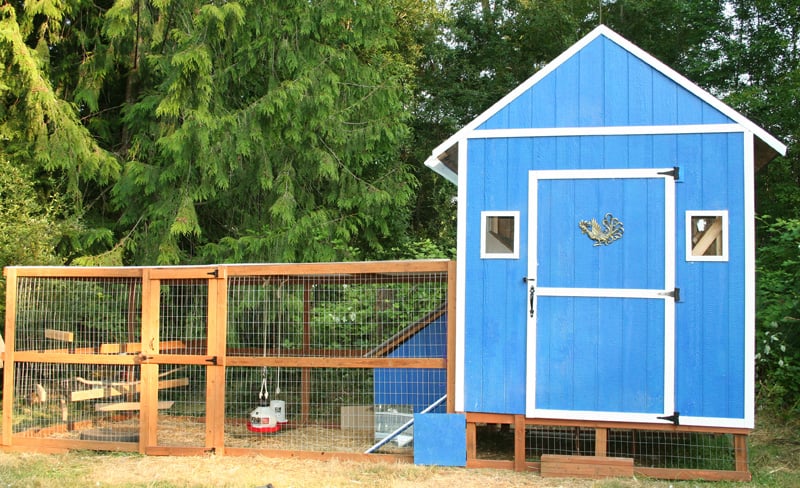
After several weeks of research, comparing prices and ideas, reading chicken books, reading the BYC forum, planning and designing, we came up with the simple shed design, an 8 x 8 x 8 shed, with a real shingled roof on top, with 3 sides made up of nice windows which we recycled. We did our best to combine the usage of new lumber with old scrap lumber and recycled materials wherever we could find and use them. This way, we could save some money, but also help with the environment.
For our build, these we our objectives.
- Enough space for 30 or so birds, bantams of different kinds. We plan for them to free range since we have an acre totally fenced in. The birds will free range during day, and stay in their home at night.
- Enough shelter and shade for rainy weather. We live in Washington state, the rain state, and we plan to keep Cochin Bantams, Polish and Silkies Bantams, which have crests and feathered feet so we most definitely needed a sheltered run and a safe warm house for Fall and Winter.
- We wanted the shed to be "convertible", if in future, we had to move or give up the chickens, we wanted the shed to be re-usable for other purposes, so we built it with that in mind, such as installing an extra large door that would allow a wheel barrow to go in, or the lawn mower, or other human junk. And to make sure we nailed stuff to the skid beams, instead of to the walls.
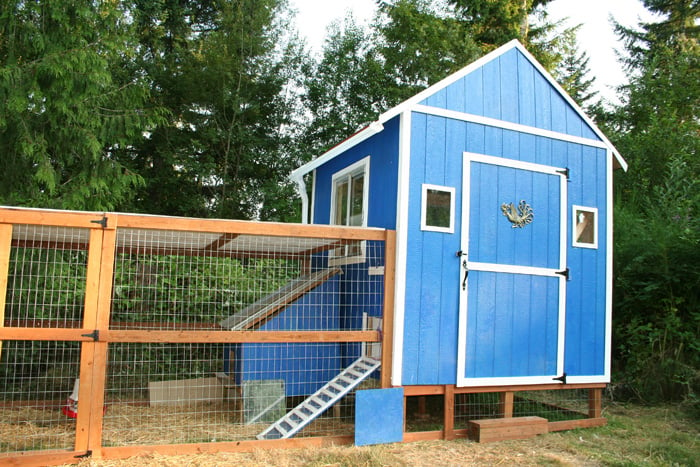
Rob wanted it sky blue, and so we bought a nice blue gallon (Sapphire Lace S-G-570) from Home Depot. In total, we spent $1000 on the coop materials, and $300 on the run. The run measures 16 x 8 and has a corrugated tin roof. The house looked like a blue cube and so that was how it ended up with name "Blue Cube Chicken Coop". Until we find a fancier name, that'll have to do.
This was how we started. Rob with the pile of materials and recycled windows from an old house.
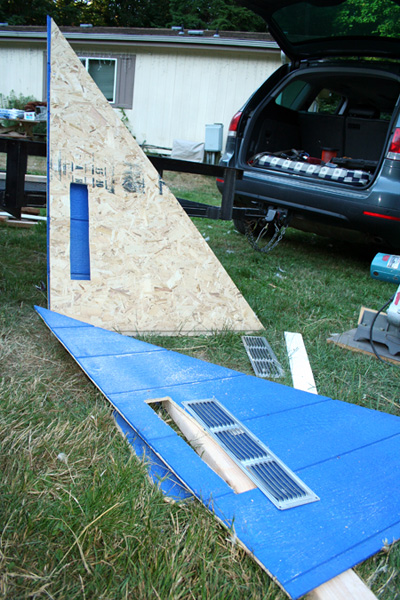
The next step was cutting, resizing, planning which pieces went where and what needed shaping etc. We worked 2 days flat for this phase, including painting too.
Rob building the side walls with 2 x 4s.
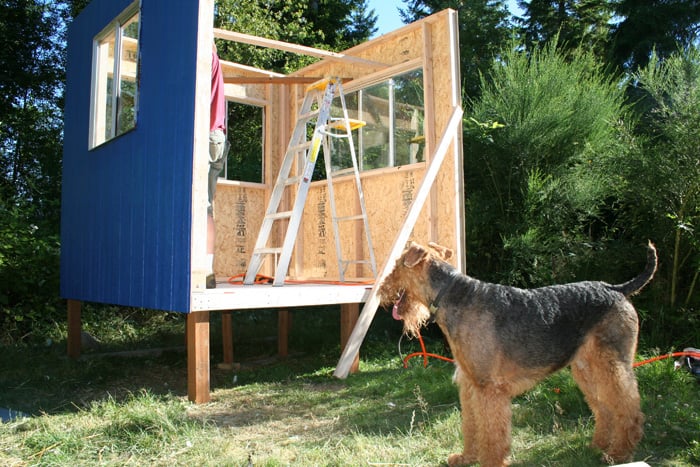
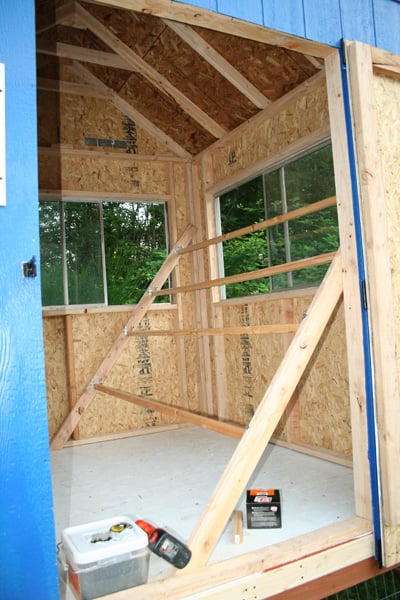
A side wall with large windows to keep the coop light, airy, bright and attractive for the birds. In the final installation, we plan to put in hardwire mesh on the inside to prevent rodents and other unwanted animals from getting in.
On the 3rd day, we brought all our parts, walls, paint, trimming etc to our home site for the assembly. The Airedales were extremely excited and eager to join in the build process.
This was what we started with. This was our previous chicken coop (what a tiny sad sight) for 4 hens. It had 3 nest boxes and Rob built it last year. The site is backed up to thick shrubs and trees on both sides, which will be a good wind break and provides some good shade. The land tilts just slightly back so it has good drainage and is mostly flat enough for our big coop and run.
Rob's brother Steve helps out with the assembly. And our Airedale Kimi does his regular supervision of the humans to make sure we're doing it right.
All the wall sides ready to be installed at the site. Our plan was to install all the sides and roof by the end of the assembly day.
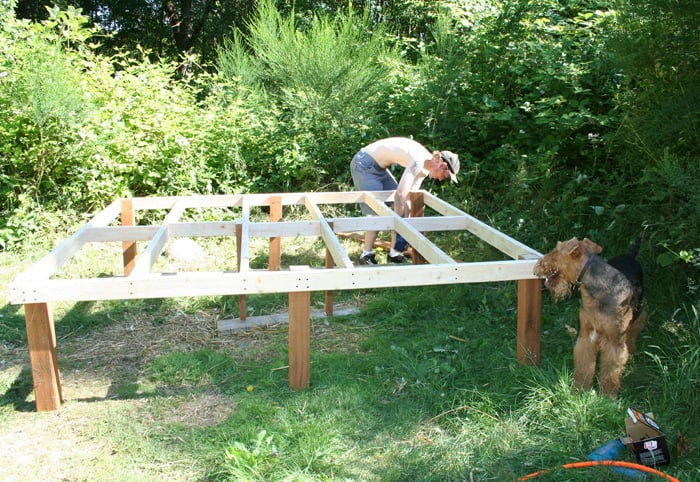
Once the foundation beams went onto the skids, we put up the side walls one by one.
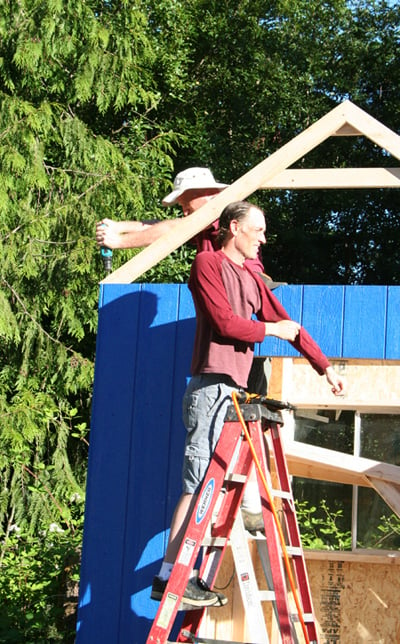
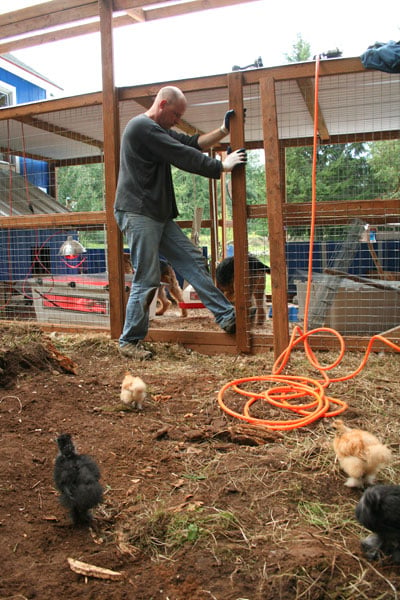
Putting up the walls was easy, we just had to make sure everything was angled right at 90 and everything fit nicely together to create the sides of a cube.
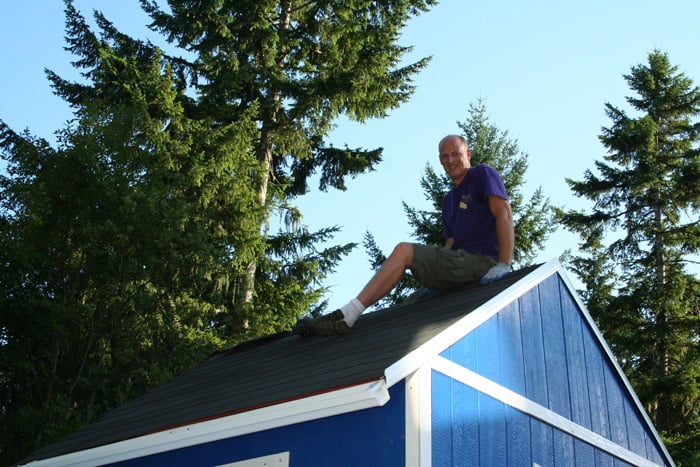
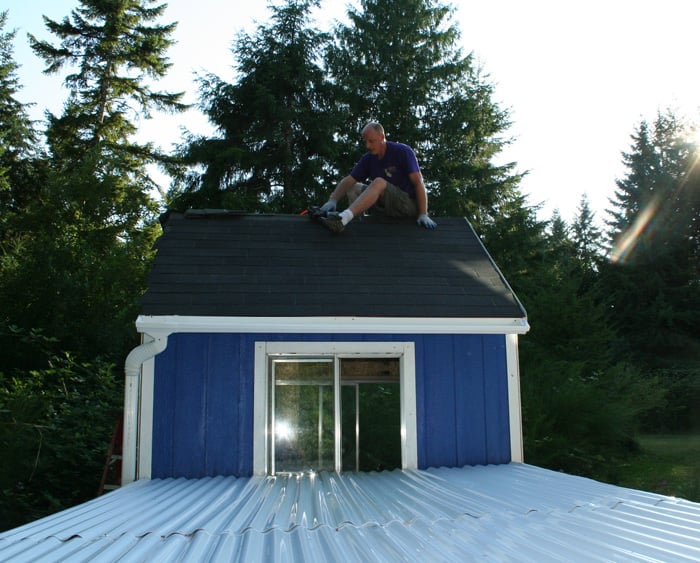
Then came the roofing, that was much harder to do, with the sun blazing down on us with the high 80s low 90s. Ouch.
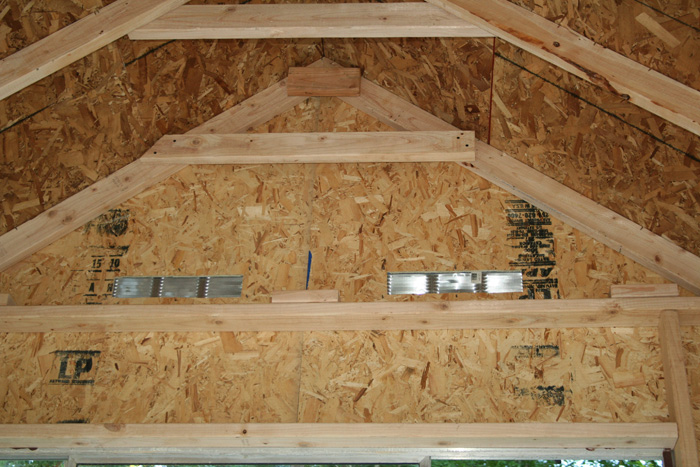
We cut holes at the top of the roof sides to put in vents for better ventilation.
Once the roof frame was up and ready, we could put the tar paper on it, and then put shingles on it. The house is now starting to come together nicely.
The view from the top of the run shows the corrugated roofing atop the run.
The interior of the roof with the vents.
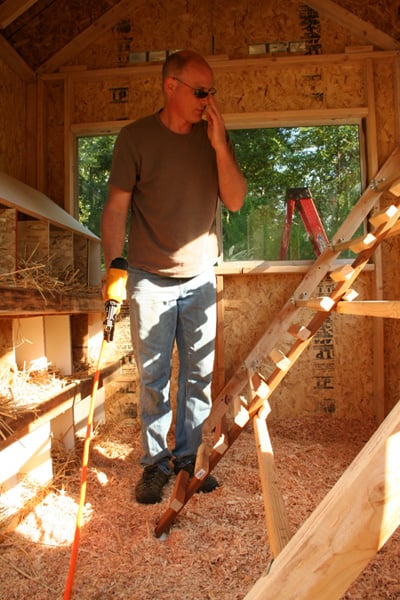
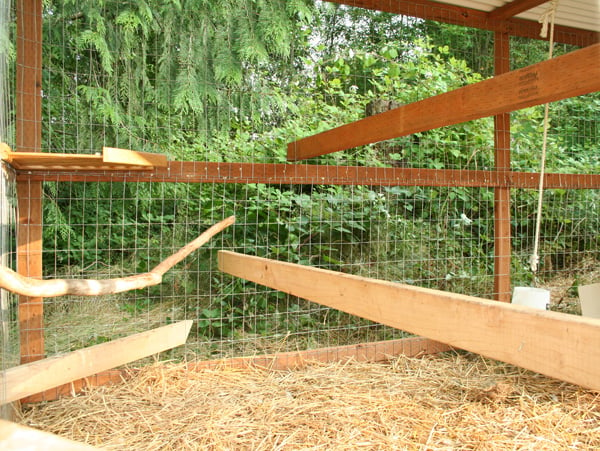
Building the perches on a strong support beam. We wanted to utilize the space and since we plan to have more than a few birds, we set them up like stairs, since the Cochin bantams and silkies probably wouldn't jump as high.
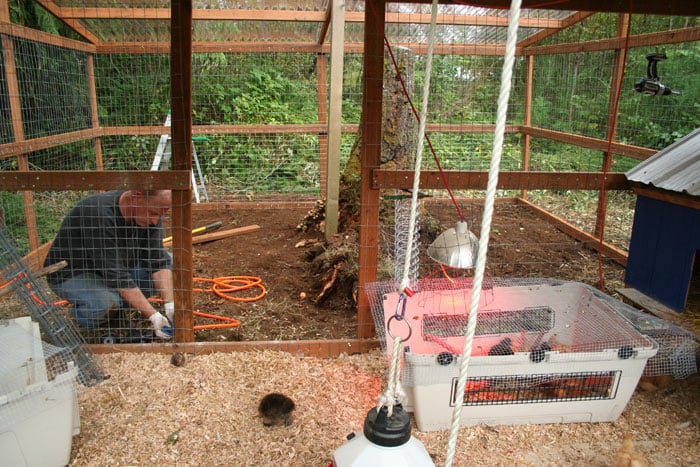
When the coop was finished, we started working on the frame of the run. We placed the old coop inside as a secondary shelter and nest box for future broodies or tired roosters, or for sick birds.
Rob even included the gutter and rain spout so that the coop will fare better with the Seattle rain.
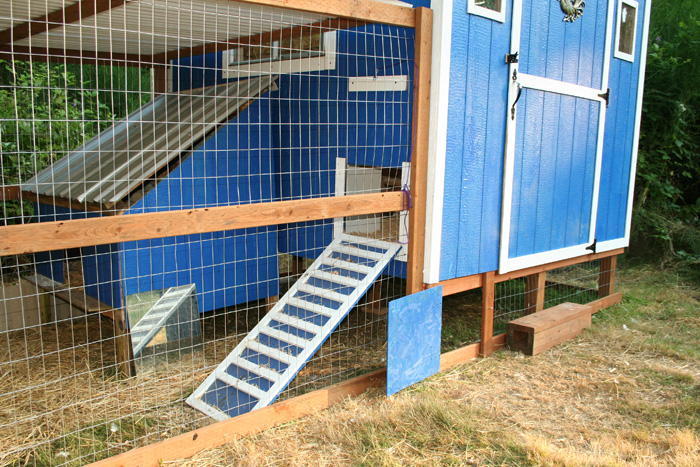
We built a ramp stair thingy for the Cochins and future silkies to get up to their perches. Hopefully, this will prevent food pad injuries if they learn how to use this ramp. We used pine shavings for the floor litter.
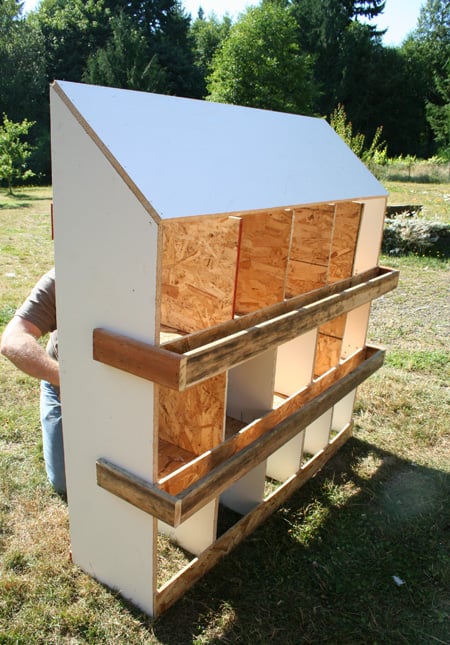
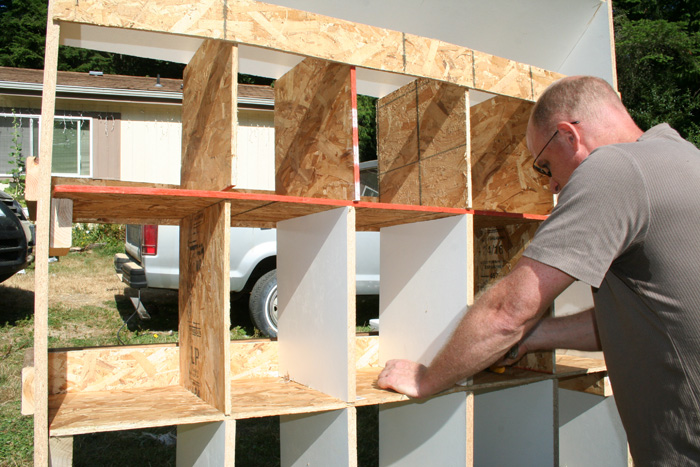
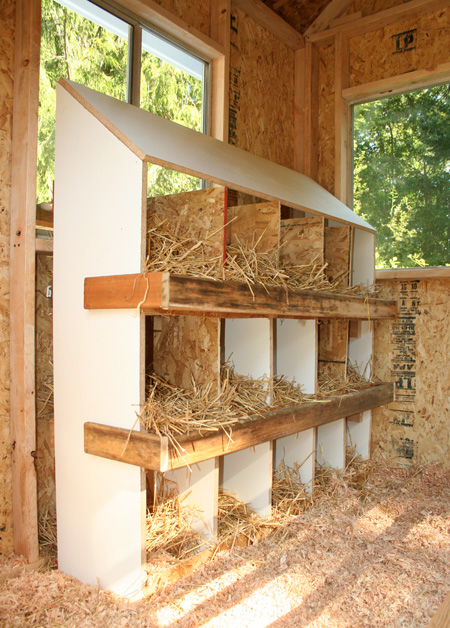
We built the nestboxes with the aim of housing about 20 hens for the future. Now we have only 1 laying hen, and a 5 growers hybrid hens, but when our Cochin bantams and polish have grown up, and start laying, all the nest boxes are already built, ready and waiting. We used 2 OSB boards, the rest of the lumber was from scrap pieces, and in total, perhaps we spent only $30 on it. But looking at catalogs for nestboxes, the prices for a 6 hole nest was about $159, that was ridiculous. Building it wasn't difficult, and it saved us so much money.
The slanting roof will prevent the birds from perching atop them and pooping on it. And there are alighting perches at the front of the nestboxes, and preventative 4 inch barriers at the back to prevent eggs from rolling off.
Once it was finished, we put it into the coop and filled the holes with hay. We wanted to make the coop as attractive and pleasant for the birds so they would find it irresistable. In future, we might need to add some curtains to make the area darker.
During the whole assembly process, the adult chickens were very curious and came to inspect our work on their home. They were not deterred by the loud noises and banging and clanging of hammers or nail guns.
On the bottom, they have their own chicken door to the run, which is 2' off the ground. This added footage below the coop will provide extra shade and shelter for the birds.
We found this metal sculptured chicken in a thrift store. It cost only $10 and was so heavy and well made, we couldn't resist that final touch.
There was a sign at the back "Made in Japan" and I believe it is a Yokohama Rooster, although we don't plan to have that breed of chicken, I thought the metal sculpture was perfect for our coop because it was so beautiful.
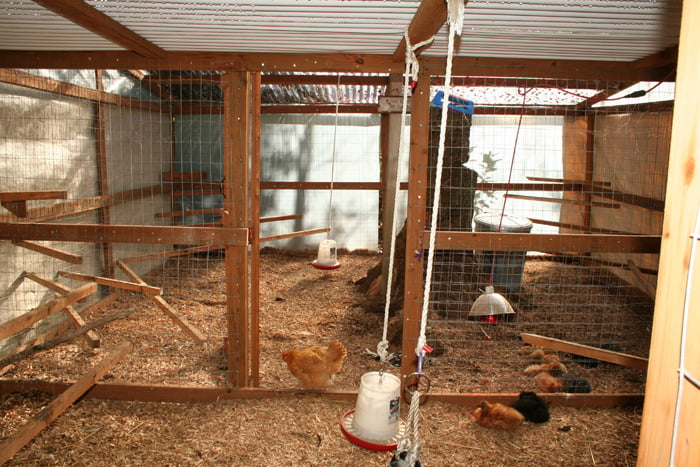
Inside the run, we placed an old tire which we filled with dirt from our land, to make a luxurious dirt bath. They found it irresistable and jumped on it the moment it was ready.
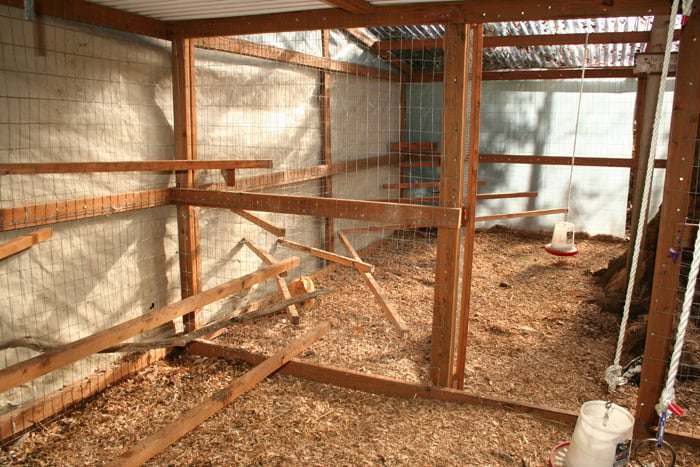
Inside the run, we placed scrap lumber to make temporary perches. We haven't yet decided on how we plan to make it better, but for now, the pieces of wood are placed strategically across the run through the metal meshing, and it is very secure and looks as if they were magically suspended.
And finally, it is all done. The birds are happy, and we are happy too.
The indoor ramp from the run to the coop.There is also a mirror in the run to allow the birds to gaze at themselves.
I hope all my birds will be happy with the house they now have.
So far, we have trained the outdoor adults to return to their coop at night, and we let them out in the morning to free range. We have had no problems getting them to roost on the indoor perches, although they are used to perching outside in the trees. The Dutch Bantam we have is the most flighty and wild, but even she has succumbed to the blue coop. Next, our goal will be to help our grower batch of Cochin bantams and Polish chicks adapt to life outside the brooder and in the open.
UPDATE: Winterization of the Blue Cube Chicken Coop
Living here in Washington state means having to deal with constant rain, sleet and sometimes snow. We had to winterize our coop, there was no doubt about it. This section is an update to the page regarding our coop, and shows how we winterized it.
This is the back view of the coop and original enclosure. Within 6 months, we had doubled our bird population and decided to expand the enclosure. Here Kimi is inspecting my ground work. I had been working hard leveling the ground, taking out roots, and making the ground as flat as possible. Preparing the site was tough work.
We decided to build around the tree stump since there was no way Rob and I could do it without additional machinery.
Building a door between the old run and the newly added run, gives us the option of making the expansion a brooder in future, or to keep new birds separated from the established flock.
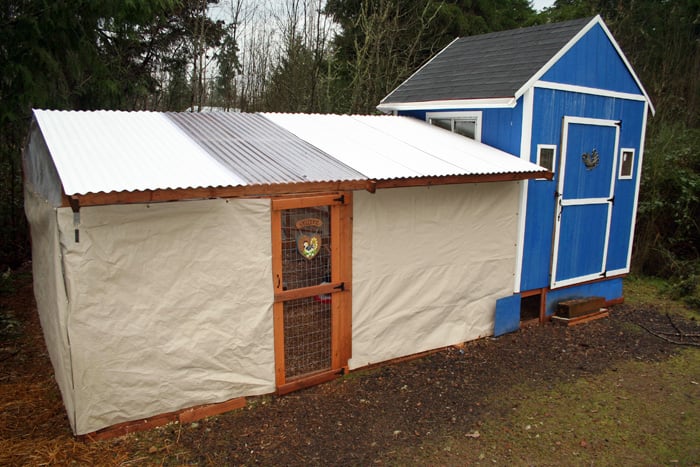
Who knew, within 6 months, we would build an added extension enclosure to the back of the run with a slanting roof, but we were lazy and left the original roof flat. Bad Idea for us! This above pic shows the original run in the front half of the photo and the newly added expansion to the back half of the run. It basically tripled our enclosed run space. The additional footage is 12 x 16.
This pic shows the inside of the original run. Notice if you look closely, you can see droplets of condensation on the white flat ceiling roof. I was so annoyed when it dripped on my head. This pic also shows the 2nd improvement we made, i.e. the addition of the back half of the enclosure. This time, we designed the roof to slant back down, to let the rain flow down. It worked great. More space for me and the chicks. I didn't realize when we first build the house and 8 x 16 run, that chickens were so addictive.
This pic shows the new slanting roof of the added enclosure.
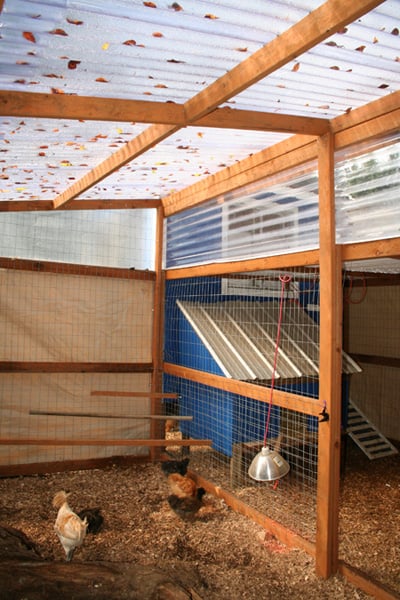
Just before the rain hit, we took our Costco barn tarps, and wrapped the sides of the enclosure. There were pre-made grommets on the tarp which made it easy for us to zip tie them to the screws. The tarps helped to keep the drafts out, reduce the windchill factor, cut down the amount of rain and snow blowing into the run. There is a distinct temperature change the moment you step into the enclosure in winter, and this really helps. However, we did not neglect the important factor of ventilation, for such a well wrapped up burrito of a run.
Then, when the rain and snow came, we found out where we screwed up. And we redid the entire front half of the roof.
The snow and rain stayed on the top of the flat part of the front roof, and it started leaking into the run. The floor litter would get wet, plus the condensation dripped down too. It was annoying for me to spend time in there.
Can you spot the difference in the slanting roof for the front of the enclosure, now it is much better. No more rain leaking in, no more condensation dripping down either. YAY.
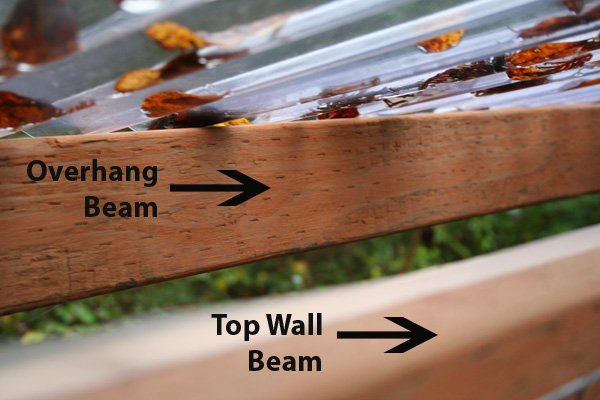
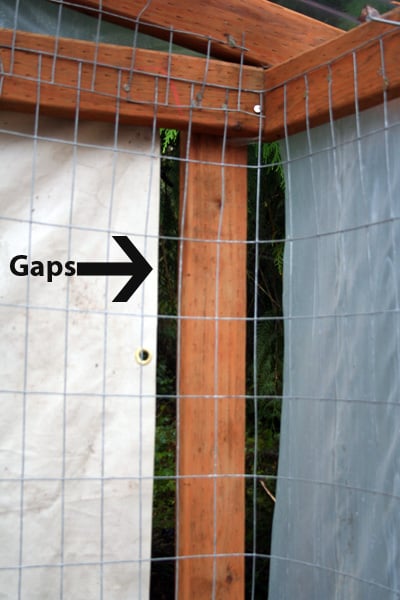
This time, we got smarter, and decided to leave 2 inch gaps right under the roof, where the corrugated paneling met the horizontal beams. It prevents rain spraying sideways in, because of the 1 foot overhang. But it is airy enough and allows good air ventilation. This is very much ideal now, and I'm really glad we have this overhang, because the airiness makes a huge difference in appeal, and makes me want to spend more time in the enclosure even though it is frosty cold outside. The birds love hanging in their expanded enclosure when its raining. There is sufficient floor space and perches where they hang out.
Here are some pics showing the gaps we left in the framing to ensure minimal water leakage, but ensuring good ventilation.
View from within the enclosure up to the roof. The choice to use the clear plastic corrugated roof was a deliberate one. We found out that it allowed in a lot of light, but kept the run dry at the same time. Light is paramount for dark weather like ours, it stays gray and miserable most of the year, and any light is good. The extra light makes the whole run seem brighter, happier, more welcoming, and helps with keeping run dry too.
Pimping out the coop
I love the wind chime outside, so it makes a nice song with the breeze.
Come spring, we will remove all the tarps, and keep it open and airy like before.
In 2011, we have plans to add 2 more longhouse styled chicken coops to the back of the enclosure to provide more warm housing. I've realized that this hobby of chicken raising is very addictive, and I plan to breed chickens to sell chicks and laying hens. I'm going to keep my breeding to a small scale, but we already have plans to add 3 breeding pens and the 2 long house styled chicken coops will be 4 x 8 and 4 ft tall. Stay tuned for more ongoing projects in chicken world.

This was how we started. Rob with the pile of materials and recycled windows from an old house.
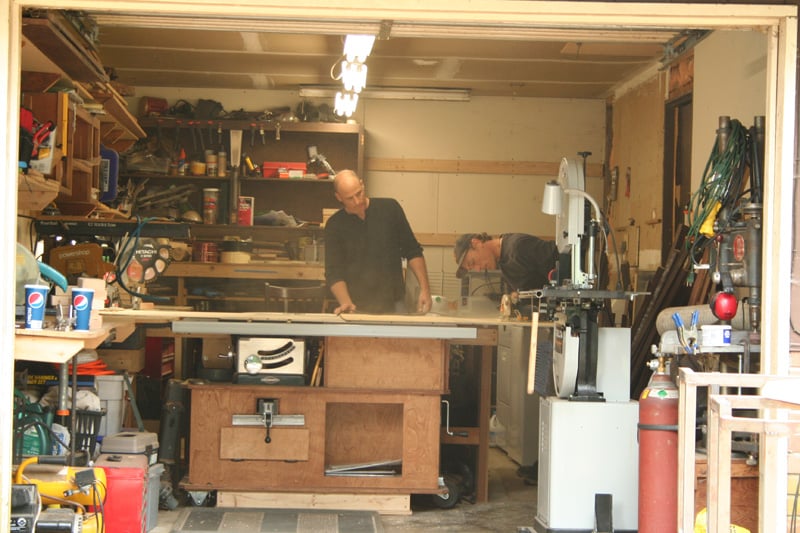
The next step was cutting, resizing, planning which pieces went where and what needed shaping etc. We worked 2 days flat for this phase, including painting too.
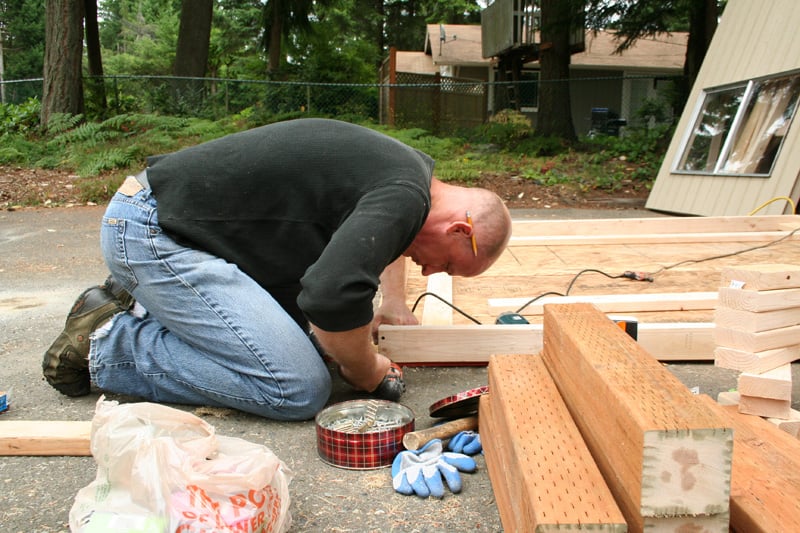
Rob building the side walls with 2 x 4s.

A side wall with large windows to keep the coop light, airy, bright and attractive for the birds. In the final installation, we plan to put in hardwire mesh on the inside to prevent rodents and other unwanted animals from getting in.

On the 3rd day, we brought all our parts, walls, paint, trimming etc to our home site for the assembly. The Airedales were extremely excited and eager to join in the build process.
This was what we started with. This was our previous chicken coop (what a tiny sad sight) for 4 hens. It had 3 nest boxes and Rob built it last year. The site is backed up to thick shrubs and trees on both sides, which will be a good wind break and provides some good shade. The land tilts just slightly back so it has good drainage and is mostly flat enough for our big coop and run.
Rob's brother Steve helps out with the assembly. And our Airedale Kimi does his regular supervision of the humans to make sure we're doing it right.
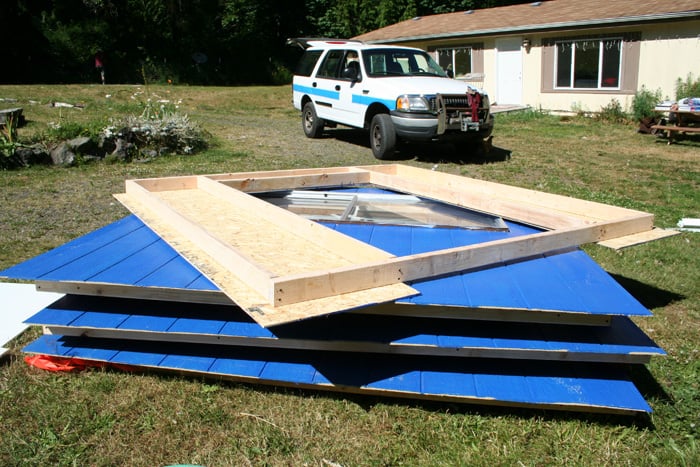
All the wall sides ready to be installed at the site. Our plan was to install all the sides and roof by the end of the assembly day.
Once the foundation beams went onto the skids, we put up the side walls one by one.
Putting up the walls was easy, we just had to make sure everything was angled right at 90 and everything fit nicely together to create the sides of a cube.
Then came the roofing, that was much harder to do, with the sun blazing down on us with the high 80s low 90s. Ouch.
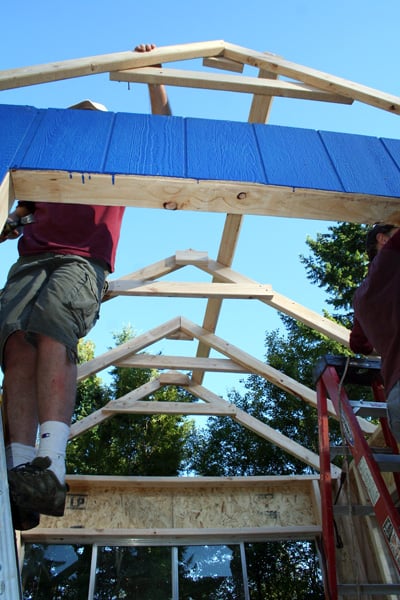
We cut holes at the top of the roof sides to put in vents for better ventilation.
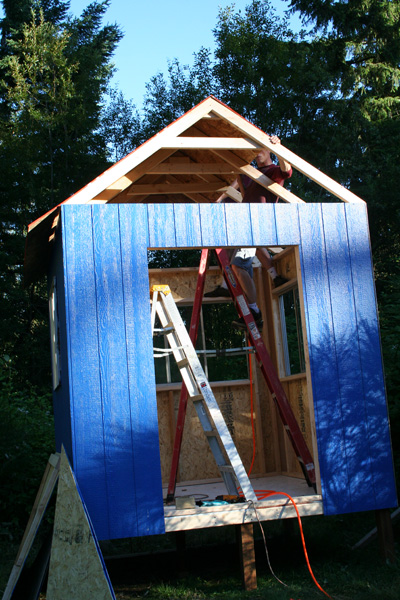
Once the roof frame was up and ready, we could put the tar paper on it, and then put shingles on it. The house is now starting to come together nicely.
The view from the top of the run shows the corrugated roofing atop the run.
The interior of the roof with the vents.
Building the perches on a strong support beam. We wanted to utilize the space and since we plan to have more than a few birds, we set them up like stairs, since the Cochin bantams and silkies probably wouldn't jump as high.

When the coop was finished, we started working on the frame of the run. We placed the old coop inside as a secondary shelter and nest box for future broodies or tired roosters, or for sick birds.

Rob even included the gutter and rain spout so that the coop will fare better with the Seattle rain.
We built a ramp stair thingy for the Cochins and future silkies to get up to their perches. Hopefully, this will prevent food pad injuries if they learn how to use this ramp. We used pine shavings for the floor litter.
We built the nestboxes with the aim of housing about 20 hens for the future. Now we have only 1 laying hen, and a 5 growers hybrid hens, but when our Cochin bantams and polish have grown up, and start laying, all the nest boxes are already built, ready and waiting. We used 2 OSB boards, the rest of the lumber was from scrap pieces, and in total, perhaps we spent only $30 on it. But looking at catalogs for nestboxes, the prices for a 6 hole nest was about $159, that was ridiculous. Building it wasn't difficult, and it saved us so much money.
The slanting roof will prevent the birds from perching atop them and pooping on it. And there are alighting perches at the front of the nestboxes, and preventative 4 inch barriers at the back to prevent eggs from rolling off.
Once it was finished, we put it into the coop and filled the holes with hay. We wanted to make the coop as attractive and pleasant for the birds so they would find it irresistable. In future, we might need to add some curtains to make the area darker.
During the whole assembly process, the adult chickens were very curious and came to inspect our work on their home. They were not deterred by the loud noises and banging and clanging of hammers or nail guns.
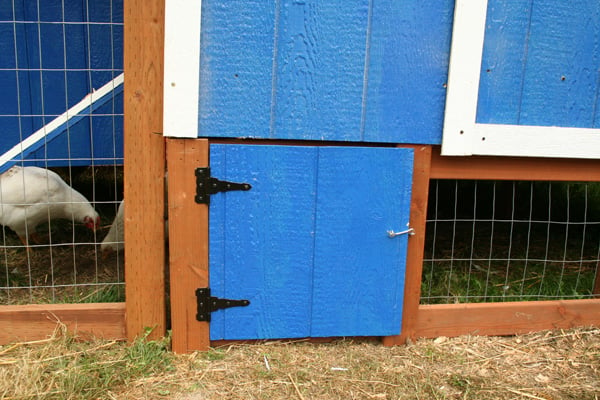
On the bottom, they have their own chicken door to the run, which is 2' off the ground. This added footage below the coop will provide extra shade and shelter for the birds.
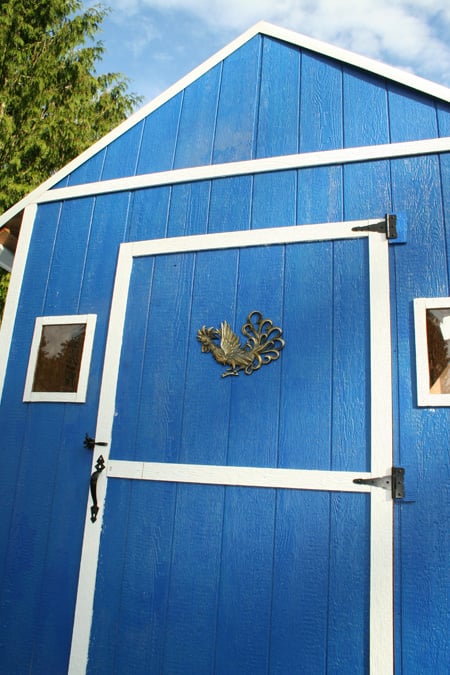
We found this metal sculptured chicken in a thrift store. It cost only $10 and was so heavy and well made, we couldn't resist that final touch.
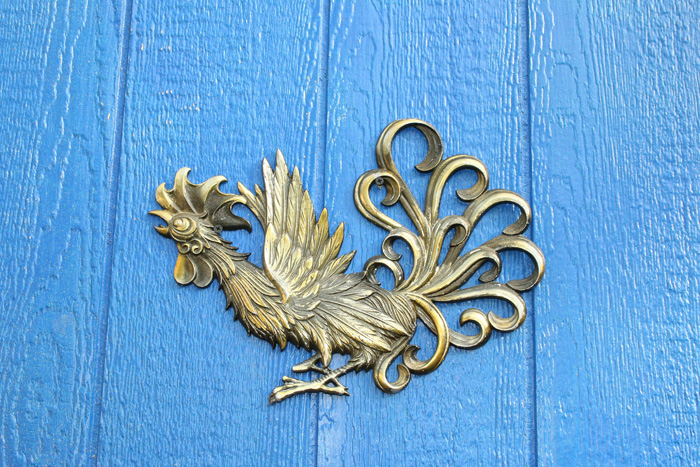
There was a sign at the back "Made in Japan" and I believe it is a Yokohama Rooster, although we don't plan to have that breed of chicken, I thought the metal sculpture was perfect for our coop because it was so beautiful.
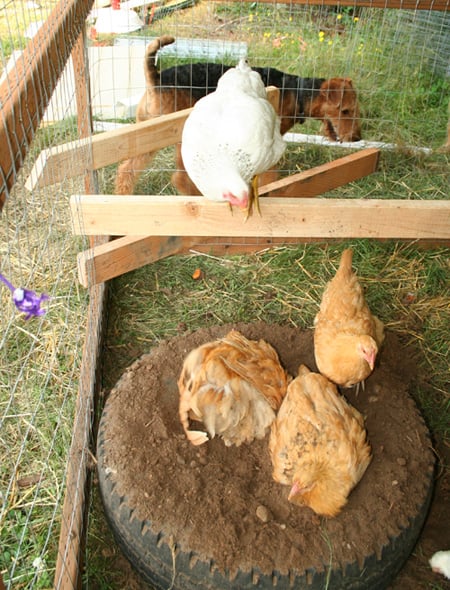
Inside the run, we placed an old tire which we filled with dirt from our land, to make a luxurious dirt bath. They found it irresistable and jumped on it the moment it was ready.
Inside the run, we placed scrap lumber to make temporary perches. We haven't yet decided on how we plan to make it better, but for now, the pieces of wood are placed strategically across the run through the metal meshing, and it is very secure and looks as if they were magically suspended.
And finally, it is all done. The birds are happy, and we are happy too.
The indoor ramp from the run to the coop.There is also a mirror in the run to allow the birds to gaze at themselves.
I hope all my birds will be happy with the house they now have.
So far, we have trained the outdoor adults to return to their coop at night, and we let them out in the morning to free range. We have had no problems getting them to roost on the indoor perches, although they are used to perching outside in the trees. The Dutch Bantam we have is the most flighty and wild, but even she has succumbed to the blue coop. Next, our goal will be to help our grower batch of Cochin bantams and Polish chicks adapt to life outside the brooder and in the open.
UPDATE: Winterization of the Blue Cube Chicken Coop
Living here in Washington state means having to deal with constant rain, sleet and sometimes snow. We had to winterize our coop, there was no doubt about it. This section is an update to the page regarding our coop, and shows how we winterized it.

This is the back view of the coop and original enclosure. Within 6 months, we had doubled our bird population and decided to expand the enclosure. Here Kimi is inspecting my ground work. I had been working hard leveling the ground, taking out roots, and making the ground as flat as possible. Preparing the site was tough work.

We decided to build around the tree stump since there was no way Rob and I could do it without additional machinery.
Building a door between the old run and the newly added run, gives us the option of making the expansion a brooder in future, or to keep new birds separated from the established flock.
Who knew, within 6 months, we would build an added extension enclosure to the back of the run with a slanting roof, but we were lazy and left the original roof flat. Bad Idea for us! This above pic shows the original run in the front half of the photo and the newly added expansion to the back half of the run. It basically tripled our enclosed run space. The additional footage is 12 x 16.
This pic shows the inside of the original run. Notice if you look closely, you can see droplets of condensation on the white flat ceiling roof. I was so annoyed when it dripped on my head. This pic also shows the 2nd improvement we made, i.e. the addition of the back half of the enclosure. This time, we designed the roof to slant back down, to let the rain flow down. It worked great. More space for me and the chicks. I didn't realize when we first build the house and 8 x 16 run, that chickens were so addictive.
This pic shows the new slanting roof of the added enclosure.
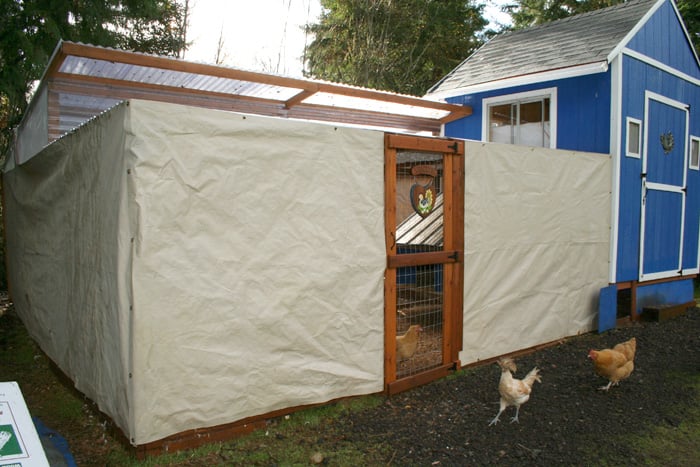
Just before the rain hit, we took our Costco barn tarps, and wrapped the sides of the enclosure. There were pre-made grommets on the tarp which made it easy for us to zip tie them to the screws. The tarps helped to keep the drafts out, reduce the windchill factor, cut down the amount of rain and snow blowing into the run. There is a distinct temperature change the moment you step into the enclosure in winter, and this really helps. However, we did not neglect the important factor of ventilation, for such a well wrapped up burrito of a run.
Then, when the rain and snow came, we found out where we screwed up. And we redid the entire front half of the roof.

The snow and rain stayed on the top of the flat part of the front roof, and it started leaking into the run. The floor litter would get wet, plus the condensation dripped down too. It was annoying for me to spend time in there.
Can you spot the difference in the slanting roof for the front of the enclosure, now it is much better. No more rain leaking in, no more condensation dripping down either. YAY.

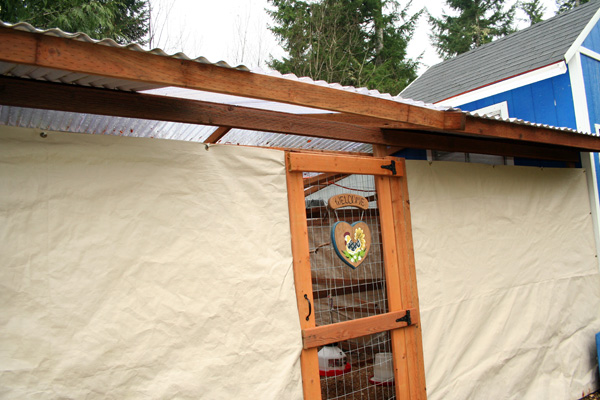
This time, we got smarter, and decided to leave 2 inch gaps right under the roof, where the corrugated paneling met the horizontal beams. It prevents rain spraying sideways in, because of the 1 foot overhang. But it is airy enough and allows good air ventilation. This is very much ideal now, and I'm really glad we have this overhang, because the airiness makes a huge difference in appeal, and makes me want to spend more time in the enclosure even though it is frosty cold outside. The birds love hanging in their expanded enclosure when its raining. There is sufficient floor space and perches where they hang out.
Here are some pics showing the gaps we left in the framing to ensure minimal water leakage, but ensuring good ventilation.

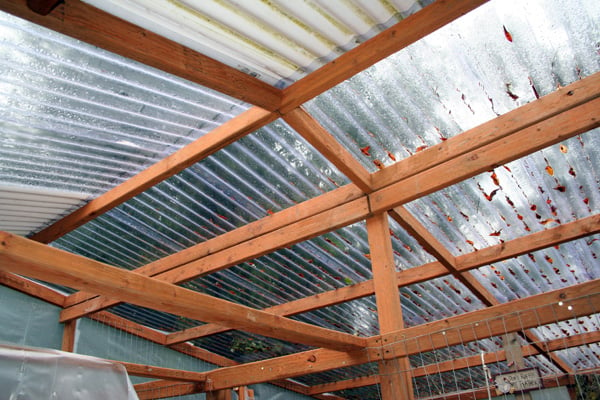
View from within the enclosure up to the roof. The choice to use the clear plastic corrugated roof was a deliberate one. We found out that it allowed in a lot of light, but kept the run dry at the same time. Light is paramount for dark weather like ours, it stays gray and miserable most of the year, and any light is good. The extra light makes the whole run seem brighter, happier, more welcoming, and helps with keeping run dry too.
Pimping out the coop

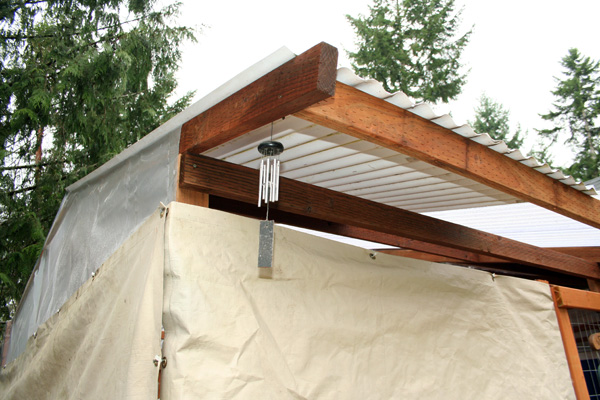
I love the wind chime outside, so it makes a nice song with the breeze.
Come spring, we will remove all the tarps, and keep it open and airy like before.
In 2011, we have plans to add 2 more longhouse styled chicken coops to the back of the enclosure to provide more warm housing. I've realized that this hobby of chicken raising is very addictive, and I plan to breed chickens to sell chicks and laying hens. I'm going to keep my breeding to a small scale, but we already have plans to add 3 breeding pens and the 2 long house styled chicken coops will be 4 x 8 and 4 ft tall. Stay tuned for more ongoing projects in chicken world.