We decided to get chickens, earlier this year, and a few weeks ago (early June 2016) I realized it's time to build them a coop to get them out of the garage. I have no prior experience with building anything this complex, but I felt confident I could do it. I didn't have any formal plans, just a basic drawing how how I wanted it to look/function. I basically just made it up as I went.
We don't have a ton of space around our property, but even more importantly, we don't have too many ideal locations. The spot we chose is shaded by sumacs and a poplar in summer, and exposed to all-day sun in winter. The ground slopes to a hill just behind the run, providing great drainage. The coop is a mere 5 feet from our attached garage, making it easy to provide power (if needed), but keeping its distance from house doors and windows (for smell).
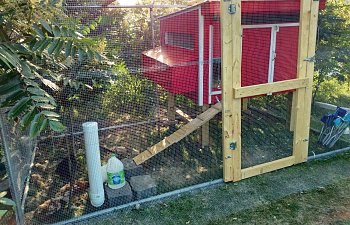
I took features from many of the coops posted on this site. The final build deviated only a little bit from the drawing. The final interior size is 5' wide, 4' deep, and 4' tall (at the front). The coop sits 2' off the ground to allow more room in our limited run space.
I began by building the frame out of pine. The 4x4 posts are treated, to resist rot at the ground. The 2x4s are untreated pine. I went with a lean-to slanted roof, allowing water to run off the back and heat to rise to the front.
Another angle of the frame.
I then moved the frame outside into an old dog-kennel that I converted into the chicken run. I removed all of the chain-link from the kennel and covered it in 1/2 inch hardware cloth (probably the toughest part of the entire process). There is also almost 2 feet of hardware cloth extending out along the ground surrounding the run, secured with stakes and blocks, to prevent predators from digging under.
The twins like to help...
Here you can see I added framing for the pop-door and nest box, as well as added plywood for the floor.
An inside view of the framing for the nest box. I held the 2x4s together using metal ties (the plates with screws).
I used exterior grade plywood for the walls.
On the left you can see the cutout for the nest-box and a South-facing window above it. On the front is the pop-door, the main access, and a permanent vent above. The window and vent are covered in hardware cloth.
A close-up of the front vent.
A close-up of the nest-box cutout and the South-facing window above it.
I got a great deal on a piece of damaged white steel roof. I attached it using metal panel screws with a rubber bushing that seals the hole.
With the roof and walls on the coop, I finished the run so I could get the girls back outside and out of their brooder box in the garage (they were too big for it). I replaced the kennel door, which used rounded corners and was not secure from predators, with a wood hardware cloth covered door. The spring-loaded hinges ensure the kids won't forget to shut the door. Here you can also see the hardware cloth along the ground.
I then built the nest-box. Its position provides more cover for the perch attached between the two South-side legs.
Looking in the nest-box from outside. I made it a bit longer and added a small storage compartment (to the right).
The nest-box from inside the coop.
The front access doors open so that the floor spills right out onto the ground, for easy cleaning of the coop. I decided against deep-litter method (which is best done on the ground, for insects and worms to reach the litter) so I could make more space under the coop for the girls, this means there won't be a ton of bedding to fall out when you open the doors.
The girls helped out while I was priming everything.
The family had a painting party.
After painting, it's time to play with chickens.
Once painted I began adding the white trim. I initially had some issues figuring out how to use a spare piece of plywood as a pop-door. Then, on a trip to the farm store, I found an aluminum channel. I cut it in half, caulked it to the side of the coop and the door slides up and down perfectly. There is a cable attached to the top of the door that uses metal eyes to direct it up to the roof and out to the front of the run, so we can open the door from outside the run.
The ramp was also made from leftover plywood. I had to go off to the side as the run wall was in the way.
Little Charlotte says the ramp is a little high...
I positioned the coop in this way for a couple of reasons. The pop door is visible from the house, to ensure the girls are secure at a quick glance. The cold winter winds come from behind and camera right, so those walls have fewer to no openings and the nest-box and pop-door are on the wind-block side.
Ready for the girls. The nest box has locking latches, as well as storage compartment. The pop-door is functional.
The access door has a latch at the top, and a piece of wood so that one door holds the other closed. I also placed a magnetic latch at the bottom of the door to help keep the whole thing shut.
Added an inside perch. It's a 4 inch board, allowing the girls to tuck in their feet during the winter to help prevent frostbite.
The perch angles toward the back on the other wall. The little step is a booster for our silkie, who can't get up to the higher perches with the other girls. I have since added additional vent holes on the wall near the ceiling in the back.
Here is the near-final version of our little chicken paradise.
There is some extra trim work I have yet to do, and a handful of other things:
- Add a hinged plexiglass window over the South-facing screen window (for winter).
- Add small plexi windows in the two access doors, so we can see the girls before opening.
- There will be a lot of planting around and in the run, for chicken foraging.
- Build a PVC feeder and waterer for inside the coop.
- Build an extended, open run to the right for the girls to play in and forage when we're home.
What I would do differently:
- I would build a wood-framed run. Wrapping the hardware cloth around the metal kennel poles was the worst part of the process.
- I would do more pre-planning. Making stuff up on the fly can get daunting.
- I would have made the coop 3 feet deep, instead of 4. It doesn't leave much room when you walk into the run.
UDATE: 7/6/2016
Added large natural perches for the girls to enjoy the day and give them a little more active room around the run.
Added a dust-bath beneath the coop. So far I have in it some yard dirt, sand, diatomaceous earth, and mostly potting soil. Haven't seen them use it yet, but there were feathers in it so maybe they have.
To prevent raccoons from being able to lift the pop door (should they break into the run) I added a left-over strip of the aluminum channel to the bottom, making it impossible to grab the bottom of the door.
I put up chicken-wire surrounding the rest of the small yard that the coop and run sit on, running along side the garage. In this image, I'm standing at the far end of the yard. Now the girls have a lush patch of grazing area, complete with wildflowers and black raspberries. They're spoiled!
I then had to create an access hatch for the girls to exit the secure run to forage in their 'extended run'. Using spare plywood, I made a solid frame and used a sash-lock for security. I used a front and back frame to sandwich the hardware cloth and keep it secure. I decided to make it open down to create a nice little ramp, especially helpful for our challenged silkie, who is afraid to be off the ground (at all).
Winter Updates: 10/31/16
My first "Winter with Chickens" quickly approaching, I have been working on winterizing the coop.
The first thing I did was to create a plexiglass window for the large "summer" window in the coop. With this large opening covered there are still two main/adjacent ceiling vents to keep moisture out during the winter.
After reading some others' posts about run doors and snow, I decided to raise the bottom of the run door off of the ground by about 6 inches, to prevent it being stuck shut by a few inches of frozen snow that remain after shoveling.
I used a couple pallets to create a wind barrier beneath the coop, both protecting the birds when they are outside and preventing the wind from chilling the coop floor.
I attached a radiant barrier to the ceiling, to prevent some heat loss through the roof.
Radiant barrier beneath the coop to help keep the floor warmer.
Radiant barrier beneath the nest box to keep the boxes warmer.
5/21/2018 UPDATE:
It's been a long while since I've updated this article. There have been a few updates to the coop. The girls are doing great.

The Chicken Guard automatic chicken door was a fantastic purchase.
I recently swapped out the PVC feeder for this 2-port bucket feeder. I'm loving the extra storage, and you can see the food level through the plastic. It's also helping to keep more water out of the feed.

and a little bit of stain makes a big difference on that door. This was last fall. We've got flowers in that planter, now.