The Coop in the Woods

Specifics:
Custom shed/coop combination based on plan CB202 from www.homegardendesignplan.com


http://www.homegardendesignplan.com/2015/11/cb202-combo-chicken-coop-garden-shed.html
Shed portion: 5 feet by 8 feet
Coop portion 8 feet by 8 feet
Covered run: 8 feet by 14 feet
Fenced pen: 50 feet by 60 feet (fence is 6 feet high), two gates
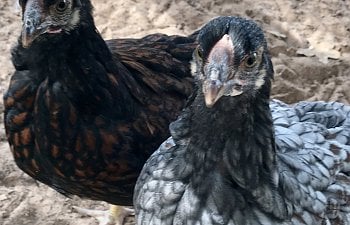
Current inhabitants: 5 Silkies and 7 Blue Laced Red Wyandottes (more to come!)

Welcome to my favorite place, the Coop in the Woods.

When I decided to add chickens to our family my main concerns were security and ease of care. I am fortunate to live on several acres, backing onto Corps of Engineer (aka coyote) land. I knew that it would stress me out to let the birds truly roam free-range, but I still wanted them to have plenty of land to mimic the free-range experience. This meant that I needed to place the chicken area fairly removed from the house, which in turn meant that I needed the chicken supplies to be located near the birds so I could easily care for them. I decided on a shed/coop combo, and really liked plan CB202 on www.homegardendesignplan.com. Bonus, the plans were free! I modified them to suit my needs, taste, and budget. My builder was a local gentleman, Tom, who has also built several coops as well as other structures. He was able to take my vision, make it a reality, and often improve on my ideas!
The structure is made of wood (2x4s, plywood, etc). The exterior is Smart Siding and the roof is 5 rib panel metal. Most construction supplies were sourced from Lowe's and/or Home Depot. I purchased the windows from Lowe's and Tom made the doors and shutters himself. The vents are automatic open/close vents (they open/close based on ambient temperature). I used a shed door T handle lock (Amazon). The exterior paints are Sherwin Williams Alabaster (white) and Tricorn Black, both from Lowes. I made the sign with my Silhouette machine, vinyl, and a chalkboard plaque that I got at Walmart for $2.


The pen fence connects to the run and excludes the shed. There are gates on two sides of the pen. My husband and I laid 4 pallets of fescue grass.

Construction begins!


Fun fact: After the structure got to this point, my husband decided that it was too close to the house and insisted that it be moved. I guess he didn’t believe me when I said that it would be pretty when it was completed! Somehow Tom dragged the whole thing to its current location. Oh, and he had originally built it on a concrete-secured foundation. While I was sick about this proposed relocation, I am very happy about how everything turned out. I like the current location much better, the only drawback is that it is further from the house and we haven’t hooked it up to power as of yet.
The structure is raised with a solid floor. When it was finished, Tom placed concrete blocks under the building and around the perimeter of the run.

Tom built the fence and run with treated wood and buried dog fencing. I understand that this won’t keep little creatures in or out of those spaces, but I liked how strong and sturdy that type of fencing is. If I have hen-raised chicks next year I plan to run hardware cloth around the lower portion of the fencing. The run is dirt/sand and the pen is a combination of fescue sod and dirt/sand. I also gave the birds some perches with fallen branches tucked into the walls of the run. Note the concrete block barrier. We covered the run with the same metal roofing (5 rib panel from Lowe's) as the coop.
I intended to stain the run dark grey or paint it white but the fencing was installed before I got a chance to do that. My husband keeps asking when I am planning to paint it (through the wire?!?) and I just say “oh, someday!” That job just seems a little too tedious for me. I think I can live with the look of the wood!

I am keeping the food and water in the run. I recently added a Grandpa’s Feeder (we’ll see how that goes!). I made a grit and shell dispenser (plans to follow at some point!). The shell dispenser is currently capped because the girls are too young to lay. I made a water dispenser with horizontal nipples (via Amazon) and a 5-gallon bucket and an GAMMA seal white plastic lid from Lowes.
The chickens use the Ador1 automatic door (yea!) which I chose because of great reviews, and the fact that the mechanics are all enclosed. I just “built” their ramp out of extra bricks from when my house was built. I also used those bricks to make a front porch step for the coop door. Free is always good!
Welcome inside!
I love the idea of having the chicken supplies completely separate from the coop area. Naturally the shed section will still be dusty, but I can live with that.
One of the best features of the interior is that it is insulated and lined. Tom was given a pile of old fencing, and he used that for the interior walls. It is so beautiful, and, again, free! Well, the wood was free but the labor was not.
") Since Tom is a closet artist, he did little things like trimming the nesting boxes and fold-down door with the old fencing as well. Tom wired the coop for electricity, but since it is pretty far away from power we have not finalized that aspect of the coop.
Since Tom is a closet artist, he did little things like trimming the nesting boxes and fold-down door with the old fencing as well. Tom wired the coop for electricity, but since it is pretty far away from power we have not finalized that aspect of the coop.I purchased a roll of linoleum at Lowes (8x12 feet) for $50 and Tom secured it with staples so that it can easily be removed if necessary. I also cut pieces for the nesting boxes and stapled them down. I’m hopeful that this will make the entire structure easy to clean.
The right wall has nails to hang broom, dustpan, etc., a 36” wide window, small trash bin, and other tools such as scraper and straw rake. I have plans to build a simple counter below the window that uses fold-down hardware so I can have a counter space to take care of birds/small projects in the shed.
At the end of the shed facing the door is the food storage. I chose a combination of Vittles Vault containers. Depending on size and price, I purchased these through Amazon, Petsmart, and Chewy.com. I used my Silhouette machine to cut vinyl labels for all of the containers. However, I need to re-do them since they didn’t stay adhered as well as I would like. I am looking into a more heavy-duty vinyl. Still looks cute for now, though. I recently added the galvanized wall organizer, plan on using it for miscellaneous items I use in the coop, i.e. scissors, etc. We ran out of fence wood for this wall, but Tom used some vintage cedar planks to finish out the wall.
Since I used human windows I worried about the flimsy screens. I asked Tom to build me interior screens with hardware cloth, and he did an even better job than I had envisioned. He basically made screens that slide into channels, then (depending on the window) can be locked with a slide bolt. So now I can use the thin screens for bug control, but have the security of the hardware cloth and bolts. No raccoon is getting through these windows!
The left wall has the fold-down door to the nesting boxes (latched), as well as shelves for other supplies. The “Hen House” sign was purchased at Target in 2013 (that’s how long I’ve wanted chickens!). Tom built the screen door out of chicken wire, and also separated the top of the sections with chicken wire. We just used a simple hook-and-eye latch for the screen door.


Now we enter the chickens’ domain. It is pretty simple, four nesting boxes, a hinged roost and a sweep-out door. While the nesting boxes are not very high, I feel that I will need to add a ladder or ramp of some sort for my Silkies. I am currently using straw and it has been working out well. My chickens are young and prefer to sleep in the straw all together.


Tom built a sweep-out door. I swing the roost up and hook it to keep it up, unlock the sweep-out door (it’s latched on the inside), and push the used straw/droppings into a wagon. Pretty simple. This picture shows the back of the coop and the sweep-out door, as well as the concrete blocks that are underneath the structure.
The windows in the coop are 24x36 (front) and 18x24 (back). If I was to do it over again I would use a larger window in the back for more light.
This is a pic of the unpainted structure following a massive rainstorm. Covered in mud! Tom put mulch outside the perimeter of the structure to help minimize rain splashing. At some point I would like to place river rocks around the structure instead of the mulch.
Summary
Changes I made from the original plans:
Orientation
Finishing: used siding instead of 1x8 lumber, purchased ready-made windows and vents, and purchased the Ador1 automatic door. I also kept the trimming simpler than the plans and placed the run door on the side rather than at the end. I made the coop portion and run larger, made four nesting boxes instead of six, added a window to back of coop, added the sweep-out door, and put the main body of the nesting boxes inside the coop rather than in the shed. Covered the interior floor and nesting boxes with linoleum. Placed the chicken’s automatic door in the center of the wall, as opposed to on one side.
I also put the roosting bars on a hinge and placed them on one side of the coop, rather than across the coop. The original plan made it difficult to clean. Also, having a large open area allows me to separate chickens as needed with a temporary wall or cage. Or I could, in the future, place a brooder box in that area.
The only structural change that I would make is to increase the size of the back window. I am hoping to be able to eventually get electricity to the coop (solar, perhaps?), and I will need to add a small ladder or ramp to the nesting boxes.
I am beyond thrilled with my coop and chicken area. I just love spending time with the birds and feel like they are happy, healthy, spoiled chickens!