Note: after 2 years of use, I've come to the conclusion that these two incubators are only really good for lock down incubators. I thought it would work better in a climate controlled house, but I'm finding that isn't the case. The reasons are as follows:
Back in November (2017), I bought two of these 56 egg, brandless, yellow topped Chinese incubators on eBay. After a refund for some shipping confusion, I spent around $85 for the pair of them. I was really pleased that they came with turners and I ran a test hatch in each one with 1 dozen eggs.

The hatch, was less than spectacular. I hatched 5 out of the top incubator, and 1 out of the bottom. I assumed the bottom incubator just didn't work well that close to the floor (this was during a cold snap) and didn't think much else of it. When I tried using them again, the incubator that had been closer to the floor was discovered to barely work. It didn't maintain temps well enough to keep eggs alive and developing. So I started using the other one to incubate eggs, and that didn't work so well either. Because it was hard to keep the humidity low enough for the first 18 days without the thing beeping like crazy. I tried resetting and it didn't work. After this, I bought a Brinsea Ovation 28 EX for my starter incubator (LOVE IT!!!!) and I started using it as my lockdown incubator, since high humidity didn't matter for the last 3 days. This worked well, but after a month of this use, it started misbehaving more often.
So I decided to gut both these machines and retrofit them with Incukit Minis. I also decided to spend the extra $9.99 to get the 5rpm Egg Turner Motor for the Incukit MINI and retrofit it to the turners with this motor.
I converted my first incubator last week, and after some trial and error, I got it working perfectly. I'll go into that later in the tutorial. I decided to document the second incubator conversion once I had most of the kinks worked out.
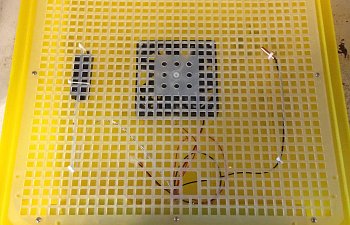
The first thing I had to do was to take the old guts out of the incubator. I unscrewed the grid, and clipped the zip ties that were holding parts to the grid.

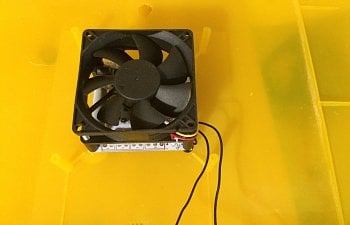
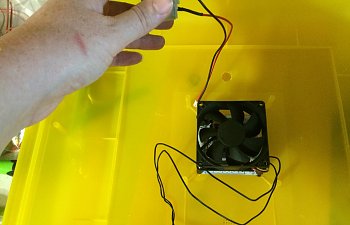
Here you see the the hygrometer, the fan, the turner plug, and the thermometer.

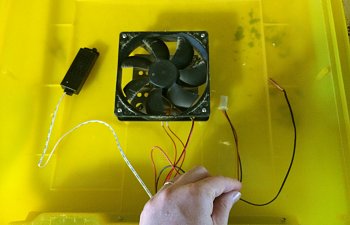
I unscrewed the fan and the heating element was located underneath.

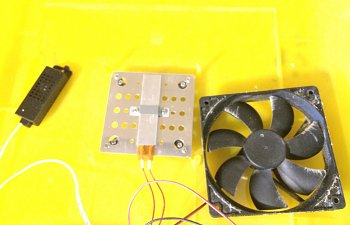
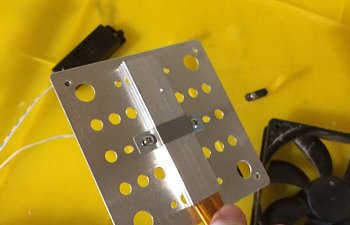
I was surprised at how small the heating element was.

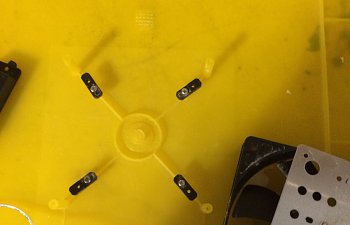
Next, I removed the 4 spacer brackets that kept the heating element off the lid. I presume to keep the element from melting the lid.

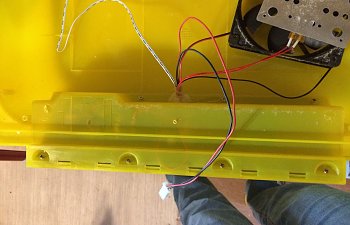
I then removed the 8 screws holding the face plate to the lid.

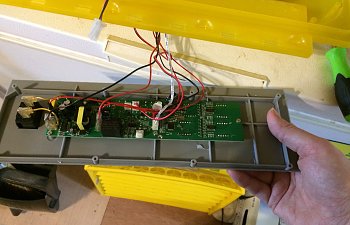
I clipped all the wires as close to the circuit board as i could get. Who knows when they might come in handy again. I could have also removed the circuit board, but I decided to leave it. I don't ever see the need to use that again.

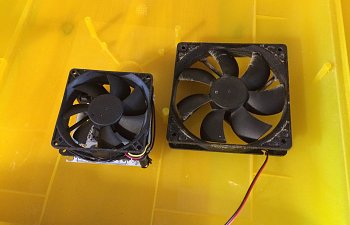
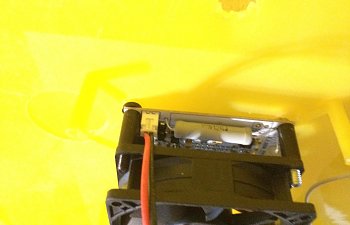
The size difference in the fans is interesting (Incukit on the left, old fan on the right).

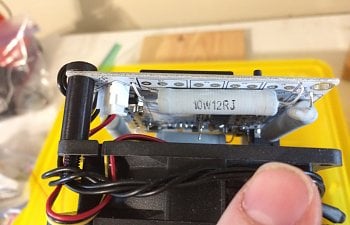
The heating elements for the Incukit are really interesting. They are these 4 grey tubes. The fan blows air up and over them carrying the heat throughout the box.

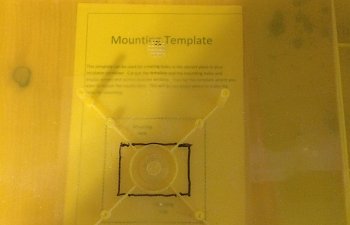
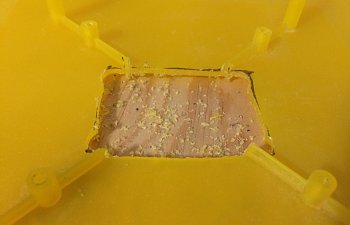
I centered the mounting template under the lid so I could mark the hole I needed to cut for the display and buttons.

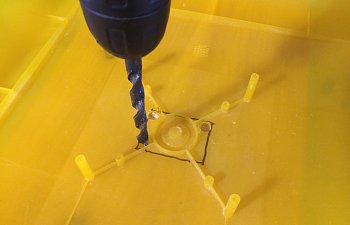
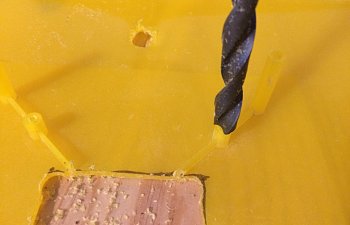
I used a 1/2" drill bit to make holes in the corners of the display hole.

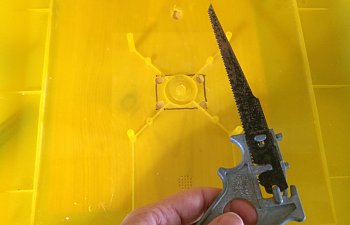
I used this sawzaw blade with a handle to cut between the drilled holes.

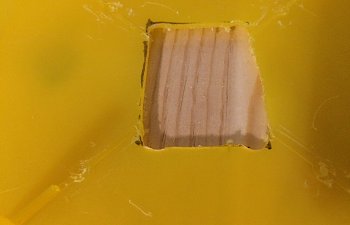
This did a good job of cutting the center out, but the unit needs to lie flush with the top of the incubator, so most of those 4 ridges and the screw sockets had to go.

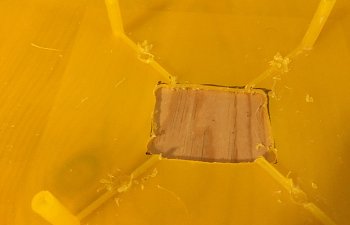
I used my drill to shave the screw sockets down to the level of the lid.

You have to be careful not to go too quickly, but it works better than shaving them down with a knife.

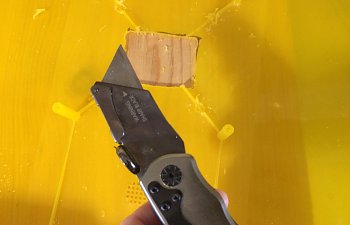
A very sharp utility knife works very well for carving away the ridges and cleaning up the remnants of the screw sockets

It takes a bit of time and patience, but it can be done.

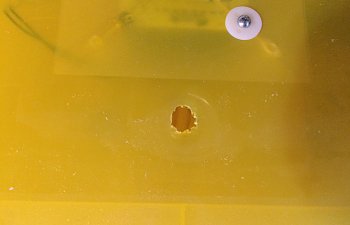
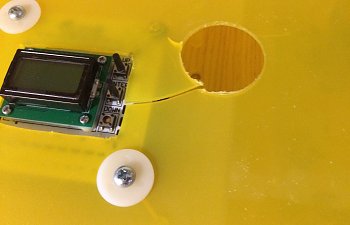
I drilled this hole through an air vent grid on the top of the incubator and cleaned it up with the utility knife. The purpose of this hole is so I can drop a temperature probe of a test thermometer without lifting the lid.

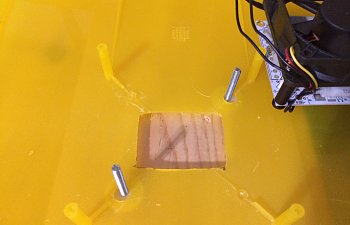
I cleaned up the edges of the main opening with the utility knife. I then made two holes for the mounting screws.

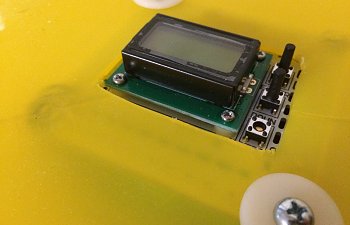
The unit mounted in the hole perfectly.

This is where I screwed up a bit. I had forgotten to drill a hole for the power cord for the Incukit until after I had mounted the kit. So I got a 1.5 inch hole saw and tried punching through. Since I wasn't able to lay the lid down flat on the board I was working on, I punched through and the plastic cracked.

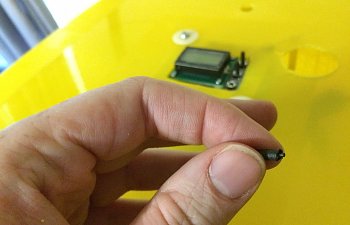
When the plastic cracked, the down control switch off the unit hit the table top and broke. My solution, use a toothpick to use the controls.
Note: After I finished the construction, I contacted Incubator Warehouse to ask how I could fix the problem and they are sending me a replacement unit. YAY!

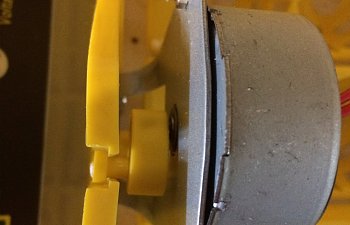
The next step was to fit the new turner motor, to the turner base. This is the original setup. The motor is attached to the metal mount, a shaft sticks through the mount and turns an arm, the arm rocks the turner cradles back and forth to turn the eggs.

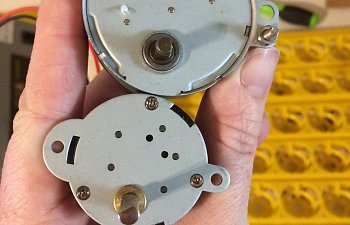
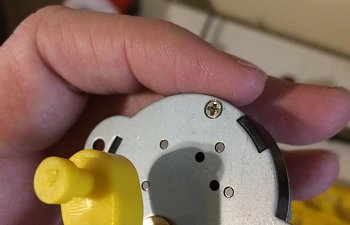
The new turner (on the bottom) is smaller than the original turner, so it couldn't be screwed into the existing holes on the mount.

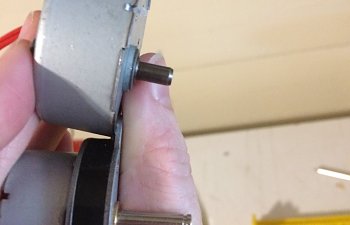
One nice thing, the shafts are both the same diameter, 5mm. So the original turner arm fits perfectly onto the new motor.

However, the shaft for the new motor is almost 3/4th of an inch longer than the original motor.

Since the workings of the original incubator were in the lid, the wires for the original turner motor were pretty long.

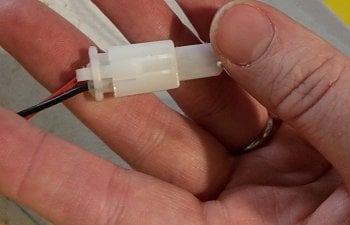
It also had this handy connector so you can easily disconnect he turner when it comes time for lock down.

The new motor had a couple of problems. First, the wires running to the Incukit unit were too short. Second, since the Incukit is going to be behind that mesh grid that is screwed into the lid there is no easy way to disconnect the turner when it is time for lock down.

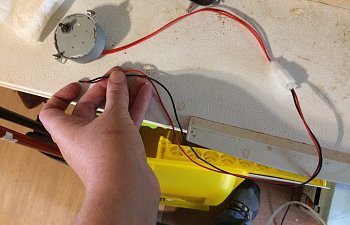
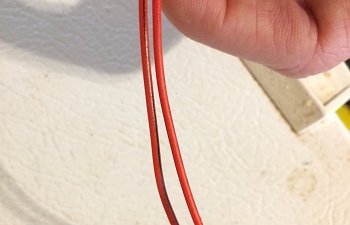
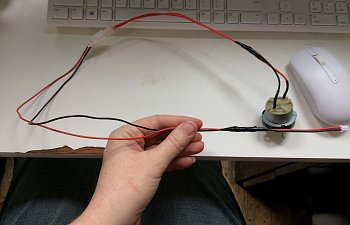
So, I decided to splice the wires from the original motor into the wire for the new motor. Since both the wires running out from the original motor were red, I ran a black sharpie down the wire that connects to the black wire on the new motor and to the black wire above the quick connect joint.

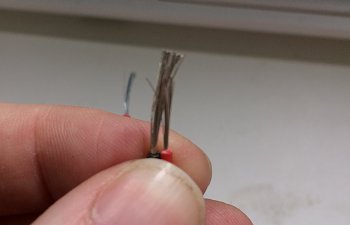
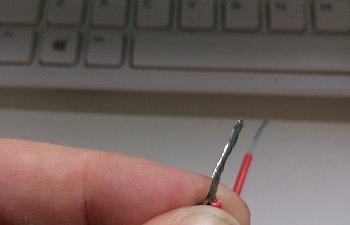
So, first, you clip the wires and strip them. Then I held them next to each other.

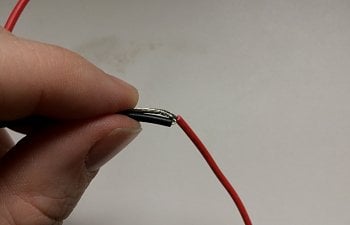
Then I twisted the wires together.

Since I didn't have any wire nuts to hold the wires together, I folded the twisted wire back against the wire shielding.

And I wrapped the wire connection in electrical tape.

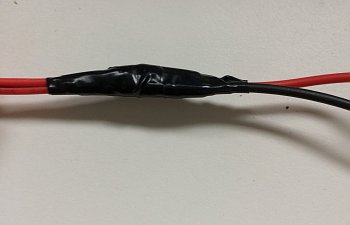
One problem with the way I connected the wires above, is that with a firm yank, the wires can be pulled apart (I did this accidentally to my first Franken-bator conversion). To prevent this, I held the two wires together, and wrapped them with electrical tape above and below the join.

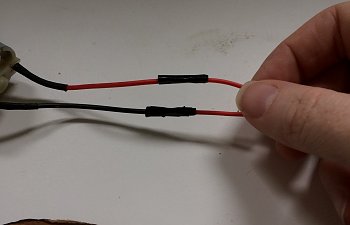
And now, I have a longer turner wire with a quick disconnect.

I then plugged the wire into the Incukit. At this point, I attached the protective plastic mesh back to the lid as well since I didn't need access to the inside of the lid any longer.

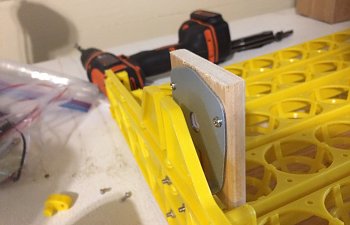
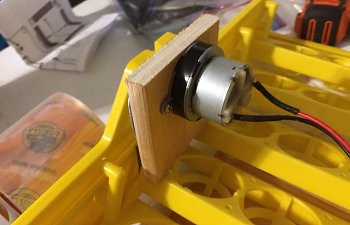
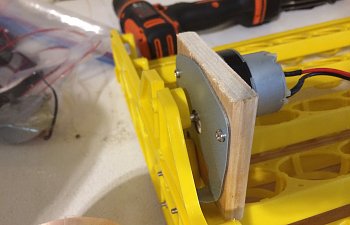
In order to make the new turner motor work. I had to take two different things into account, how to take up the extra 3/4ths of an inch in length on the turning shaft, and how to mount the motor. Fortunately, one solution takes care of both, a 3/4" thick block of wood. I screwed the block onto the mount, using the holes for the original motor.

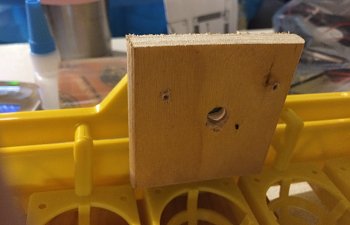
I drilled a hole through the block for the shaft.

I put the shaft through the hole and mount it to the block using its mounting holes.

And now the turner arm sits right where it needs to be.

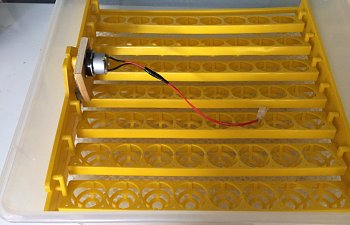
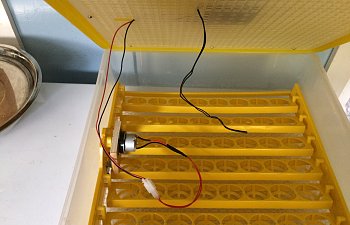
Here is the retrofitted turner in the box.

It is now attached to the wire connected to the Incukit. The black wires hanging down are connected to the temperature probe from the Incukit.

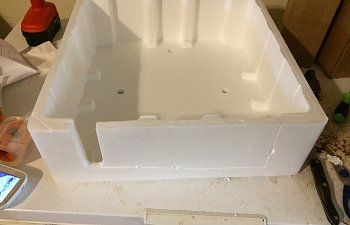
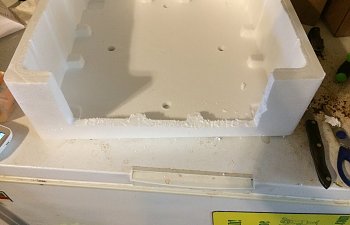
I use the original foam packaging to insulate the bottom of the incubator.

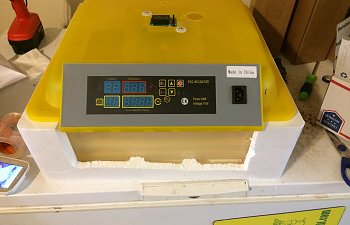
After I cut a window for so I can view inside the incubator.

And this is when I started testing my first build. The Incukit instructions say to check on how much your heater elements are being utilized to check if your incubator box is either 1) too big and/or 2) not well enough insulated. When I first tested the incubator in this configuration (with a smaller power cord hole). It took almost 3 hours for the incubator to get up to temperature. Once it got there, the Incukit had trouble maintaining the temperature, and kept dipping down into the 97-98 degrees F range. The instructions say that it is best if the heating elements are being used at less than 65% capacity most of the time. In this configuration, the lowest utilization I saw was 85%. So, the box is either too big or not well enough insulated.

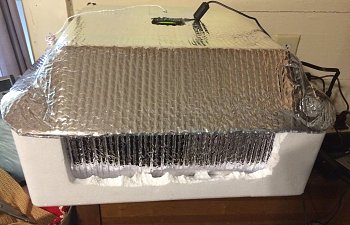
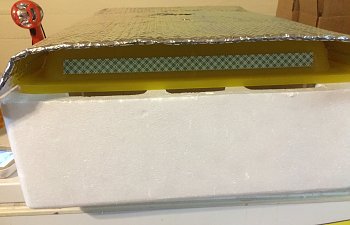
So, I went out and got some 2ft X 50ft Reflective Insulation which is basically metallic bubble wrap. and made a lid cover out of it. After I added this cover, the heaters usually hover around 50-56% capacity and spike up to 85% occasionally. After lifting the lid, it can jump to 100%, but that is okay for short periods.

I used double sided foam tape to adhere it to the lid, and I cut the corners and folded them around the corners and stuck them together using packing tape. I intended to get more pictures of the process, but I forgot until I was almost finished.

I also put a piece of the insulation in the window to retain the heat there as well.
After everything, I spent about $230 on two 56 egg incubators. Not bad considering I paid over $400 for my 28 egg Brinsea.
ETA: there is a second part to this article, Adjusting the Franken-bator, that discusses changes I had to make to this design after I started using it.
- It is hard to keep the temp and humidity steady enough for starting eggs.
- Even when the eggs I start in these incubators hatch, I they often have issues that cause them to die in the next week or two.
Back in November (2017), I bought two of these 56 egg, brandless, yellow topped Chinese incubators on eBay. After a refund for some shipping confusion, I spent around $85 for the pair of them. I was really pleased that they came with turners and I ran a test hatch in each one with 1 dozen eggs.
The hatch, was less than spectacular. I hatched 5 out of the top incubator, and 1 out of the bottom. I assumed the bottom incubator just didn't work well that close to the floor (this was during a cold snap) and didn't think much else of it. When I tried using them again, the incubator that had been closer to the floor was discovered to barely work. It didn't maintain temps well enough to keep eggs alive and developing. So I started using the other one to incubate eggs, and that didn't work so well either. Because it was hard to keep the humidity low enough for the first 18 days without the thing beeping like crazy. I tried resetting and it didn't work. After this, I bought a Brinsea Ovation 28 EX for my starter incubator (LOVE IT!!!!) and I started using it as my lockdown incubator, since high humidity didn't matter for the last 3 days. This worked well, but after a month of this use, it started misbehaving more often.
So I decided to gut both these machines and retrofit them with Incukit Minis. I also decided to spend the extra $9.99 to get the 5rpm Egg Turner Motor for the Incukit MINI and retrofit it to the turners with this motor.
I converted my first incubator last week, and after some trial and error, I got it working perfectly. I'll go into that later in the tutorial. I decided to document the second incubator conversion once I had most of the kinks worked out.
The first thing I had to do was to take the old guts out of the incubator. I unscrewed the grid, and clipped the zip ties that were holding parts to the grid.
Here you see the the hygrometer, the fan, the turner plug, and the thermometer.
I unscrewed the fan and the heating element was located underneath.
I was surprised at how small the heating element was.
Next, I removed the 4 spacer brackets that kept the heating element off the lid. I presume to keep the element from melting the lid.
I then removed the 8 screws holding the face plate to the lid.
I clipped all the wires as close to the circuit board as i could get. Who knows when they might come in handy again. I could have also removed the circuit board, but I decided to leave it. I don't ever see the need to use that again.
The size difference in the fans is interesting (Incukit on the left, old fan on the right).
The heating elements for the Incukit are really interesting. They are these 4 grey tubes. The fan blows air up and over them carrying the heat throughout the box.
I centered the mounting template under the lid so I could mark the hole I needed to cut for the display and buttons.
I used a 1/2" drill bit to make holes in the corners of the display hole.
I used this sawzaw blade with a handle to cut between the drilled holes.
This did a good job of cutting the center out, but the unit needs to lie flush with the top of the incubator, so most of those 4 ridges and the screw sockets had to go.
I used my drill to shave the screw sockets down to the level of the lid.
You have to be careful not to go too quickly, but it works better than shaving them down with a knife.
A very sharp utility knife works very well for carving away the ridges and cleaning up the remnants of the screw sockets
It takes a bit of time and patience, but it can be done.
I drilled this hole through an air vent grid on the top of the incubator and cleaned it up with the utility knife. The purpose of this hole is so I can drop a temperature probe of a test thermometer without lifting the lid.
I cleaned up the edges of the main opening with the utility knife. I then made two holes for the mounting screws.
The unit mounted in the hole perfectly.
This is where I screwed up a bit. I had forgotten to drill a hole for the power cord for the Incukit until after I had mounted the kit. So I got a 1.5 inch hole saw and tried punching through. Since I wasn't able to lay the lid down flat on the board I was working on, I punched through and the plastic cracked.
When the plastic cracked, the down control switch off the unit hit the table top and broke. My solution, use a toothpick to use the controls.
Note: After I finished the construction, I contacted Incubator Warehouse to ask how I could fix the problem and they are sending me a replacement unit. YAY!
The next step was to fit the new turner motor, to the turner base. This is the original setup. The motor is attached to the metal mount, a shaft sticks through the mount and turns an arm, the arm rocks the turner cradles back and forth to turn the eggs.
The new turner (on the bottom) is smaller than the original turner, so it couldn't be screwed into the existing holes on the mount.
One nice thing, the shafts are both the same diameter, 5mm. So the original turner arm fits perfectly onto the new motor.
However, the shaft for the new motor is almost 3/4th of an inch longer than the original motor.
Since the workings of the original incubator were in the lid, the wires for the original turner motor were pretty long.
It also had this handy connector so you can easily disconnect he turner when it comes time for lock down.
The new motor had a couple of problems. First, the wires running to the Incukit unit were too short. Second, since the Incukit is going to be behind that mesh grid that is screwed into the lid there is no easy way to disconnect the turner when it is time for lock down.
So, I decided to splice the wires from the original motor into the wire for the new motor. Since both the wires running out from the original motor were red, I ran a black sharpie down the wire that connects to the black wire on the new motor and to the black wire above the quick connect joint.
So, first, you clip the wires and strip them. Then I held them next to each other.
Then I twisted the wires together.
Since I didn't have any wire nuts to hold the wires together, I folded the twisted wire back against the wire shielding.
And I wrapped the wire connection in electrical tape.
One problem with the way I connected the wires above, is that with a firm yank, the wires can be pulled apart (I did this accidentally to my first Franken-bator conversion). To prevent this, I held the two wires together, and wrapped them with electrical tape above and below the join.
And now, I have a longer turner wire with a quick disconnect.
I then plugged the wire into the Incukit. At this point, I attached the protective plastic mesh back to the lid as well since I didn't need access to the inside of the lid any longer.
In order to make the new turner motor work. I had to take two different things into account, how to take up the extra 3/4ths of an inch in length on the turning shaft, and how to mount the motor. Fortunately, one solution takes care of both, a 3/4" thick block of wood. I screwed the block onto the mount, using the holes for the original motor.
I drilled a hole through the block for the shaft.
I put the shaft through the hole and mount it to the block using its mounting holes.
And now the turner arm sits right where it needs to be.
Here is the retrofitted turner in the box.
It is now attached to the wire connected to the Incukit. The black wires hanging down are connected to the temperature probe from the Incukit.
I use the original foam packaging to insulate the bottom of the incubator.
After I cut a window for so I can view inside the incubator.
And this is when I started testing my first build. The Incukit instructions say to check on how much your heater elements are being utilized to check if your incubator box is either 1) too big and/or 2) not well enough insulated. When I first tested the incubator in this configuration (with a smaller power cord hole). It took almost 3 hours for the incubator to get up to temperature. Once it got there, the Incukit had trouble maintaining the temperature, and kept dipping down into the 97-98 degrees F range. The instructions say that it is best if the heating elements are being used at less than 65% capacity most of the time. In this configuration, the lowest utilization I saw was 85%. So, the box is either too big or not well enough insulated.
So, I went out and got some 2ft X 50ft Reflective Insulation which is basically metallic bubble wrap. and made a lid cover out of it. After I added this cover, the heaters usually hover around 50-56% capacity and spike up to 85% occasionally. After lifting the lid, it can jump to 100%, but that is okay for short periods.
I used double sided foam tape to adhere it to the lid, and I cut the corners and folded them around the corners and stuck them together using packing tape. I intended to get more pictures of the process, but I forgot until I was almost finished.
I also put a piece of the insulation in the window to retain the heat there as well.
After everything, I spent about $230 on two 56 egg incubators. Not bad considering I paid over $400 for my 28 egg Brinsea.
ETA: there is a second part to this article, Adjusting the Franken-bator, that discusses changes I had to make to this design after I started using it.

