Construction Begins
The first phase of any construction project includes gathering materials. In our case, we also needed to make some repairs to the doors and windows we found. All the old glazing needed replaced along with a few pieces of glass (oops). Since this type of work can be done inside the heated garage and it's March in Indiana this is where we started.

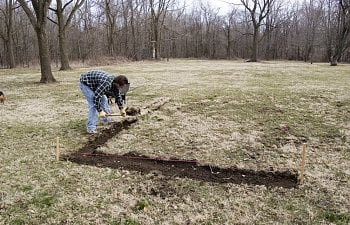
Once we finally got a break in the weather it was time to begin building the foundation. Starting off with staking out the dimensions then scraping a shallow trench for the concrete block.

We were lucky to have some concrete blocks laying around. They were formerly part of another structure here on the farm so they needed some excess mortar chipped off. After that it was time to lay them in place and level them out with some patio/paver base from the hardware store.

This should help keep the bottom boards from rotting anytime soon. And also keep any predators out.

We used 2x6 pressure treated lumber for the floor joists. However the joists will be completely encased in other materials to prevent the birds from being exposed to the treated wood.

A couple of extra concrete blocks serve as piers for supporting the center of the floor.

We decided on one half inch tongue and groove OSB for the flooring. Later we'll add some inexpensive vinyl in the coop area for easy cleaning.

The siding material is called ABTCO Knotty Barnside. It comes in a 4x8 sheet and should look great once painted.

Laying out the studs and completely assembling the walls proved to be the easiest method of construction for the long walls.

Then simply lift it in place and brace with a few 2x4s.

The end walls can then be put in place while the bracing is still there.

Then when you're ready you can remove the braces and add the siding. Since the ends have more openings it's nice to have one person hold the siding up, another marking the cuts and then remove the piece and cut before nailing to the studs.

The trusses were built in the workshop and then carefully lifted into place. This part requires two brave people willing to stand precariously on ladders. Unfortunately we had one brave person and another clinging on for dear life.

Installing the plywood for the roof was no easy task either.

Then it was time to go back to those windows. We would highly recommend if it's within your budget to just go buy new windows. But if your crazy about old houses and old house stuff like us, you might give building your own framing a try. We think they'll add some character.

We finally caught a break in the weather and were able to get the roof on. Here the ridge vent is getting the final touches. The 40 year warranty shingles were leftovers from my parents house. We now have nicer shingles on the coop than our house.