.jpg")
I ended up having three broodies at the same time, with eggs from the same five day period. Which meant WAY too many Mom's and chicks in the coop at the same time. Having already converted a clamshell dog crate into an 'emergency' mini-coop, I knew I'd need something to house the other two hens and their chicks, as one hen and chicks could go in the clamshell.
(insert picture of dog crate coop here)
I spent the first two or three days of the hens' broodiness thinking of our flock's needs, where to put additional 'houses' in their run, how to incorporate additional elements into this layout of ours.
(insert picture of run here)
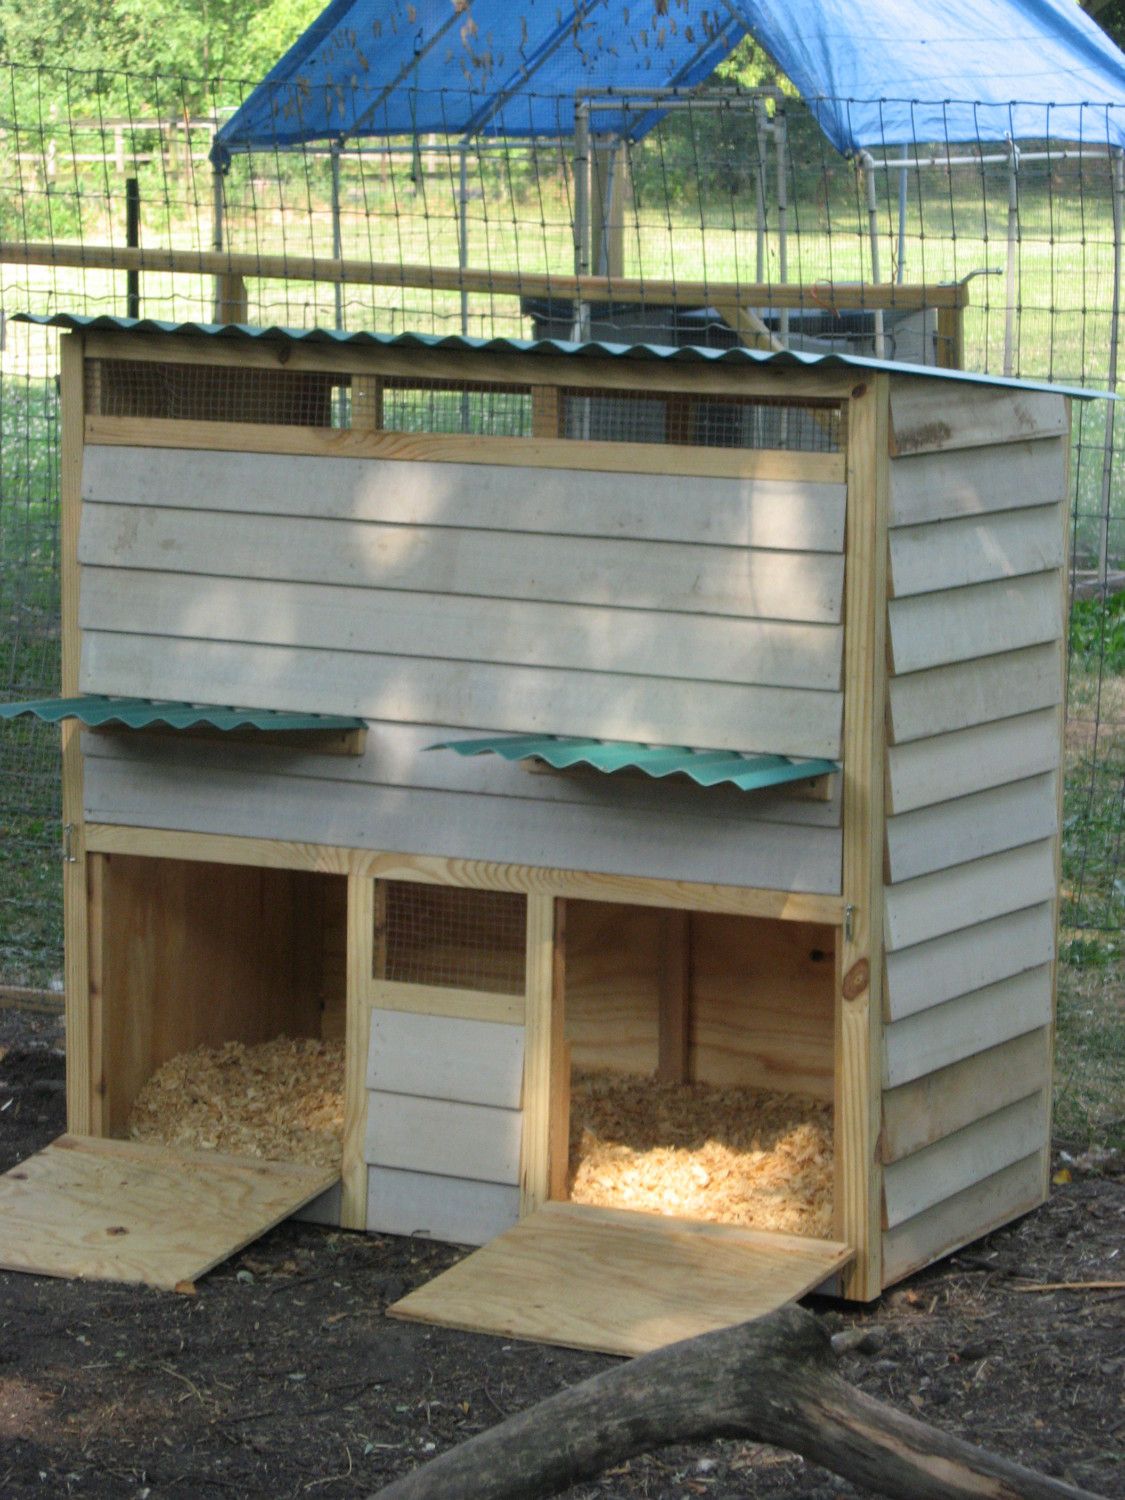
I realized that a broody hen doesn't need a whole lot of space. And I guessed that she would be bringing her bitties out with her pretty soon after they hatched. Consequently, I determined to build a 2x2' square base for each hen. Perhaps a two-flat? No, the ramp would be hard to navigate for itty-bitty legs. A side-by-side duplex idea was formulated.
(insert drawing here)
Because I hate cutting plywood with our hand-held circular saw (kick backs), I decided to make as few cuts as possible. So the coop dimensions were based on available plywood stock and a few additions from Menards. 4'x2'x1/2" exterior grade plywood was used for the box.
Menards has a 'cheap wood' bin section for odds and ends. To my great delight, I found all the framing members I needed in that bin! Each 'stick' was just .29 cents. Most were 1"x2"x46" long. Therefore, the duplex broody coop would be similar dimensions.
(insert picture of framing here)
Using AC2 'green' 4"x4"x2" ends left from a fence project gave me the feet of the unit.
I then cut and built a frame out of the 1x2's the same dimensions as the plywood.
Tip: MEASURE EVERYTHING! Our plywood was not 48" longx24" wide. It was all 24 1/2" wide x 47 3/4" long! Only one piece was actual dimensions. Had I started with that piece, the frame would be larger (or smaller) than the plywood!
(insert picture of tape measurer on plywood here)
Using the base as a building block, I created one side and the back. As I was building by myself, this was tricky to attach the back and side to the base - keeping everything square, plumb and level - clamps helped a lot, as did one of the barn posts to lean the whole shebang against.
Repeating the second side dimensions was quick and easy to install. There was finally some stability in the cabinet, so I could breathe a bit better! Did I mention this was built during the 102 degree weather we've been having? Yeah, that'll slow you down a bit!
I left the front for a day to ponder different door options, and to cool off from the oppressive heat.
(insert picture of drawing options here)
I determined that doors on the exterior edges would be better than on the interior, as then there would be more of a 'corner' to get comfortable in, and less likelihood of a hen entering the wrong space.
I also had to determine the size of the doors. I choose oversized doors of 18" square, as this is the only access point in the coop for cleaning, checking eggs, checking on Mom, etc. I need to be able to get in there too for maintenance!
(insert picture of door here)
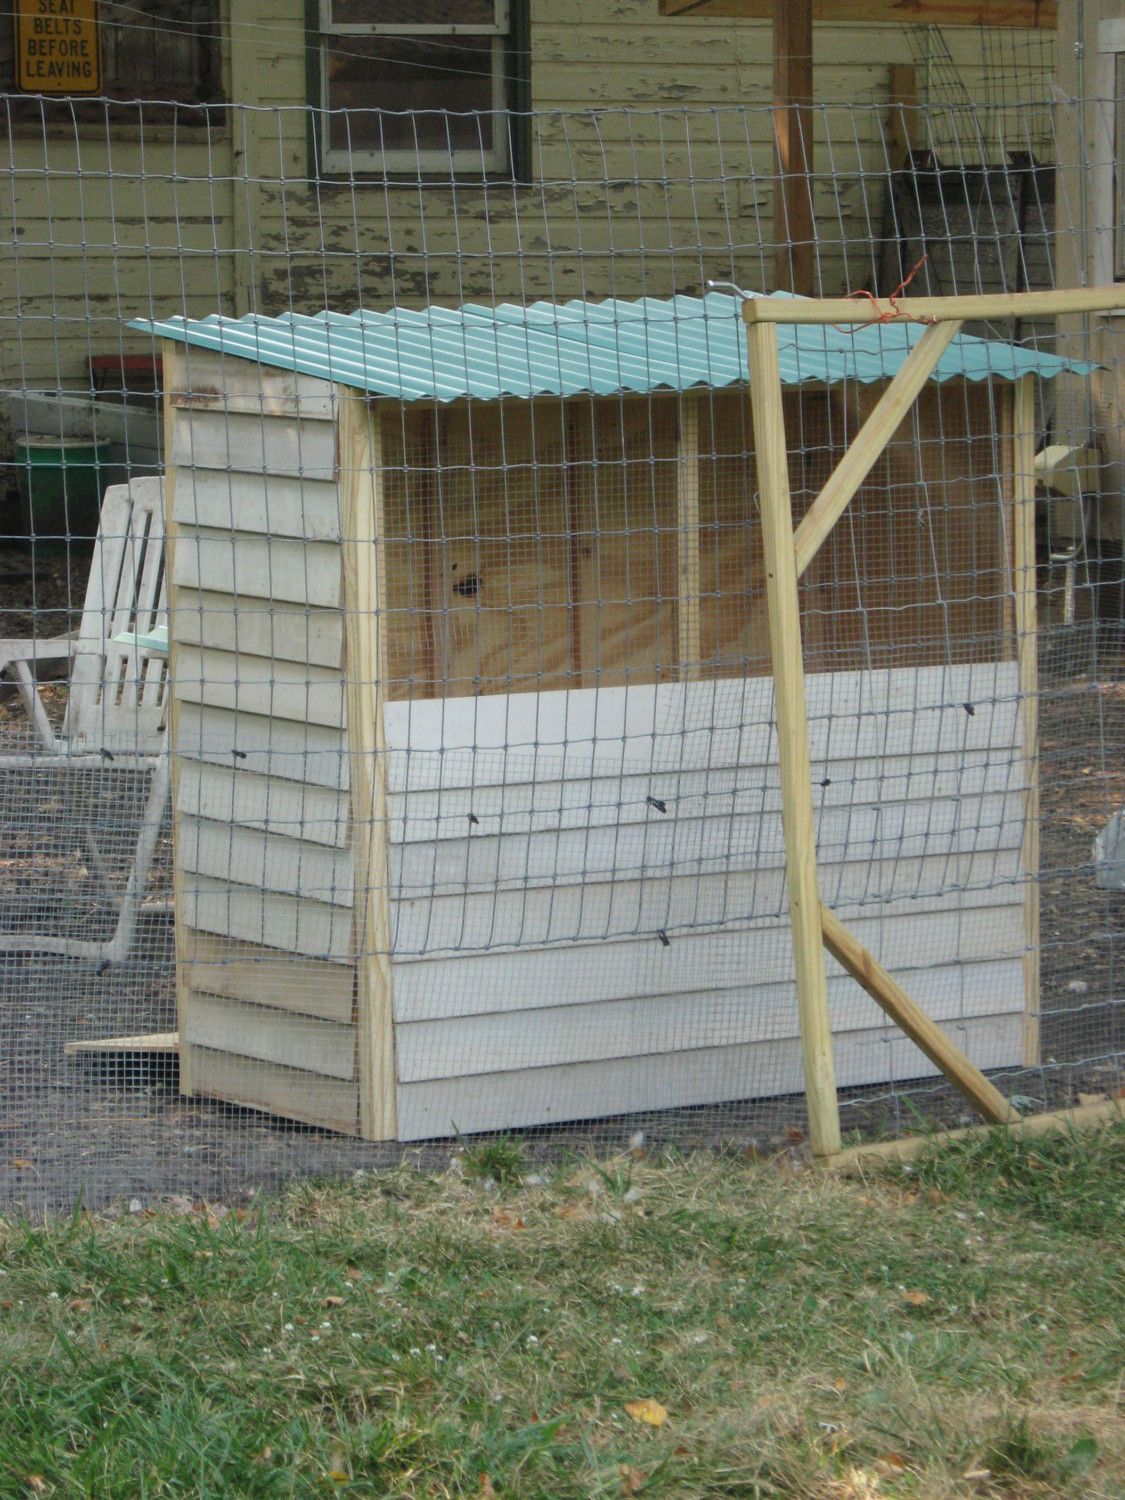
As this is intended as a three-season coop, ventilation is more than I would put in a regular coop. (Watch, I'll end up with a broody in it in November and have to change everything!) 1/2 of the back is open to ventilation as is a small section on the front under the roofline.
After cutting the plastic roofing material, I realized I had enough left-over to make small awnings over the doors. My concern is that rainfall from the front lip would enter the coop and get the bedding all wet. So awnings were installed! I'd like to re-make these so the awning slants downward instead of straight out. I also have not installed the interior divider, as one broody happily keeps her brood in the main coop without any problems. But it's all cut and ready to be installed at a moments notice!
Using left-over clapboard from repairwork on our house provided all the exterior materials. Now, to get left-over exterior paint to paint it!
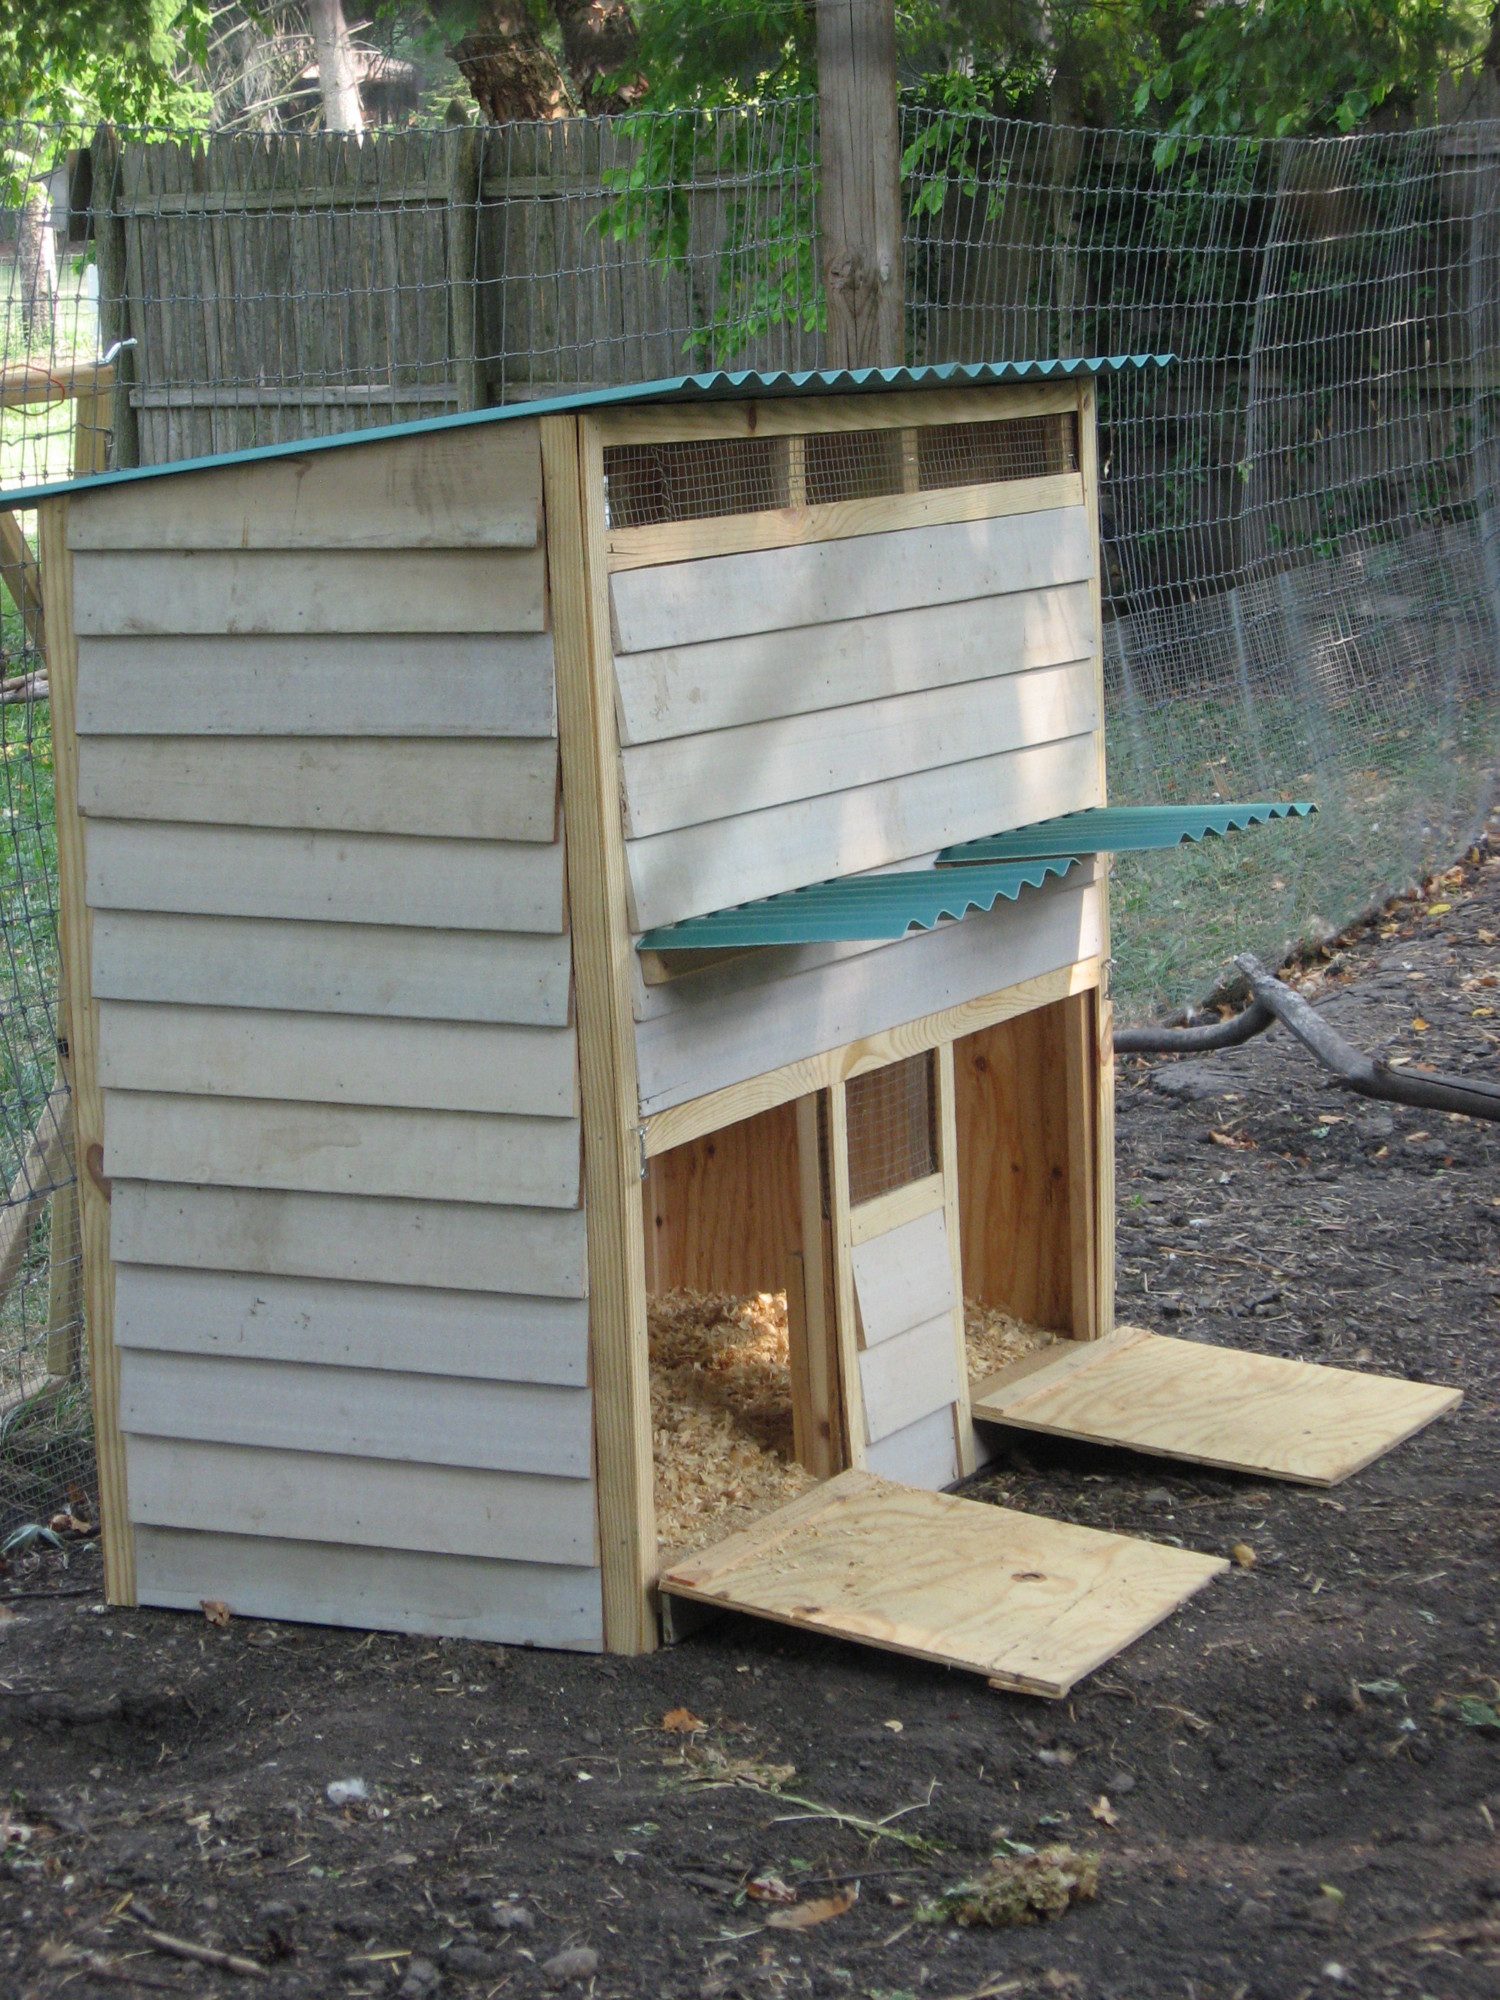
I also cut a 2x3" as a roostbar to fit inside the coop. When the chicks are a bit older (say 3wks), I'll install the roost bar for them to sleep up on. At this point, Mom is still sleeping with them on the floor. But when she determines to leave this group and rejoin her flock, the roost will be available if the chicks do not follow her (unlikely, but....)
