I've wanted chickens all my life, but it took some nudging from my bird loving daughter to finally make that dream a reality. A friend gave us five newly hatched Serama hybrid chicks in the spring of 2009, and now the only thing I regret is not getting chickens sooner!
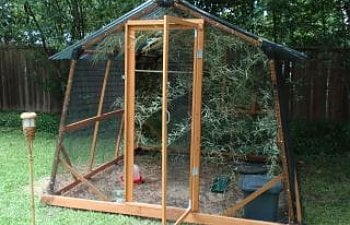
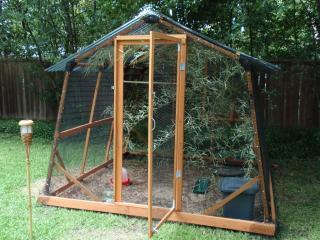
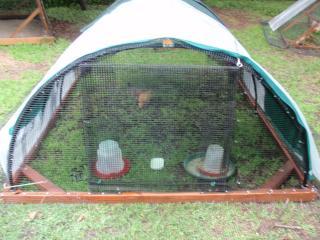
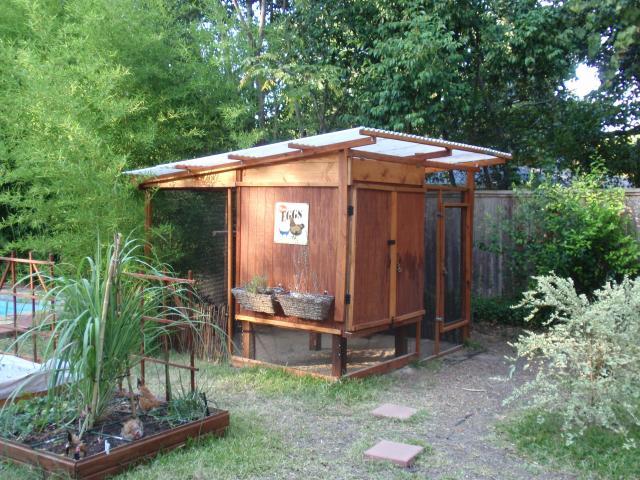
We live in North Texas, so the first thing I built was a summer coop/run, suited to our hot summer weather. It is 8' by 8' by 6' tall at its highest point. We call it our Tiki Coop.
It didn't take our five bantams very long to dig up all the grass in this coop, so I put down a bed of sand. I put a long rectangular plant tray under the roost and simply dump the poop into our compost and hose off the tray every morning. Then I go around the run with a kitty litter scoop and pick up any stray poops in the sand. I love sand!
By the way, that isn't a bush growing inside the coop, those are cut bamboo boles that I replace periodically (we have plenty of spare bamboo growing in our yard). I like how it looks, and the chickens seem to like roost under the branches, too.What I should have done differently: I should have placed this coop somewhere in our yard where it wouldn't have received afternoon sun. In our sweltering summers, this coop gets very hot even with its open sides and shade tarps, and the heat lingers on into the evenings. However, in the winter, this is a benefit.
Since our bantams are so tiny they would be vulnerable even to roaming neighborhood cats, we don't free range them except with supervision. But I wanted them to have the benefit of scratching around in the grass, so I built some daytime tractors.
Here's my first model:
I made it using an old trampoline frame that I painted and wrapped with the same wire I used on the summer coop. Over the wire, I attached a willow rolled fence for looks. It's 8' in diameter, and almost 3' high.

I also constructed a wire apron lying on the ground for the tractor, but of course I didn't tack it down. The apron helps to prevent a chicken from squeezing out under the wire someplace the lawn isn't quite level. Our yard is fenced, so hawks and cats are the likeliest risks during the daytime, and the tractor ought to thwart them. It isn't raccoon-proof, though, so we move the chickens into a more secure, stationary coop/run when we leave the house during the daytime, just in case a raccoon drops by.
I used some rope and a branch to fashion a handle that I use to lift up one side of the tractor and drag it around the yard every day or so. You can't see it in these photos, but I cut a chicken door in the side, with a wire door flap and a bungee cord fastener (the door gets covered up by the wicker siding too after the chickens have gone in). The chickens quickly got used to the routine of going into the tractor in the morning (I throw some scratch in there first thing, which helps motivate them). At the end of the day, I let them out to free range in the yard under my supervision, then I herd them into a stationary coop/run for the night. After the hens started laying, I realized I needed to cut another door in the roof to insert and remove a nestbox.
Model no. 1 had some design problems. Every so often as I dragged it around the yard, the apron would bend under the edge and it was a hassle to straighten it out. The darn thing was also too heavy. And the plastic edging covering the sharp wire door frame kept popping off and was difficult to get back on. Plus, since the roof was flat, I couldn't easily tarp it in case of rain. So....ta da!... Tractor Model no. 2:
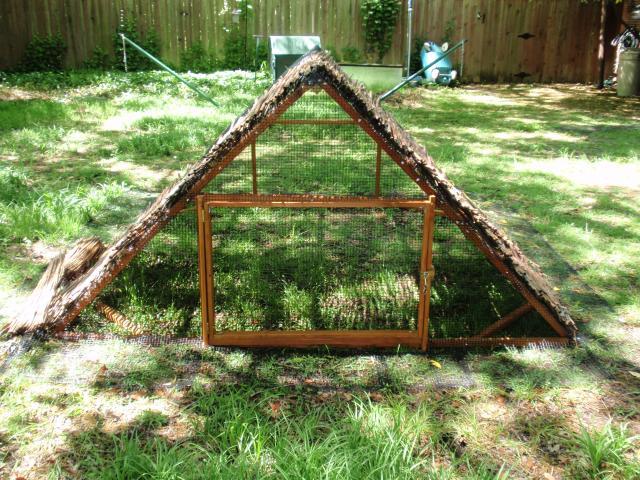

But I needed another tractor as a grow out pen for some chicks we hatched out in the summer of 2010, so I tried another design. Here's Model no. 3:
Last fall, I also built a winter coop because I was nervous about how cold tolerant my tiny bantams would be.
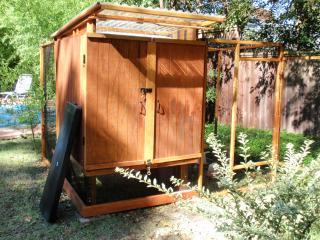
I used 2 by 2's for the framing, plywood inside, a layer of reflective insulation, then another panel of plywood on the outside. I used clear Suntuf panels on the roof. I hoped that the clear roof would provide light (without the need to cut windows in the side of the coop) and make the coop warmer for the winter. So far, the temps inside the coop run 5 to 10 degrees higher than the outside temperatures during the day, but that heat is quickly lost when the sun goes down because of the lack of insulation on the roof. So my solar experiment is a failure, except to the extent that on cold winter days the chickens will have the option of hanging out in the coop to warm up if they want to (with the nest box inside the coop, it will be a warmer place for them to lay). This coop will be way too hot for use in summer; that much is obvious. However, the run does come in handy and I've been using it to separate my adult chickens from the teenagers in summer.
Here's a picture of the inside of the winter coop:

This whole front wall opens up for access. There are two flaps covering the wire covered front vent at the roofline so I can close down half or all of it. There is another wire covered vent on the top of the back wall that stays open.
A removable board at the front keeps the sand substrate inside (easy to keep clean, but a tad chilly). I put a boot tray under the roost at night and clean and hose it down every morning. There's a sliding door inside covering the pop door, with an outside drop down door that I can open from inside the coop:
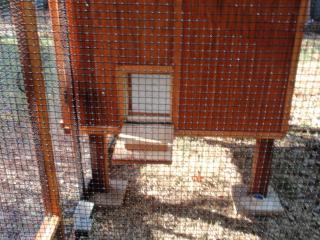
The chickens use the drop down door as their perch for entering the coop.
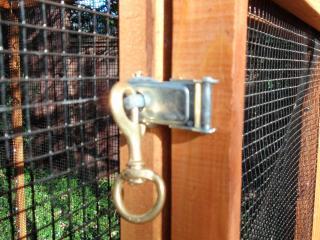
All of the doors to my coops are double latched at the top and the bottom of each door and secured with a spring operated clip like this:
I copied the roof design of The Garden Coop http://www.thegardencoop.com/. The top of the enclosed coop is covered with hardware cloth, and I can cover it with insulating panels in the winter if I want to cut back on some of the ventilation. However, my plans are now only to use this during daytime.
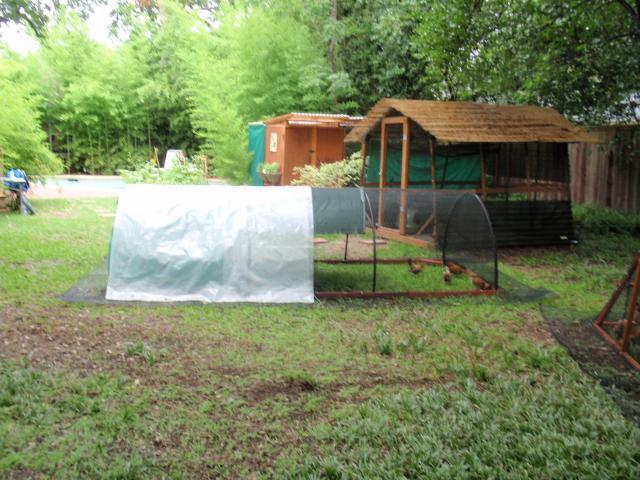
Here's the winter version of our Tiki coop:
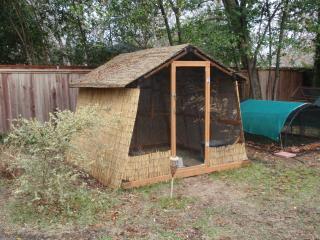
I attached 6 mil plastic to 3 of the sides then covered the plastic with cheap rolled reed fencing. The plastic provides wind block and the fencing helps keep the plastic from flapping around. On sunny winter days, it's quite cozy inside this run.
For those of you wondering whether to build yourself or buy a coop ready made, let me offer this perspective. It was a lot of work to build these coops (and a few times during the summer when the sweat was pouring off me like a waterfall and the mosquitoes were eating me alive, I did cuss a bit and wonder whether I was completely insane for trying to build my own coop). However, I got to build them exactly the way I wanted them. I think it was easier to do this, than to buy a prebuilt coop and then fiddle with modifying it to suit.
I built everything shown on this page without the use of any power tools other than an electric drill/screwdriver, because I reasoned in my inexperienced hands a power saw was not worth the risk to my limbs. I had the plywood and the 4" by 4" post cut for me at Home Depot; the rest of the wood I cut to size using a small hand saw. That's why most everything I built is based on stock lengths of 4' and 8', because I was trying to minimize the number of cuts I'd need to saw. Certainly someone better at construction than I am could do a better/quicker job than I did; but here's proof that even someone with no skills or experience starting out can get the job done.
I didn't keep a tally of the costs for the summer coop/run and tractor, but the winter coop and run cost me about $600. And the satisfaction of building something yourself? Priceless.
And yet...I thought it was only fair (since I've tried just about everything else) to see what it would be like to hire a professional builder to construct a coop larger than I felt comfortable tackling on my own:
https://www.backyardchickens.com/web/viewblog.php?id=32217-the-just-right-coop