Our Chicken Story
By FELIDAET
One day we were were casually talking about what else we could do besides vegitables. We live in an unincorporated area that has pretty much no restrictions on animals. We tossed around the idea of raising a couple of pigs. That is still a possibility but is down a ways on the list. I have one daughter that enjoys visiting a nearby pig farm and would just love to bring home one or two of those pigs. We also talked about a cow or a goat or a lamb or rabbits for meat. Finally my wife said that her mother raised chickens during the great depression. They had a large flock and it provided a significent amount of meat and eggs for their family. My wife said that she wouldn't mind having a few chickens. I told her that I have always thought it would be fun to raise a few chickens. I never suggested it because I thought she we be very opposed to the idea. We talked about it a little more and decided to look into raising a few in 2009. We were thinking that 4 - 6 laying hens would be good.
I am a person that does not like to enter into a new "adventure" or trying something without knowing something about it. I started researching the topic of raising chickens on the internet. I spent a significent amount of time looking into what it takes to raise them and trying to learn about different breeds. I spent a lot of time looking over and over and over the breed list on My Pet Chicken. Then one evening we stumbled upon this website. That was probably late November. I have since spent countless hours reading messages and responses on this site. We also visited with a family about 1 mile from our house is raising 9 White Leghorns. We talked to them for about an hour and closely examined their coop, run, feeding setup, etc. We decided that we could do it but planned to do a few things different than this family did.
Coop Design
Coop design was one of the the first things I started working on. I have helped in the building of two homes and therefore have some construction skills/knowledage. I also have some of the tools. I decided that I could build my own coop. I looked around for plans on the Internet with minimal success. I finally found one free plan that looked pretty good at http://www.buildeazy.com/. I printed the plan and studied it many times. I decided to make a few minor modifications. Then a few more and a few more... Then we decided that we both like a gambrel style roof. So we then changed the roof design. I drew and redrew the plans several times before we finally came up with our design. I have read on this forum many times to build much bigger than needed. I am starting to wonder now if the design we came up was big enough even though it is nearly double the original size. Oh well...
My drawings are not good enough quality to post here and they are drawn with pencil and paper. I don't have them electronically. Here are some of the specifications and features of our coop design.
- Overall dimensions - 8' x 10'
- Coop area dimensions 8' x 8'
- Storage area with it's own external door - 8' x 2'
- Wall separating the storage area and coop can be easily removed in the future if desired to expand.
- Two large windows (free from Craigslist)
- We want the coop to look like a minature barn
- We don't want to walk through the run to enter the coop.
- We don't want to enter the coop to gather eggs.
- The Pacific Northwest is wet. Therefore the run needs some type of roof.
- Roof is also necessary for the run because we have hawks and eagles flying over head frequently.
- There are Coyotes and Raccoons in the area. The coop needs to be preditator proof. The run needs to be as preditator proof as possible.
- Vinyl floor over 3/4" Pressure Treat plywood
Chicken Selection
I put as much work into selecting breeds of chickens as I did in planning the coop. I spent countless hours looking at the photos and descriptions on the My Pet Chicken website. I then read about all of the breeds on various postings in these forums. I also did a Google on some of them. I think that we will be very happy with our selections. Are criteria was:
- Colorful flock
- Large or Extra Large eggs
- Frequent layers
- Various egg colors
- Standard size birds
- Friendly birds
- Relatively quiet
- Silver Laced Wyandotte (2)
- Gold Laced Wyandotte (1)
- Araucana (EE) (2)
- Barred Rock (2)
- Black Australop (2)
- Welsummer (2)
- Buff Orpington (1)
- Deleware (2)
There were a few other breeds on my wish list but these were my priorities. I would like to have an Ancona or two but none of the feed stores I checked with were getting these within the time frame I wanted them (Apr 1 - 22). I will probably continue to keep watching for these. There are two feed stores that have chicks coming in by my office and they have not announced what breeds they will have in April. They are both getting small quantities of many breeds each week. One of them is getting Anconas but they are too soon for me. Maybe they will have more in April.
Updated 1/31/2010
The list of chicks that we got changed. I was not able to get the Delewares. We also found a great promotion at a local feed store: Buy a bag of chicken feed and get 5 free laying chicks (layers). This list of what we got are:
- Silver Laced Wyandotte (2) - 1 turned out to be a rooster and has been rehomed
- Gold Laced Wyandotte (1)
- Araucana (EE) (3)
- Barred Rock (3)
- Black Australop (2) - These have been rehomed
- Welsummer (2)
- Buff Orpington (1)
- Rhode Island Red (1)
- Gold Comet (1)
- White Leghorn (1)
- Brown Leghorn (1)
Coop Construction
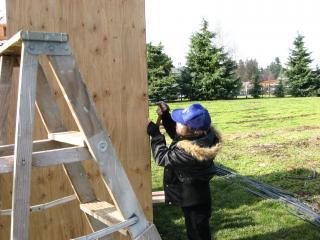
Construction of the coop began in Late January 2009. Progress was a little slow due to short days. I also work full time. I am doing 99% of the work but I do have two little "helpers" that occasionally assist. I have taken lots of photos of the construction but I will just show a limited number of them here to keep the size of this page smaller. Some of the photos show my helpers and I will only post their photos if their face is not visiable.
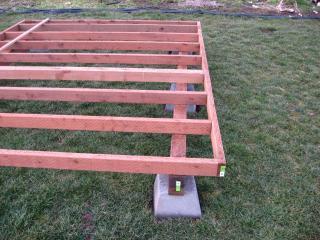
Floor joists are 2" x 4" pressure treat. They are sitting on 4" x 6" pressure treat runners.

3/4" Pressure Treat plywood makes up the floor. Expensive - yes.
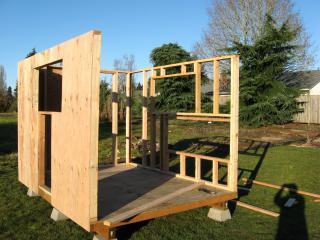
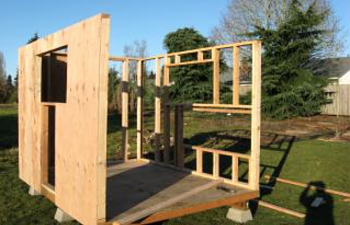
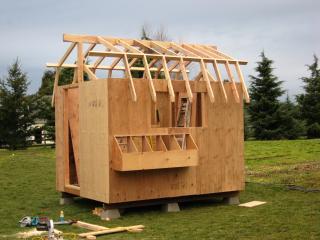
This wall contains a large window and soon the nest boxes. It took a lot of carefull planning to layout this wall. Wall framing uses 2" x 4". Wall sheating is 1/2" Plywood. I would have preferred to attach the plywood sheating to each wall before standing it up but I ran out of plywood after the second wall and did not want to take the time to go buy more right then. So I went ahead and framed the third wall and stood it up without the plywood.

The nest boxes are added. Probably more nests than I will need. The nest boxes were pre-built in the garage in December. It is one unit that was easy to drop into place. They are built from 5/8" plywood.
One of my helpers pounding in a nail.
My other helper also pounding in a nail.
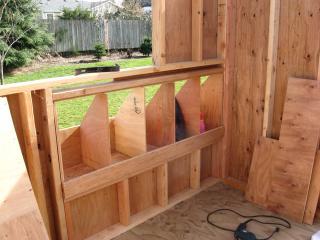
Another view of the nest boxes. More of the plywood sheating is up now.

Time to begin the roof. I found some rafter design software on the internet that could be downloaded for a 30 day free trial. I only needed it for one day. It is great software. The website is http://www.easyrafters.com/. I could not have designed these rafters without it. The design that it gave me was so good and detailed that the first rafter I cut actually fit perfectly!!! I has expected it to take 3 or 4 tries to get it right. Cutting the angels correct required the use of a power miter saw. This was my Christmas gift from my wife this year. I specifically requested it knowing it would be a great help in building the coop. The ridge board is a 2" x 6".
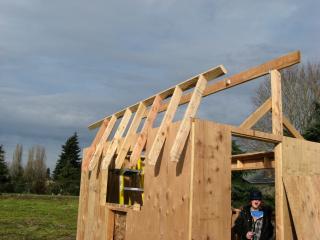
Lower half of the rafters on one side in place. Rafters are generally spaced 16" OC (on center).
The upper half of the rafters are starting to be attached.
Most of the rafters are in place now.
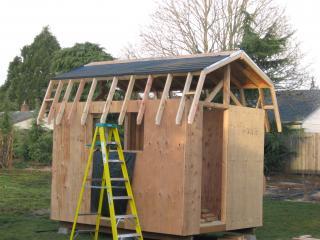
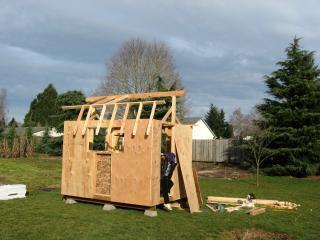
Roof sheathing installed on the top portion of the roof and roofing material starting to go on. Sheathing wood is 1/2 OSB. I was trying to minimize costs where possible. I found a discount building supply store where I was able to by the roofing material for $13.95 per square. Much better than the approx $75.00 per square price I was finding at building supply stores and big box stores. This is such a good price that I have decided to put a regular roof on my run as well.
The piece of black plastic was only temporary until I had a scrap of plywood the right size to go there. The plastic was to help keep the rain out.
Notice the blue tarp? I was covering the entire coop at night until I got the roof completed to try to keep the wood as dry as possible. It rains often here.
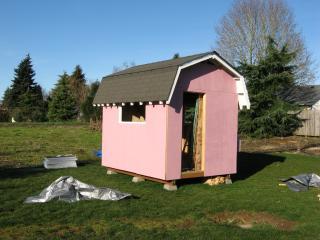
The coop is pink! Did the paint store mess-up???OH NO!!!!
Luckily this is ok. It is only tinted primer. If I had used white primer it would have taken several coats of paint to cover it. whew...
Quick... Lets get this covered up with the paint.
And here it is the next day. First coat of paint.
A neighbor hollored over the fence and said he liked this color much better than the pink. This is one coat and the pink is still partially visable. A second coat is still needed.
The second coat of paint finished covering the pink primer.
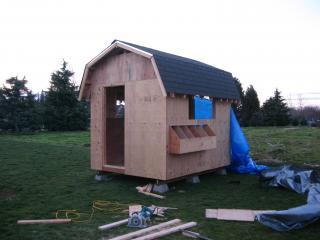
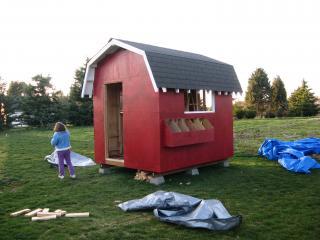
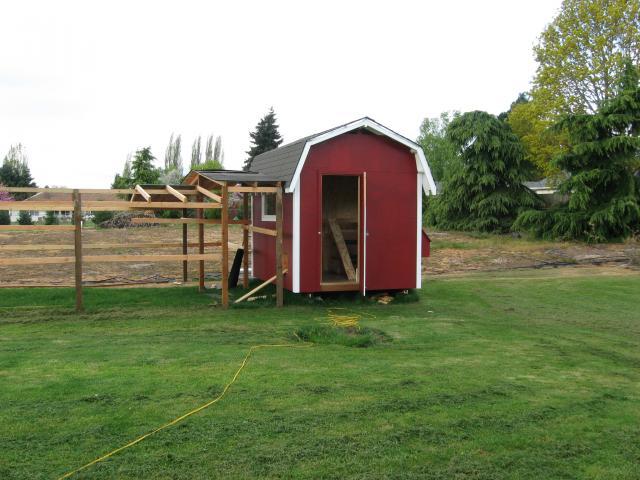
It is starting to have the minature barn look I desired. The first door is assembled and hung. I need to add the handle and a couple of latches.
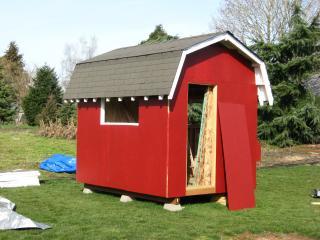
Next to come is white corner trim boards, Door handle and locks, windows, trim under roof painted white (it is only primer in these photos.), build and install the door on the other side (storage area), and cut out the chicken door, finish building the internal wall dividing off the storage area, lay the vinyl floor, build the roosts, and build the feeder.
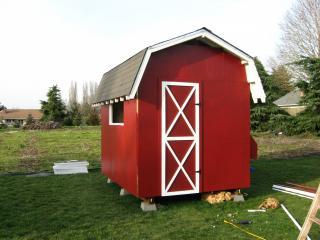
The coop is 99% complete. Construction is now beginning on the run.
Most of the framework is in place for the run. Construction of the roof in underway. 2" x 4" are used for the rafters. These are covered with 1/2" OSB. Then roofing felt and shingles.
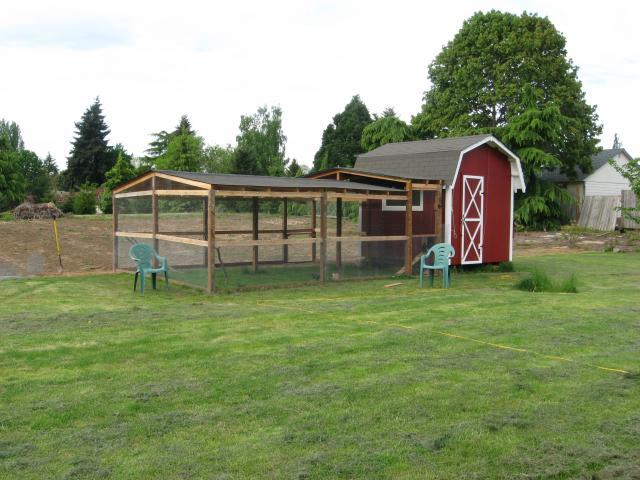
The roof on the run is complete. Hardware cloth is used on the bottom half. Poultry wire is used on the top half.
NOTE - The following pictures were not taken in the sequence. After the chickens move in I noticed that I was missing some pictures. I took these latter and inserted them where I intended them to be in the photo sequence.
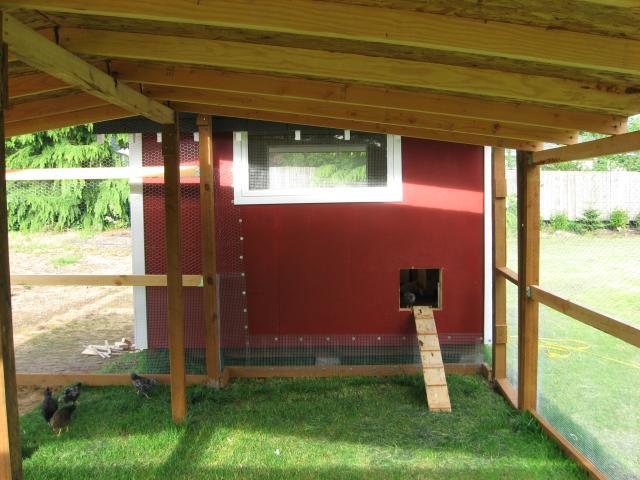
This photo shows the underside of the roof. The chicken door and a ramp was been added.
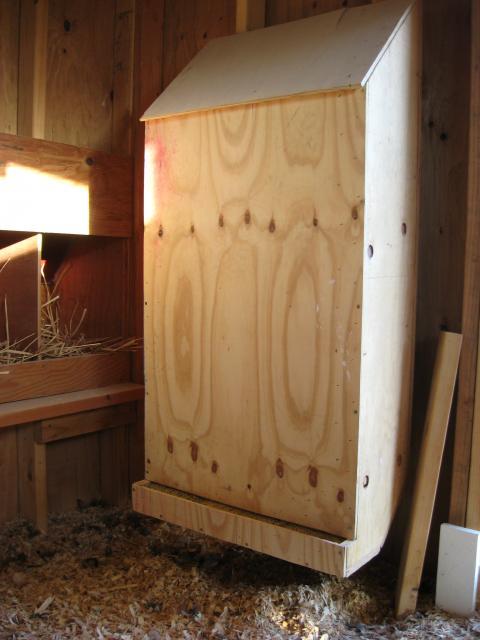
I built my feeder. It holds about 150 lbs of feed. It is much bigger than is actually needed. It is mounted to the wall with screws so that it can be raised as the chicks grow.

This feeder is much smaller. There is a divider in the center. On one side is grit and the other is oyster shell.
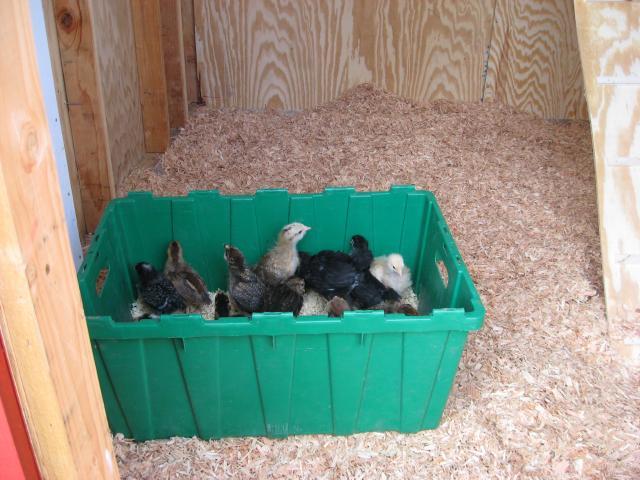
Moving in day. Notice how clean everything is. It's the last time it will every look this nice!

The chicks love their new home. Much more space than the brooder. A couple of them discover they even have room to fly.
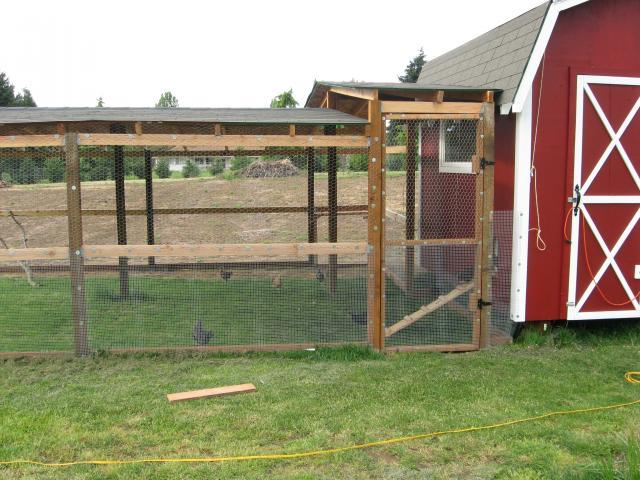
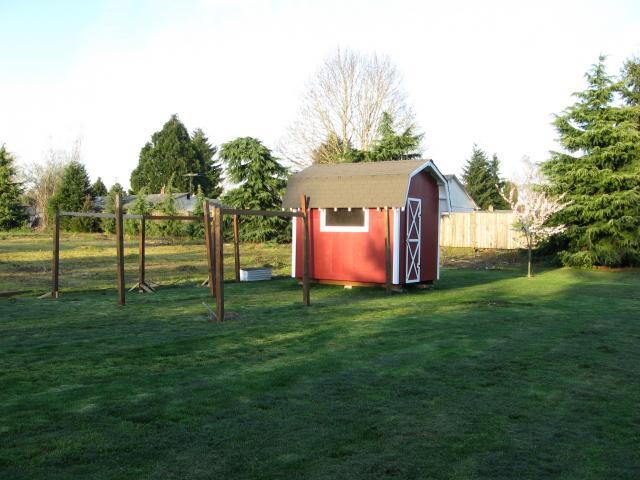
Here is the final coop and run. Notice the rope on the front of the coop. This is used to open and close the chicken door.