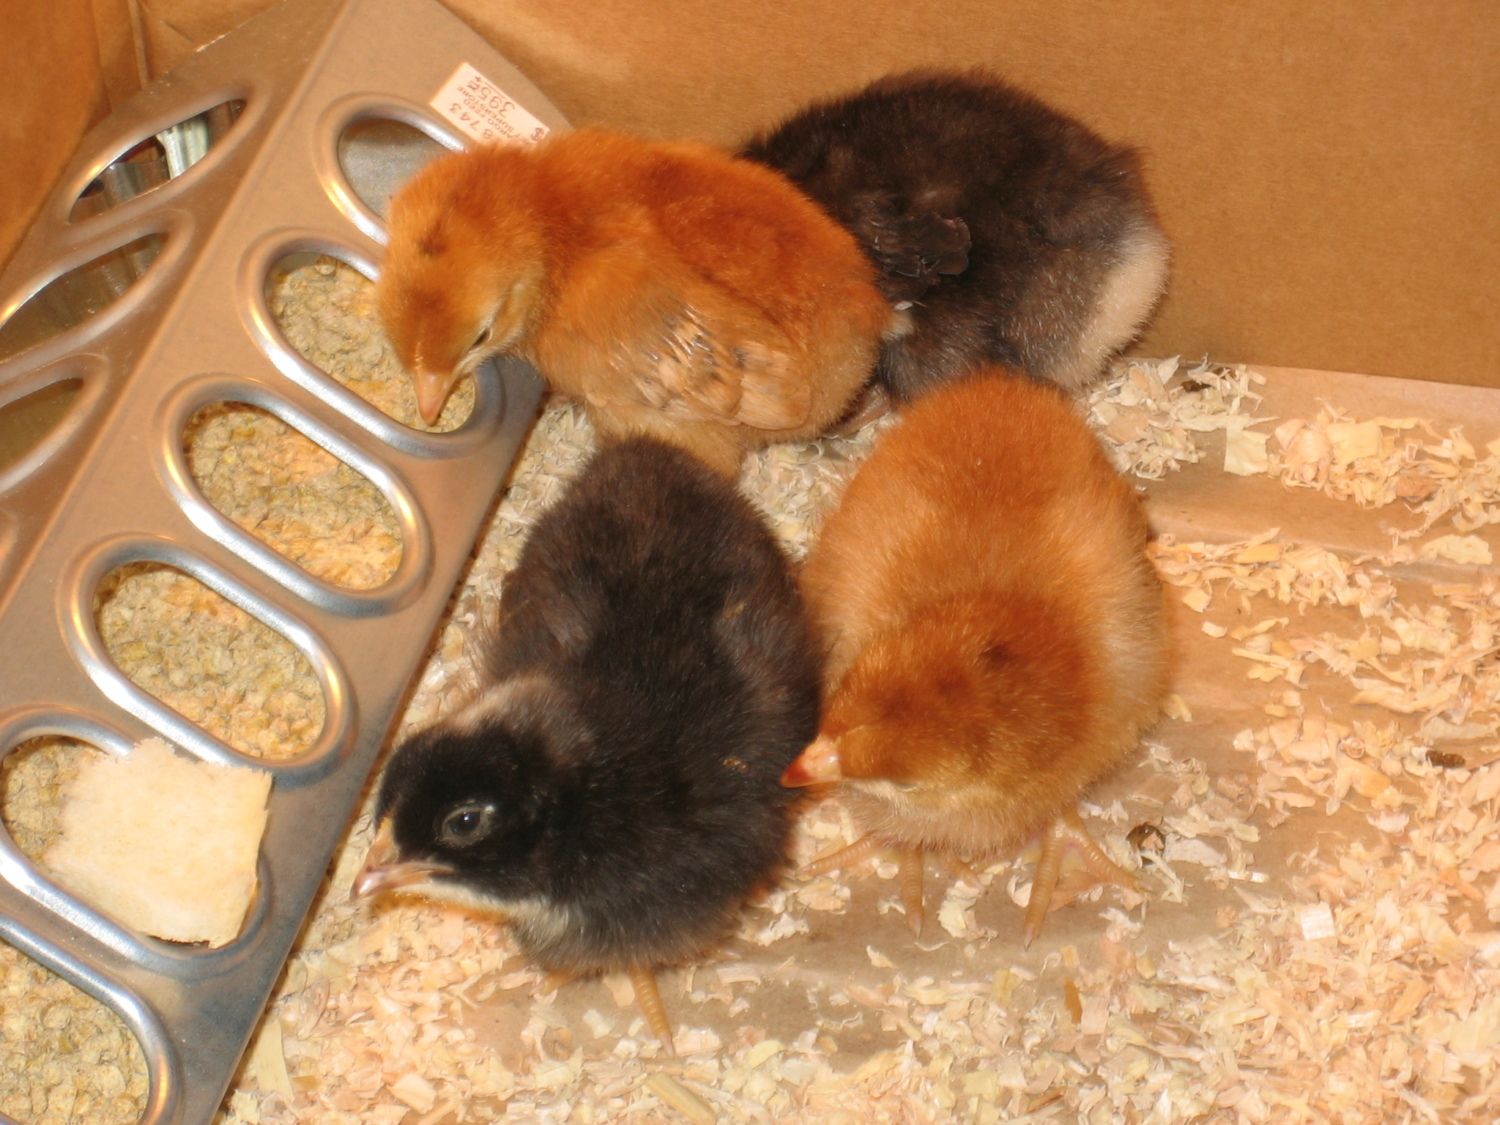
Backyard hens became legal in Pinellas County Florida December 2011 so after a bunch of research we took the plunge and acquired 4 chicks the first week of 2012. Here are the lil cuties, two Rhode Island Reds and two Barred Plymouth Rocks.

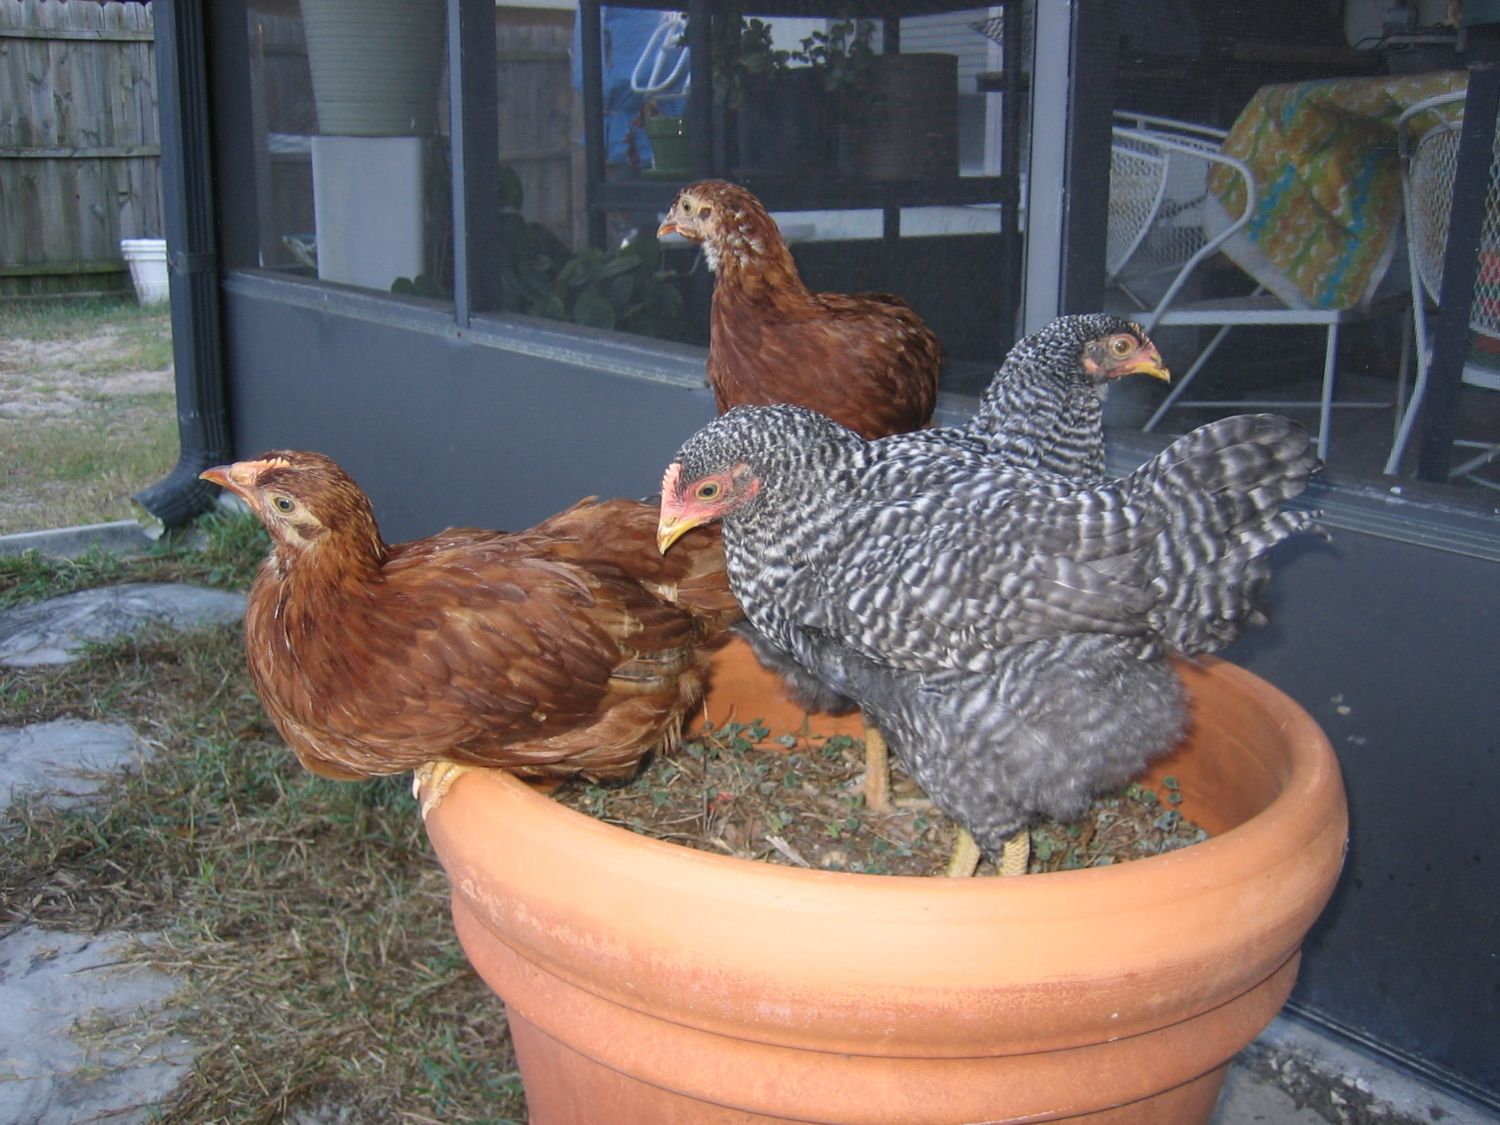
By March I was ready to start the coop construction as the girls were quickly outgrowing their temporary living room dog kennel residence.
Here they are enjoying a bit of the outdoors.
Although hurricanes are rare on west coast of Florida I still wanted to be prepared. Knowing that designing and building a coop that may have to withstand 70 mph winds or more would be expensive and difficult I went a different route and constructed this coop so that it could be easily disassembled and moved in pieces into the garage.
Also with the warm weather we love here I wanted the girls to have plenty of circulation as well as protection from our frequent summer showers. The coop is sited alongside our house which will give them protection from strong winds coming in off the gulf and with the side wall facing north they should be warm enough in the winter.
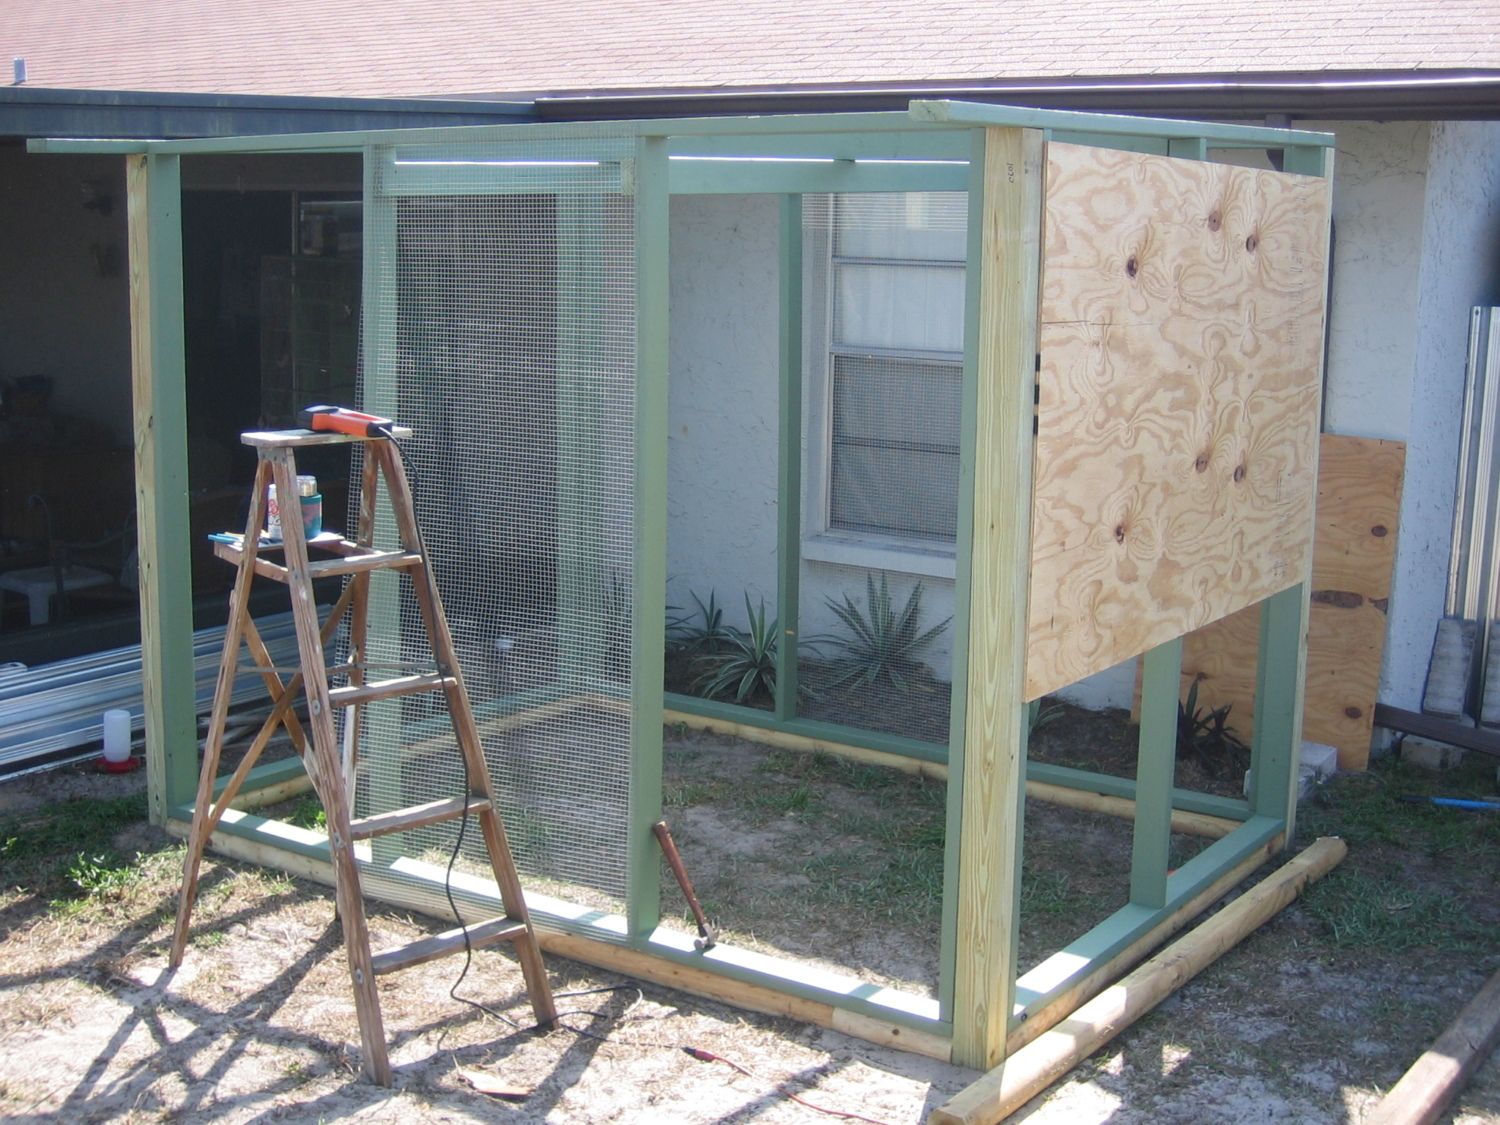
First we built and painted 4 stud walls, here they are in the garage after having been painted.
And here we have the stud walls attached to four 4"x4"x8' fence posts which were sunk into the ground to the appropriate depth. The stud walls are resting on landscape timbers cut to fit. The footprint of the coop/run is 6'x9' which accomodates the width of the hardware cloth.
Couple of detail shots of the 1/2" welded wire attachment method. Staples followed by 1"x2" trim strips screwed on to secure and hide staples.
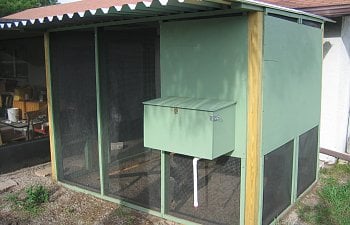
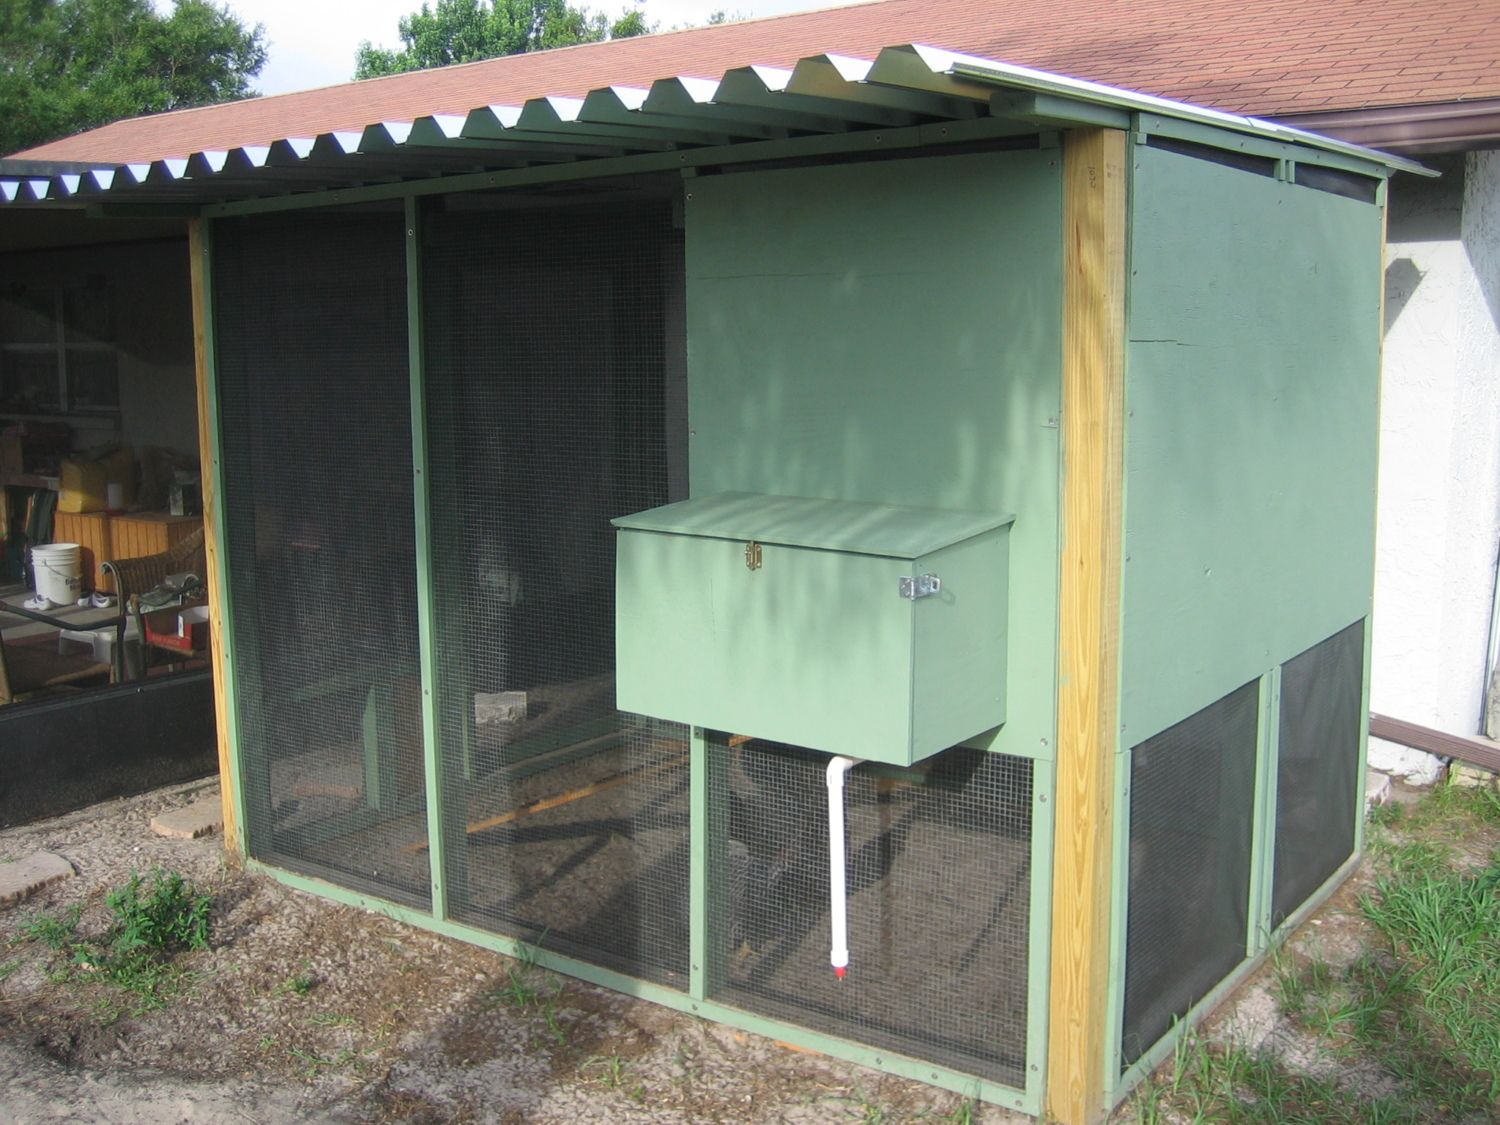
And here is the completed coop/run. The girls love their new home!
This is the front of the coop including nesting box and one of three nipple waterers.
I also covered the wire with screen as the mosquitos are extremely heavy this year.
Additionally I insulated the underside of the roof with 3/4" foam insulation board which had the added benefit of covering the
gaps created by the metal roofing.
Another angle. You can see the roof insulation in this shot as well as the people door and sliding hen door with fold down mosquito screen which in this pic is being held up by magnets.
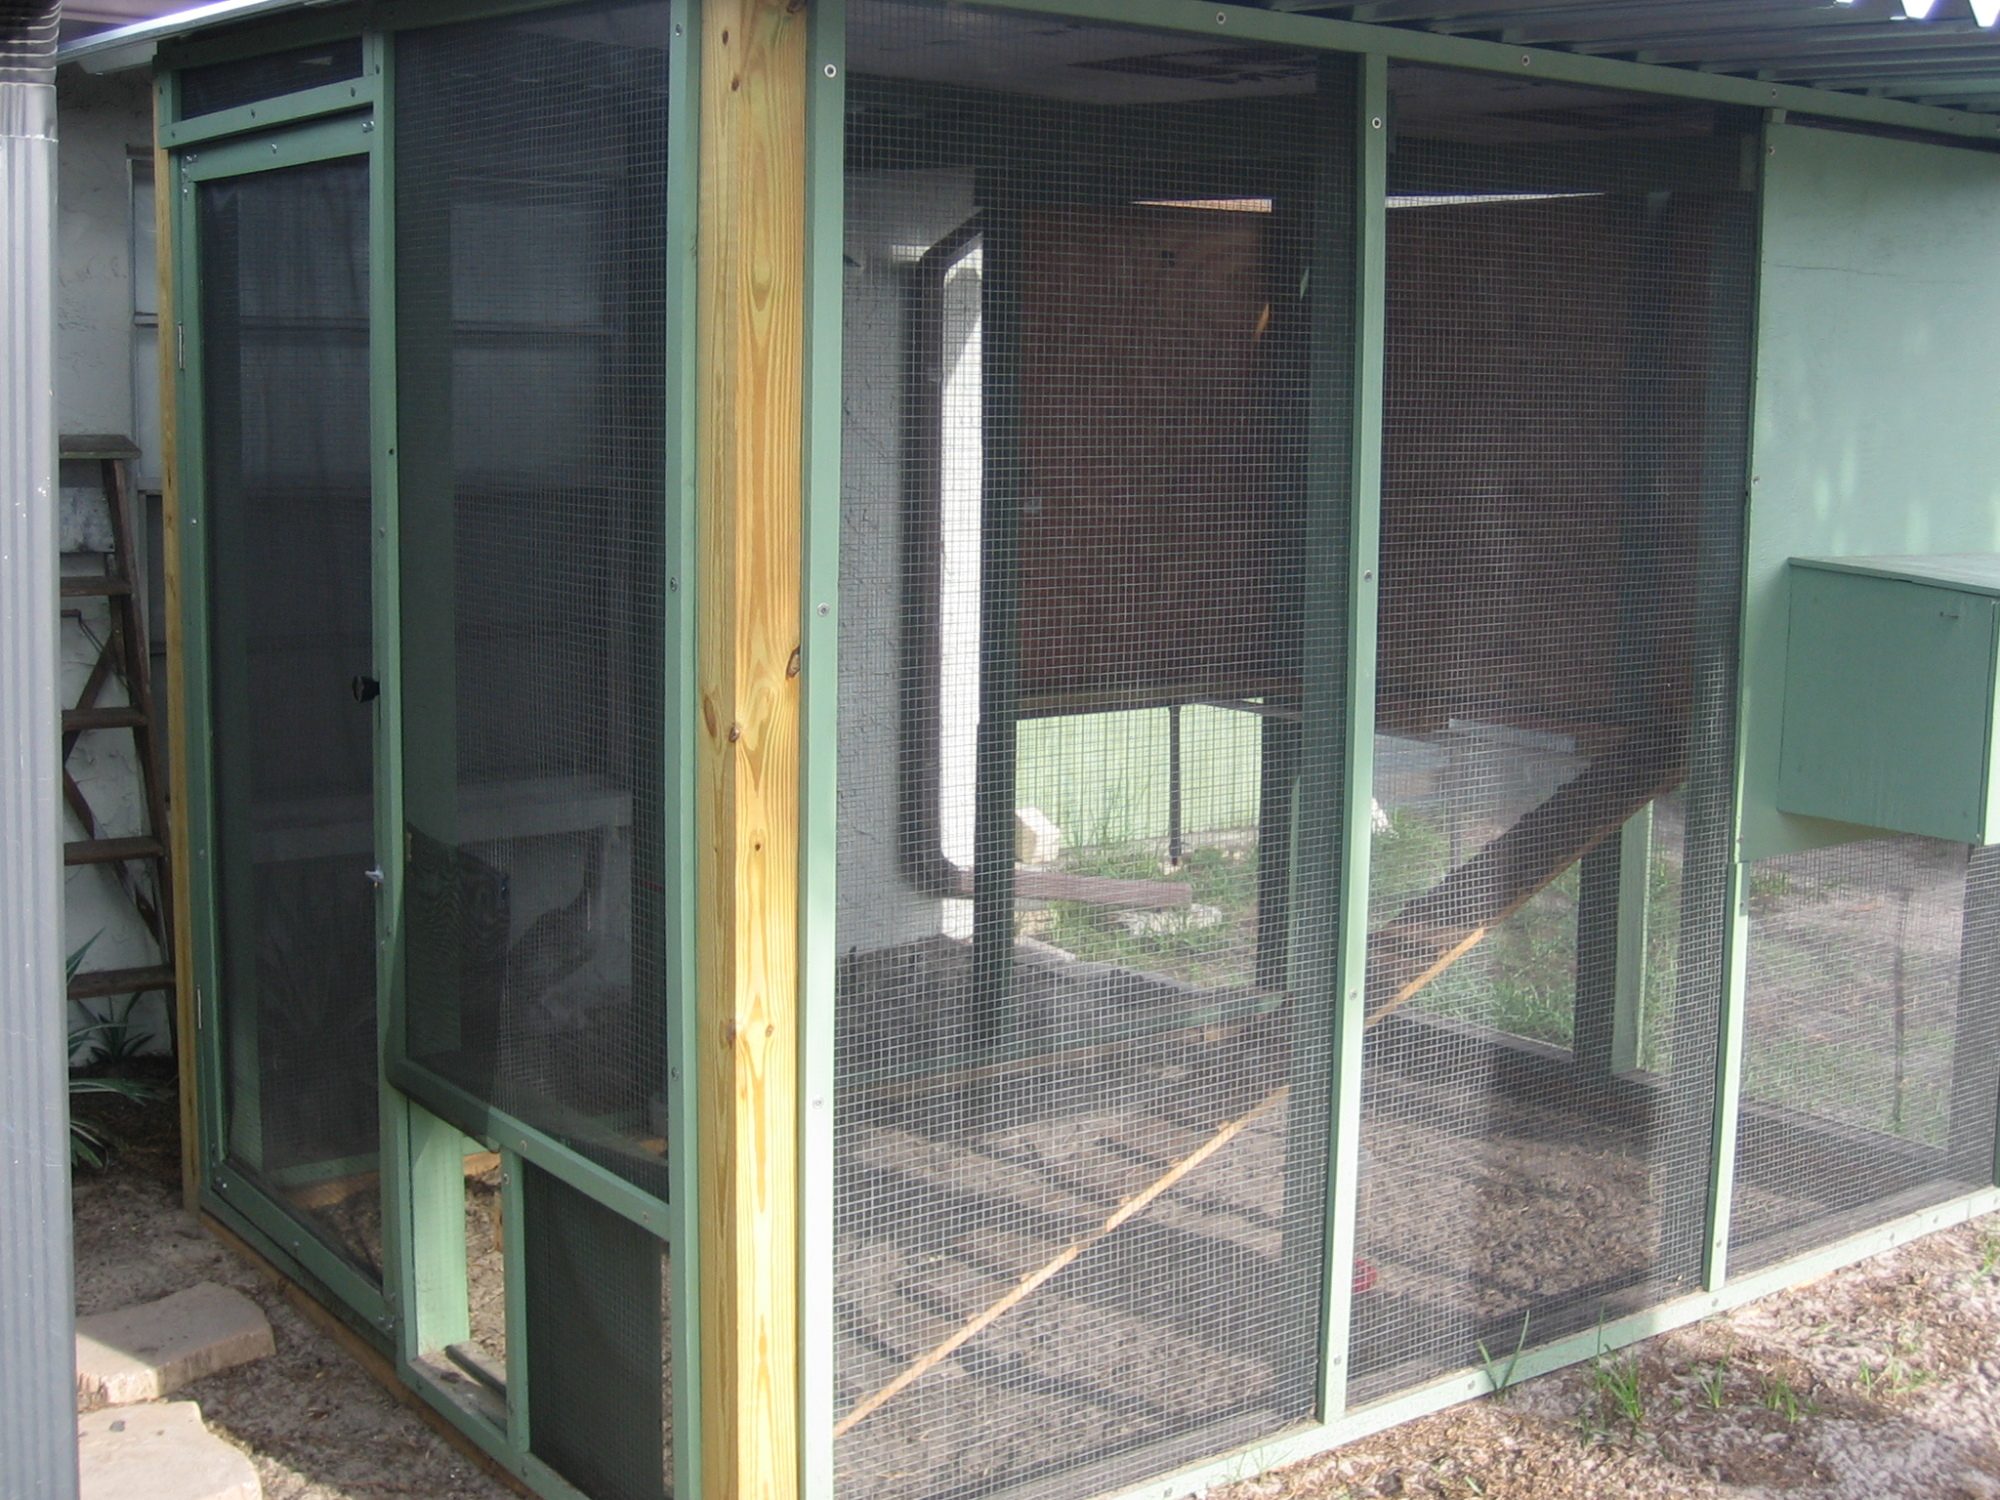
Side and back including bucket and pvc water system.
Interior shot including their roost, entrance to nesting box and their ramp.
Homemade feeder which along with the water system creates low maintenance chicken care.
Other than raking up the copious amounts of chicken doo once a day. My compost heap is loving it...
And the payoff for all the hard work and planning.
Happy hens!
And a gift to us. Our first two egg day along with a golf ball and marble egg to trick them.
First eggs came about a week ago and they have given us ten so far.
Everything was assembled using deck screws so if need be I could pull off the roof panels, disassemble the water system and move each wall into our garage out of harms way.
Total cost came in at about 650, and a whole lot of time but the end result is well worth it.
By March I was ready to start the coop construction as the girls were quickly outgrowing their temporary living room dog kennel residence.
Here they are enjoying a bit of the outdoors.
Although hurricanes are rare on west coast of Florida I still wanted to be prepared. Knowing that designing and building a coop that may have to withstand 70 mph winds or more would be expensive and difficult I went a different route and constructed this coop so that it could be easily disassembled and moved in pieces into the garage.
Also with the warm weather we love here I wanted the girls to have plenty of circulation as well as protection from our frequent summer showers. The coop is sited alongside our house which will give them protection from strong winds coming in off the gulf and with the side wall facing north they should be warm enough in the winter.
First we built and painted 4 stud walls, here they are in the garage after having been painted.

And here we have the stud walls attached to four 4"x4"x8' fence posts which were sunk into the ground to the appropriate depth. The stud walls are resting on landscape timbers cut to fit. The footprint of the coop/run is 6'x9' which accomodates the width of the hardware cloth.

Couple of detail shots of the 1/2" welded wire attachment method. Staples followed by 1"x2" trim strips screwed on to secure and hide staples.


And here is the completed coop/run. The girls love their new home!
This is the front of the coop including nesting box and one of three nipple waterers.
I also covered the wire with screen as the mosquitos are extremely heavy this year.
Additionally I insulated the underside of the roof with 3/4" foam insulation board which had the added benefit of covering the
gaps created by the metal roofing.
Another angle. You can see the roof insulation in this shot as well as the people door and sliding hen door with fold down mosquito screen which in this pic is being held up by magnets.
Side and back including bucket and pvc water system.

Interior shot including their roost, entrance to nesting box and their ramp.

Homemade feeder which along with the water system creates low maintenance chicken care.
Other than raking up the copious amounts of chicken doo once a day. My compost heap is loving it...

And the payoff for all the hard work and planning.
Happy hens!

And a gift to us. Our first two egg day along with a golf ball and marble egg to trick them.
First eggs came about a week ago and they have given us ten so far.

Everything was assembled using deck screws so if need be I could pull off the roof panels, disassemble the water system and move each wall into our garage out of harms way.
Total cost came in at about 650, and a whole lot of time but the end result is well worth it.