'FOR SUB BEGINNERS COOP BUILDING --- EPISODE 3' & 4, 5,6 etc...
First Episode discussed the 4x4x4 coop plan which as it seemed way too small for 11 hens was heightened to a 4x6
That way the 4x4 base could still be used.Just A HIGHER skyscraper coop.
First DONT ...Used "treated" wood for raised floor ...supposedly poison to chickens.
MORE DONTS;
MEASURE well...DONT build the walls too high for the ply wood piece or cut the ply too short.- I did this....fortunately my son told me to put a header in each frame which took up the space that had been a large crack where light came through at the top. It worked.
;
DONT make the COOP BASE TOO SMALL IE if your coop is 4x4 make the base(floor) larger than that.
Idid this
I couldnt change this 4x4 base so we just winged it and the back was nailed to the sides of the frame sides took up more of the inside this way and looks odd but ...its on.
.
ONE MORE DONT..
.DONT put the ply on the frame FIRST.
Put frames up then nail it to the other frames .(Notice i said NAILED so almost unchangable)..then the siding (WE did this one on one side.)
.
DO THIS instead .. easiest to put the whole buildings frame up then add the plywood screw,.
DO have a 1/2" extra edge on your base all around to accomodate the plywood and set them on as you nail them on.
I did do this but didnt leave a wide enough edge
.
I have to admit my son helped a lot with the work today getting the plywood in place and the frames up and nailing it all too in high places .(he doesnt use screws)
I bought styrofoam for insulation under the roof and then the plywood will go on that then shingles..
The big heaviest parts are done..
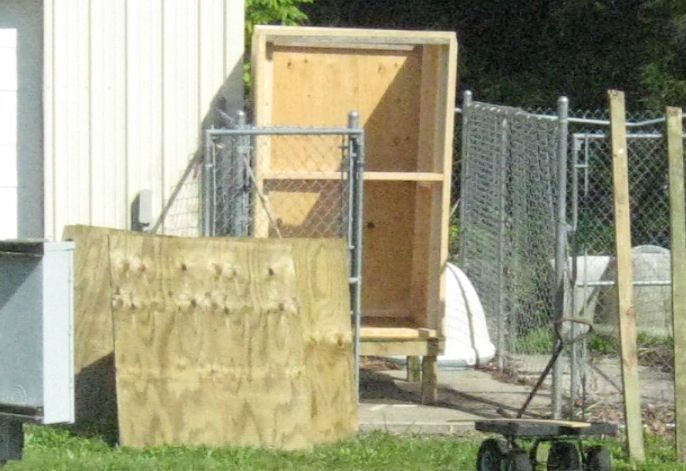
I am leaving the front open for now so i can put in the roosts and nest boxes etc
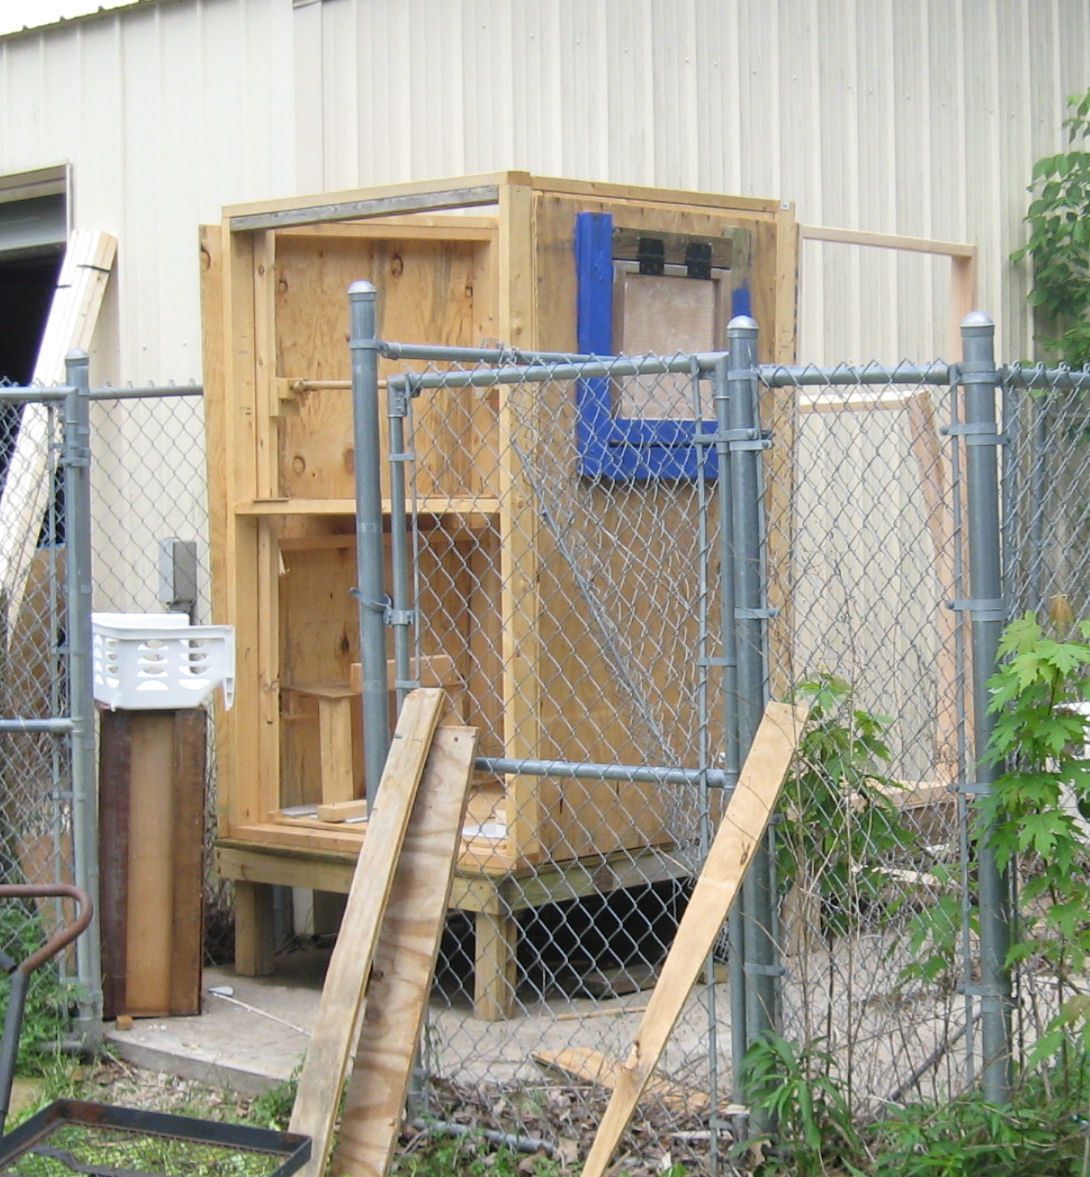
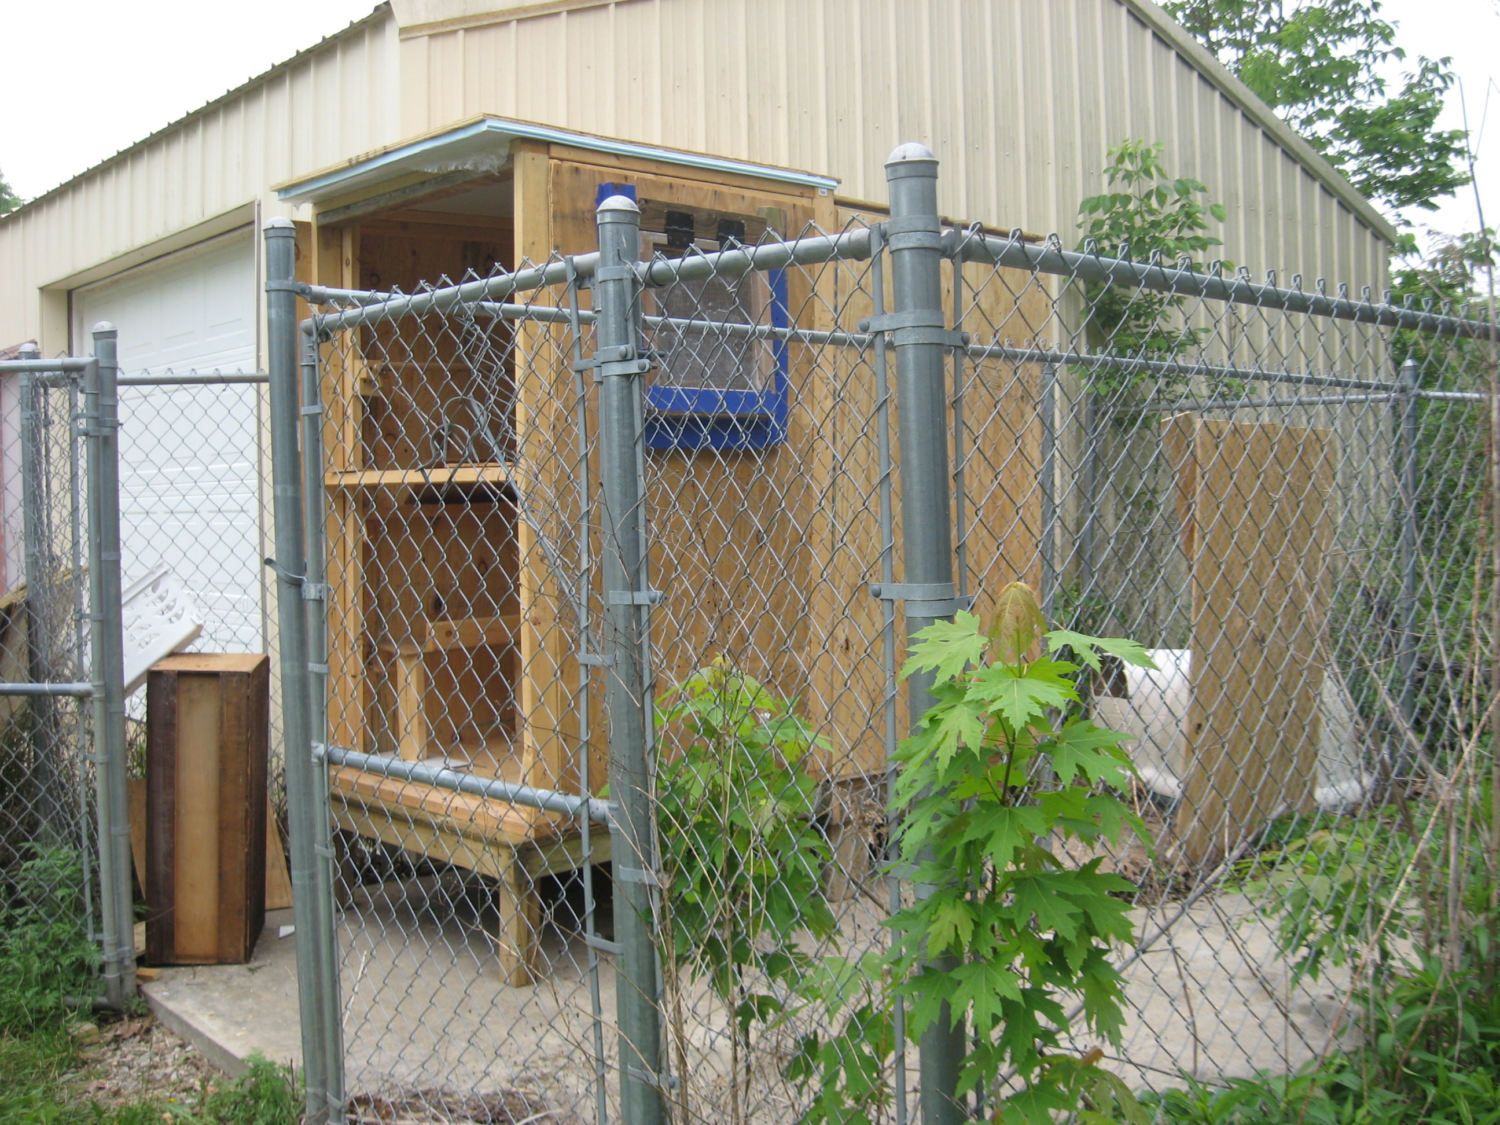
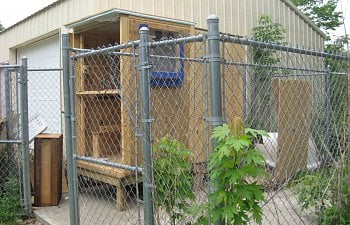
Here it is so far..Luckily. My nearest neighbors are cows or this would have to look better.
I dont think cows will mind though. Dang! Didnt get the dog igloo out before the frame went up!!! OH well.

My FIRST WINDOW.
Used more found things in my garage. Think these holders for the roost were pipe holers of some kind .
Antique window ( the glass was broken) i used some clear hard plastic i had bought for a project years ago..only thing cant get the saran wrap type cover off
My DONT for this episode 4 ARE;
...DONT put the window on before you change out the glass! DO IT FIRST..
Adding new points to hold the pane is a bear to get in from underneath the window outside looking up.Finally used small nails.Worked much better.
DONT put the hardware cloth up FIRST just leaving a gap of 4 inches to do things to the window.Doesnt work and cuts your arms up
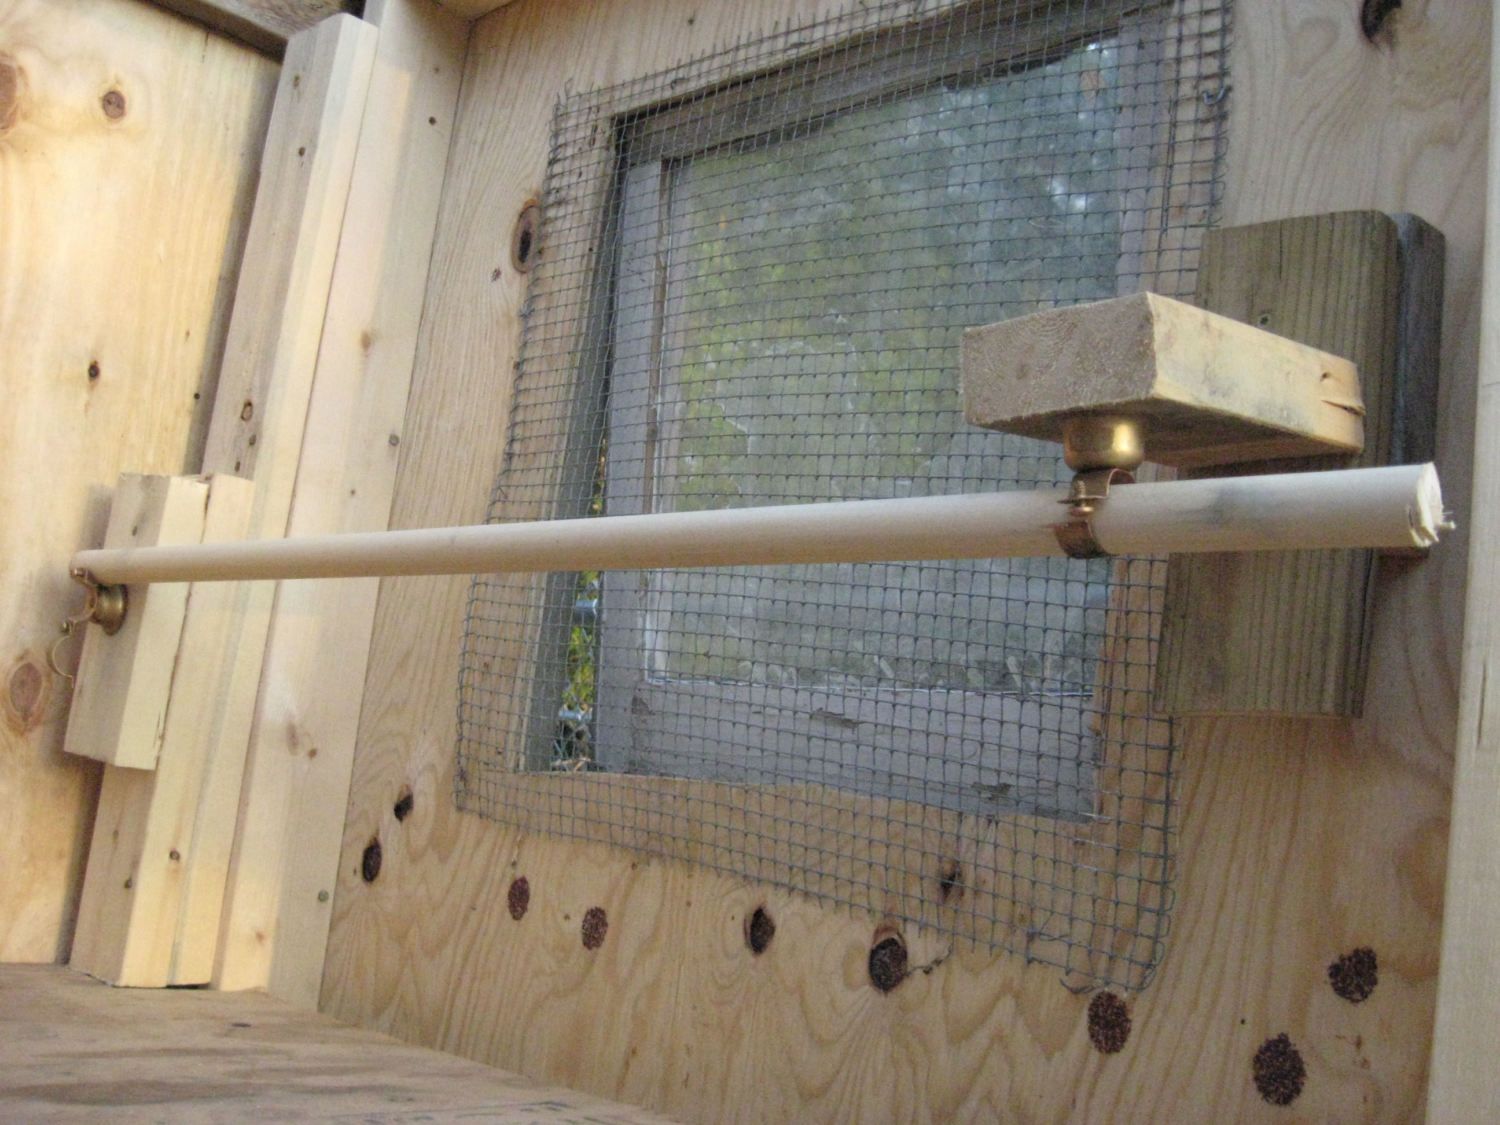
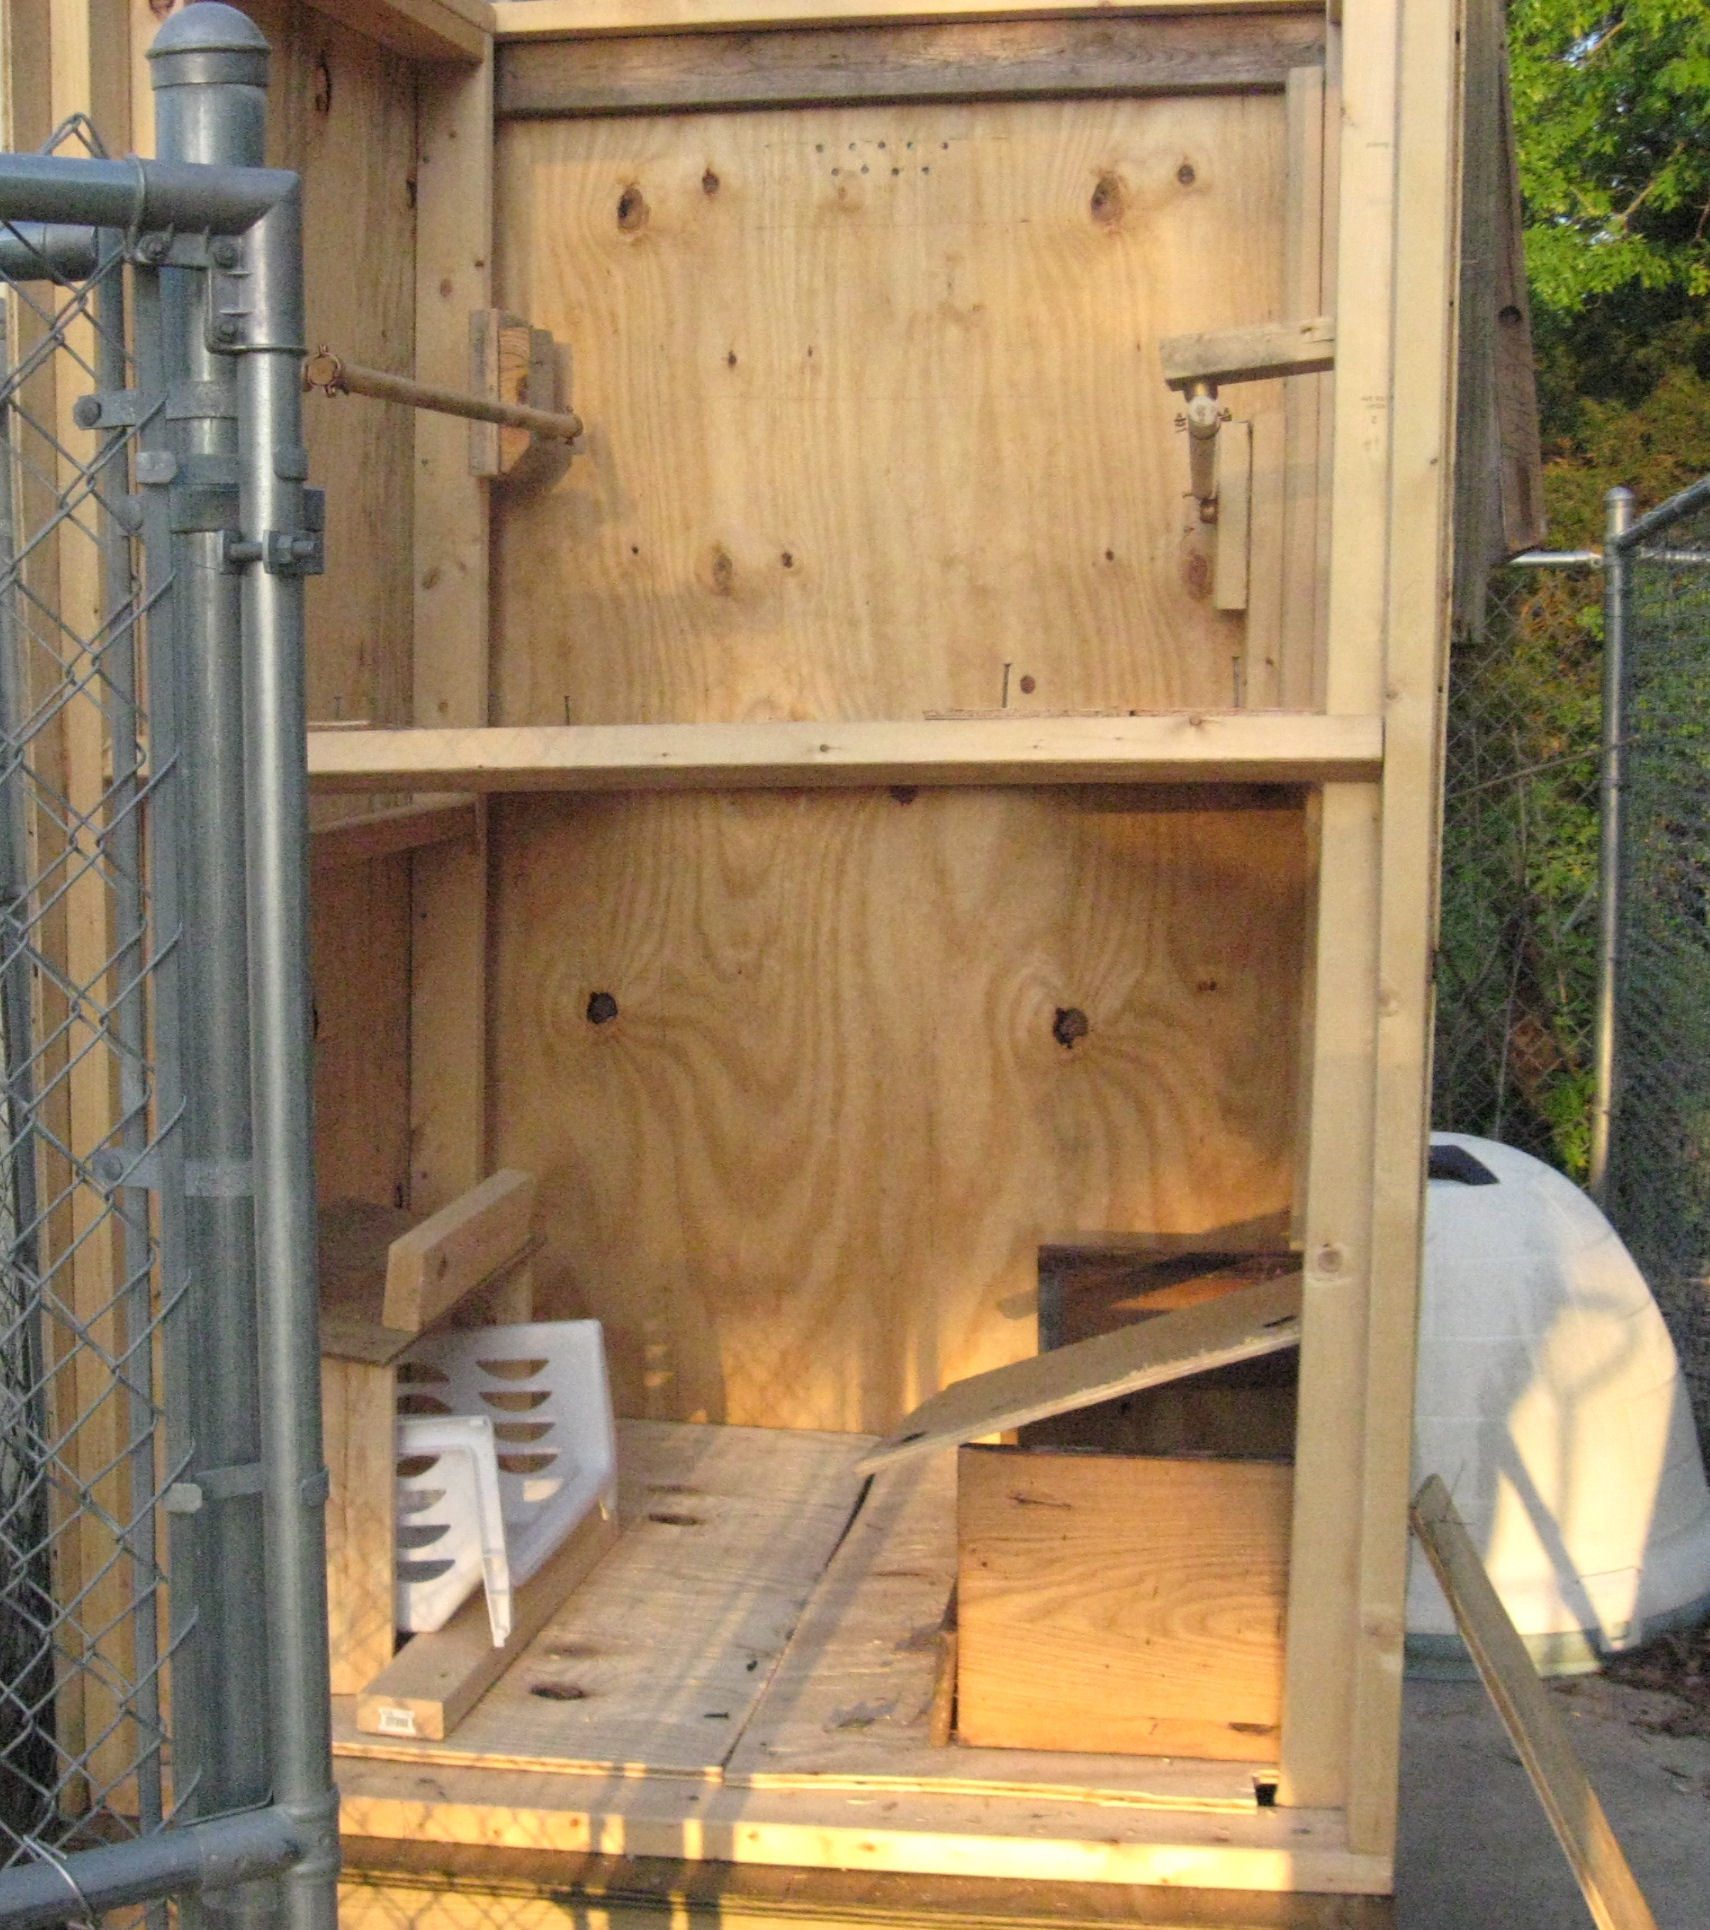
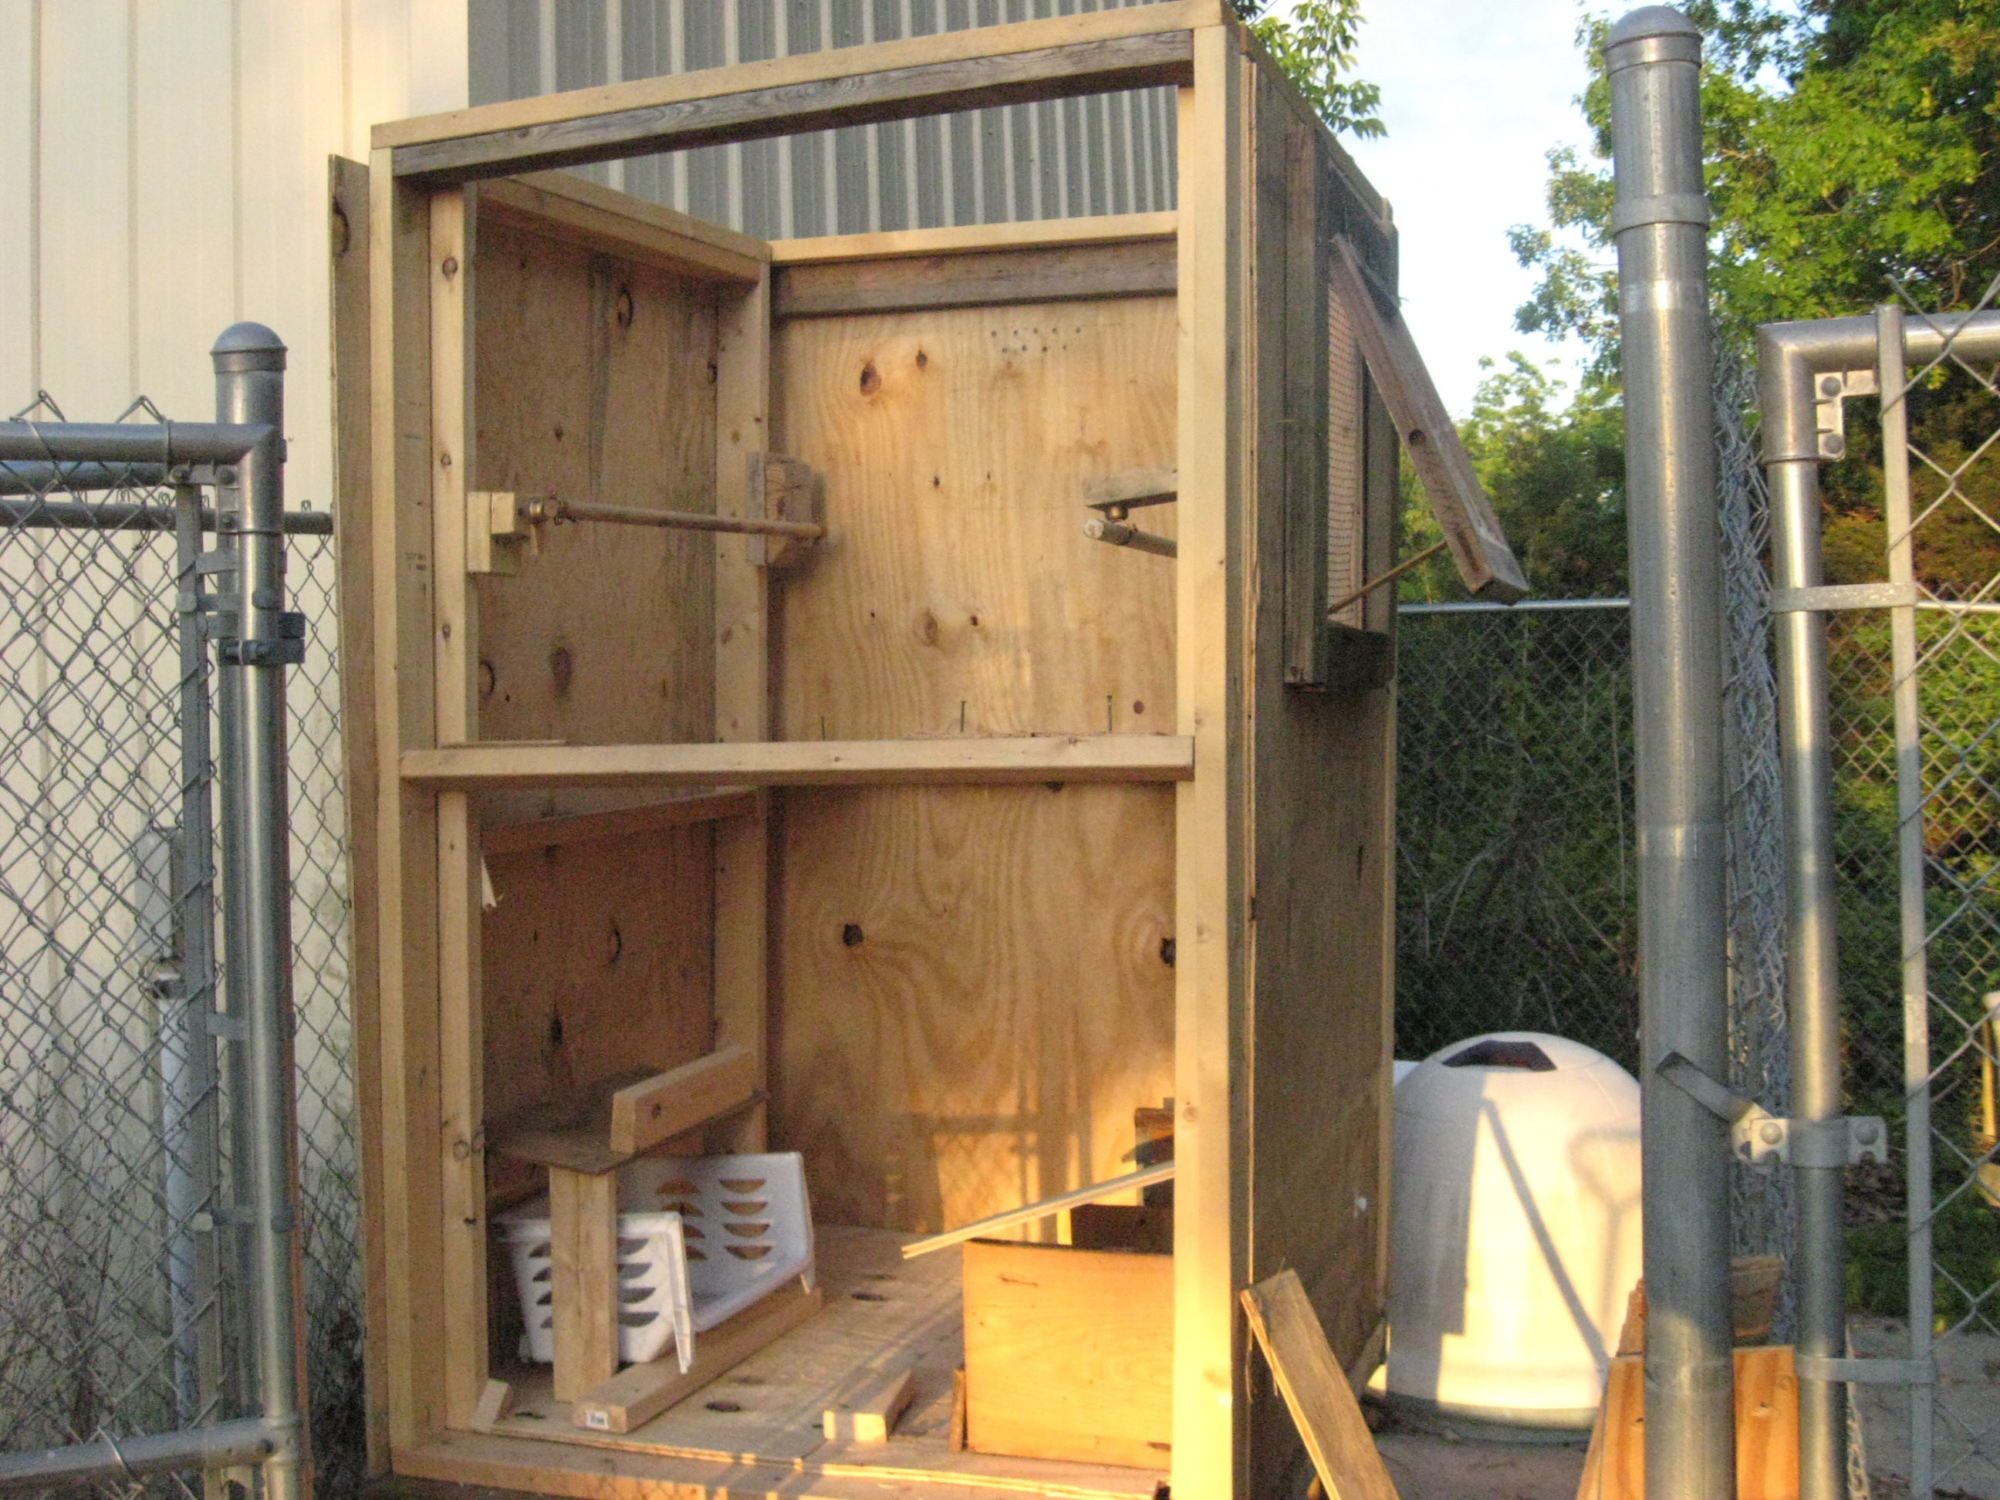
I made eveything inside removeable for cleaning; roosts,boards beneath etc. Holes intghe poop boards are resting on 2x4's inside frame with holes drilled extra large in the ends for humidity ajustments which fit over nails in 2x4 to hold the poop boards from falling
A side note.....
I have seen such beautiful coops here, MANY...I am so impressed ...inside and out, even for the first timers. WONDERFUL jobs!!! .. ..
I have to say here I know my coop is pretty piece meal and primative but i am trying to get by as cheaply as possible and i do make a lot of mistakes that I correct as best i can.
.No excuses really though as there are many JUST like me out here who can do a FANTASTIC JOB of this and many other projects like this ..... but because i am a female 67 with some bodily limits and probably mental too( i aint as quick as i use to be) I have to say I am proud of myself even of this little piecemeal coop.
I have done everything on this coop myself EXCEPT for lifting the plywood walls up and nailing the top nails and roof nails ,and flipping over the base to put wall on.
(My son did those things)
i Plan to building the base, reclaimed ,took apart an old old dog pen for the 2x4s .. putin the window which so far has turned out well
I mention all this as a SUB BEGINNER ... to let people who are afraid they CANT do this, to know, THEY CAN!!!
So Sure Maybe this wont ever be a showcase coop but it WILL work. And mistakes....You never learn ANY new skill without mistakes.They are the BEST teacher of all..
.Oh and my NEXT coop will be BETTER!.
.BUT onward and upward with THIS coop.
SOOO
. Changed annother plan to making outside nest boxes
I will use the whole dog pen rather than 1/2. and screen the top over...
.I am thinking of expansion out the back of the coop as i still feel it seems too crowded in here for 11 hens 4x 4x 6 high.
2 certainties so far... Plans change as i go along and i have a path in the road from my house to LOWES..
My side window is propt open here
DO
.Frame around your windows and doors your bad saw cuts dont show!...(just sayin')
APRIL 27, EP 5
Chicks 4 weeks old...
SHOULD HAVE CALLED THIS THE ALICE IN WONDERLAND COOP AS IT GROWS AND GROWS.!!!.
Worrying still if i have floor space enough ..SOOO . i have decided to DOUBLE the size .
It will now be 8 ft x 4 ft x 6 ft tall Now 11 hens should fit..
As an added benefit i didnt have to think this out, just copied what i did the first time( minus the mistakes)Well THOSE mistakes...
April 29 EP 6
Had to shorten the width of the back wall as it was too wide for the opening,.
So took it apart (thank you screws) took off 3 inches. screwed back on
Think my son felt sorry for me taking forever to do everything and yesterday put all the walls up and the roof too with me as director
but ...Of course the DONT s;
Make SURE you have the RIGHT wall frame
My son hammered one down and then we found it was the WRONG wall frame (the one I said was FOR SURE right for the side..... OOPS.!!) Why the upset over this .?..
.The wall NEXT to the garage is so close we had to put the plywood on it FIRST as no room .USED NAILS so i had put it on the BACK wall, not the intended side or risk tearingf it up to take the ply off..
.Soo all had to come down and change walls.Then cut off the over hang on the back wall off (that had been the side wall) as it was made for the side wall not the back wall.HUH? Oh forget it
.
(My son uses nails but screws would have made this CHANGE of walls SO much easier).
Also i was going to use the back wall of the first 4x6 coop, on the back of the extended 4x8 coop but as it was NAILED ON WAY too WELL. he couldnt get it off
We had to Sawzall most of it off for an opening to the back 1/2 of the coop .and buy new ply
DO'S....I cant say ENOUGH .UNless you really know what you are doing USE SCREWS!! !Makes things SO much more simple to change mistakes.
The base(floor) sticks out almost a foot in back (Mistake that worked)so just perfect for outside nest not the inside ones i was going for at first..
.Tried out the paint for the moldings.
The blue at the roof is insulation . I will put trim up to cover it.
New 4 x 8 x 6' inside....I might move in myself!
MAY 5th EP 7
Now we are into May and i am STILL working on this coop b/c of expansion. The rainy days are messing up my timeline ( along with my plans) .
Cut a 2 x 2 ' window hole for a 9 pane old window in coop back
West facing hot sun blares down in summer on the front. Had to change plans..again..
Would have looked so cute on the front but for girls comfort had to move it to the east (back) side BOO!!!.. No awning would go low enough to shade that scorching glare.
Too bad. Project on delay while the tractor coop and run are built CANT WAIT Girls are 6 weeks old and inside the bathroom....YUCK!!!
First Episode discussed the 4x4x4 coop plan which as it seemed way too small for 11 hens was heightened to a 4x6
That way the 4x4 base could still be used.Just A HIGHER skyscraper coop.
First DONT ...Used "treated" wood for raised floor ...supposedly poison to chickens.
MORE DONTS;
MEASURE well...DONT build the walls too high for the ply wood piece or cut the ply too short.- I did this....fortunately my son told me to put a header in each frame which took up the space that had been a large crack where light came through at the top. It worked.
;
DONT make the COOP BASE TOO SMALL IE if your coop is 4x4 make the base(floor) larger than that.
Idid this
I couldnt change this 4x4 base so we just winged it and the back was nailed to the sides of the frame sides took up more of the inside this way and looks odd but ...its on.
.
ONE MORE DONT..
.DONT put the ply on the frame FIRST.
Put frames up then nail it to the other frames .(Notice i said NAILED so almost unchangable)..then the siding (WE did this one on one side.)
.
DO THIS instead .. easiest to put the whole buildings frame up then add the plywood screw,.
DO have a 1/2" extra edge on your base all around to accomodate the plywood and set them on as you nail them on.
I did do this but didnt leave a wide enough edge
.
I have to admit my son helped a lot with the work today getting the plywood in place and the frames up and nailing it all too in high places .(he doesnt use screws)
I bought styrofoam for insulation under the roof and then the plywood will go on that then shingles..
The big heaviest parts are done..
I am leaving the front open for now so i can put in the roosts and nest boxes etc
Here it is so far..Luckily. My nearest neighbors are cows or this would have to look better.
I dont think cows will mind though. Dang! Didnt get the dog igloo out before the frame went up!!! OH well.
My FIRST WINDOW.
Used more found things in my garage. Think these holders for the roost were pipe holers of some kind .
Antique window ( the glass was broken) i used some clear hard plastic i had bought for a project years ago..only thing cant get the saran wrap type cover off
My DONT for this episode 4 ARE;
...DONT put the window on before you change out the glass! DO IT FIRST..
Adding new points to hold the pane is a bear to get in from underneath the window outside looking up.Finally used small nails.Worked much better.
DONT put the hardware cloth up FIRST just leaving a gap of 4 inches to do things to the window.Doesnt work and cuts your arms up
I made eveything inside removeable for cleaning; roosts,boards beneath etc. Holes intghe poop boards are resting on 2x4's inside frame with holes drilled extra large in the ends for humidity ajustments which fit over nails in 2x4 to hold the poop boards from falling
A side note.....
I have seen such beautiful coops here, MANY...I am so impressed ...inside and out, even for the first timers. WONDERFUL jobs!!! .. ..
I have to say here I know my coop is pretty piece meal and primative but i am trying to get by as cheaply as possible and i do make a lot of mistakes that I correct as best i can.
.No excuses really though as there are many JUST like me out here who can do a FANTASTIC JOB of this and many other projects like this ..... but because i am a female 67 with some bodily limits and probably mental too( i aint as quick as i use to be) I have to say I am proud of myself even of this little piecemeal coop.
I have done everything on this coop myself EXCEPT for lifting the plywood walls up and nailing the top nails and roof nails ,and flipping over the base to put wall on.
(My son did those things)
i Plan to building the base, reclaimed ,took apart an old old dog pen for the 2x4s .. putin the window which so far has turned out well
I mention all this as a SUB BEGINNER ... to let people who are afraid they CANT do this, to know, THEY CAN!!!
So Sure Maybe this wont ever be a showcase coop but it WILL work. And mistakes....You never learn ANY new skill without mistakes.They are the BEST teacher of all..
.Oh and my NEXT coop will be BETTER!.
.BUT onward and upward with THIS coop.
SOOO
 . Changed annother plan to making outside nest boxes
I will use the whole dog pen rather than 1/2. and screen the top over...
.I am thinking of expansion out the back of the coop as i still feel it seems too crowded in here for 11 hens 4x 4x 6 high.
2 certainties so far... Plans change as i go along and i have a path in the road from my house to LOWES..
My side window is propt open here
DO
.Frame around your windows and doors your bad saw cuts dont show!...(just sayin')
APRIL 27, EP 5
Chicks 4 weeks old...
SHOULD HAVE CALLED THIS THE ALICE IN WONDERLAND COOP AS IT GROWS AND GROWS.!!!.
Worrying still if i have floor space enough ..SOOO . i have decided to DOUBLE the size .
It will now be 8 ft x 4 ft x 6 ft tall Now 11 hens should fit..
As an added benefit i didnt have to think this out, just copied what i did the first time( minus the mistakes)Well THOSE mistakes...
April 29 EP 6
Had to shorten the width of the back wall as it was too wide for the opening,.
So took it apart (thank you screws) took off 3 inches. screwed back on
Think my son felt sorry for me taking forever to do everything and yesterday put all the walls up and the roof too with me as director
but ...Of course the DONT s;
Make SURE you have the RIGHT wall frame
My son hammered one down and then we found it was the WRONG wall frame (the one I said was FOR SURE right for the side..... OOPS.!!) Why the upset over this .?..
.The wall NEXT to the garage is so close we had to put the plywood on it FIRST as no room .USED NAILS so i had put it on the BACK wall, not the intended side or risk tearingf it up to take the ply off..
.Soo all had to come down and change walls.Then cut off the over hang on the back wall off (that had been the side wall) as it was made for the side wall not the back wall.HUH? Oh forget it
.
(My son uses nails but screws would have made this CHANGE of walls SO much easier).
Also i was going to use the back wall of the first 4x6 coop, on the back of the extended 4x8 coop but as it was NAILED ON WAY too WELL. he couldnt get it off
We had to Sawzall most of it off for an opening to the back 1/2 of the coop .and buy new ply
DO'S....I cant say ENOUGH .UNless you really know what you are doing USE SCREWS!! !Makes things SO much more simple to change mistakes.
The base(floor) sticks out almost a foot in back (Mistake that worked)so just perfect for outside nest not the inside ones i was going for at first..
.Tried out the paint for the moldings.
 The blue at the roof is insulation . I will put trim up to cover it.
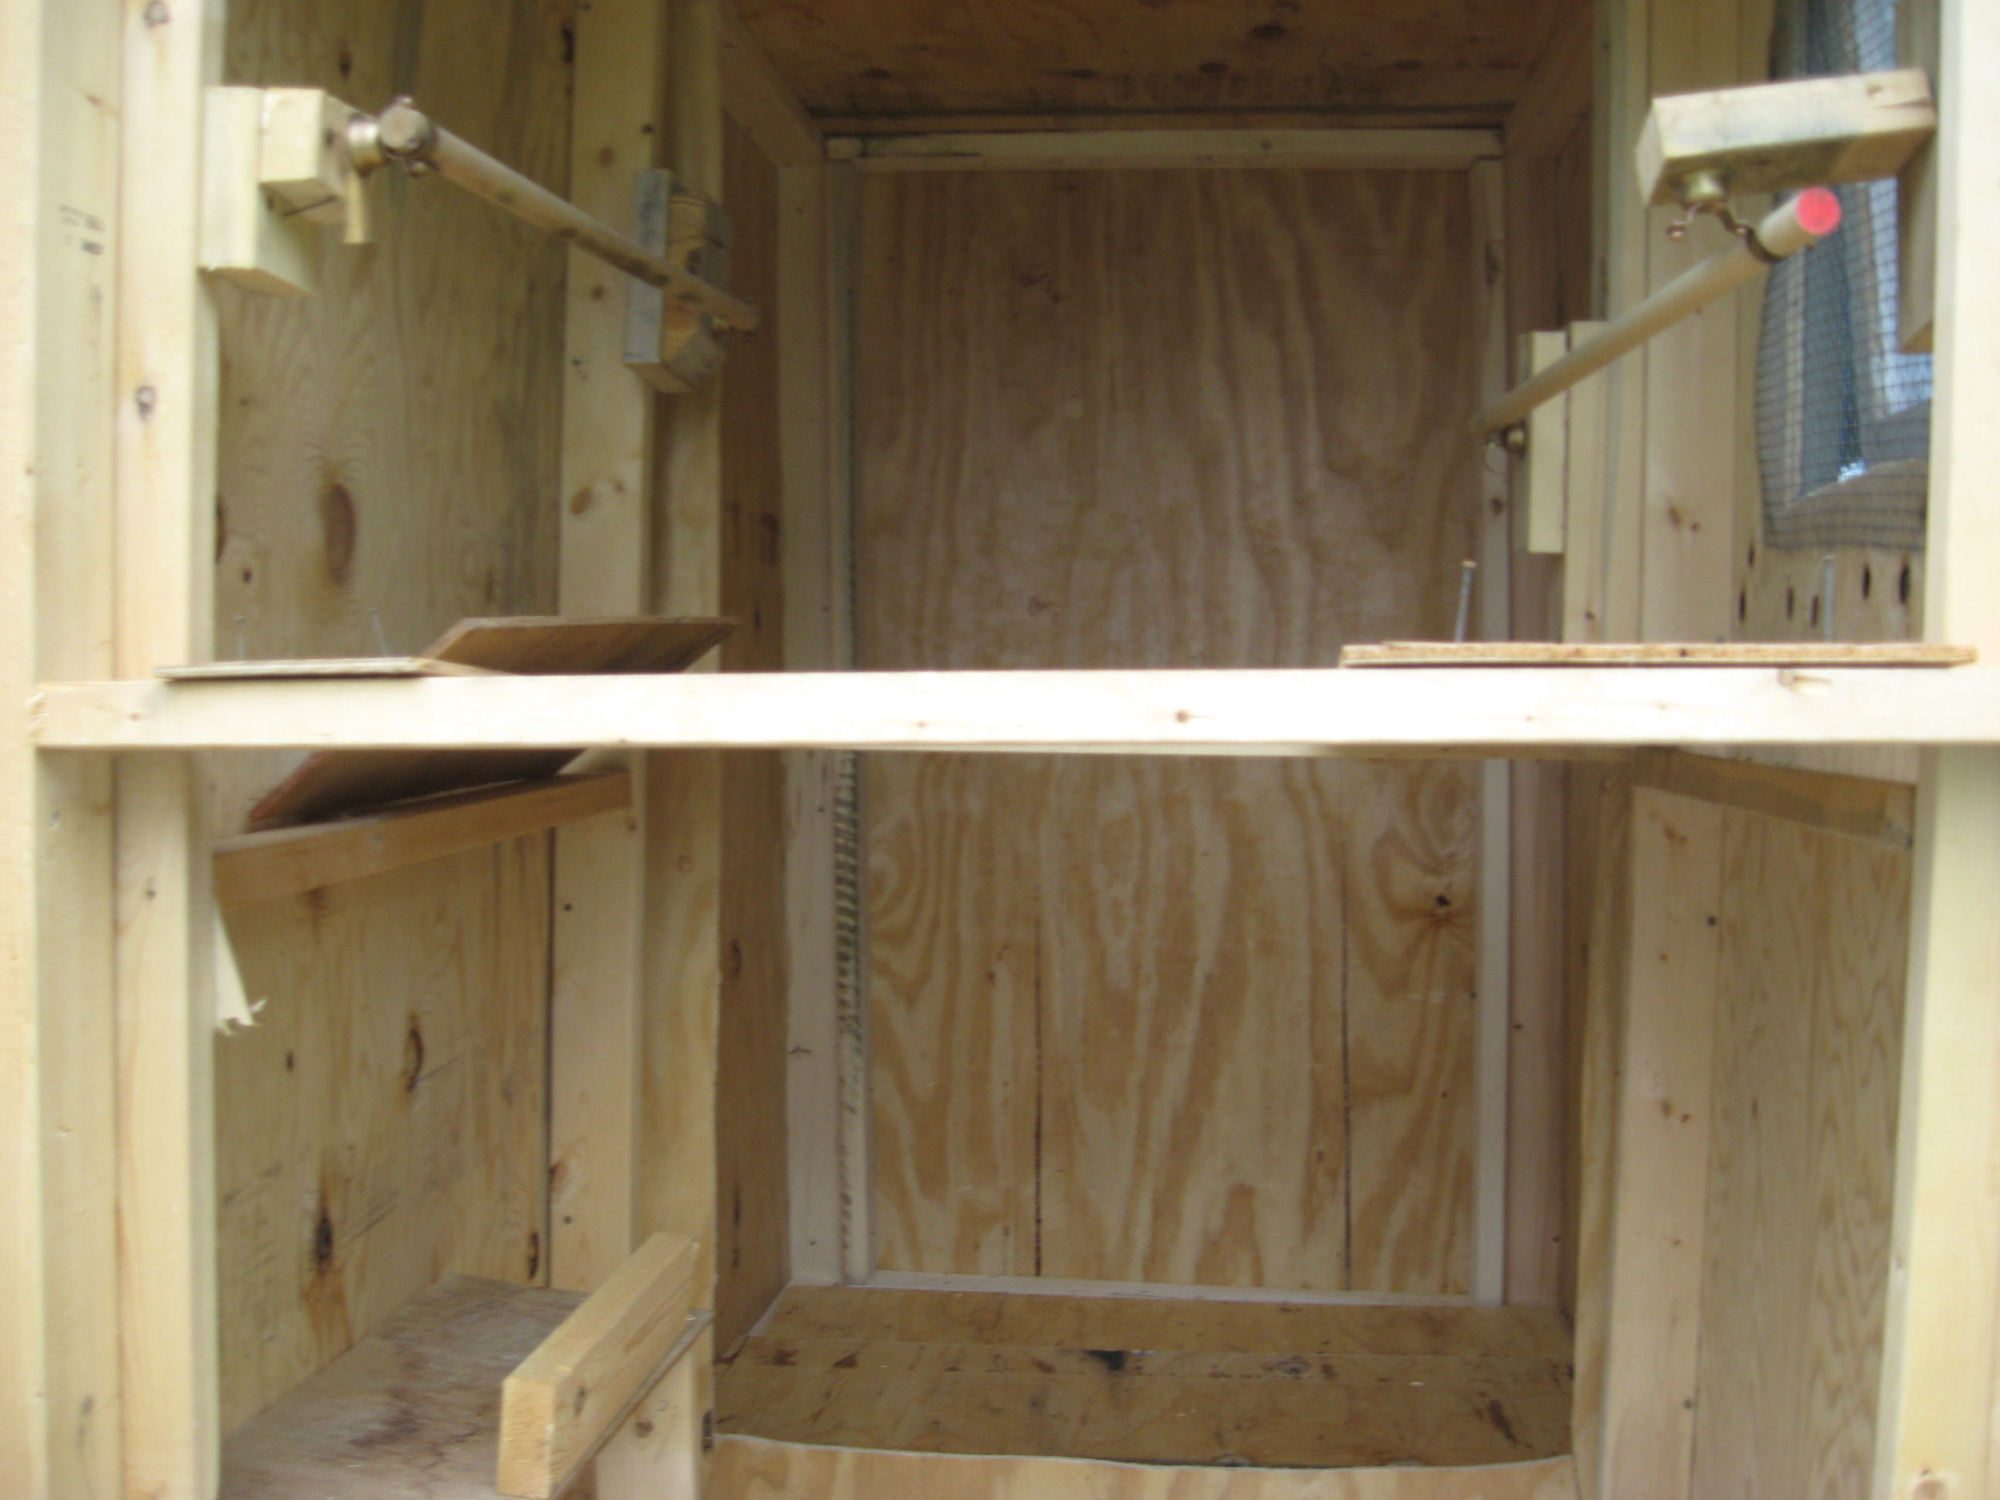
New 4 x 8 x 6' inside....I might move in myself!
MAY 5th EP 7
Now we are into May and i am STILL working on this coop b/c of expansion. The rainy days are messing up my timeline ( along with my plans) .
Cut a 2 x 2 ' window hole for a 9 pane old window in coop back
West facing hot sun blares down in summer on the front. Had to change plans..again..
Would have looked so cute on the front but for girls comfort had to move it to the east (back) side BOO!!!.. No awning would go low enough to shade that scorching glare.
Too bad. Project on delay while the tractor coop and run are built CANT WAIT Girls are 6 weeks old and inside the bathroom....YUCK!!!
")