A brief timeline
I began building my small coop the weekend of April 13, 2014, I picked up four day-old chicks on the 16th, and the coop was ready for them to move in 10 weeks later, on June 21. It took me about another month to get all the trim installed, and I made minor alterations in the fall in preparation for Winter.
I had been kicking around the idea of keeping chickens for about a year, since my inner-ring suburb passed an ordinance allowing residents to keep up to four chickens. I made up my mind and placed an order for the chicks from Meyer Hatchery on January 8th, 2014. I spent all Winter reading books, researching coop features and designs, drawing sketches, making minor changes and pondering details of construction. I did make drawings of each elevation and floor plan, but I can't find them at the moment, and they changed in the final build. I'll post them if I can find them. Here are the basics of my plan.
The basic requirements
1. I wanted to have four hens which is the legal limit for my suburb.
2. I decided on the advice of Harvey Ussery in his book "Small Scale Poultry Flock" to build at least 5 square feet of floor space per bird in the coop, especially when using the deep litter method of manure management, so I made the footprint 4'x6' in theory, giving me 24 square feet. To simplify construction, I used a single 48" wide sheet of plywood for the floor with the stud wall resting directly on the plywood, so I lost about 5 square feet to the stud cavities, but I still ended up with over 18 square feet, which combined with the outside run seems to be plenty of space for four chickens.
3. I wanted to be able to stand up inside for ease of cleaning and feeding etc, but not make it so tall as to appear awkwardly tall and skinny, so the wall height is just over 5' with a gable roof 6'10" high inside at the peak. I prefer a gable roof instead of a shed roof because I feel the downward sloping eaves will provide better protection from wind and rain, and I want to have ventilation slots under the eaves and on each gable end.
4. There will be an attached run 8'x10' which is double the recommended minimum of 10 square feet per bird.
5. I wanted to use as much salvaged and free materials as possible.
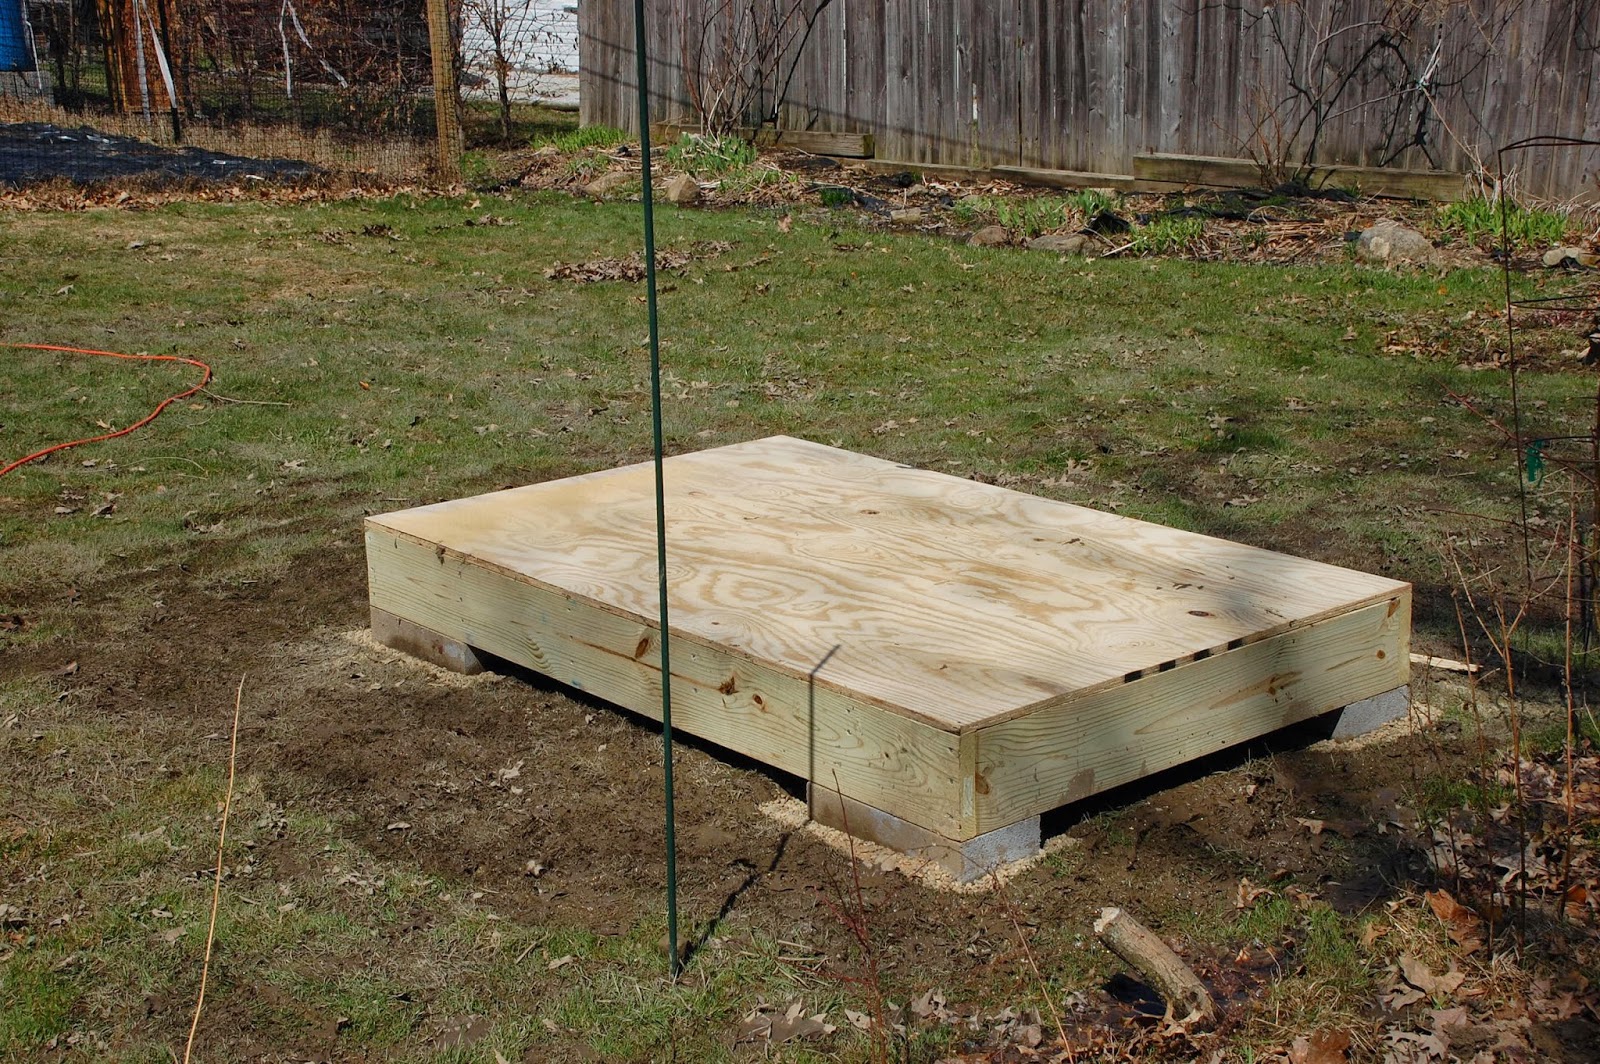
5. I decided on an "on grade" foundation, using a solid concrete block at each corner set on a 4-6" deep bed of pea gravel.
6. I designed the height of the nest boxes and roost to account for up to 12" of bedding material on the floor since the deep litter method involves continually adding more bedding instead of cleaning out the old material. I had read that a good height for a nest box is 12-18", so I increased that to 24". I had also read that you want the roost to be higher than the nest box to prevent the hens from roosting in the nest boxes, so I made my roost 34" high.
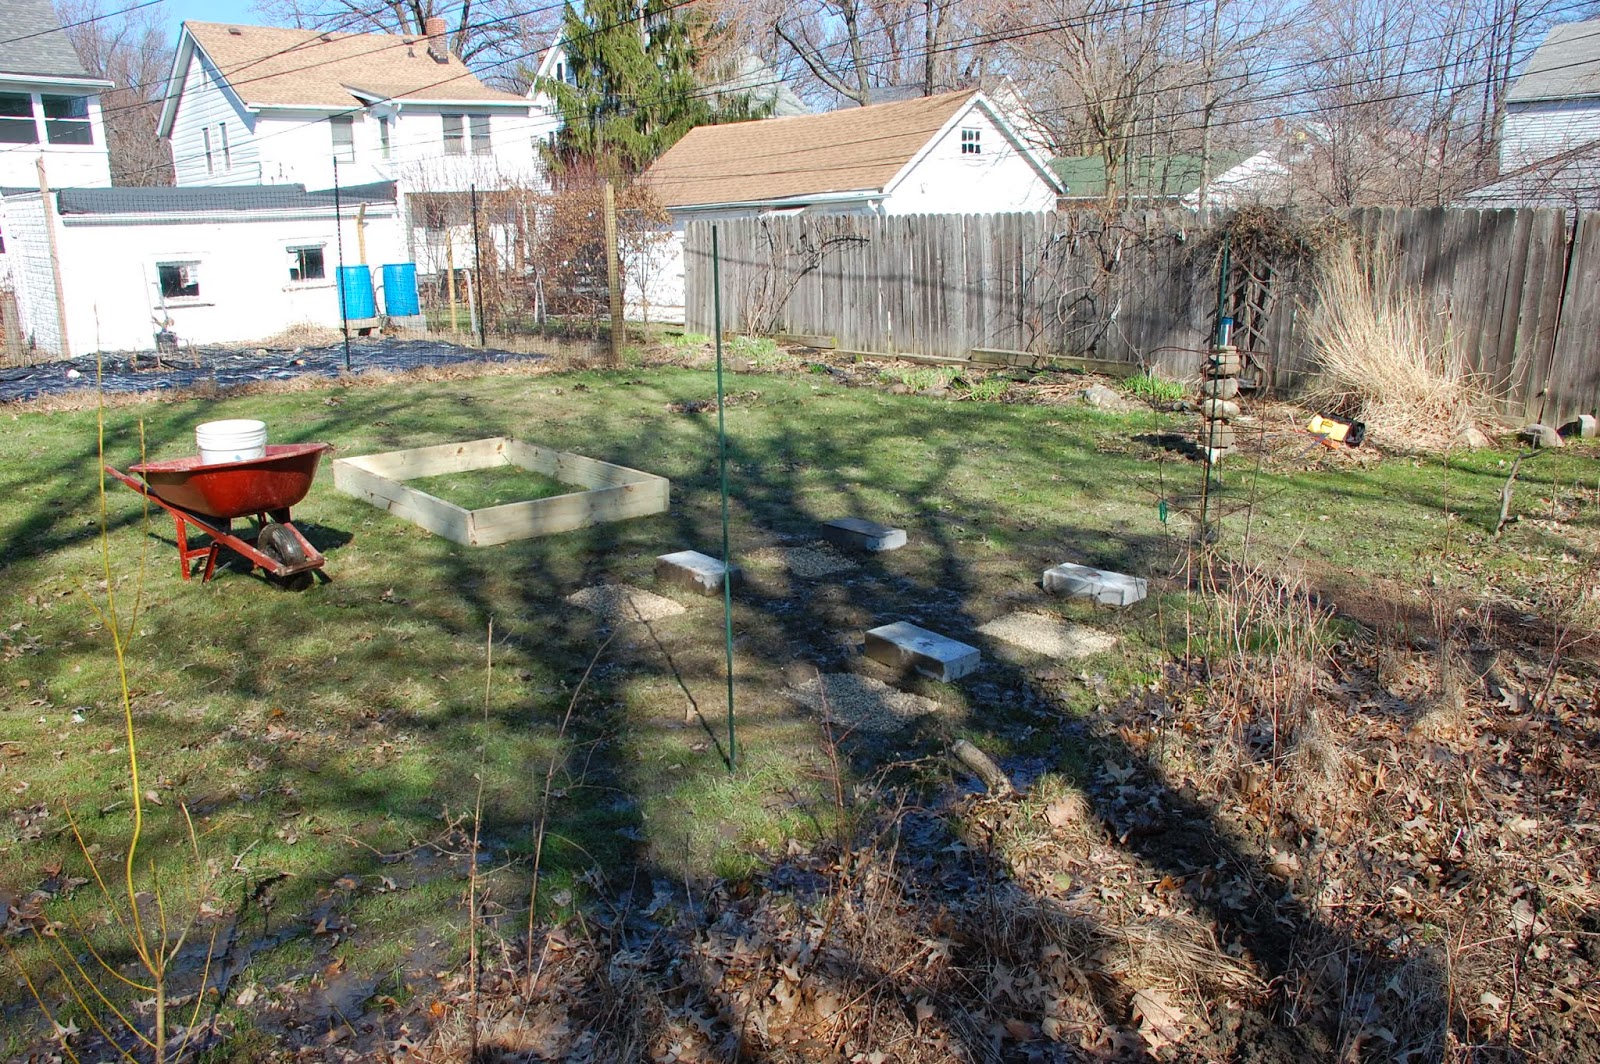
The Foundation
Here's a photo sequence of my foundation work. This took me 3 1/2 hours working alone.
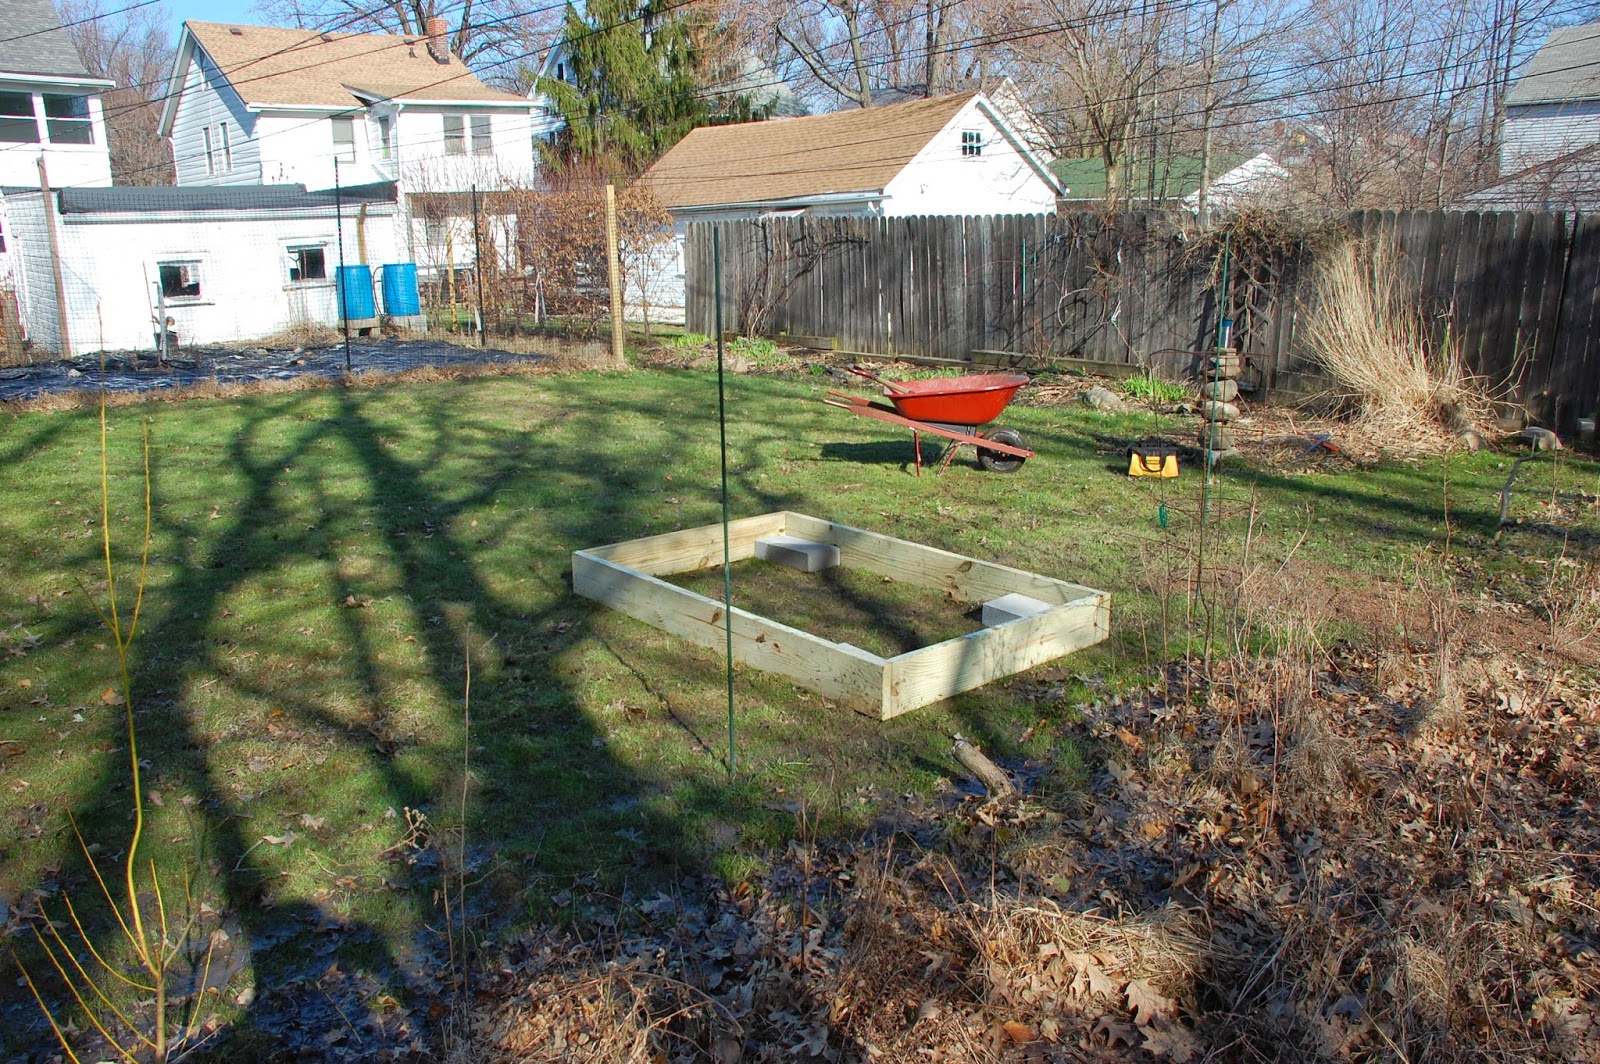
Build the floor joist frame, square up and lay in position

Lay a concrete block inside each corner to mark the positions
Move the frame out of the way
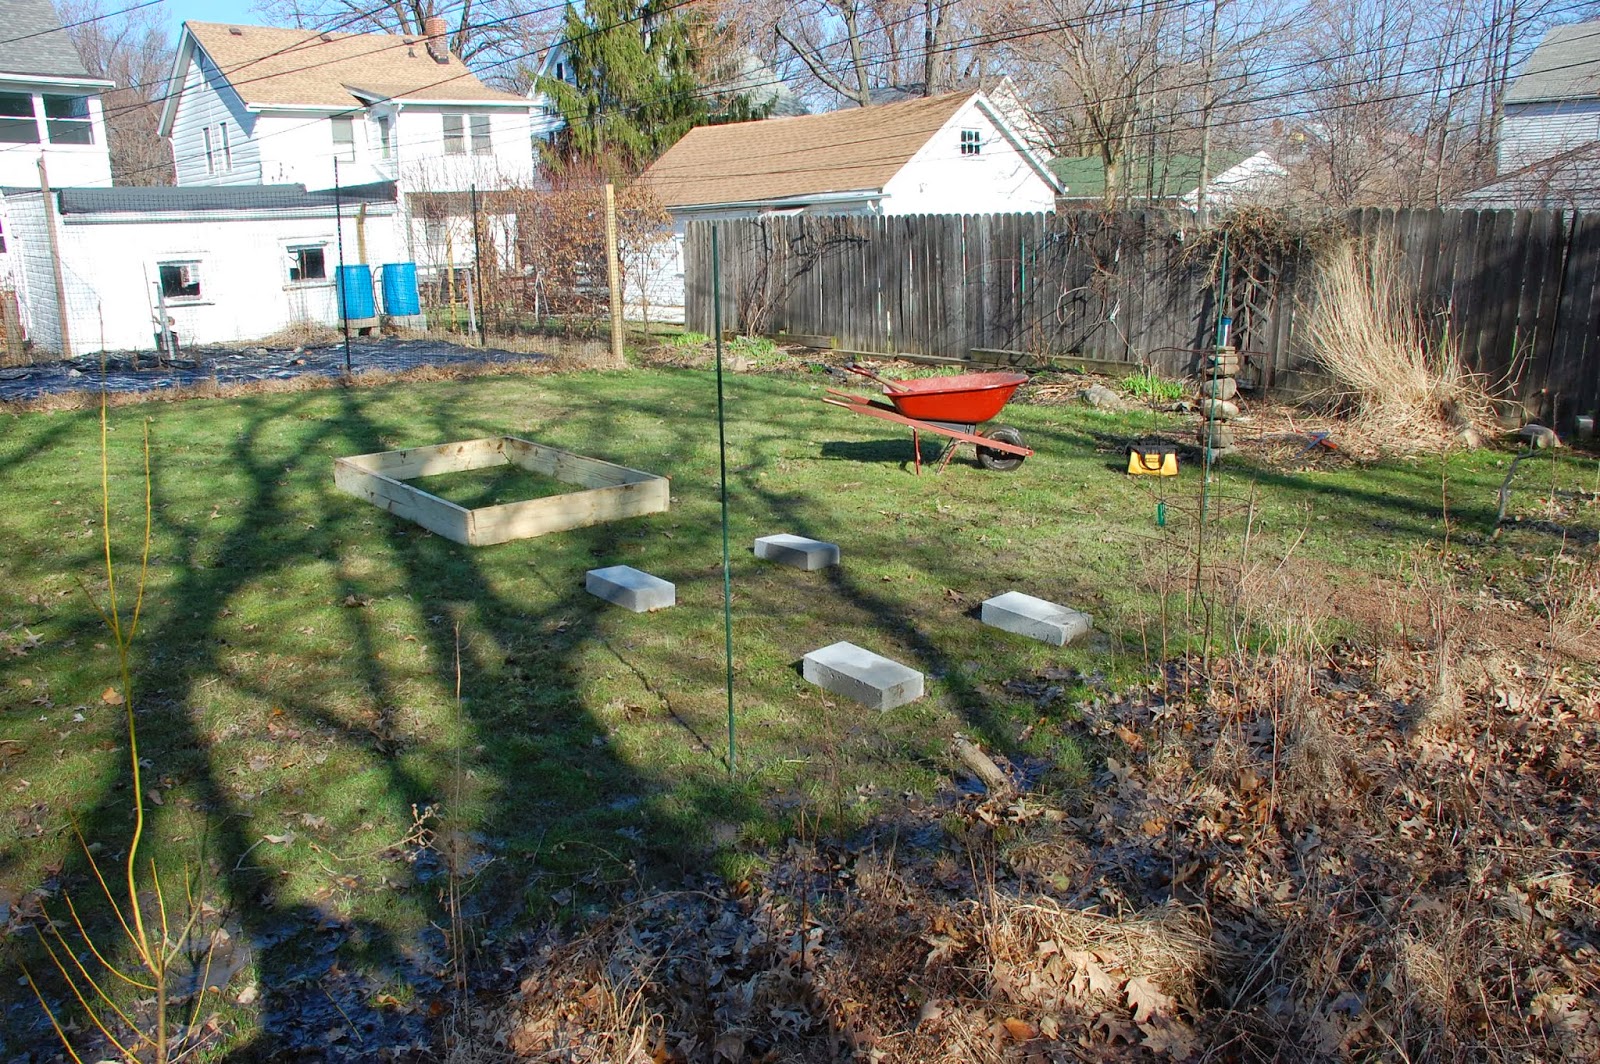
Dig holes a little bigger than each block down to clay/rocky soil
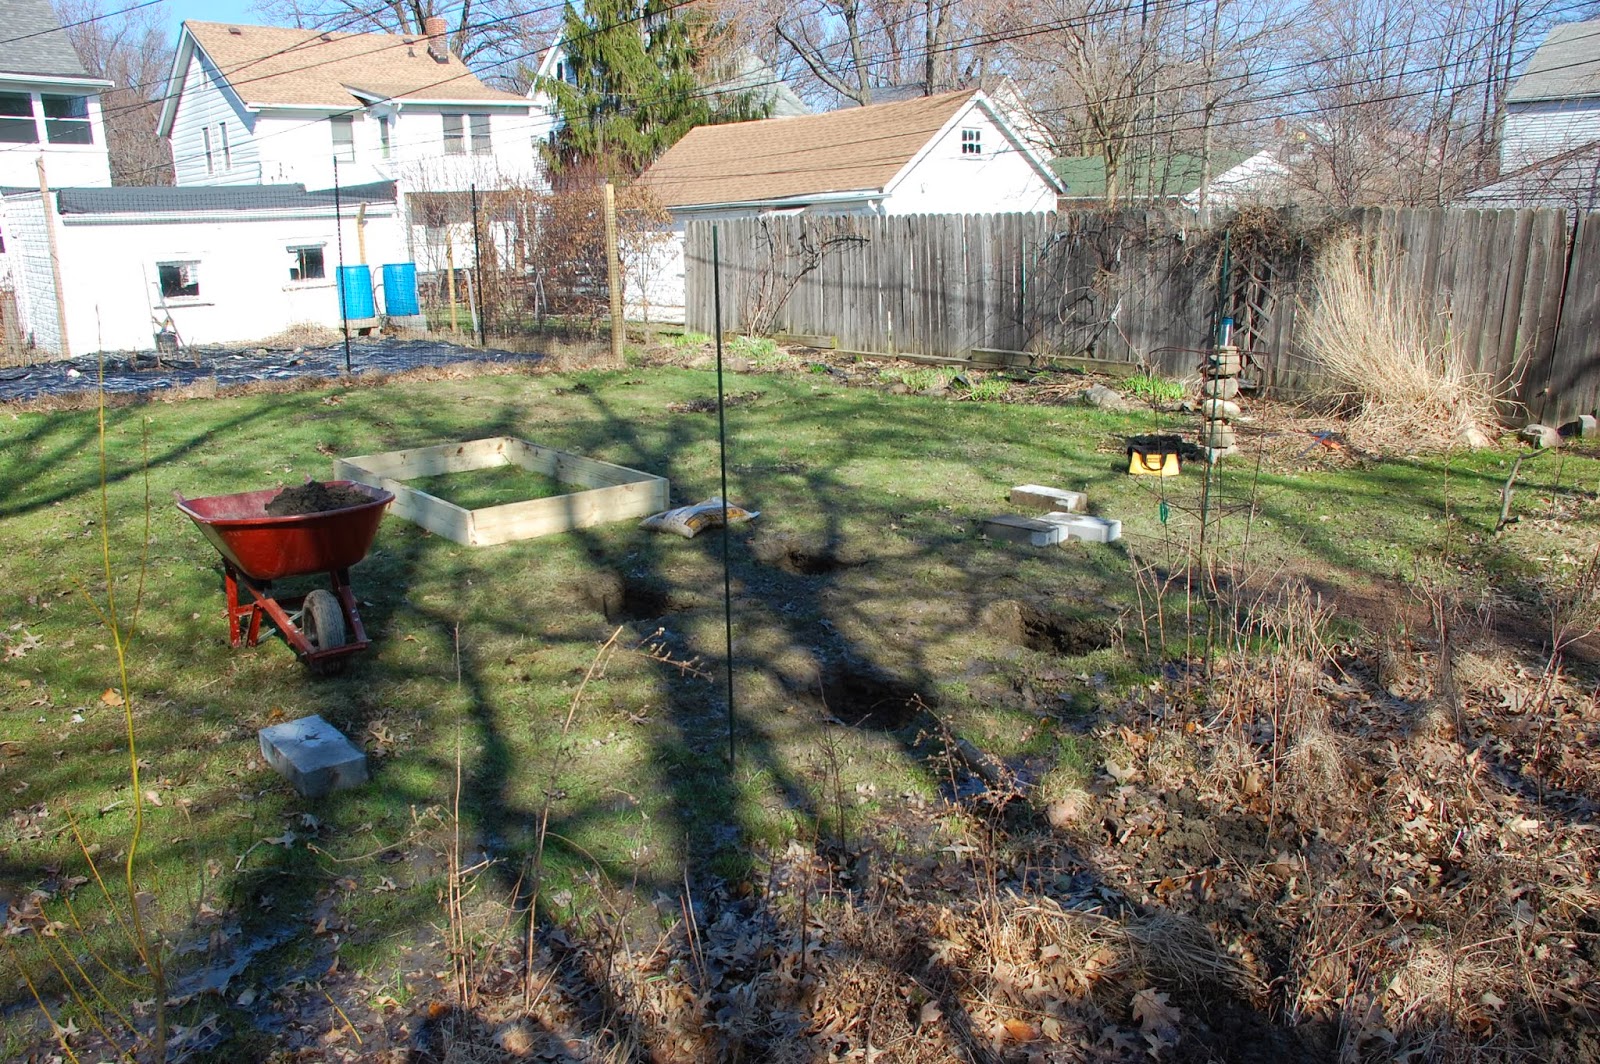
Fill each hole with pea gravel
Set the blocks and level them by adding or removing gravel
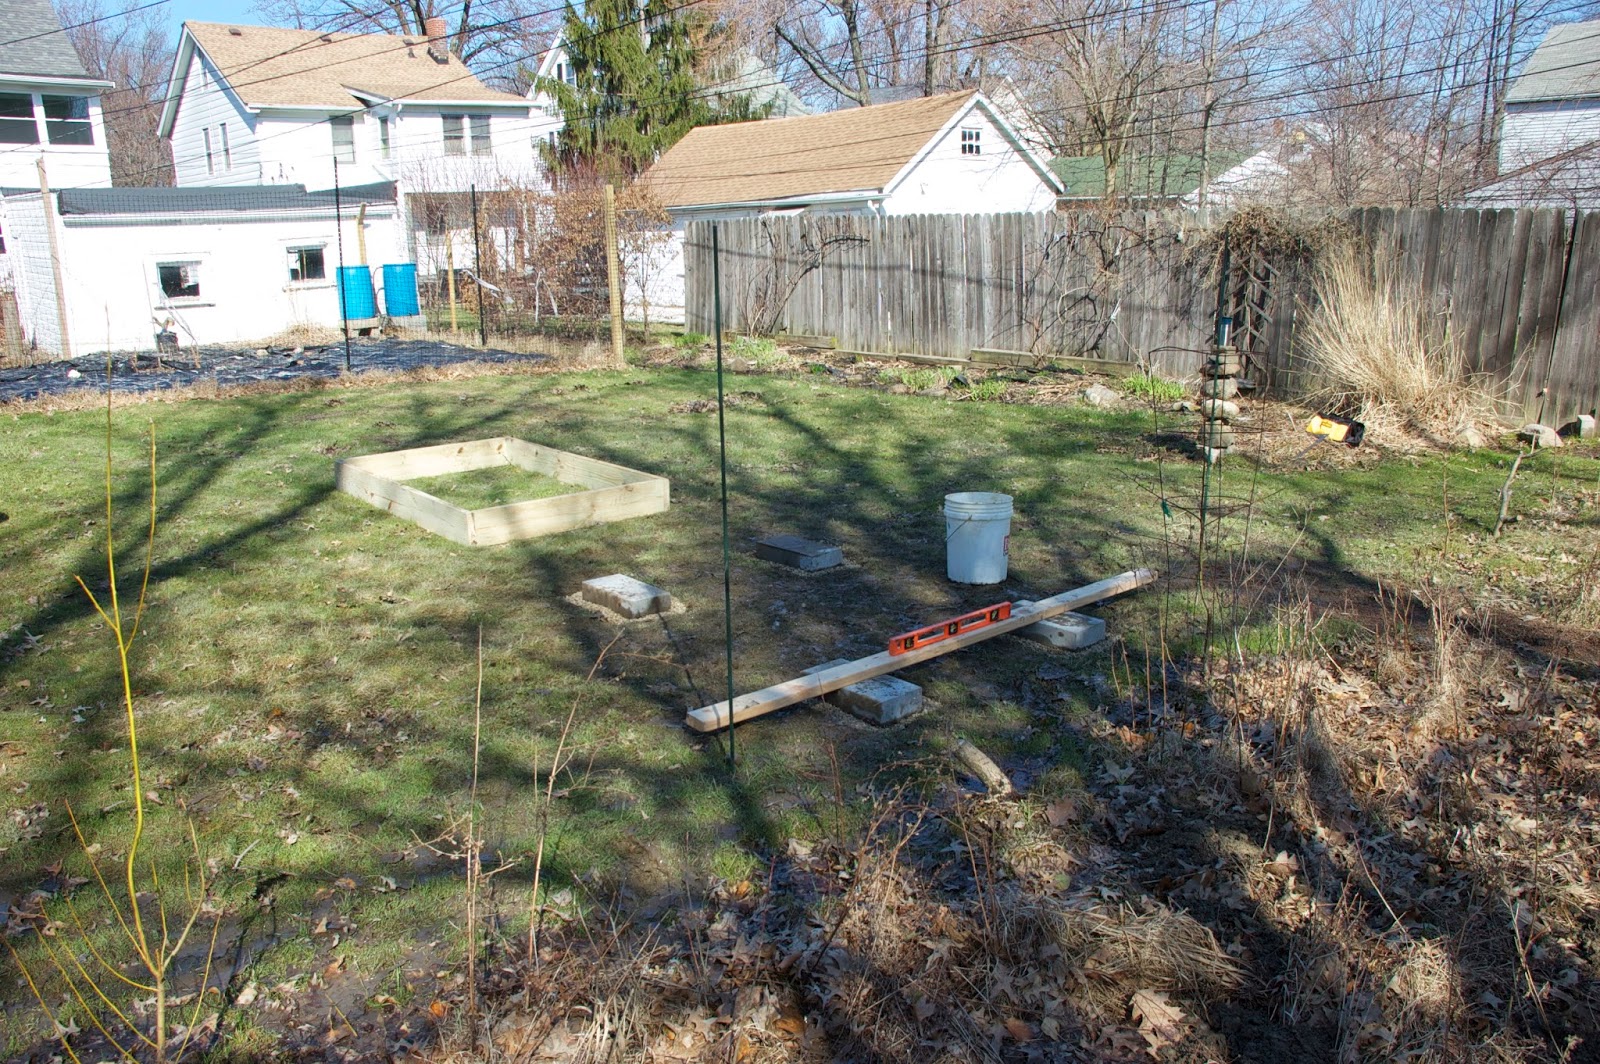
Set the frame in place, recheck level and measure from corner to corner to square up the frame. Nail a diagonal board temporarily to keep it square.

Add floor joists. The wacky colors and sizes are because I used as much reclaimed lumber as possible. I did purchase the pressure treated joists, blocks and gravel, but the rest of the framing lumber is salvaged from a building that was being gutted.

Nail down the plywood floor.
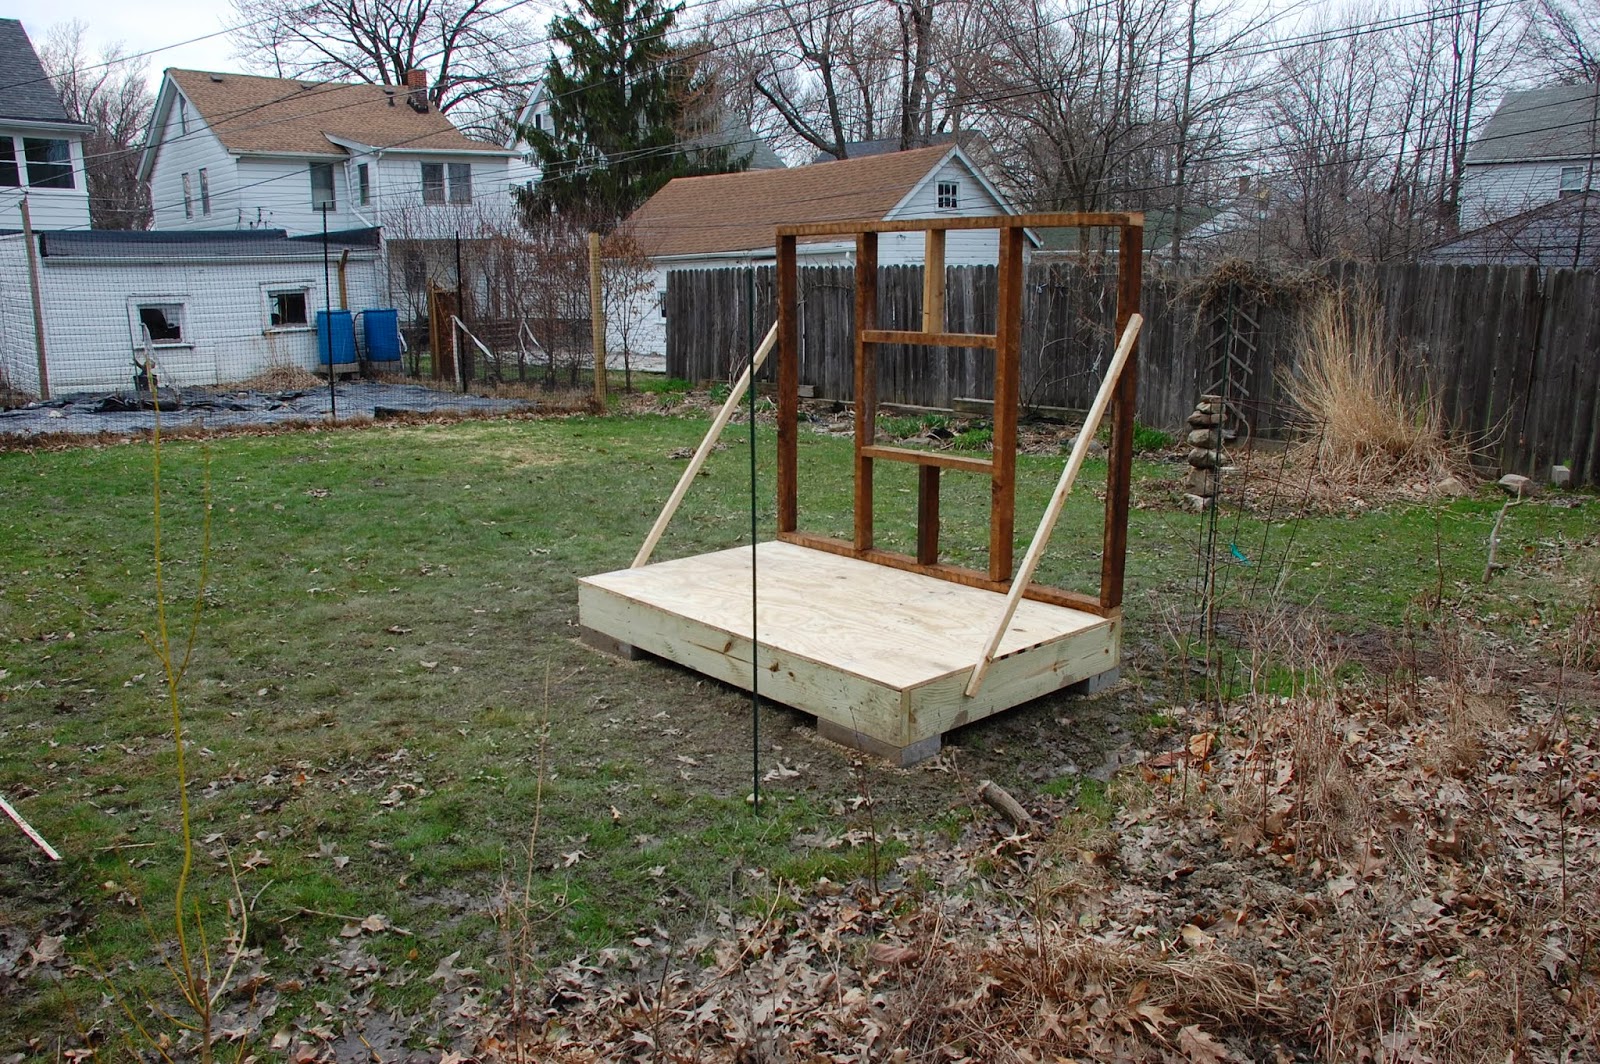
The framing
The next day my Dad came over and helped me build the first wall. It was a big help when nailing the studs together and having another person to think about dimensions and measurements (someone who is much better at these things than I am.) It took two of us 2 hours. The opening in the middle of the wall is for the nest boxes. All the 2x4's I used were from the inside of an old apartment building that was gutted. I salvaged several carloads of lumber and pulled the nails out.
The next weekend I once again had the pleasure of working with my Dad on the chicken coop. We made great progress, and like the previous week, completed everything I hoped we would, which in my experience, rarely happens. We finished the remaining three walls, and the outline of the two gable ends. The South wall (facing left in the picture) has two rough openings for windows, and the West wall (facing towards the garage) has a rough opening for a person door.
The next weekend I worked alone, and although I completed the work I had planned, there were some tense moments and frustration that could have been avoided with a helper. Next time I'll call a friend. I built one side of the roof framing on the ground and then lifted it up to nail it in place. That was very difficult alone, and would not recommend it. The next side I did in segments. Here are the details:
The West gable end has an overhang of 12" to provide weather protection for the person door.
The eaves overhang 16" in a straight line which is about 12"horizontally out from the wall.
The East gable end is flush with the wall to allow the run fencing to attach to the wall. There is a small overhang at the very top to keep rain out what will be a triangular vent, this will be above the top of the run.
Instead of cutting out notches on the rafters to rest on the top plate, I made little triangles to transfer the load onto the wall. I had no choice because of how the rafters sit on the gables, but I feel better with no notches since the rafters are only 2x4's and there is a large overhang
The ridge board rests on top of the gable frames
The finished framing
The East end, which will have the chicken door opening into the run.
The roof
Next I installed the fascia boards (1x4" primed and painted pine nailed to the vertical cut ends of the roof joists) and the plywood roof sheathing. Then I nailed up all the trim on the gable ends (which I made from an old wooden bed frame I found on the curb) installed drip-edge, tar paper, and shingles. Those jobs took about 6 1/2 hours with a helper.
They say you need one bale of shingles for each 4x8 foot section of roofing, and my roof used two 4x8 sheets of plywood; but I bought opened bales with some damaged shingles (for 40% off). I only had 5 shingles left, so I'm glad I bought three bales instead of two.
Siding
The next job was installing the siding, this took my Dad and I about 5 1/2 hours including a trip to HD to get the siding. It took longer than I expected, but we also cleaned out half of my garage to make space for painting. I used T 1-11, which is an exterior grade plywood with a textured surface and vertical grooves to make it look like barn siding. I cut the overall size and then applied one coat of Sherwin Williams Woodscapes, a semi-transparent colored polyurethane sealant that allows the woodgrain to show through. My original plan had been to use pallet decking as horizontal overlapped siding, but in the end I decided the time spent driving around town to pick up the pallets, and then cutting them apart was not worth the savings. I also would have had to rent a box truck to get the oversized pallets necessary to cover the long sides of the coop.
The openings for the windows and nest boxes were cut after the siding was nailed up. I used a brad nailer (borrowed from work) to avoid getting hammer marks on the textured surface of the siding.
The straw on the ground in the back is where the run will be. I dumped several wheel barrow loads of dirt to raise up the soil level, because that area is frequently muddy. I planted barley, oats and wheat just for a treat, realizing that it will be gone in no time once the chickens move in.
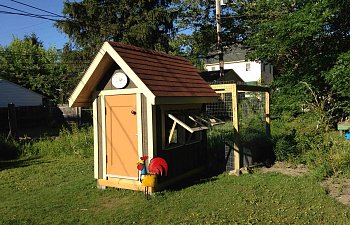
Here's me and my six-year old (then five) so you can see the scale of how big the coop is. Even though the door is much shorter than me, it's not hard to get in because I'm stepping up from the ground 8" or so.
Windows and doors
I wanted to have lots of natural light inside, so I used these two reclaimed windows from my house, they are each about 2 feet square. The door is from an old rental property that I cut down and refinished. I do go inside the coop frequently to feed, or to stir up the bedding, so I'm glad I have an almost full-sized door. I got the door hinges and shingles from the Habitat for Humanity Re-Store, which has left over building materials donated by contractors. The door frame is made out of 1x4" pine, and the threshold is pressure treated.
The windows hinge from the top and have latches at the bottom. I prop them open with sticks in hot weather. Here they are all trimmed out. I primed and painted the trim first, and then nailed it up with a brad nailer. The brads are so tiny you don't even need to fill the holes after nailing them in. This picture was taken later after the run was in place as you can see.
The eaves are covered with pallet decking, and left unpainted since they would be getting direct rain, and I like the look.
The lid for the nest box was actually quite time consuming. It's just a piece of 3/4" plywood covered with cedar shingles, but it took a lot of trial and error to get the trim in the right place, and all the angles cut correctly. Since I don't have the ability or software to design every detail, a lot of dimensions were determined empirically as I went along. Here it just has an eye hook and screw eye; I later added two screw eyes and a small padlock. I did notice one morning little muddy foot prints all over the nest box lid, climbing up the front door and on the roof, so I know racoons have been trying unsuccessfully to get in.
The chicken door is just a simple sliding piece of 3/4" plywood the rides in a track between the studs and a frame of 1x2's. I did eventually trim it all out inside and out.
You can see the 1/2" hardware cloth stapled to the edge of the siding, and the 2x4 welded wire fence just goes all the way across.
The inside
It isn't pretty, but it works. The floor is covered with leftover sheet vinyl from a kitchen remodel. I planned on using the deep litter method of manure management, so I made the vinyl flooring go 12" up the walls to protect the floor from moisture. The walls have styrofoam insulation leftover from an attic remodel. The walls are partially covered with 1/4" plywood I found in a dumpster. The chicken door is a guillotine style sliding door with a rope and pullies that allow me to open and close it from the outside near the nest boxes. You can see the gable vent at the top which is covered with 1/2" hardware cloth; there is an identical vent on the other end. The top six inches of the side walls are also open and covered with hardware cloth. Ventilation is important to remove ammonia vapors which are harmful to the respiratory systems of the birds, and to remove humidity in Winter to prevent frost bite. Any of the vents can be closed off to make adjustments in really cold weather, although I always keep at least one gable vent open. The roost is a 3-4" thick mulberry branch; I had read about others using a 2x4 on its side so the hens can cover their feet with their bodies to keep them warm, but I wanted a more natural roosting material, so I thought this branch would work well.
The windows are also covered with 1/2" hardware cloth to keep predators out when I open them in the summer. The eaves overhang enough to keep out direct sunlight during the hottest times of the day during the summer, but allow it in during the Winter (if there is any sunlight in Winter)
The two nest boxes are 14" wide x 14" deep x 18" high and have a 3" board across the front to keep in nesting material and eggs. They are made out of the T 1-11 3/4" siding and nailed together with a pneumatic stapler, and nailed directly to the stud opening.
Here's a cool night-time picture showing the eave vents, which were made just by stopping the siding 6" below the top of the stud wall. I have strips of wood that can pop into the openings and be secured with a wooden swivel.
The run
The run is 8x10 feet and 6 feet high. There are five 8 foot 4x4" pressure treated posts set 2 feet deep in concrete. The two close together posts are for a gate, and I set them wide enough to allow my wheel barrow to go in so I can bring in loads of compost for the hens to pick through, and so I can haul out seasoned compost to add to my garden.
I dug trenches all the way around (except where the gate is) and buried the 1/2" hardware cloth about 6" deep and 12" out, replacing the dirt and sod on top of the hardware cloth. I also buried a 4" thick slab of sandstone just inside the gate opening to prevent predators from digging under, or the chickens from digging out, making it easier for predators to get in.
I attached 2x4 welded wire fencing from the ground up to the top of the posts. It is attached with hot dip galvanized staples. My son is having fun watching the chickens venture into their run for the first time.
There are 2x4's between the tops of the fence posts and another one through the middle of the enclosure to support the fencing on top.
The top is covered with polypropylene deer fencing to keep out hawks, which do fly over from time to time.
What I would do differently next time:
1. Make the nest box a little lower. Because the eaves overhang so much, when I lift up the lid to the nest box it's hard to see down into the box unless I put my head right down inside it. Being a first time chicken keeper, I went very strictly with the height and dimension recommendations that seemed the most universally accepted, but I now believe that it would have been fine to lower the nest boxes 6-8 inches, making it more convenient to check for eggs.
2. I read this one numerous times from other people, and I didn't believe it. I wish I had made the coop bigger. I had very well thought through reasons for why I chose the dimensions I did, one of which was cost. I knew the siding was going to be expensive, and I thought I had it planned out perfectly to side it with four pieces of T 1-11, but because of how the siding boards overlap, I had to buy six sheets, and I had lots left over. So I really could have made my coop 4x8 feet instead of only 4x6. The main benefit for a bigger size is in Winter, when it's really cold (below 10 degrees F or so) I don't let them out into the run, and if there is snow on the ground, they don't want to go out anyway, so they have been cooped up for up to 10 days in a row. They really get crazy and start pecking at anything they can get their beaks on, and more space would have been welcome.
3. I probably didn't need to use 2x4 studs as close together as I did. Part of what determined the spacing was the location of the windows and nest box openings. But I'm sure it's way over built. Fortunately I didn't need to buy the lumber.
What I hope to add in the future:
1. I made the chicken door the right size to add a Pullet-Shut with automatic opener. I already spent almost $1000 on this project, so I'm not keen on spending any more at the moment though. I have neighbors and a co-worker who are all willing to open and close the door, so it's not a high priority.
2. Electricity via a buried cable. This Winter I ran a 100' extension cord to power the heated waterer and a light on a timer to give them extended daylight hours, but it would be nice to have it hard-wired. Again, not a high priority.