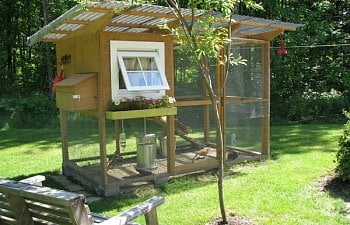
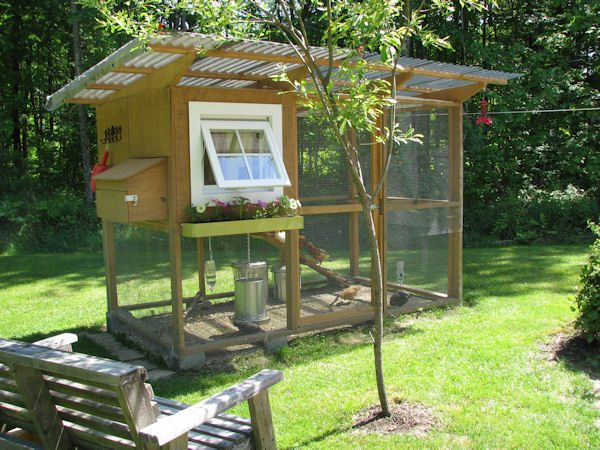
I bought the Garden Coop plans online: www.thegardencoop.com . It turned out to be a great project which I did mostly by myself. The plans are a good "building block" if you have ideas of your own to add to it. The coop looks great in my yard and is a perfect set up for me. Easy to clean, room enough for my 6 chickens, and everybody loves to visit my backyard now.

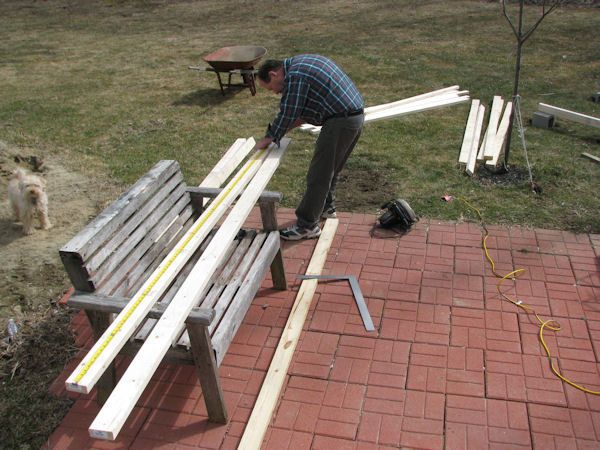
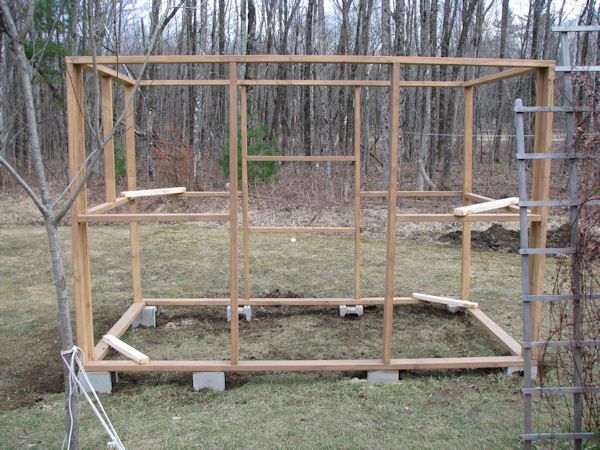
Dad helped me make the frame.
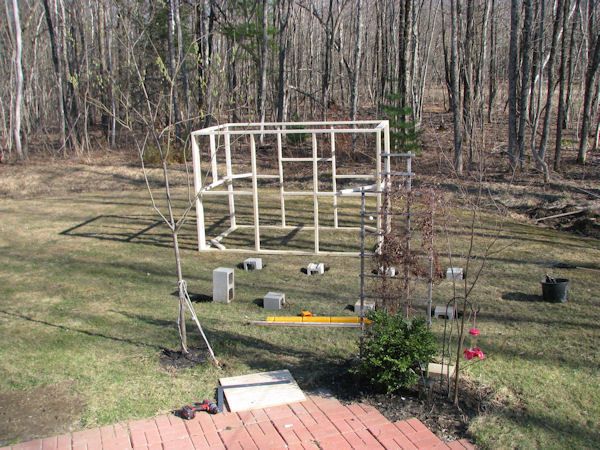
Setting the peirs.
The frame is heavy but can be moved with two or more people.
I opted to use semi-transparent stain. I used a full gallon for the whole coop. I could have used another cup full though. Ugh.
After it was leveled, Dad and I attached the rafters for the roof.
Then we added the purlins (going --> that way). Then I screwed on the roof panels.
Then I finished digging my trench about a foot down and attached the lower half of the hardware cloth all the way around.
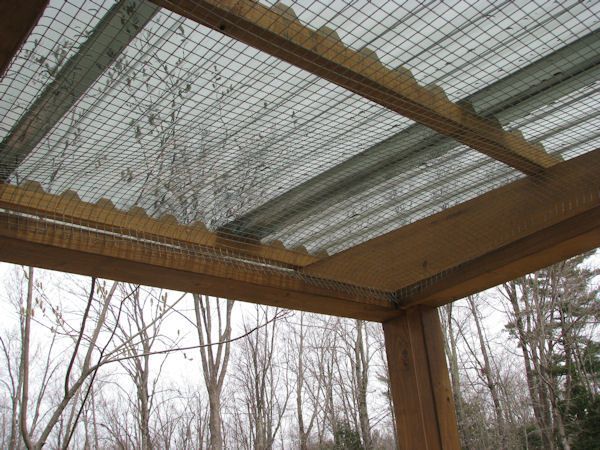
I put hardware cloth in the three openings at the top of the frame, under the roof which leaves an open air space for good ventilation.
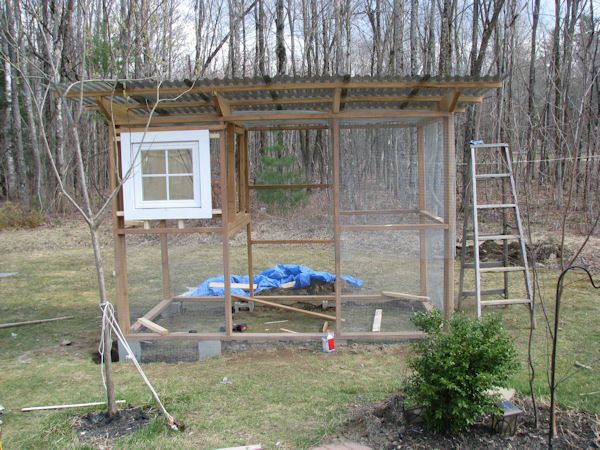
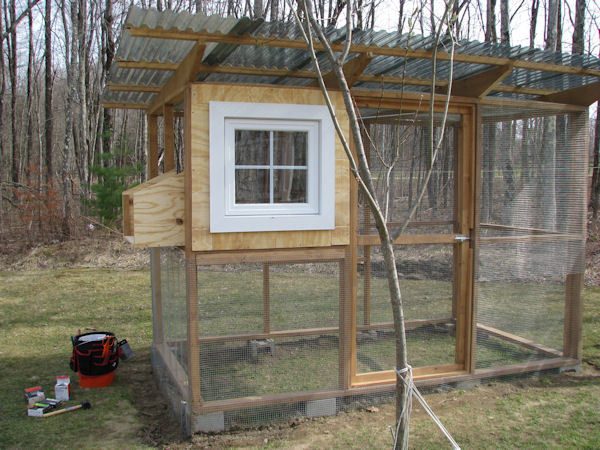
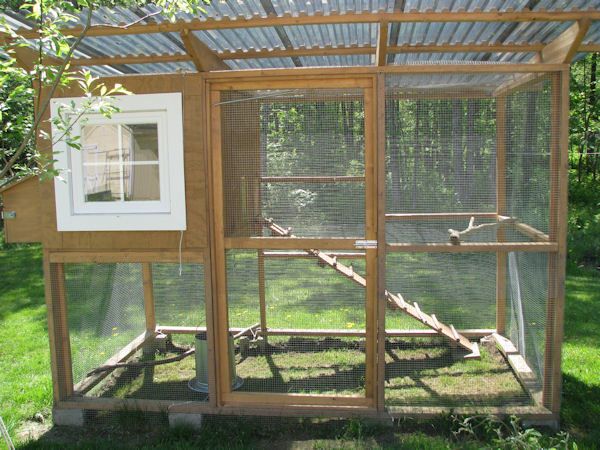
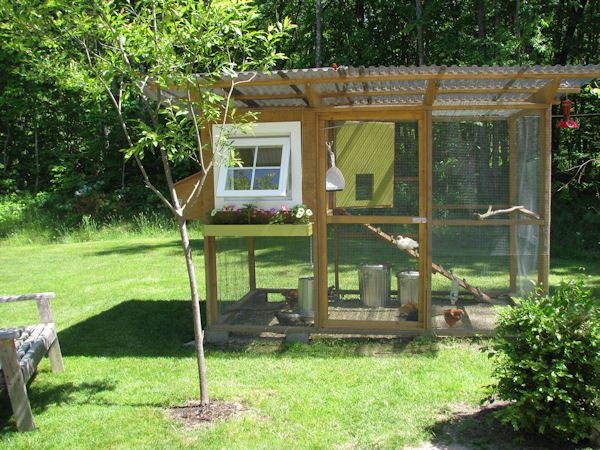
Then I wrapped the upper half of the coop in hardware wire and added this window that I have had sitting in my cellar for the past 9 years. It really just happened to fit by chance. It was supposed to go in my house when we built it, but the eave of my roof was in the way, so we stuck it in the cellar. I was thrilled when I was looking for extra lumber down there and noticed it! It is way better than what I was going put there.
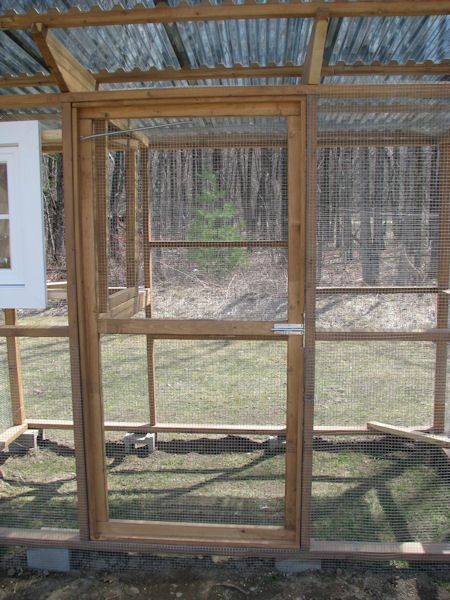
Then I made this perfect screen door all by myself. One of my proudest moments.
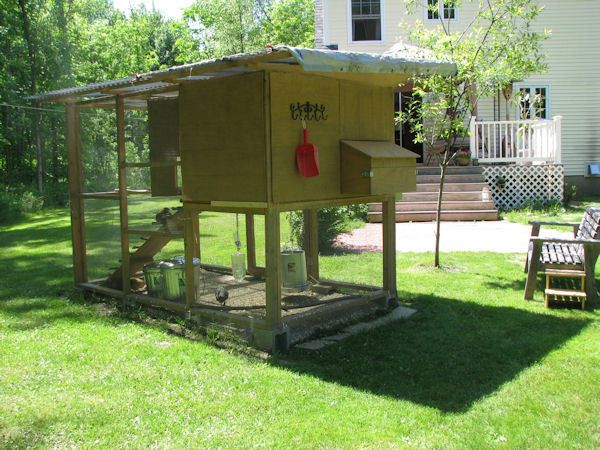
Then I started on the external nesting box. This was not in the original plans but I found the "add-on" plans on the Garden Coop website (free). Dad gave me that orange tool bucket. It was so great for hauling my tools in and out every night.
I made quite a few changes on the hen house. I decided to use T1-11 for the exterior walls.
This is the access door and chicken / pop door. I experimented with plexiglass in the access door. It turned out to be one of the best parts of the coop. The chickens love to nestle into the shavings and look out into the yard. I can also see what is going on in there before I open the door. I added a latch off to the right on the frame and on warm days I latch it open, cause they like it.
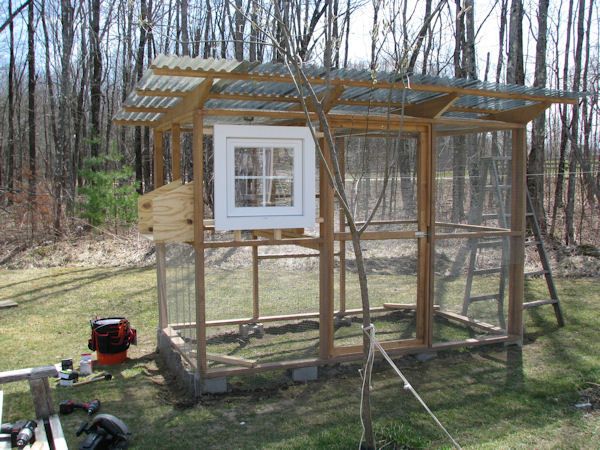
Ooh, now I'm starting to see the end in site.
This is the interior of the hen house from the back. Nesting box came out good. Added a linoleum remnant to the floor. (Which I love now that I am cleaning up after them). I added a solar powered garden light which makes a great, dim night light.
I cut the T1-11 into sections and screwed them on. This will be great for adding the insulation later and easier if I ever want to make any changes to the hen house in the future.
I finished staining everything and made the ramp.
I did the same thing on the inside walls as I did outside. I used Luan and cut it into sections and screwed all the panels in. Again, this is great for make changes in the future. Then I sealed all the cracks with silicone caulking. I primed the whole interior. Then I painted the walls with two coats of semi gloss paint in green. The semi gloss washes soooo nicely. I painted the inside of the nesting box pale blue. I was going to stamp a small pattern all over to make it look like wall paper but it just made it look messy. Maybe next time. I never got a picture of the sliding pop door I made (it got a little to tight in there for taking pictures at that angle).
Here is a view of the interior through the plexi window I made on the access door.
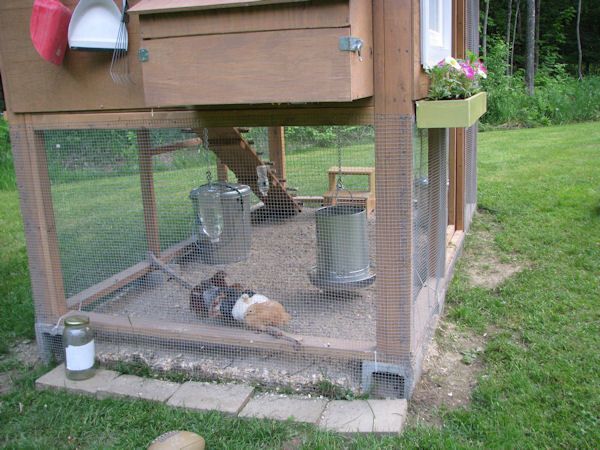
I added a roost inside the hen house, one on the right side of the run up high and one on the left side of the run down low. They use all of them. I screwed branches to the ramp. I attached a rope to the sliding pop door and ran it straight up through the hardware cloth on the roof. Then I put an eye screw just above the window (you can see it just next to the 2nd rafter from the left if you look hard), ran the rope through it and tied a knot in the end. I tuck the rope along the window and the knot holds up under the frame of the window. It just worked out that way. You can see the tail of it hanging below the window. I bought the metal feeder and hung it from the bottom of the hen house with a hook, chain and S hooks. It is way bigger than what I need for 6 chickens though.
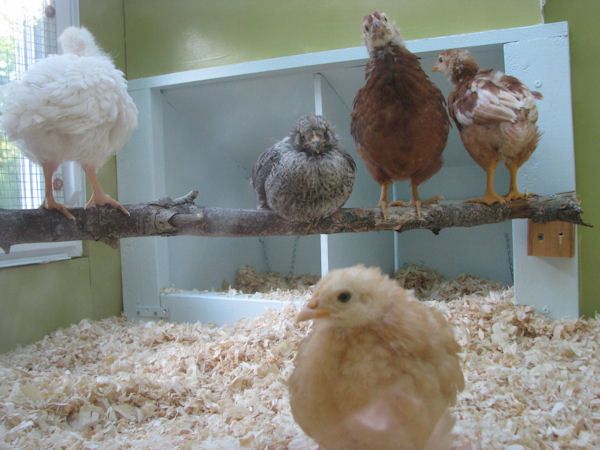
I also added pine shavings to the hen house when they moved in. I will put hay in the nesting boxes when they get a bit bigger.
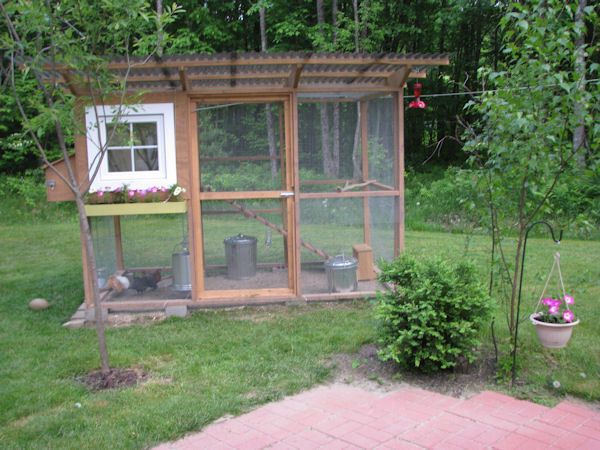
I didn't want the project to end so I added the window box. I still have plans to put patio bricks around the sides and the front with a walkway connecting it to my existing patio. I leave the two small metal cans in the coop, one full of feed and one full of scratch.
My flock moved in. These first moments were scary. After 5 minutes they were running around and stretching out. So much more fun than the brooder!
A warm day. I leave the hen house access door open. They can still go in through the chicken door at the top of the ramp too.
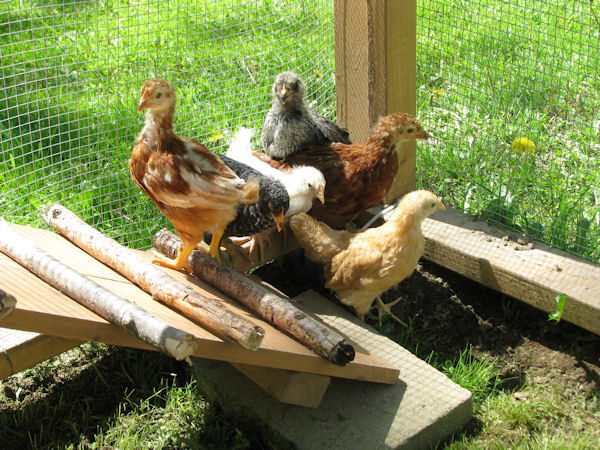
They hang out on the ramp a lot. I added a hook (see the dust pan) for any tools I am using. I put sand in the bottom of the run. I like it because it coats the poops (no bad smells this way). The chickens love taking dust baths every day too.
A bench is nice because you will spend a lot of time watching.
I added another set of hooks here for tools. I had a minor leak during an extreme storm. So I quickly put a tarp on the top of the hen house with a couple of utility clamps. I put some silicone on a couple of the not-too-straight roof screws and the leaking stopped.
My daughter went off to college and my son is a teenager. I was feeling a bit of empty nest syndrome. This helped me to keep busy, focused on something positive and literally helped fill the nest again!
I did a lot of research before I began this project. All the sample coops on BYC really inspired me and helped me figure out how to do this. I hope my pictures help or inspire you!
Dad helped me make the frame.
Setting the peirs.
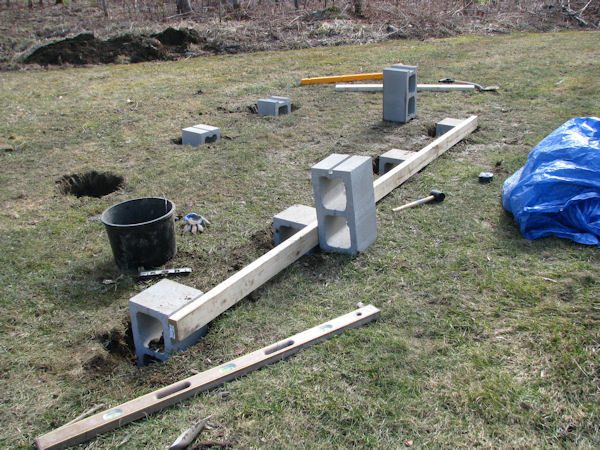
The frame is heavy but can be moved with two or more people.
I opted to use semi-transparent stain. I used a full gallon for the whole coop. I could have used another cup full though. Ugh.
After it was leveled, Dad and I attached the rafters for the roof.
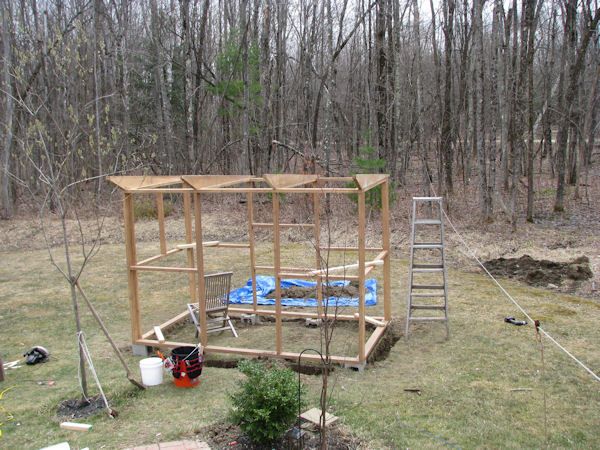
Then we added the purlins (going --> that way). Then I screwed on the roof panels.

Then I finished digging my trench about a foot down and attached the lower half of the hardware cloth all the way around.
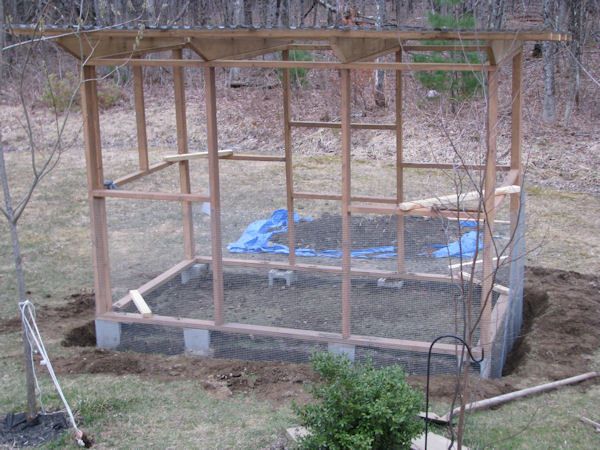
I put hardware cloth in the three openings at the top of the frame, under the roof which leaves an open air space for good ventilation.
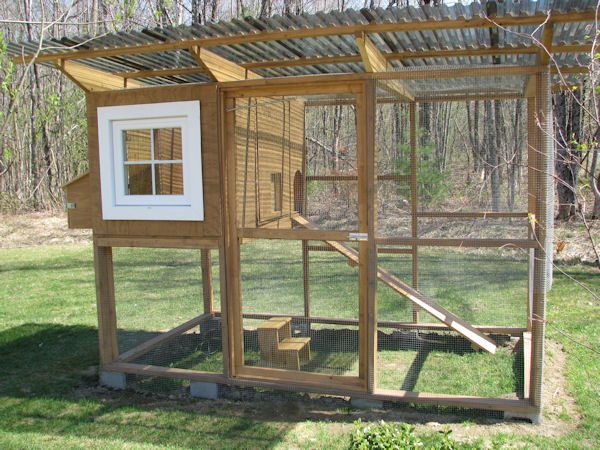
Then I wrapped the upper half of the coop in hardware wire and added this window that I have had sitting in my cellar for the past 9 years. It really just happened to fit by chance. It was supposed to go in my house when we built it, but the eave of my roof was in the way, so we stuck it in the cellar. I was thrilled when I was looking for extra lumber down there and noticed it! It is way better than what I was going put there.
Then I made this perfect screen door all by myself. One of my proudest moments.
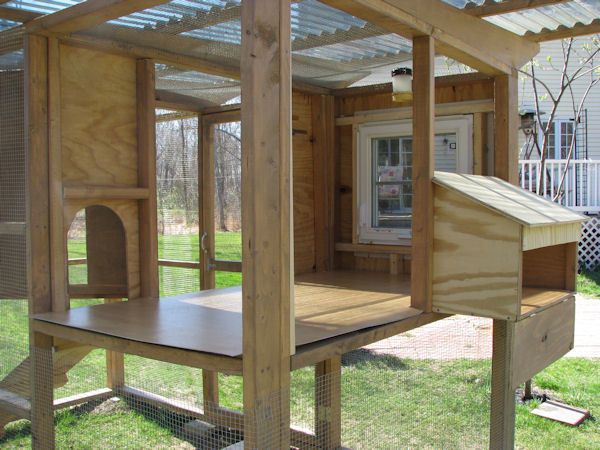
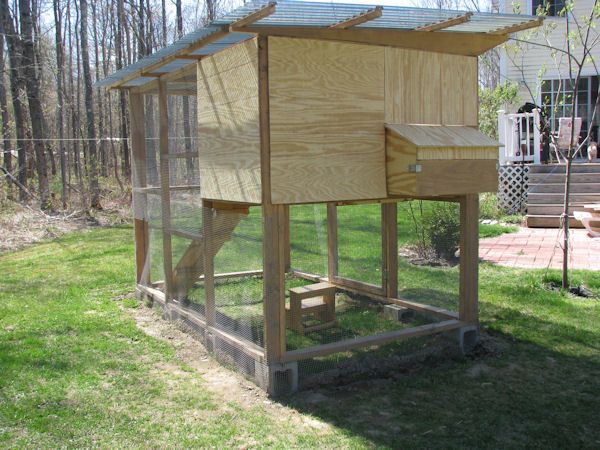
Then I started on the external nesting box. This was not in the original plans but I found the "add-on" plans on the Garden Coop website (free). Dad gave me that orange tool bucket. It was so great for hauling my tools in and out every night.
I made quite a few changes on the hen house. I decided to use T1-11 for the exterior walls.
This is the access door and chicken / pop door. I experimented with plexiglass in the access door. It turned out to be one of the best parts of the coop. The chickens love to nestle into the shavings and look out into the yard. I can also see what is going on in there before I open the door. I added a latch off to the right on the frame and on warm days I latch it open, cause they like it.
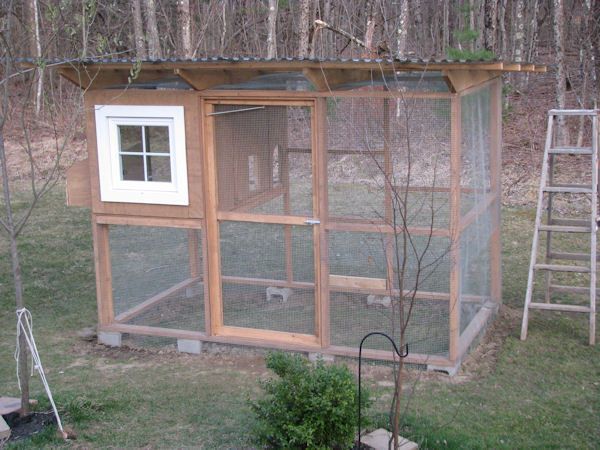
Ooh, now I'm starting to see the end in site.
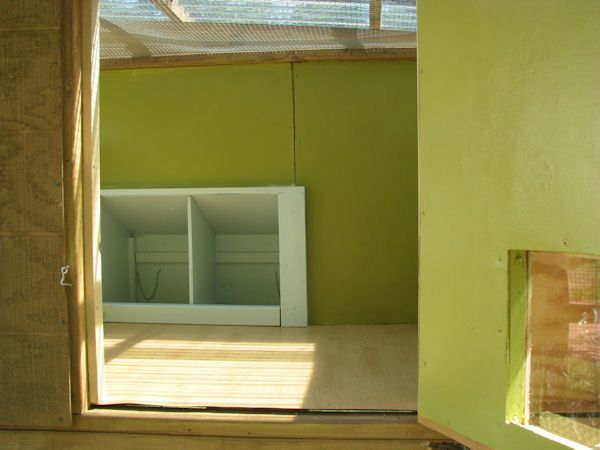
This is the interior of the hen house from the back. Nesting box came out good. Added a linoleum remnant to the floor. (Which I love now that I am cleaning up after them). I added a solar powered garden light which makes a great, dim night light.
I cut the T1-11 into sections and screwed them on. This will be great for adding the insulation later and easier if I ever want to make any changes to the hen house in the future.
I finished staining everything and made the ramp.
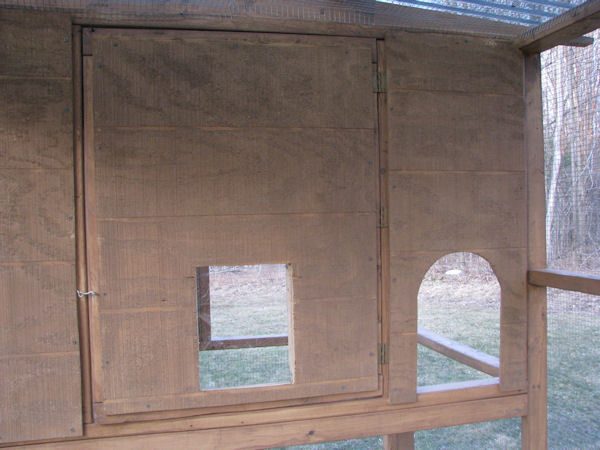
I did the same thing on the inside walls as I did outside. I used Luan and cut it into sections and screwed all the panels in. Again, this is great for make changes in the future. Then I sealed all the cracks with silicone caulking. I primed the whole interior. Then I painted the walls with two coats of semi gloss paint in green. The semi gloss washes soooo nicely. I painted the inside of the nesting box pale blue. I was going to stamp a small pattern all over to make it look like wall paper but it just made it look messy. Maybe next time. I never got a picture of the sliding pop door I made (it got a little to tight in there for taking pictures at that angle).
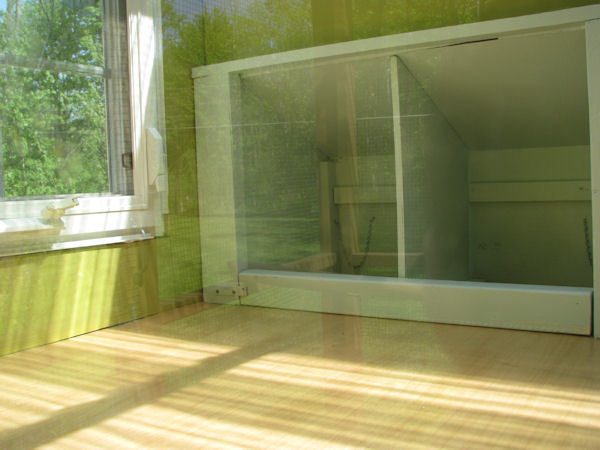
Here is a view of the interior through the plexi window I made on the access door.
I added a roost inside the hen house, one on the right side of the run up high and one on the left side of the run down low. They use all of them. I screwed branches to the ramp. I attached a rope to the sliding pop door and ran it straight up through the hardware cloth on the roof. Then I put an eye screw just above the window (you can see it just next to the 2nd rafter from the left if you look hard), ran the rope through it and tied a knot in the end. I tuck the rope along the window and the knot holds up under the frame of the window. It just worked out that way. You can see the tail of it hanging below the window. I bought the metal feeder and hung it from the bottom of the hen house with a hook, chain and S hooks. It is way bigger than what I need for 6 chickens though.
I also added pine shavings to the hen house when they moved in. I will put hay in the nesting boxes when they get a bit bigger.
I didn't want the project to end so I added the window box. I still have plans to put patio bricks around the sides and the front with a walkway connecting it to my existing patio. I leave the two small metal cans in the coop, one full of feed and one full of scratch.
My flock moved in. These first moments were scary. After 5 minutes they were running around and stretching out. So much more fun than the brooder!
A warm day. I leave the hen house access door open. They can still go in through the chicken door at the top of the ramp too.
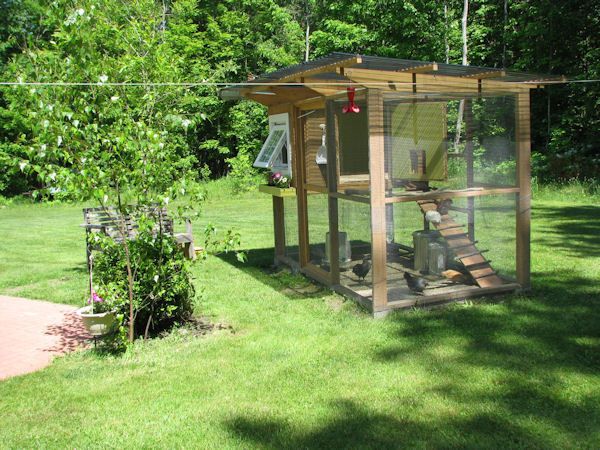
They hang out on the ramp a lot. I added a hook (see the dust pan) for any tools I am using. I put sand in the bottom of the run. I like it because it coats the poops (no bad smells this way). The chickens love taking dust baths every day too.
A bench is nice because you will spend a lot of time watching.

I added another set of hooks here for tools. I had a minor leak during an extreme storm. So I quickly put a tarp on the top of the hen house with a couple of utility clamps. I put some silicone on a couple of the not-too-straight roof screws and the leaking stopped.
My daughter went off to college and my son is a teenager. I was feeling a bit of empty nest syndrome. This helped me to keep busy, focused on something positive and literally helped fill the nest again!
I did a lot of research before I began this project. All the sample coops on BYC really inspired me and helped me figure out how to do this. I hope my pictures help or inspire you!