Hennsington Palace, or Casa de Caca

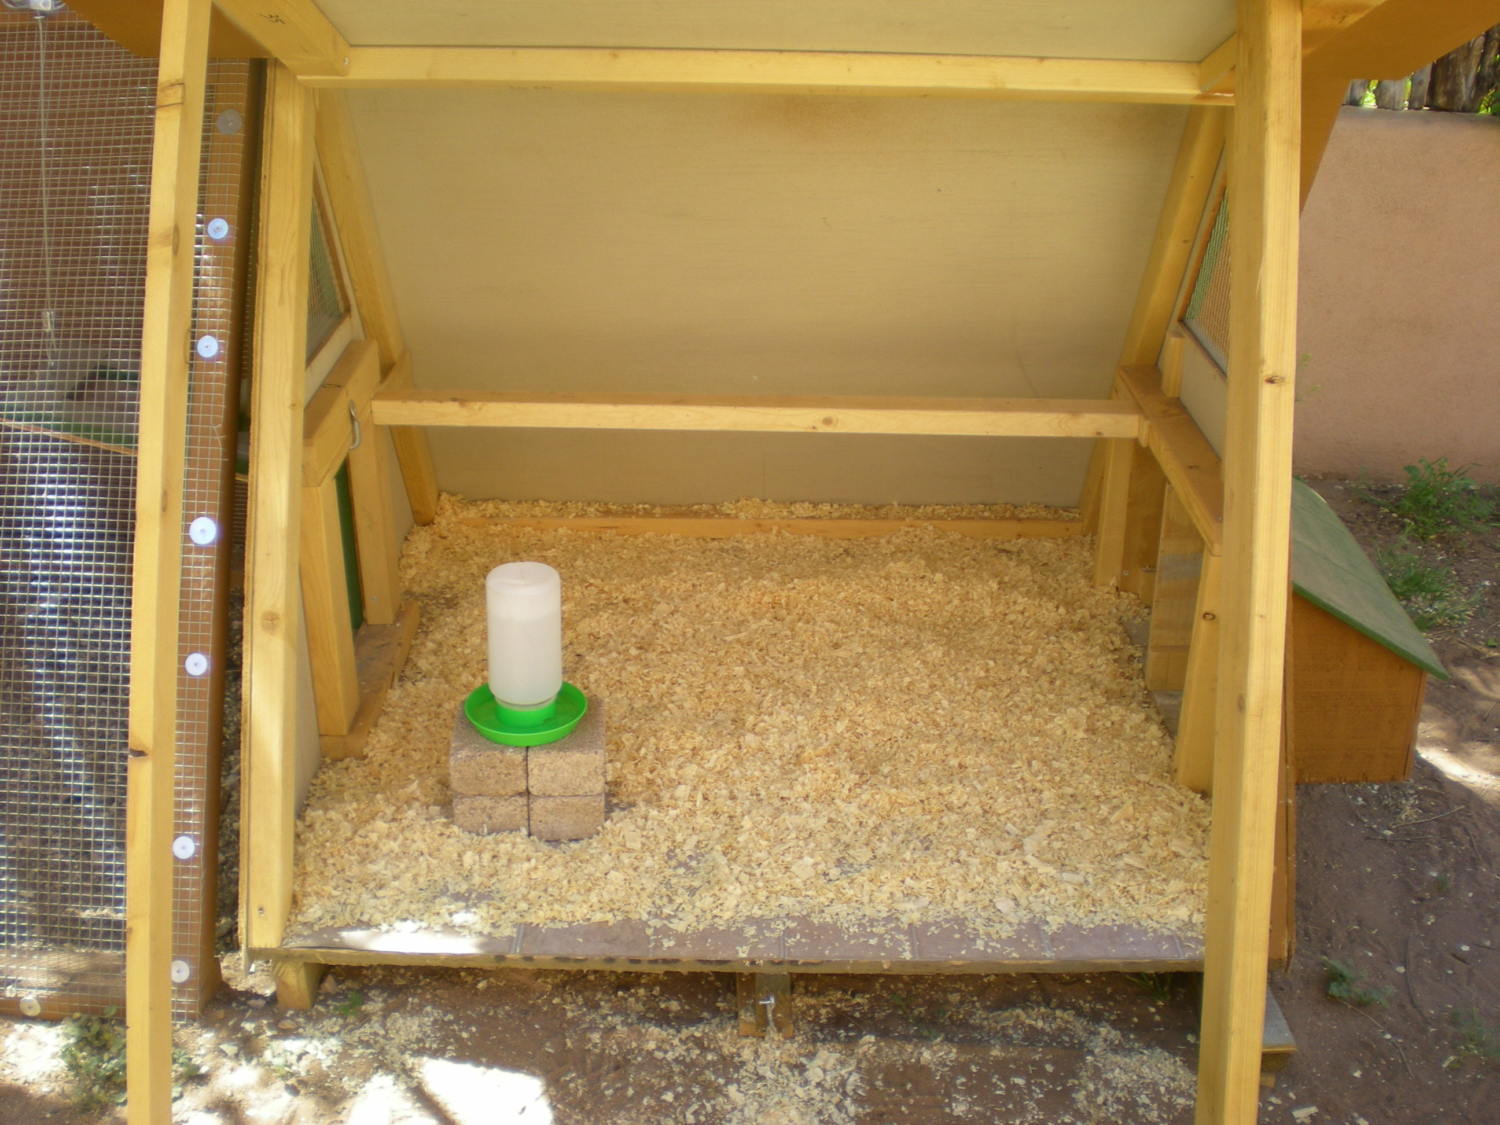
The finished product, with our girls apparently fascinated by something in the corner.

The finished product, with our girls apparently fascinated by something in the corner.
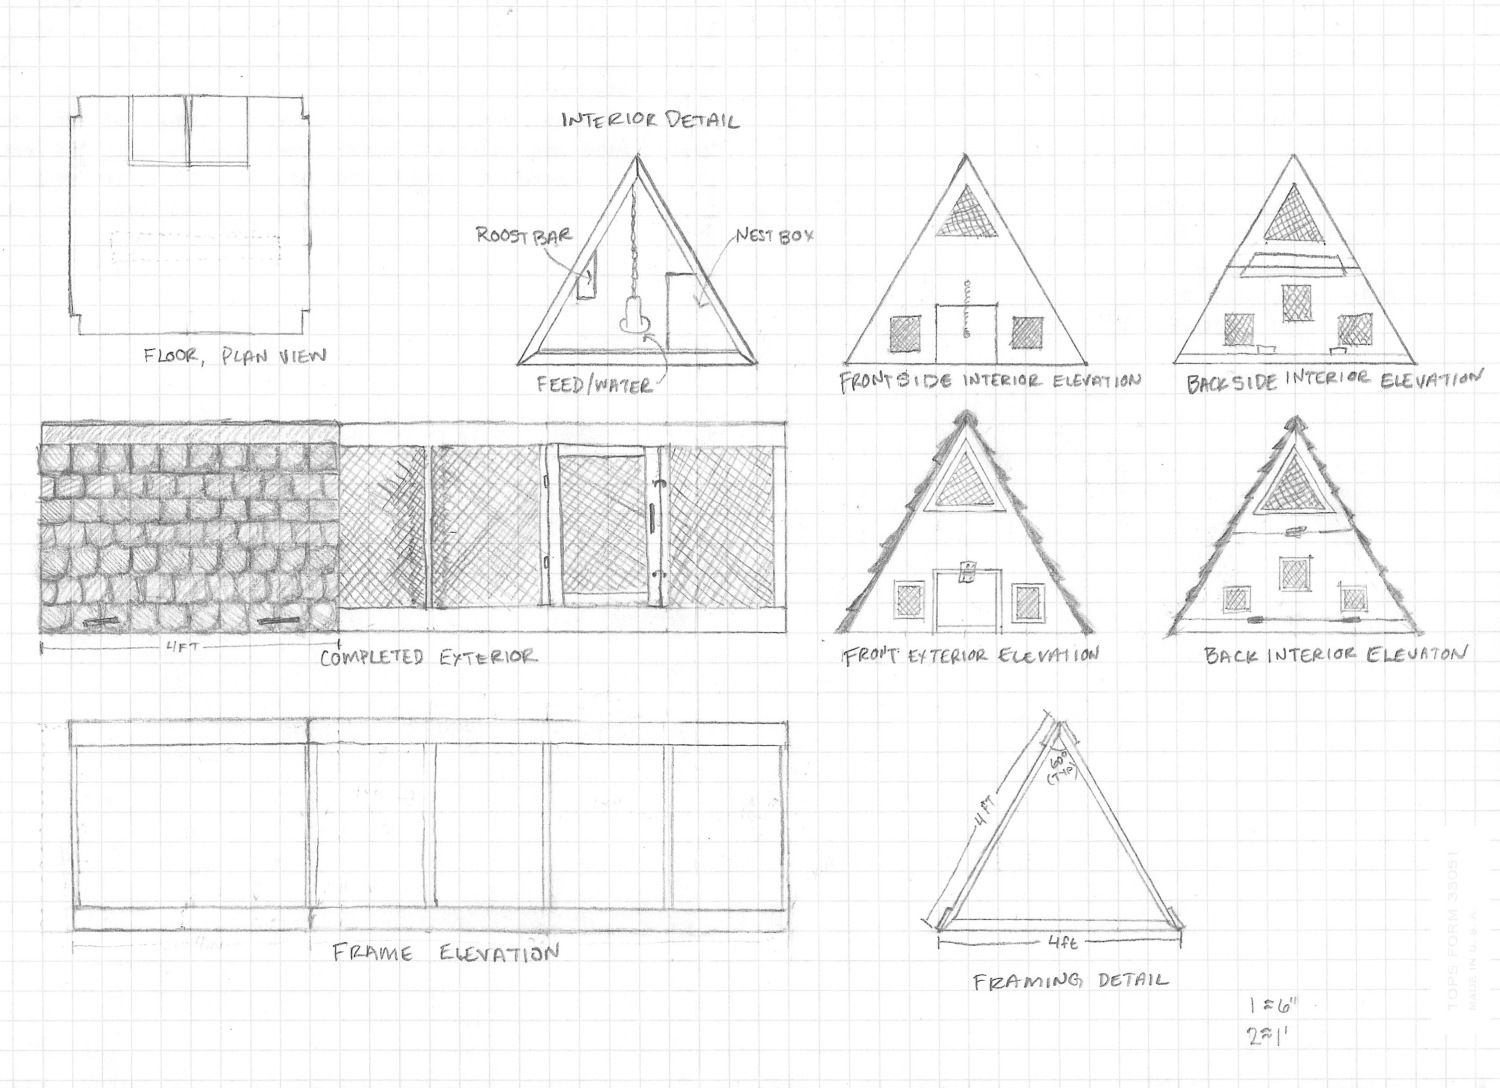
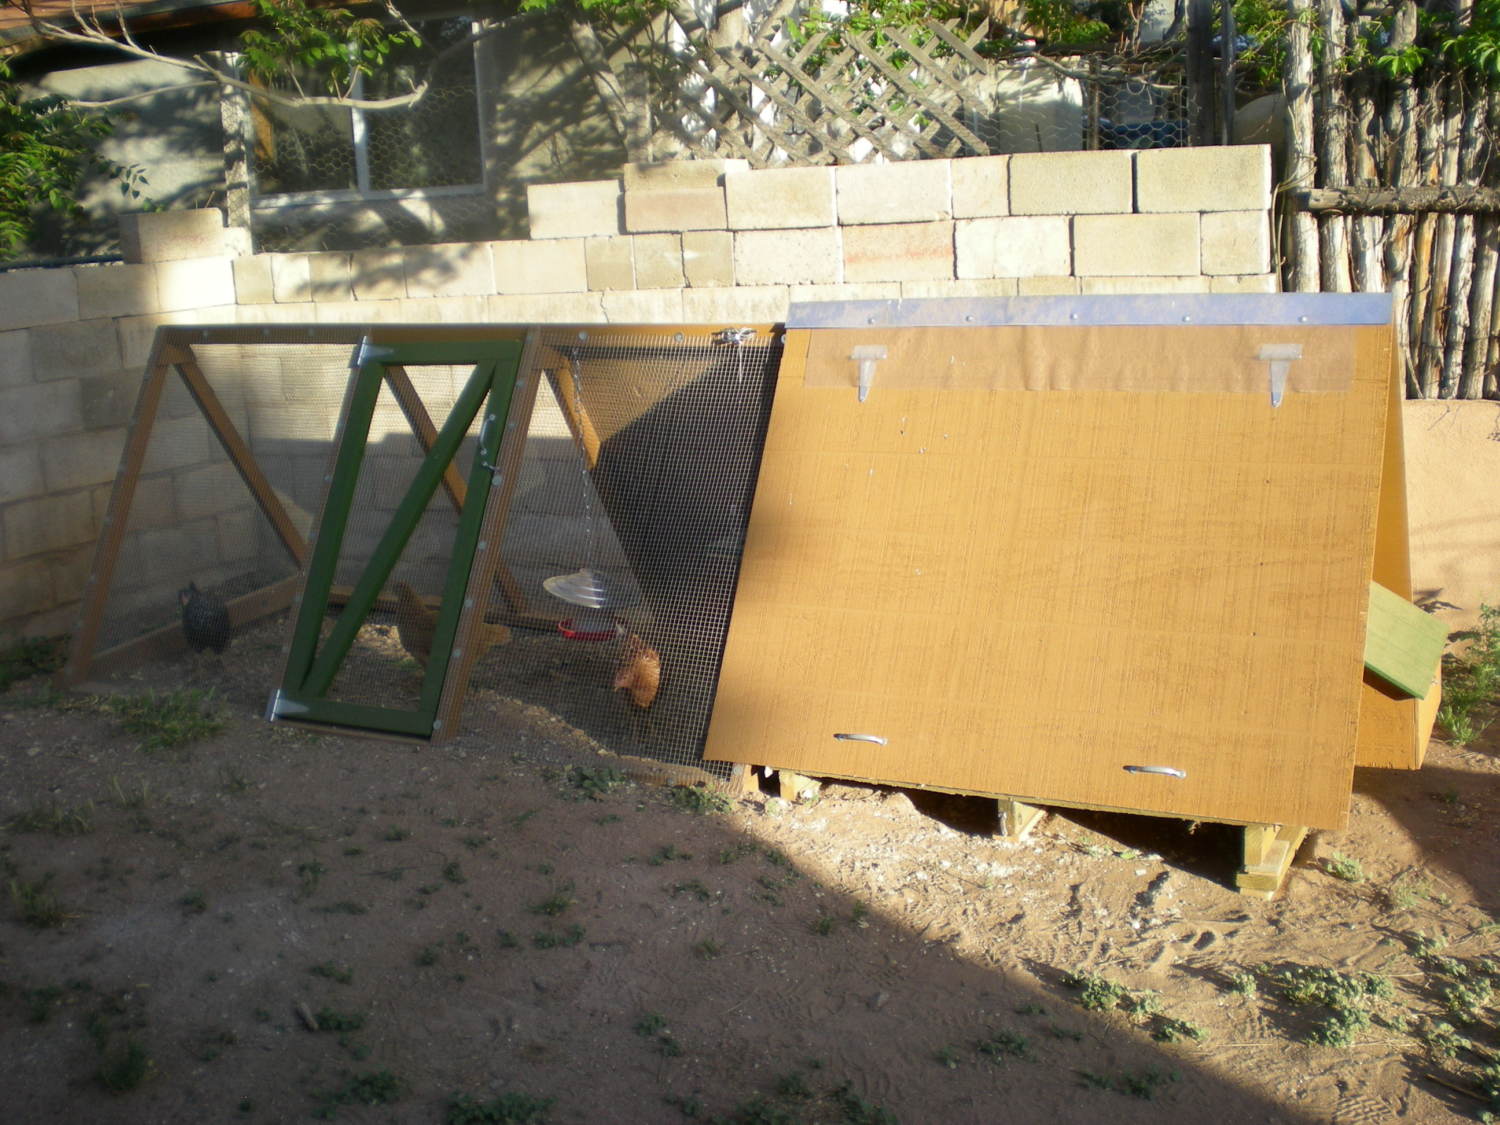
This is the coop my boyfriend and I built for our three hens, Blacula (Barred Rock), Biggie (Red Star), and Buffminsterfullerene (Buffyball for short, a Buff Orpington). I searched the farthest reaches of the internet for plans or directions but couldn’t find any that were exactly what I wanted. (Well, that’s not exactly true. I definitely found ones I wanted, but not ones that I wanted that I also had room for and/or could afford.) Here is a sketch of what I had in mind:
I might have gotten a little carried away.
We had originally planned on getting 4 birds, so I wanted the coop interior to be at least 4’x4’, and a run of at least 8’x4’. We live in a rental house, therefore needed something non-permanent, and I wanted something that looked halfway decent in the backyard. The coop had to accommodate the warm summers (80-100°F) and cold winters (10-30 °F) of northern New Mexico. Also, neither Ben nor I have much carpentry experience, so it had to be fairly easy to build with minimal tools.
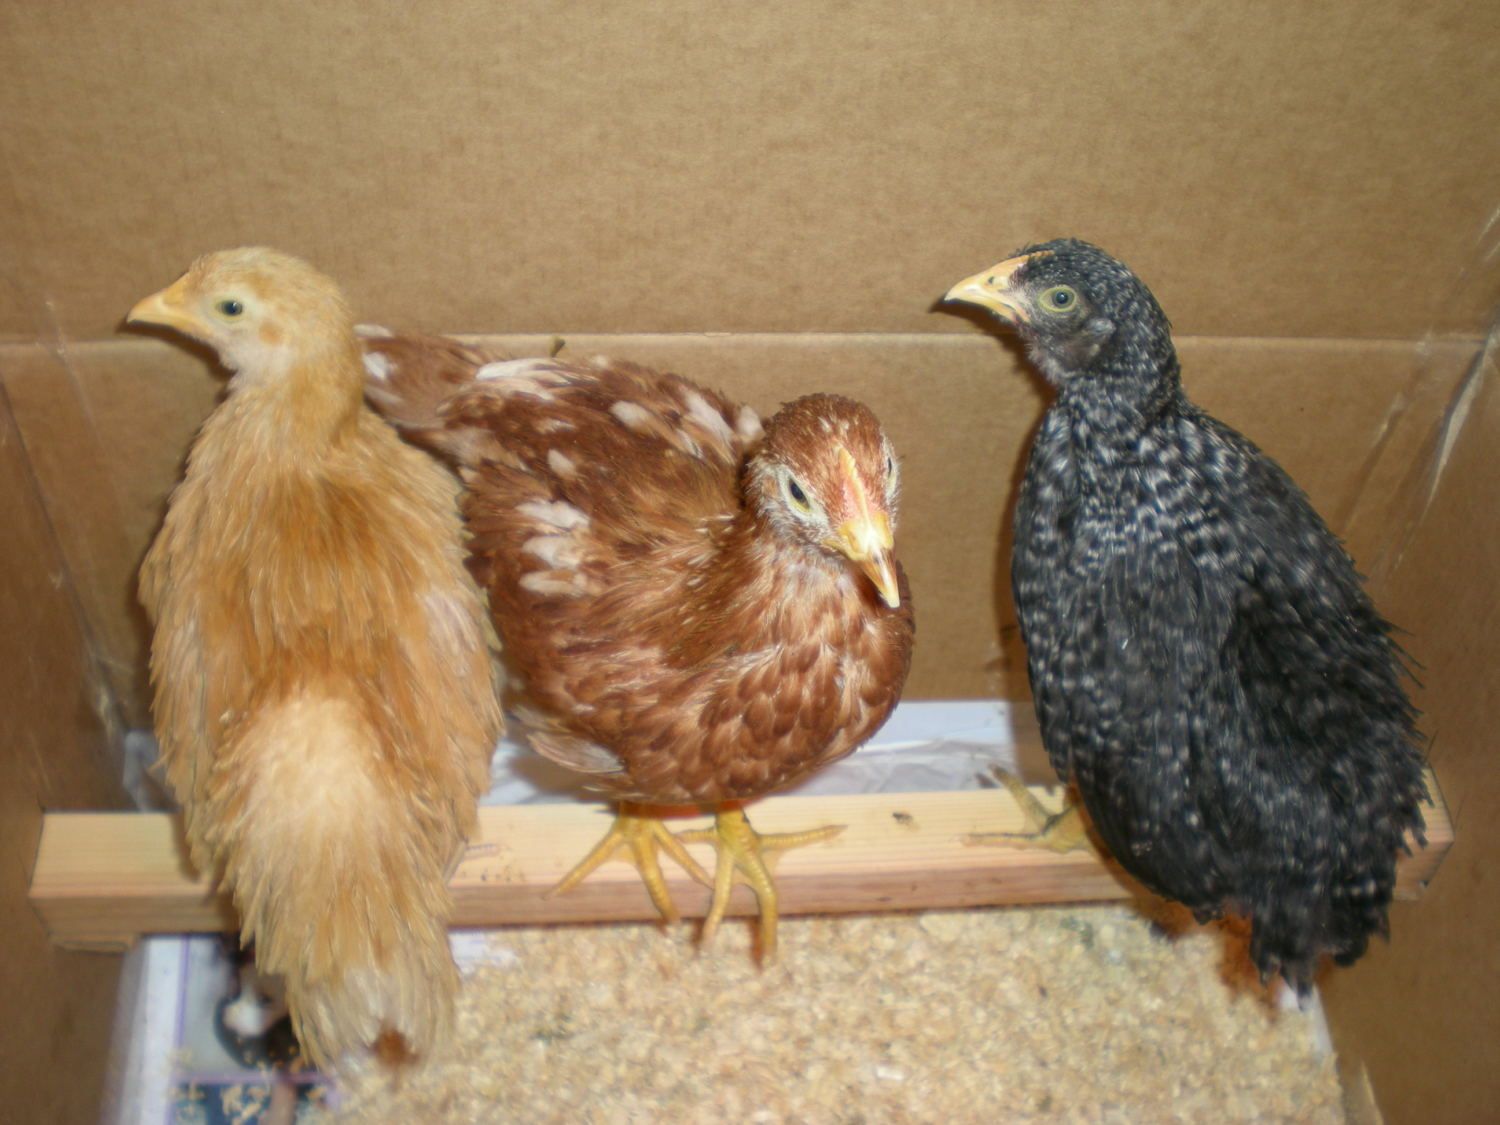
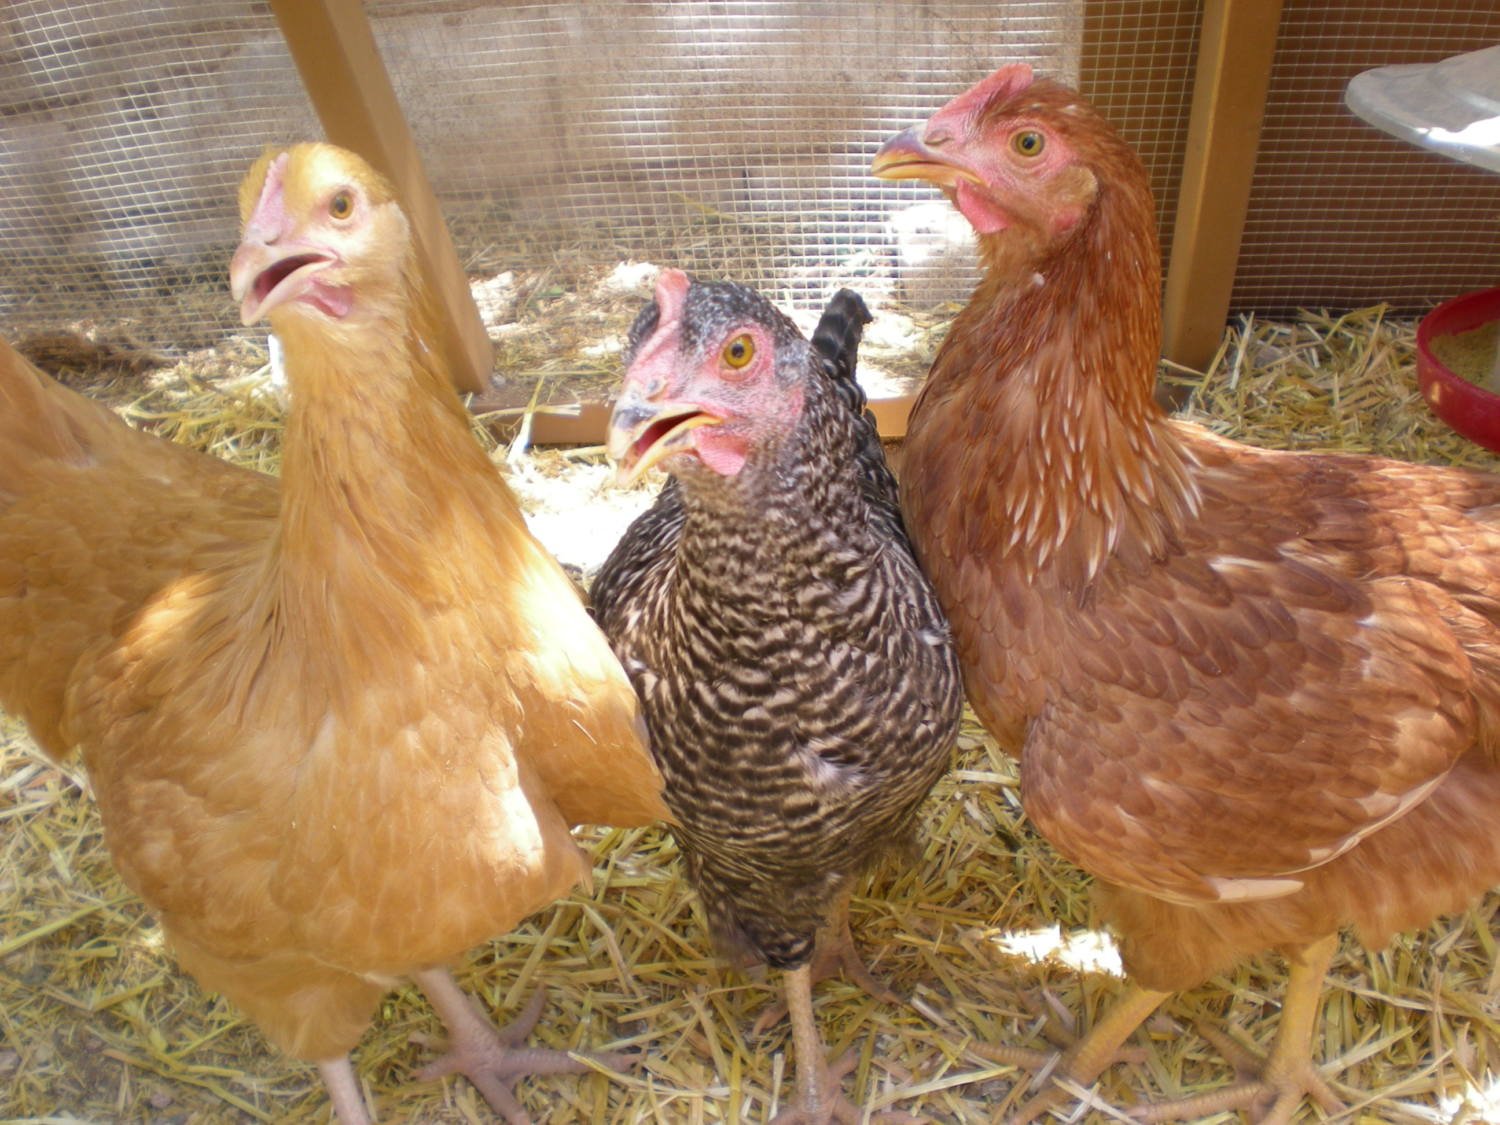
Crankypants 1,2, &3: Buffyball, Biggie, and Blacula in their temporary home.
Keeping these criteria in mind, I re-doubled my search efforts. I checked my local libraries for poultry books, even my mom and sister in two different (heavily agricultural) states checked theirs, but all we could come up with were children’s books or guides on raising chickens. That is until I found Building Chicken Coops for Dummies. What a godsend. It had plans, materials lists, instructions, techniques, and hints for a coop that was almost exactly what I wanted. From there, it was easy enough to add the features I wanted (windows, eaves, a longer run, a door open-able from outside the run) and modify the cut list and bill of materials. This plan also had some features that I wasn’t originally considering, like exterior nest boxes and a hinged wall. I’d include examples of the plans here, but my copyright law knowledge is a little fuzzy (a.k.a, non-existent). The book is out there, Amazon, B&N, used book store, whatever your poison, it’s relatively inexpensive and a good resource. (Also, if you don’t like our coop, the book includes 4 other sets of complete plans, from tiny to huge!)
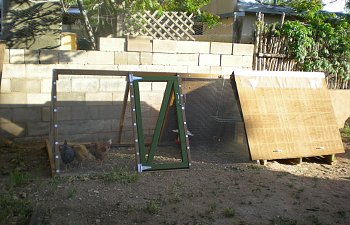
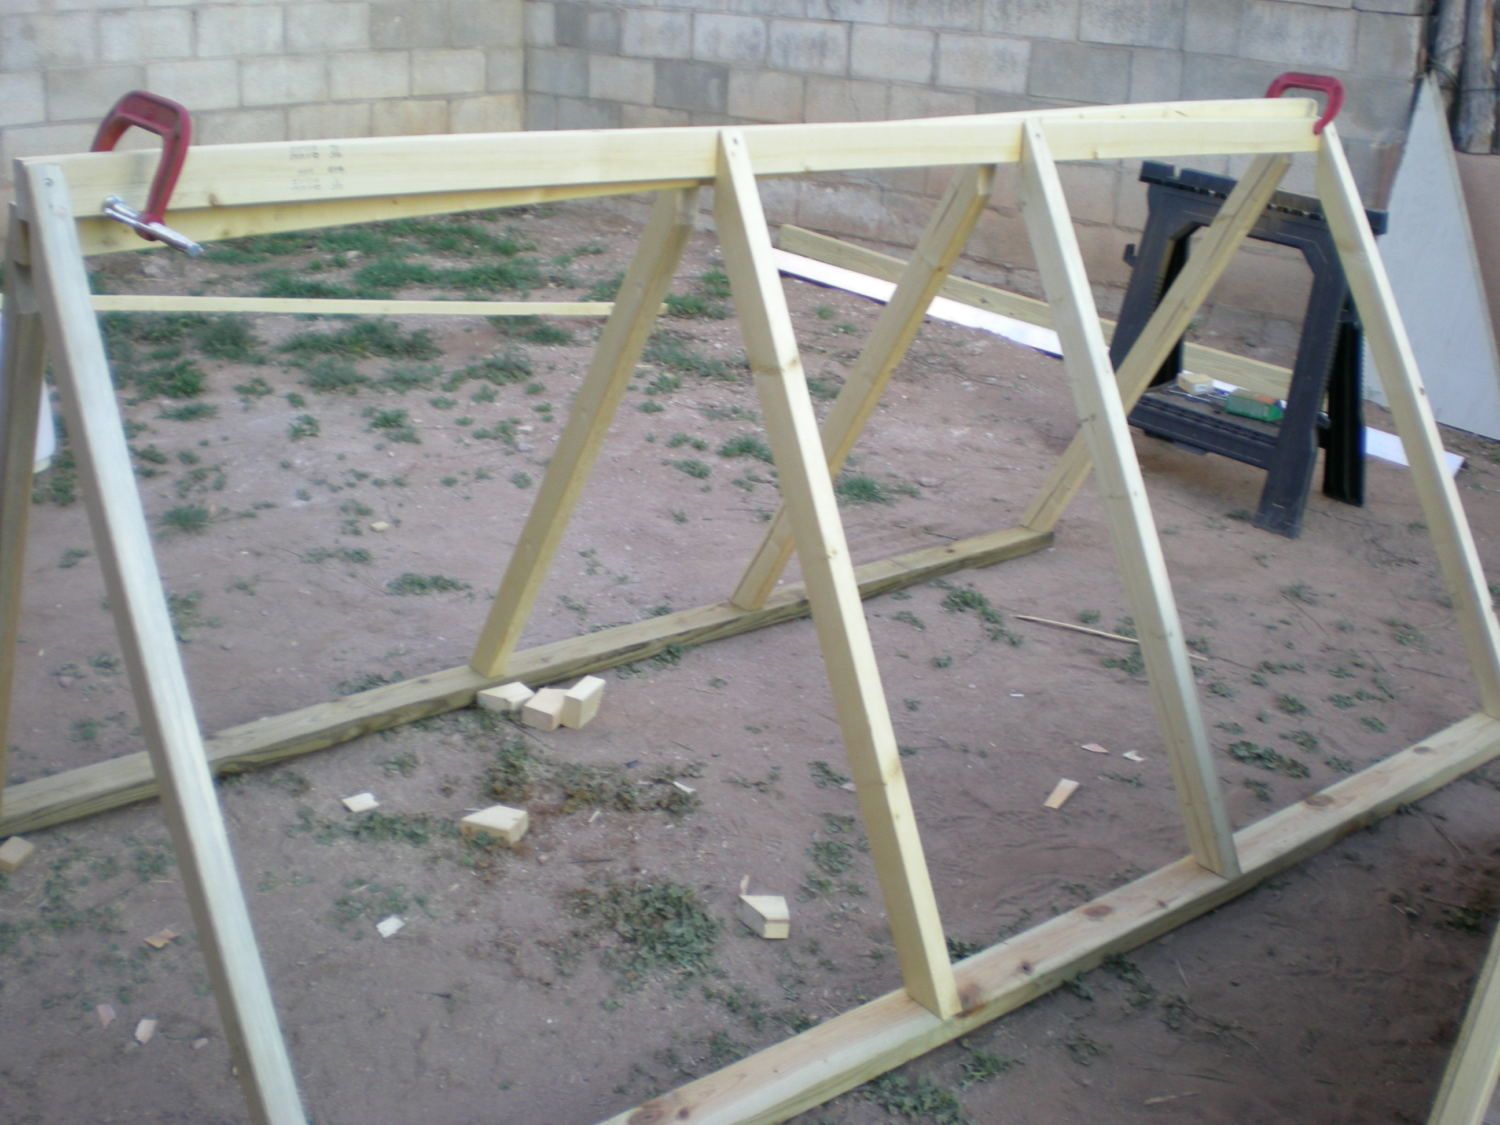
I scrutinized the plans obsessively and made material list after materials list until I was certain it would be perfect. Ben purchased the building materials in mid-March when our chicks were about two weeks old (I was out of town or I would have gone with him to make sure he had it EXACTLY RIGHT. That’s probably why he went while I was gone; I can’t blame him). We started putting everything together the following weekend.
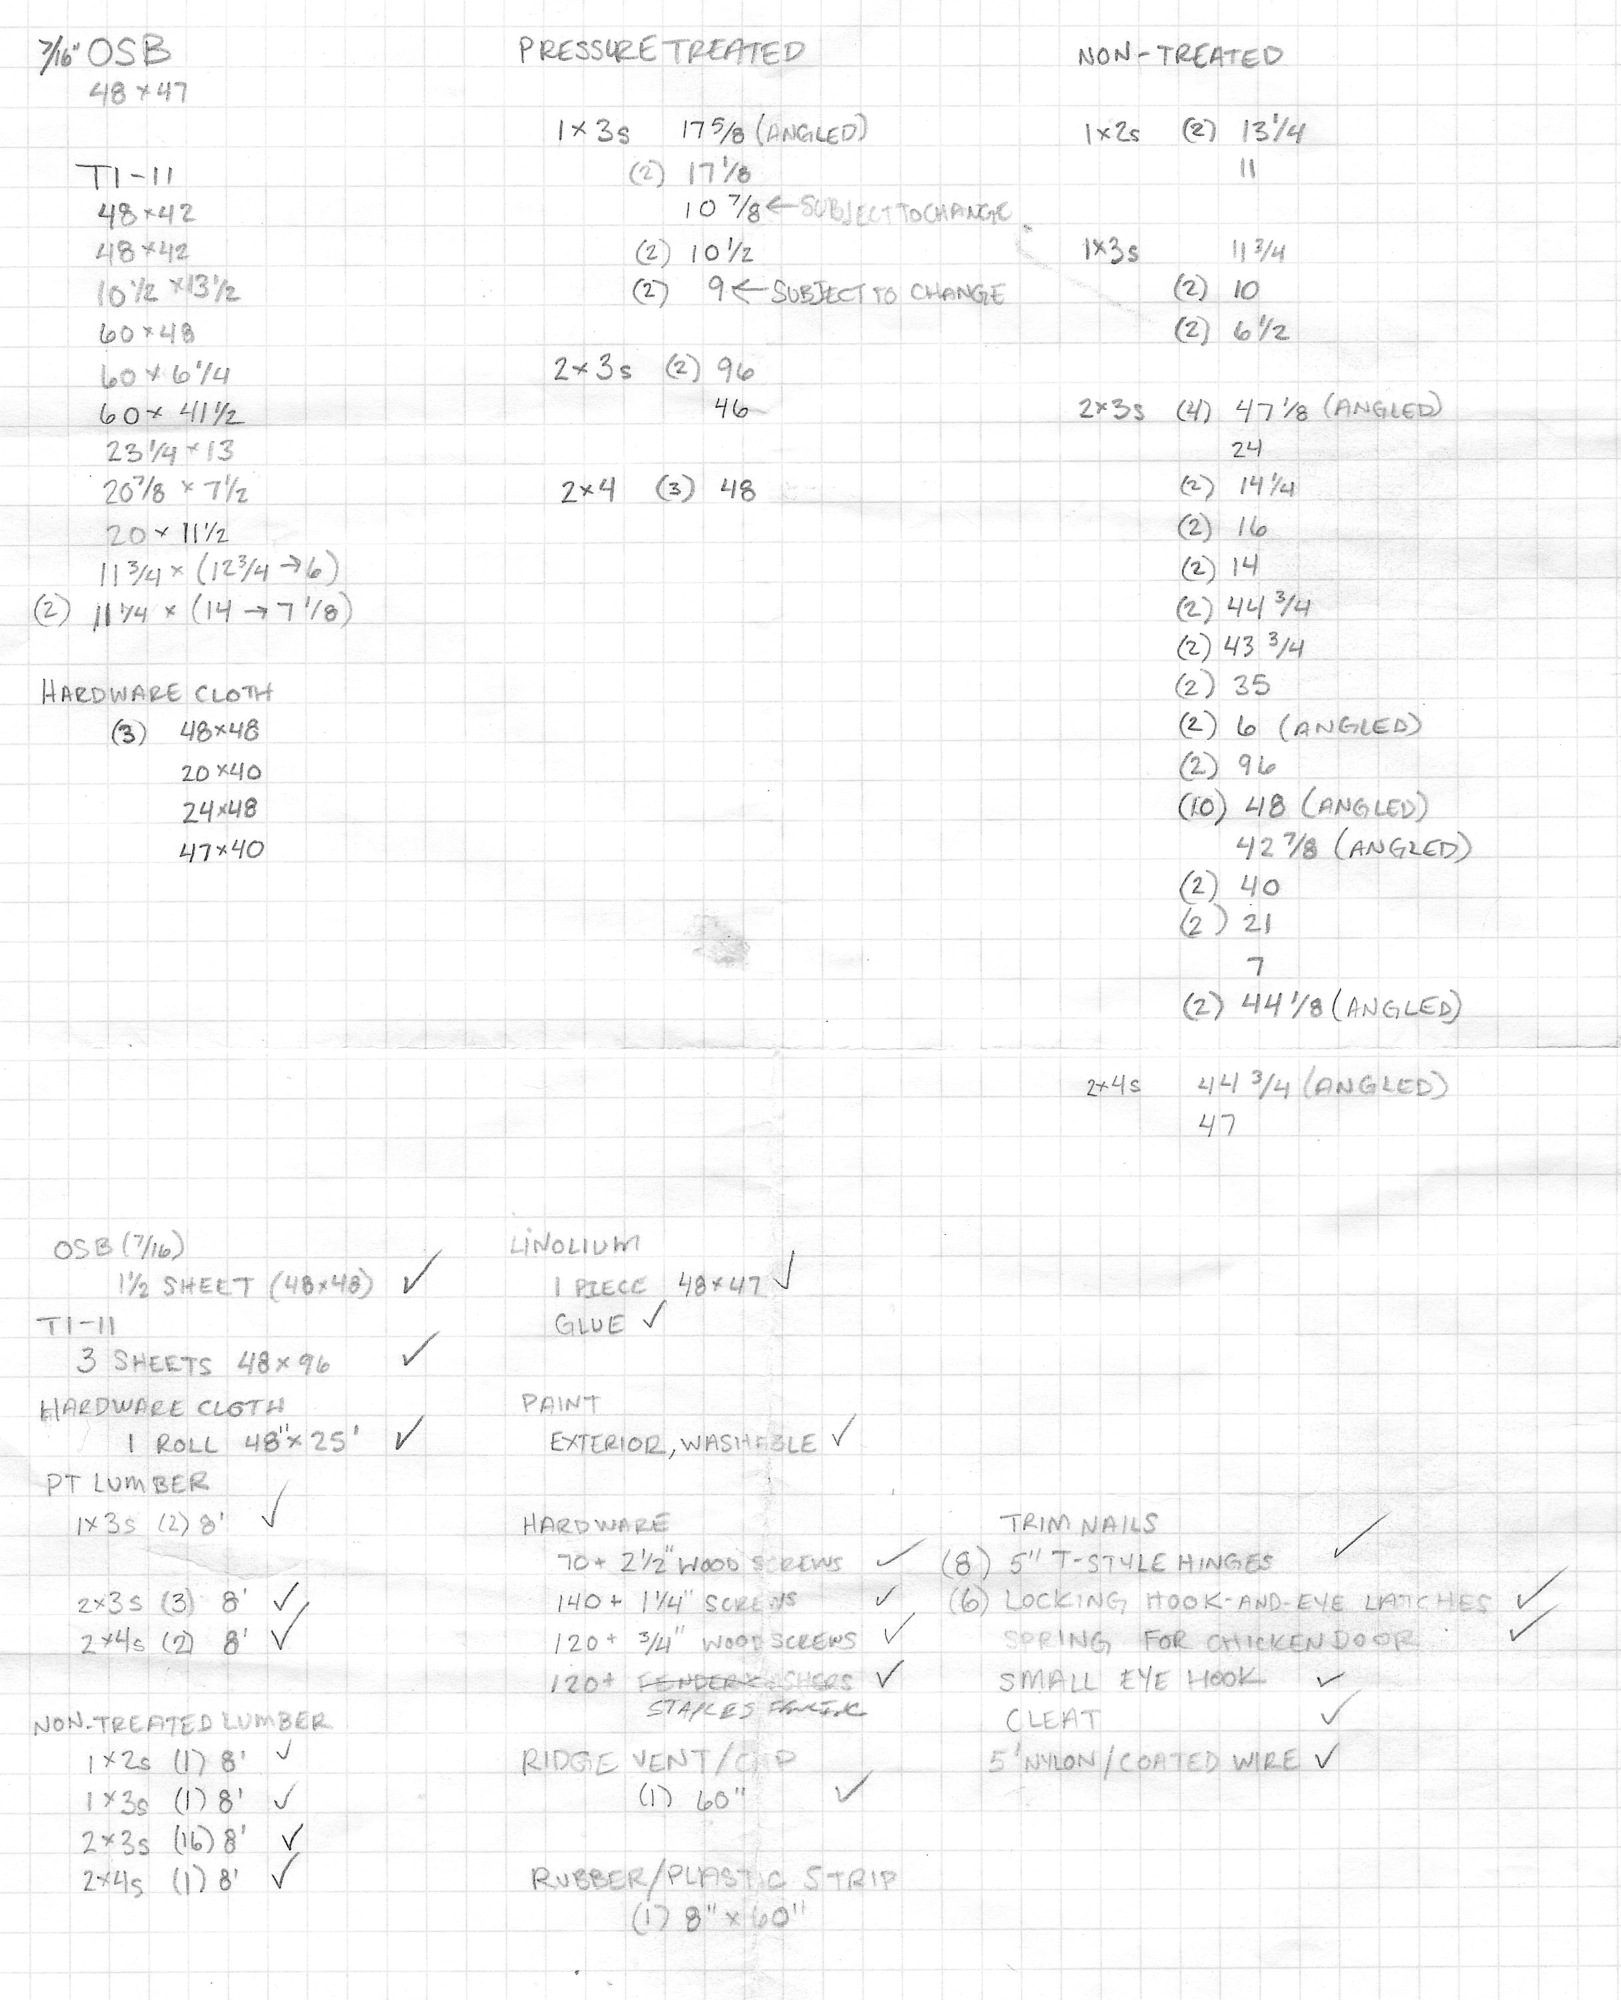
Here's the cut list/materials list I finally compiled. Click to embiggen.

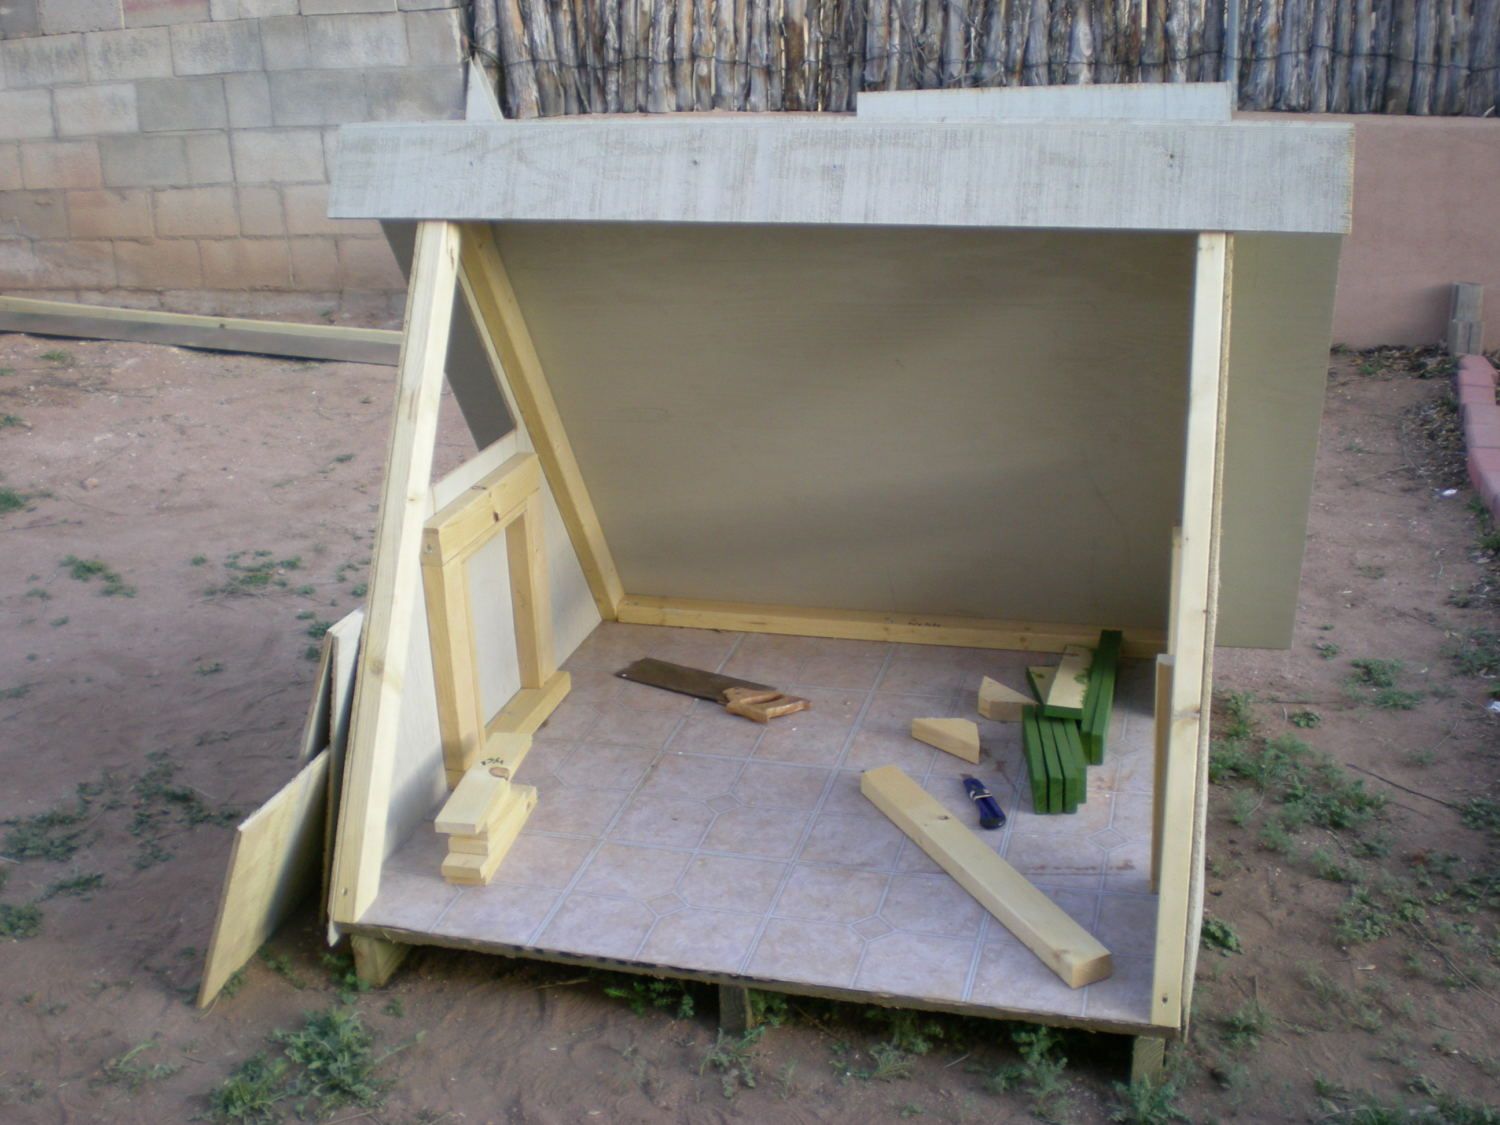
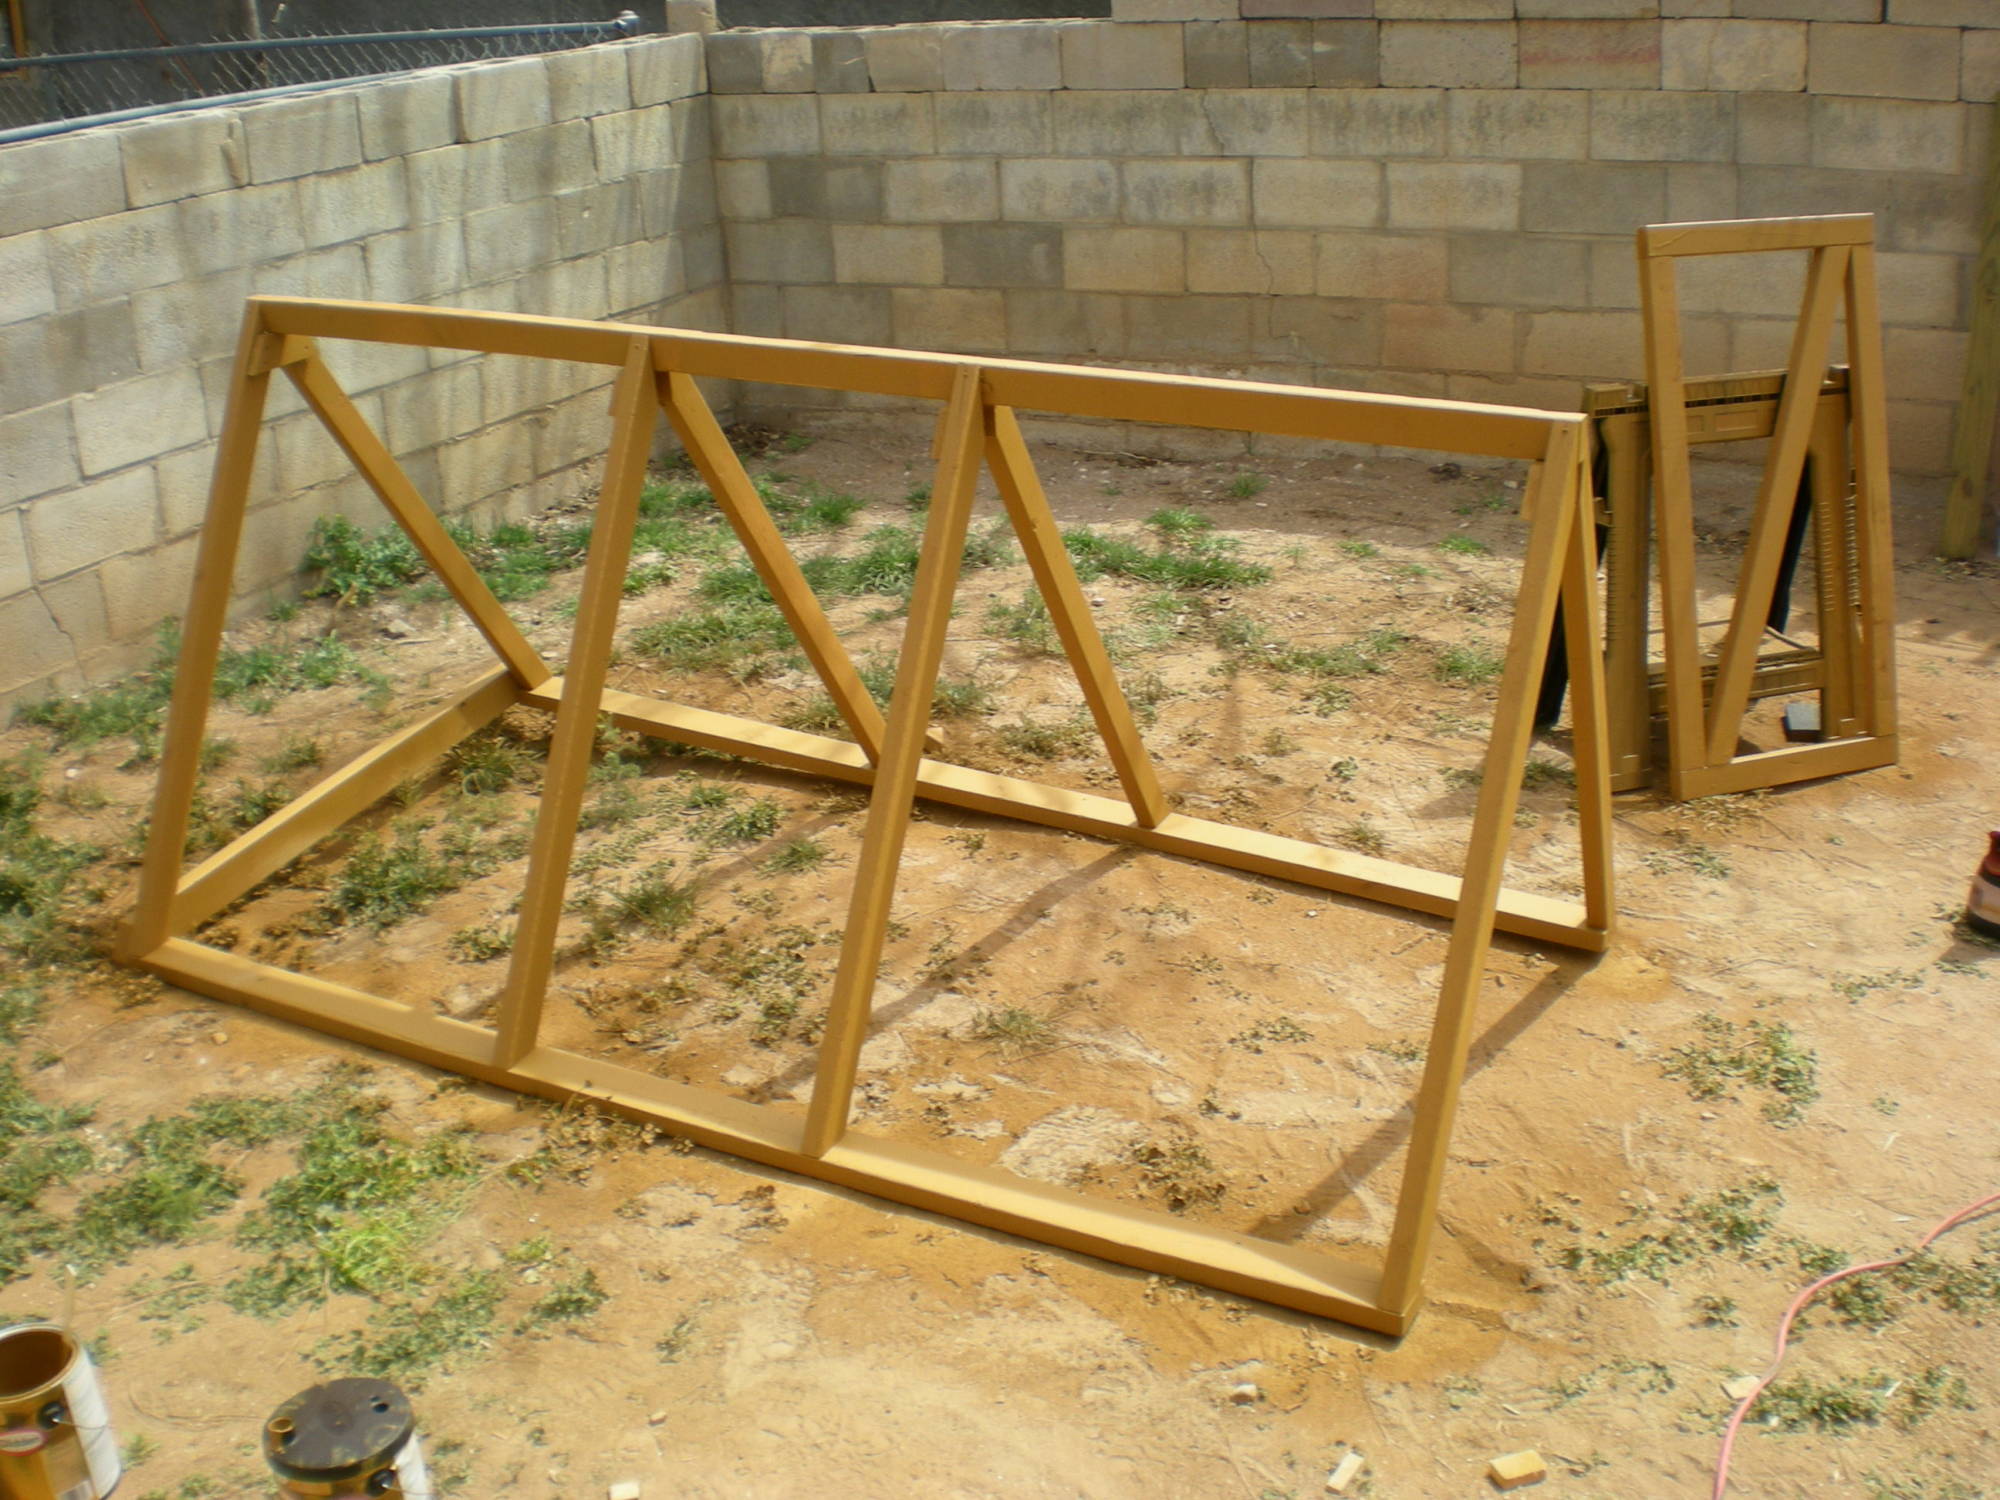
Approximately one week’s worth of work. The green is the painted trim, the nest box blocking is in progress, and the windows have been cut. This is the “oops” color paint.
The next weekend the A-shaped ends and the fixed wall went up. It started to look like a coop! Over the work week the hinged wall was framed and the nest boxes cut, put together, and installed. It was finally time to paint again. This time I bought 2 gallons of good exterior paint and a $100 handheld paint sprayer (no air compressor needed). BEST IDEA EVER. While it took me nearly 8 hours to put 2 coats of paint on the coop with a brush and roller, it only took 20 minutes to put on each coat of paint with the sprayer. In addition to being a major time saver, the sprayer was very good at getting paint into the nooks, crannies, and grooves of the T1-11 and used less paint overall since it put down a fine, even coat consistently. Although I wouldn’t use it for small project because it takes a while to clean thoroughly, I’m already planning several more painting projects that I never would have attempted before I purchased the sprayer. It may seem like spending $100 on a $500 project is ridiculous, but I think it’s already paid for itself in terms of labor saved. Anyway, back to the real story.
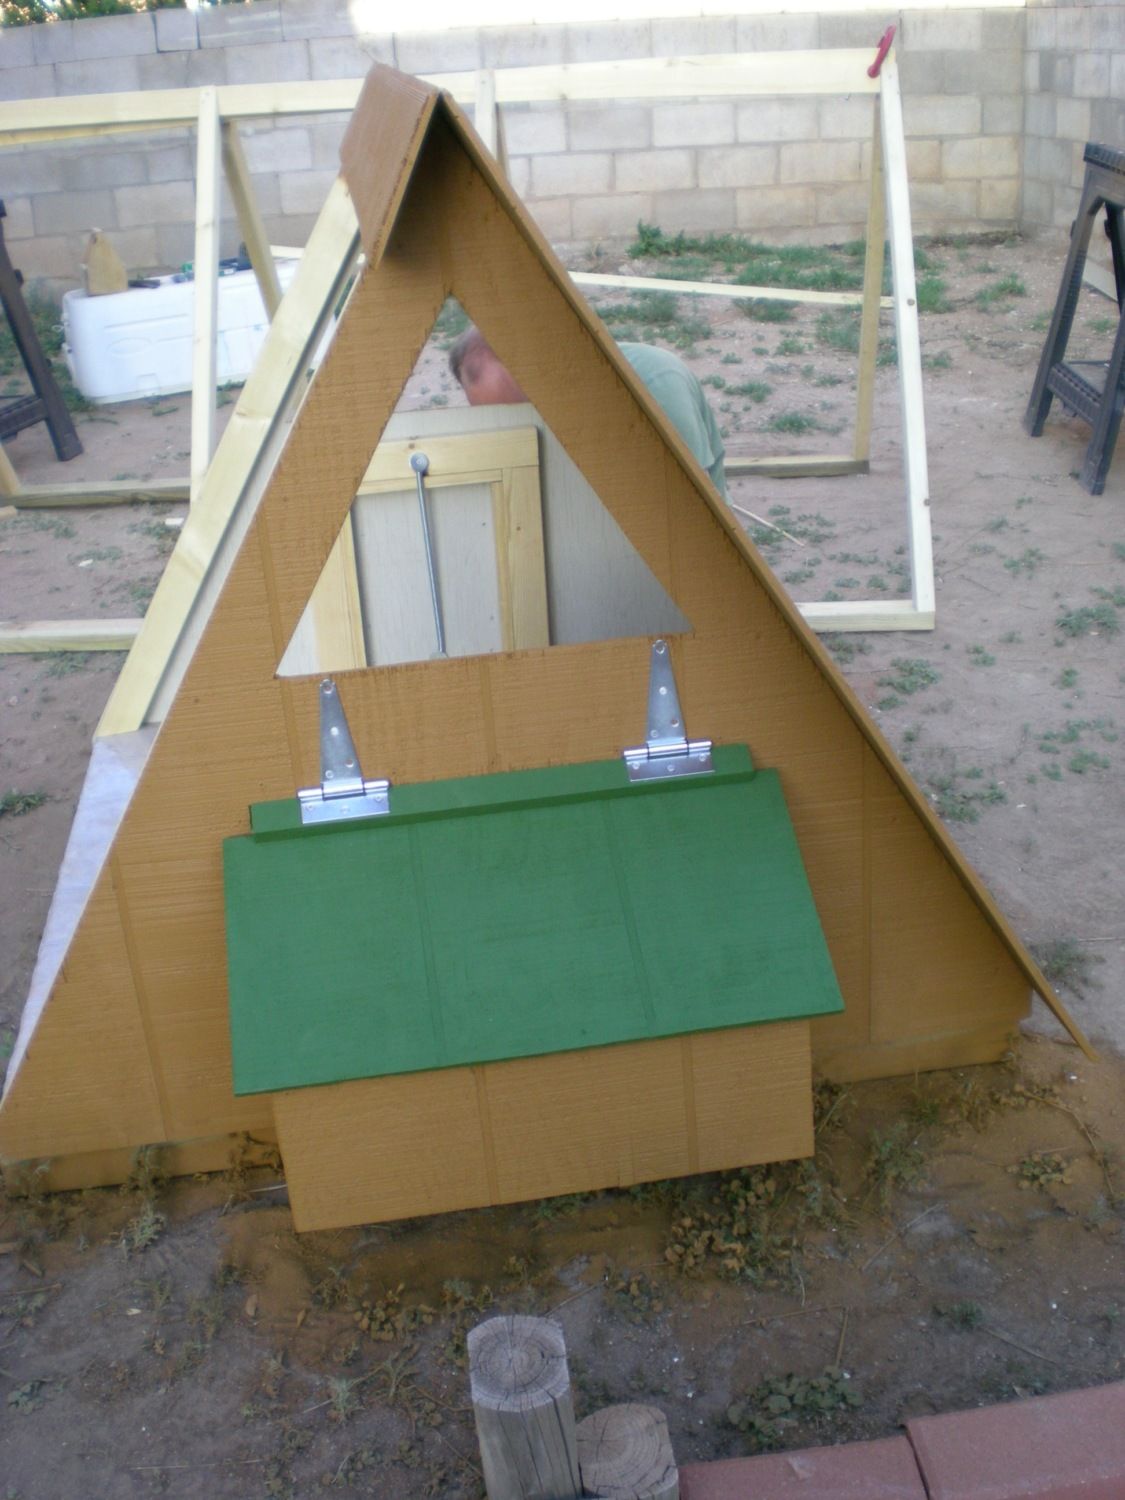
The chicken door is cut and framed (taped in place for painting).
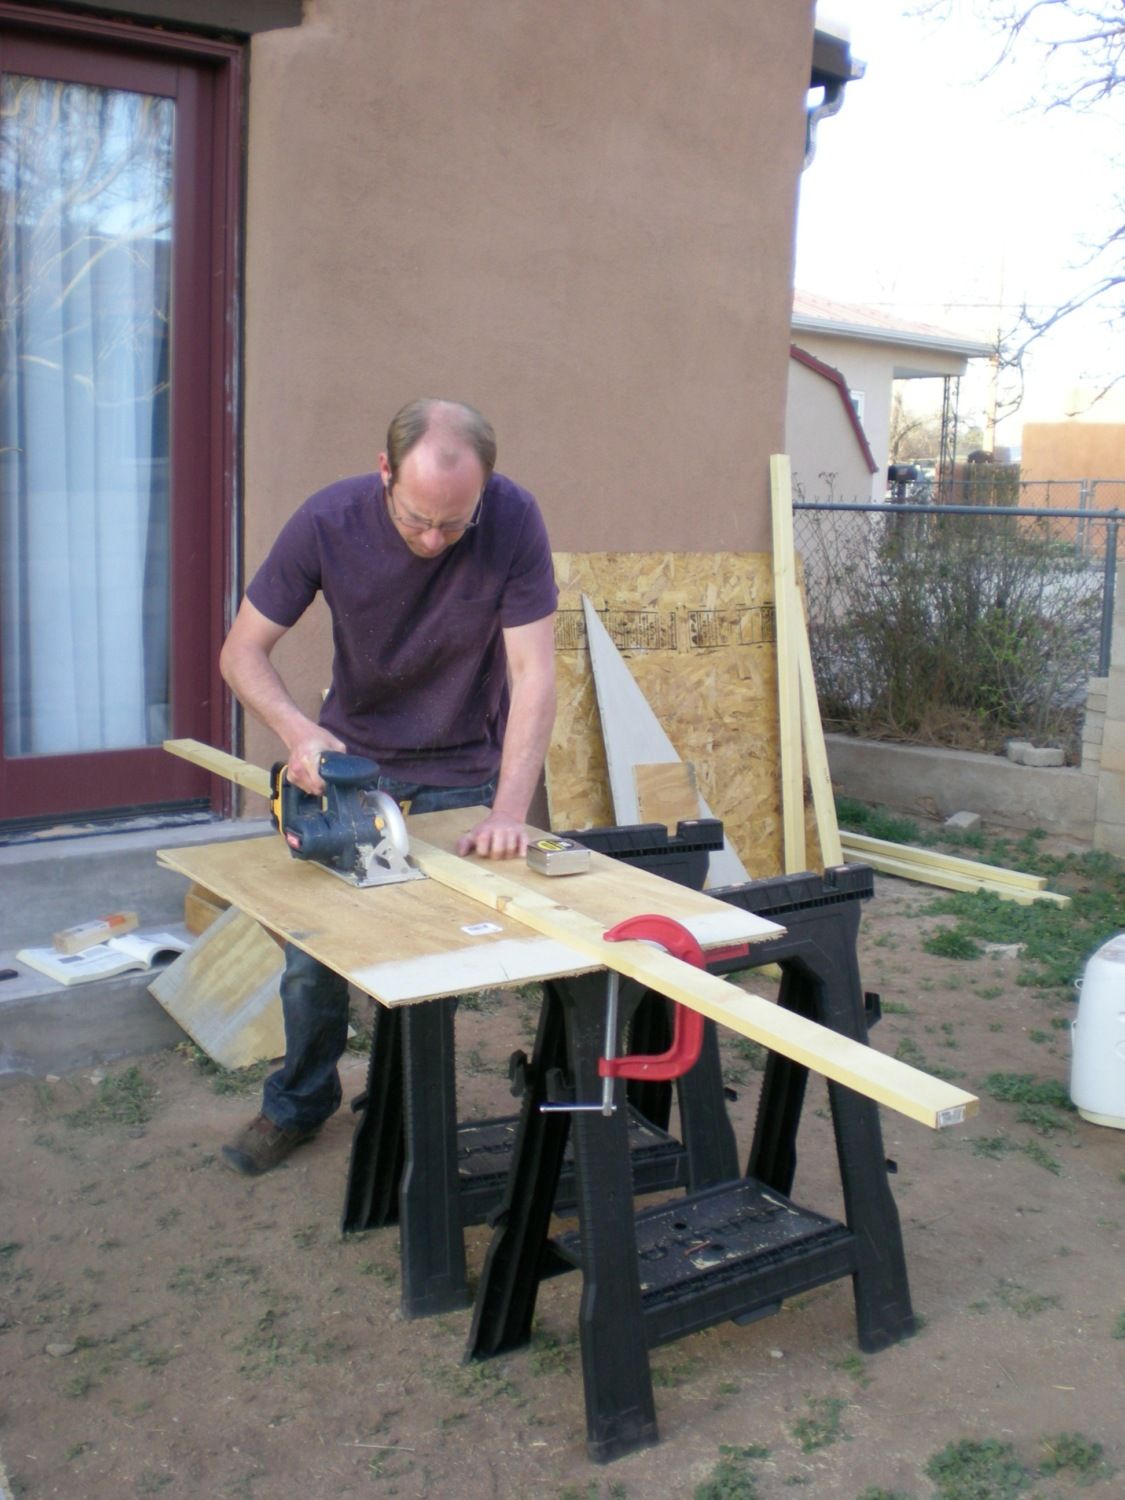
Ben working on pieces for the nest boxes. This was as sophisticated as our tooling got.
Painted with the nice paint, nest boxes and lid installed, run frame in progress in the background.

Inside the nest boxes.
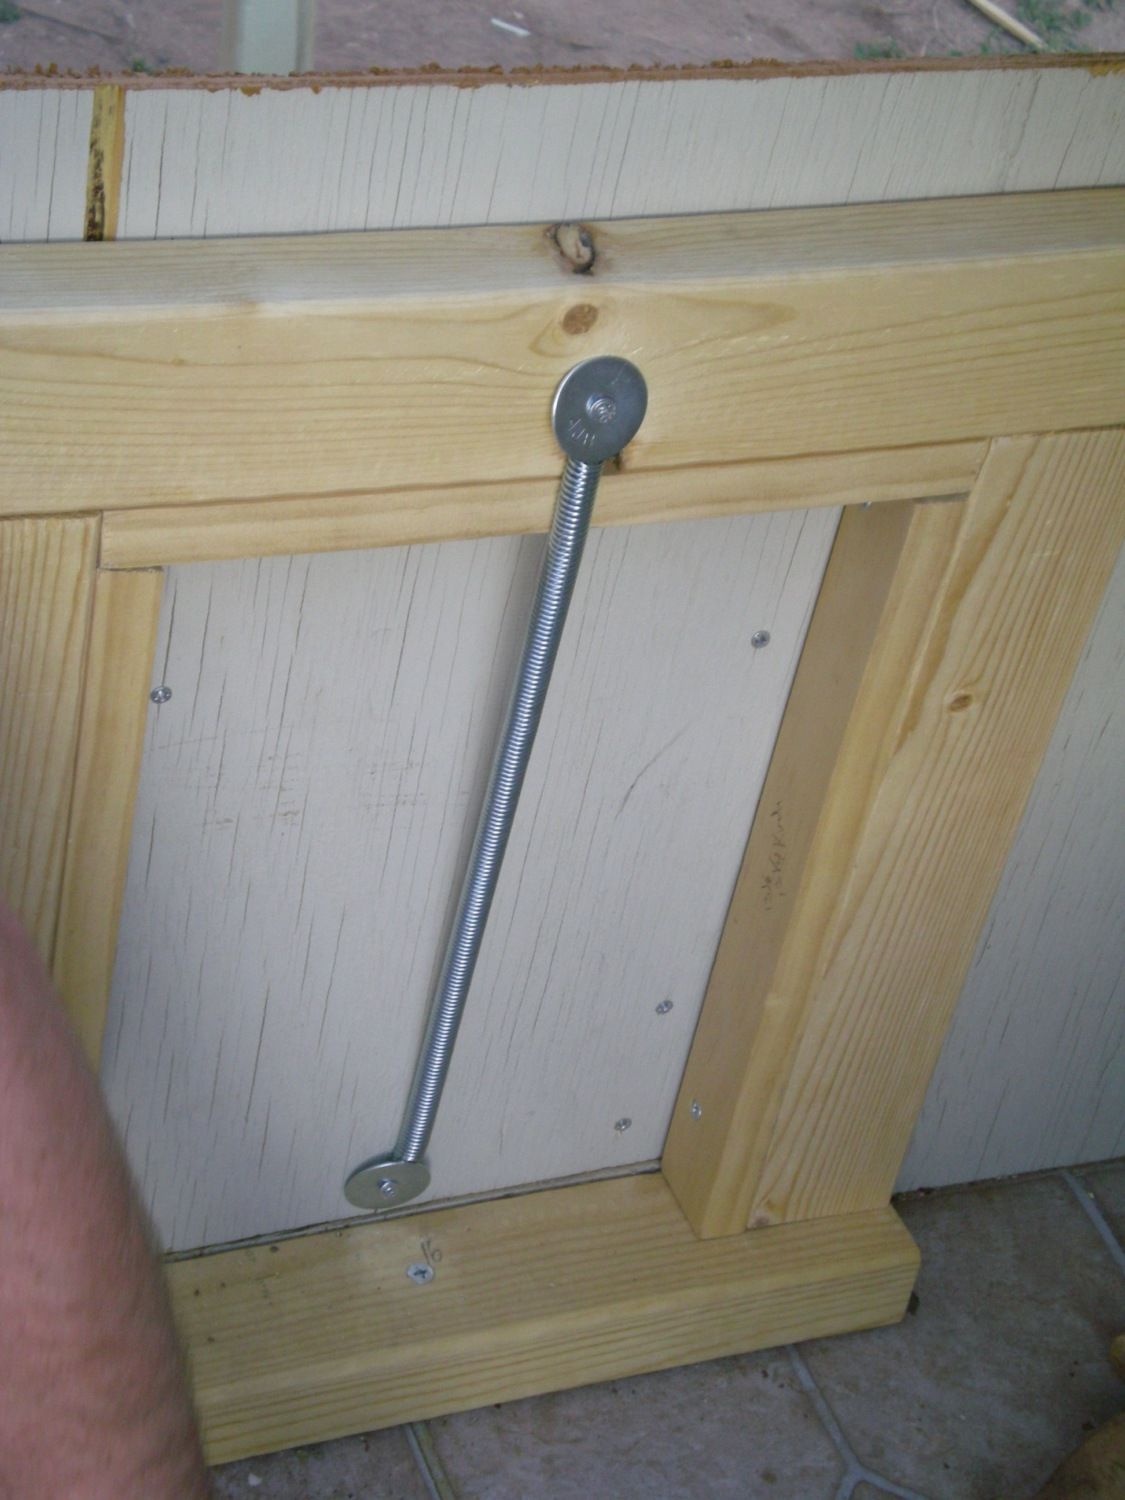
Spring on the inside of the chicken door to pull it closed when the cable is released.
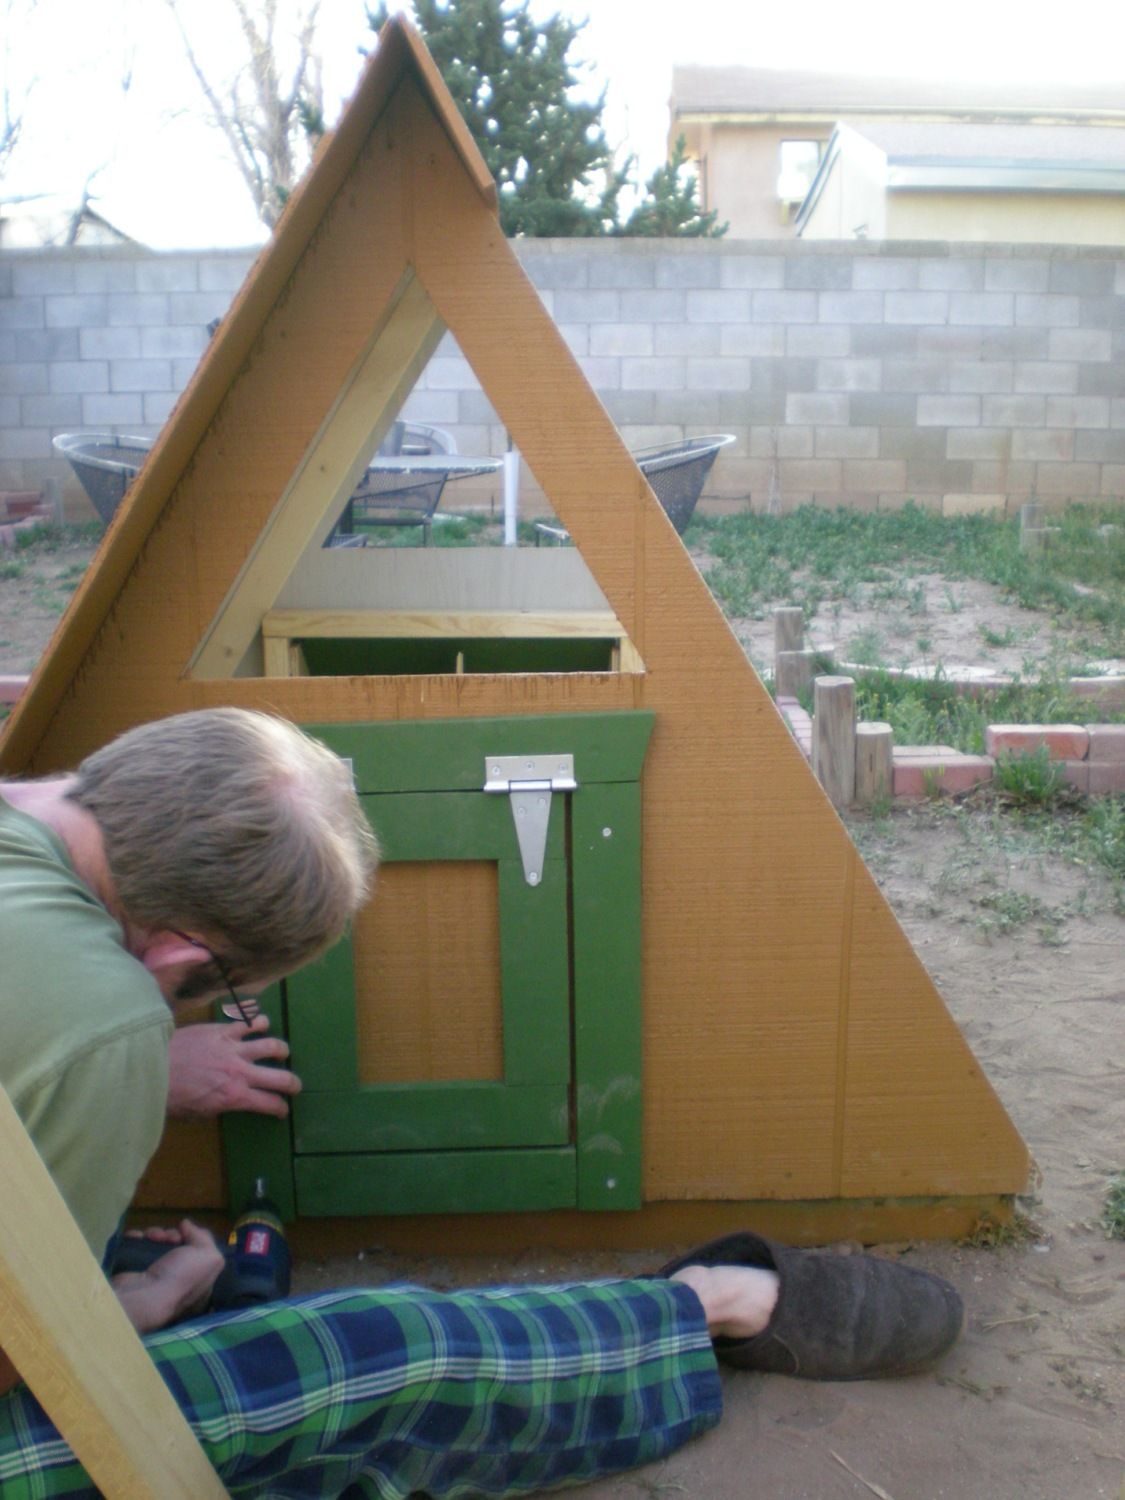
Ben installing chicken door trim.
Wonky run frame with two headers, one severely warped footer. There should have been a triangular frame piece to cap off one of the ends, but that just messed things up even more.
The new, improved frame with only one header and the cross piece on the bottom left end. You can also see the cross support at the top on the left end. The run door is in the background, I ended up repainting it green, and I'm glad I did.

Ben installing the vinyl and roof flashing. The much heralded paint sprayer is on the ground to the left. I know it looks like I didn’t do much since I’m not in any of the pictures, but I was told at the onset that my job was to “keep your mouth shut and paint.” He was only kidding, of course, but I held him to it.
I painted the run door while Ben attached the hardware cloth to the frame with fender washers and short screws. We framed the windows, sandwiching the hardware cloth between the trim and outside of the T1-11, but had to modify the trim on the chicken-door side to get the run frame snug against the coop. It was finally finished!! Except for attaching the run door; putting locks on the run door, hinged wall, and nest box; attaching the eye hooks, plastic-coated cable, and cleat to operate the chicken door; and leveling/gap-proofing the bottom of the run. Oh, and installing the roost bar. Oh, and actually putting it where we wanted it. And hanging the feeder up and putting the waterer inside.
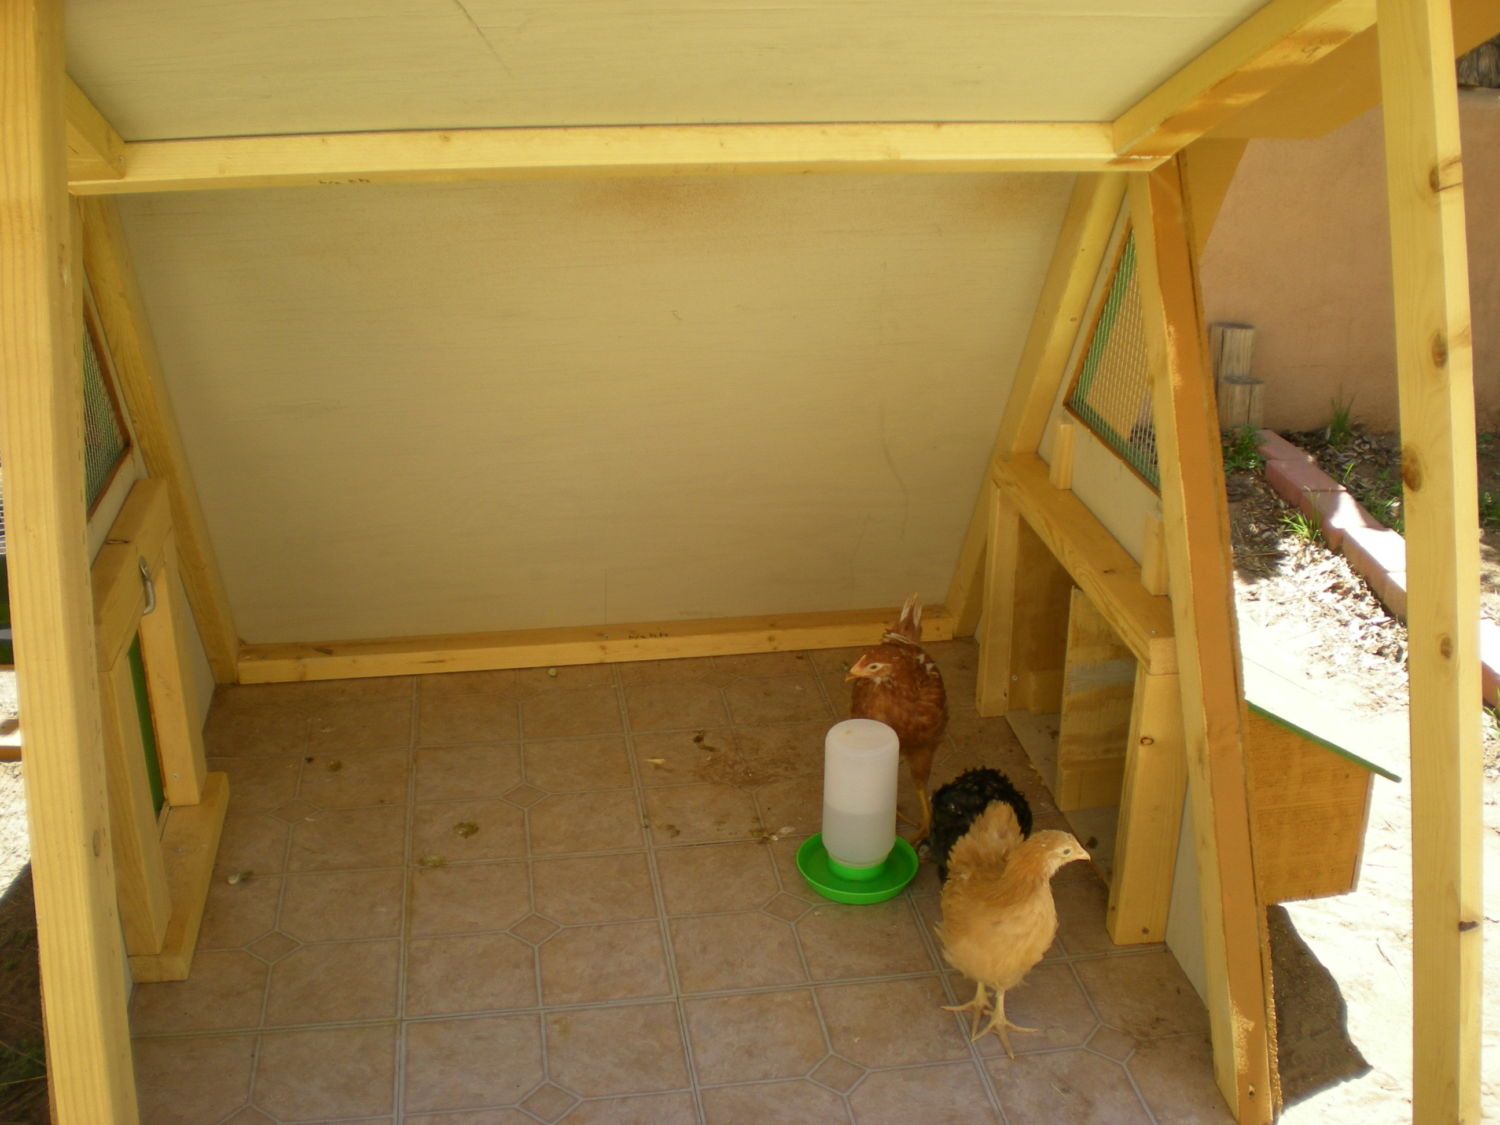
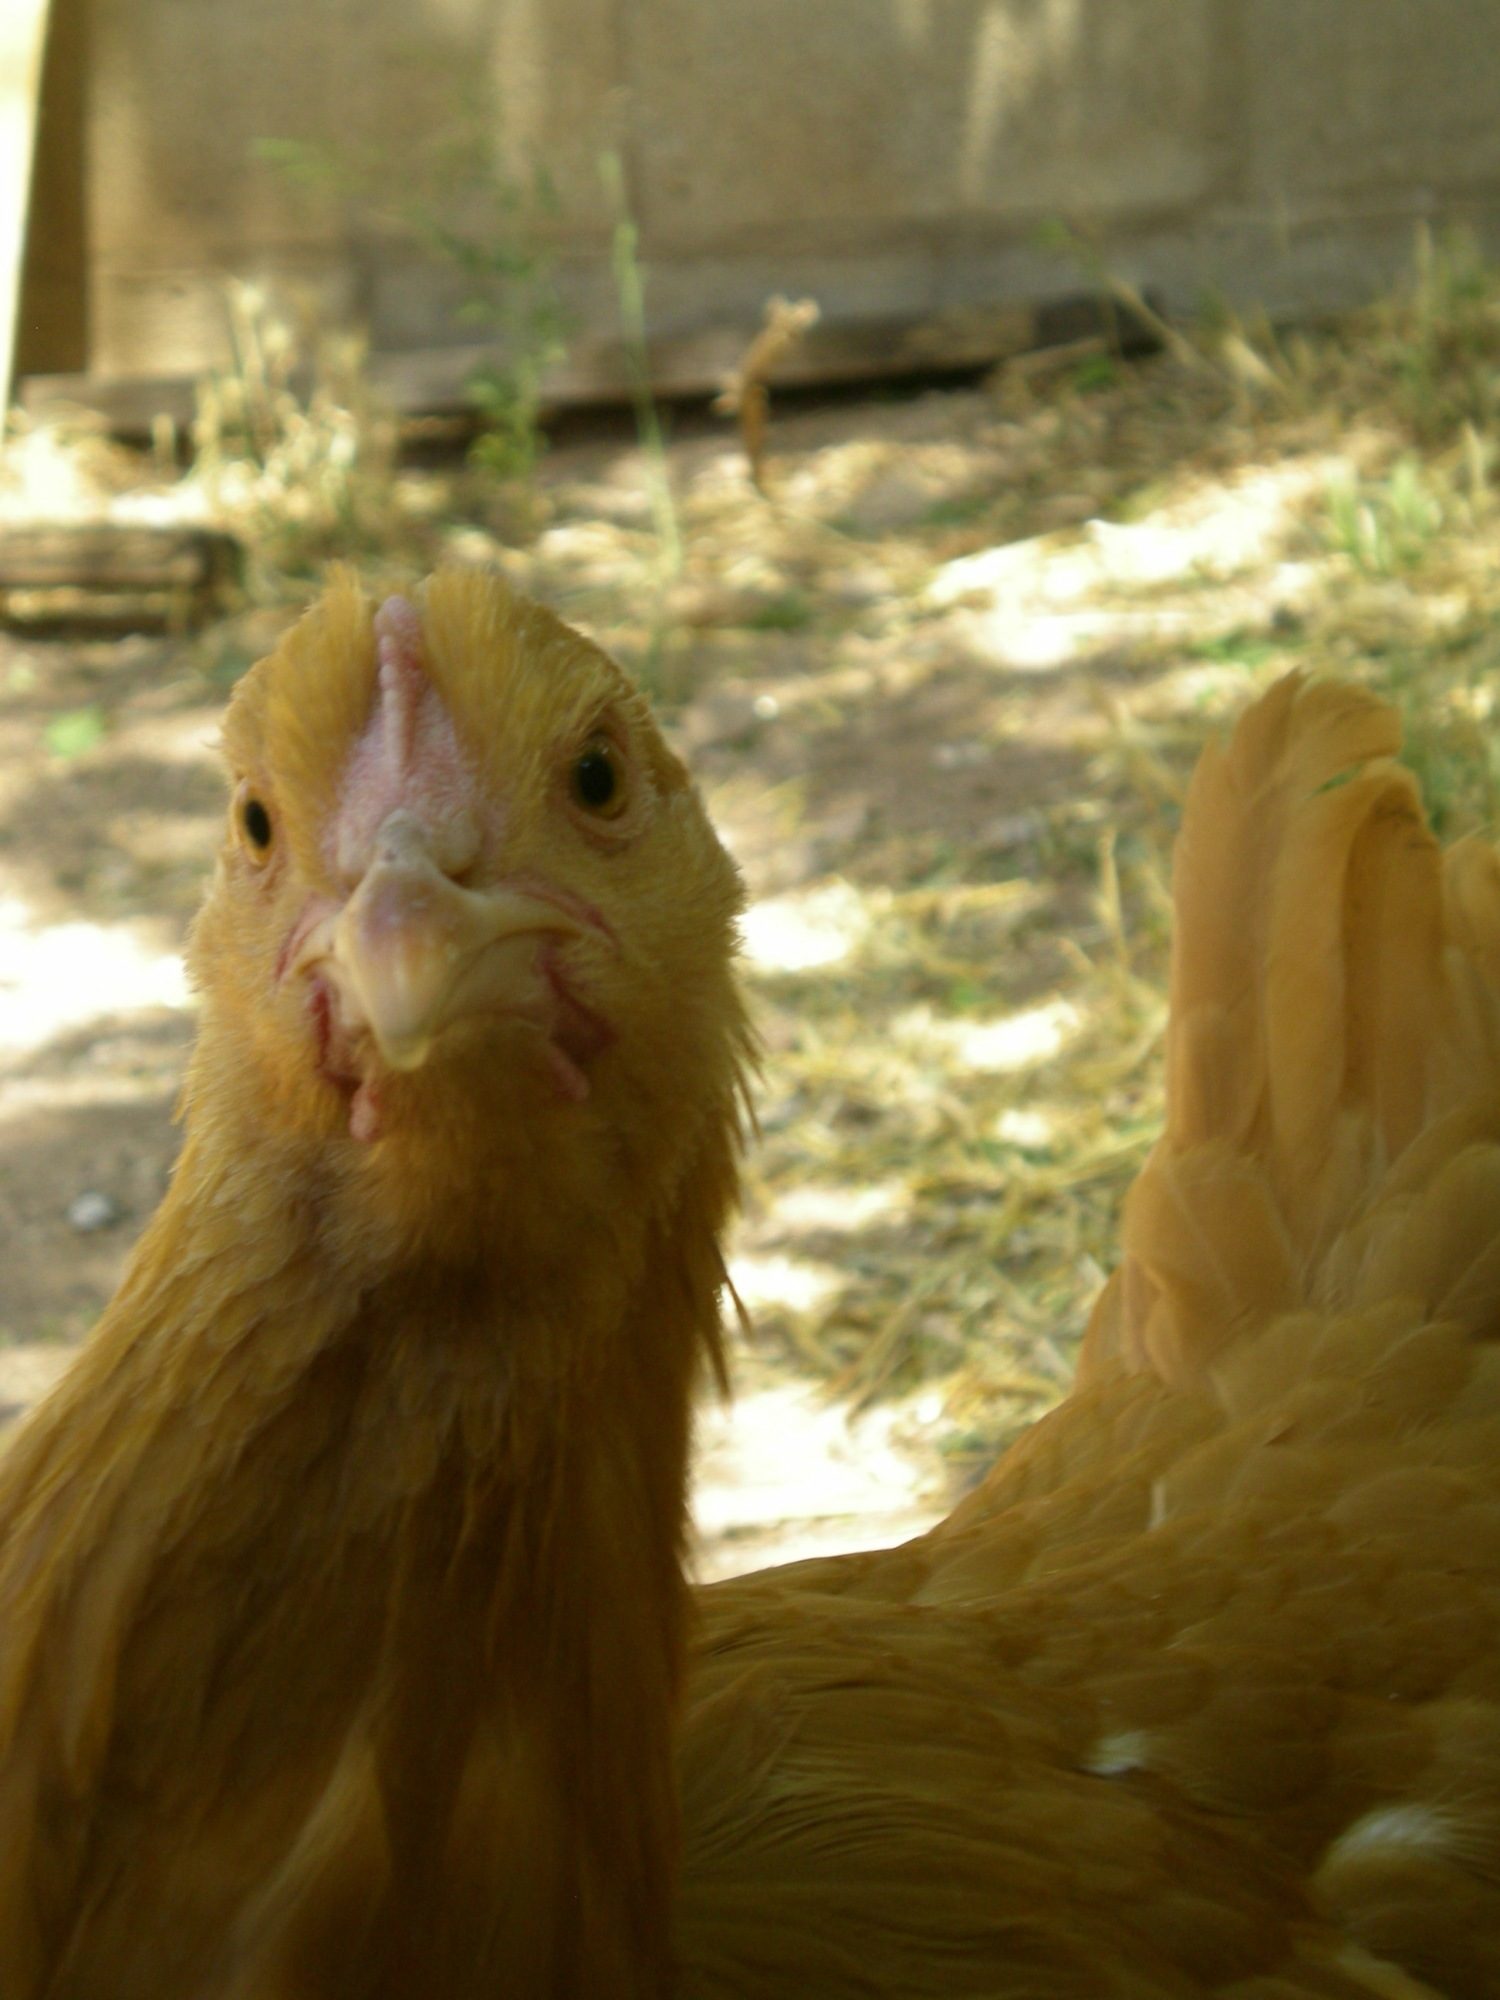
The girls checkin’ it out.
We drug the coop to a couple of different spots before we were satisfied with its location. It turns out that the soil in our yard was actually softer than I thought it would be, so Ben had the run frame leveled and partially buried before I even got the other shovel to help. We used hook and eye latches with spring closures to lock the run door, nest box, and hinged wall. They were relatively easy to install, as were the cleat and cable for the chicken door. For now, the roost bar is held in place by a shim, because we don’t know if the girls will need it repositioned as they grow, but it’s in, and that’s what matters. I’m not jazzed about having the feeder in the coop, I’d rather it be outside, but it’s been raining here in the afternoons and I don’t want our girls to have to eat wet food. (Update: We improvised a protected feeder to hang outside, it’s great.)
All clean with roost bar installed, waterer filled, and run abutted.
Over all I am extremely pleased with how our coop turned out. We had some happy accidents, such as running out of ugly paint, and some not so happy accidents, like the run debacle. Ben and I both have a couple of improvements we’d like to make, but it’s livable for now. In fact, we moved the girls out yesterday morning on their 7 week-elapsed-time-at-our-house birthday, and despite my concerns, all three were still alive when we got home from work. They seemed pretty happy with the extra room to flap around. I’m happy to have our bathroom back.
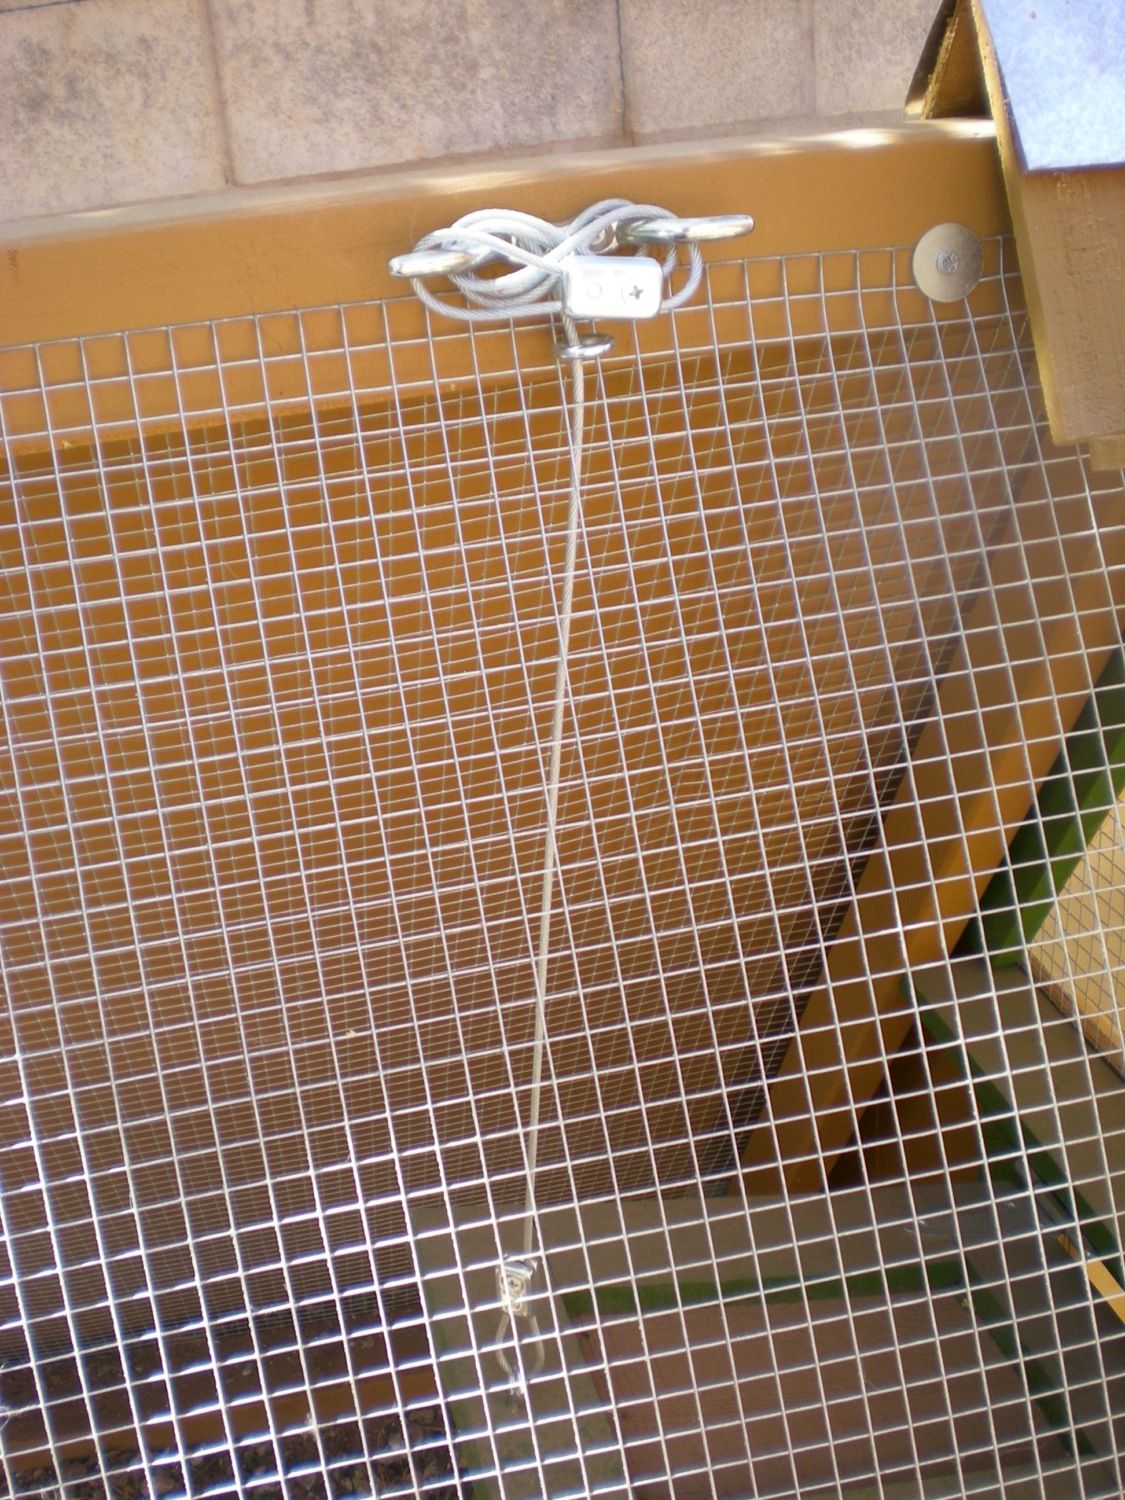
Detail of the cable and cleat used to open the chicken door.
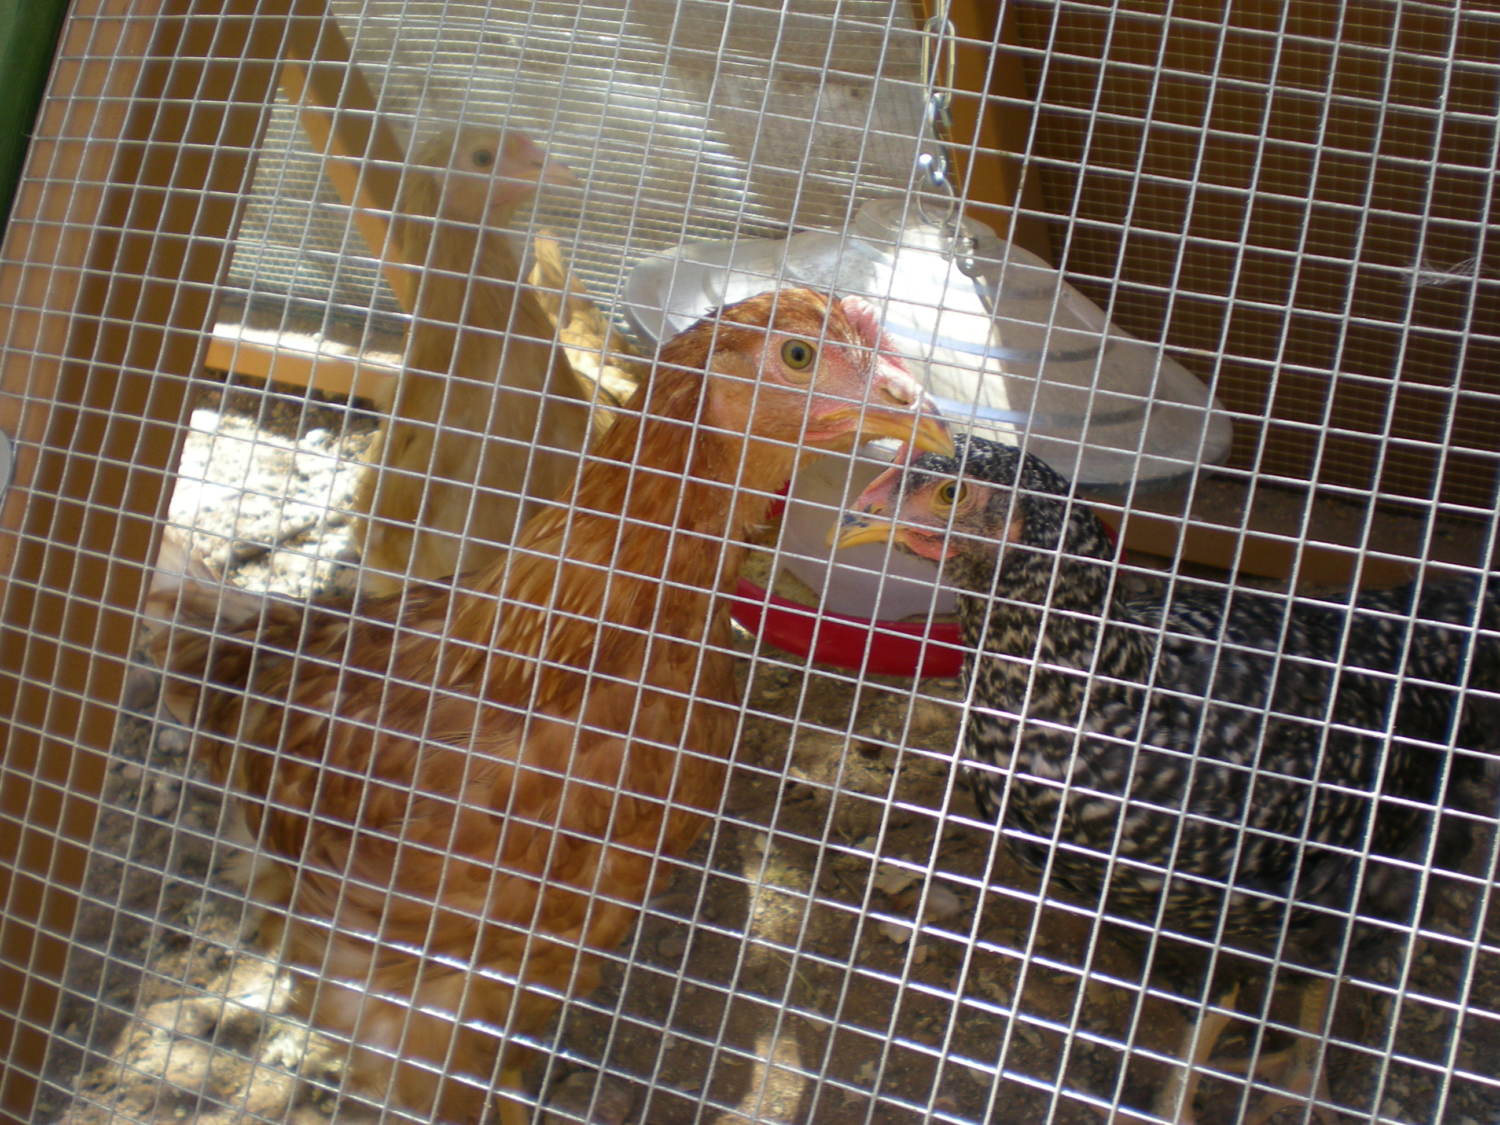
Happy faces!
What’s still upcoming for this project is some better locks for the hinged door and nest box (Ben’s project), and a guard rail to keep any nesting materials in the nest box (my project). I’d also like to get some Lexan or plexiglass cut to cover the windows (only partially, of course, for ventilation considerations) in the winter so it’s not too cold or drafty.
I think we’re coming in at just under $600 for the whole project, but that’s half the price of a comparable pre-manufactured coop, so I think we did pretty well. From materials purchase to livable it took about 5 weeks, but there were several days were we didn’t work on the coop at all, days for paint to dry, snow days, etc. Someone dedicated to working on it every day, with more carpentry skills, or a more advanced set of tools could easily finish this project in a week.
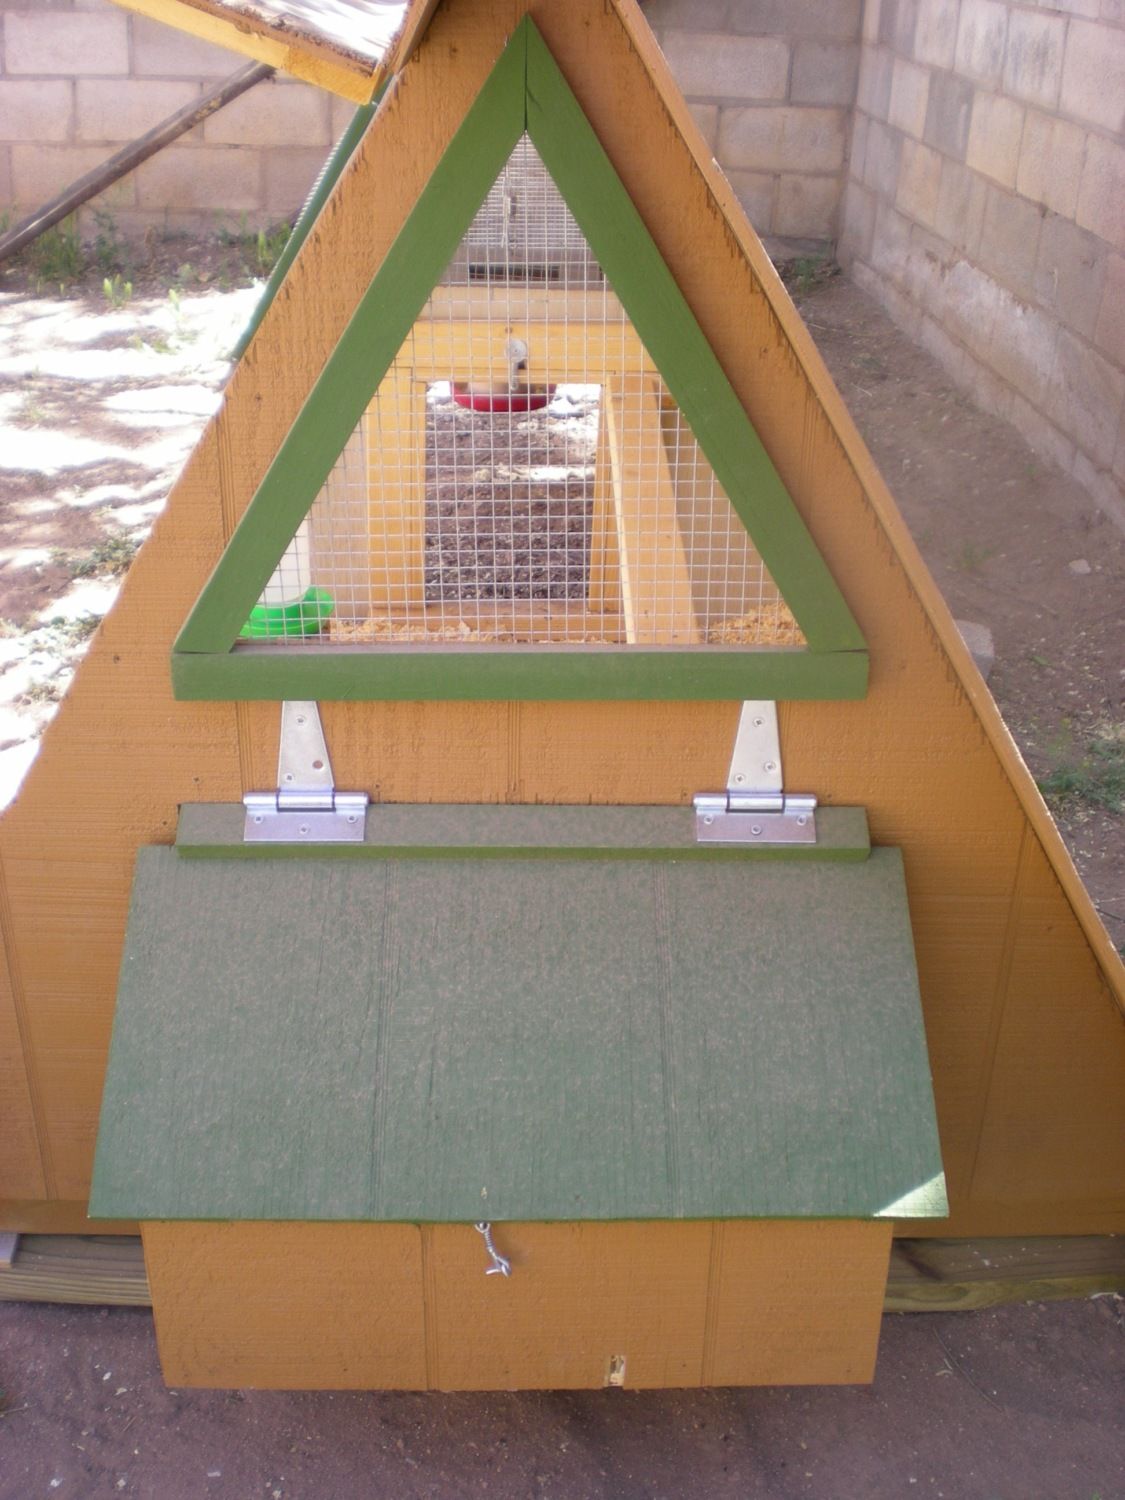
Nest boxes locked, window screened and trimmed. The chip on the bottom right is relocation damage. I think this picture was taken a couple weeks after the girls moved in, it had rained and was windy, so the green paint is really dirty.
-It doesn’t have to be perfect. Corners don’t mate exactly or siding isn’t flush? Call it ventilation.
-Purchase more hardware than you think you’ll actually use. Inevitably, screws will be stripped, nails bent, washers dropped, etc.
-Keep ease-of-cleaning in mind when selecting or modifying a plan.
-GET A PAINT SPRAYER!!
-Get a high capacity waterer. We are still using the quart-sized chick waterer, and with evaporation and growing girls, it needs refilling once a
day.
-Measure twice, then measure again, then cut. Then measure again. Every piece, every time (helps minimize the frustration of tip #1).
-If possible, start building your coop in its desired location. We didn’t have to move ours far, but it wasn’t buckets of fun and we did a little
damage to the nest box, which could have been avoided.
-Have fun!
In all its glory!
6/3/12 Update: Well, the girls are about 14 weeks old now, and we’re getting very excited about the prospect of eggs. Most of the upgrades we wanted to make to the coop are finished, except the waterer.
The first time I went to change the small waterer we keep inside the coop, I forgot about the hook and eye lock on the underside of the door. It turns out it doesn’t take much force to pull those little screw things loose. We were planning on replacing that lock anyway, I guess I was just motivating us do get to it sooner than we had planned.
Get. Out. Of. My. HOUSE!
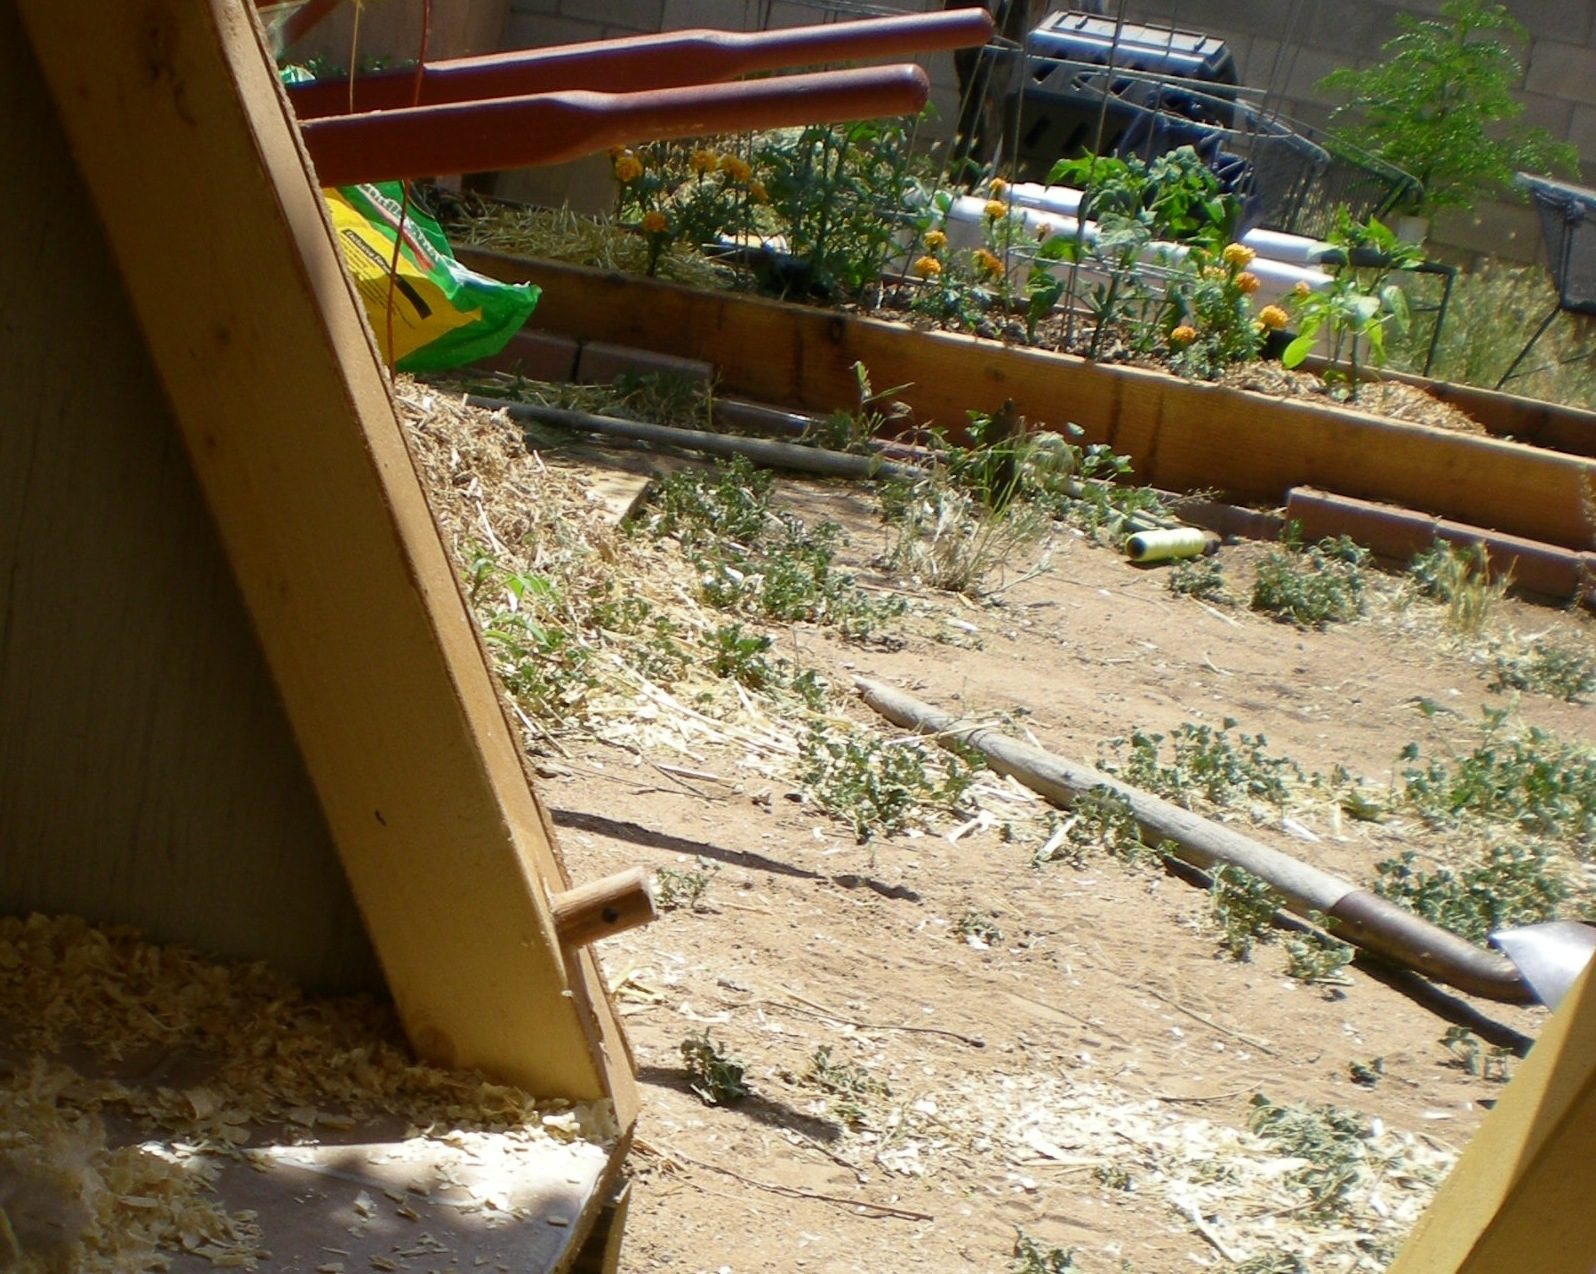
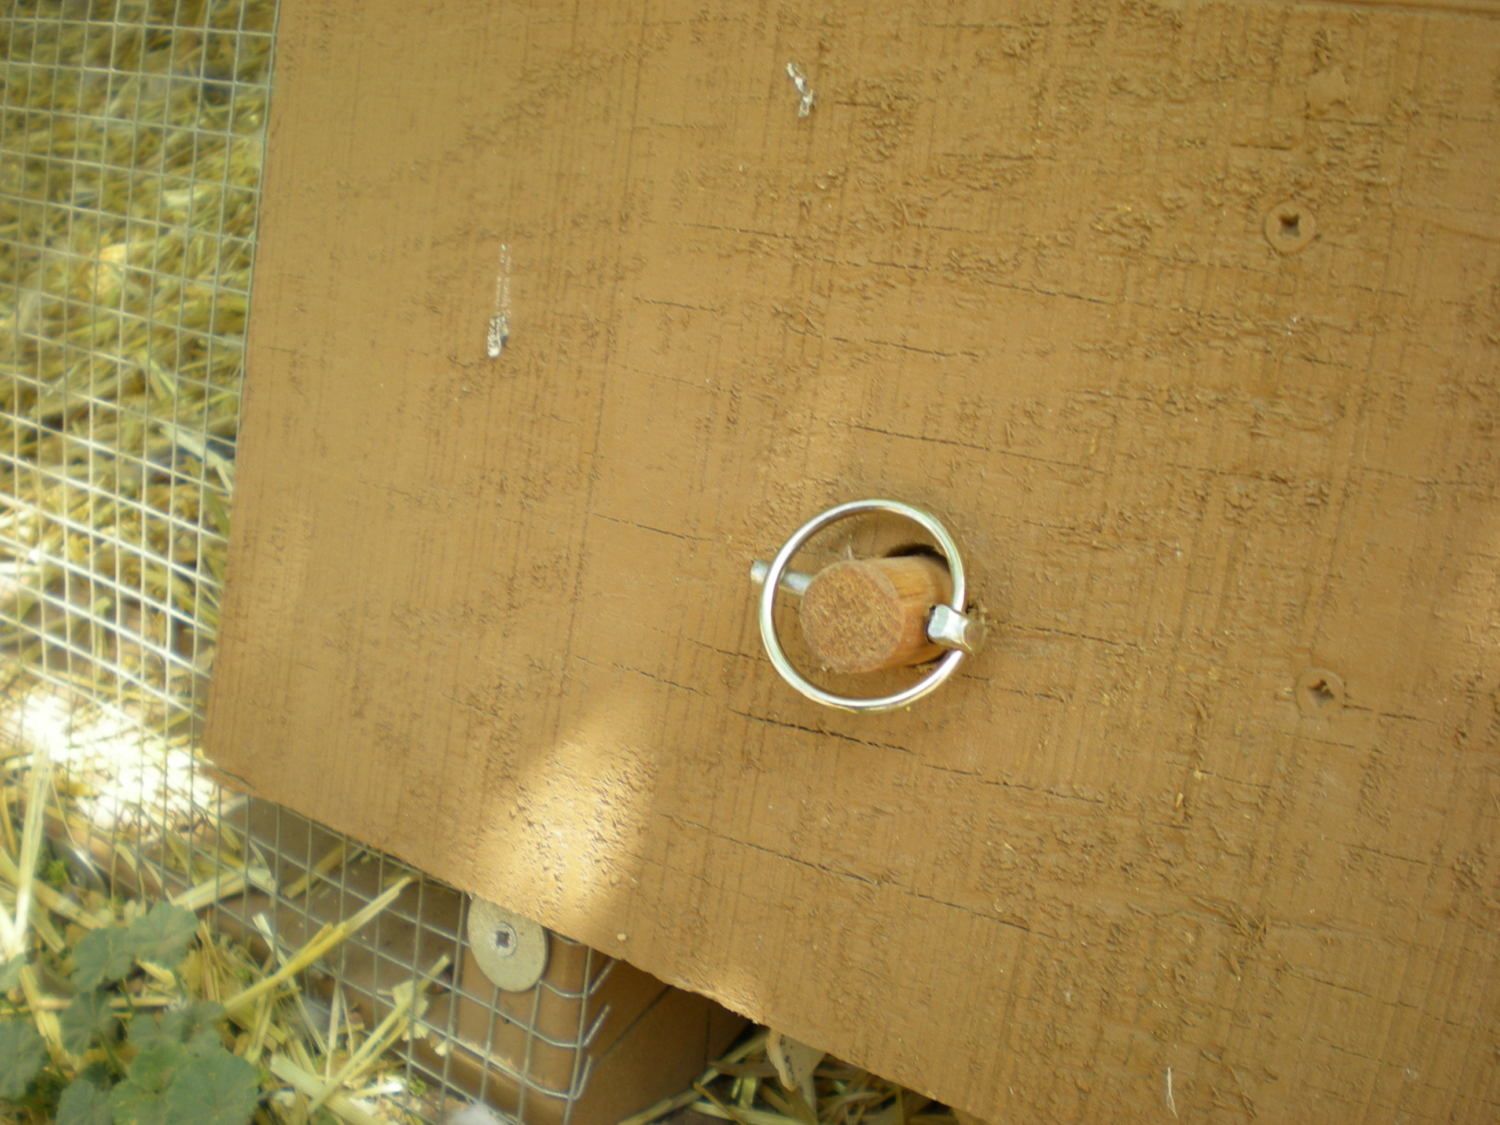
The solution: Ben used a spade bit to drill a ¾ inch hole through the outside of the hinged door into the vertical “A” supports, one hole on each side. Then he glued a 2 ½ inch length of a ¾ inch diameter dowel into the hole on the 2x4, and drilled a ¼ inch hole horizontally through the dowel end sticking out of the support. With the door closed, a 2 inch linchpin slides through the ¼ inch hole.

Here is the dowel glued into the support. The hole for the linchpin is about ½ inch from the end, oriented horizontally.
Here’s the dowel on the other side, you can see the hole for the linchpin.
No raccoons here!
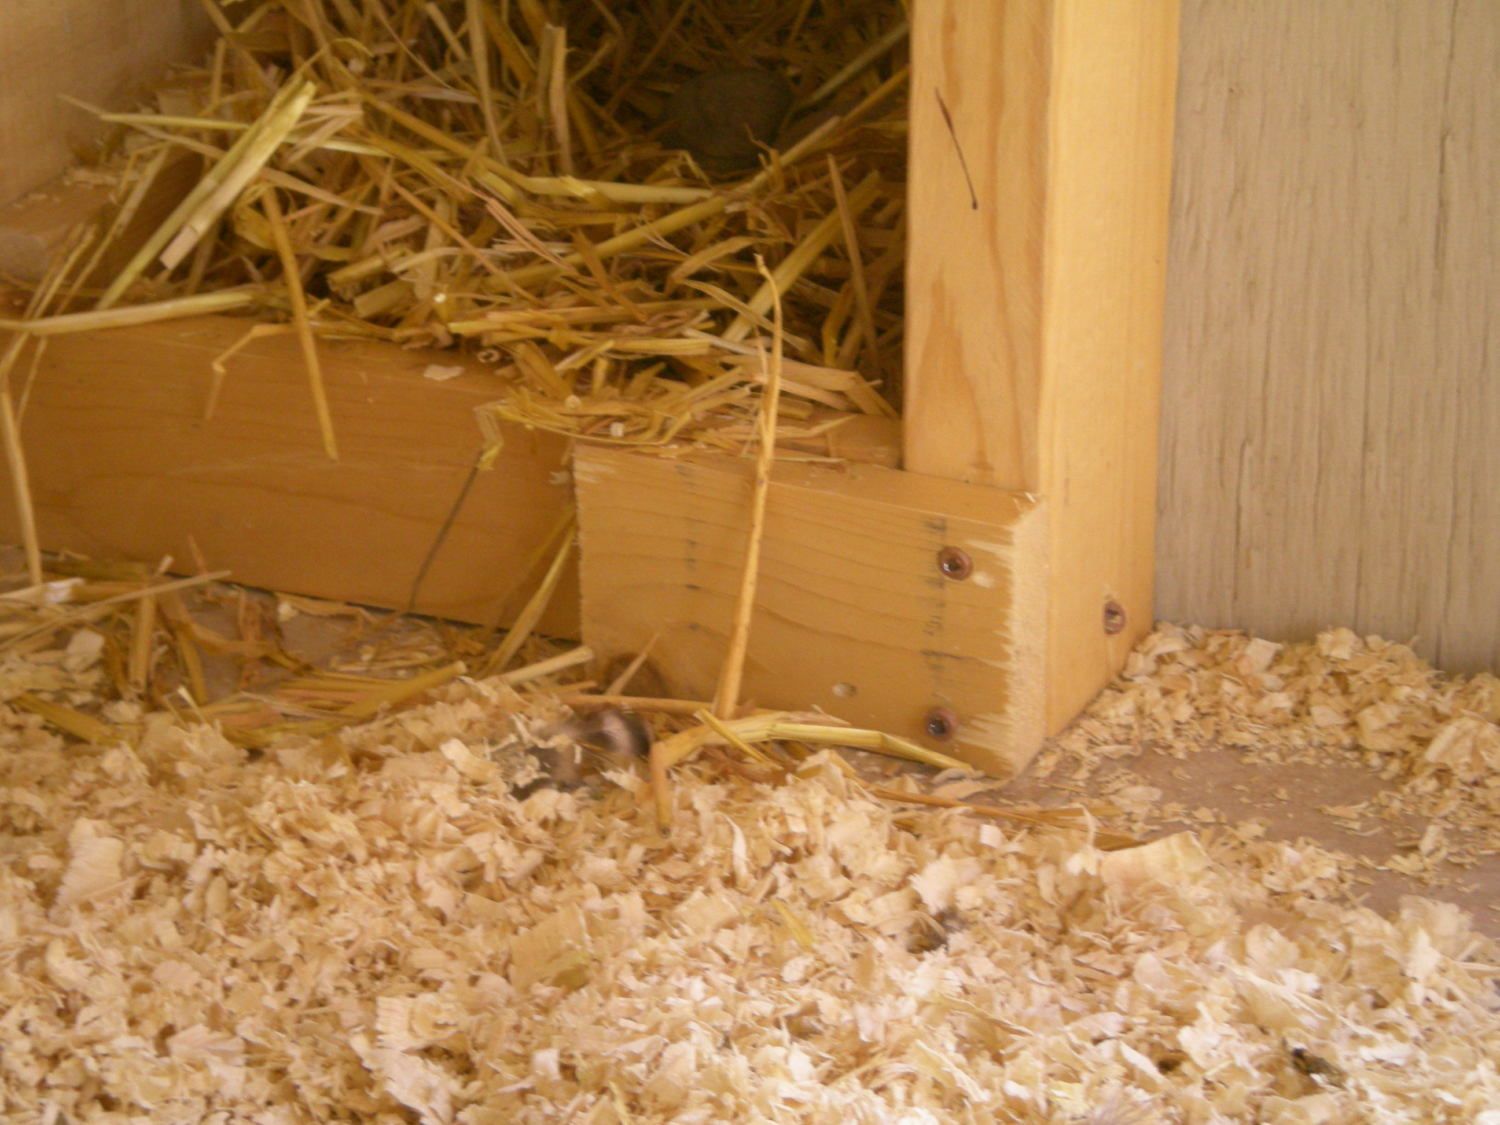
The 6 inch piece holding in the “kick board.”
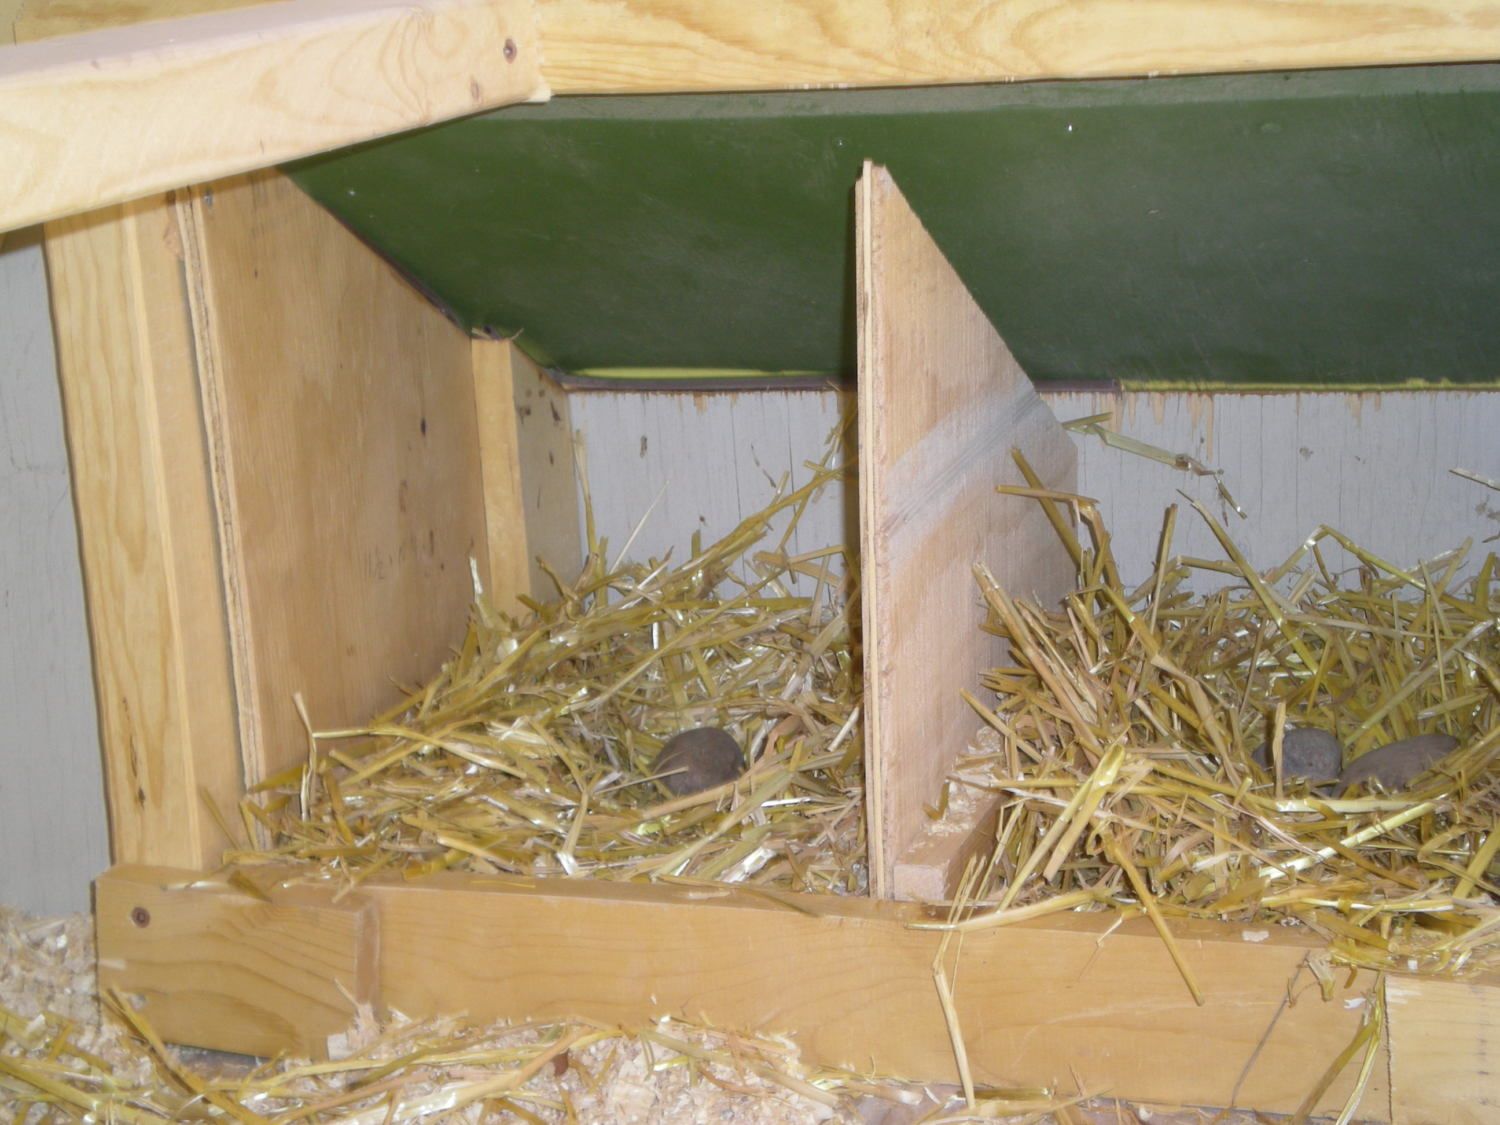
The “kick board” in place with nest material and “eggs.”
Ben also secured the roost bar, so maybe they’ll start using it now instead of trying to cram into the nest boxes to sleep.
Treats?!?!