•Return to Homepage•
How to: Use the ChickBator
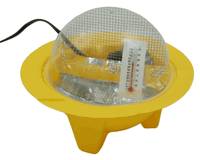
So many good people have wasted their money on this thing, the infamous ChickBator! With its terrible insulation and impossible temperature controlling, it kills your precious eggs within days. Few people have managed to get it right, but it takes so much effort and temp checking that it makes you want to pull your hair out!
Here is a step-by-step guide to get your money's worth out of this sad incubator and make it useful!
This article has:
- SUPPLIES LIST
- DETAILED STEPS
- DETAILED PHOTOS

Supplies: Chickbator Fluffy Towel Reliable small thermometer Reliable small hygrometer Plug-in light dimmer | |||
- Step 1: Temperature Control Setup -
This is the most important step since it sets the ChickBator up with a good way to regulate temperature. Plug or wire in the dimmer to the light plug on the ChickBator. Remove the aluminum foil from the base of the incubator, but leave the foil on the wire wall. Direct heat from the light hitting the eggs could overheat them, so keep them in the shade. the dimmer switch allows you to regulate the temperature freely without having to open the incubator. | |
- Step 2: Temperature Moderation -
Place the thermometer and hygrometer on top of the wire where the eggs will be, then cover the entire incubator with the towel. A fluffier towel will be more efficient than a thin towel. Play with the dimmer until until you get the temperature you desire. One setting on the dimmer will not be the only setting since the temperature in the surroundings change. Mark a line where you want to set the dimmer at night, when its cooler, and day, when its warmer | ||
- Results -
