Jenny's Small Suburban Coop
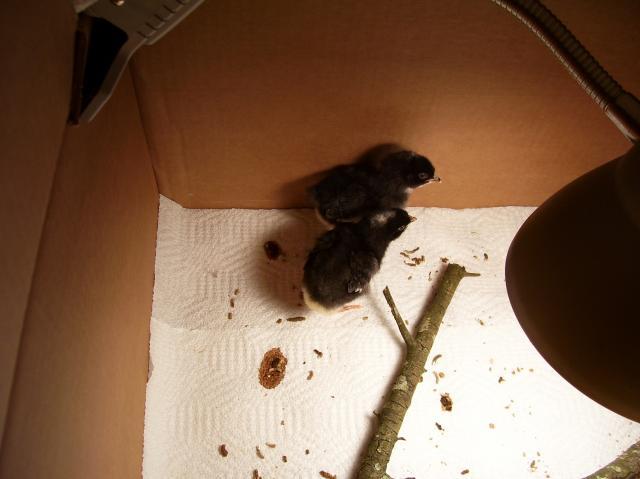
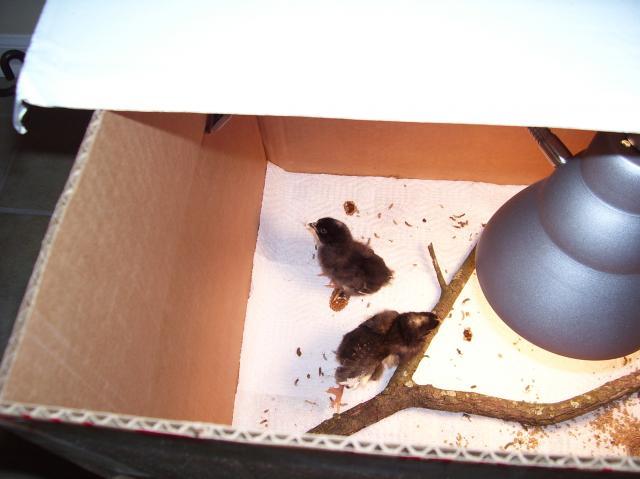
My 2 Barred Rock pullets have arrived!

We named them Crazy Daisy and Sally
While they are growing coop construction begins;
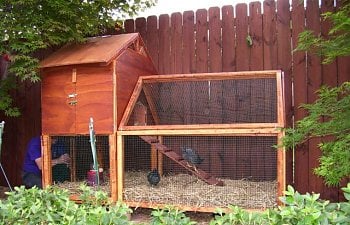
The coop is situated in the shade of my Japanese maple trees - I tied some of the branches back to get the pics, so hopefully they will enjoy the shade and not get too hot in summer. We also have a water mister system for the garden that we can turn on if it is very hot.
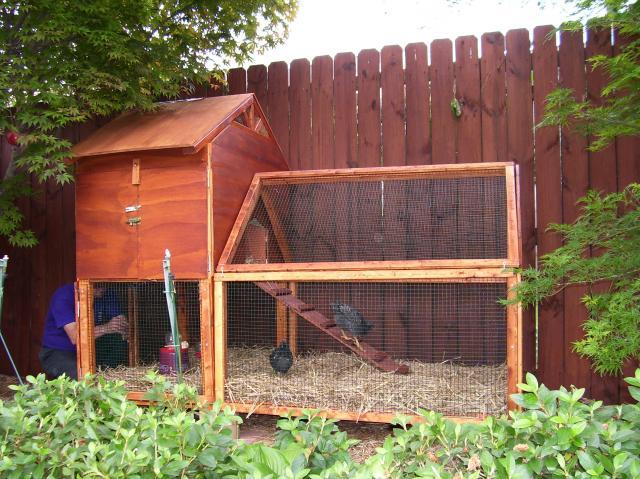
My girls in the run. I think they look so cute. The ladder design was helped by several BYC'ers, thanks to Jason with the red coop for the pics of his ladder!
I was so proud when the girls started to use the ladder - it worked!!!
The little coop doors open to the inside.
My girls proudly showing you their digs!
Sally in the forefront with the stubby tail, Crazy Daisy in the back.
The doors are actually better aligned they they appear, I just didn't close them properly.
The run is not really that screw it's the picture! I was trying to get the whole thing in. I never claimed to be a photographer! Not a very good carpenter either.
The run is made from 2X2 untreated and stained.
We attached the hardware cloth with staples (ceiling tile staples, they are long and very sharp) and then covered all the edges with 1X2 Firring? strips to create nice clean edges and that nothing could snag me or the girls.
The whole top right hand side of the run opens up for easy access. It can be proped open with two firring strips that function like opens the hood (bonnet) of a car. It is made with 1X2's joined at the corners with L shaped mending plates.
My large access door to the run
We acclaimated the girls to the run before the coop was attached. Here they are covered with shade net as it got very hot during the day. We brought them in the house at night. When the coop and run were attached we walked them up the ladder at night and closed them in the first 4 nights, opening up for them to go into the run at around 6:30am. We could not believe it the 5th night they put themselves to bed!
Because the hinges are small for the front door of the coop I first glued them in place so I could allign the doors properly. Once they were set in place I screwed them in.
The coop door opens for easy access.
The bottom of the coop has double doors at the back for feeding and cleaning. The lower level is all covered in green vinyl coated 5/8" hardware cloth. We chose this as it can hardly be seen and figured the vinyl coated will last longer and we were looking for something that would be less obtrusive.
All parts of the coop are screwed rather than nailed and can easily be removed.
The coop is stained with Behr wood finisher in Redtone.
We attached double doors to the front of the coop to be able to close them in at night until they got used to the coop. The double doors on the side are cleanout doors.
Lumber is 2X3 untreated and finished with a wood sealer.
Notice the insert for the roost on the sides of the upper level and the hanging bar for the feeder.
The gable area is done with 1X2 Firring strips glued in place and backed with hardware cloth for ventilation.
There is an approximate gap of 2" on either side under the eaves also covered with hardware cloth for additional ventilation.
Although the coop is not built out of treated wood the 2X4 feet on which the coop rests are.
Our New Run is 16'X6' covered with clear poly and situated under a very large oak tree for shade. The old coop and run open into this new run.
Things I am happy with:
1) The large access doors
2) The green vinyl coated hardware cloth
Things I would change:
1) Buy a bigger house so I could have a bigger yard, bigger coop and more chickens!!!
I loved the brightly colored, Hansel and Gretel type, and the coops with all the bells and whistles on the site, but had to come up with something that was practical and that had to blend into my landscape.
Thank you to everyone I learned something from on the forum, if anything I have done sparks your imagination I will be very happy!
Thanks for visiting my page!
Jenny - chicken lover and licensed Realtor - Tuscaloosa, AL
https://www.backyardchickens.com/forum/uploads/28681_coop_design.jpg
https://www.backyardchickens.com/forum/uploads/28681_chickens_coop_addition.jpg
https://www.backyardchickens.com/forum/uploads/28681_chickens-mister2.jpg
My 2 Barred Rock pullets have arrived!
We named them Crazy Daisy and Sally
While they are growing coop construction begins;

The coop is situated in the shade of my Japanese maple trees - I tied some of the branches back to get the pics, so hopefully they will enjoy the shade and not get too hot in summer. We also have a water mister system for the garden that we can turn on if it is very hot.

My girls in the run. I think they look so cute. The ladder design was helped by several BYC'ers, thanks to Jason with the red coop for the pics of his ladder!
I was so proud when the girls started to use the ladder - it worked!!!

The little coop doors open to the inside.
My girls proudly showing you their digs!
Sally in the forefront with the stubby tail, Crazy Daisy in the back.
The doors are actually better aligned they they appear, I just didn't close them properly.
The run is not really that screw it's the picture! I was trying to get the whole thing in. I never claimed to be a photographer! Not a very good carpenter either.
The run is made from 2X2 untreated and stained.
We attached the hardware cloth with staples (ceiling tile staples, they are long and very sharp) and then covered all the edges with 1X2 Firring? strips to create nice clean edges and that nothing could snag me or the girls.
The whole top right hand side of the run opens up for easy access. It can be proped open with two firring strips that function like opens the hood (bonnet) of a car. It is made with 1X2's joined at the corners with L shaped mending plates.
My large access door to the run
We acclaimated the girls to the run before the coop was attached. Here they are covered with shade net as it got very hot during the day. We brought them in the house at night. When the coop and run were attached we walked them up the ladder at night and closed them in the first 4 nights, opening up for them to go into the run at around 6:30am. We could not believe it the 5th night they put themselves to bed!

Because the hinges are small for the front door of the coop I first glued them in place so I could allign the doors properly. Once they were set in place I screwed them in.
The coop door opens for easy access.
The bottom of the coop has double doors at the back for feeding and cleaning. The lower level is all covered in green vinyl coated 5/8" hardware cloth. We chose this as it can hardly be seen and figured the vinyl coated will last longer and we were looking for something that would be less obtrusive.
All parts of the coop are screwed rather than nailed and can easily be removed.

The coop is stained with Behr wood finisher in Redtone.
We attached double doors to the front of the coop to be able to close them in at night until they got used to the coop. The double doors on the side are cleanout doors.

Lumber is 2X3 untreated and finished with a wood sealer.
Notice the insert for the roost on the sides of the upper level and the hanging bar for the feeder.
The gable area is done with 1X2 Firring strips glued in place and backed with hardware cloth for ventilation.
There is an approximate gap of 2" on either side under the eaves also covered with hardware cloth for additional ventilation.
Although the coop is not built out of treated wood the 2X4 feet on which the coop rests are.
Our New Run is 16'X6' covered with clear poly and situated under a very large oak tree for shade. The old coop and run open into this new run.
Things I am happy with:
1) The large access doors
2) The green vinyl coated hardware cloth
Things I would change:
1) Buy a bigger house so I could have a bigger yard, bigger coop and more chickens!!!
I loved the brightly colored, Hansel and Gretel type, and the coops with all the bells and whistles on the site, but had to come up with something that was practical and that had to blend into my landscape.
Thank you to everyone I learned something from on the forum, if anything I have done sparks your imagination I will be very happy!
Thanks for visiting my page!
Jenny - chicken lover and licensed Realtor - Tuscaloosa, AL
https://www.backyardchickens.com/forum/uploads/28681_coop_design.jpg

https://www.backyardchickens.com/forum/uploads/28681_chickens_coop_addition.jpg
https://www.backyardchickens.com/forum/uploads/28681_chickens-mister2.jpg