Our chicken coop was (and is being) built in stages, due to some serious weather issues, work schedules that seemed to change daily and a pretty big learning curve. I was a complete newbie w/ power tools at the start of this project and my hubby is not a handy sort of guy so many things took much longer for us than it should have. Share my Corner Coop Adventure!
PHASE 1-Covered run and coop.
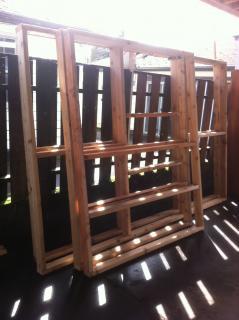
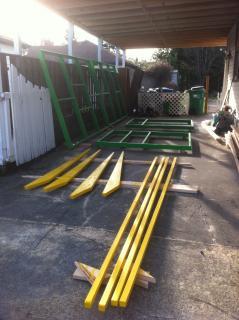
Thursday, March 10-Finally got started on the coop! My handy man Tom Hovland and I built the frame to the covered run/henhouse and cut out the rafters-my work schedule just went crazy without warning and I needed some help on days my hubby wasn't around (at work), so I found a great handyman who was willing to let me do my part and even show me some great tricks as well!! This coop is based on the Garden Coop design, with lots of modifications. I'm essentially building two Garden Coops (as my current design calls for-keeps changing!), one covered with the henhouse and the other uncovered (but roofed with hardware cloth). They will come together in a corner of my property, under a big pine tree for extra summer shade. I'm working the main coop for now as the priority is getting shelter for the month old babies, but the uncovered section will get started very soon as well. Here are Thursday's efforts (done in nasty, rainy, windy weather)! Thanks again Tom!!

Friday, March 11-I took advantage of some slightly less nasty weather to paint-for 8 hours. I worked so hard I could barely move by the end of the day. I really did not realize that two coats of solid stain would take SO LONG to get on! Clearly a newbie being naive!
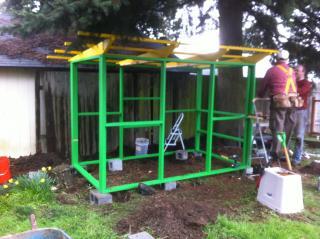
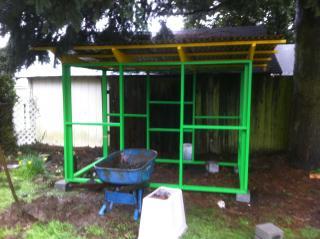
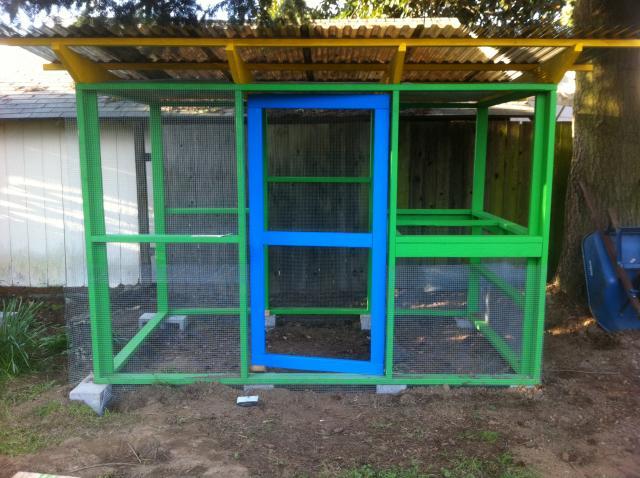
Sunday, March 13- Rainy weather, no doubt about that. The hubby finished staining the main coop frame (just one side of each short wall was left) last night, but w/ the weather they are still a touch tacky in places. We also discovered that a little bit of the yellow rafters weren't completely dry...the downside of doing this in spring") Tom was very nice and agreed to come out on his day off to help us set the frame and roof the covered coop. Thanks a million Tom! In the next shots we moved the frame walls to the site and used the blocks to create a platform where we screwed the walls together. Then we leveled the 4 blocks on the ends and set the frame on that while we added the roof and supports (we're using Suntuf panels that block some of the UV but let a lot of light through). In the middle picture you can see the open end of the coop, where the next set of framing will attach (not built yet). The block in the bottom left of center is aprox where the uncovered run will go to. We had all but three blocks in place and most of the roof on when the heavens errupted and we have to hurry to get the last panel on enough so we can finish cleaning up. Not only was the rain pouring down, but the wind got very gusty and made things ten times worse. Tom stuck by us and got enough screws in to hold the last panel and we all ran for cover.
Tom was very nice and agreed to come out on his day off to help us set the frame and roof the covered coop. Thanks a million Tom! In the next shots we moved the frame walls to the site and used the blocks to create a platform where we screwed the walls together. Then we leveled the 4 blocks on the ends and set the frame on that while we added the roof and supports (we're using Suntuf panels that block some of the UV but let a lot of light through). In the middle picture you can see the open end of the coop, where the next set of framing will attach (not built yet). The block in the bottom left of center is aprox where the uncovered run will go to. We had all but three blocks in place and most of the roof on when the heavens errupted and we have to hurry to get the last panel on enough so we can finish cleaning up. Not only was the rain pouring down, but the wind got very gusty and made things ten times worse. Tom stuck by us and got enough screws in to hold the last panel and we all ran for cover.
March 13th thru March 29th-RAIN. RAIN. RAIN. CHICKS GETTING BIGGER BUT CAN'T BUILD/PAINT/DIG BECAUSE OF RAIN. LOSING MY MIND.
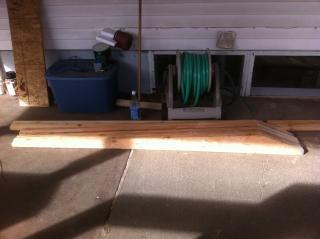
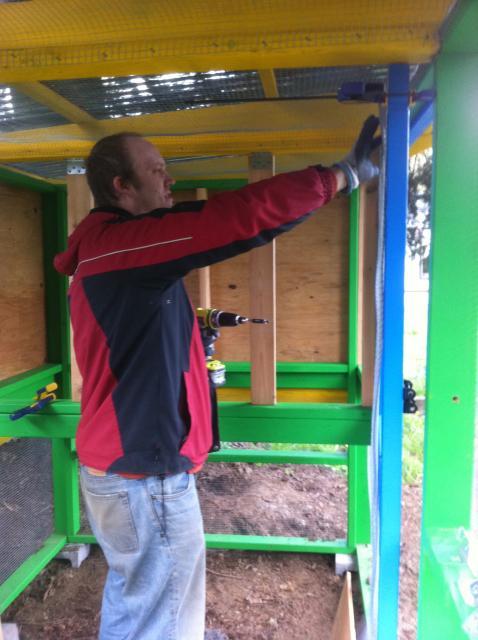
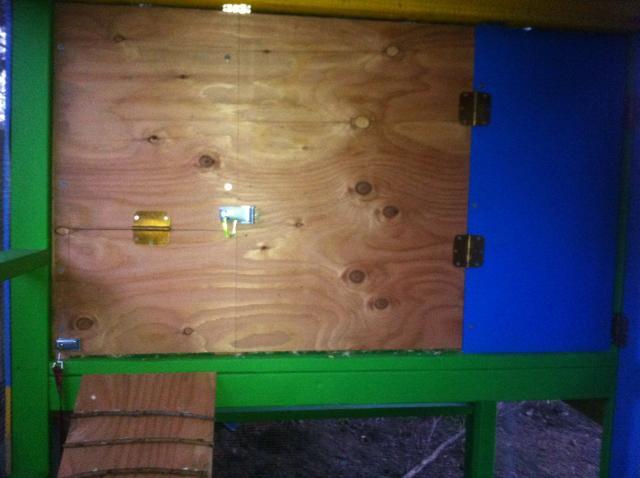
March 30 to April 3-Had one long 4 day weekend with only a little rain (after the third rainiest March on record and going into what would become the rainiest April I've ever seen) and the chicks were outgrowing the brooder box to the point I felt like an animal abuser, so I put in about 60 hours to get the hardware cloth dug in and secured, to get the door built and to get enough done on the coop itself that the chicks could move in by the end of the weekend. I went with 1/2" hardware cloth to keep rodents as well as the bigger nasties out and dug it in over 12" down to keep things from digging in. Little did I know how important this feature would be a few days later! Being a newbie at building, I could not figure out how to dig the trench for the hardware cloth, since a shovel didn't work because it erroded too much dirt around the foundation. So I hand dug it with a trowel. Yes, I did. Getting a post hole digger did not occur to me until AFTER I spent all day hand digging and installing the lower hardware cloth! The door you see below also took me the better part of 5 hours to build and hang, because it was a tiny bit off square and kept catching edges. Not having the skill to shave small amounts of wood off using my circular saw, I used sandpaper instead, which is why the door took as long as it did. By the end of day 2 all the hardware cloth was up and wired together at the seams, the door was hung in such a way that it closes on it's own behind you with no need for a spring and I was starting to cut the 1/2" exterior plywood for the siding to the coop. I used a platform and guide to cut the plywood-the platform is actually another run wall that we will use for Phase 2 later on, but it worked great. I'm small, so I couldn't reach far enough to cut the plywood without crawling onto the sheet. On days 3 and 4 the hubby was off work so we really cranked out the rest of the coop and added a temporary hardware cloth screen to somewhat secure the left side of the run (where the next part of the run will attach). We will take this down for Phase 2. Painting things can come later (Much later, as things turned out).
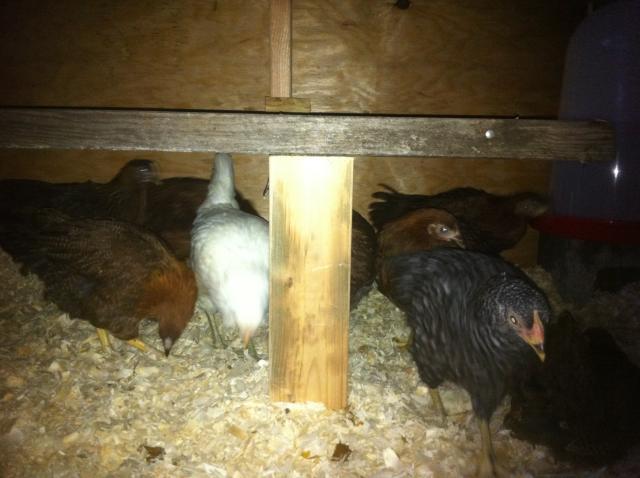
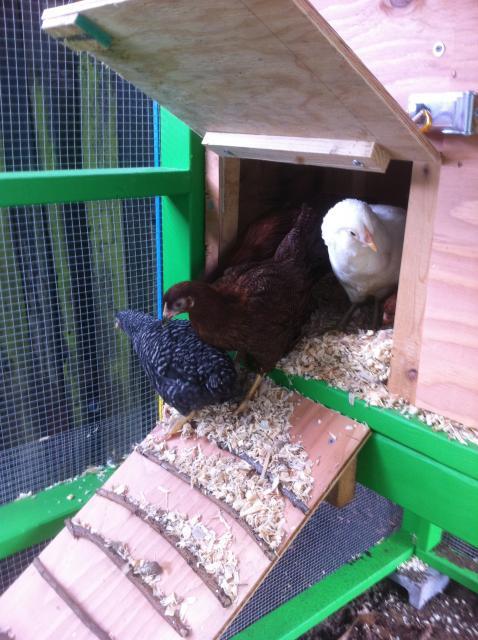
April 3rd-Built the roost using an old wooden ladder-THE CHICKS HAVE ENTERED THE NEW COOP!!!!!!!!! They were so scared, since they have lived thus far in a box in a basement. The wind, the rain-all very scary things. It took them a week before they decided to try out their ladder and check out the run. PHASE ONE COMPLETE!
PHASE 1.2
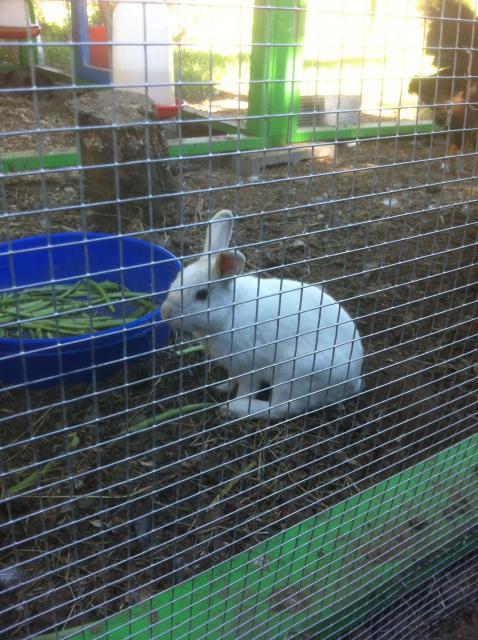
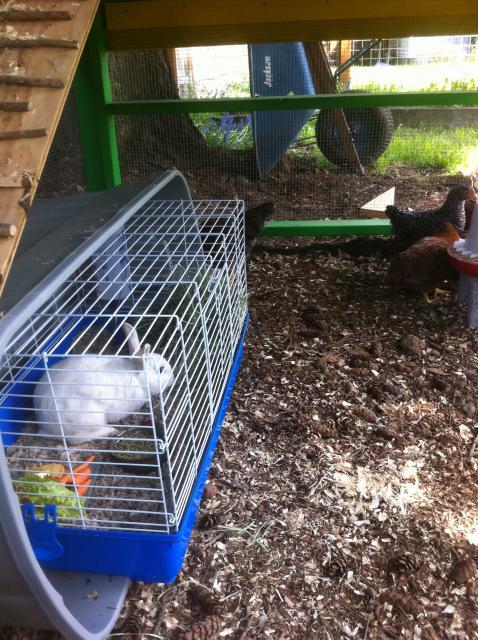
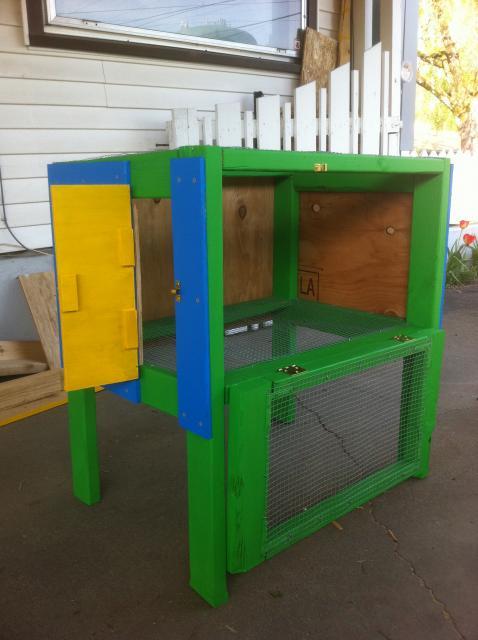
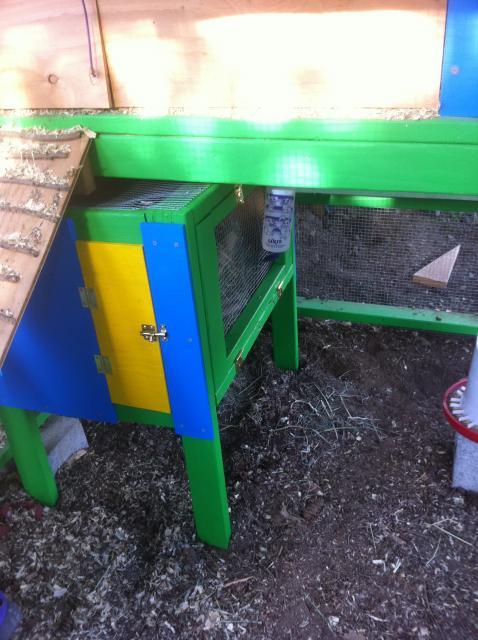
April 11th, 16th and 17th- An unexpected event has brought a new addition to the coop. A co-worker of mine came to work with a rabbit she found the night before. The poor thing was standing in the middle of the road in a drenching downpour and almost got hit by my co-worker. She stopped and picked him up, and since he seemed really friendly she brought him to work the next day looking for someone to give him a home. I know NOTHING about bunnies but agreed to try him out in the coop with the ladies. So the next weekend I built a bunny hutch instead of working on finishing the coop. The bunny will be let out once we finish the rest of the run addition, but for now must be locked in the hutch since the temporary hardware cloth cover on the left side of the coop is not secure enough to contain a bunny. At least I designed the run to be dig-proof when complete! I didn't know then that I was going to have a bunny to keep in but it's an awfully good thing that I dug the hardware cloth so far down!
This was the last work done on the coop until June. The rain simply did not stop in April or May, and I needed at least three dry days to build, stain and assemble the second part of the run-not to mention digging a trench for the hardware cloth!
PHASE 2-Uncovered run and release of the bunny!
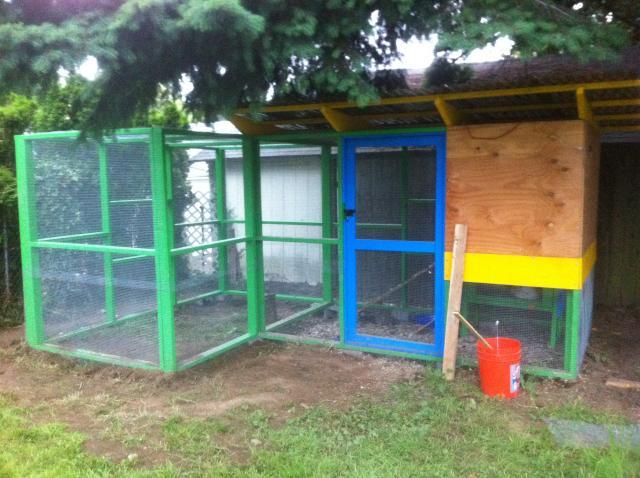
June 16th-19th-Another 4 day weekend for me and two sunny days to build and stain! Got all the framing for the uncovered run build and stained, so when the Hubby's days off came we went to work. This was our second wedding anniversary and how better to spend it than finishing Phase 2 together. We leveled the foundation blocks as we attached the new run walls to the existing run-easy as pie! I convinced hubby that we really did need a post hole digger for the trench (he tried digging with the shovel for two hours before he agreed with me-then dug the remaining 20' in less than an hour). It did rain all day Sunday, but not badly enough to prevent us from finishing. By the end of the weekend all we had left was to wire the seams of the hardware cloth together, which I finished over the next week. FREE BUNNY and HAPPY CHICKENS!
PHASE 1-Covered run and coop.
Thursday, March 10-Finally got started on the coop! My handy man Tom Hovland and I built the frame to the covered run/henhouse and cut out the rafters-my work schedule just went crazy without warning and I needed some help on days my hubby wasn't around (at work), so I found a great handyman who was willing to let me do my part and even show me some great tricks as well!! This coop is based on the Garden Coop design, with lots of modifications. I'm essentially building two Garden Coops (as my current design calls for-keeps changing!), one covered with the henhouse and the other uncovered (but roofed with hardware cloth). They will come together in a corner of my property, under a big pine tree for extra summer shade. I'm working the main coop for now as the priority is getting shelter for the month old babies, but the uncovered section will get started very soon as well. Here are Thursday's efforts (done in nasty, rainy, windy weather)! Thanks again Tom!!
Friday, March 11-I took advantage of some slightly less nasty weather to paint-for 8 hours. I worked so hard I could barely move by the end of the day. I really did not realize that two coats of solid stain would take SO LONG to get on! Clearly a newbie being naive!
Sunday, March 13- Rainy weather, no doubt about that. The hubby finished staining the main coop frame (just one side of each short wall was left) last night, but w/ the weather they are still a touch tacky in places. We also discovered that a little bit of the yellow rafters weren't completely dry...the downside of doing this in spring
Tom was very nice and agreed to come out on his day off to help us set the frame and roof the covered coop. Thanks a million Tom! In the next shots we moved the frame walls to the site and used the blocks to create a platform where we screwed the walls together. Then we leveled the 4 blocks on the ends and set the frame on that while we added the roof and supports (we're using Suntuf panels that block some of the UV but let a lot of light through). In the middle picture you can see the open end of the coop, where the next set of framing will attach (not built yet). The block in the bottom left of center is aprox where the uncovered run will go to. We had all but three blocks in place and most of the roof on when the heavens errupted and we have to hurry to get the last panel on enough so we can finish cleaning up. Not only was the rain pouring down, but the wind got very gusty and made things ten times worse. Tom stuck by us and got enough screws in to hold the last panel and we all ran for cover.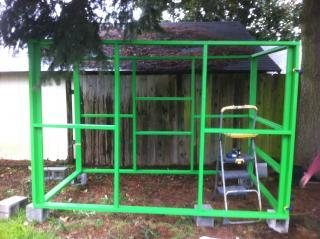
March 13th thru March 29th-RAIN. RAIN. RAIN. CHICKS GETTING BIGGER BUT CAN'T BUILD/PAINT/DIG BECAUSE OF RAIN. LOSING MY MIND.
March 30 to April 3-Had one long 4 day weekend with only a little rain (after the third rainiest March on record and going into what would become the rainiest April I've ever seen) and the chicks were outgrowing the brooder box to the point I felt like an animal abuser, so I put in about 60 hours to get the hardware cloth dug in and secured, to get the door built and to get enough done on the coop itself that the chicks could move in by the end of the weekend. I went with 1/2" hardware cloth to keep rodents as well as the bigger nasties out and dug it in over 12" down to keep things from digging in. Little did I know how important this feature would be a few days later! Being a newbie at building, I could not figure out how to dig the trench for the hardware cloth, since a shovel didn't work because it erroded too much dirt around the foundation. So I hand dug it with a trowel. Yes, I did. Getting a post hole digger did not occur to me until AFTER I spent all day hand digging and installing the lower hardware cloth! The door you see below also took me the better part of 5 hours to build and hang, because it was a tiny bit off square and kept catching edges. Not having the skill to shave small amounts of wood off using my circular saw, I used sandpaper instead, which is why the door took as long as it did. By the end of day 2 all the hardware cloth was up and wired together at the seams, the door was hung in such a way that it closes on it's own behind you with no need for a spring and I was starting to cut the 1/2" exterior plywood for the siding to the coop. I used a platform and guide to cut the plywood-the platform is actually another run wall that we will use for Phase 2 later on, but it worked great. I'm small, so I couldn't reach far enough to cut the plywood without crawling onto the sheet. On days 3 and 4 the hubby was off work so we really cranked out the rest of the coop and added a temporary hardware cloth screen to somewhat secure the left side of the run (where the next part of the run will attach). We will take this down for Phase 2. Painting things can come later (Much later, as things turned out).

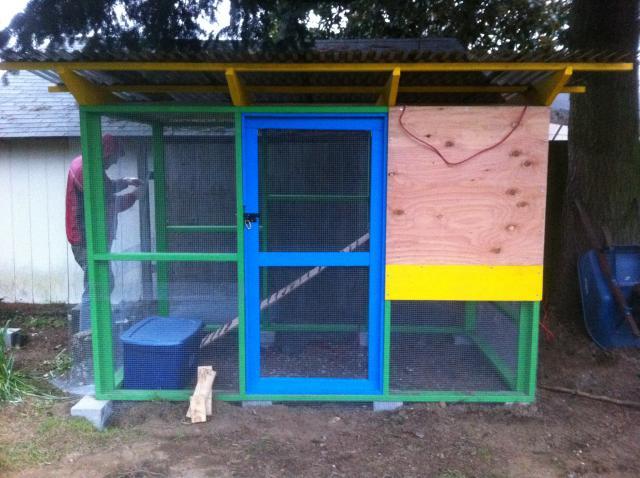
April 3rd-Built the roost using an old wooden ladder-THE CHICKS HAVE ENTERED THE NEW COOP!!!!!!!!! They were so scared, since they have lived thus far in a box in a basement. The wind, the rain-all very scary things. It took them a week before they decided to try out their ladder and check out the run. PHASE ONE COMPLETE!
PHASE 1.2
April 11th, 16th and 17th- An unexpected event has brought a new addition to the coop. A co-worker of mine came to work with a rabbit she found the night before. The poor thing was standing in the middle of the road in a drenching downpour and almost got hit by my co-worker. She stopped and picked him up, and since he seemed really friendly she brought him to work the next day looking for someone to give him a home. I know NOTHING about bunnies but agreed to try him out in the coop with the ladies. So the next weekend I built a bunny hutch instead of working on finishing the coop. The bunny will be let out once we finish the rest of the run addition, but for now must be locked in the hutch since the temporary hardware cloth cover on the left side of the coop is not secure enough to contain a bunny. At least I designed the run to be dig-proof when complete! I didn't know then that I was going to have a bunny to keep in but it's an awfully good thing that I dug the hardware cloth so far down!
This was the last work done on the coop until June. The rain simply did not stop in April or May, and I needed at least three dry days to build, stain and assemble the second part of the run-not to mention digging a trench for the hardware cloth!
PHASE 2-Uncovered run and release of the bunny!
June 16th-19th-Another 4 day weekend for me and two sunny days to build and stain! Got all the framing for the uncovered run build and stained, so when the Hubby's days off came we went to work. This was our second wedding anniversary and how better to spend it than finishing Phase 2 together. We leveled the foundation blocks as we attached the new run walls to the existing run-easy as pie! I convinced hubby that we really did need a post hole digger for the trench (he tried digging with the shovel for two hours before he agreed with me-then dug the remaining 20' in less than an hour). It did rain all day Sunday, but not badly enough to prevent us from finishing. By the end of the weekend all we had left was to wire the seams of the hardware cloth together, which I finished over the next week. FREE BUNNY and HAPPY CHICKENS!