WELCOME!
I first came across BYC while looking for an educational resource to support my goal of raising my own small flock of layers. Lurking before even registering, I learned so much from the questions others had and the experienced insight of the members.
From the helpful hints and encouragement of BYC members, I have gained the confidence to not only care for my small group of initial chicks, but to also tacking the exciting challenge of hatching from shipped eggs! This blog will serve as a journal for my first hatch, including the good, the bad, and the mistakes of a first-timer. I hope that if any of my ideas are found different or interesting, others can learn from my progress. The same goes for any errors of mistakes made along the way. Here goes…
My Initial Flock
In my spare time (which is pretty limited), I volunteer as an interpreter of Colonial History at two historic sites: The National Colonial Farm and The George Washington Birthplace National Monument. Both sites strive to preserve and promote heritage breeds, inclusive of period appropriate poultry. It was at the Colonial Farm that I first met Dominique, a lovely hen named for her breed!
The barring on her feathers was so striking and her connection to my favorite time period gave me a great deal of affection for the breed. When the time came for me to select chicks to be raised at our home, the choice seemed simple: Dominiques it was!
Uneasy with the prospect of ordering hatchery chicks (due to large minimum orders and the idea of being shipped so young…I wouldn’t enjoy that!), I sought to find a local breeder for my stock. As luck would have it, a gentleman nearby had week old chicks available. We drove down and were presented with eight Dominique pullets, $2 each. “Pretty cheap!”, I thought. Uh huh.
Pretty soon there after, I discovered that my “Dominiques” were actually Barred Plymouth Rocks, complete with single combs. Those “pullets” were also a mixed run! I waited four weeks to ensure the correct sexing and found my four little roos a brand new home. To say I was disheartened is a HUGE understatement.
As they say, though, everything happens for a reason. In my time at BYC, I had learned so much more about various breeds, continued my research, and had met some fantastic and VERY knowledgeable members. I had grown to really appreciate my little Rocks and am actually happy with how the situation worked out. I also found a whole new breed to be excited about: the Silver Penciled Plymouth Rock!
Silver Penciled Plymouth Rocks
After much research and reading, the breed just struck me. The penciled feathering on the pullets was like a fine lace. The incredible colors of the roos are magnificent! They would be similar in size to my Barred pullets, so integrating should be safe. Now where to find them?
As a relatively rare breed, finding chicks was proving to be a great challenge. Not wanting to go the route of hatchery sizes and straight runs made the task impossible! Asking one member about her own flock, she suggested abandoning the idea of live chicks for hatching eggs. She had done this is great results!
As soon as I read the words, I wondered why I hadn’t thought of that! I then remembered my inexperience and felt a lump in my throat. Hatching is an art and such a responsibility…was I capable? I knew that for my specific breed, there was only one person to ask: our own Wynette!
I had read so many of her posts and the endless reviews of her high quality hatching eggs! She seemed so knowledgeable and so willing to offer helpful advice to other members. Surely, she would be willing to give me some advice. I could have never imagined just how warm and kind she would be and the countless questions she answered. Better yet, she gave me the confidence to proceed with hatching on my own. Then sold me some of her fabulous eggs, to boot!
Hatching
Armed with as much reading and research as I could handle, I called up my local TSC and placed my order: a Still Air Little Giant Incubator, matching automatic egg turner attachment, and an Accurite indoor/outdoor thermometer with humidity and daily high/low readings. I also found a Brinsea Spot Check incubator thermometer, purchased for increased accuracy. I ordered one dozen SPPR hatching eggs from Wynette, set to ship out on 7/12/10 and was good to go.
7/12/10 – Incubator Set-up
Wynette shipped my eggs as scheduled, sending me a confirmation number first thing! I was so excited, I could barely sit still! My incubator and accessories had been delayed until today, so that was picked up in the afternoon and taken home for setup. The eggs are anticipated to arrive sometime between Wednesday and Thursday and has been requested for pick-up, rather than chance them being left out in the summer heat.
I got everything home and assembled in a room free from drafts and away from windows and doors. Setup was a cinch! Following the instructions, I added water to the small grooves in the incubator floor (about half way full for testing purposes). I popped on the lid and turned the thermostat all the way up, waiting for my temperature to be reached to them adjust down from there (per instructions). The light came on. I waited.
Watching all of those thermometers (three in total now), I was at 75 degrees all around. I waited some more. Still the light was on, still no change. After about 30 mins, I reached in and tapped the coils: not hot. I touched them: cold as could be. I unplugged it, waited some more, plugged it back in. Nothing. I had a busted ‘bator!
7/13/10 – New Incubator
The lovely folks at TSC gladly exchanged my damaged Little Giant for a new one. Set-up was completed once more and was successful! The knob was turned to the “hottest” degree setting and the temperature showed a steady climb. As the thermometers neared the 99 degree mark, we slowly backed the knob down until the temperature settled at 99.5 degrees. After several hours of checking, the temperature was maintaining this setting quite well. Water was added to the interior grids using a squirt bottle (like those used for condiments at cookouts), giving me a long narrow tip and the ability to leave the water at room temperature.
To confirm the actual temperature, the Brinsea Spot Check was inserted through one of the top vents with the probe tip at low to mid egg height (about the middle position of the embryo (were there eggs in place). The thermometers included with the incubator were off by approximately 2 degrees, reading higher than the actual temp. Slight adjustments were made by “squeezing” the knob to produce the smallest possible “turn”, as the temperature settings are sensitive. The humidity reading for the interior read consistently at 47% for several hours, rising to 48% through the night. The humidity level of the room was constant at 40% with a temperature of 74 degrees.

7/14/10 – They’re here!
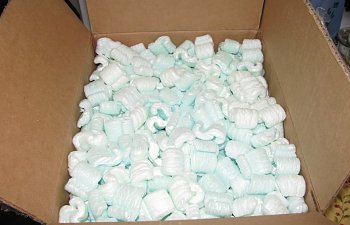
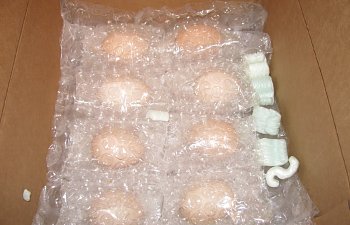
The SPPR hatching eggs arrived right on schedule. I couldn’t wait to open the box and see them! Wynette did a fabulous job of packaging them…you could have stood on the box without causing damage! Each egg was extremely clean (though certainly not washed) and individually wrapped in bubble packing. Several layers of larger bubble packing cushioned the eggs from the top and bottom (with a layer between eggs), topped off with packing peanuts! Incredible!
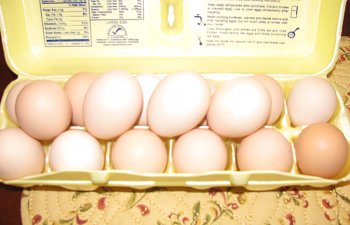
All eggs arrived intact and were carefully inspected for weakness or damage. One was somewhat questionable, having what appeared to be “veins” showing on the outside. I was not sure if this was caused during development or from a hairline crack. Candling the eggs would show if this was true weakness or just discoloration. Unable to find my light for candling, it was placed with the others in a carton to settle overnight.
7/15/10 – In they go!
All 16 eggs (4 extras were sent!) were placed in the incubator approximately 14 hours after unpacking. The temperature dipped significantly, as expected, reaching closer to 80 degrees, then slowly climbing back to the setting at 99.5-100.0. The humidity had dipped to 41% in the night. Lukewarm water was added to increase the level slightly.
7/22/10 – Day 7: First Candling
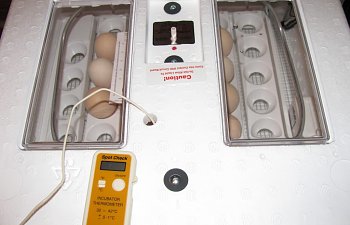
Using a high output (yet small) flashlight, I candled each egg, being careful to only open the incubator lid enough to slip in and out quickly. In two eggs, I believe I observed a blood ring, one being the original questionable egg, which was also more porous than any of the others. Being inexperienced, though, I plan to leave those two for a few more days and check back…just in case I have made an incorrect notation.
The majority of the eggs appeared to be fertile and developing. The color of the shells differs a bit, so some were easier to see into than others. One in particular showed clear movement in the embryo that really surprised me! I plan to candle again at day 10 or 11.
7/25/10 - Day 10: Second Candling
We definitely have some quitters, but none appear cracked or are creating any type of smell. I am planning to leave them until Day 15 or so, to clearly see who is going to be headed for lockdown on Day 18 and who will be opened up for investigation. I can see at least two bloodrings, possibly three. At least one egg shows virtually no sign of development, a couple of others appear to have started and given up. Several (the majority) look to be progressing nicely! For my first attempt and using shipped eggs, I'd be happy with just a couple chicks! Fingers crossed!!!
7/30/10 - Day 15: Third Candling
Looking again today, I saw three eggs which appeared to be chock full o'chick. Many of the others looked more like large blobs, but didn't seem as well defined. I am thinking that I may only get a 19% turnout...3 out of 16. Since I have never hatched or candled and none are weeping or stinking, I figure I'll leave them in until Day 18 and check them before lockdown.

8/2/10 - Day 18: Lockdown!
Well, my plan to re-candle prior to lockdown is toast. The hubby was trying to be super helpful and got them all set up for me. The temp is steady at 99.8 and the humidity is in the low 60s. I think it is probably best to leave them alone and let nature take its course, rather than to mess with the settings at all. We shall see...
8/4/10 - Day 20: First Pip!!!
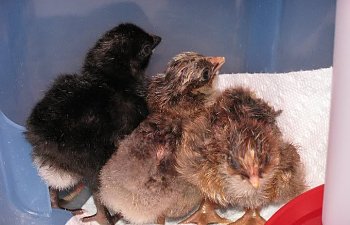
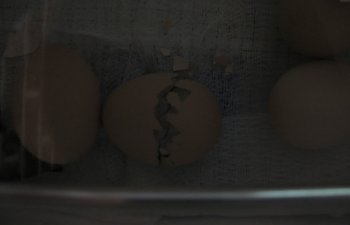
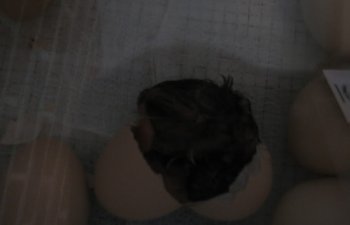
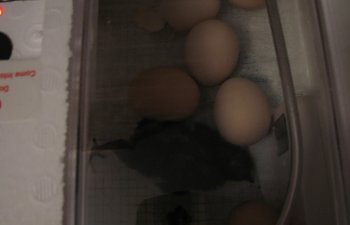
I woke up this morning to my first pip!!! WOOHOO!!! By 4 PM, we had two precious peepers and one new pip. The humidity in the incubator went from a controlled 65% to 73% following the first two pips, hatches, and third pip. The chicks are fluffing out slowly. One is obviously the expected SPPR...the other is a...SURPRISE Black Jersey Giant! The eggs got mixed up during collection! Both are healthy and using the other eggs as bumpers as they bounce all over!
8/5/10 - Day 21: Third Chick!
Our third chick hatched this morning, waiting for me to get up and ready for work. It really seemed to struggle, but is doing well with the other two. No new pips, sounds, or movement, so the candling seems confirmed. We'll plan to wait a bit longer, just in case. With everyone well fluffed, we moved the newbies to their brooder late in the evening. We checked on them several times and everyone was exploring and checking out the waterer.
About 14 hours after the third chick hatched, I noticed that she had laid down by herself out near the center of the brooder. As they all kept taking short breaks from exploring, I figured that she was just warming for a second. Her beak was opening and closing, but she had been drinking well. She flipped onto her back a little, then started moving her feet and wings...not in a distressed fashion, just a little movement. I touched her to flip her onto her side in case she felt stuck. She went limp and stopped breathing. We lost out third chick, the second SPPR.
8/11/10 - One Week Old!
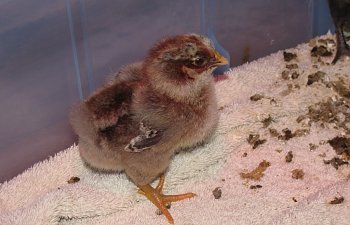
Today, the two surviving chicks are doing quite well! They are friendly and very active, eating, and drinking (and pooping!) well. We candled the remaining eggs after movingthe babies to the brooder and found them all to be confirmed quitters. They were buried along with Chick #3, to give back them back to nature.
8/14/10 - Tragedy and a New Beginning
Today, I set 14 gorgeous new SPPR eggs in the incubator! I am leaving the temperature a little lower for this hatch (around 99.3), to avoid the potential of a heat spike. Even with the high/low readings on the weather station, we are concerned that this is what led to such a low hatch rate on the last group. I cleaned the brooder and went to the barn to take care of the other babies. I returned to find a massacre! Our Jack Russell Terror broke through two gates and wire to get to the brooder. We are still uncertain of how he was able to manage this, but the damage is done. Both chicks have perished!!!
8/24/10 - Day 10: First Candling of 2nd Hatch
We candled our second batch of SPPRs and found that at least 11 out of 14 are developing!!! One of the additional three was porous but appeared to have good development. As this egg was more difficult to read, it wasn't included in the good count. Another seemed to have a bloodring, but then seemed to show movement! I set it in a different location to watch. The third was much lighter, but not clear. As it's shell was on the darker side, I'm not sure how impacted my viewing was. None had any cracks or imperfections, weeping, or smells, so they'll stay put for now. We plan to keep a close eye and re-candle on Day 18, to choose who will go into lockdown.

