The Darbo-McClellan hobby farm just added chickens.
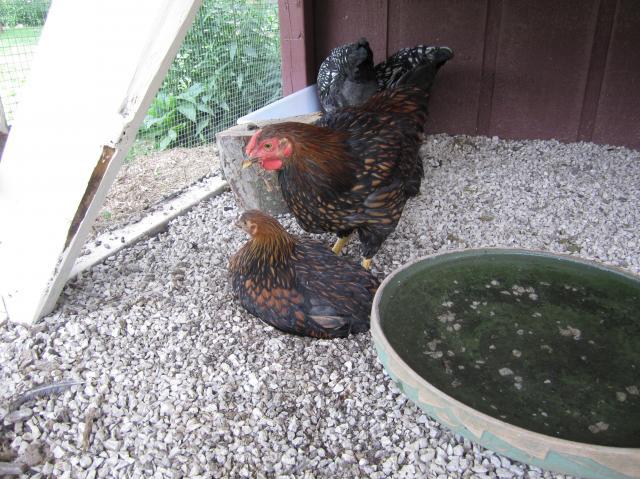
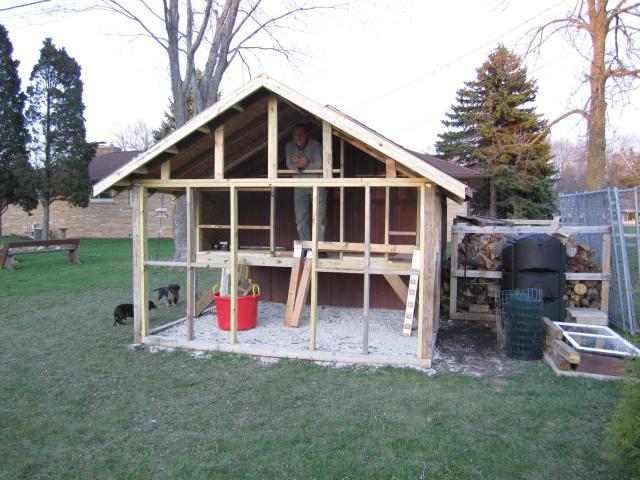
We purchased 4 Wyandotte, 3 day old chicks. The coop was built as the babies were growing. We housed them in a dog kennel until the coop was complete. We built the coop to join onto our already existing shed. We already had a gravel floor that had been used previously as a wood pile. The only thing we had to change was the floor size. It worked out great since the gravel would allow moisture/water to drain through. This allows us to be able to thourghally wash out the coop about once a month. Again this is our first time to have chickens so we are still learning.

We looked through several pictures of other coops to get ideas of how to build and we would add or take out of the desings. After putting the frame up we then started building the actual housing part of the coop. The ideas we had were how big, ventilation, and making sure we insulated it completely since we live in Wisconsin.
We have a roof and a housing area for the chicks.
The area were my husband is looking out of is going to be an open area with fencing. This will allow for extra ventilation. In the winter we plan on covering this area with insulation and boards to keep out the cold.
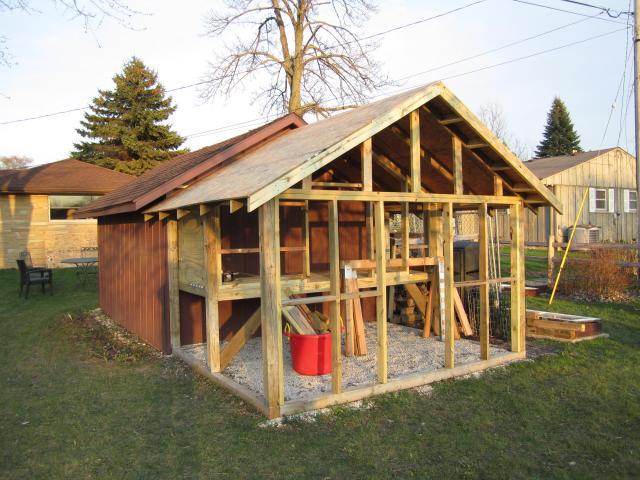
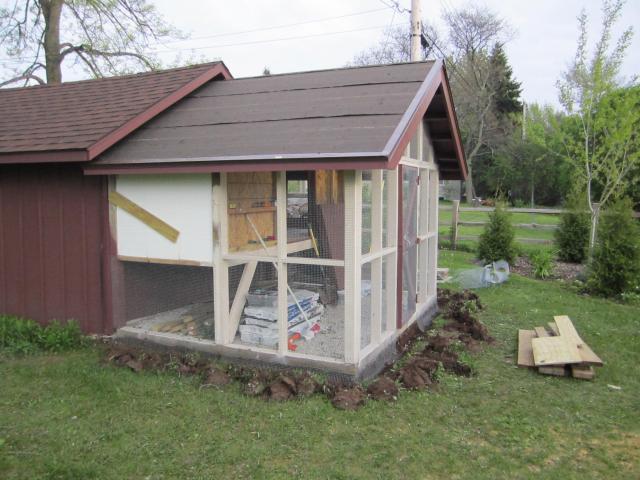
The next phase is to finish the front of the housing area, paint, put on doors and fencing. These next pictures show the coop after we painted, put on doors and fencing. As you can see we dug about 1-2 feet down to bury the fencing to be sure to keep out predators. Not only do they have to dig under but also dig up around 6 inches of gravel. After the fencing was on we put the chicken in their new home.
The chickens are in their new home. The neighbor kids are helping.
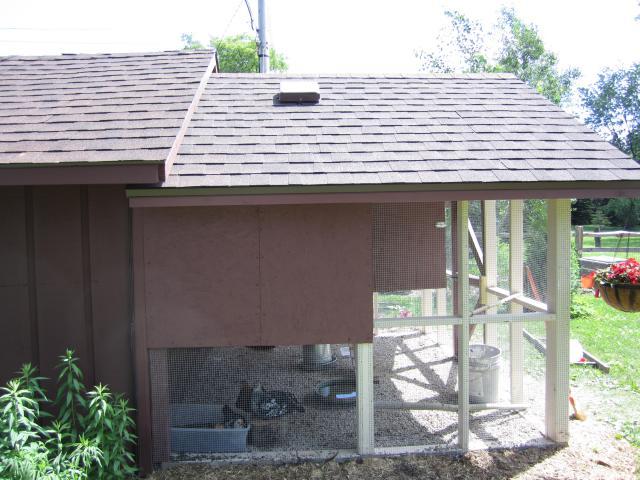
We have now insulated the floor and all walls. The ceiling will be insulated before winter and the wall that is inside the shed will be insulated.
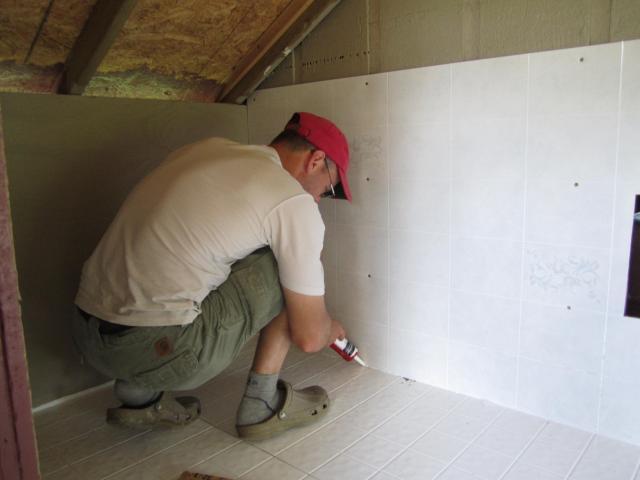
Now we have finished roofing, ceiling vents, several perches, a dirt bathing area and enrichment. We added shower backer board to the inside of the coop to make it easier to clean and a nesting box. We debated on adding shower board because of how slippery it would be for the chickens. They have been on newspaper since chicks and with bedding/shaving down they seem to be adjusting well. As for the nesting box they haven't wanted to go in yet. Not sure if we will have to build another one or just hope that when they get ready to lay, which will be around October/November they will figure it out.
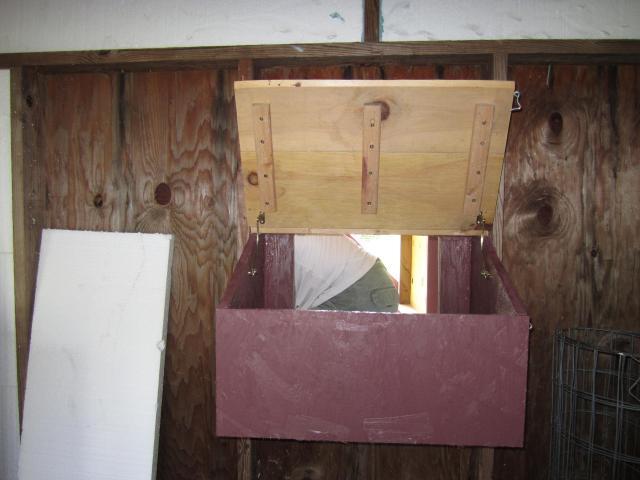
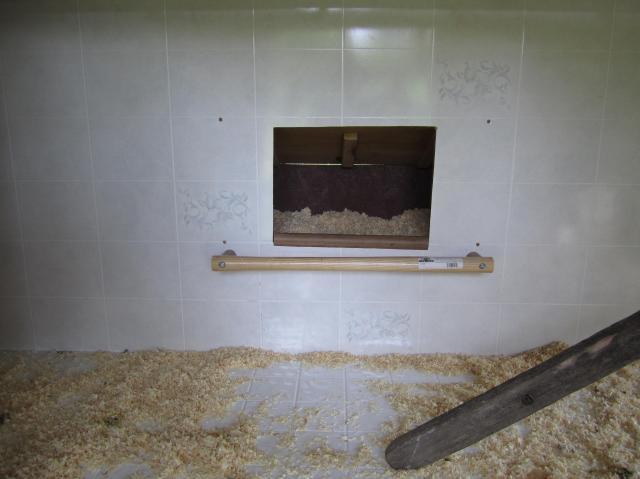
Our nesting box inside the shed.
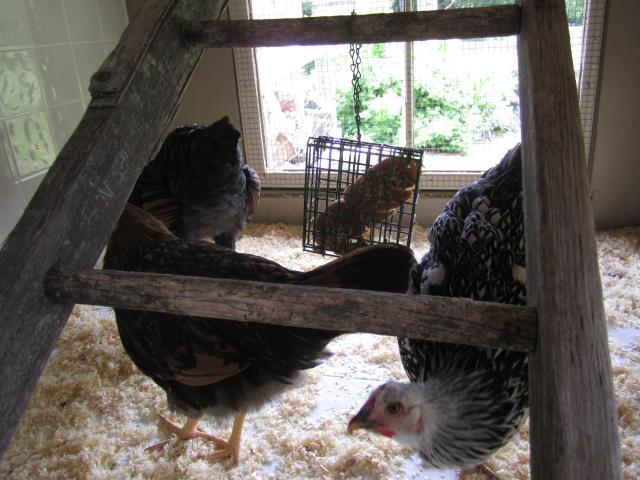
We have given the chicken different types of enrichment. Here are pictures of thier log that my husband drilled holes in. I made a peanut butter, dried meal worm, chick feed mixtures and shoved it in the holes. They loved it. I also bought a suet feeder and use it to put veggies, fruit and bread in. I will hang it so the chicken will have to find it and then peck at it to get the food out. Hours of fun!
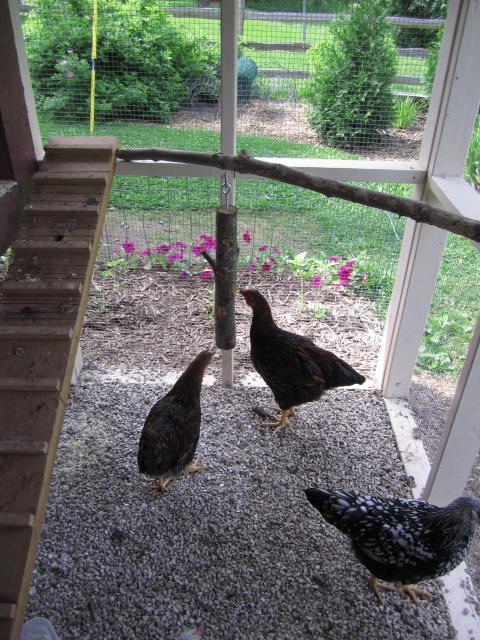
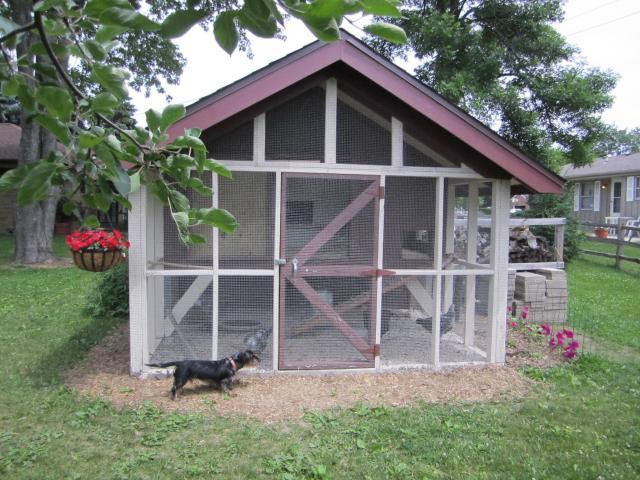
This is what our coop looks like today. We are still learning and change things around as we go. I have worked with the dogs with positive reinforcement to leave the chickens alone. The dogs are doing great and the chickens actually like the dog coming by the coop. They will follow him.
One last thing. Even though we ordered hens you never know if you'll get a rooster. This is our rooster! We love him and he is going to be a very handsome rooster. Unfortunelty we can't have roosters so we have found a home for him on a farm. He will be able to have a flock of hens at his new home.
We purchased 4 Wyandotte, 3 day old chicks. The coop was built as the babies were growing. We housed them in a dog kennel until the coop was complete. We built the coop to join onto our already existing shed. We already had a gravel floor that had been used previously as a wood pile. The only thing we had to change was the floor size. It worked out great since the gravel would allow moisture/water to drain through. This allows us to be able to thourghally wash out the coop about once a month. Again this is our first time to have chickens so we are still learning.
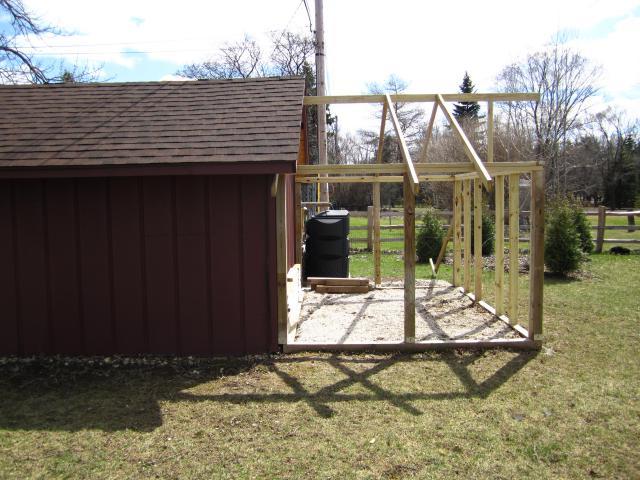

We looked through several pictures of other coops to get ideas of how to build and we would add or take out of the desings. After putting the frame up we then started building the actual housing part of the coop. The ideas we had were how big, ventilation, and making sure we insulated it completely since we live in Wisconsin.
We have a roof and a housing area for the chicks.
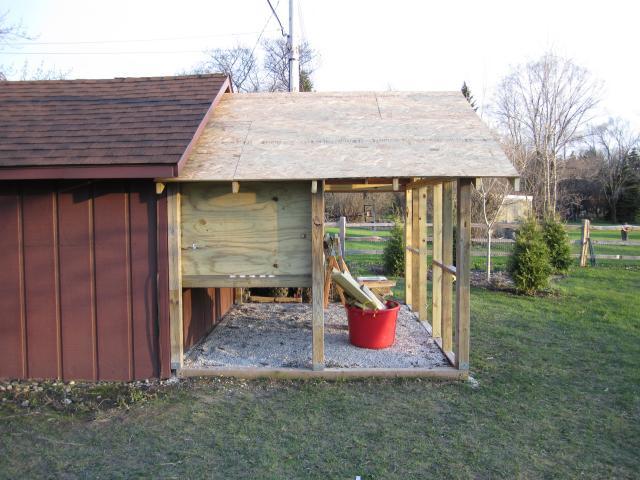
The area were my husband is looking out of is going to be an open area with fencing. This will allow for extra ventilation. In the winter we plan on covering this area with insulation and boards to keep out the cold.
The next phase is to finish the front of the housing area, paint, put on doors and fencing. These next pictures show the coop after we painted, put on doors and fencing. As you can see we dug about 1-2 feet down to bury the fencing to be sure to keep out predators. Not only do they have to dig under but also dig up around 6 inches of gravel. After the fencing was on we put the chicken in their new home.

The chickens are in their new home. The neighbor kids are helping.

We have now insulated the floor and all walls. The ceiling will be insulated before winter and the wall that is inside the shed will be insulated.
Now we have finished roofing, ceiling vents, several perches, a dirt bathing area and enrichment. We added shower backer board to the inside of the coop to make it easier to clean and a nesting box. We debated on adding shower board because of how slippery it would be for the chickens. They have been on newspaper since chicks and with bedding/shaving down they seem to be adjusting well. As for the nesting box they haven't wanted to go in yet. Not sure if we will have to build another one or just hope that when they get ready to lay, which will be around October/November they will figure it out.
Our nesting box inside the shed.

We have given the chicken different types of enrichment. Here are pictures of thier log that my husband drilled holes in. I made a peanut butter, dried meal worm, chick feed mixtures and shoved it in the holes. They loved it. I also bought a suet feeder and use it to put veggies, fruit and bread in. I will hang it so the chicken will have to find it and then peck at it to get the food out. Hours of fun!
This is what our coop looks like today. We are still learning and change things around as we go. I have worked with the dogs with positive reinforcement to leave the chickens alone. The dogs are doing great and the chickens actually like the dog coming by the coop. They will follow him.
One last thing. Even though we ordered hens you never know if you'll get a rooster. This is our rooster! We love him and he is going to be a very handsome rooster. Unfortunelty we can't have roosters so we have found a home for him on a farm. He will be able to have a flock of hens at his new home.