Back when my daughter was six or seven she happened to go to the farmers supply with me. It was spring and they guys up at the Co-op had the ducks and chicks out for sale. Of course EVERY 6 year old thinks that baby ducks and chicks are adorable and so it has been a tradition for years to go by the Farm Store every spring to play with he babies.
Every year it's the same thing. She begs me to take some home.
Well, I retired about 6 years ago due to some really well placed investments before the real estate market crashed, and we moved out of the city onto a small 2.5 acre plot. My daughter is a senior this year and has been accepted to the University of Central Arkansas. I figured it was "Now or Never", so, for Easter she and her brother got 4 chicks and 2 ducks.
The look on her face was priceless by the way...
Anyways, if you have chickens, you need a chicken house. I began to do research online about how to, what to, where to and all the other "to's" that needed to o happen...and quickly. Apparently chickens are awfully stinky when set under a heat lamp in ones living room!
I found this site, and it seems to have the most useful info. Now that I have built my chicken coop, I thought I would share it with the rest of you since I pretty much borrowed ideas from many of the other chicken owners on this site. My coop would probably be considered a medium sized coop. It is only 5'x10' and the chicken house itself is 4'x5'.

I first built the foundation. I used a mixture of sand, gravel, dirt and a bit of portland cement to build up a "hardpan" and then put the pabving stones on top. This will be hard enough that predetors cannot tunnel through, but will drain when I spray it off.
Here is a detail of the foundation. I had to cut a few of the paving stones to fit.
Spray everything off with a hose to activate the portland cement, and take the rest fo the day off.")
I framed everything with treated lumber. It gets humid here in Arkansas, not to mention all the rain we get so wood will rot quickly if it is untreated and left outside.
The Hen House itself was bult with 3/8 T1-11 Siding. If painted or stained it holds up pretty well
I wired the Coop to include a light in the Hen House, (or a heat lamp in the winter), A light in the coop itself, a fan to help with ventilation in the summer time and an outlet in the front as well as one up at the rafters for a bug zapper.
Roof framing complete.
Detail of Roof Framing
Nesting boxes added. Got a little fancy here with the rafters and the supports.
Yes, I realize that 8 nesting boxes is overkill for 4 chickens, but this way as I add to my flock, I do not have to retrofit the chicken coop. My understanding is that I can have up to two chickens per nesting box, so if I add to the yard, I can feasibly have up to 16 chickens. That is WAY more eggs than I can eat! ;-)
The first coat of stain. I used a semi-solid oil based stain. Call me old school, but I have just noticed that oil based products hold up better to weather extremes than latex or acrylic products.
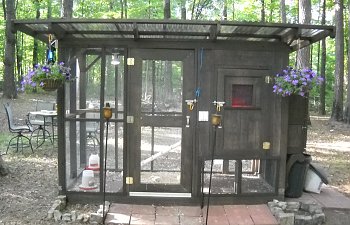
The finished product. Added some hanging plants, the bug light, and a couple of small flowerbeds. The roof is smoke colored lexan. the walls are 1/2"x1/2" galvanized hardware cloth. Installed a door sweep to help keep out the mice and snakes. Also, I did not want to catch my clothes or a finger on the metal screen so I installed lattice over the edges of the screen. After looking at the lattice Lowes and Home Depot had to offer, I got some treated 2x4s, ripped them on my table saw, and made my own. It is twice as thick as what they were selling (about 1/4"-3/16" thick), so i figure it will hold up better.
Home at last! Resting comfortably...
Every year it's the same thing. She begs me to take some home.
Well, I retired about 6 years ago due to some really well placed investments before the real estate market crashed, and we moved out of the city onto a small 2.5 acre plot. My daughter is a senior this year and has been accepted to the University of Central Arkansas. I figured it was "Now or Never", so, for Easter she and her brother got 4 chicks and 2 ducks.
The look on her face was priceless by the way...
Anyways, if you have chickens, you need a chicken house. I began to do research online about how to, what to, where to and all the other "to's" that needed to o happen...and quickly. Apparently chickens are awfully stinky when set under a heat lamp in ones living room!
I found this site, and it seems to have the most useful info. Now that I have built my chicken coop, I thought I would share it with the rest of you since I pretty much borrowed ideas from many of the other chicken owners on this site. My coop would probably be considered a medium sized coop. It is only 5'x10' and the chicken house itself is 4'x5'.
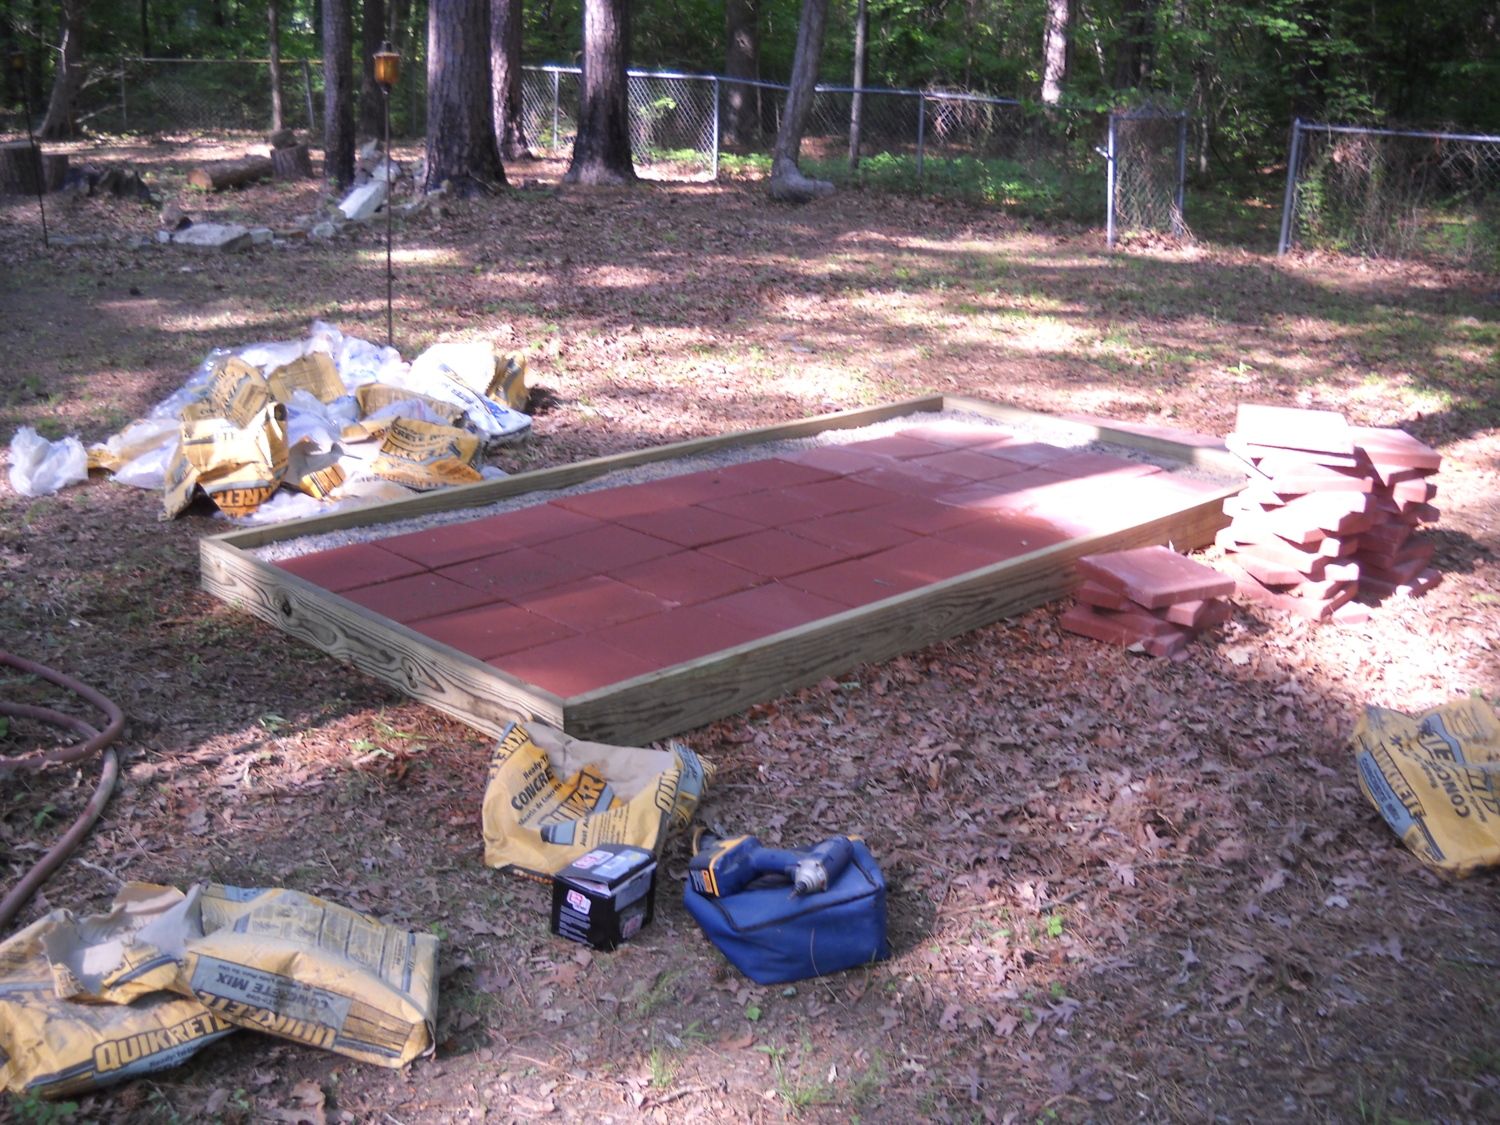
I first built the foundation. I used a mixture of sand, gravel, dirt and a bit of portland cement to build up a "hardpan" and then put the pabving stones on top. This will be hard enough that predetors cannot tunnel through, but will drain when I spray it off.
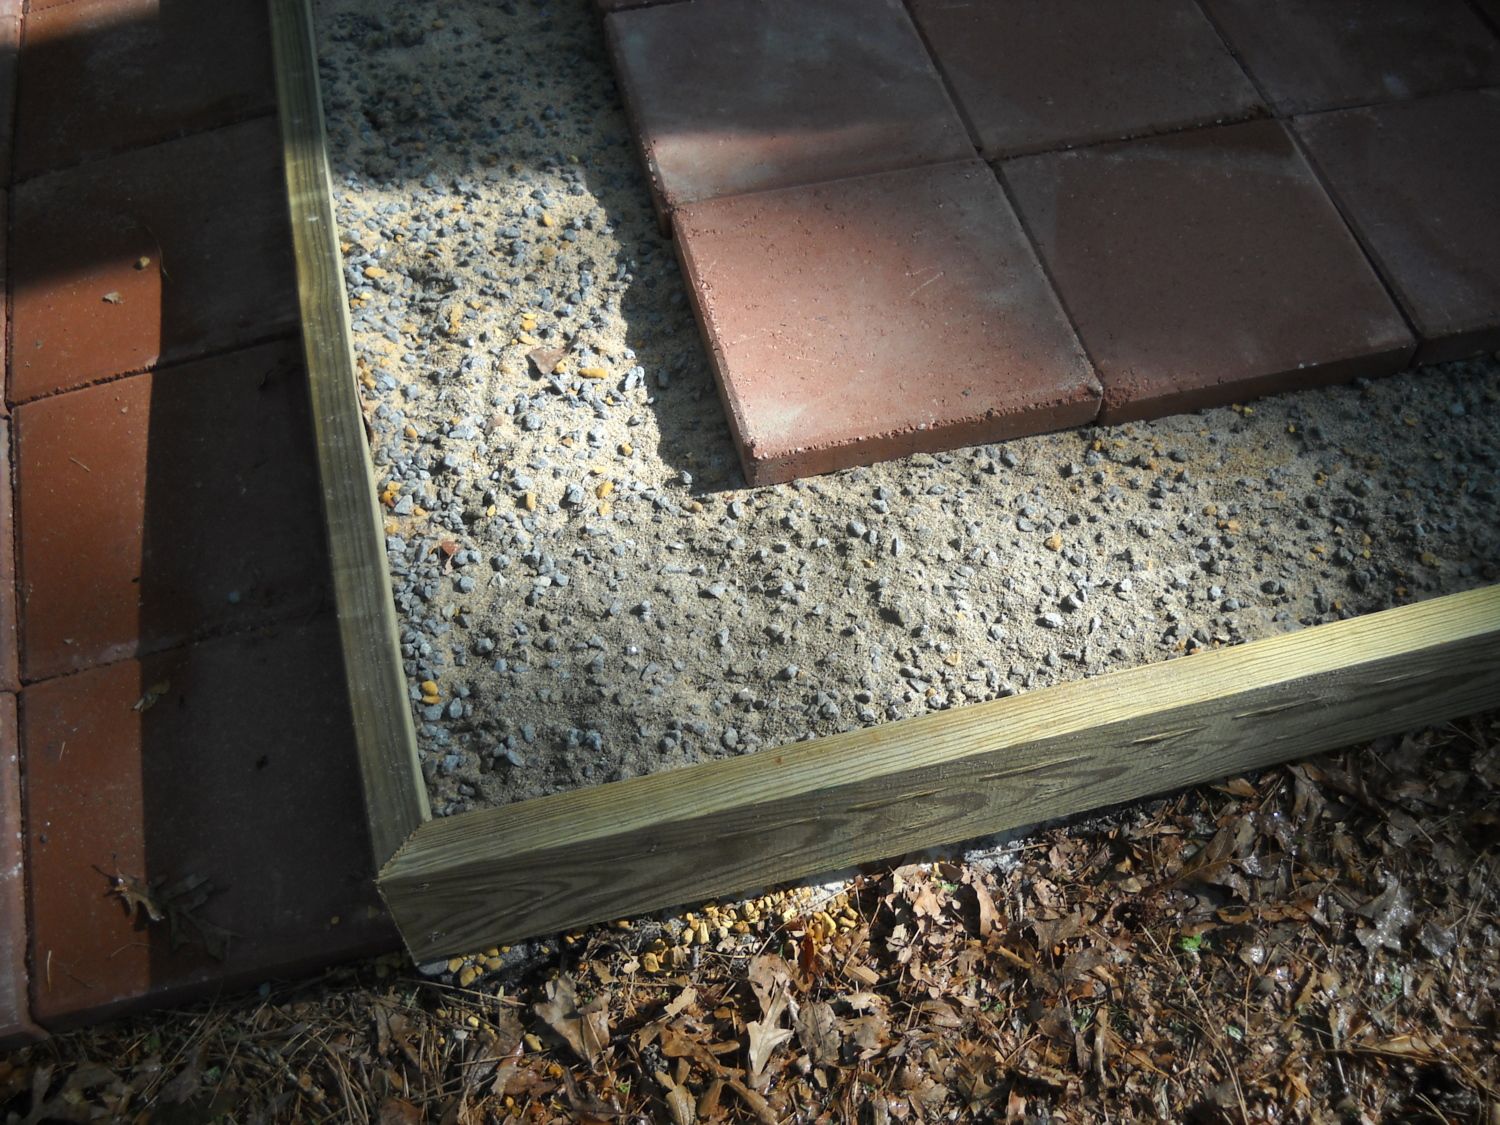
Here is a detail of the foundation. I had to cut a few of the paving stones to fit.
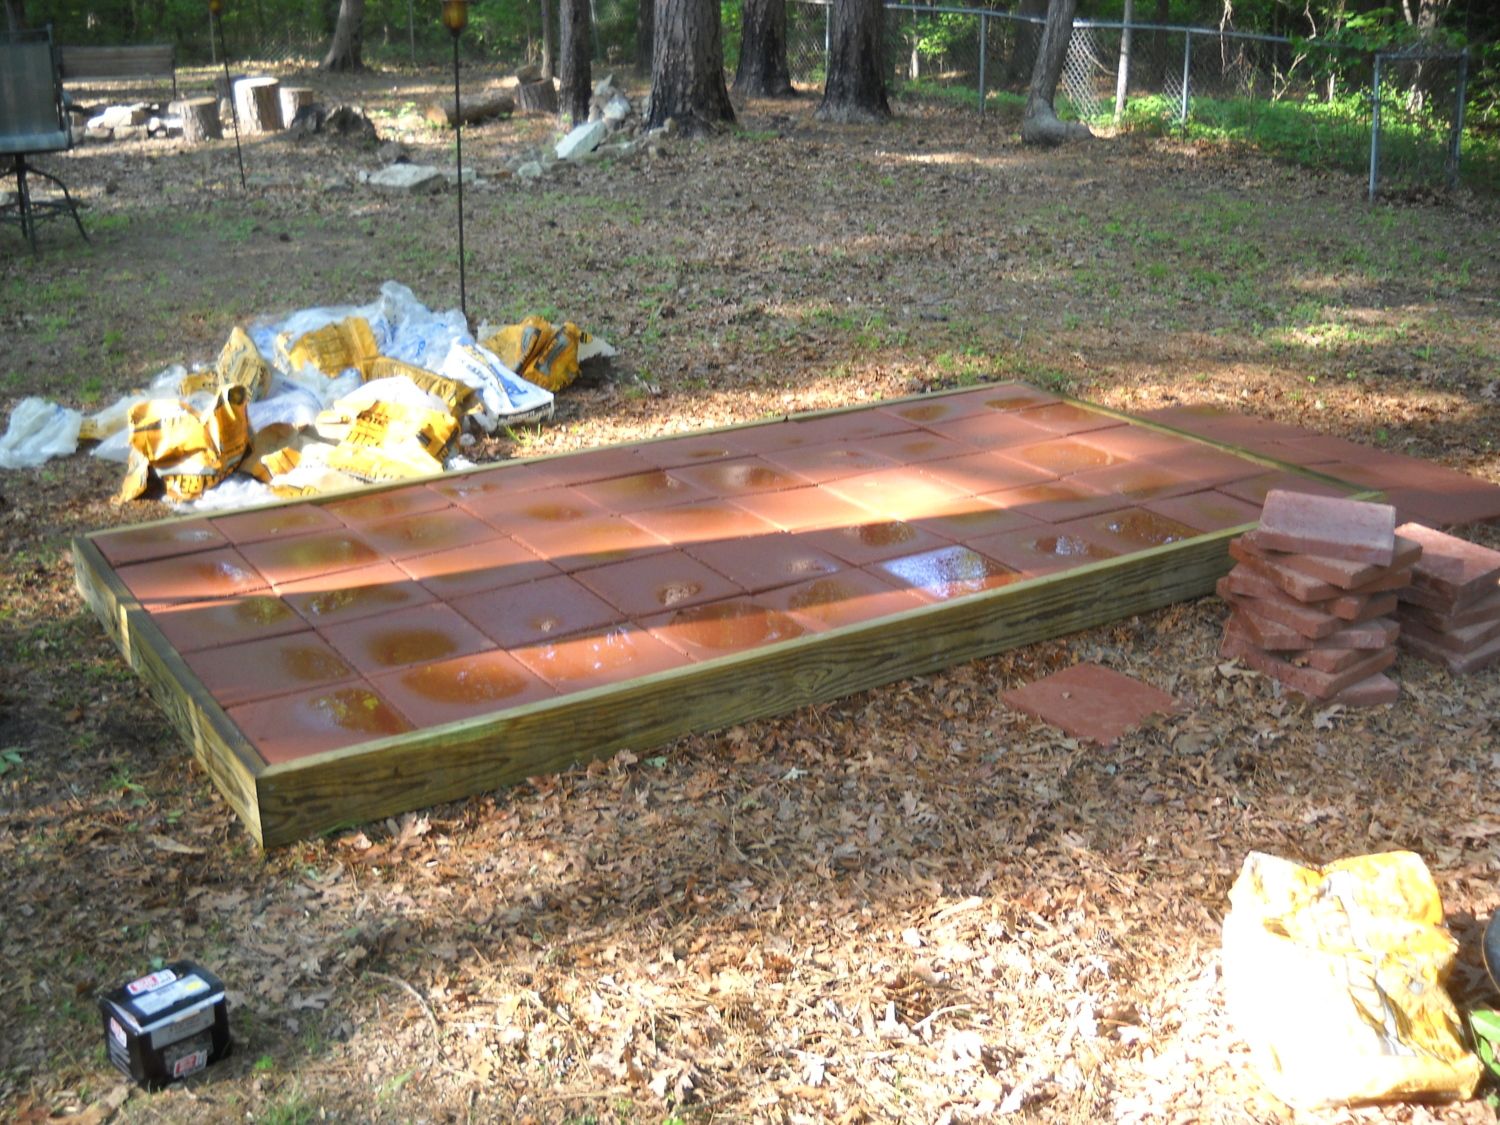
Spray everything off with a hose to activate the portland cement, and take the rest fo the day off.
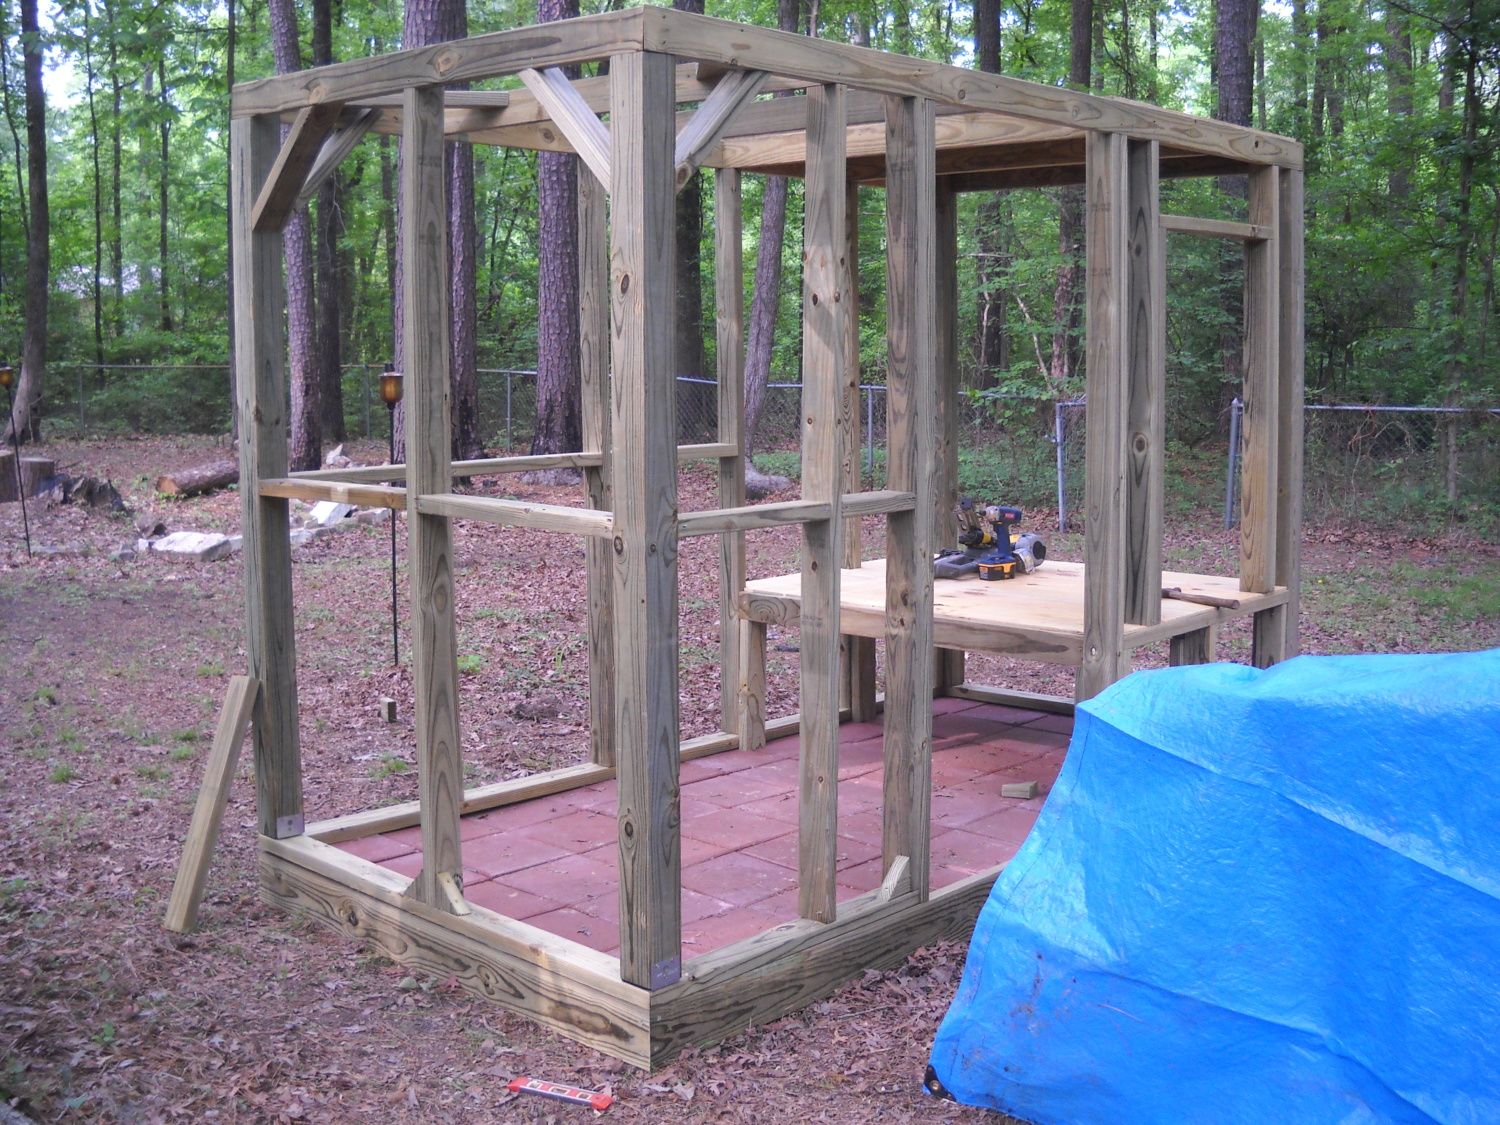
I framed everything with treated lumber. It gets humid here in Arkansas, not to mention all the rain we get so wood will rot quickly if it is untreated and left outside.
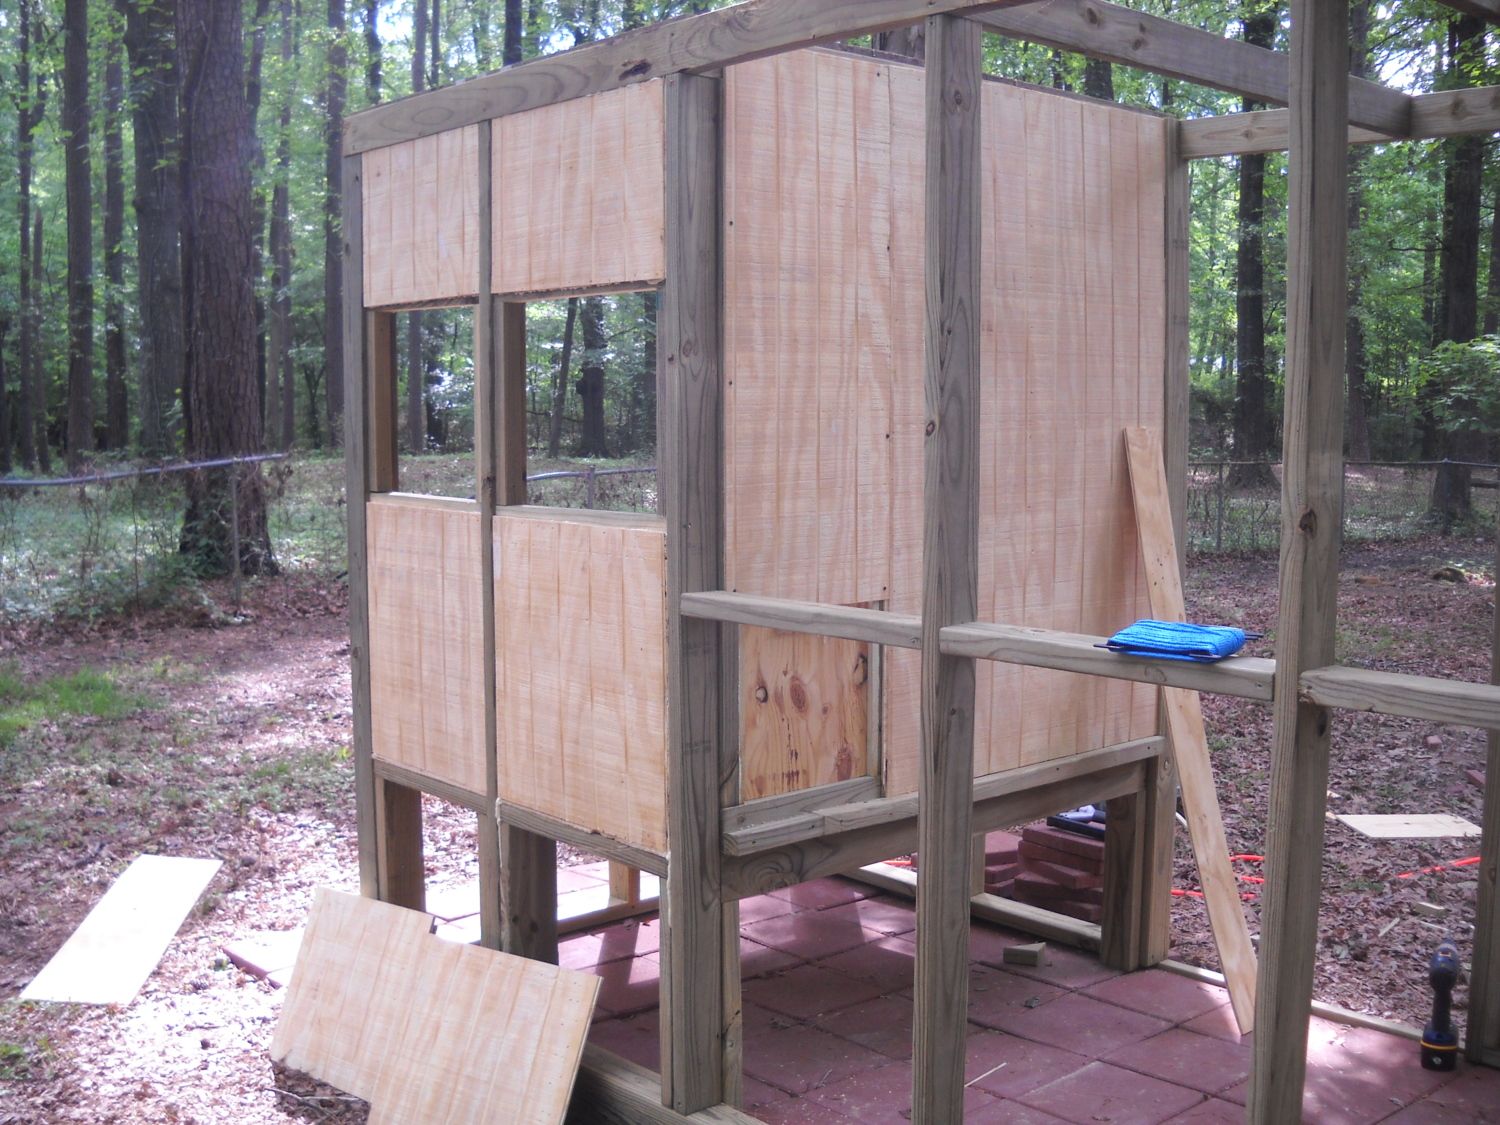
The Hen House itself was bult with 3/8 T1-11 Siding. If painted or stained it holds up pretty well
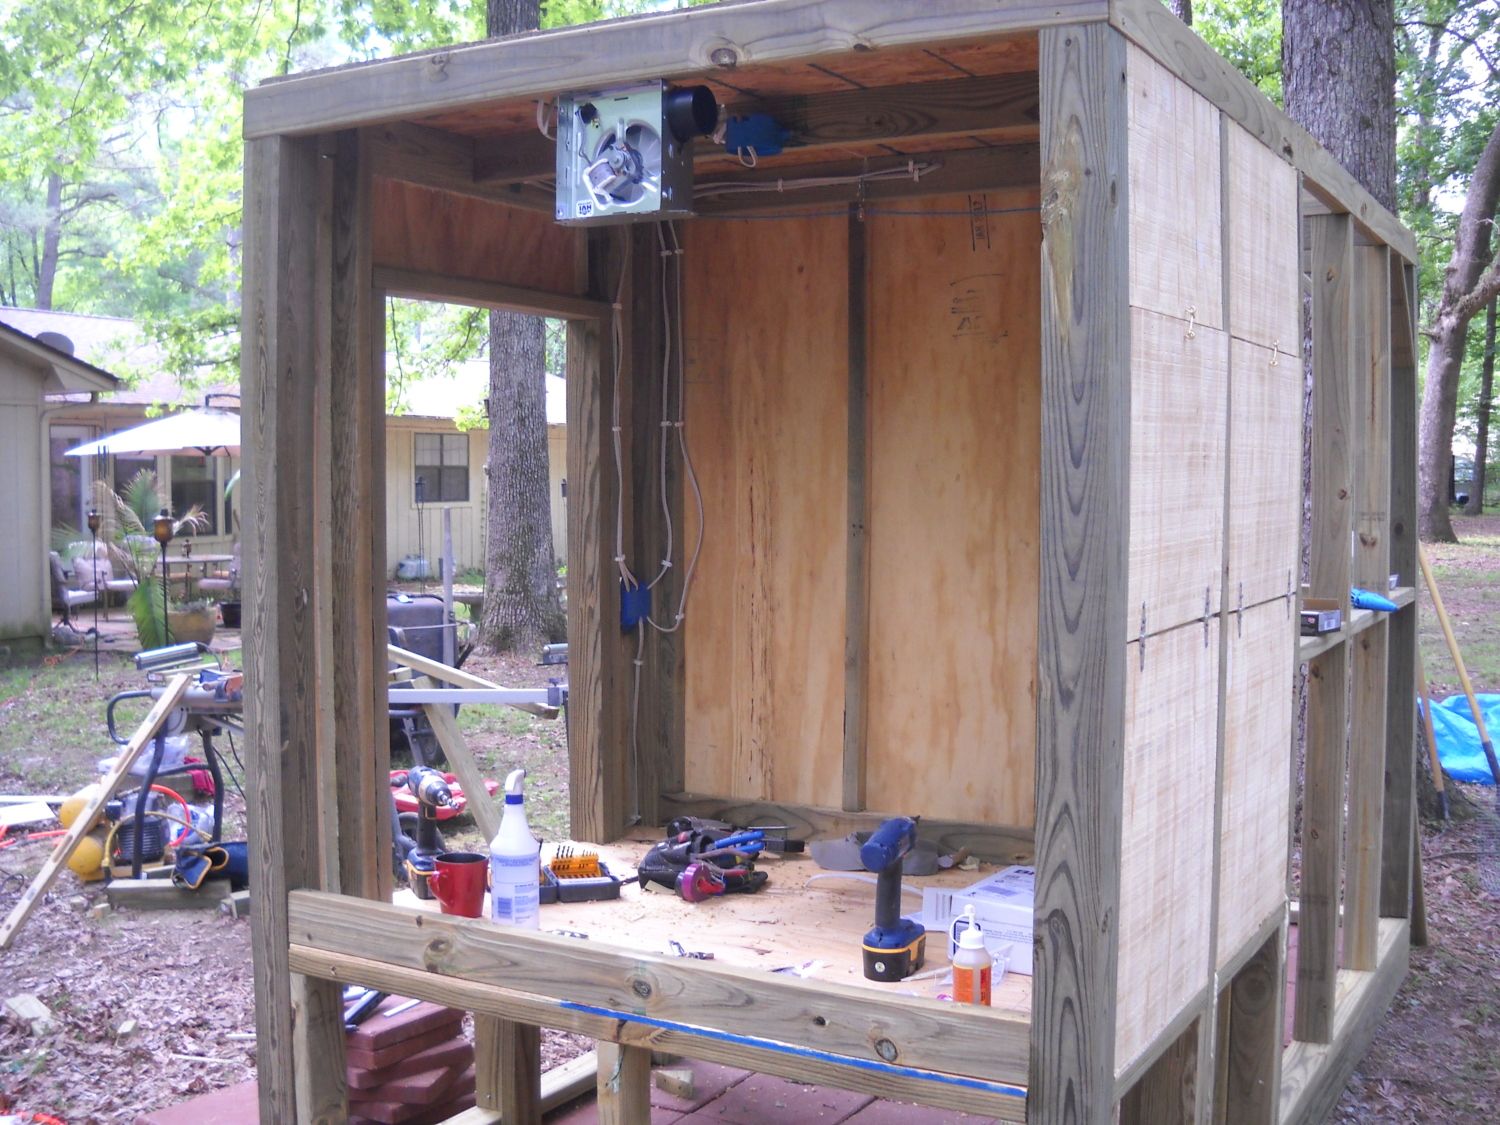
I wired the Coop to include a light in the Hen House, (or a heat lamp in the winter), A light in the coop itself, a fan to help with ventilation in the summer time and an outlet in the front as well as one up at the rafters for a bug zapper.
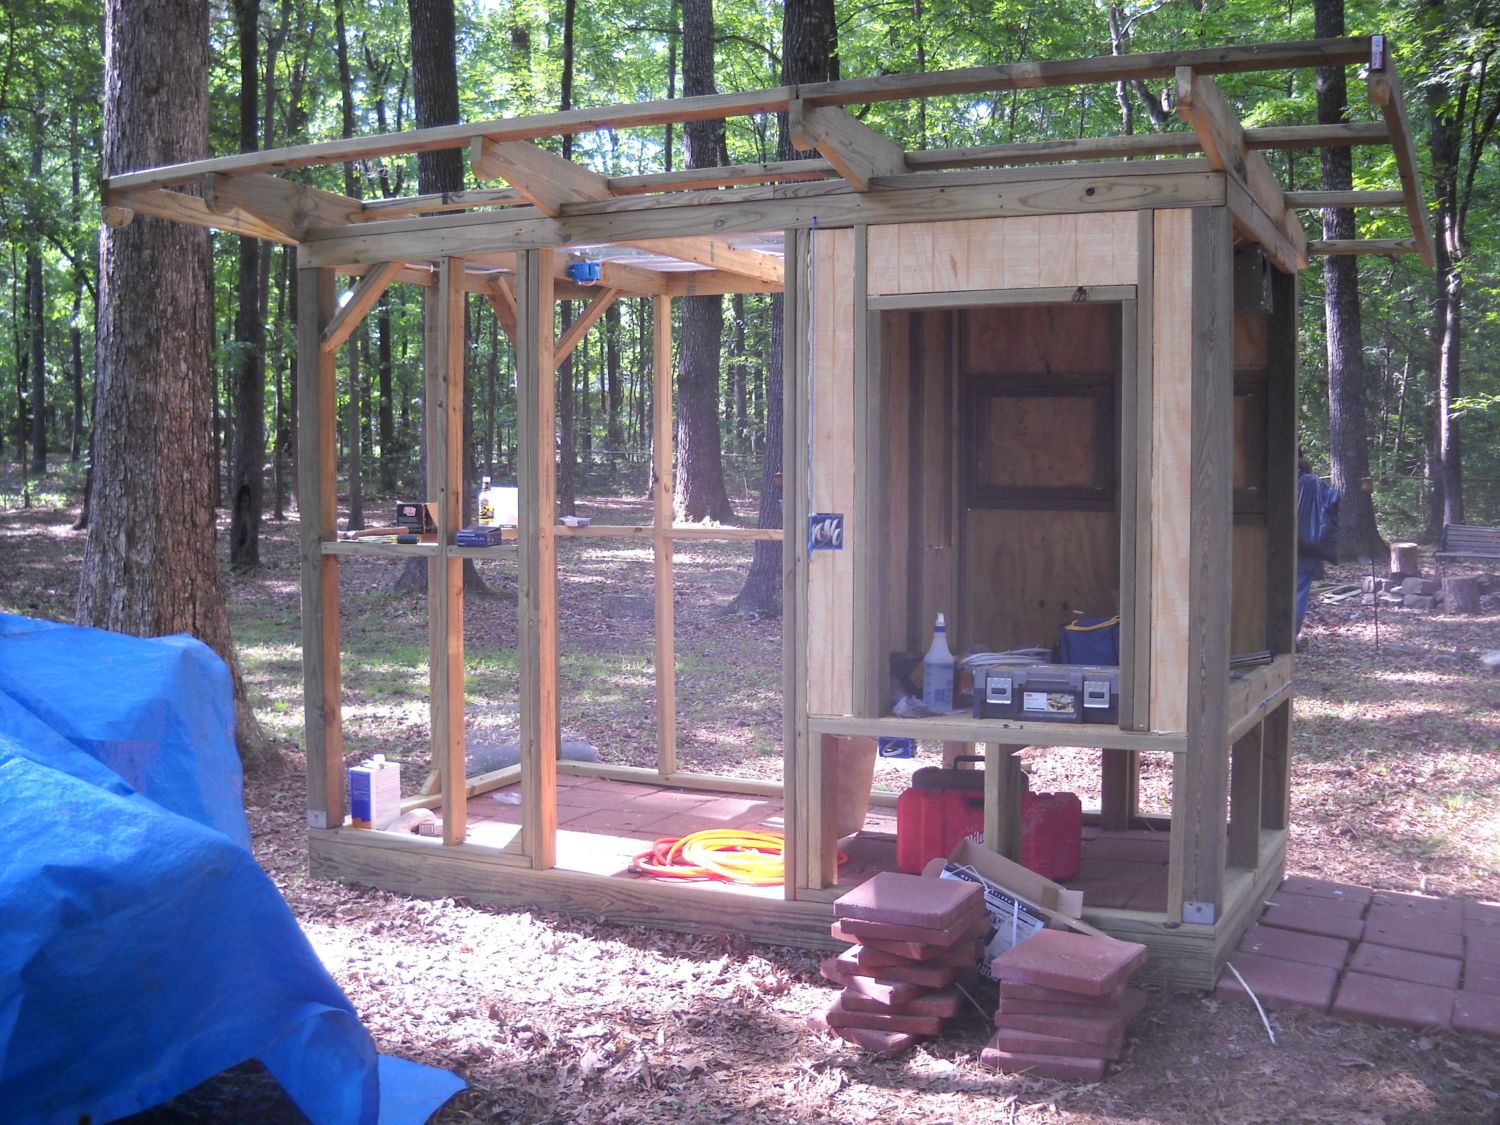
Roof framing complete.
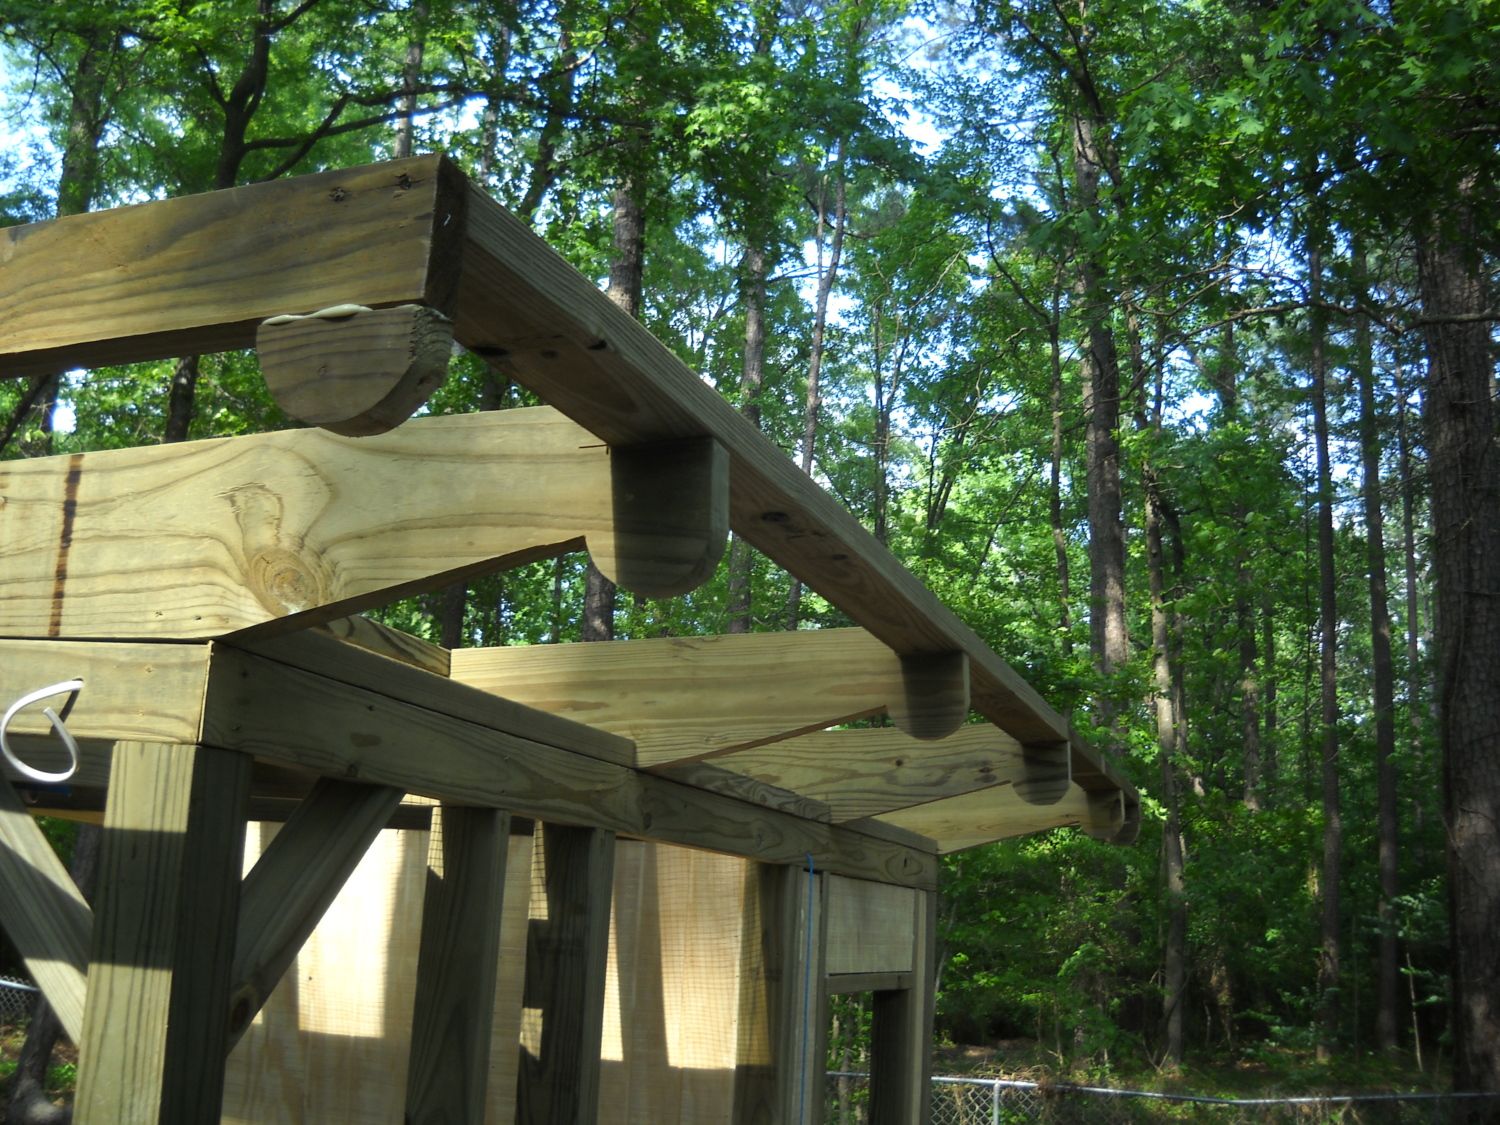
Detail of Roof Framing
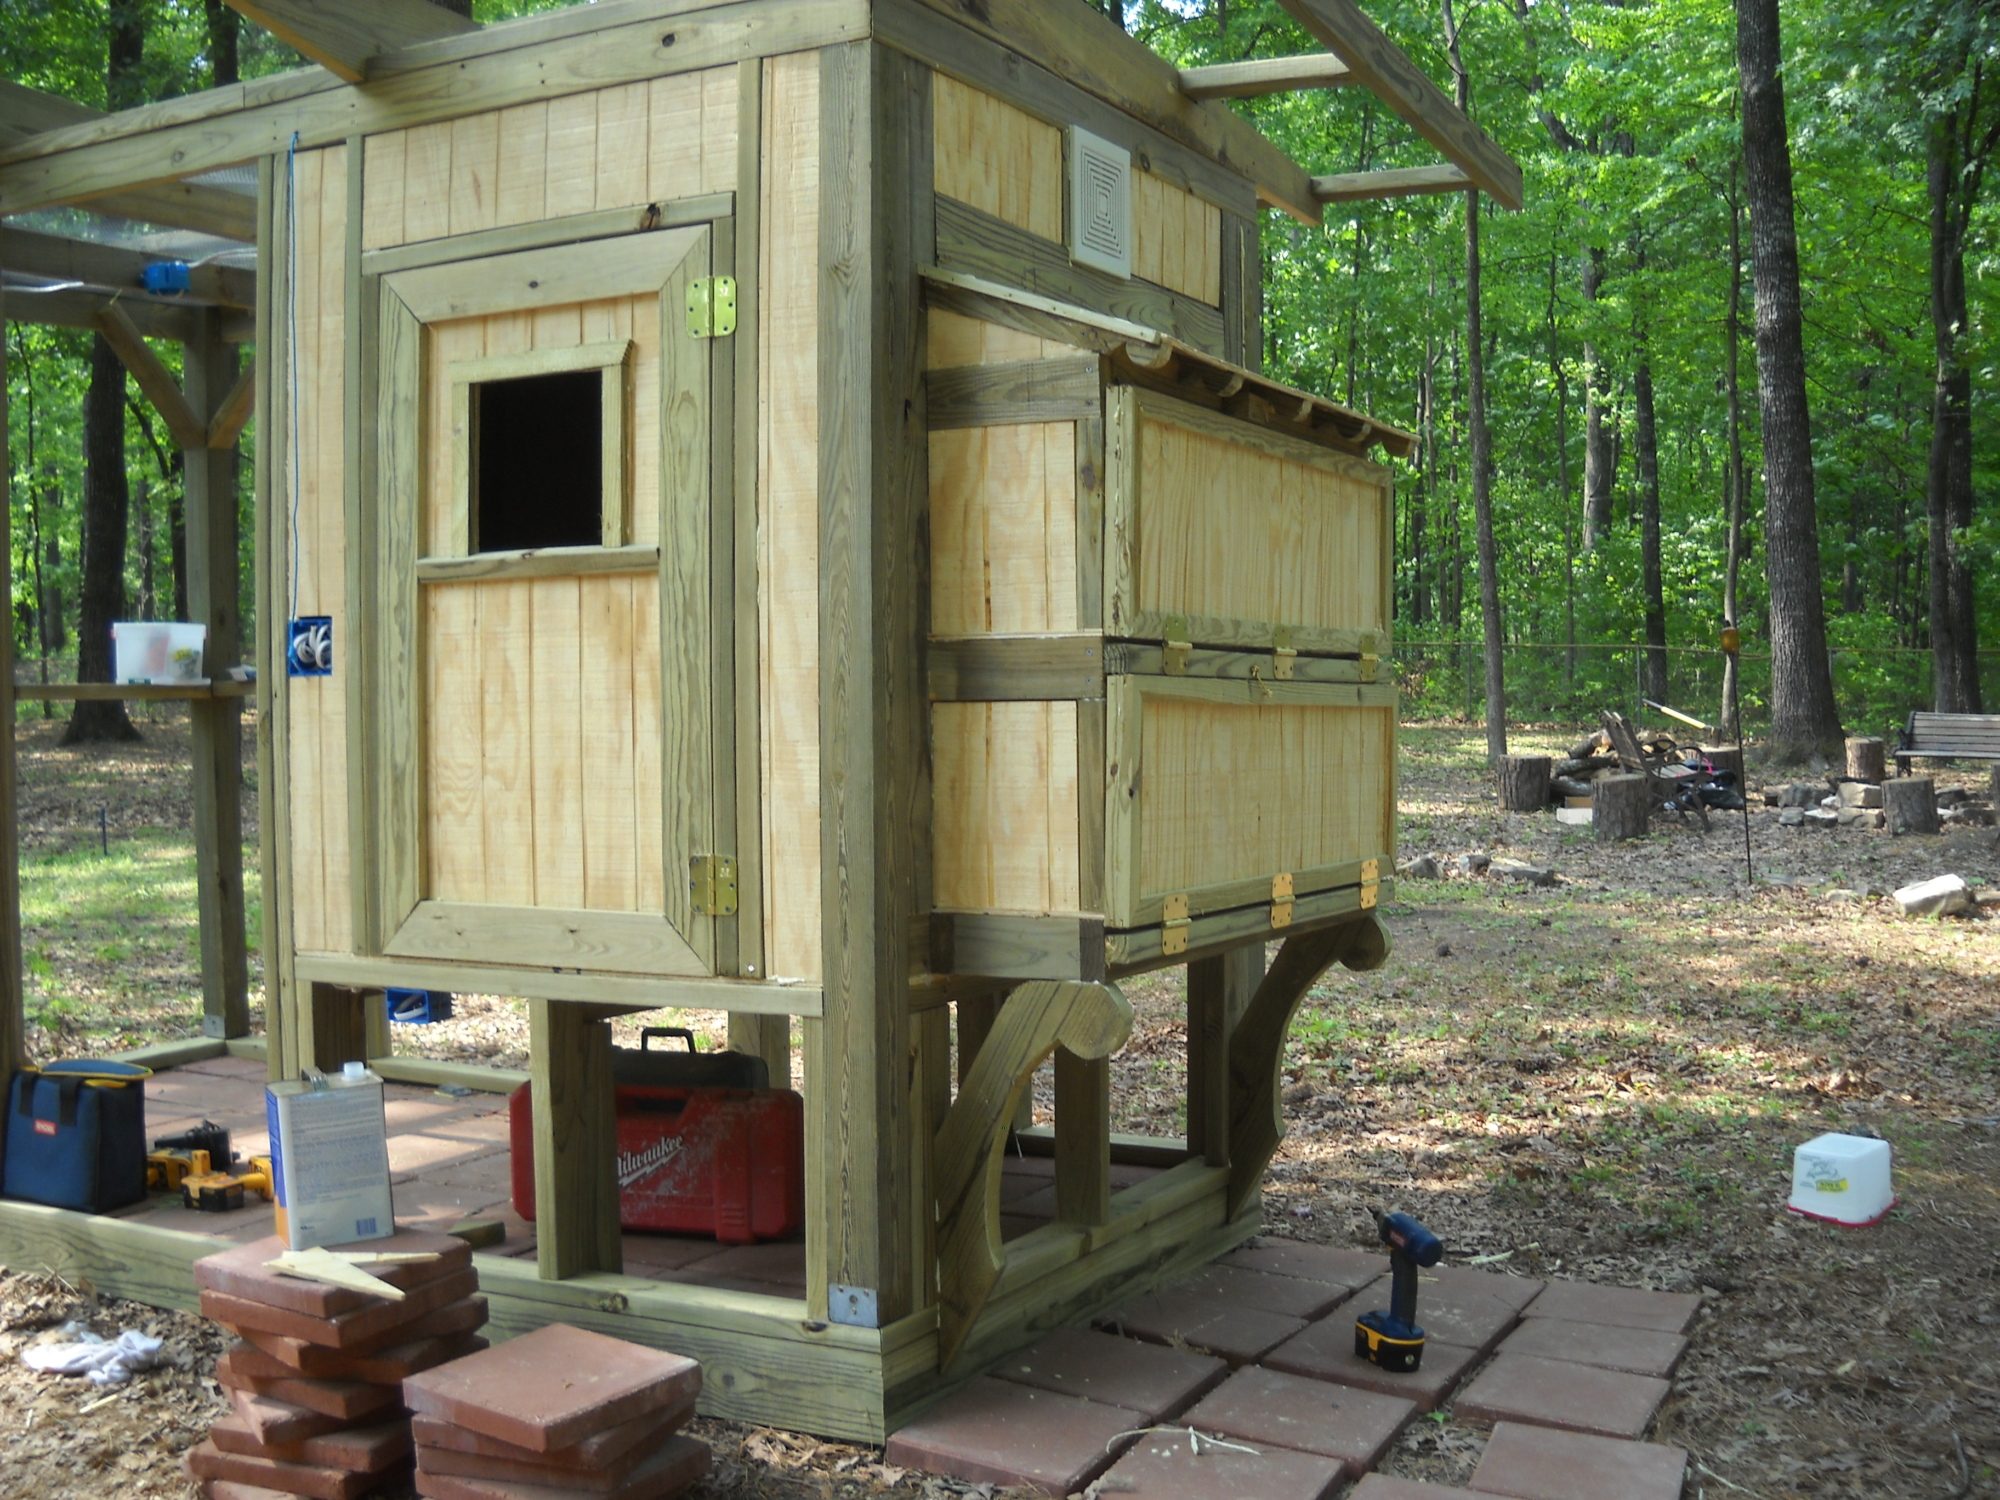
Nesting boxes added. Got a little fancy here with the rafters and the supports.
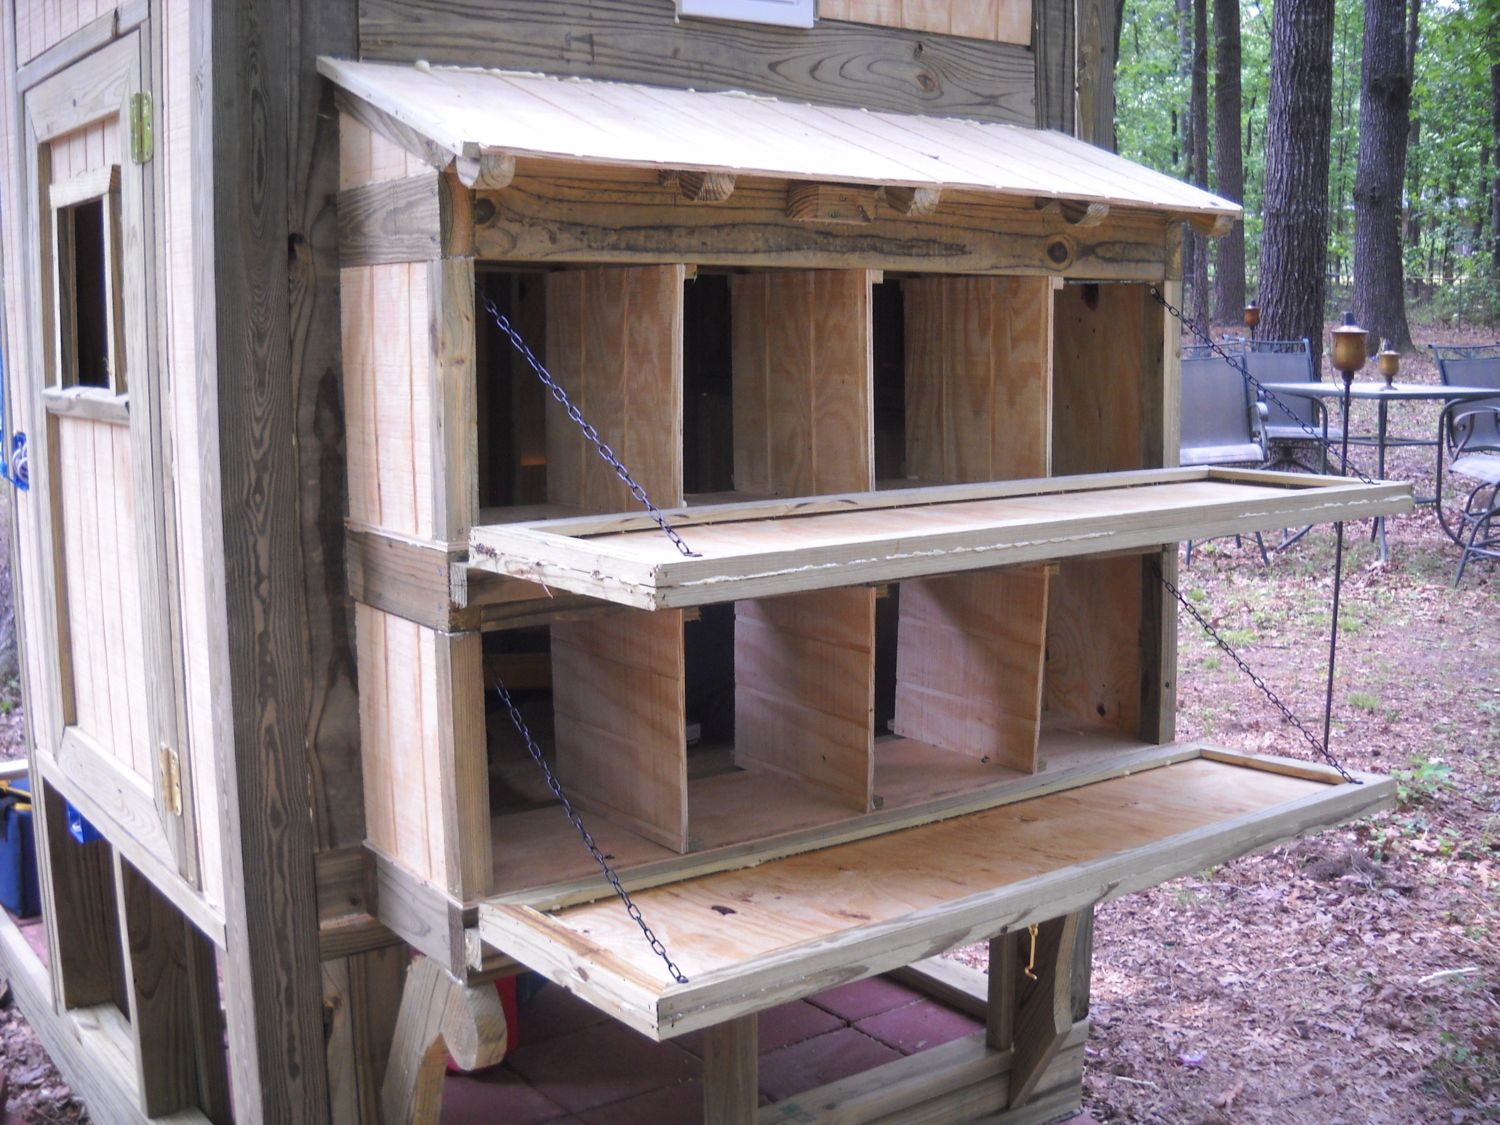
Yes, I realize that 8 nesting boxes is overkill for 4 chickens, but this way as I add to my flock, I do not have to retrofit the chicken coop. My understanding is that I can have up to two chickens per nesting box, so if I add to the yard, I can feasibly have up to 16 chickens. That is WAY more eggs than I can eat! ;-)
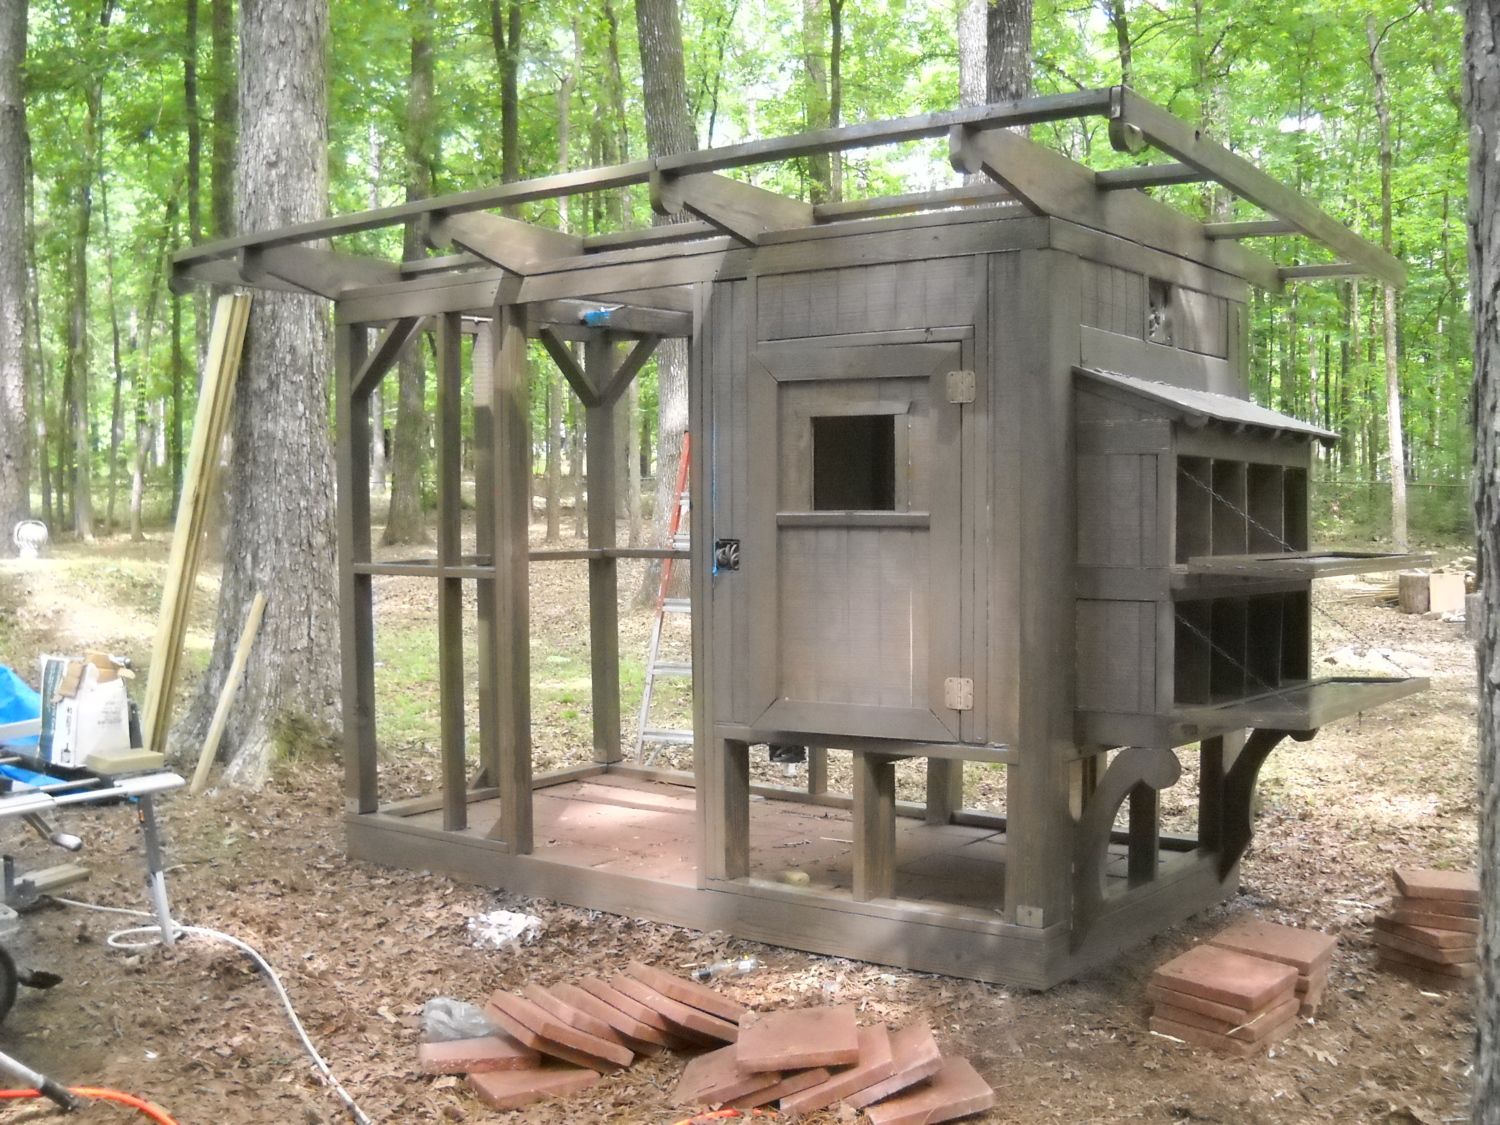
The first coat of stain. I used a semi-solid oil based stain. Call me old school, but I have just noticed that oil based products hold up better to weather extremes than latex or acrylic products.
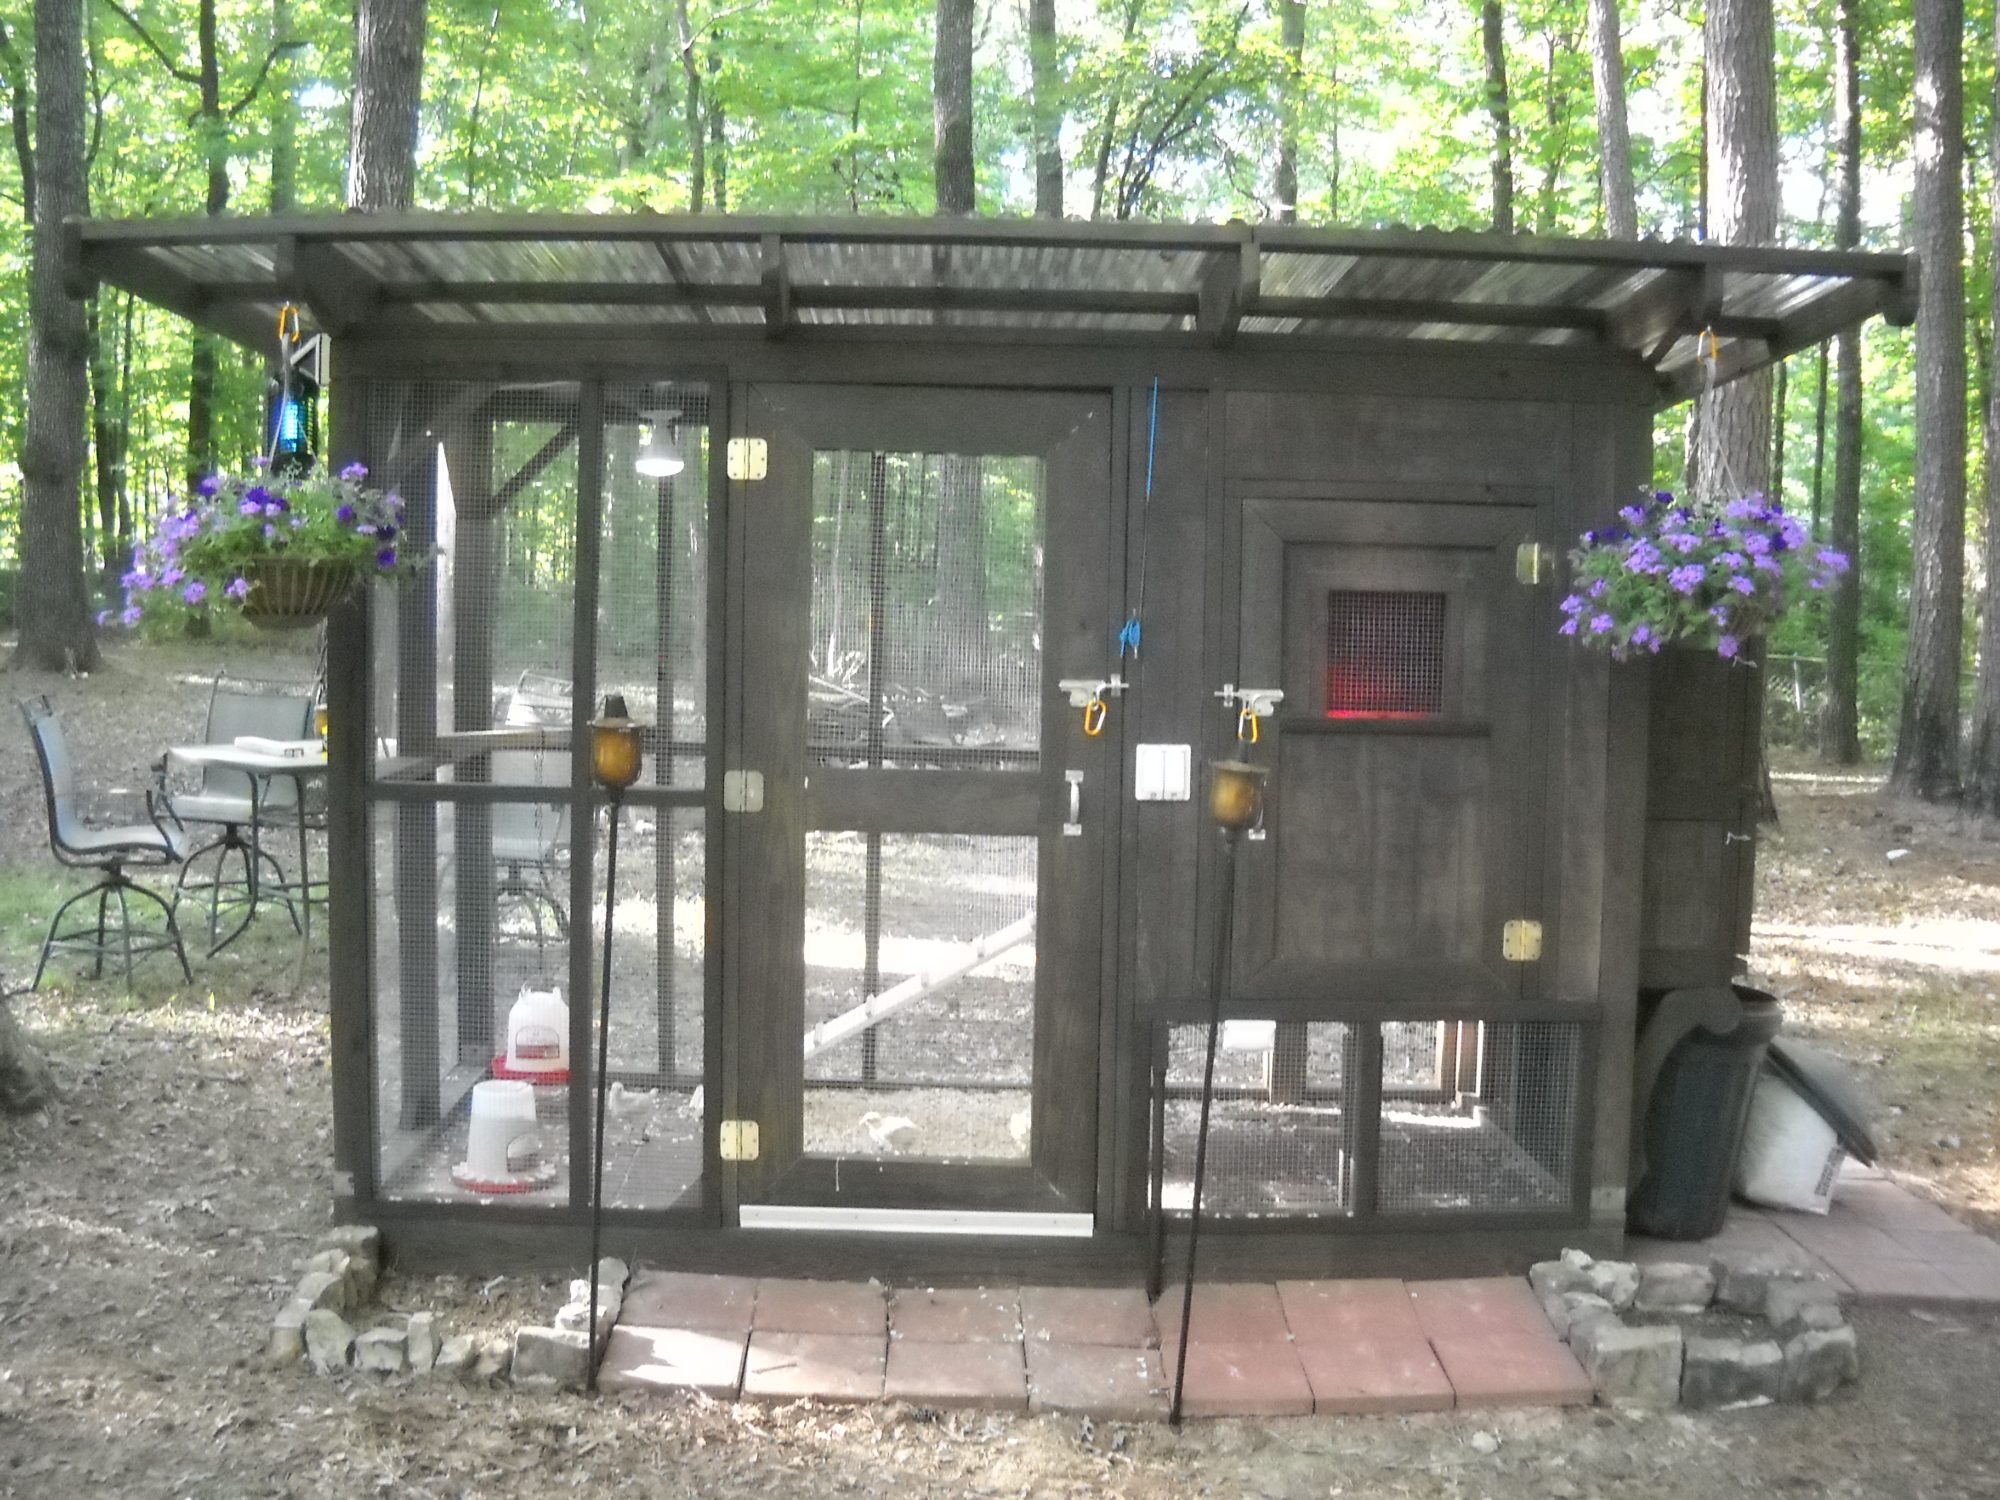
The finished product. Added some hanging plants, the bug light, and a couple of small flowerbeds. The roof is smoke colored lexan. the walls are 1/2"x1/2" galvanized hardware cloth. Installed a door sweep to help keep out the mice and snakes. Also, I did not want to catch my clothes or a finger on the metal screen so I installed lattice over the edges of the screen. After looking at the lattice Lowes and Home Depot had to offer, I got some treated 2x4s, ripped them on my table saw, and made my own. It is twice as thick as what they were selling (about 1/4"-3/16" thick), so i figure it will hold up better.
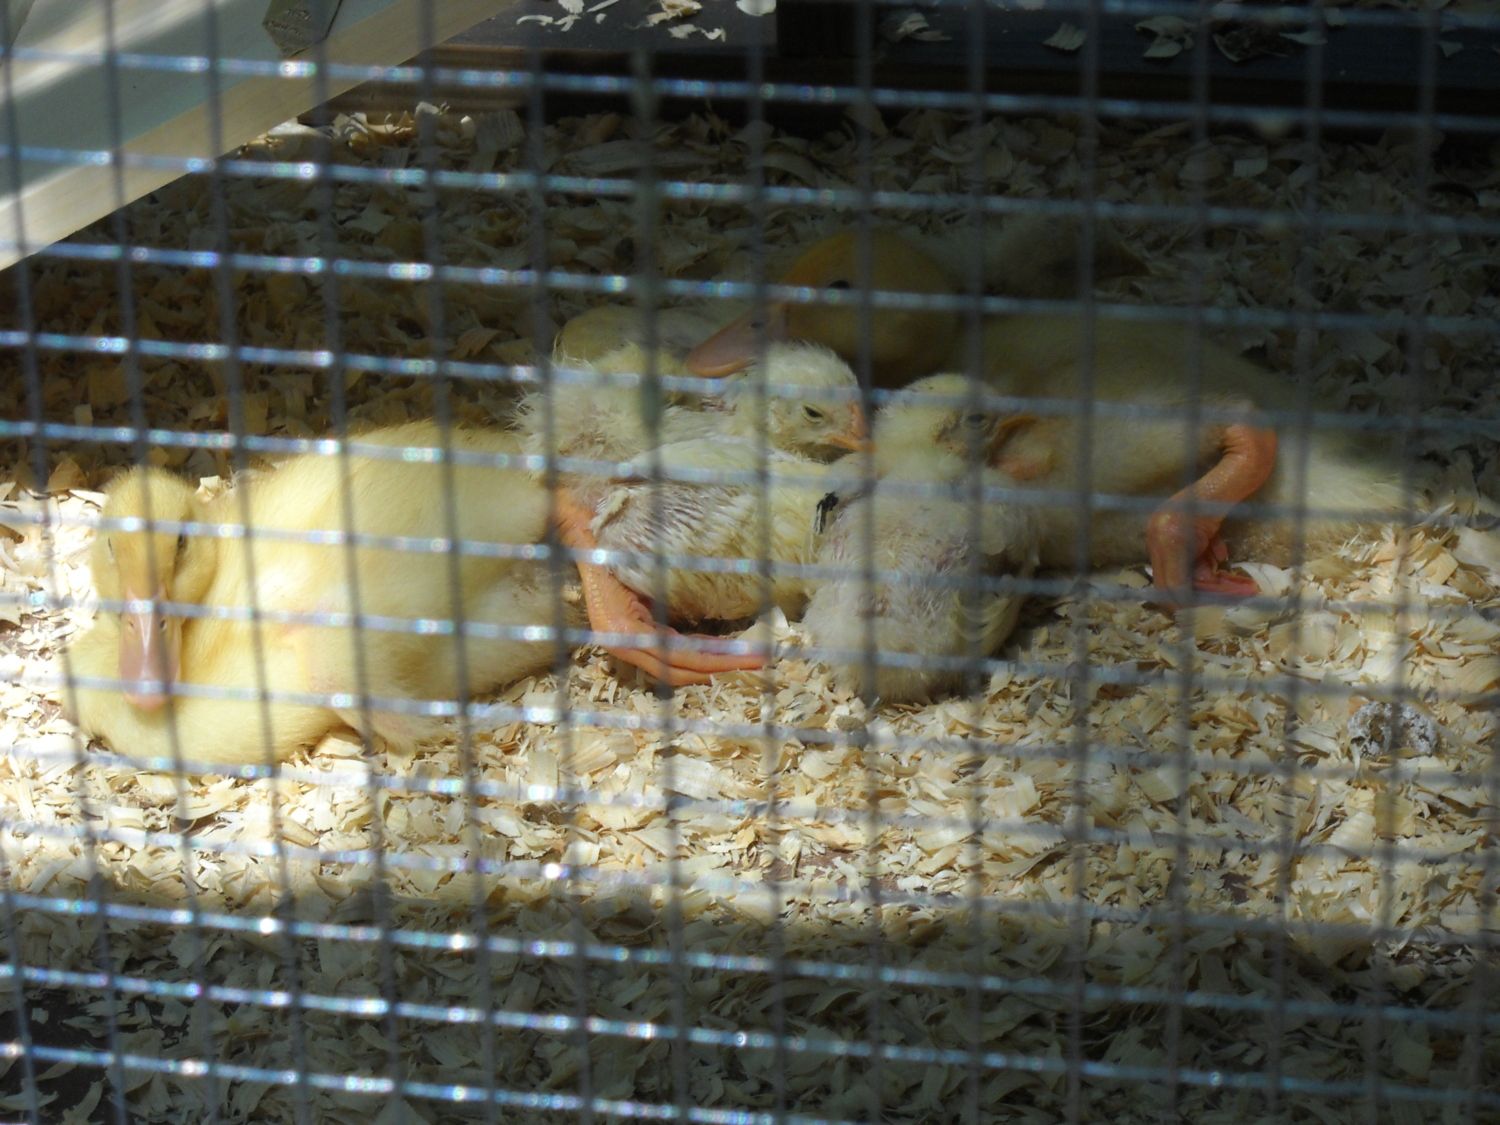
Home at last! Resting comfortably...