NW Garden Coop...AKA "The Garden of Eggin"

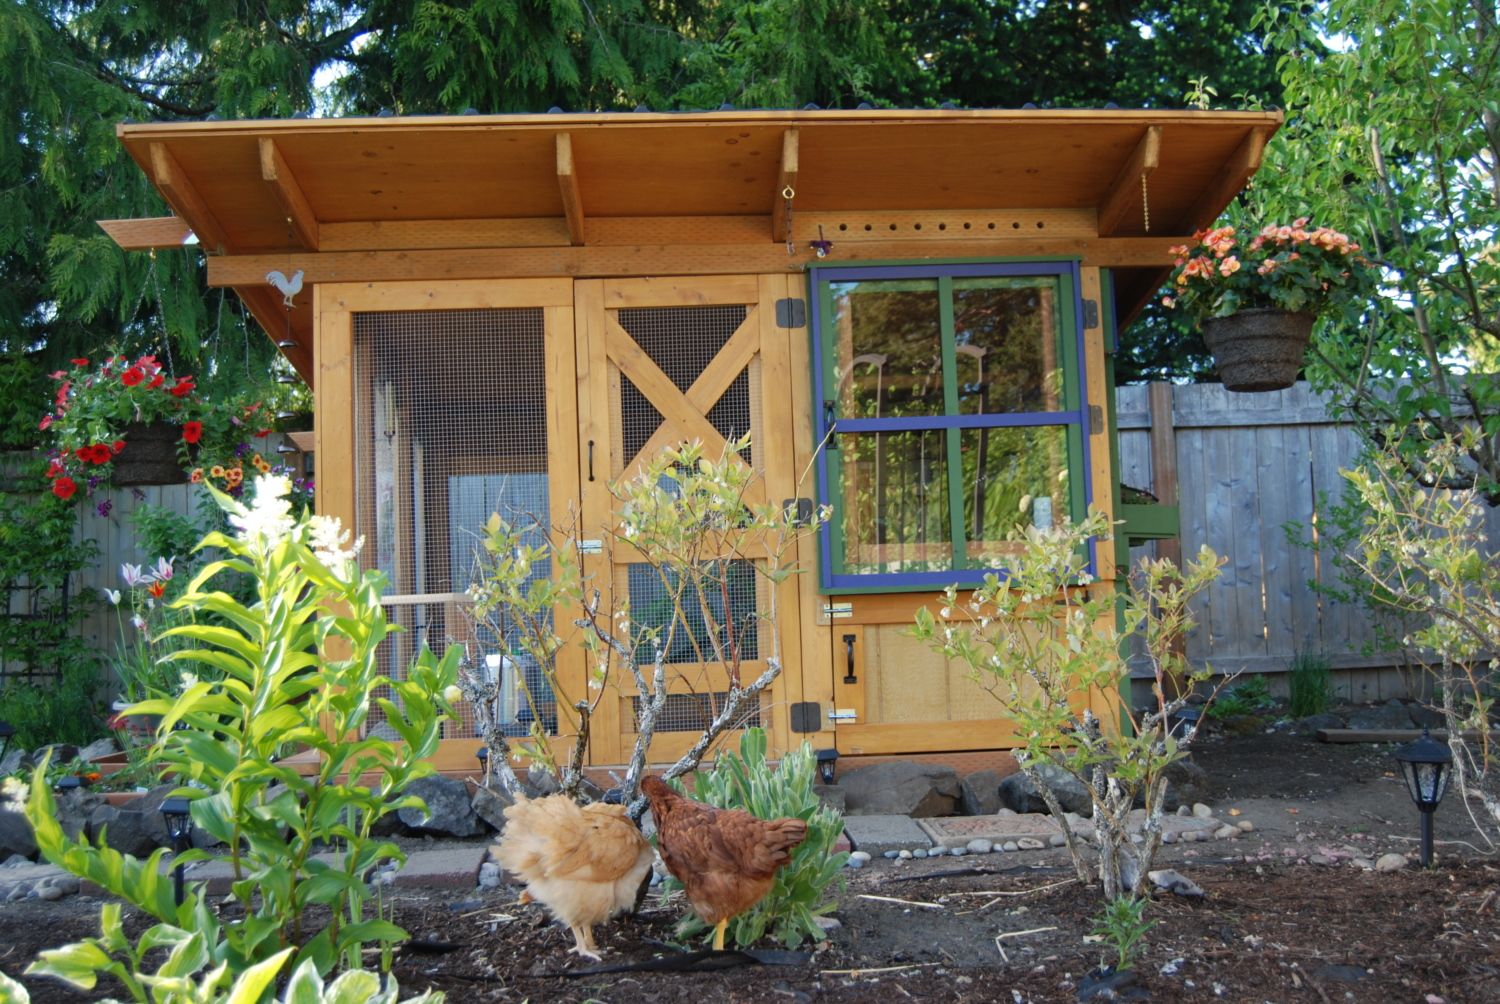
A view of the front with two of our pullets, Harriet (left) and Blue.
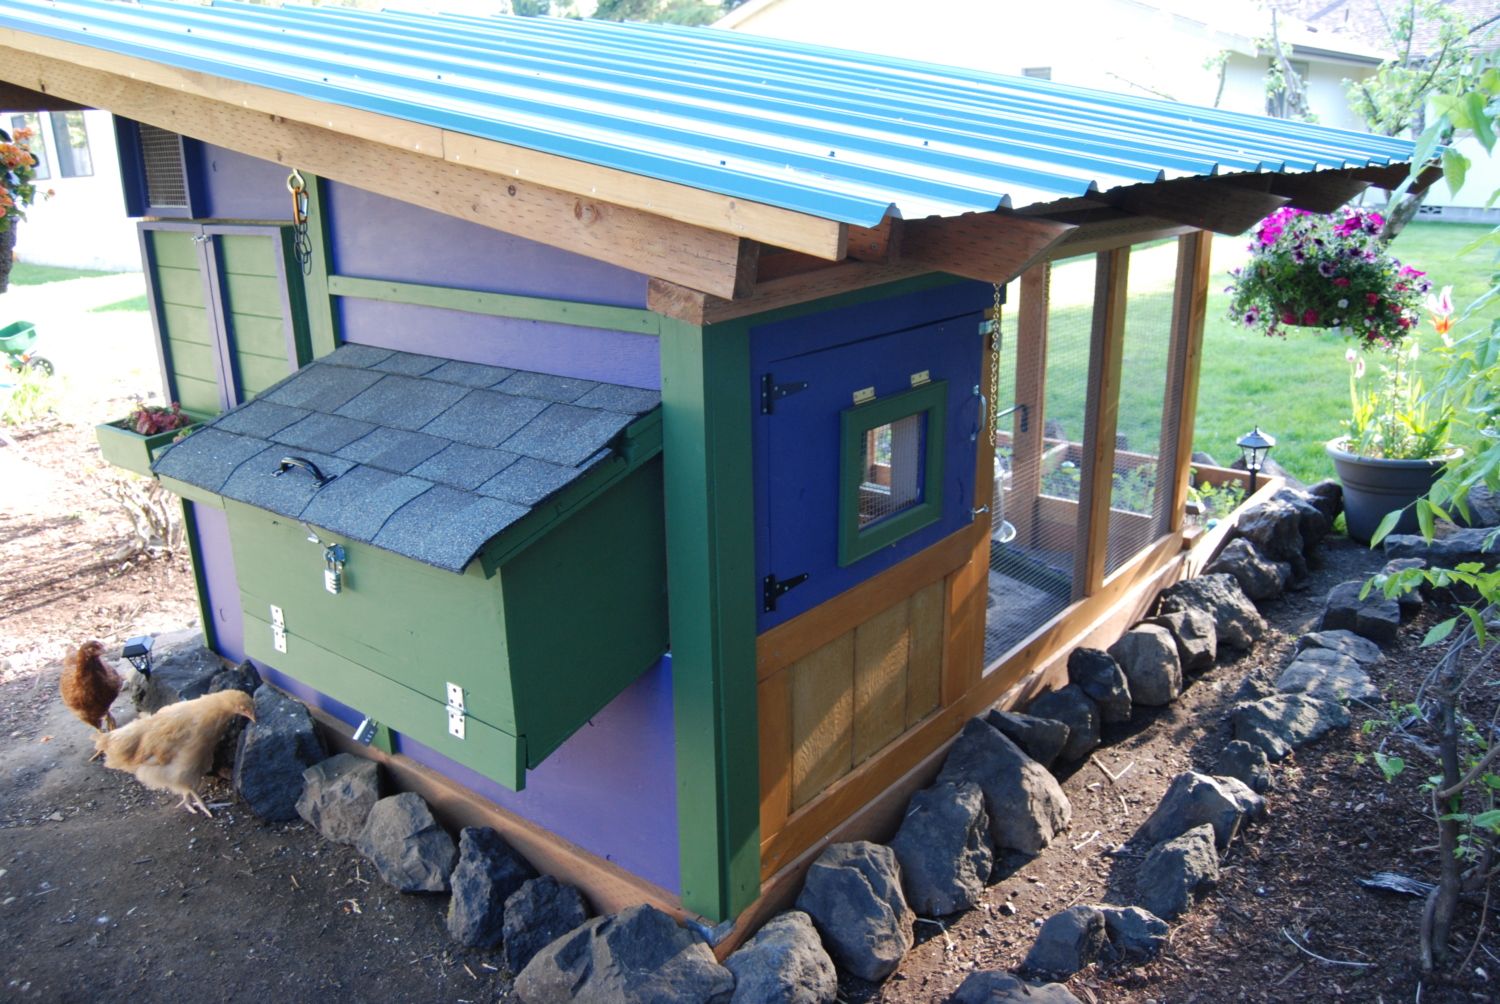
The north side of the coop - you can see the ramp and pop hole door as well as the north smaller door with the flip up window open.
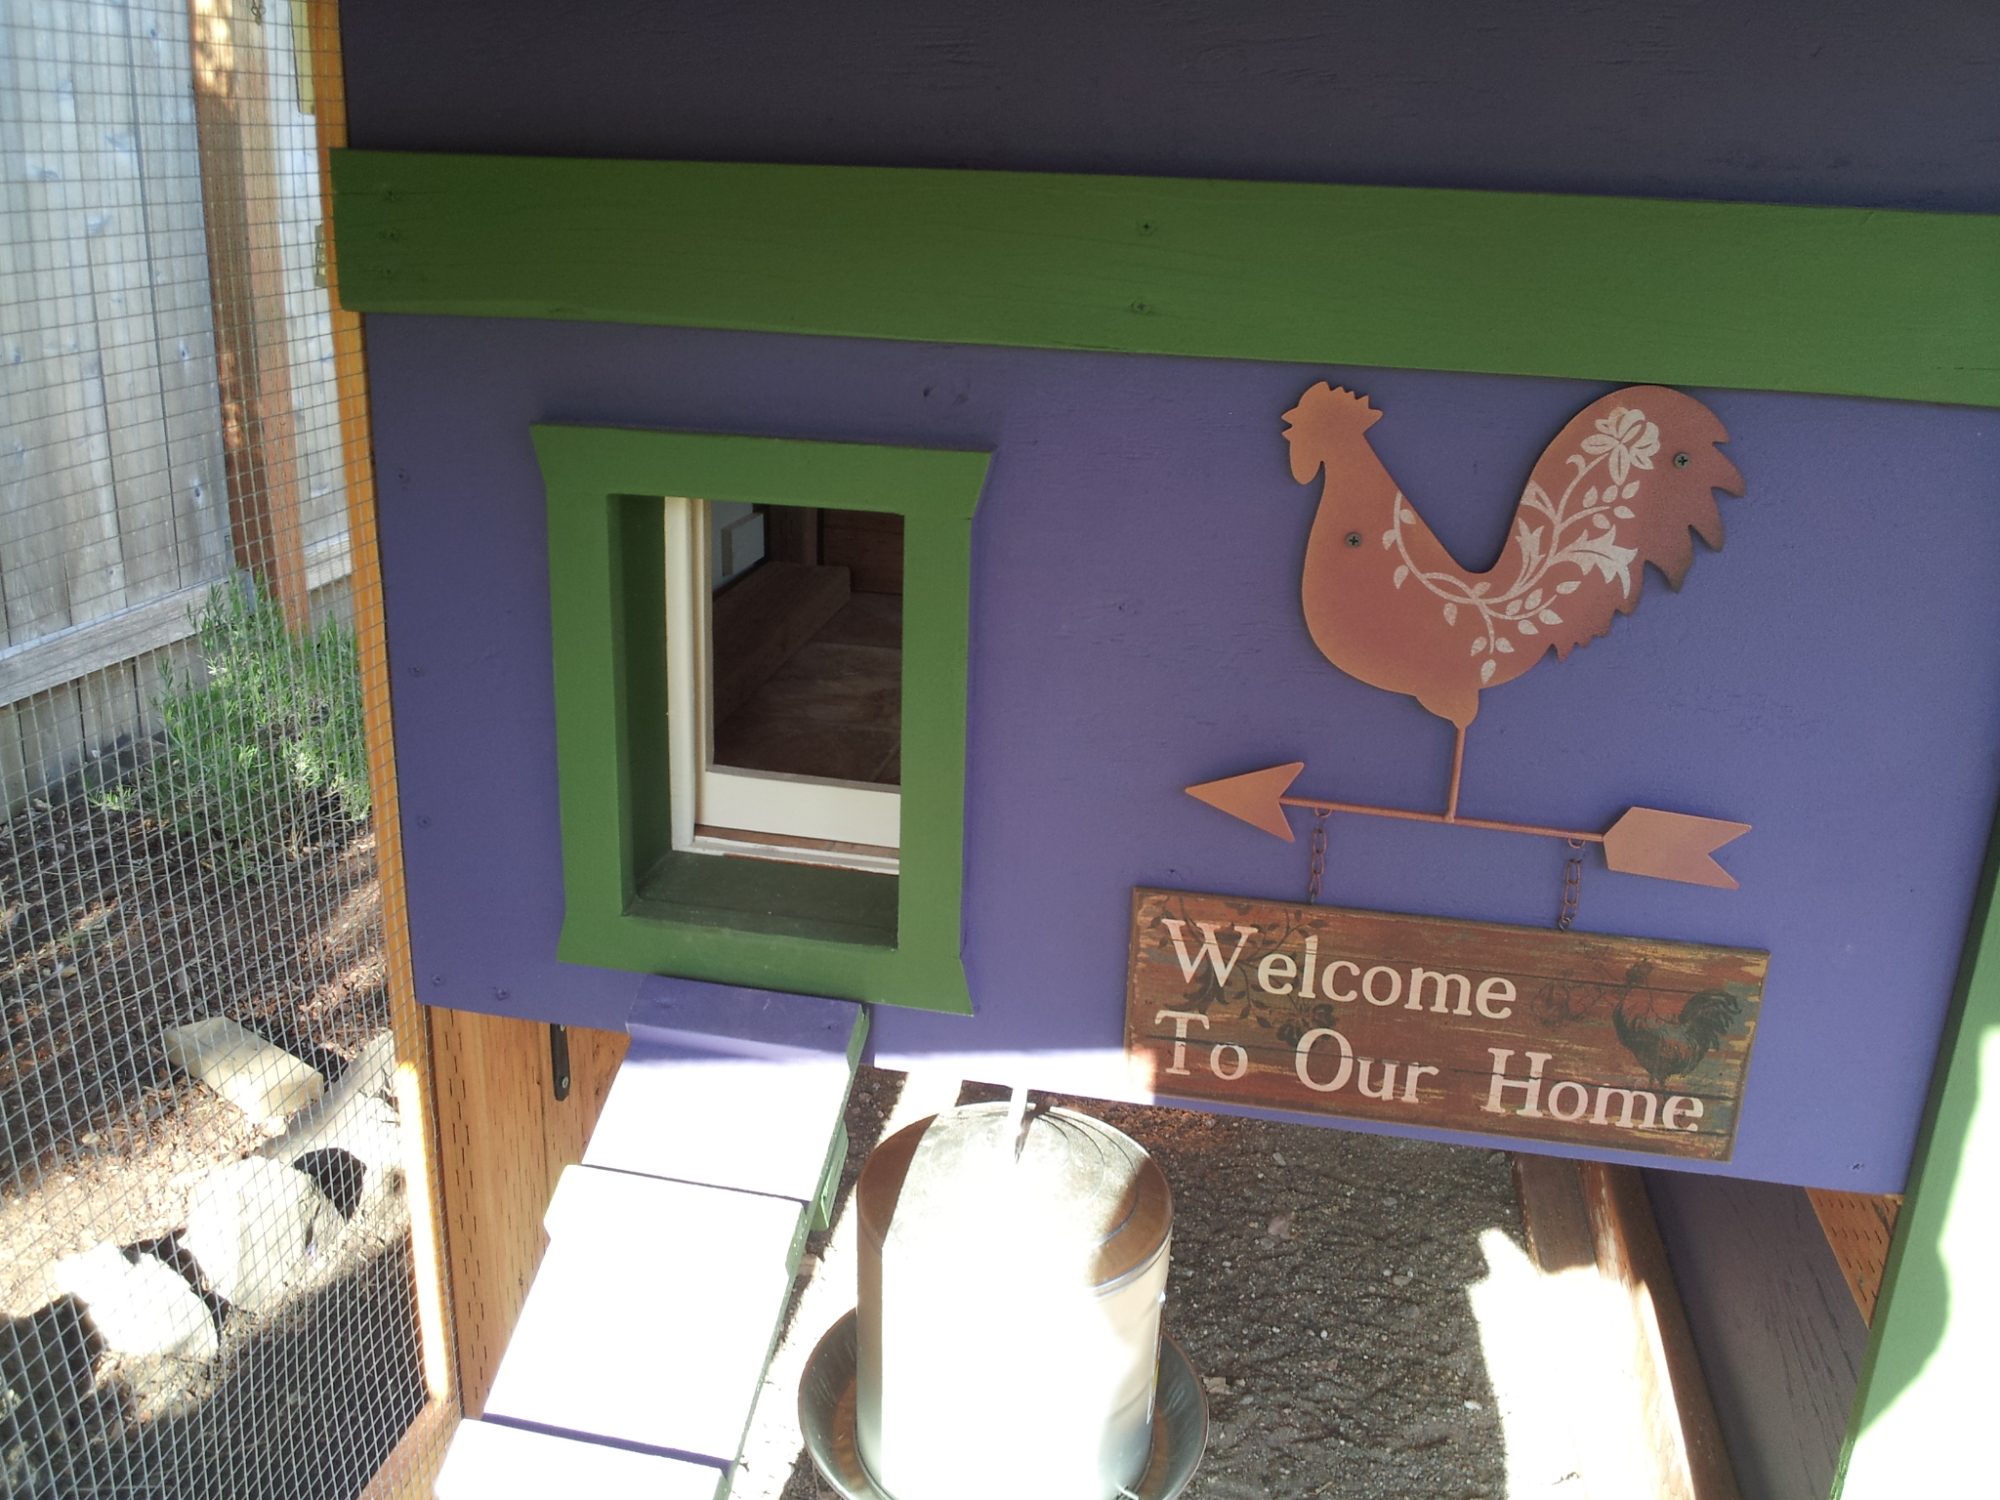
He found this great little chicken sign that fits perfectly next tot he pop hole door.
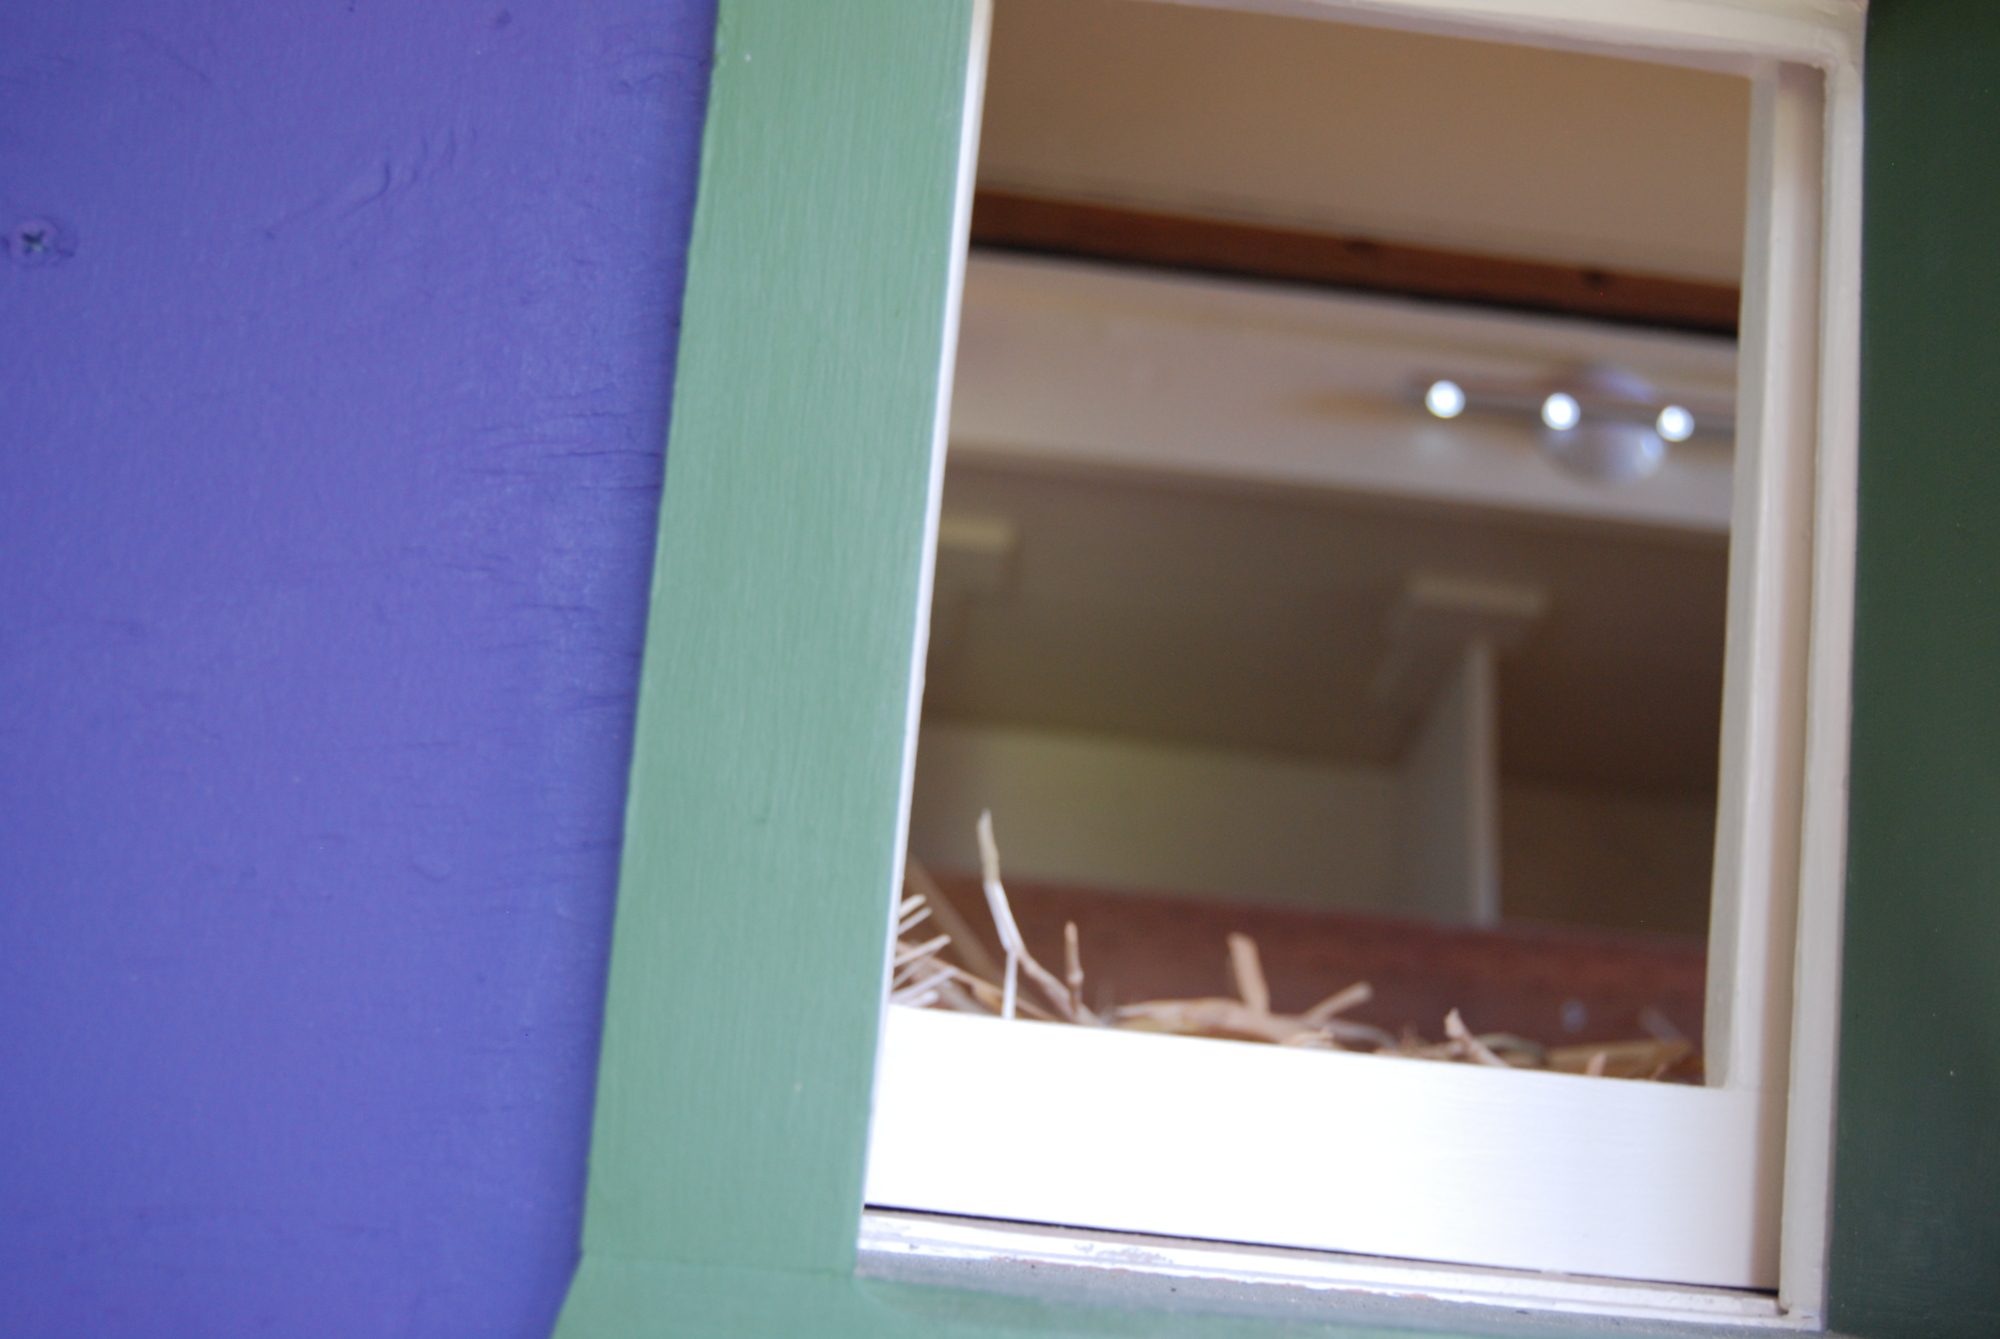
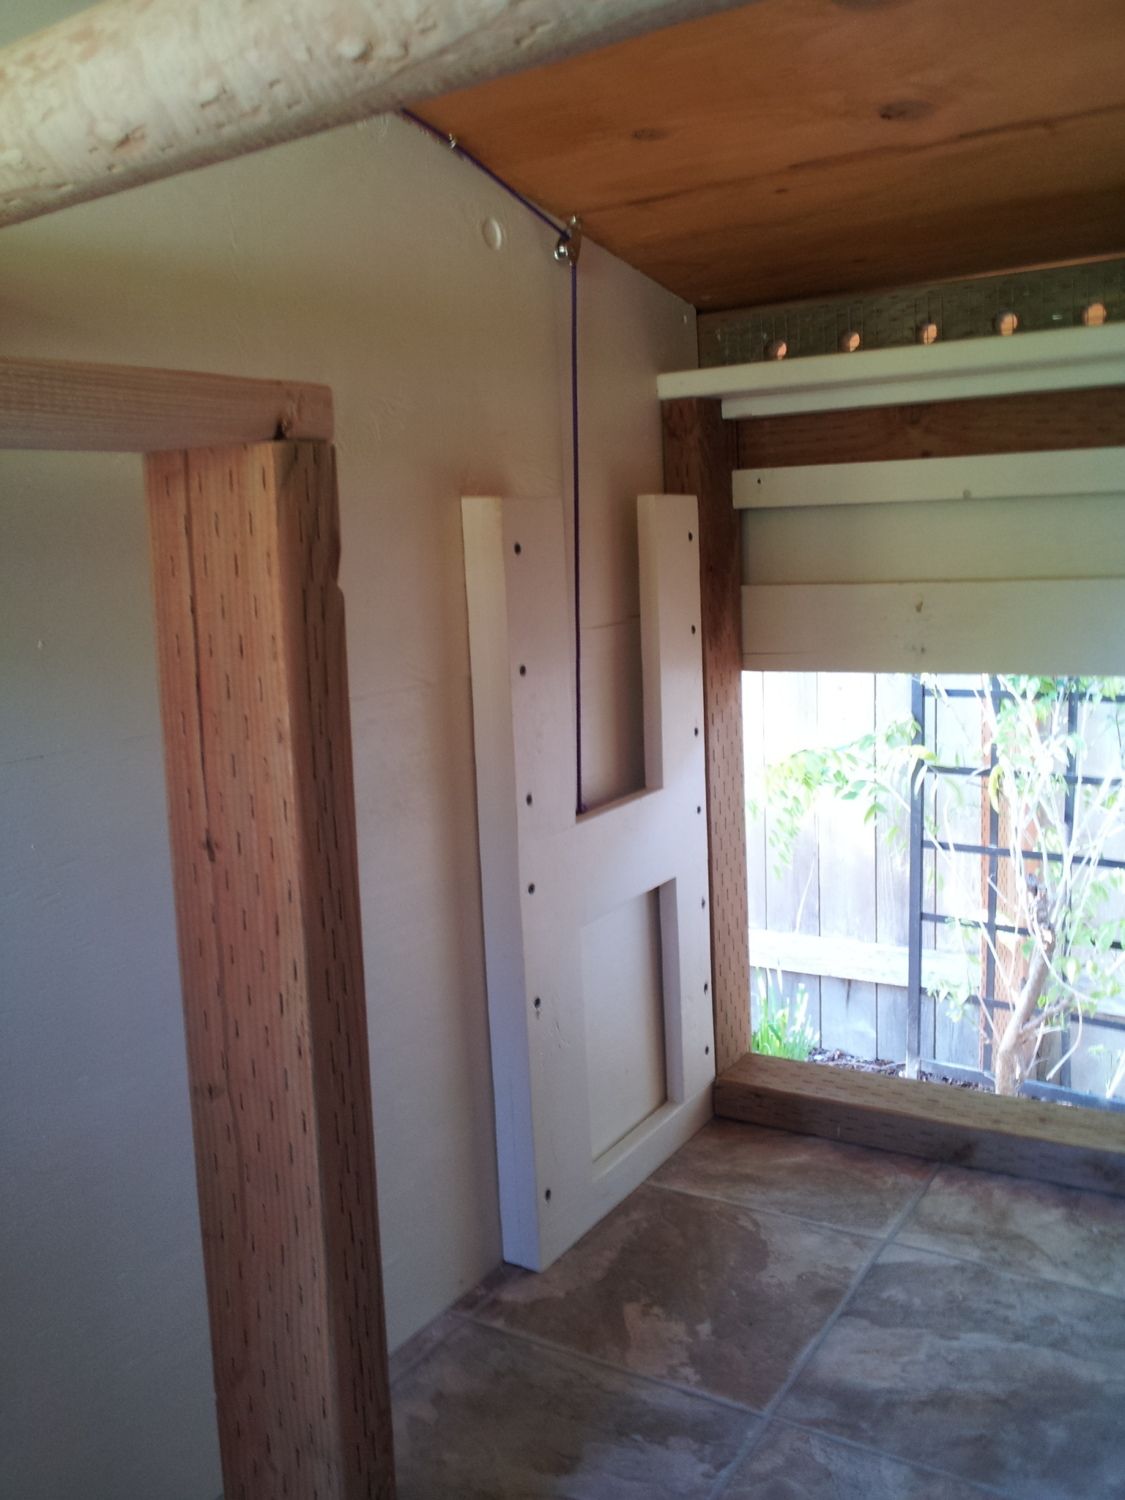
Looking into the cabin through the pop hole door.
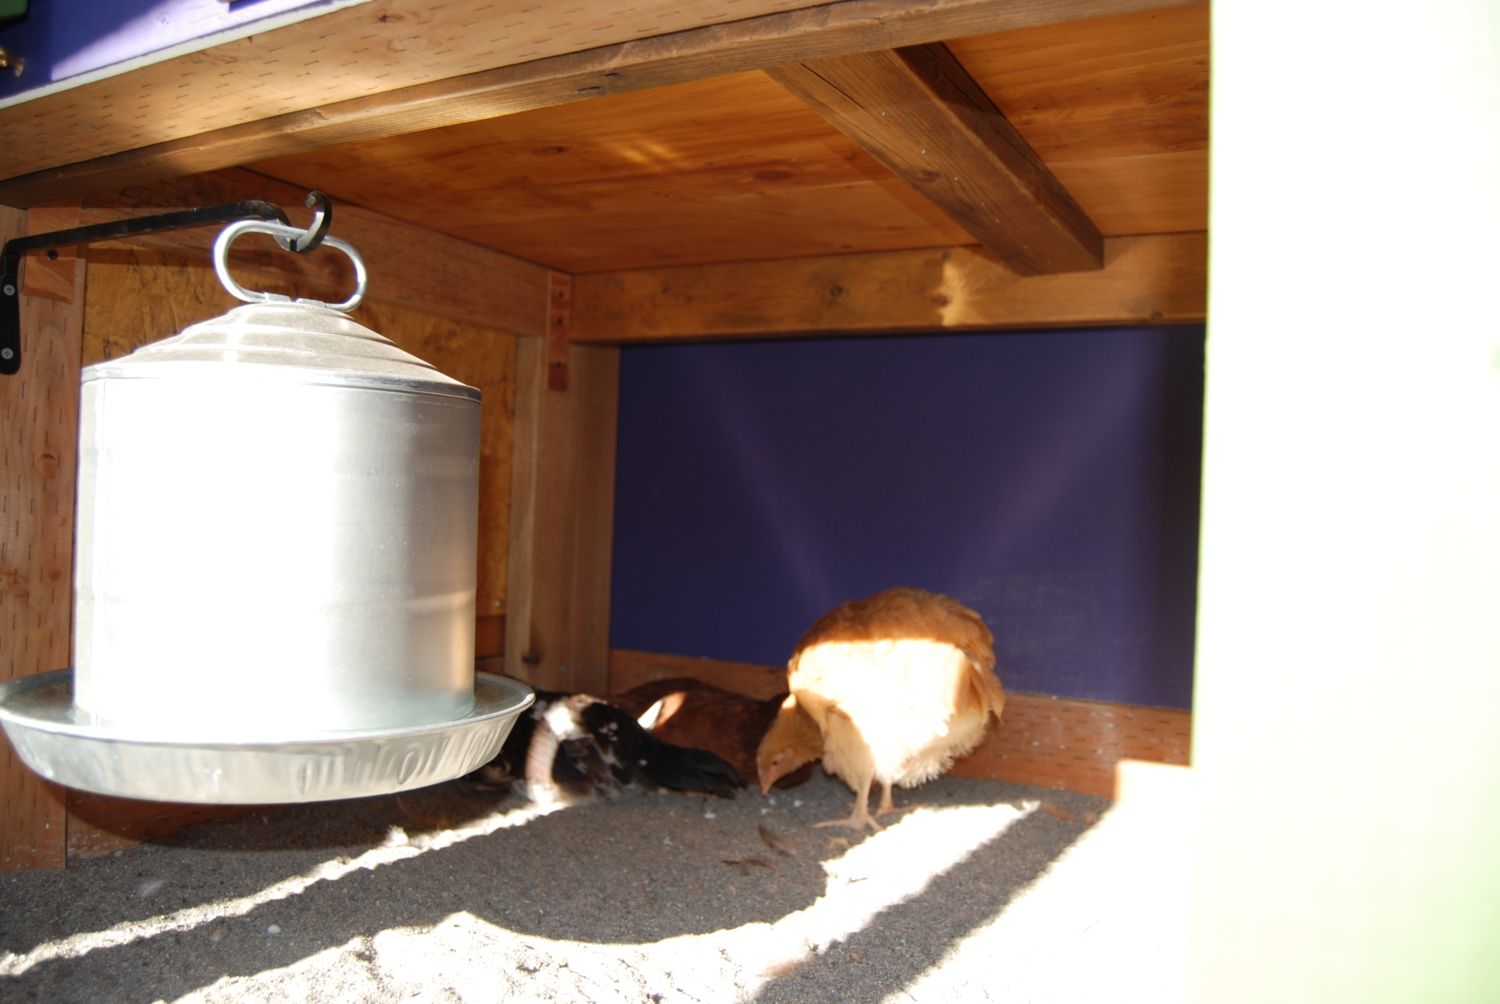
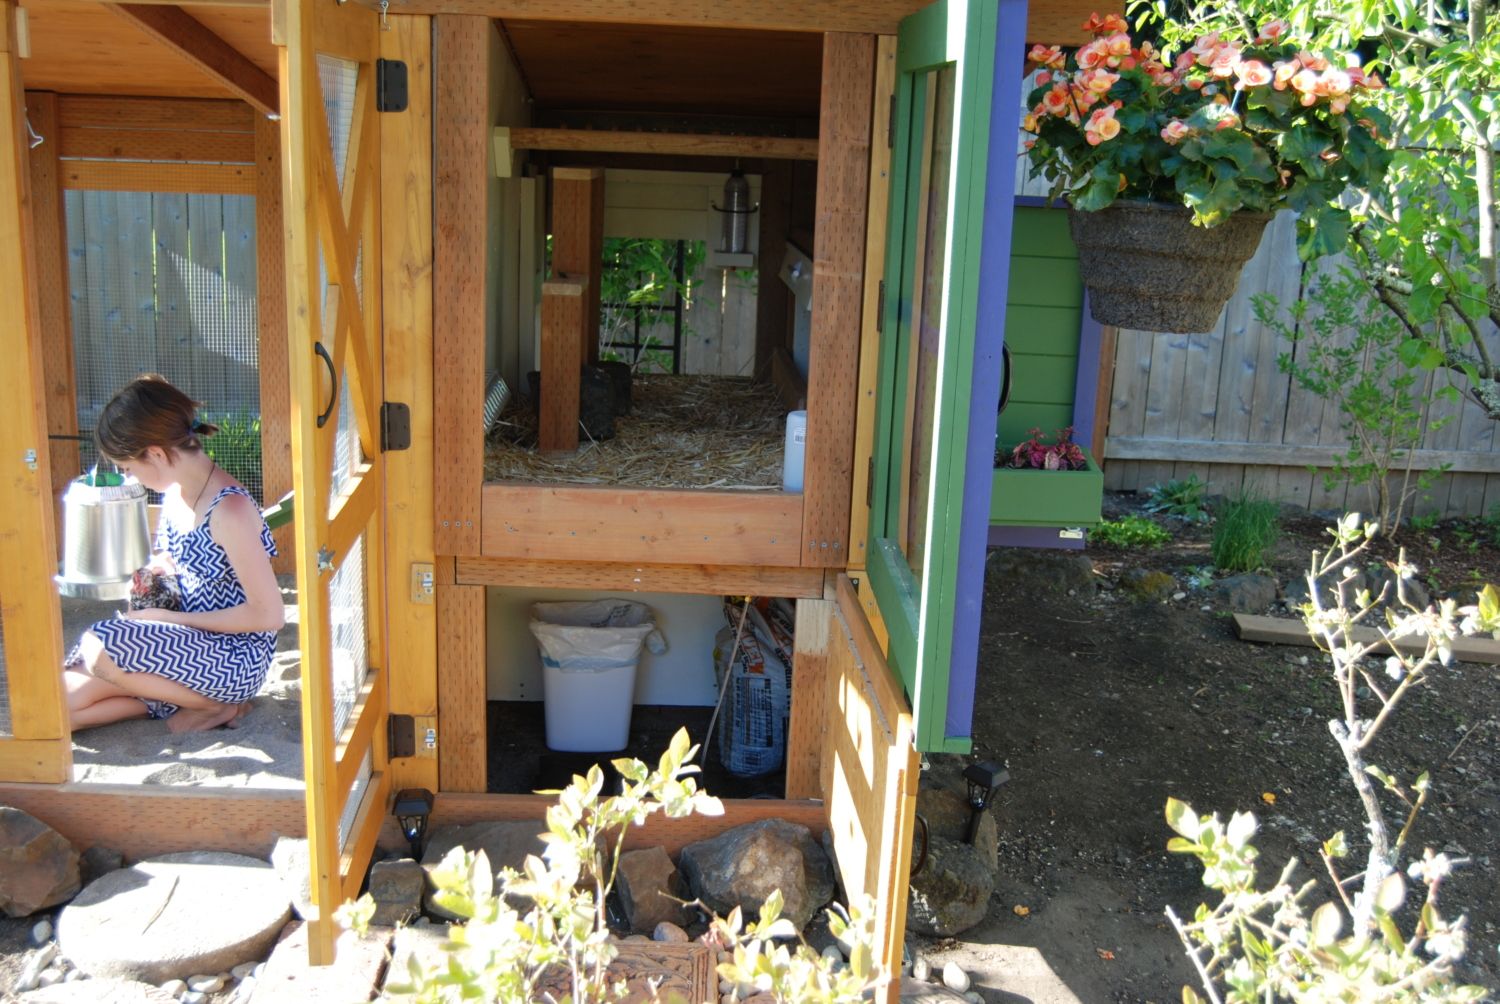
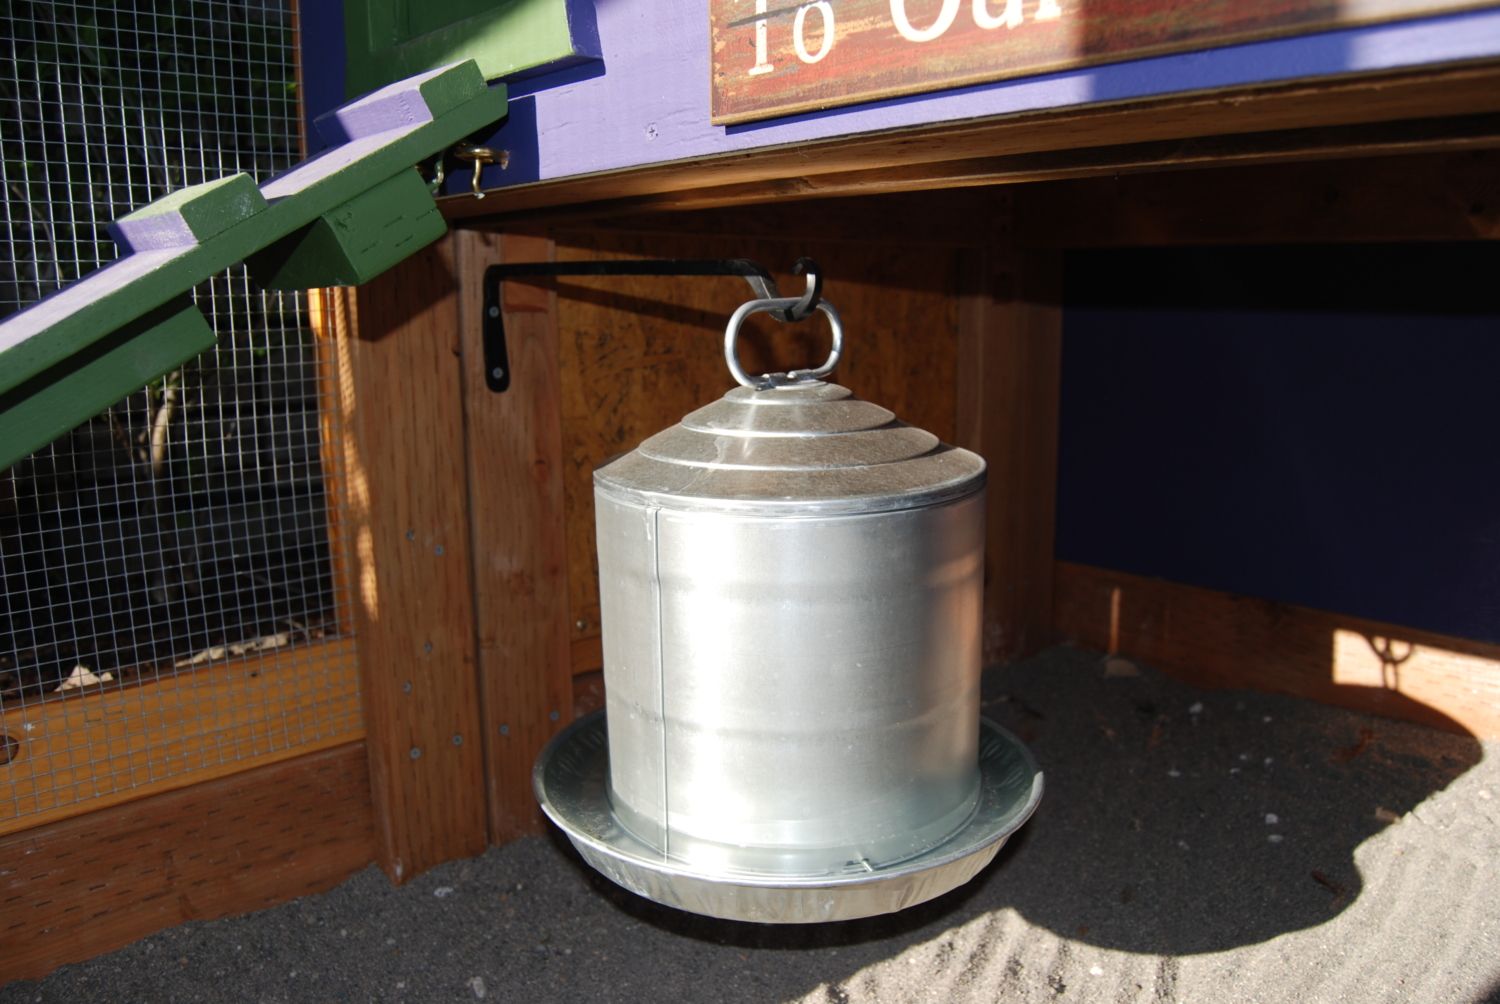
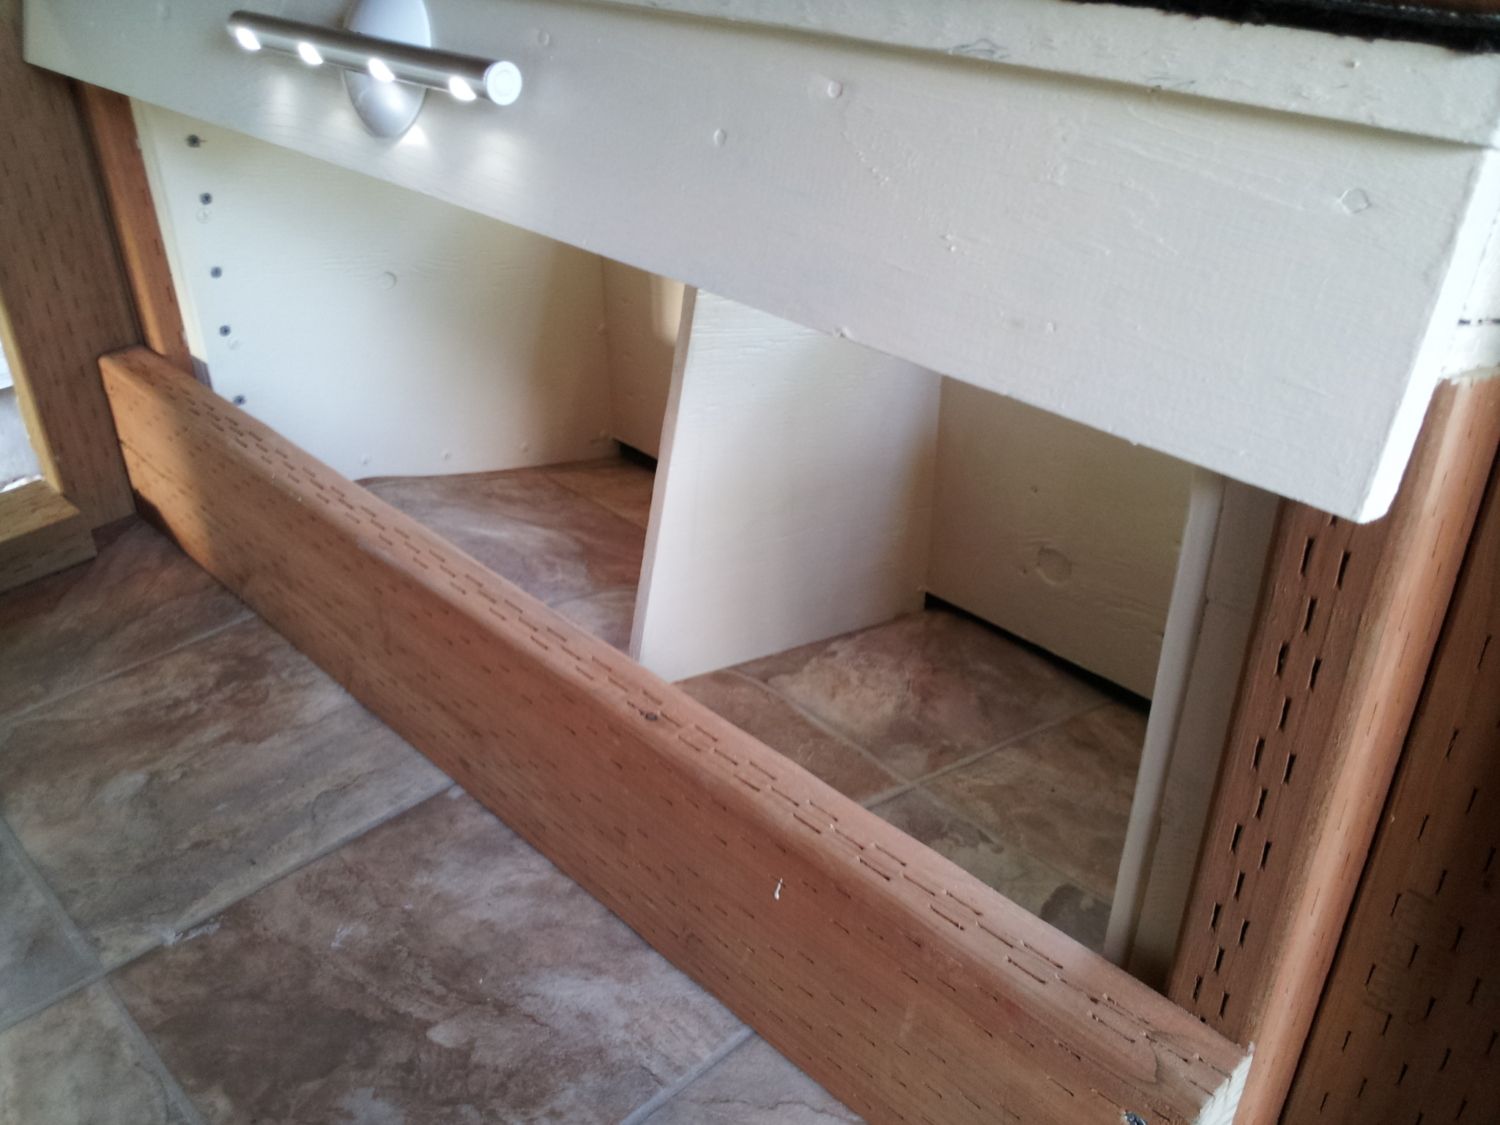
Under the cabin, food bin and a cozy spot for the chickens to hang out.
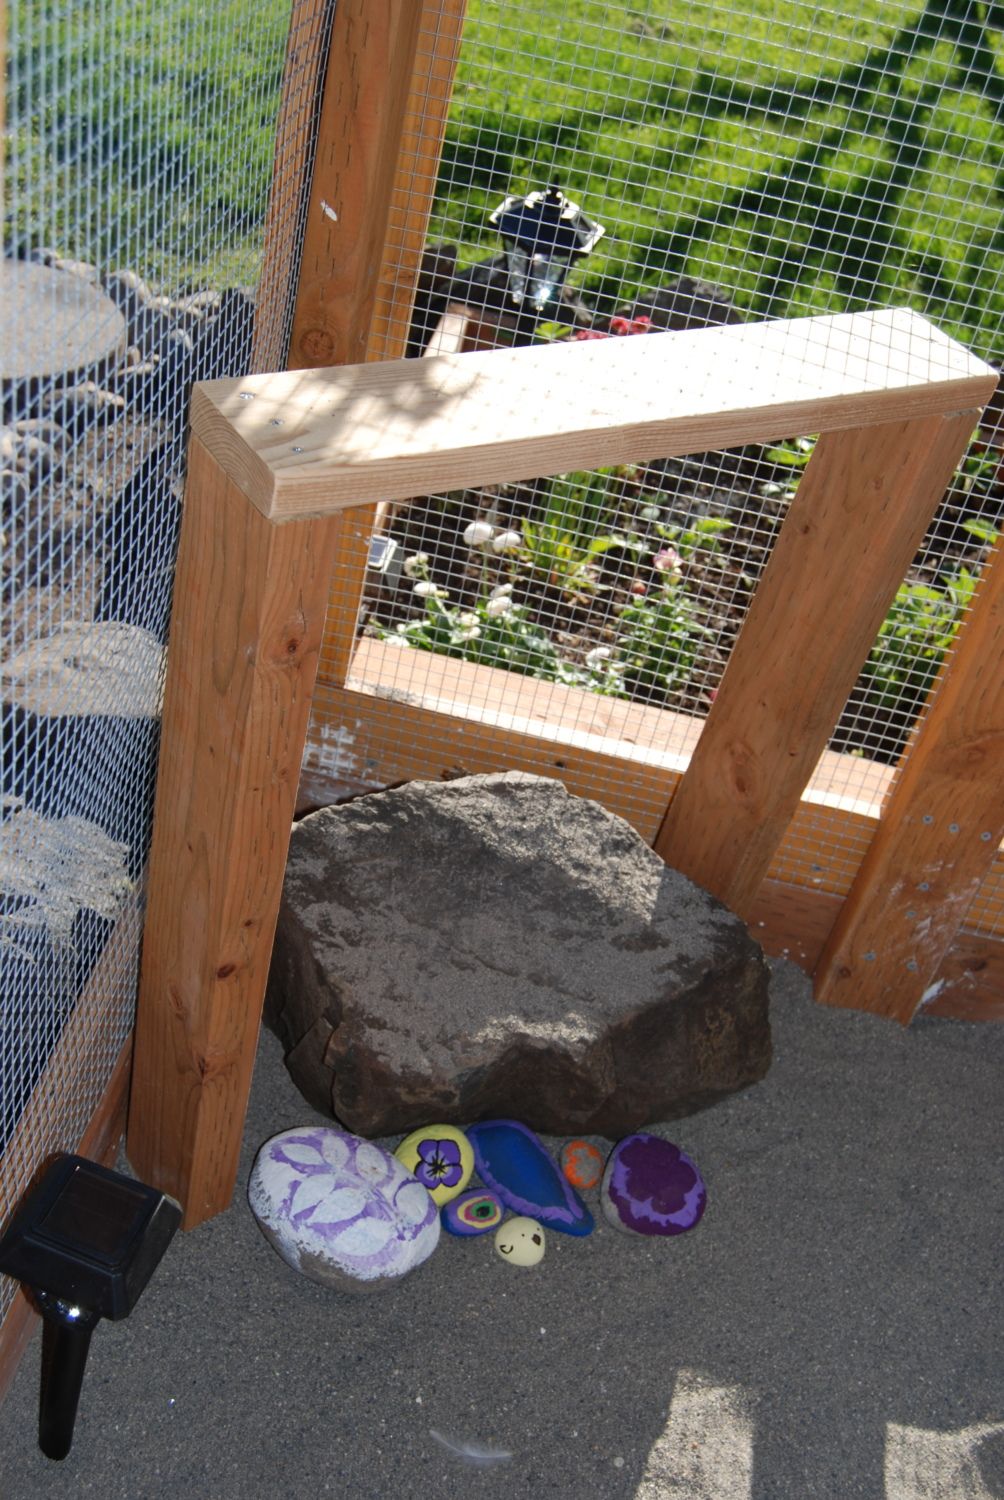
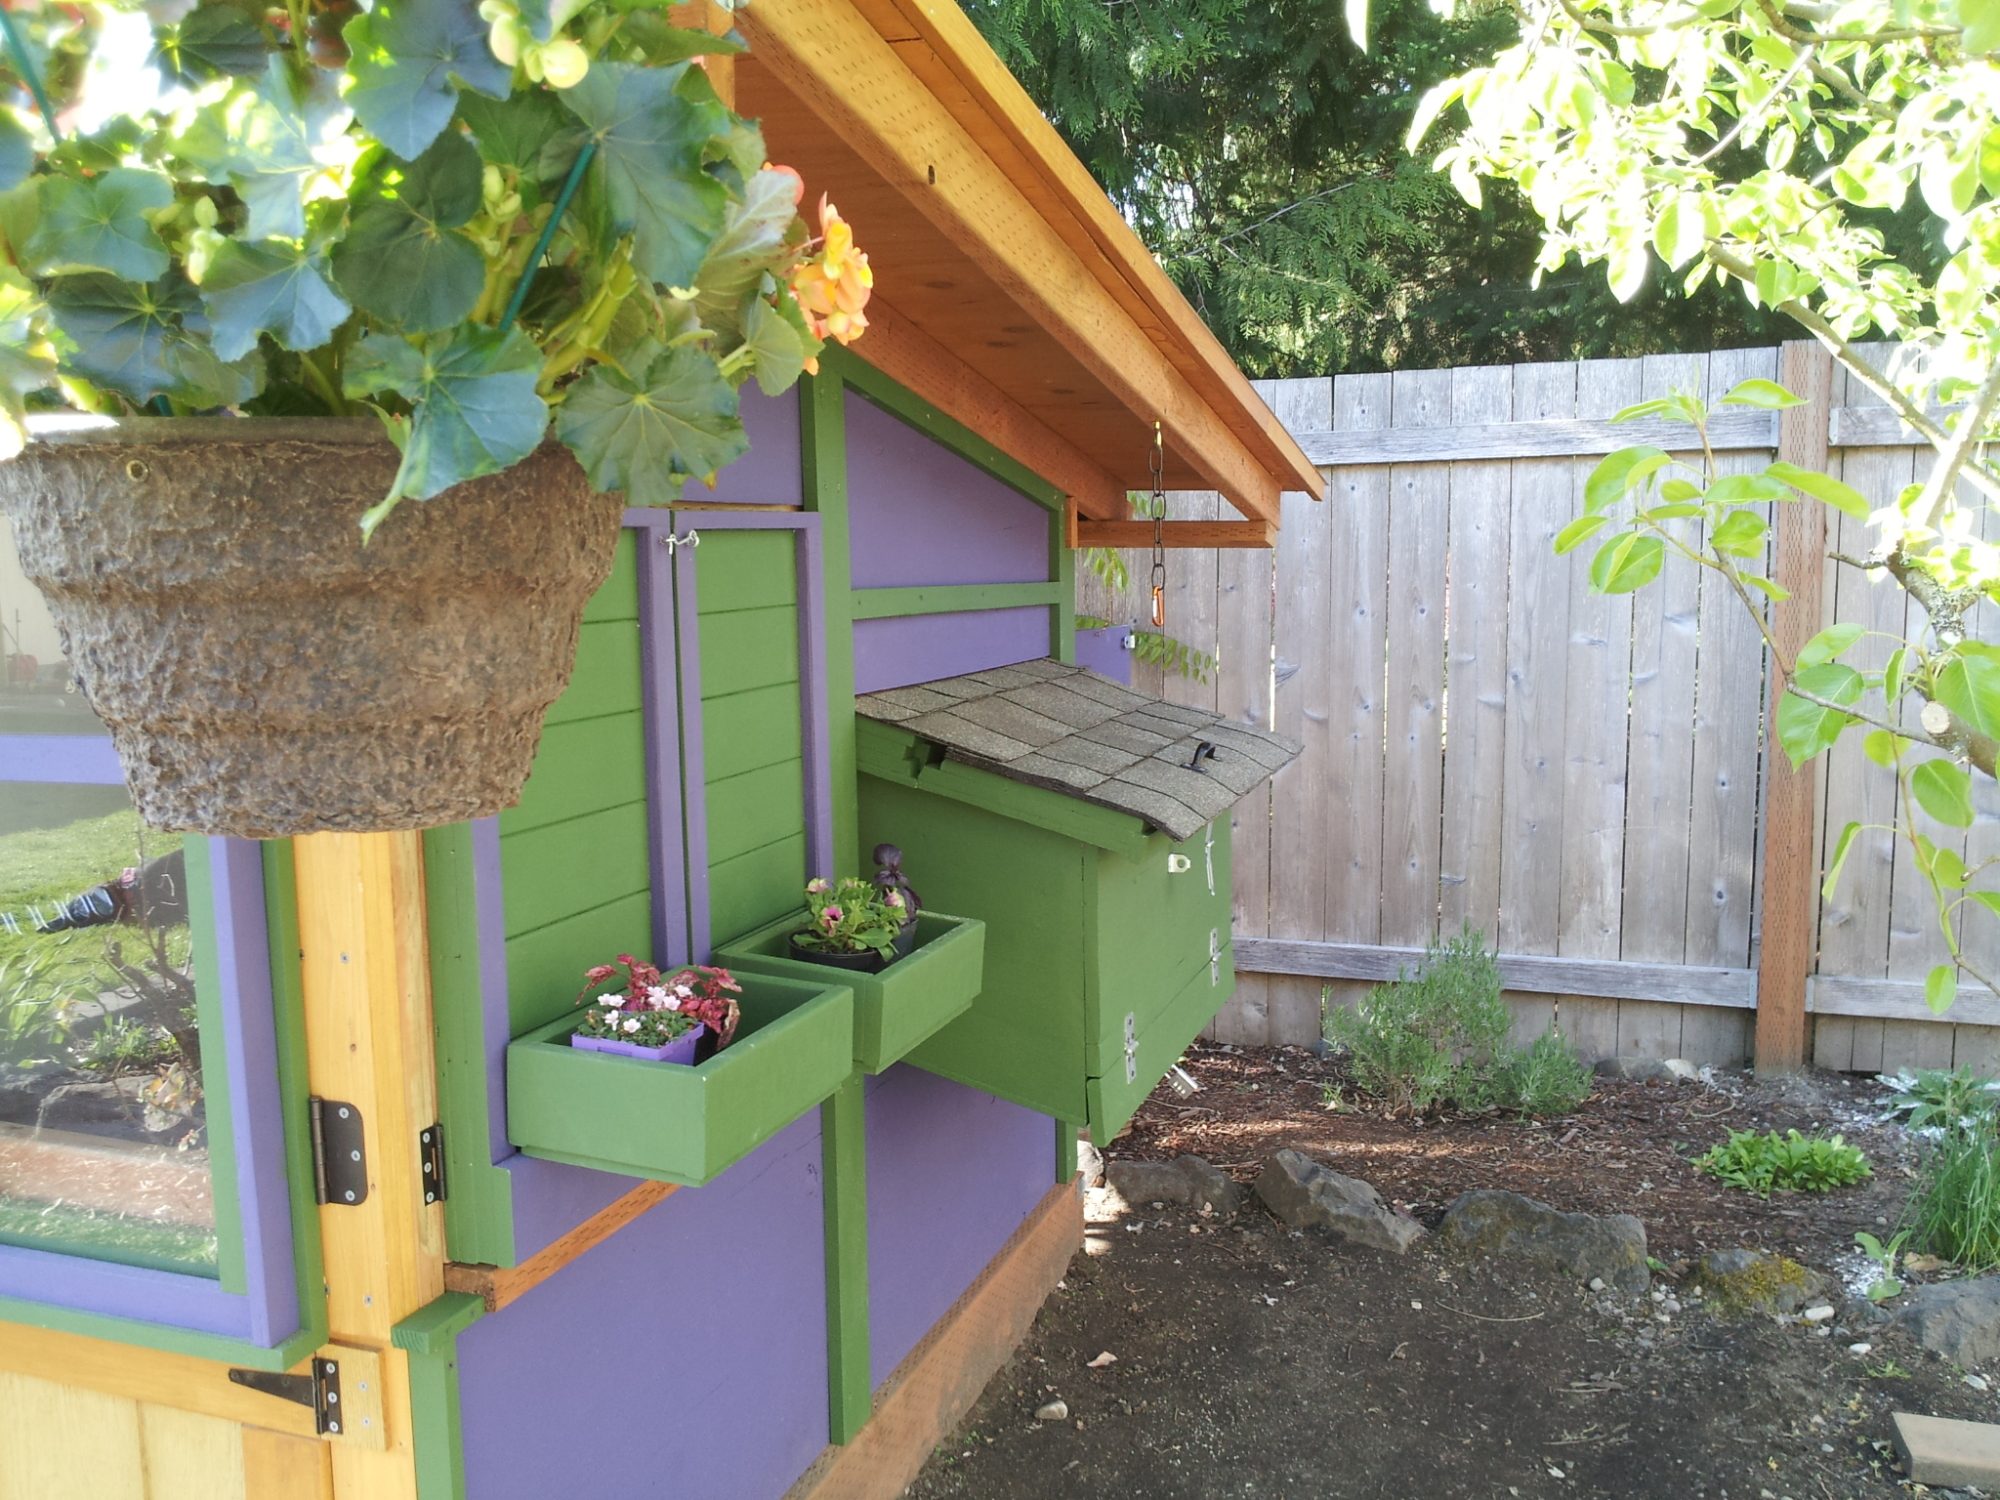
An outdoor roost with decorated rocks below,
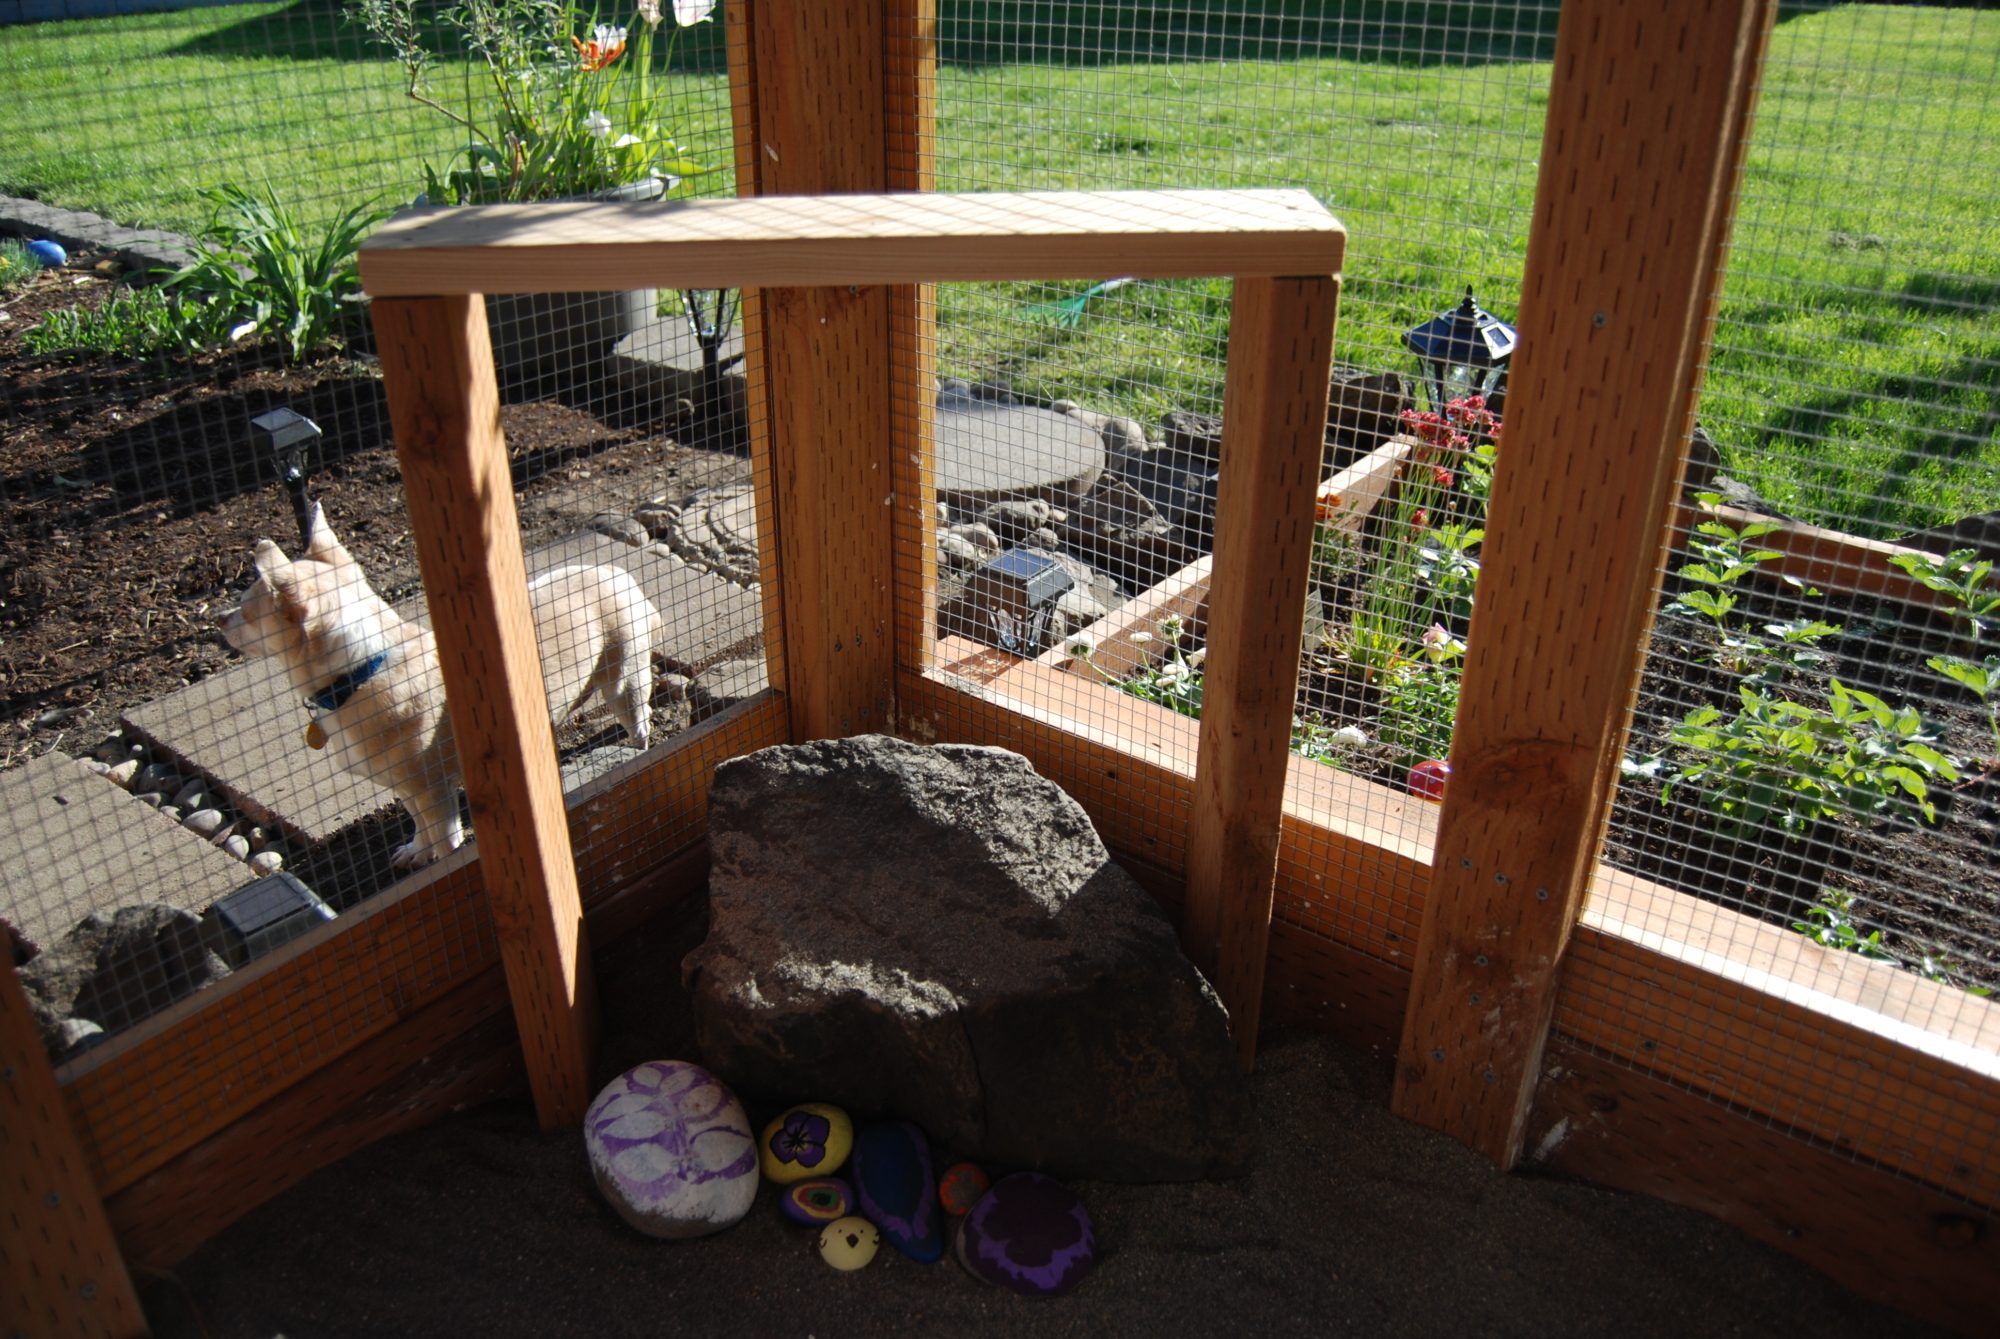
The outdoor roost with our chihuahua standing watch.
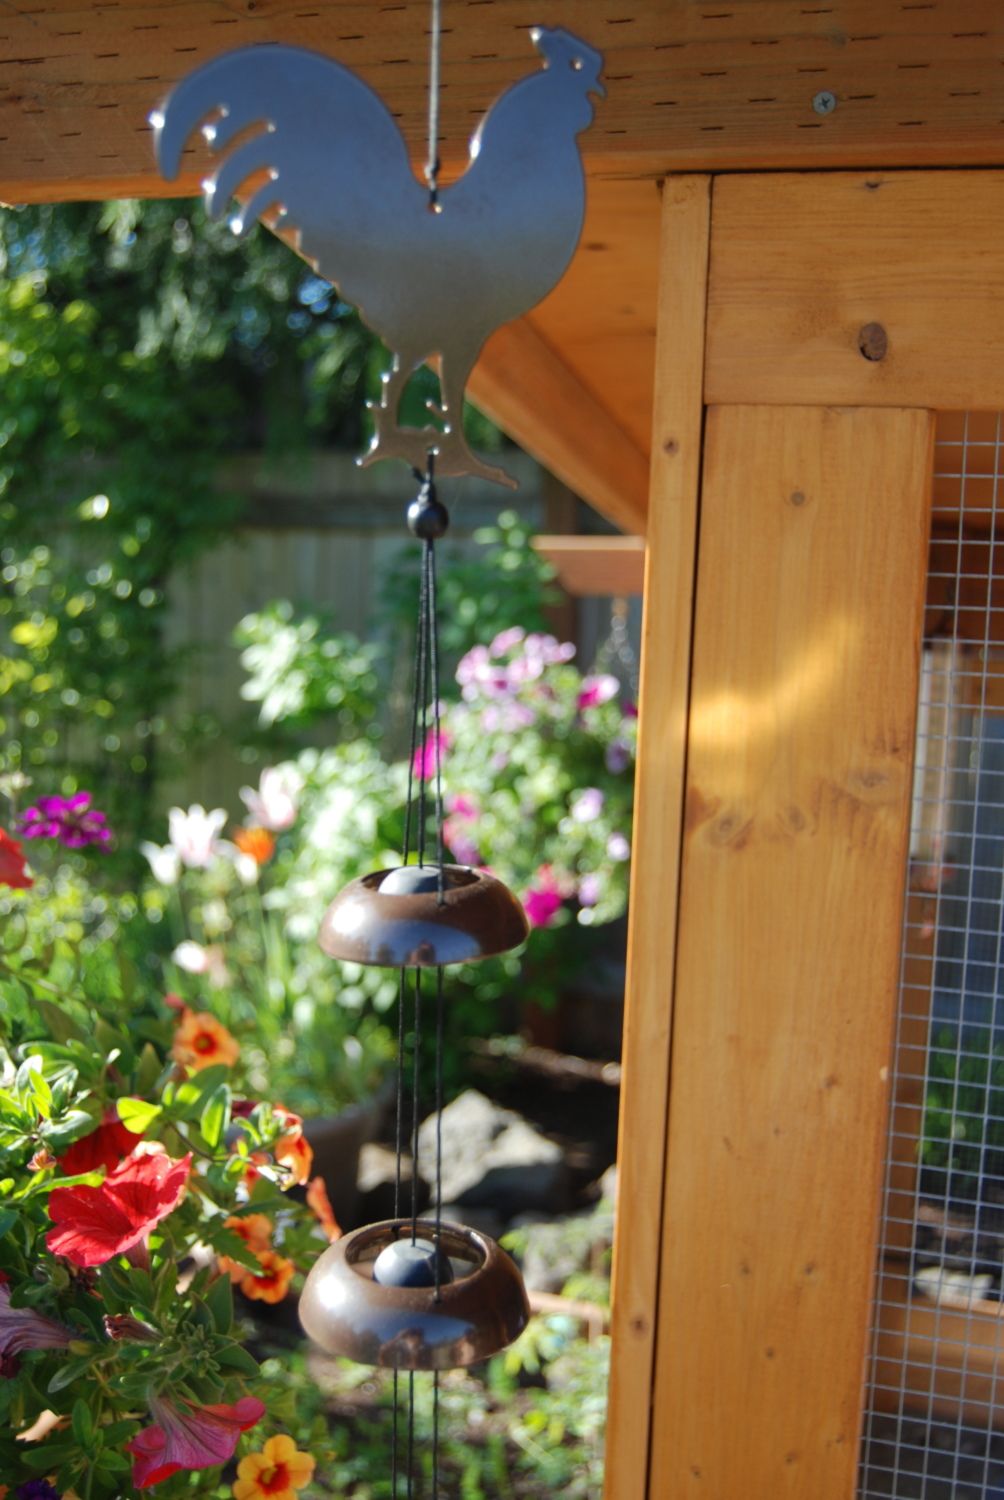
Pretty wind chimes
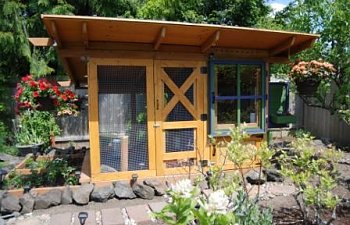
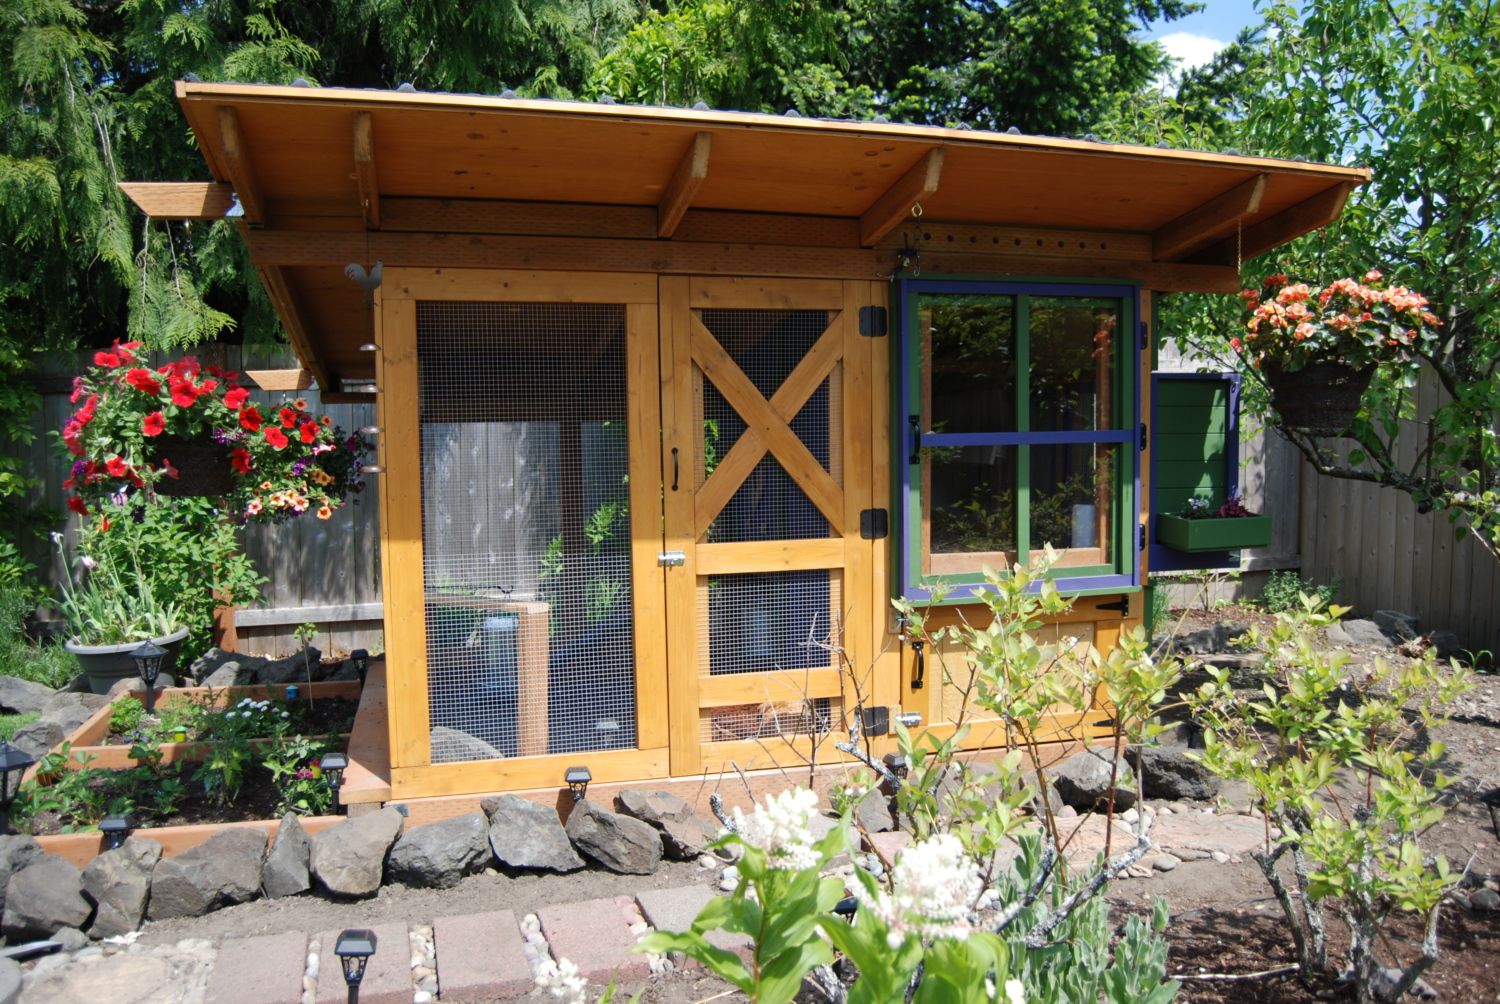
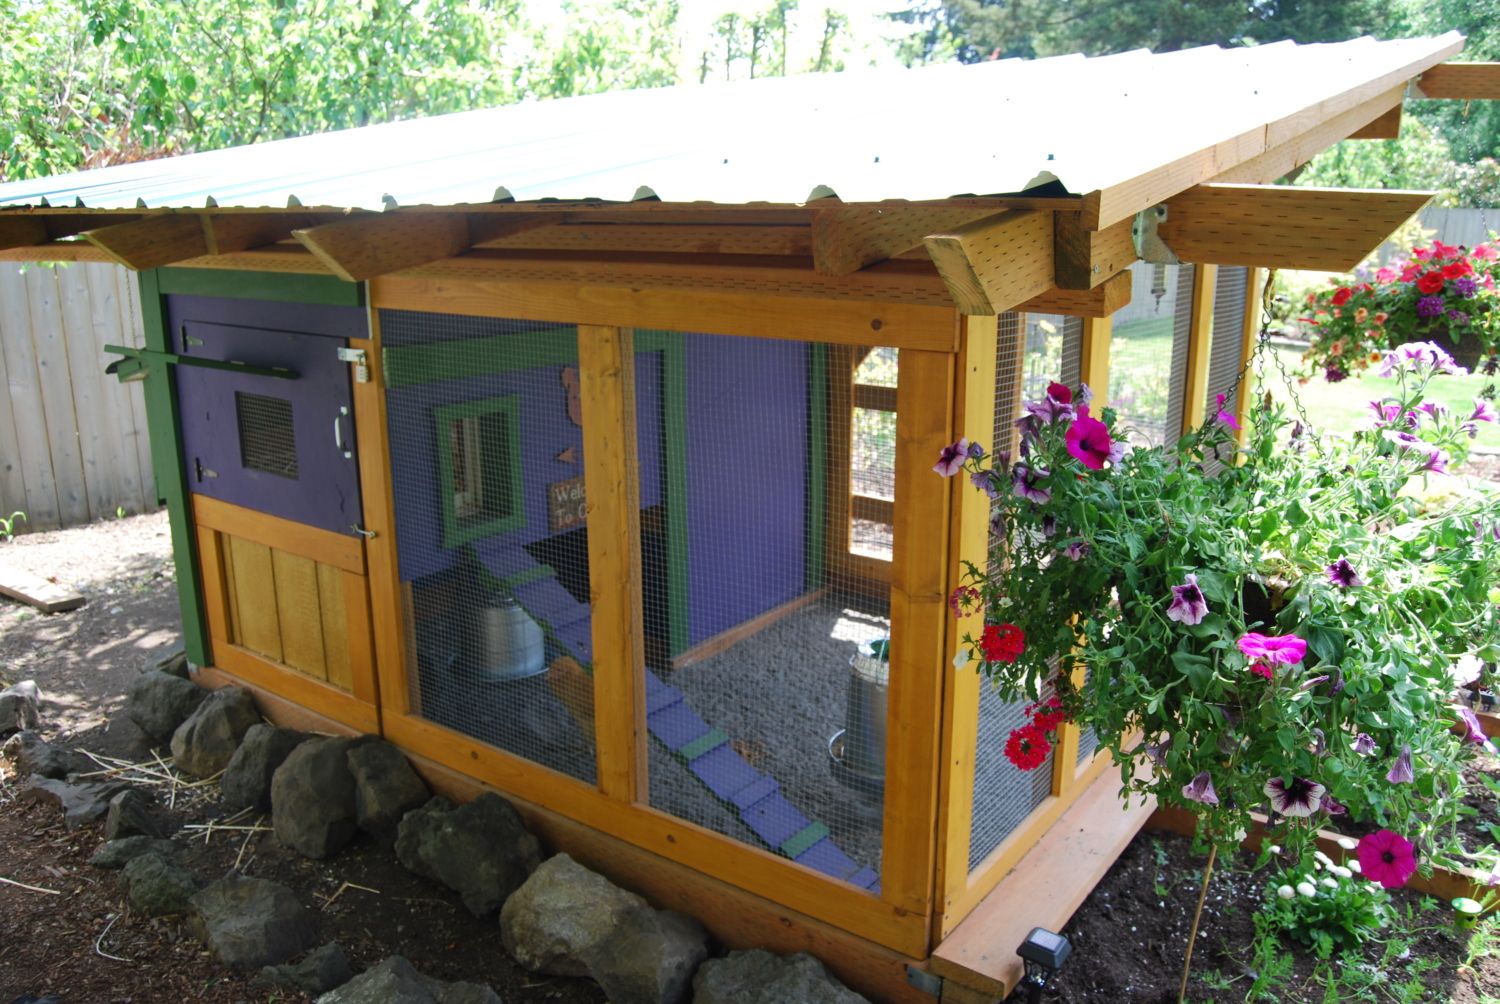
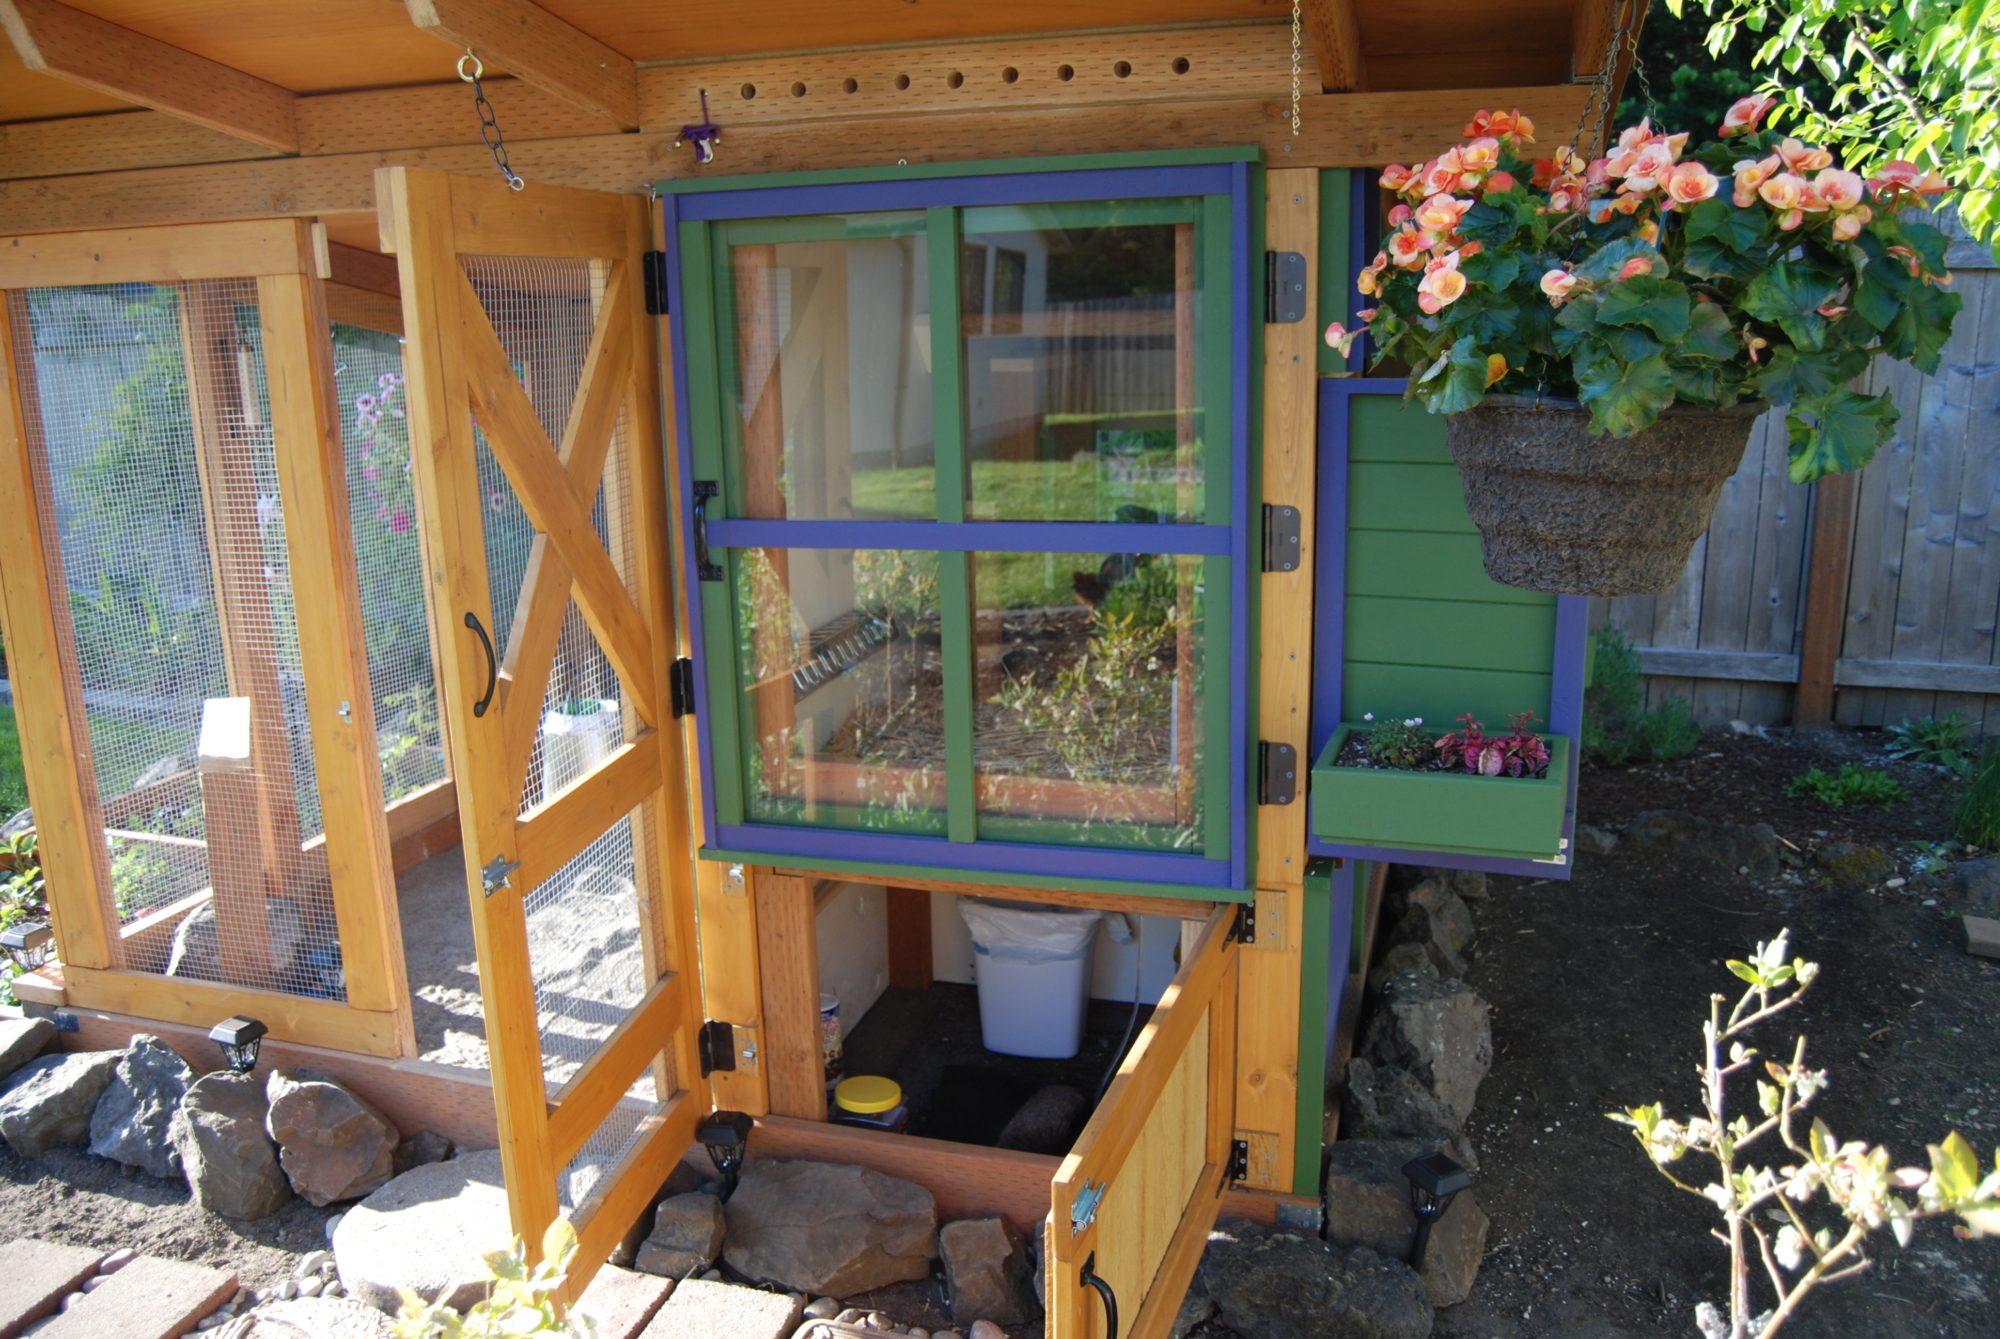
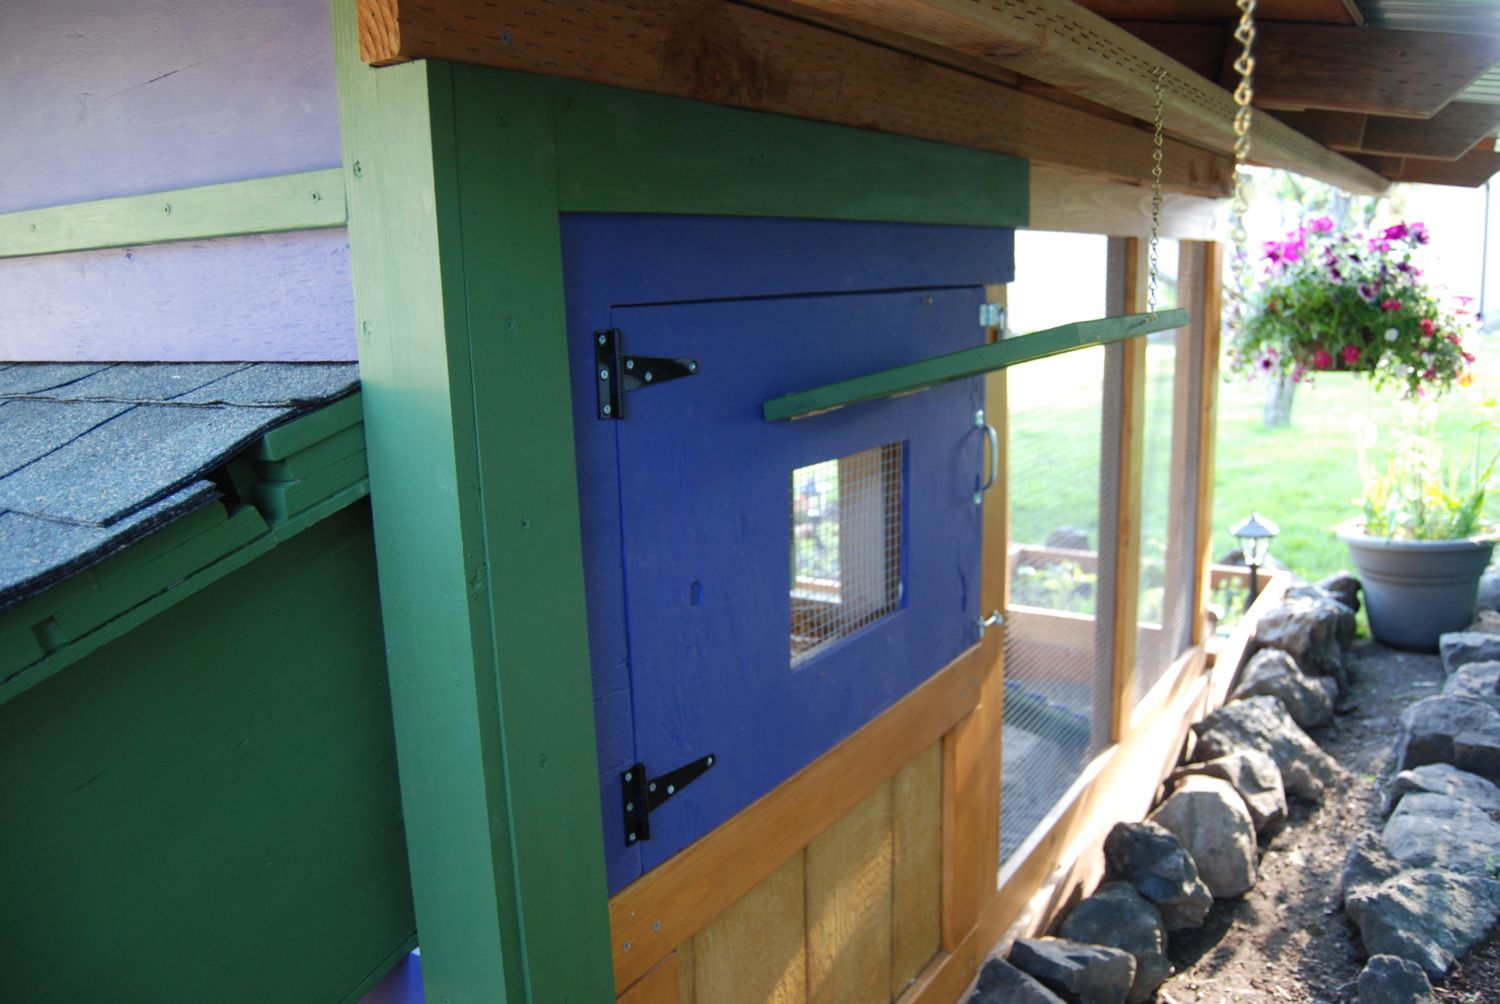
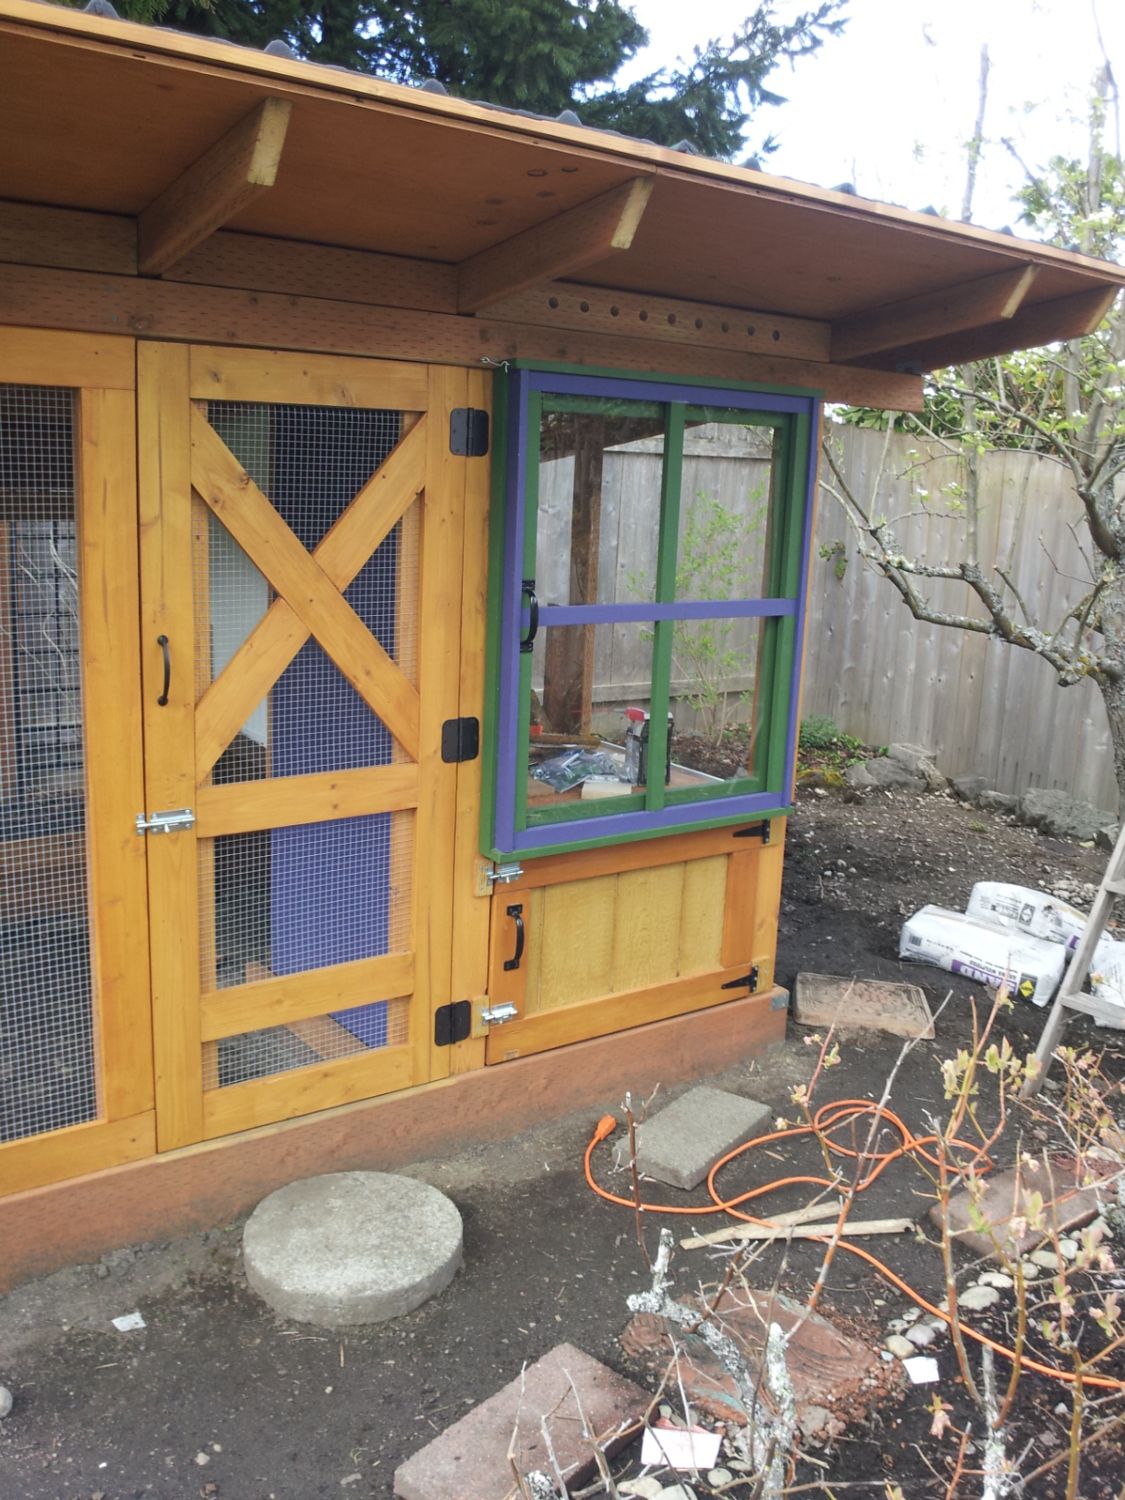
A view of the front side with the doors and windows open. The front door to the run, the door to the storage under the cabin and the big window to the cabin. We put 3 hanging flower baskets on the 3 sides visible from the house to add some color!
Big window closed
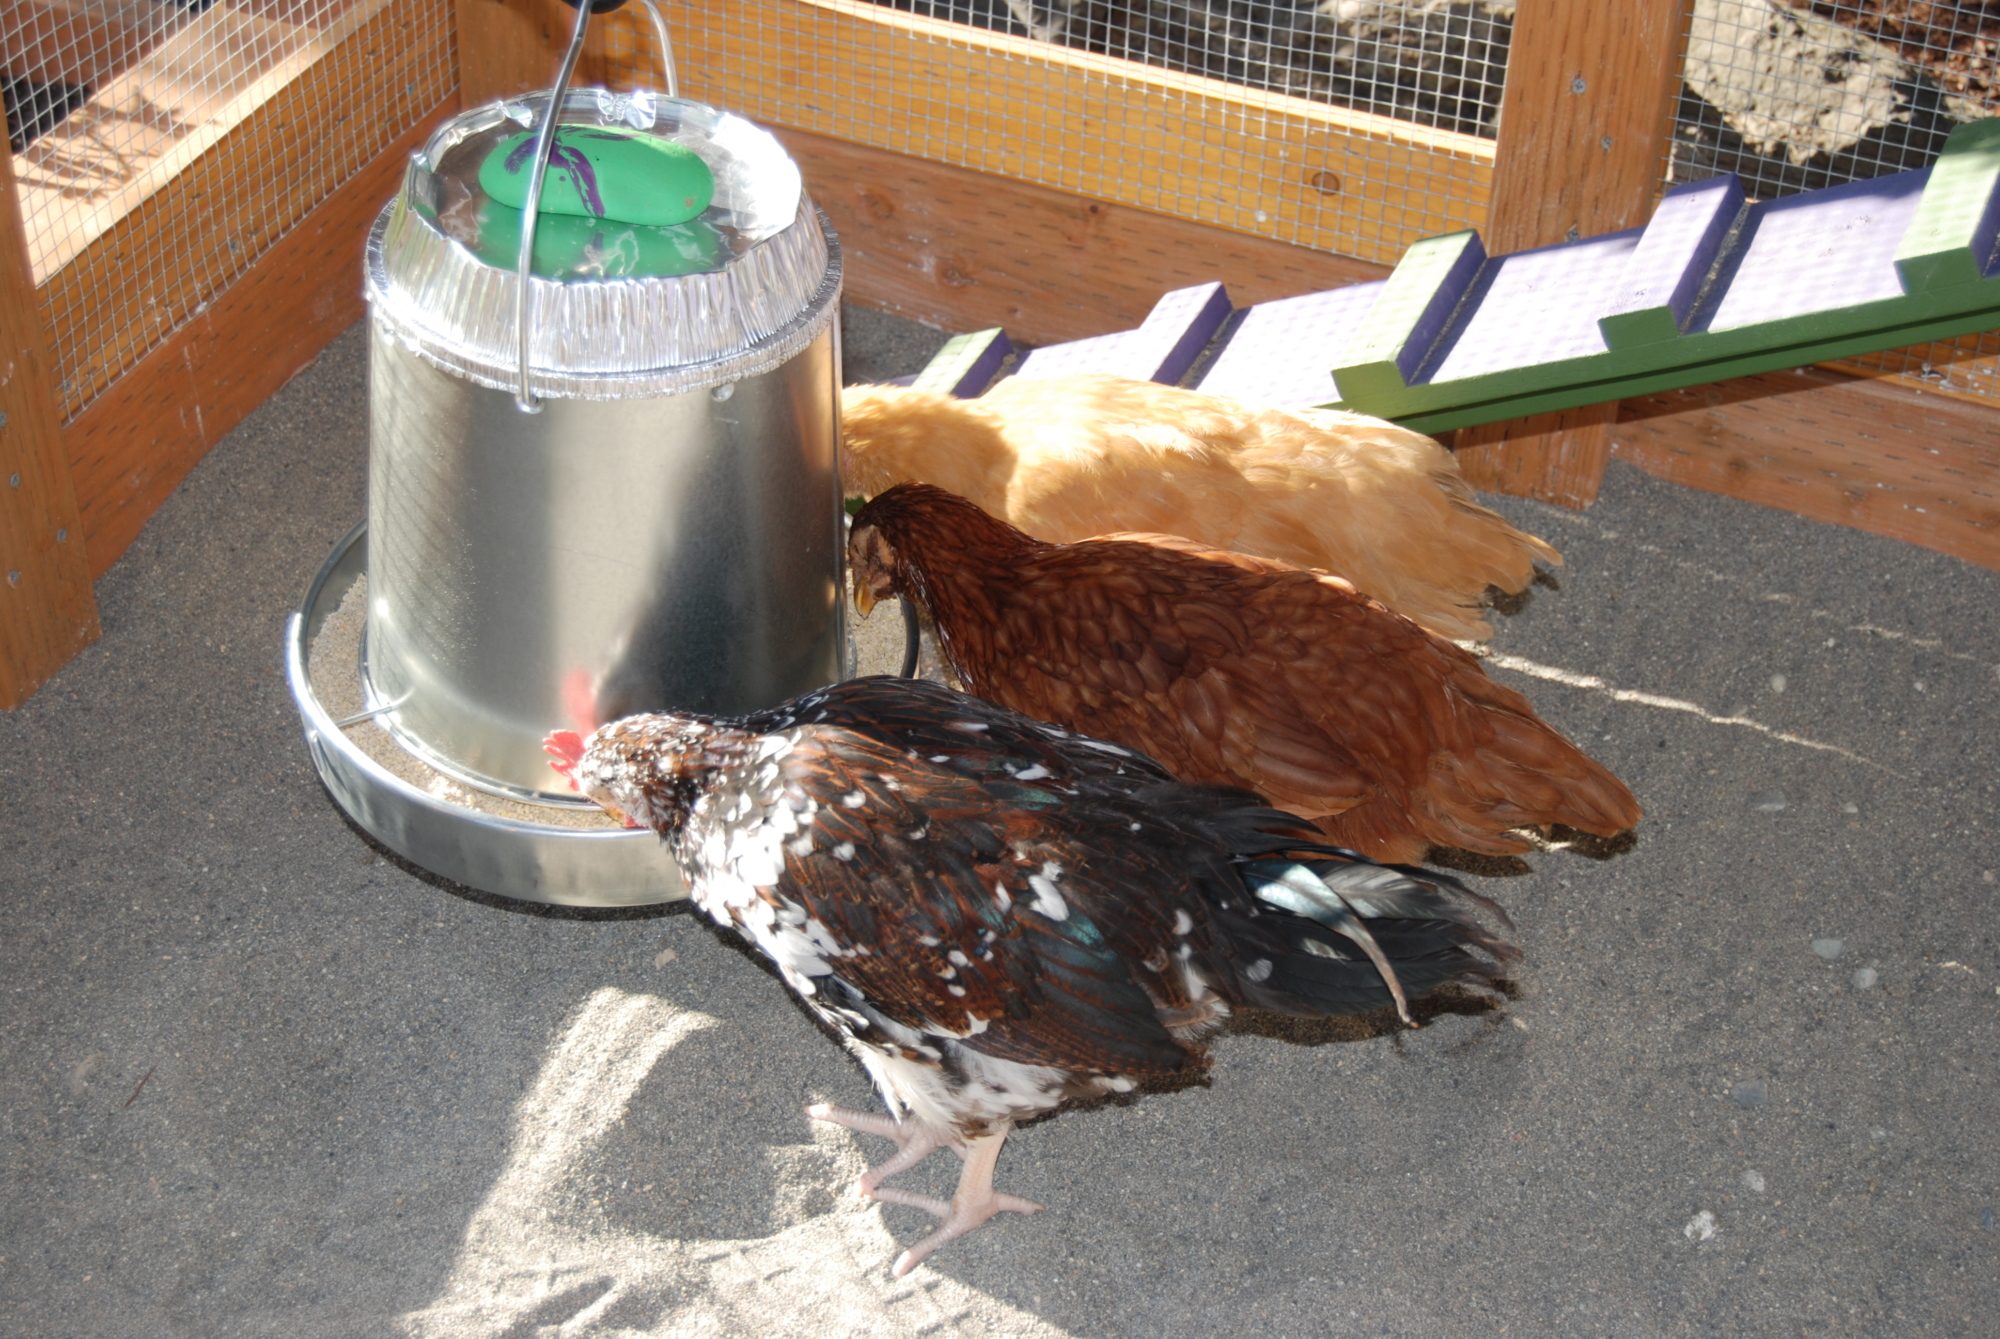
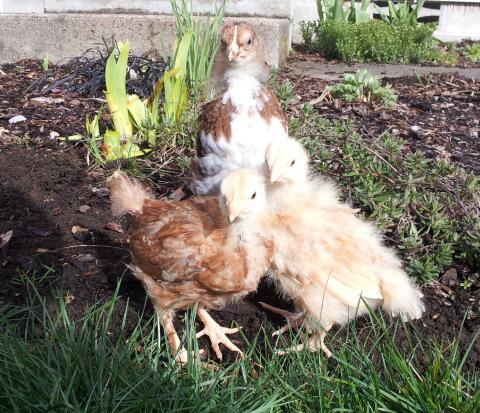
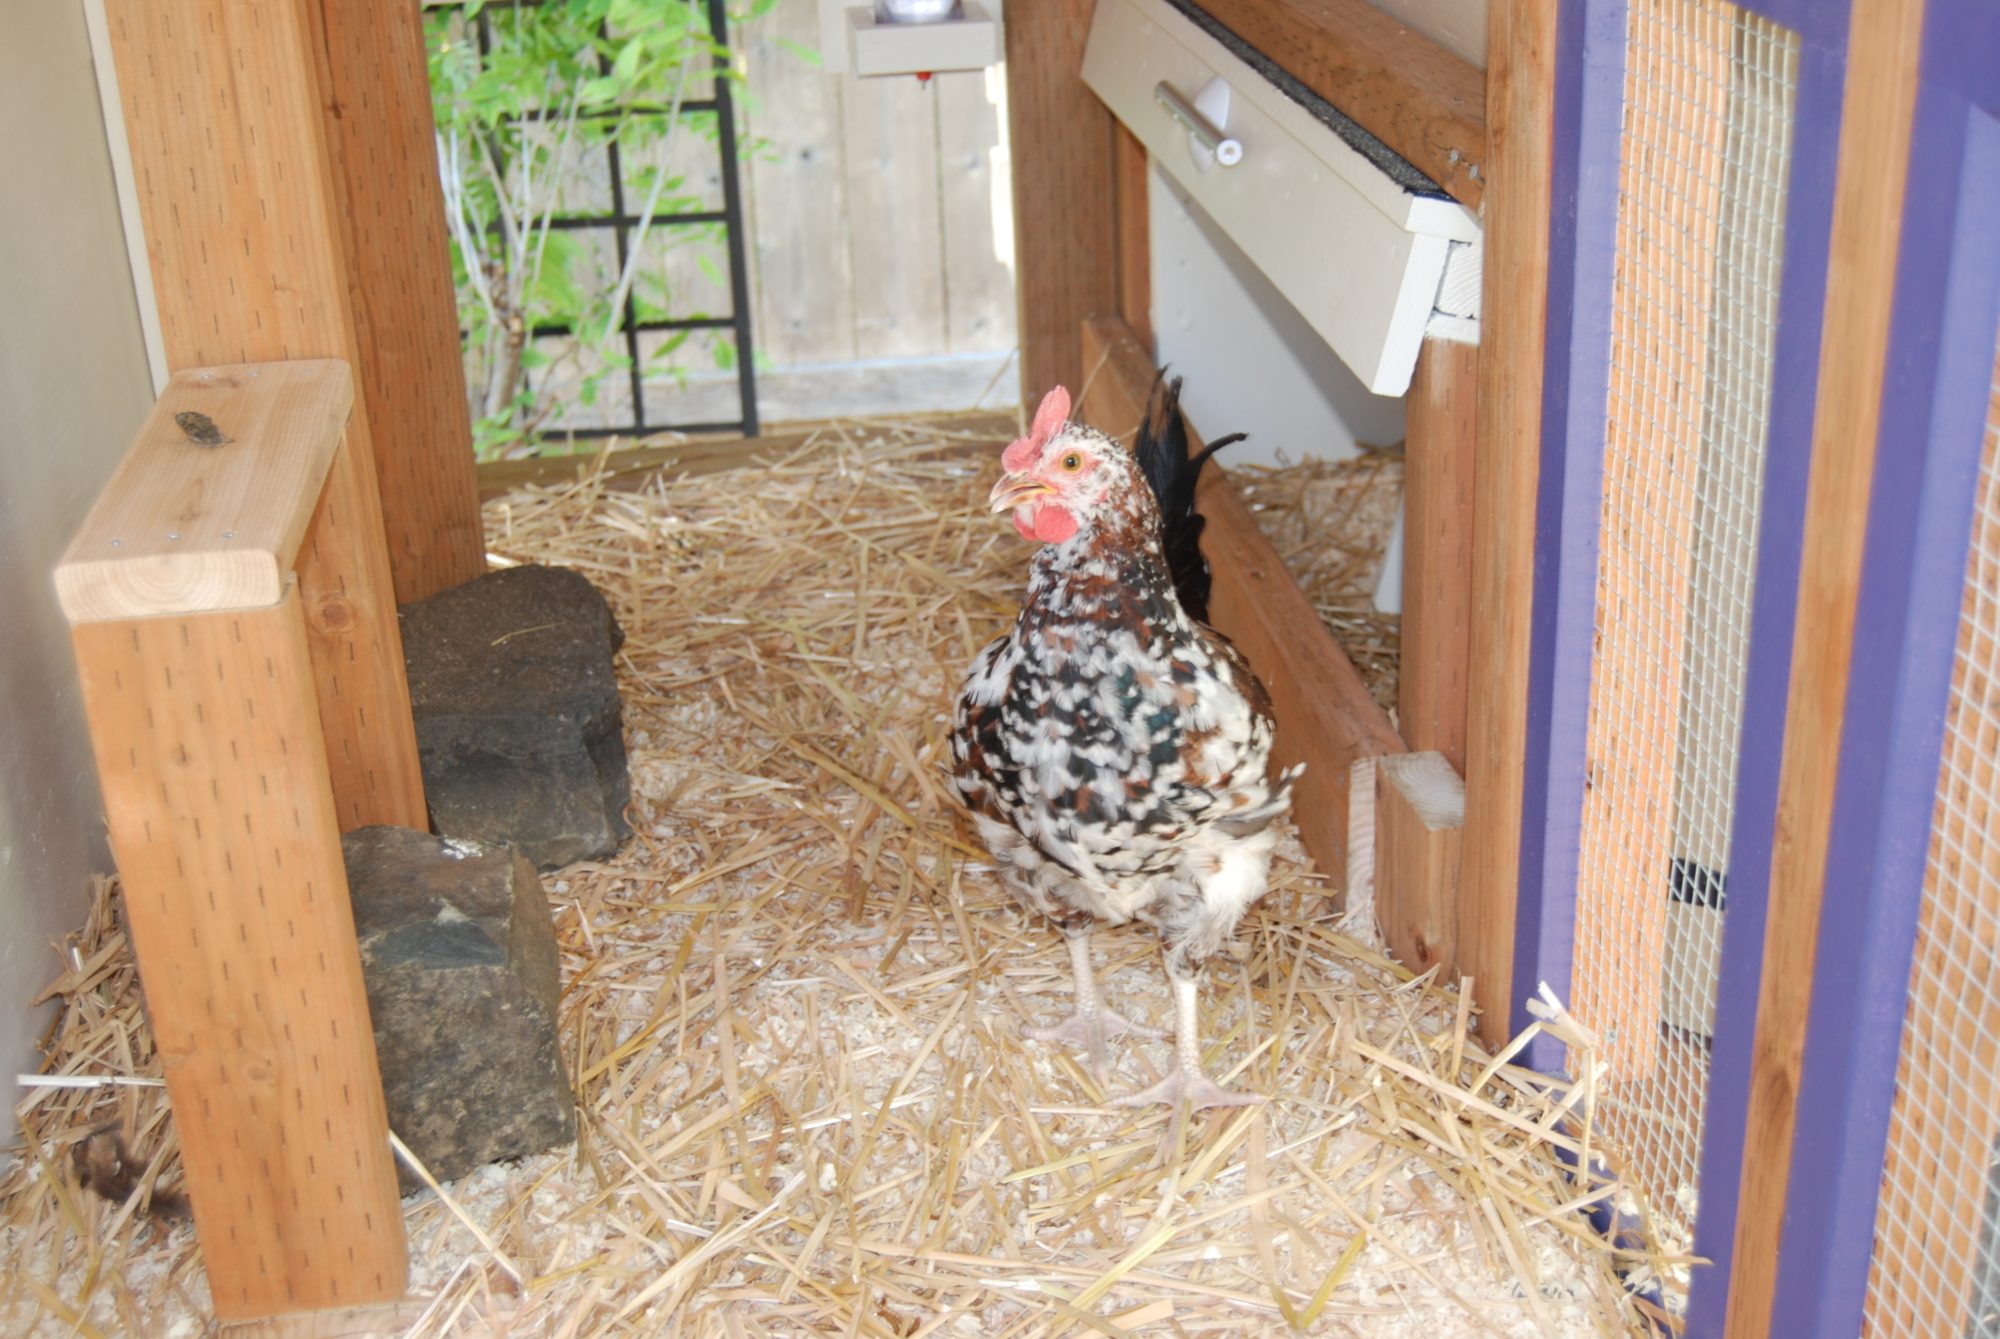
Snack time
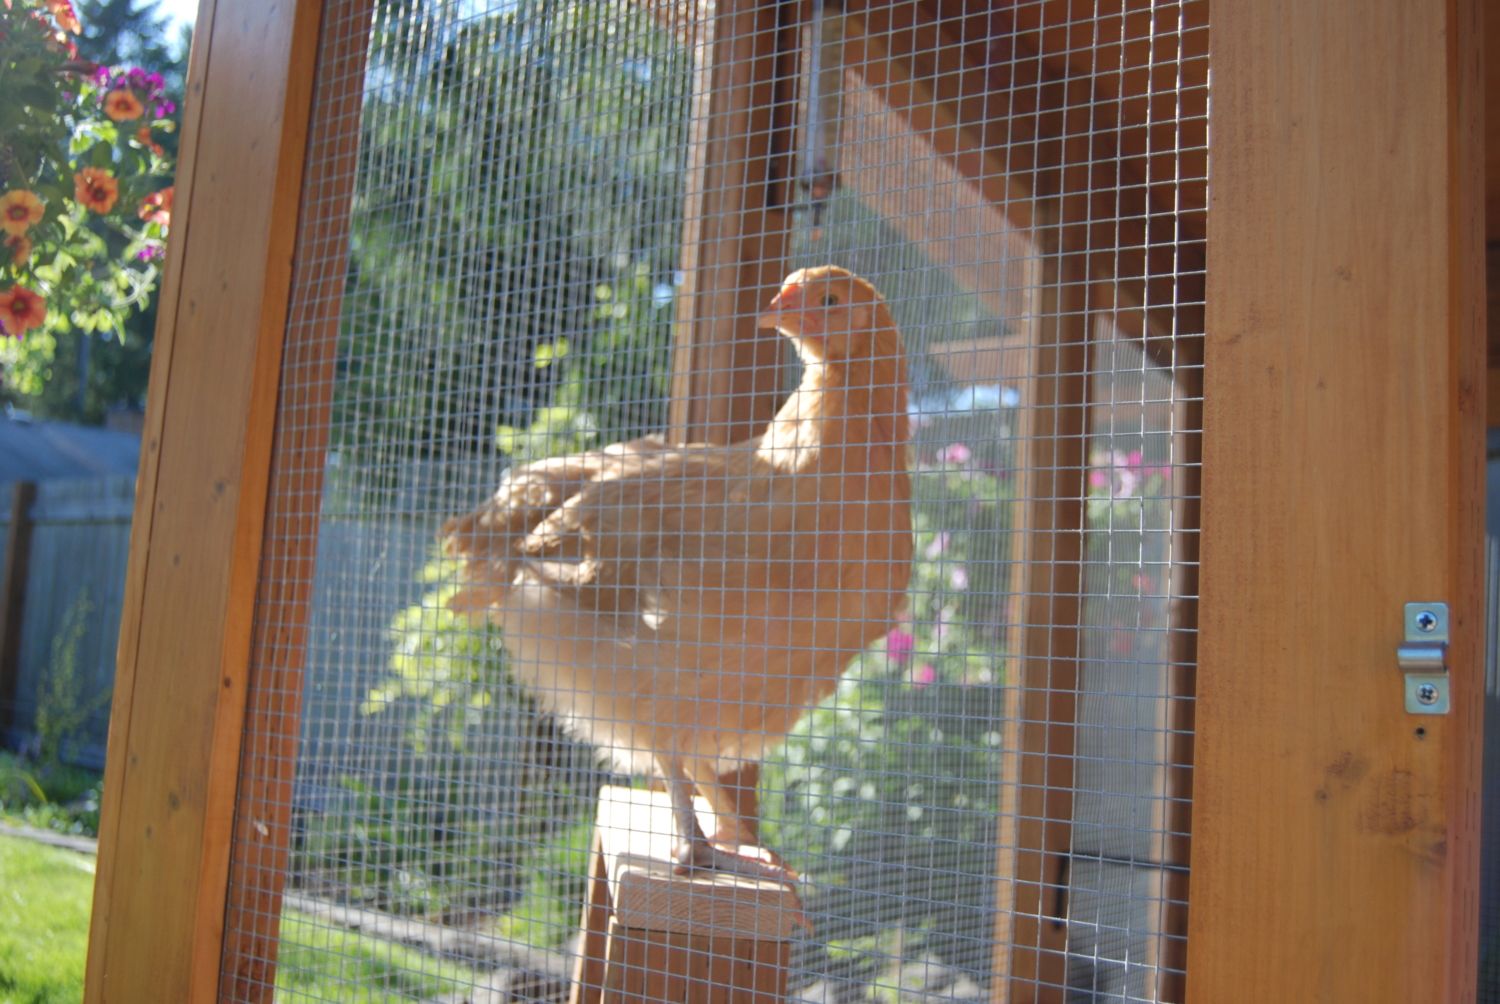
Harriet on the outdoor perch.
Nesting boxes and north side door open
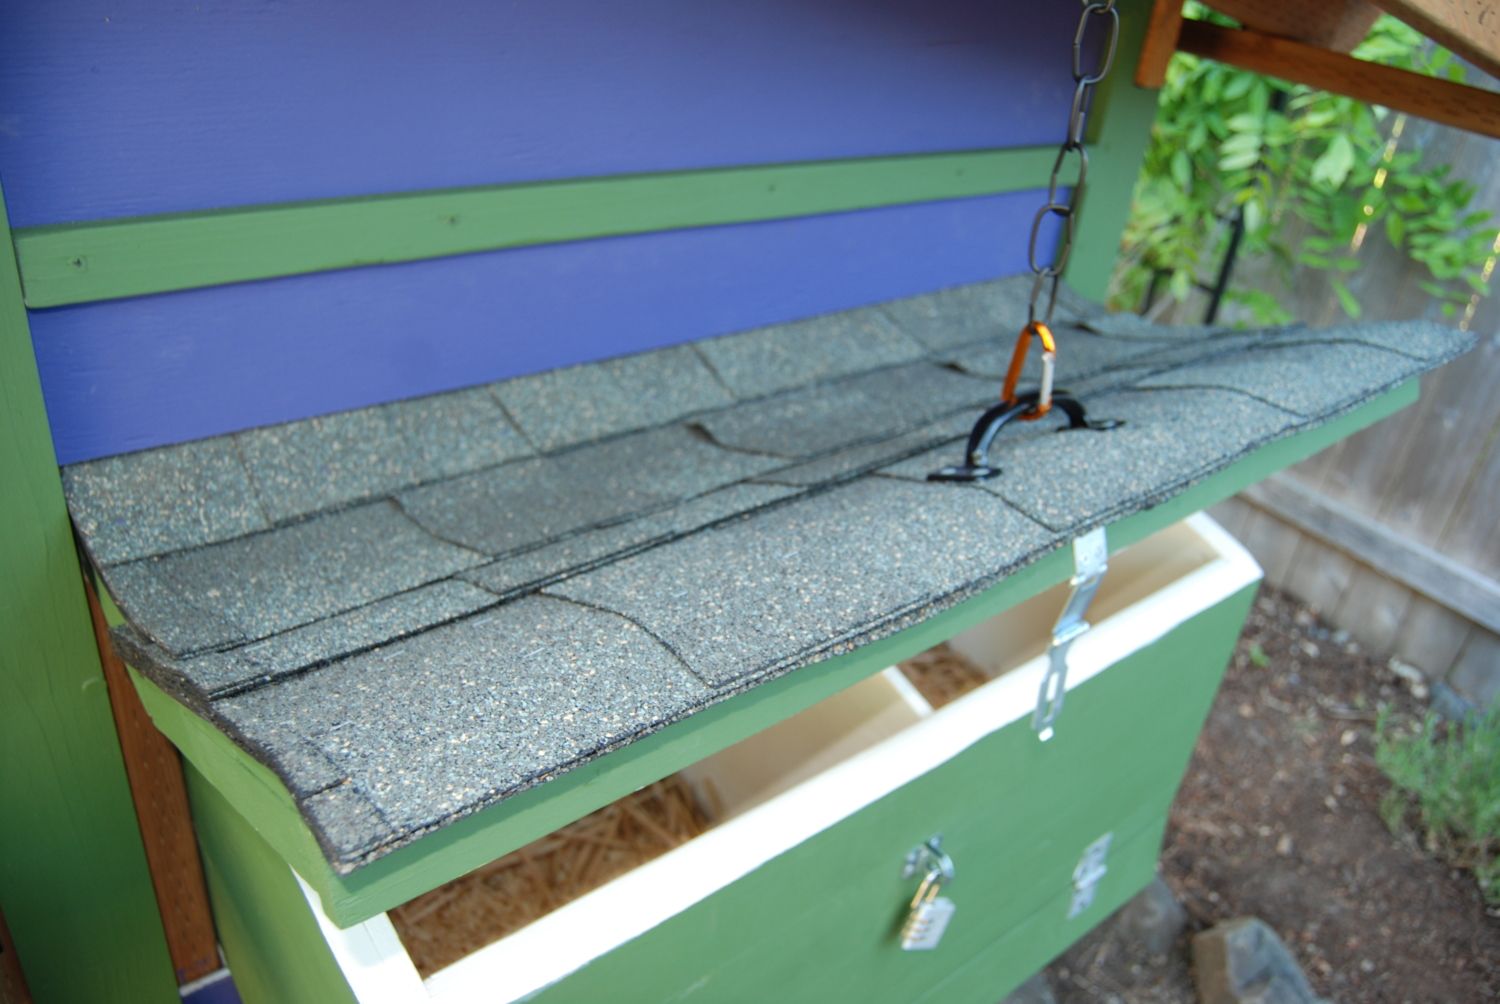
Nesting box with articulating roof.
Lower cleaning access door
... open
Inside the nesting boxes, shown is the removable panel for cleaning
... panel removed
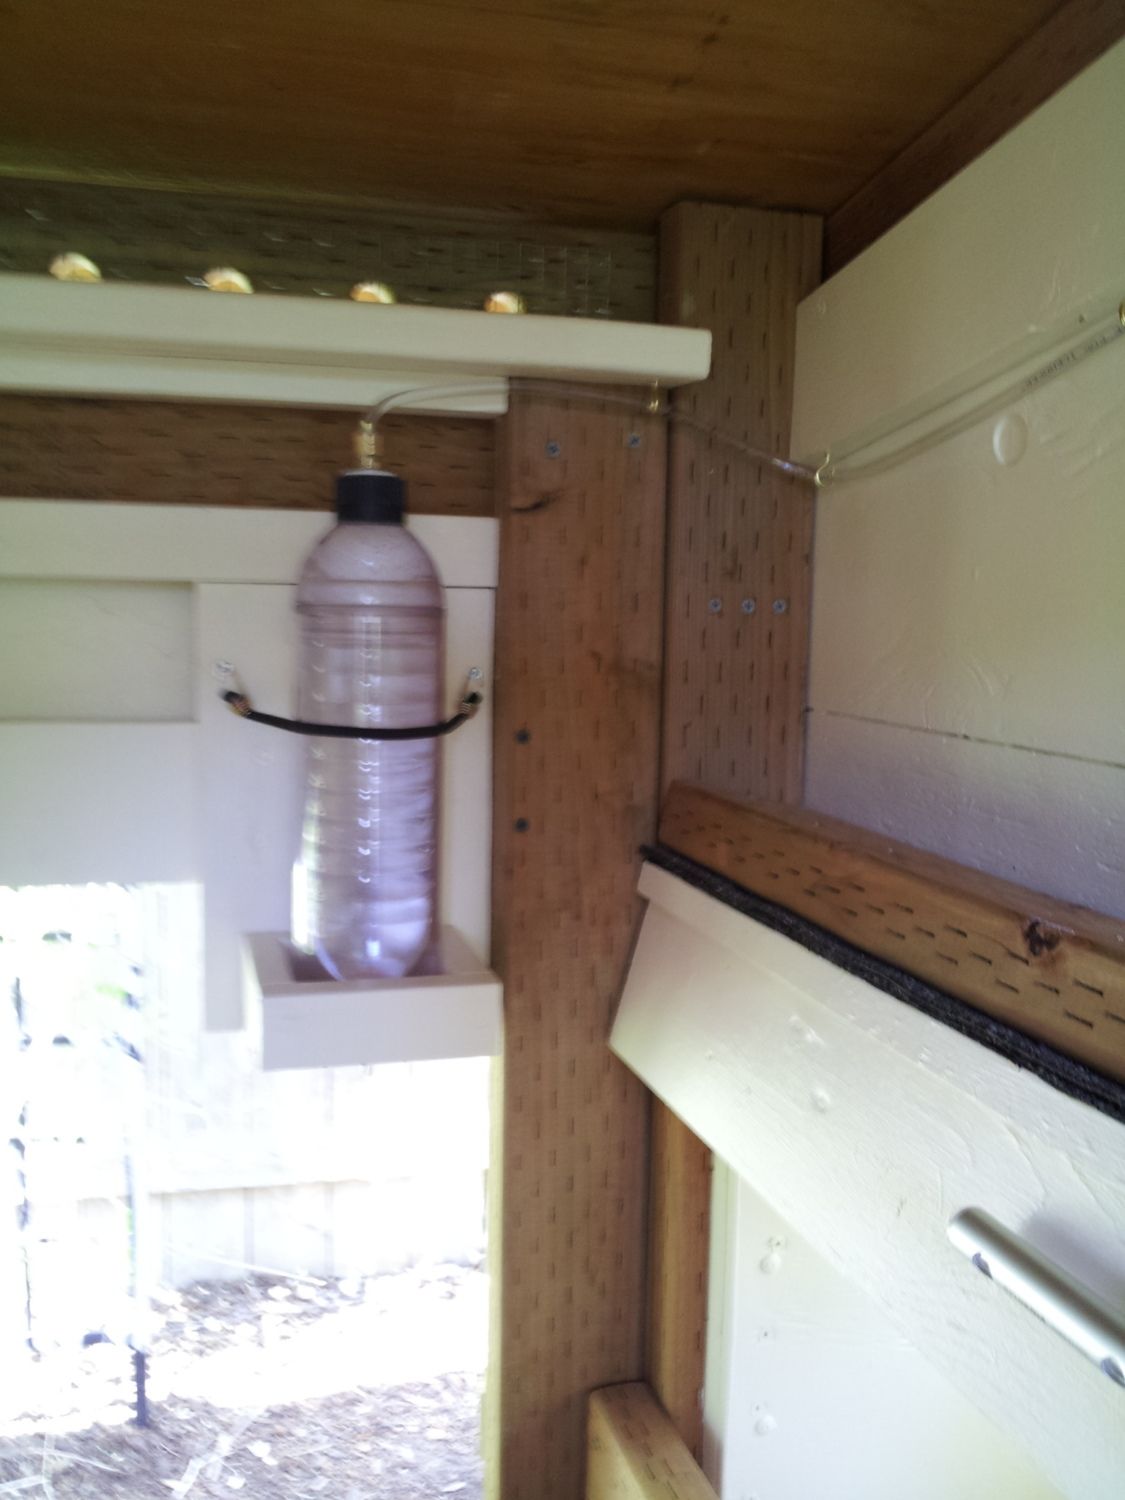
A view of the indoor nipple waterer with the nesting boxes (with nightlight) in the background.
Eastern side of the coop - seen are the eastern side window boxes, the nesting boxes, northern door.
Northern door with the stained glass window I made of Blue, our Rhode Island Red. This window flips open for ventilation.
The stained glass window I made of our Silkie, Aretha. It also flips up for ventilation.
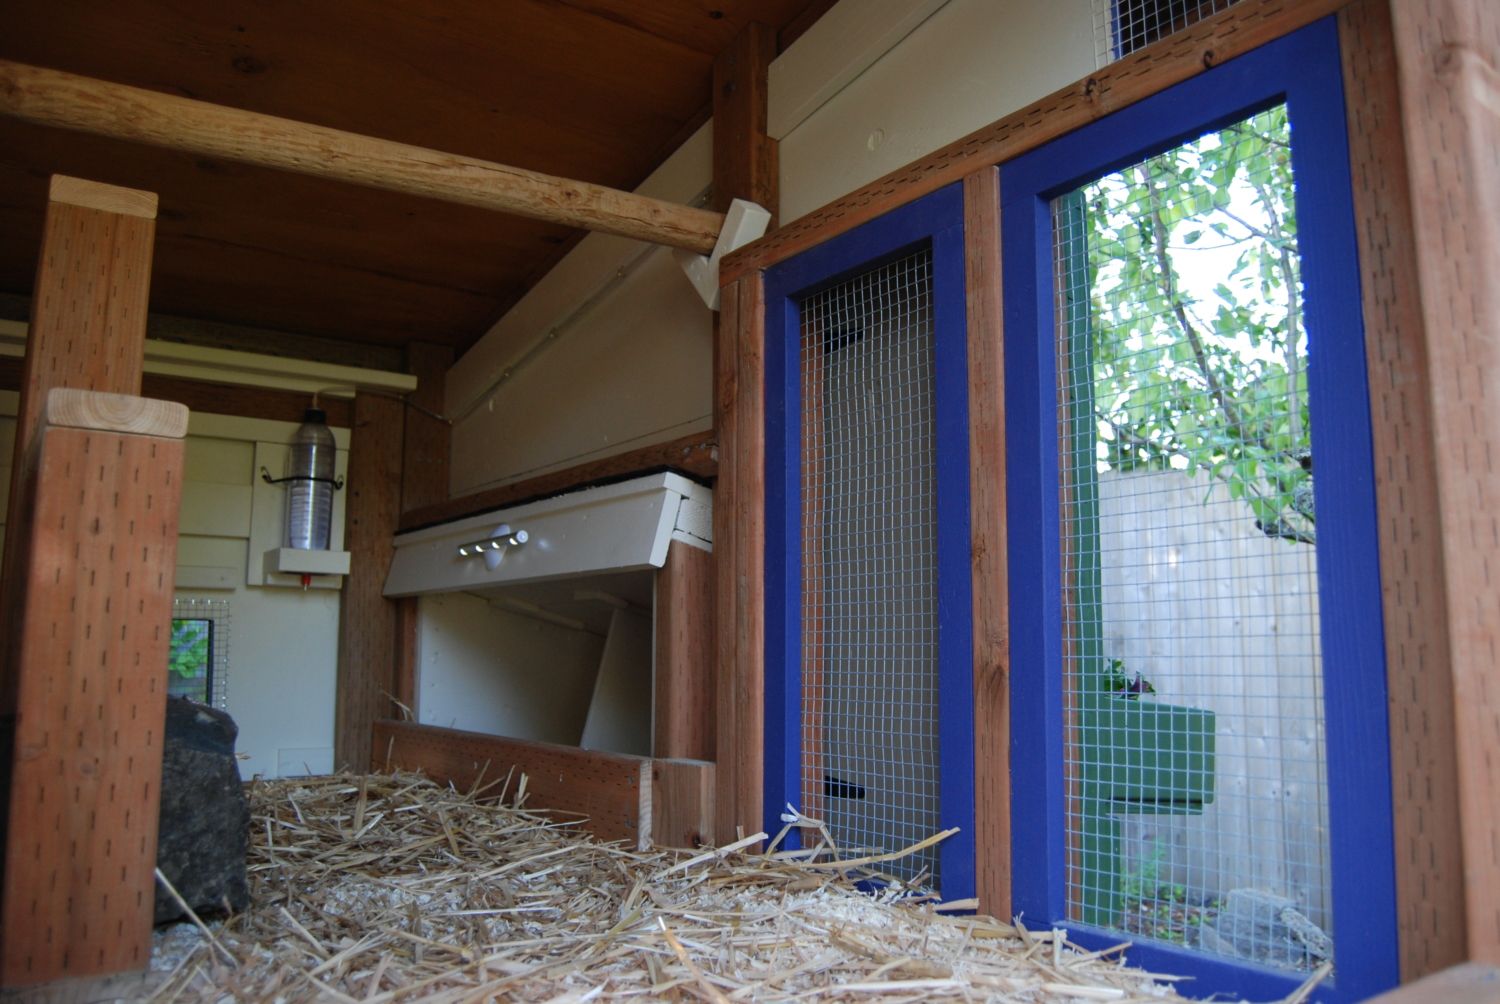
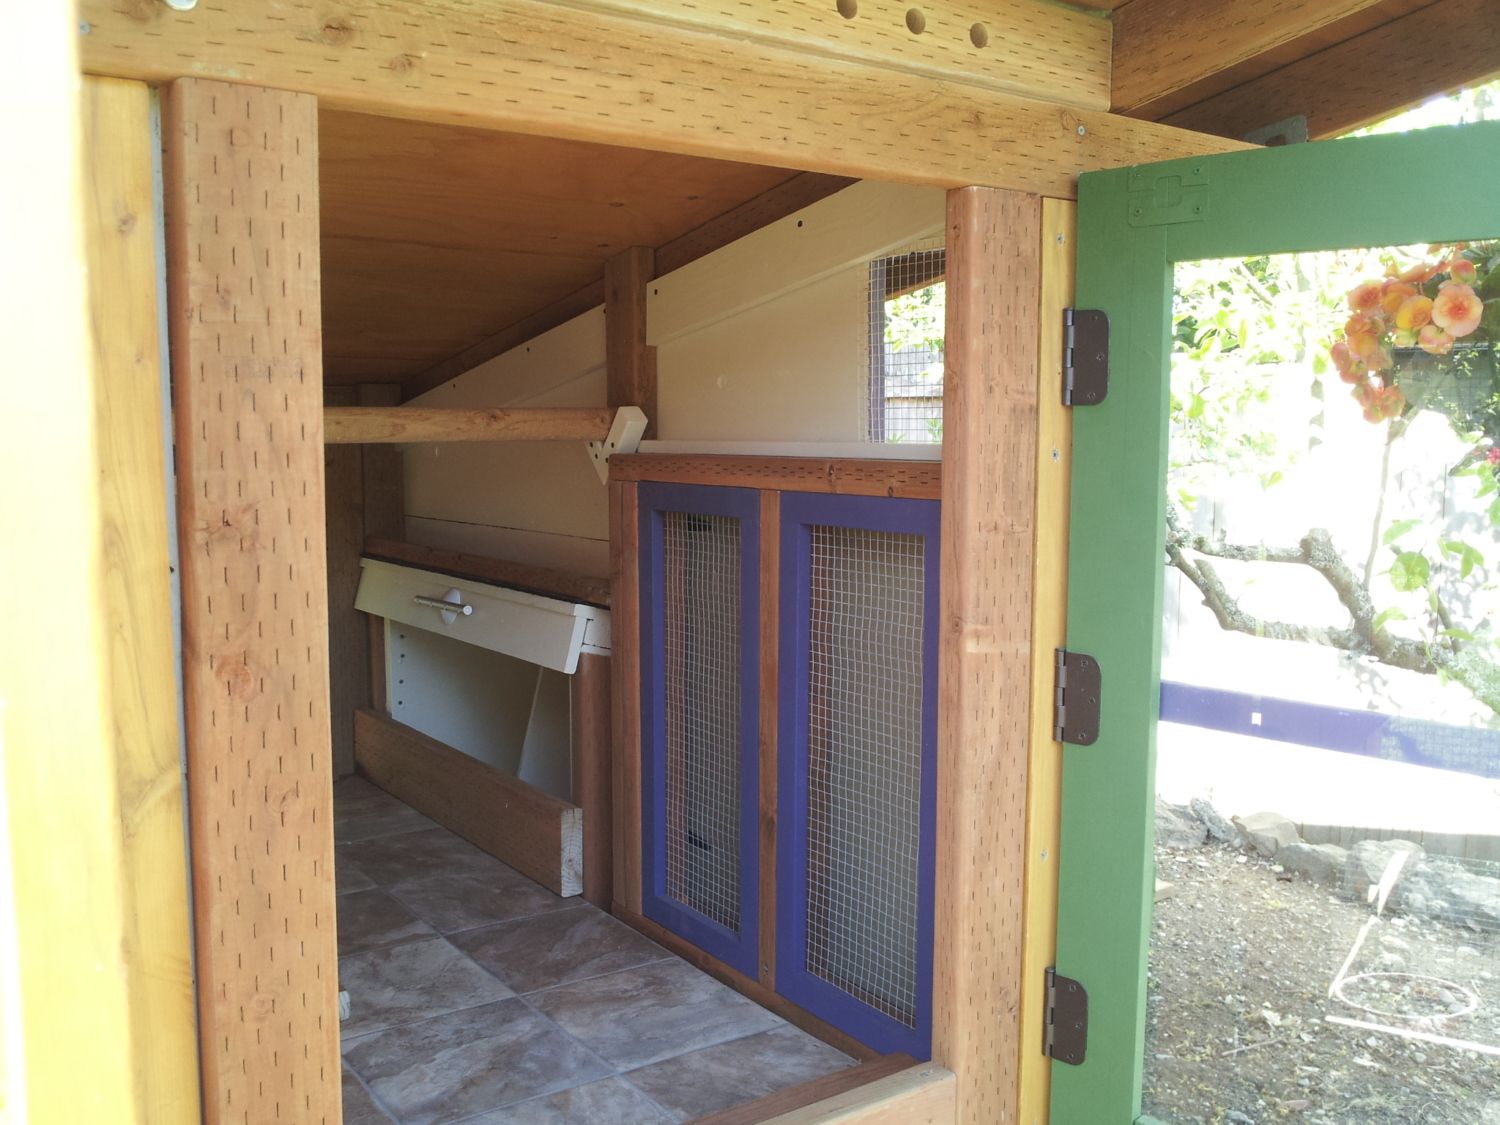
Inside the cabin
Northern window hooked open for ventilation.
Chicken playground, roosting bar, nipple waterer, nesting boxes with nightlight and windows with flower boxes.
Pop hole door cable running along the roof of the cabin.
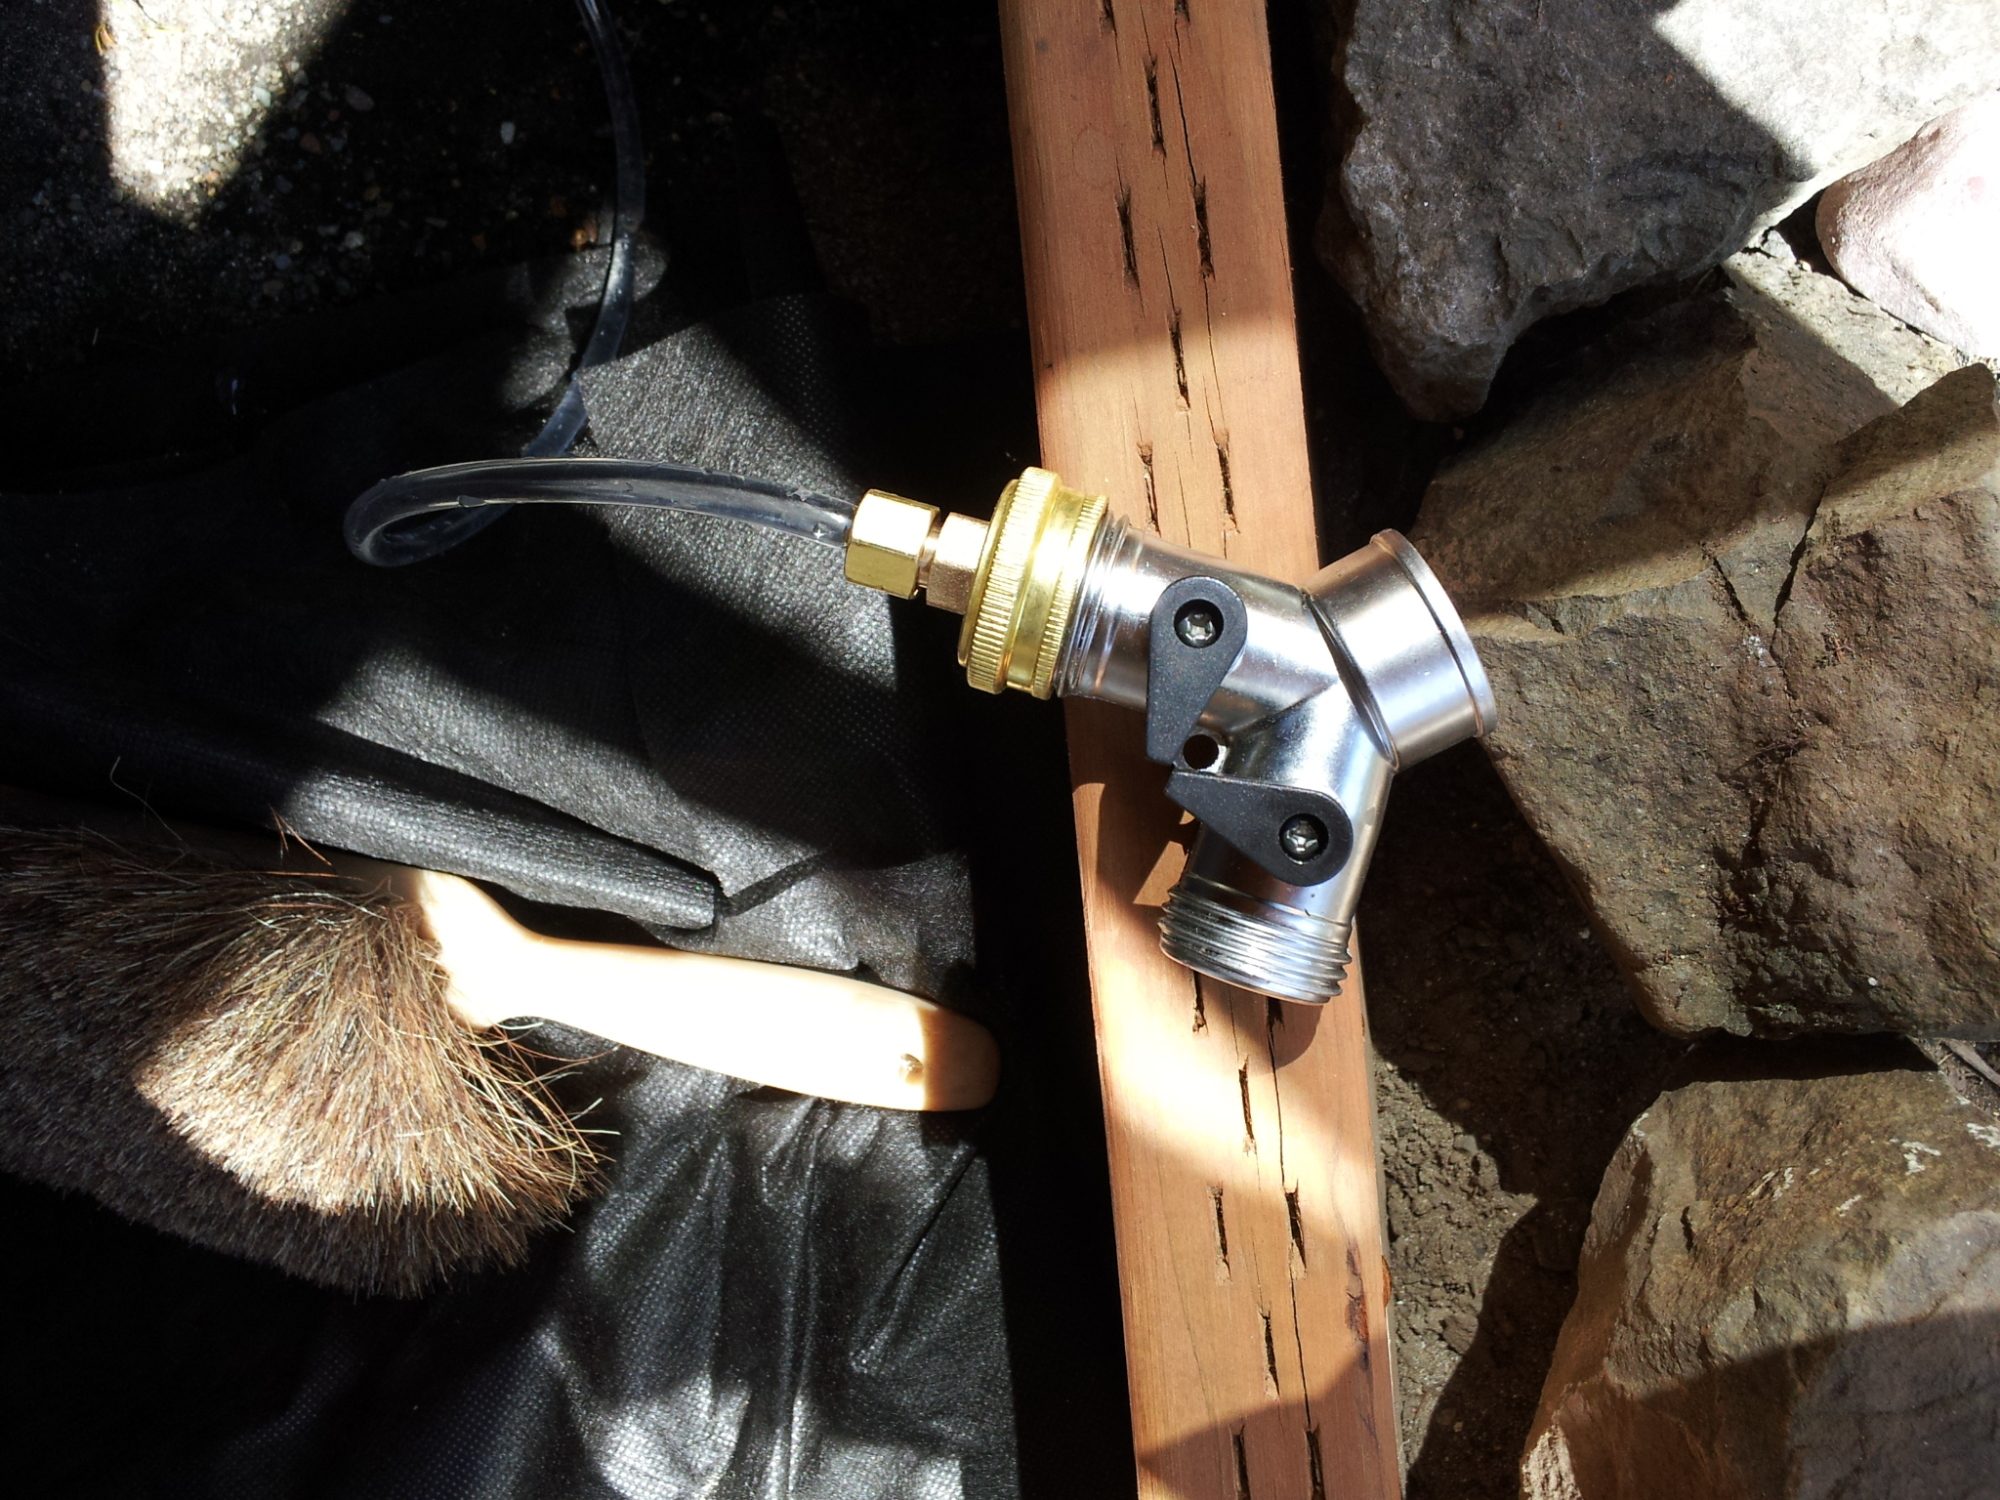
Nipple waterer access hose. Hose is accessible though the storage compartment below the cabin.
Harriet and Blue checking out their new roosting bar.
Work bench with the coop in the background.
Nighttime shot. The exterior solar lights illuminate the cabin and run nicely.
And this is where it all began...
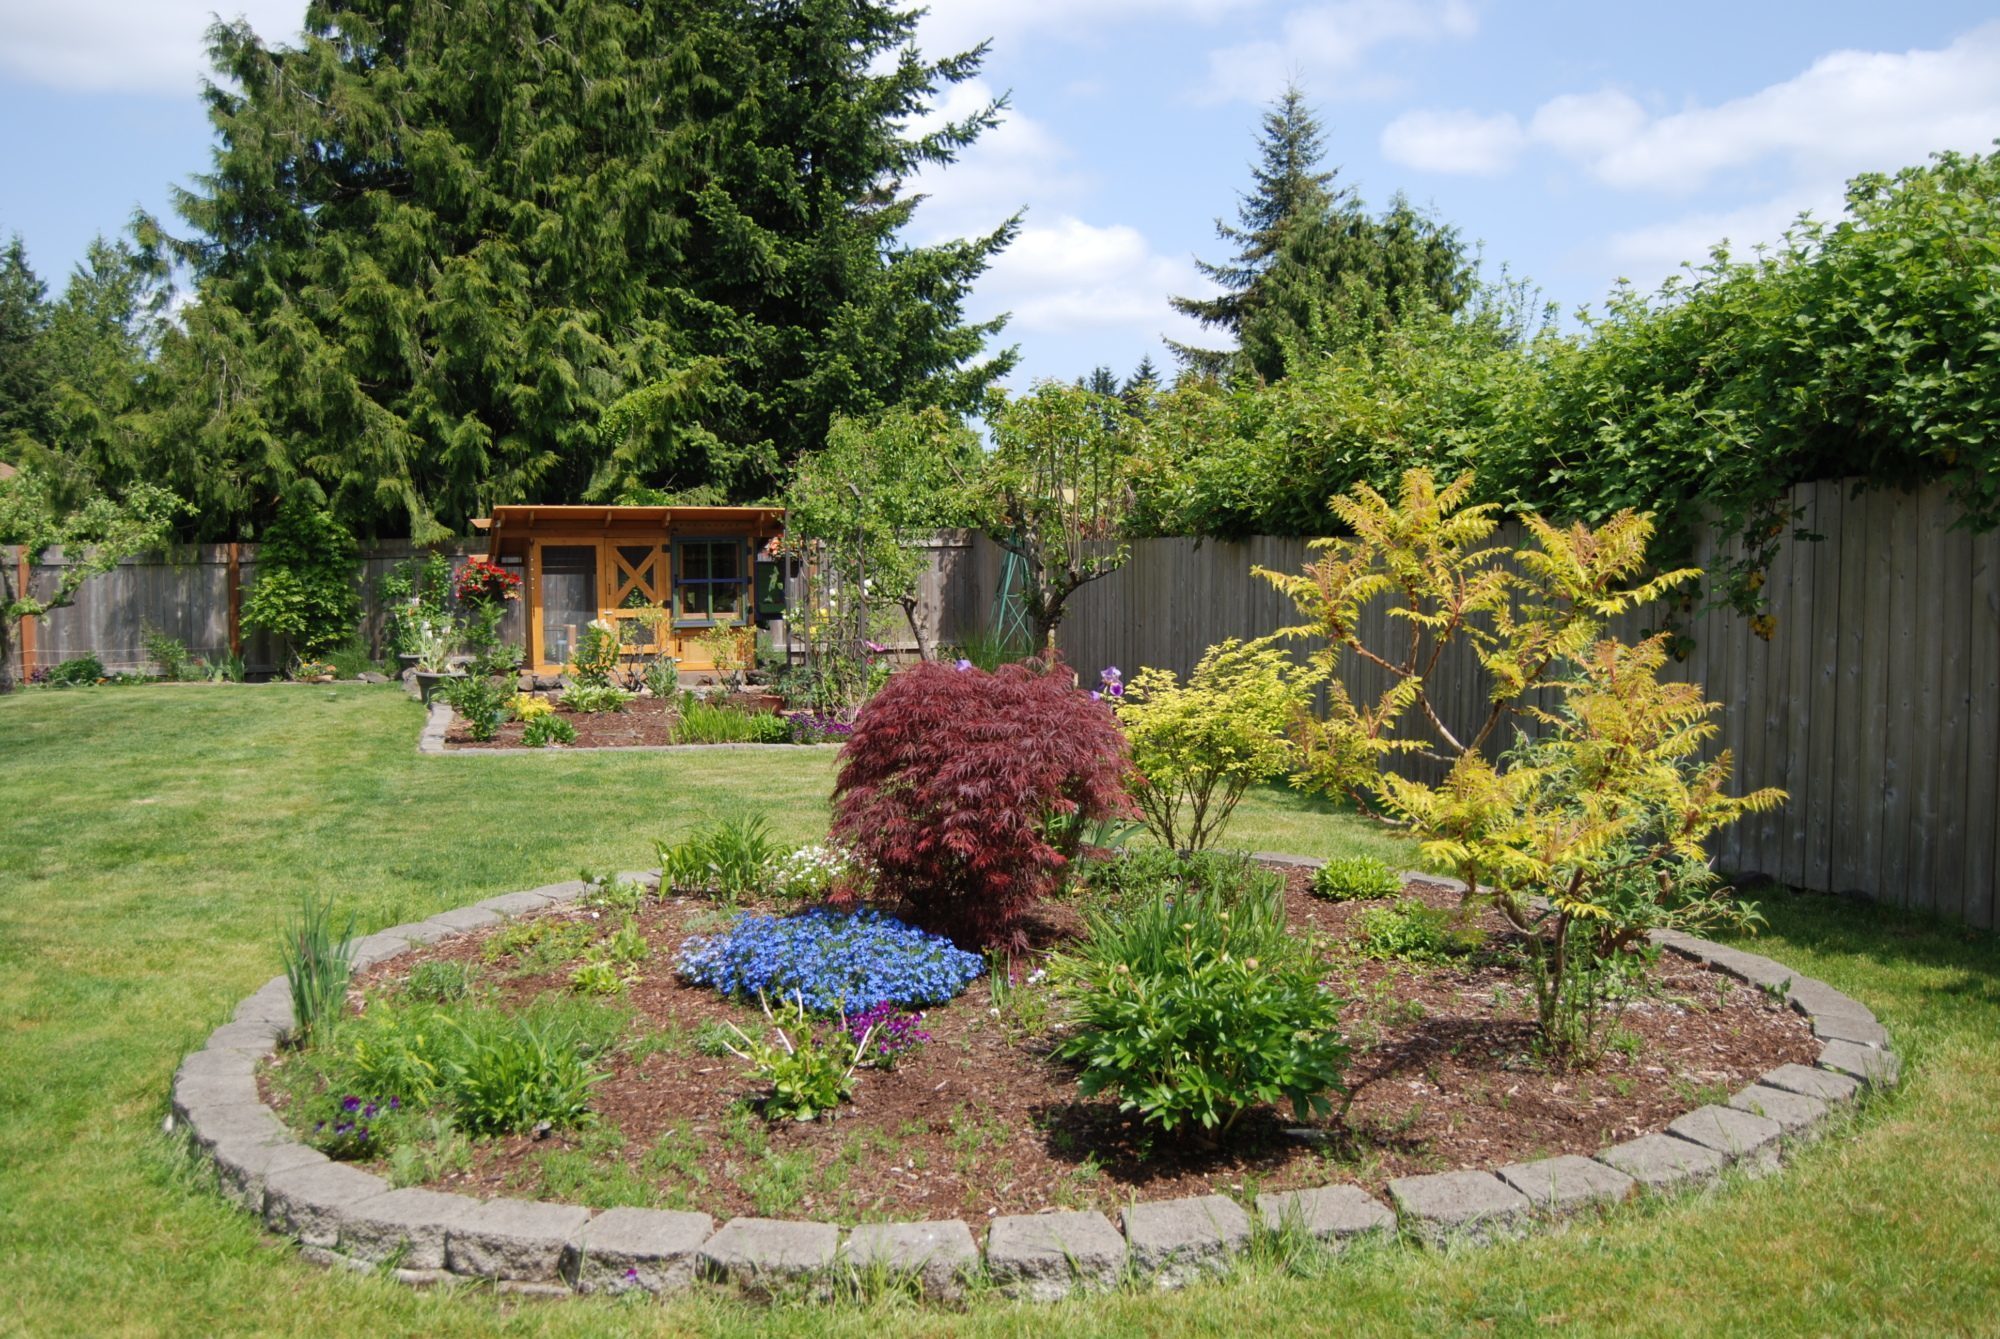
We have a beautiful yard with an open plot. I thought I would put a vegetable garden in there, but then we got the urban chicken bug. So the veggie garden was minimized and the coop construction began.
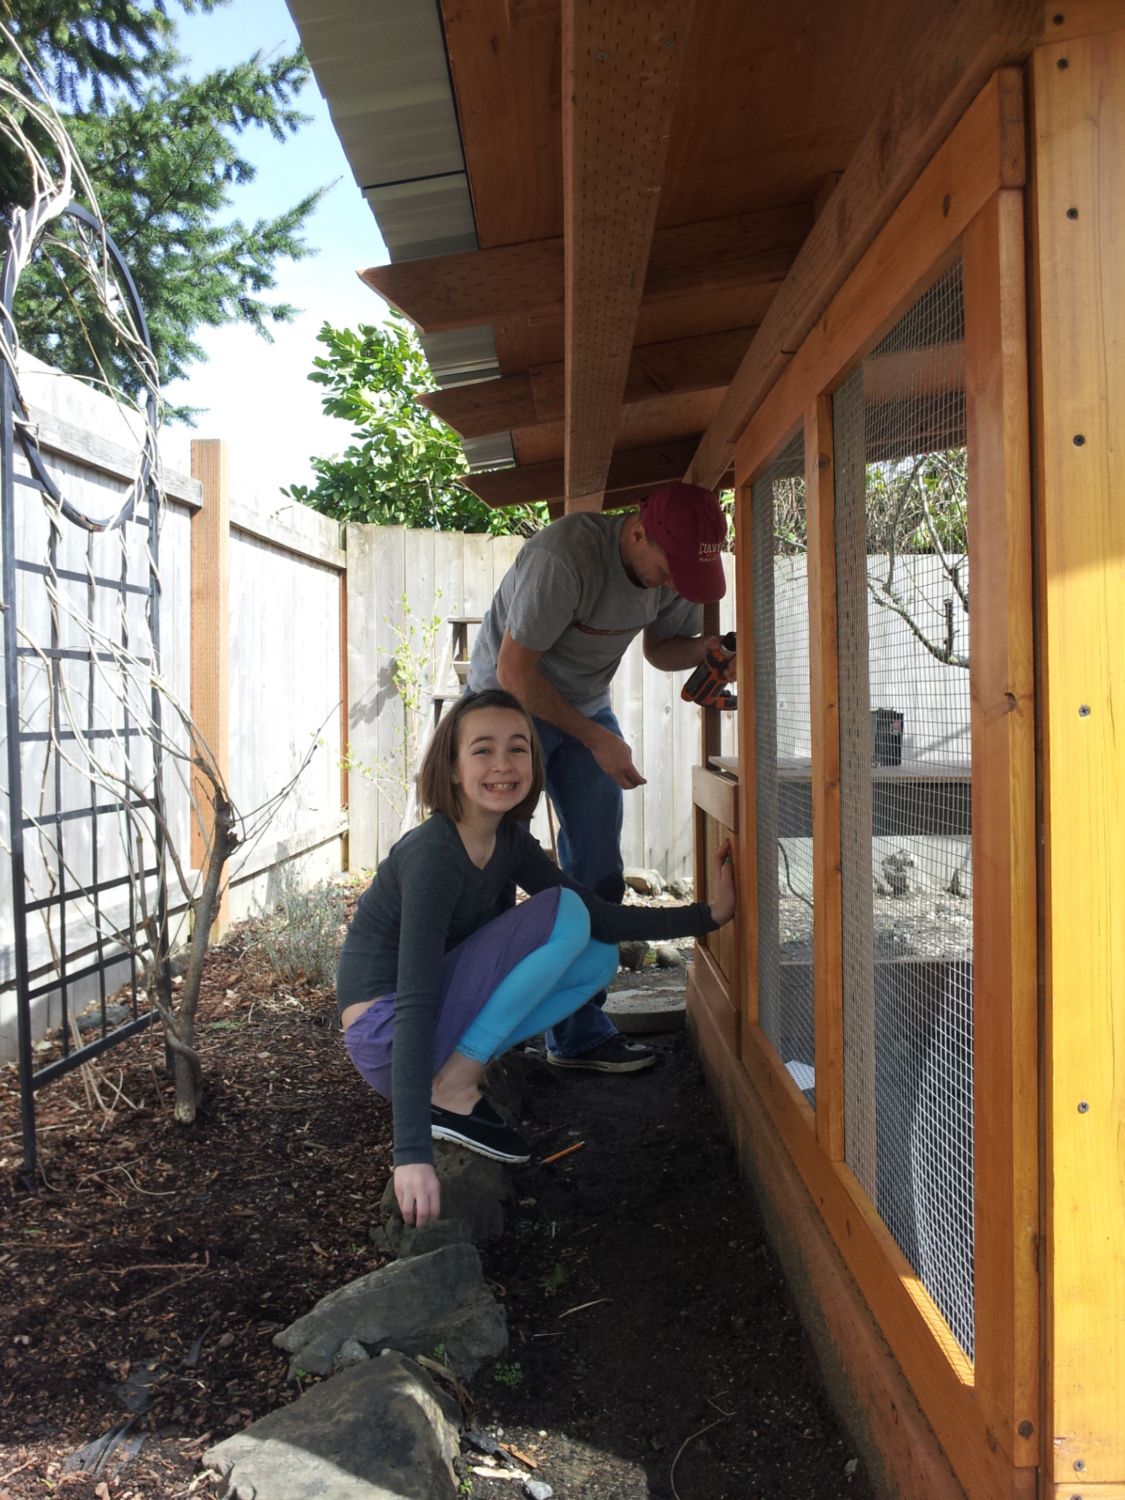
Let me point out that my husband built the entire thing unassisted. I did the painting but the construction was all him. And he is not a carpenter. He's an emergency veterinarian and I've never seen him really build anything. He built this beautiful coop all while working long, grueling hours in a 60 hour work week. With no plans. Mostly in the rain.
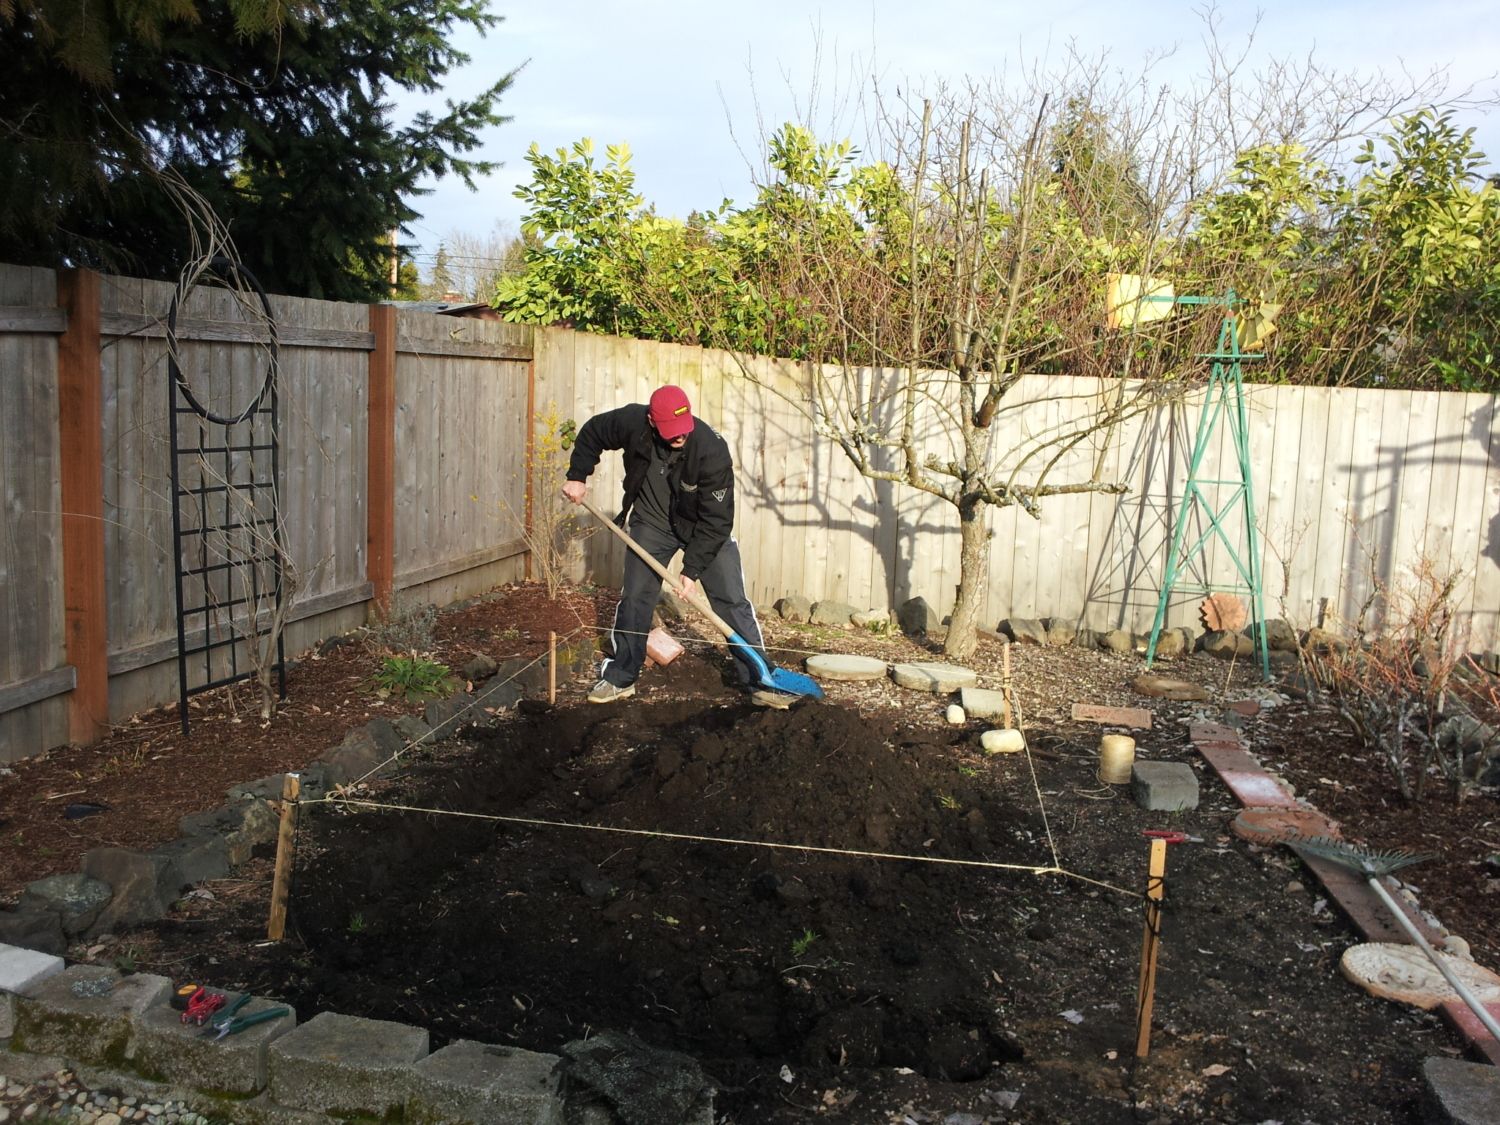
Digging for the foundation.
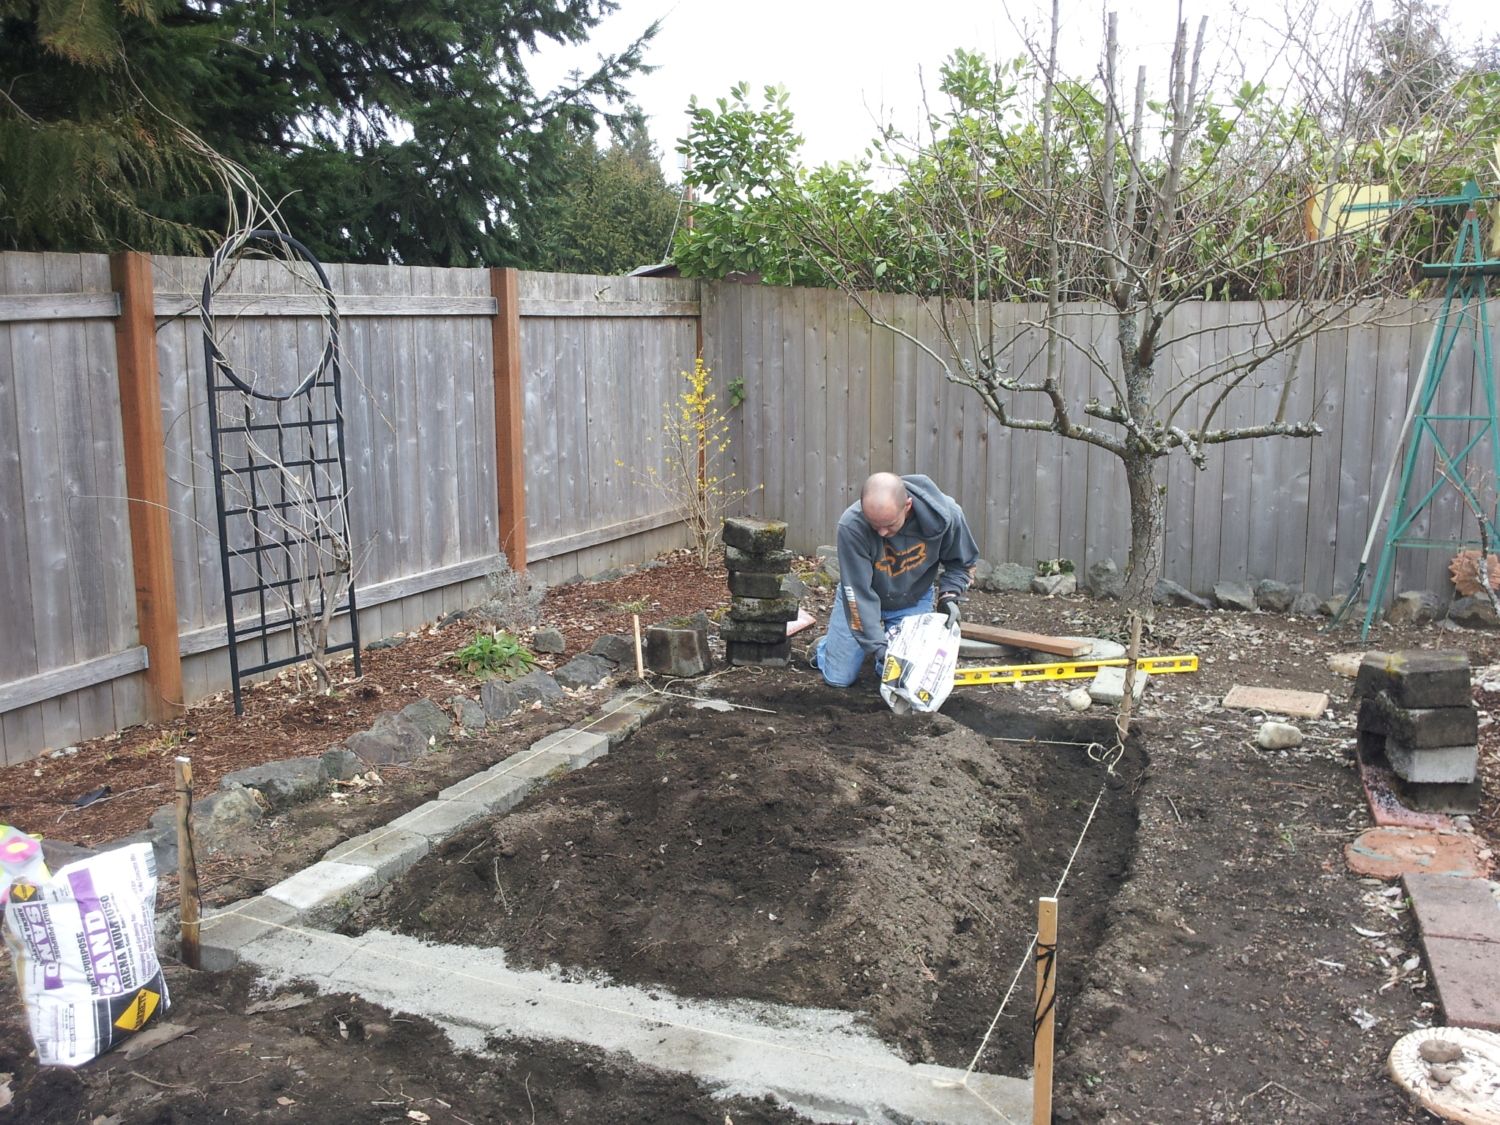
Laying the bricks and sand for the foundation.
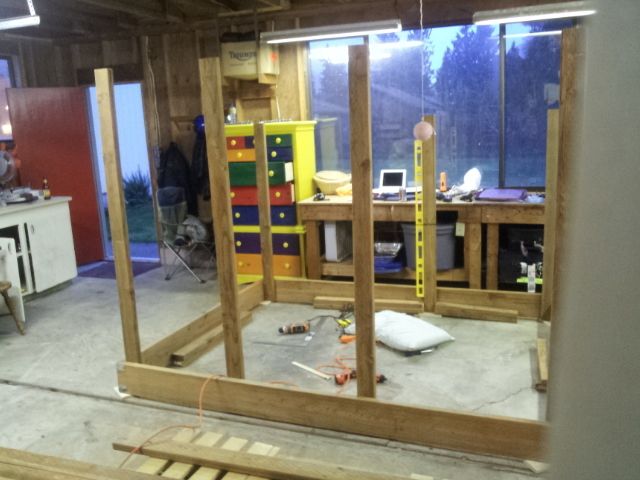
The frame was started in our shop.
The nice neighbors helped us move the frame outside. Heavy!
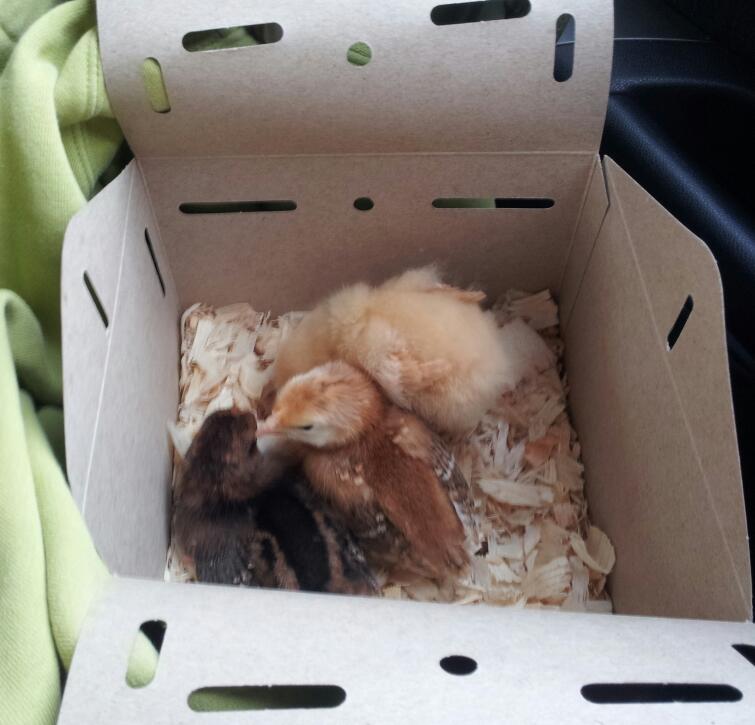
Meanwhile... these three little day-old chicks came home. We got a Rhode Island Red, a Buff Orpington and a Speckled Sussex.
Back to the hard work...
Securing the roof frame boards and the 1/4" fabric cloth along the run walls.
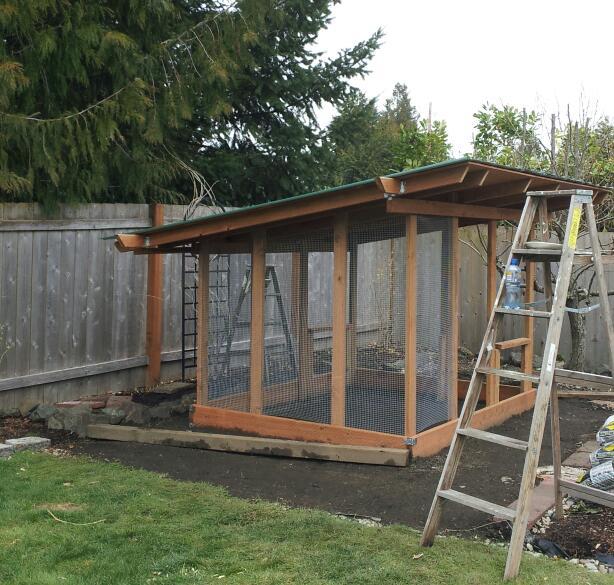
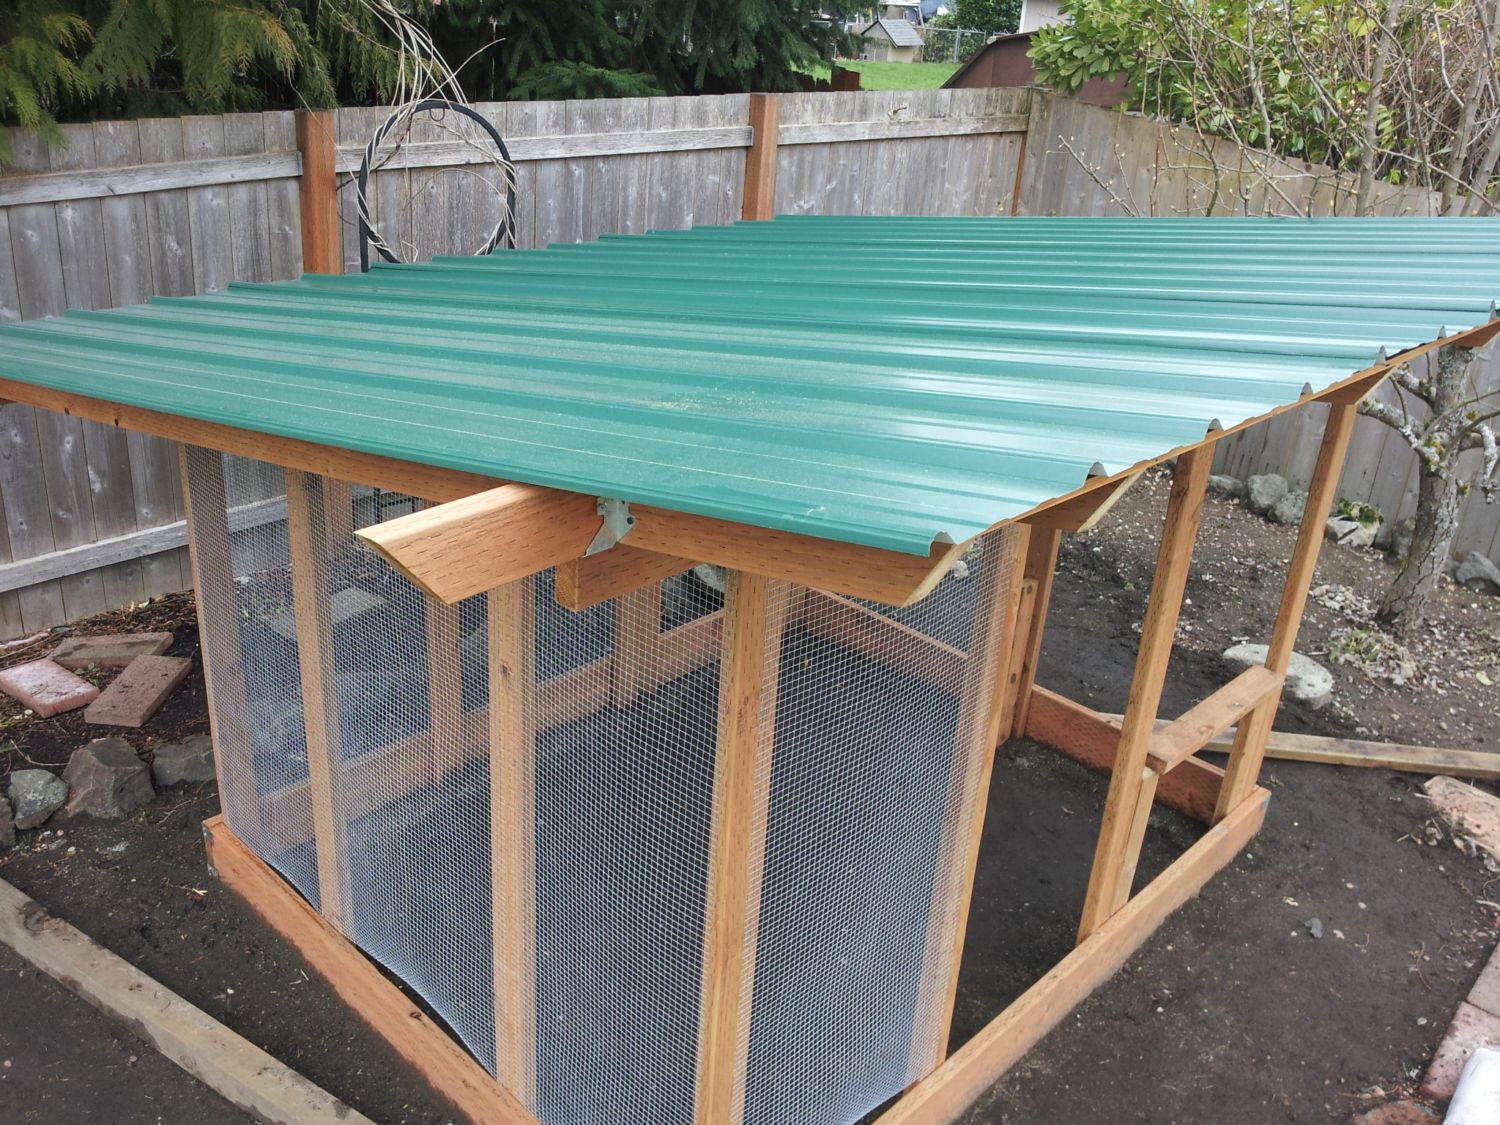
The forest green metal roof (which may have been the most challenging part) and fabric cloth walls complete.
He made me a micro garden along the west side of the run. Inside you can see the beginnings of the cabin.
We spent lots of quality time with the three chicks.
And tried to help as much as we could outside with the big project.
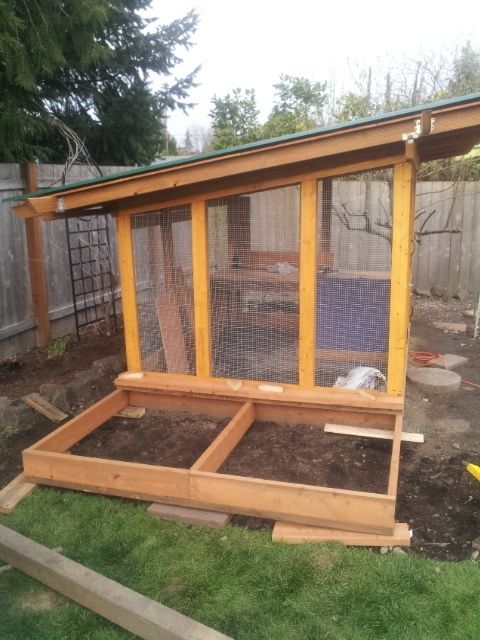
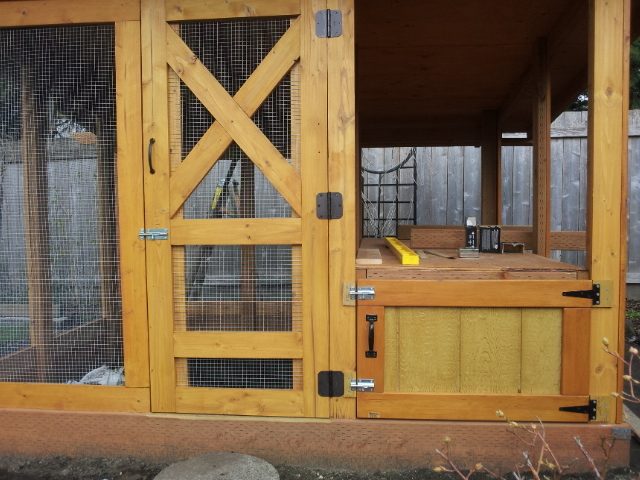
The gorgeous door is mounted and the storage compartment under the cabin is completed.
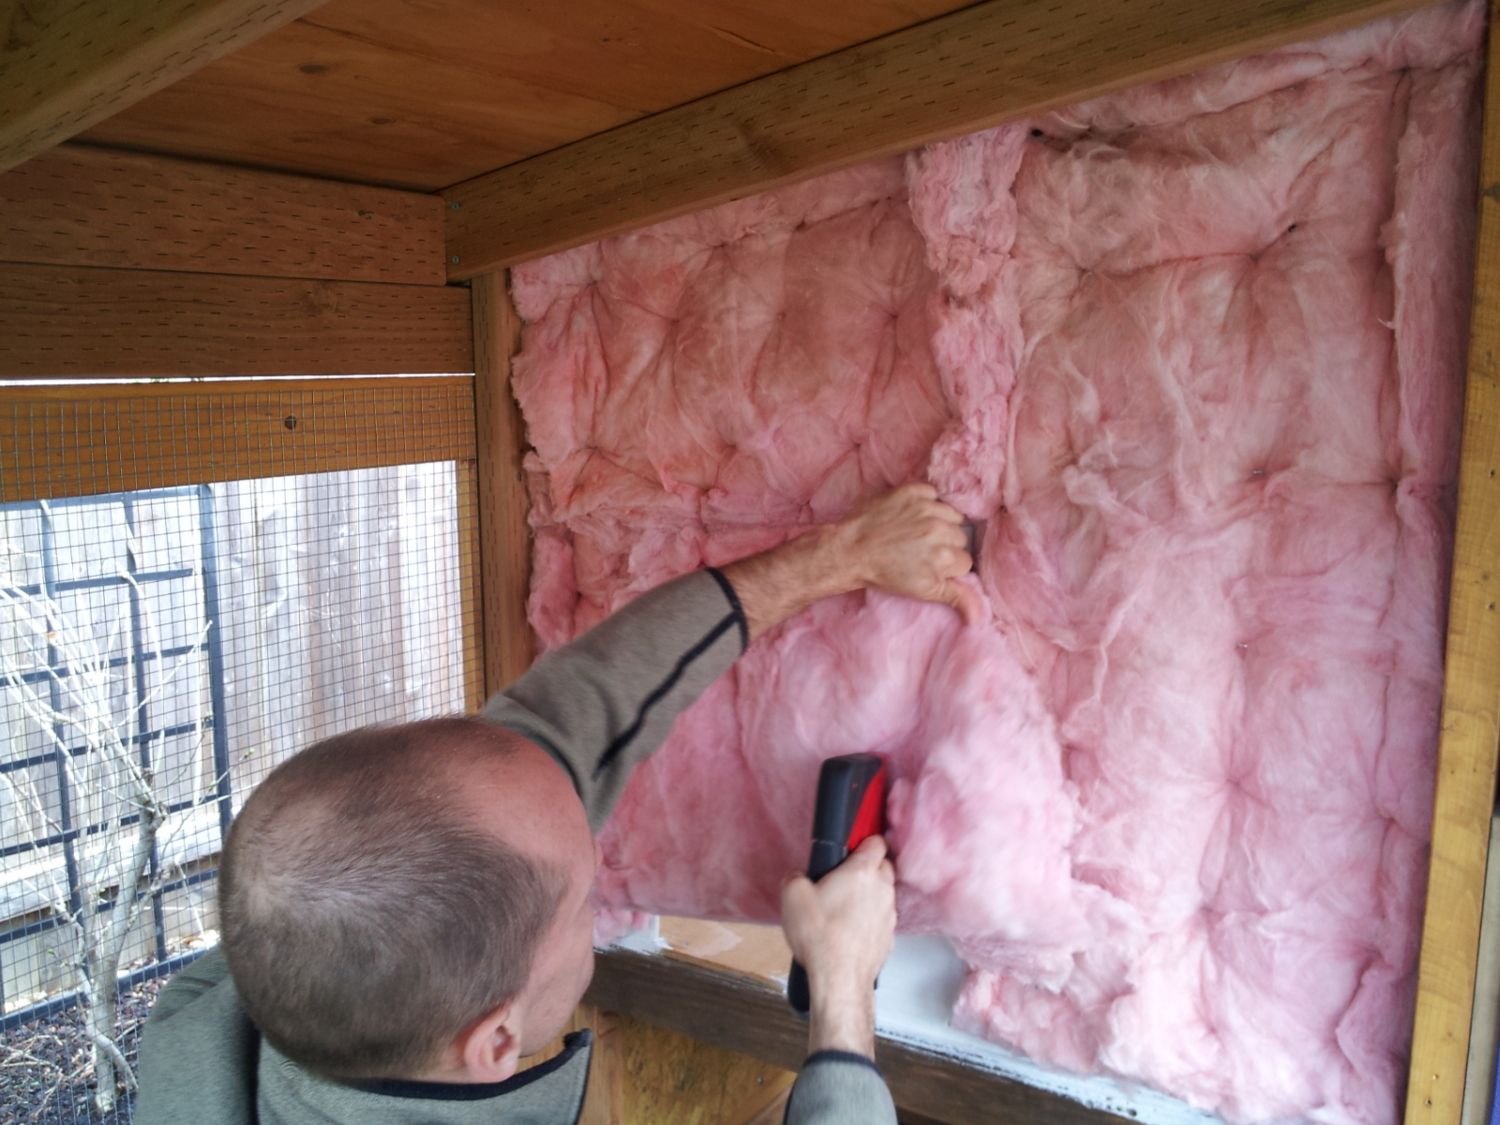
No one wants cold chickens! He insulated the main wall of the cabin so I'd stop worrying that they'd be cold.")
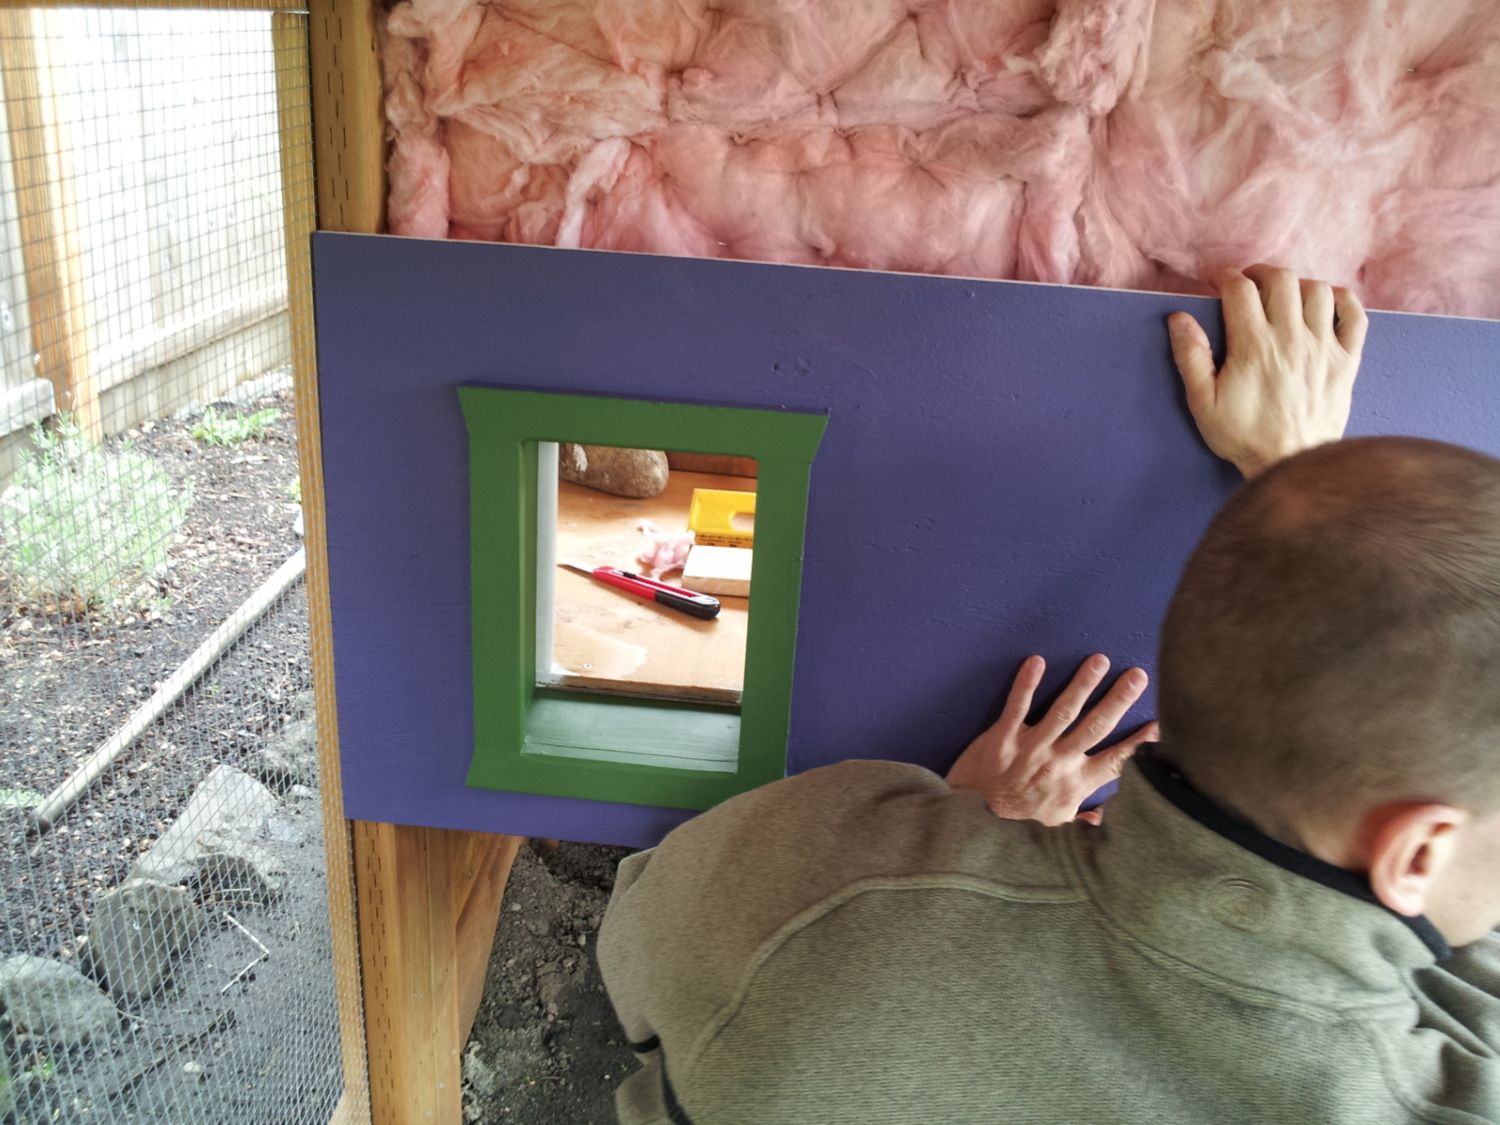
We found this great big piece of glass and he made a window frame for it.
The pop hole door mounted.
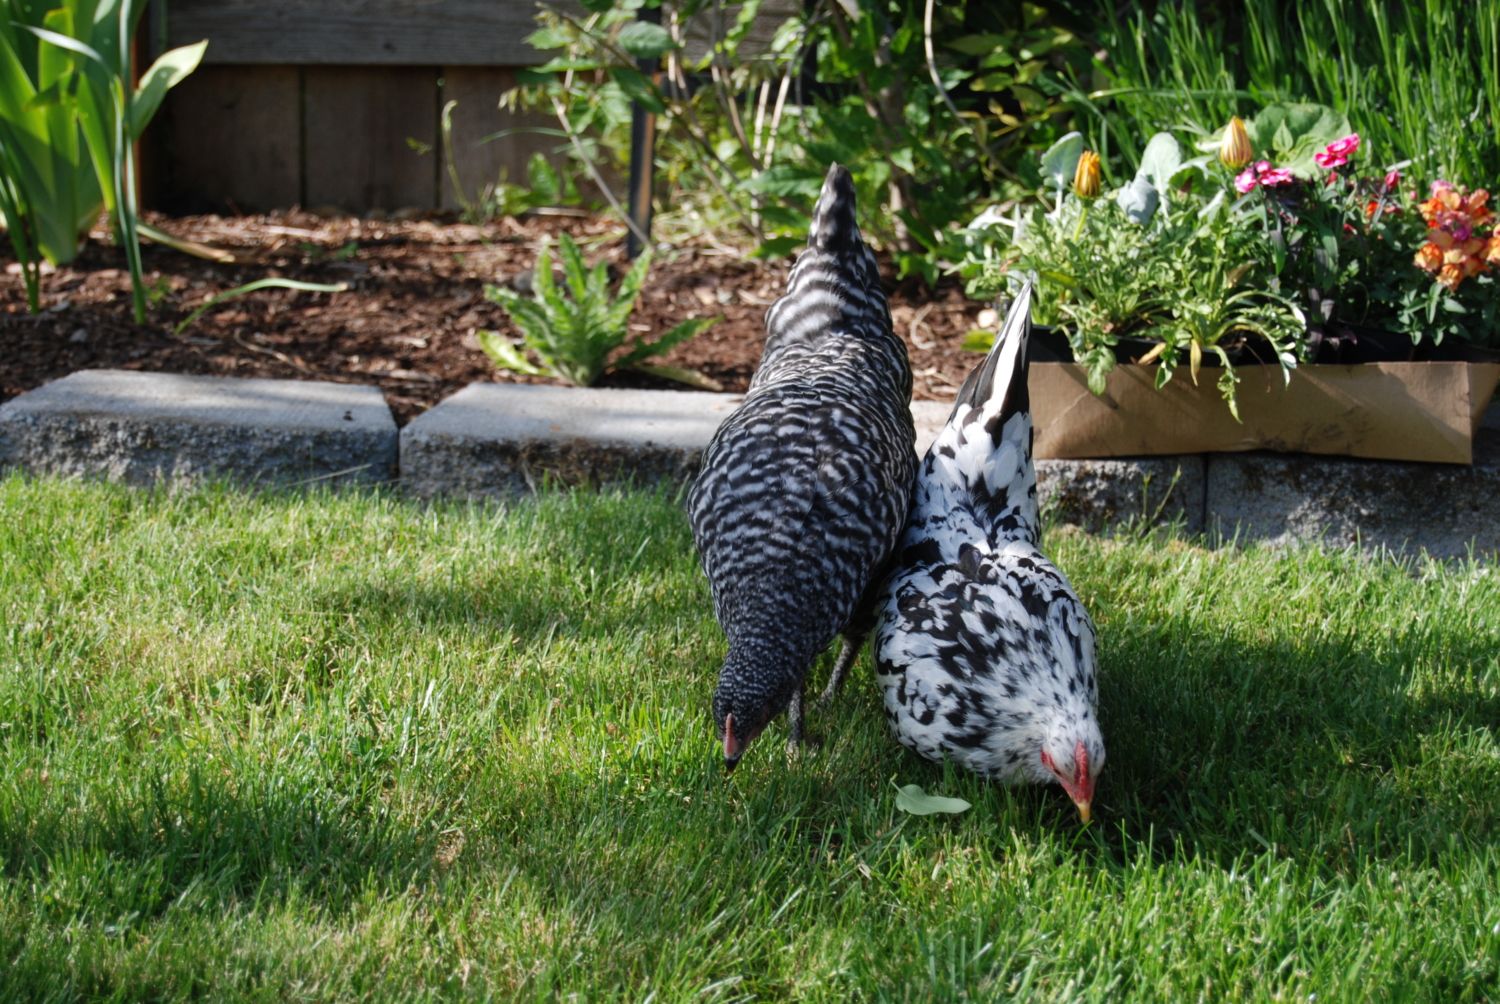
One of their first days outside - they were nervous at first but got the hang of scratching and pecking around!
Soon to be flower window boxes, screens not installed yet.
Flower window boxes, screens installed.
Nesting boxes (with nightlight for wintertime). It's hard to see, but there is a cleaning release panel on the bottom of the outer wall of the boxes.
Eastern side completed! Flower window boxes (with plants that still need to be planted).
We chose plant hangers mounted on the run walls to hang our feeder and waterer. Nice and sturdy!
Also, we chose gravel with sand over it for the bottom of the run. Easy cleanup and low pest problems.
We sadly realized our Speckled Sussex, Aggie, was a roo, but we found a great permanent home for him (a local family with 5 pesticide free acres to free range with 17 hens)
And we adopted these 2 silkies. The white one is Aretha and the blue one is Georgia.
And we added Phyllis, a 10 month old Serama and Nelly, a 4 month old Barred Rock.
We have a gorgeous and very hardy, functional coop and run and some happy and healthy chickens!
From the builder: Ok so I am told to add some technical data. I have to say I had absolutely no idea what I was doing and used pics and ideas from here and other random ideas that just popped in my head after staring at a blank space for a while. If you are looking for great laid out plans...well I am unfortanately not going to be much help. I actually had fun just freestyling and making it up as I went along. Only pressure was the presence of growing chicks in our spare bedroom. It took me about 8 weeks to build and I admittedly spent hours doing a lot of laying out ideas in my shop before actually screwing in. We recently moved into a home with a very nice shop space to work in and I have always wanted to build something fun and creative. We wanted to make the coop look like part of the garden that just happened to house some chickens. I also tried hard to make it functional and easy to clean. All and all we are very happy with the final coop. Although I may add some touches like a gutter that feeds a rain barrel, we are ready for the summer and eggs to come! We have had a few already from our young Serama...yum!
I bought a miter saw that was the workhorse of the whole project...
When I figured out my roof slope was 8 degrees it made future miter cuts a breeze. Just measure, line up with the laser, cut and sand... and repeat....I got kinda good at it for no experience.
The main coop is 6' x 8' and is covered by a 10' x 10' roof. I almost completely stole the framing of "Witchita Cabin Coop" and like everything else just put a little different spin on it. I had never done framing so I had to start somewhere! The cabin is 3' x 6'. I used treated 2 x 8 on the base because we basically live in a rain forest and get some mud splash. The big rocks cover the base and were in the yard when we moved in. The rest of the frame is basically 2 x 4 treated. I used some 1 x 4 to for framing pieces. All the non-pretreated stuff was coated with 4 thick coats of waterproofing stain. The frame was built in the shop when we were still getting freezing temps and then carried out by some helpful college kids next door. The foundation was made using thick yard bricks already on the property buried deep on sand over gravel. The floor ended up pretty darn level and we were lucky to have good soil to work with. The result is a very flat base that predators cannot get underneath.
I originally was going to put hardwire cloth all the way to floor level but it wasn't needed. I used waterproof stainless staples and bought a good staple gun for the hardwire cloth install. Be careful when you unroll that stuff as it can whip around and cut you (ahem').
Once the frame was built and put on top of the foundation, I added the roof. I used 3/4 plyboard, covered with roofing felt, then used blocks of 1/4 to raise slightly before covering with green metal roofing. Cutting that stuff was more than my little shears wanted to handle effectively. Tough! The roof comes with hex bolts that I put in by hand because I wanted the control of not going too deep. I then lined the front with a foam guard and 1x2 furring strips. The result is a very sturdy, waterproof cover that has worked like a charm. It runs rain off the back into our garden bed and rocks below so no more puddles. If I was to do it all over again I would have had a helper and a driver for install. I now have very buff forearms though! Lol.
I cut a lot of 3/4 in plyboard pieces with a hand saw after frying a friend's loaner then realized my neighbor had some goods to spare for some free vet advice. Oh I wish I lived in the days when you could just barter for stuff you needed. I then had a jigsaw and skill saw to work with. Much needed tools for a build this big.
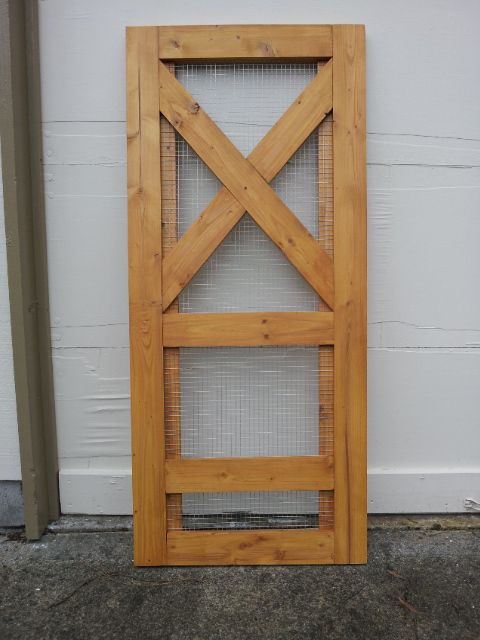
I used some old pieces of wood house siding, lined with boards from an old futon for the walls of the storage door and the wall beneath the north access door.
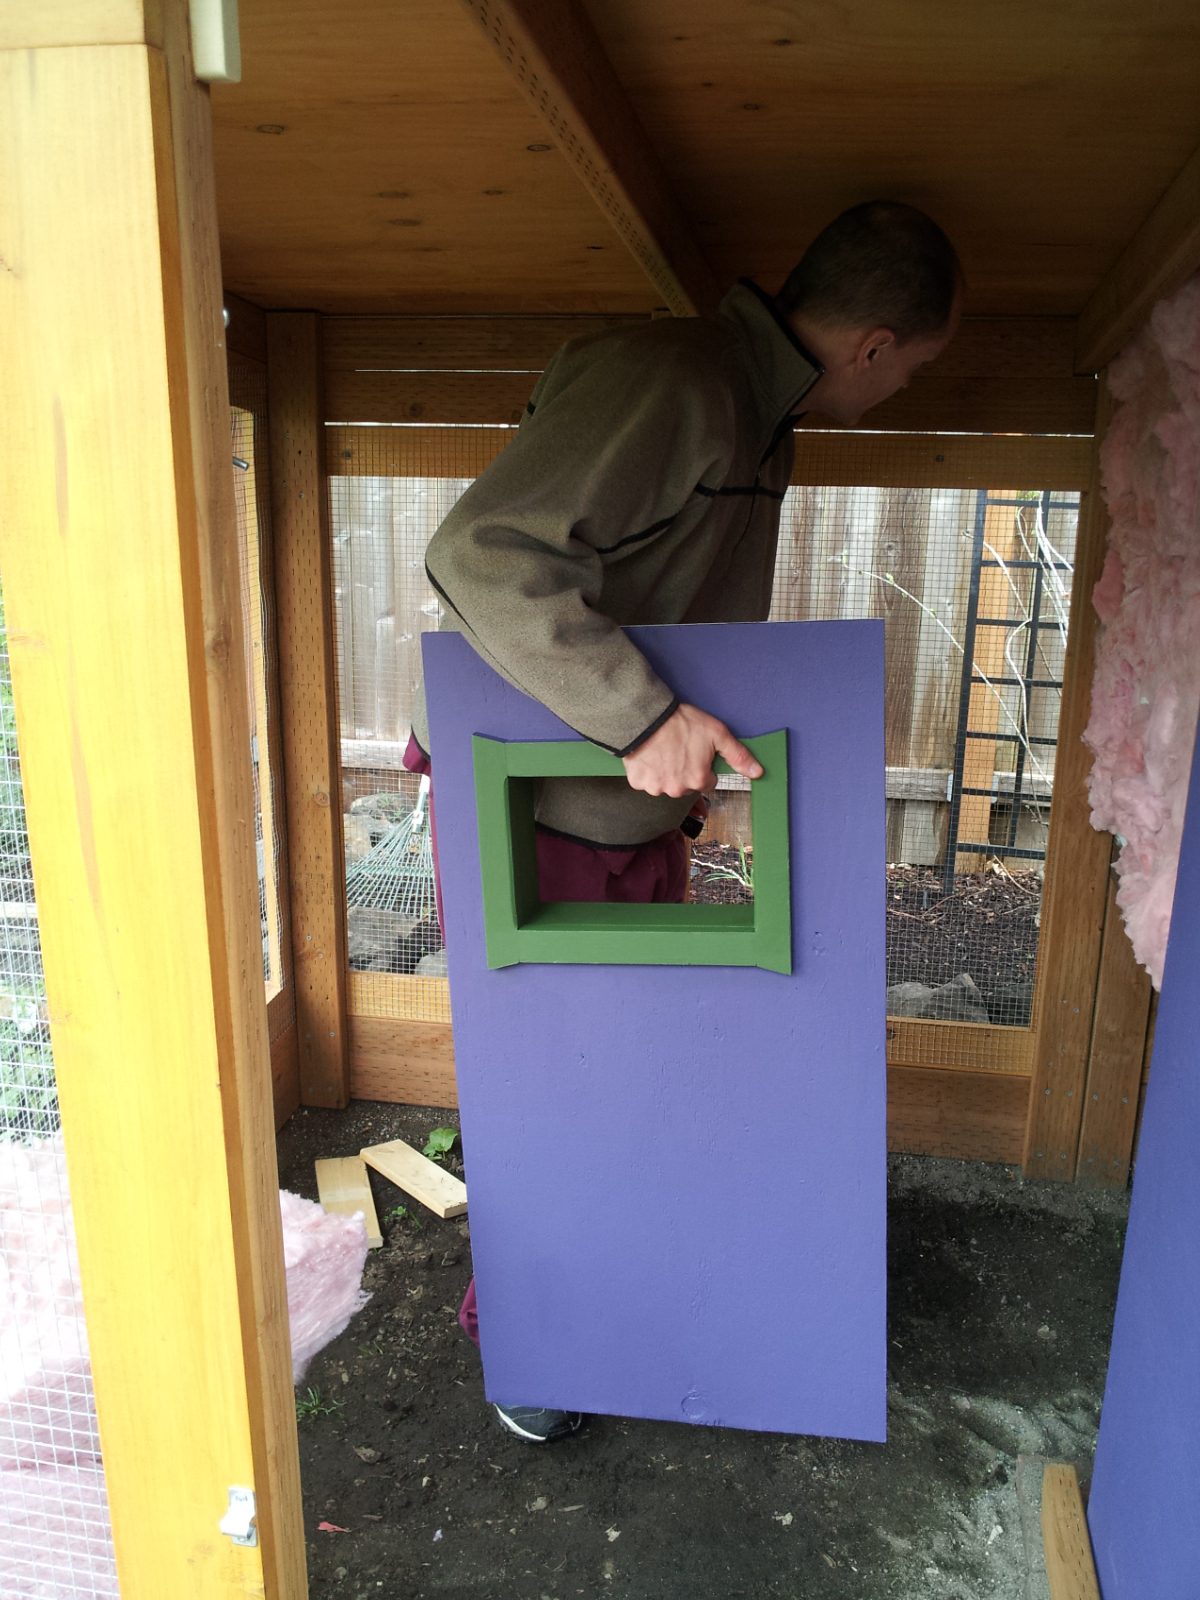
I used more old futon boards to make faux shutter doors with removable planter boxes..
My first door!
I basically cut a bunch of spare plyboard pieces like a puzzle and framed them with leftover boards with contrasting color. My wife painted her tail off and helped make everything cute!
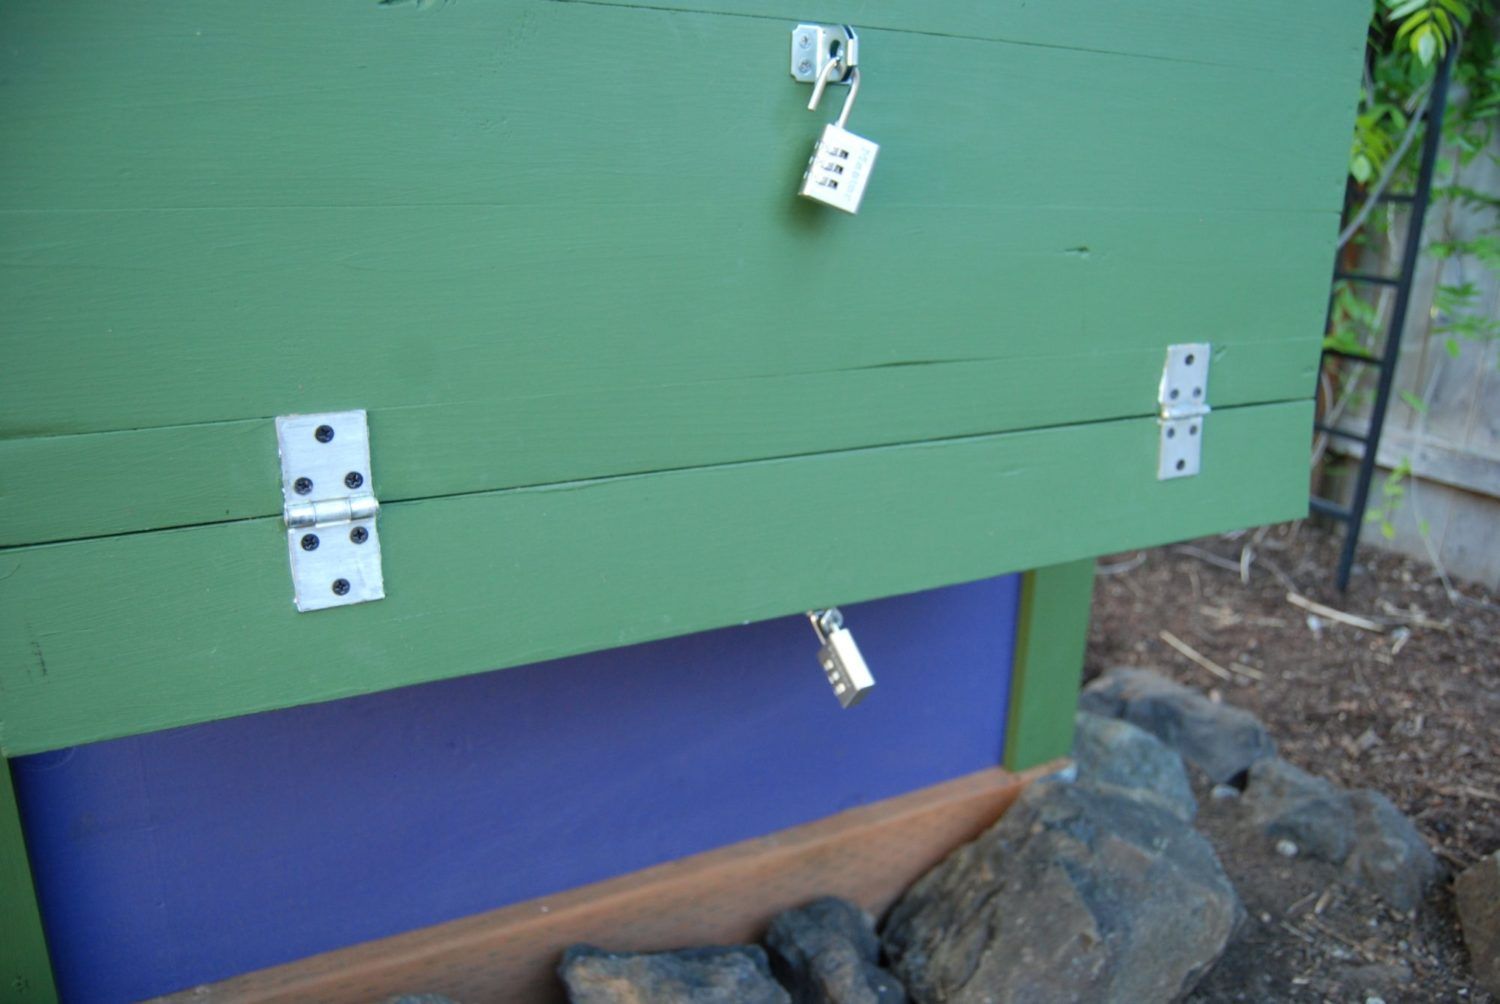
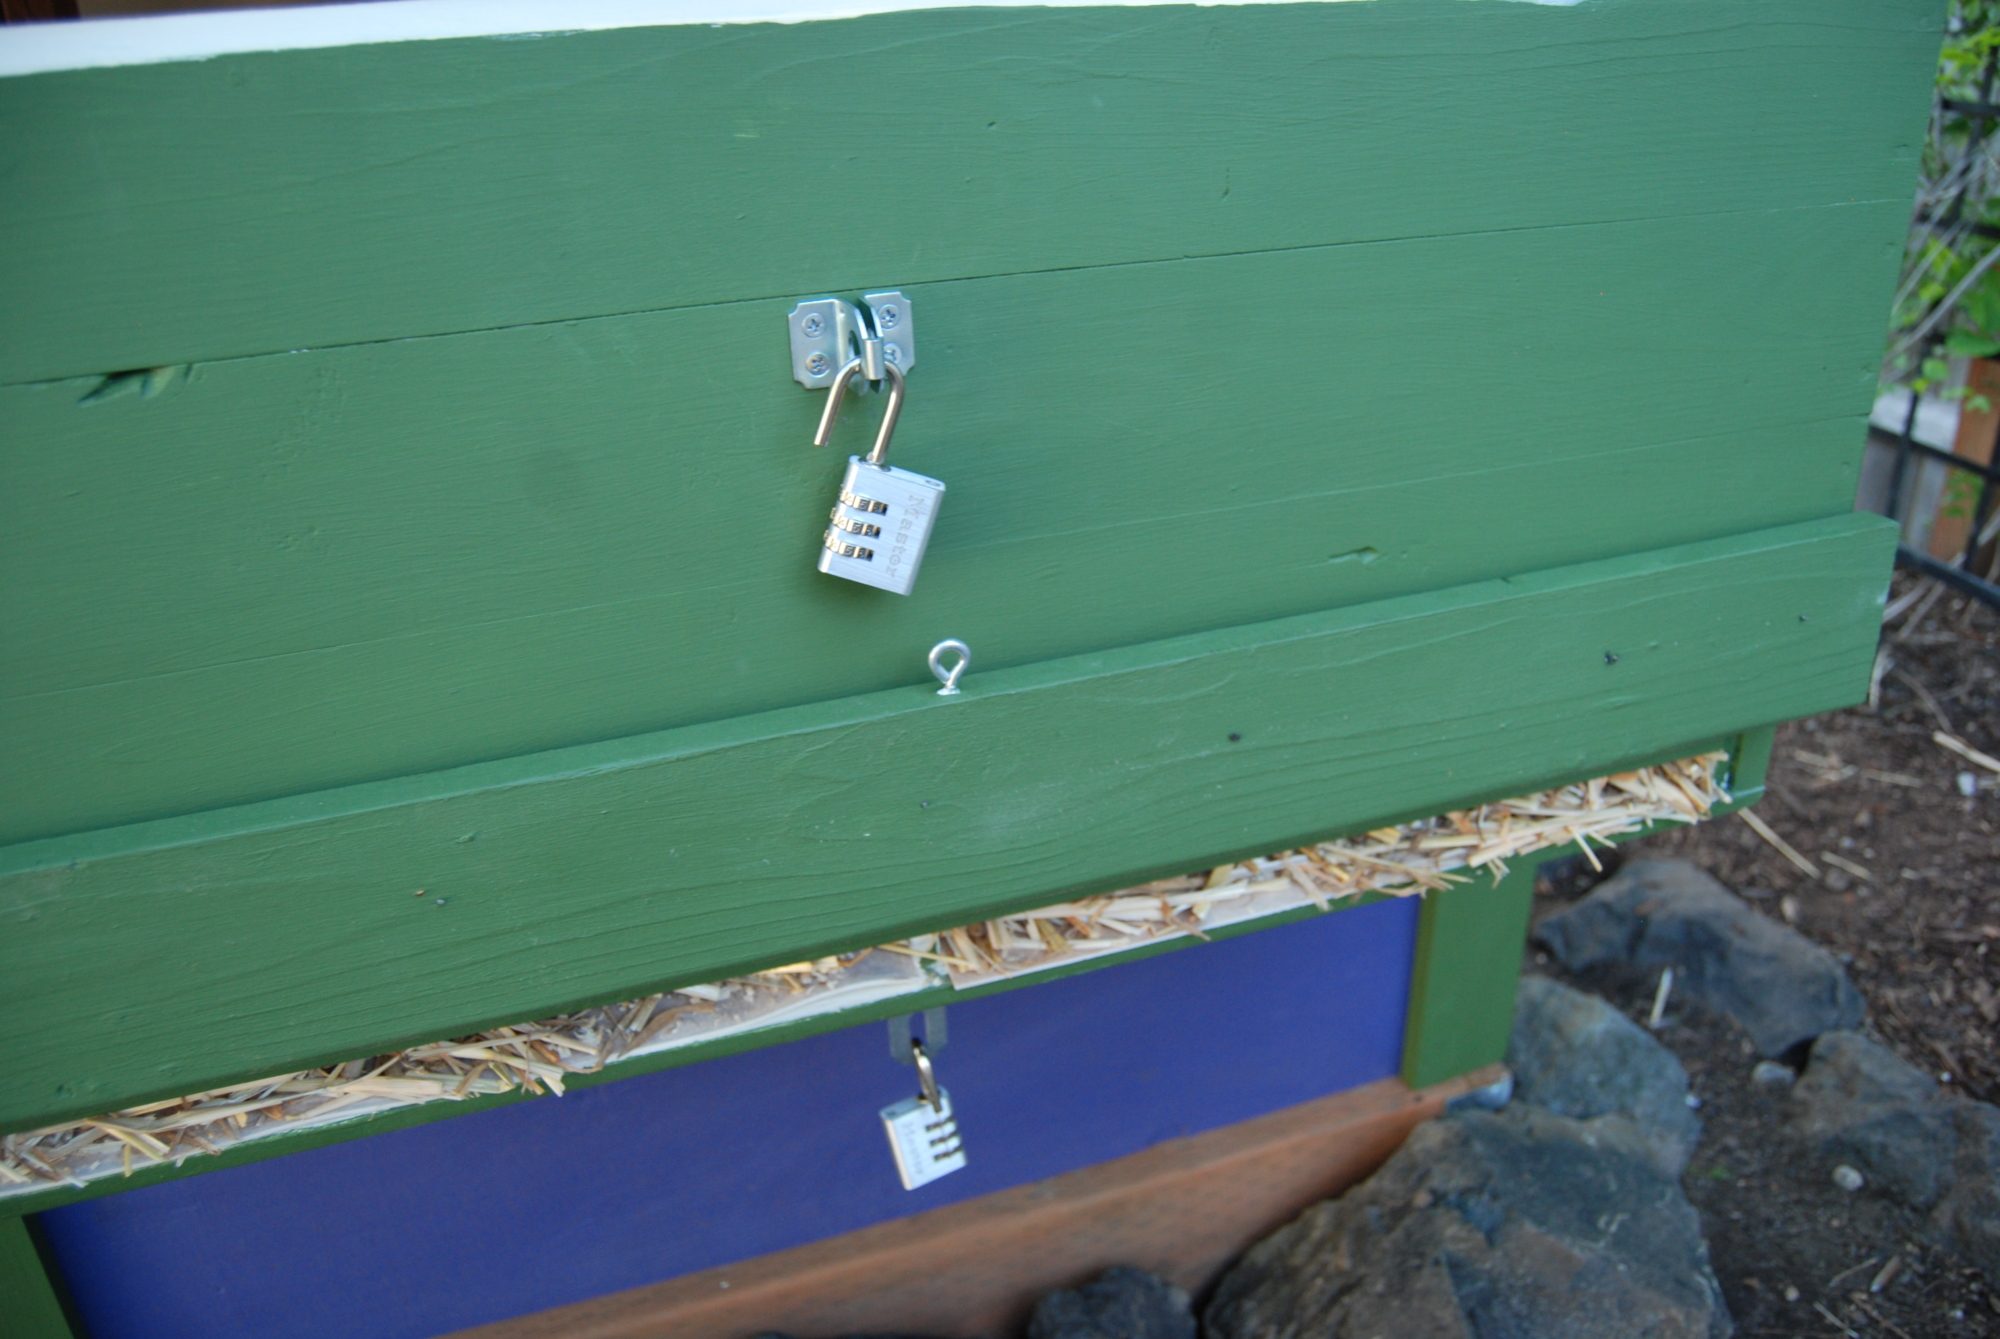
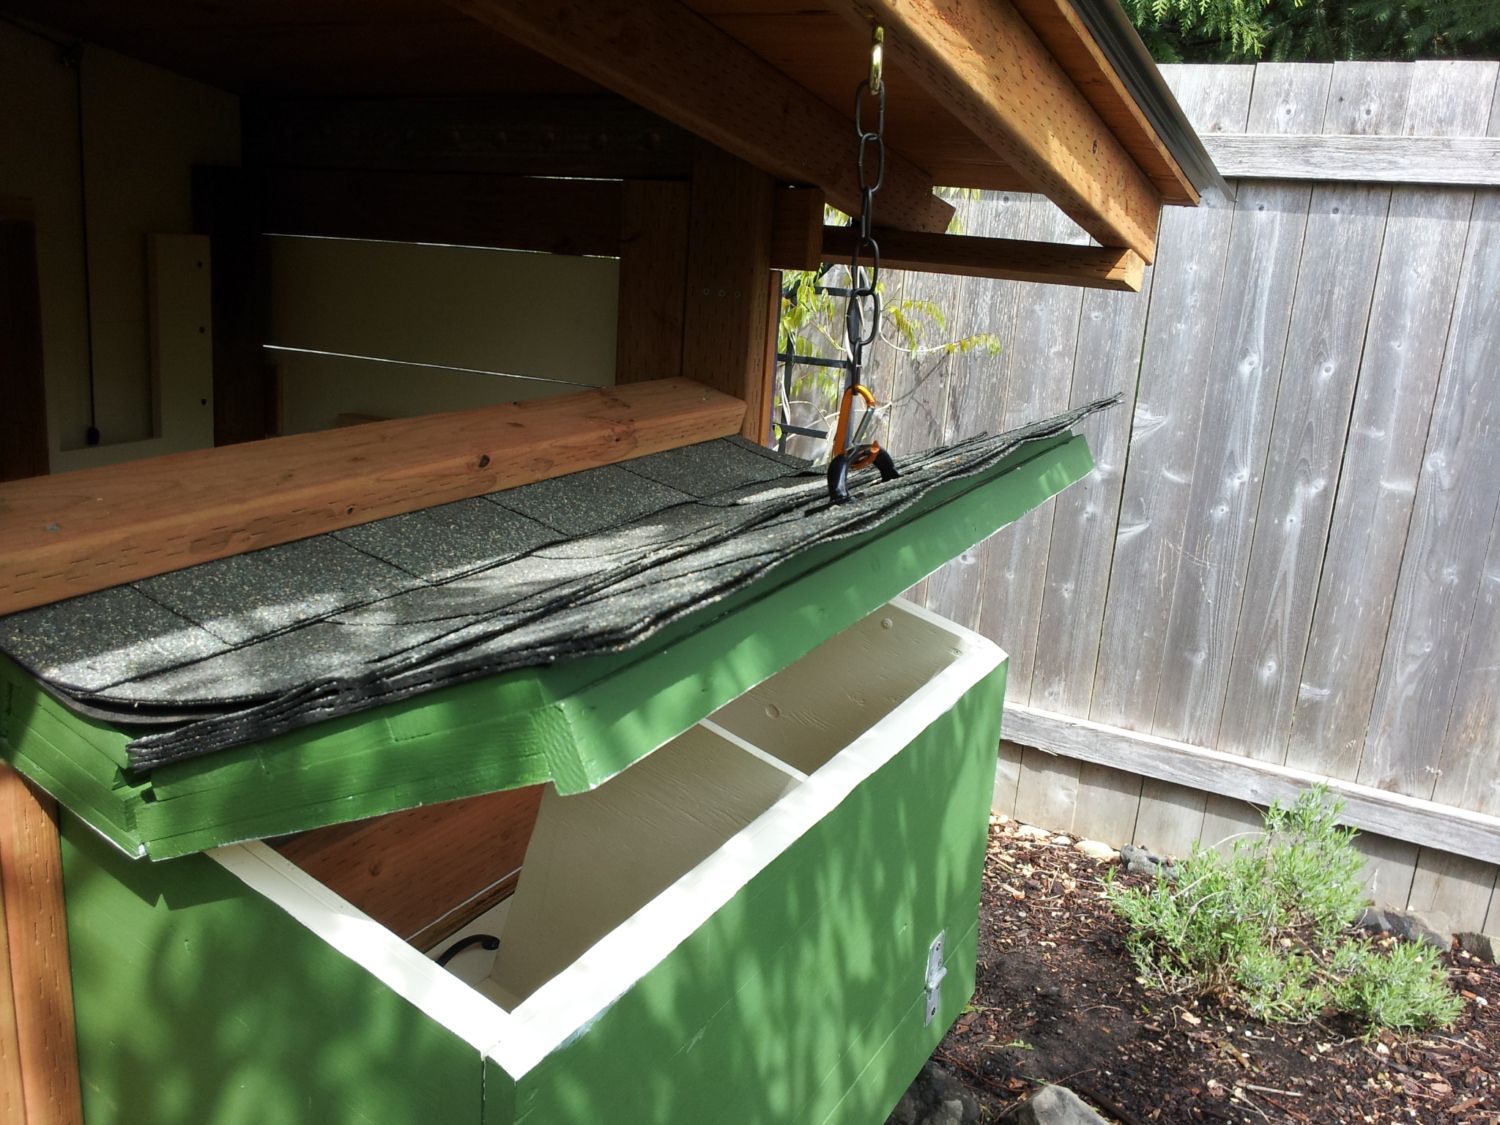
The nesting boxes were a lot of spare boards sanded down and the roof of the nesting boxes are insulated. The shingles are attached so they slide when it opens. It flexes just enough not to put too much stress and is 3 layers thick. This project took me a lot of time I will admit. It is slightly sloped so I can water it out the back flip door and is lined with lineleoum flooring, as is the whole cabin. Everything locks if desired.
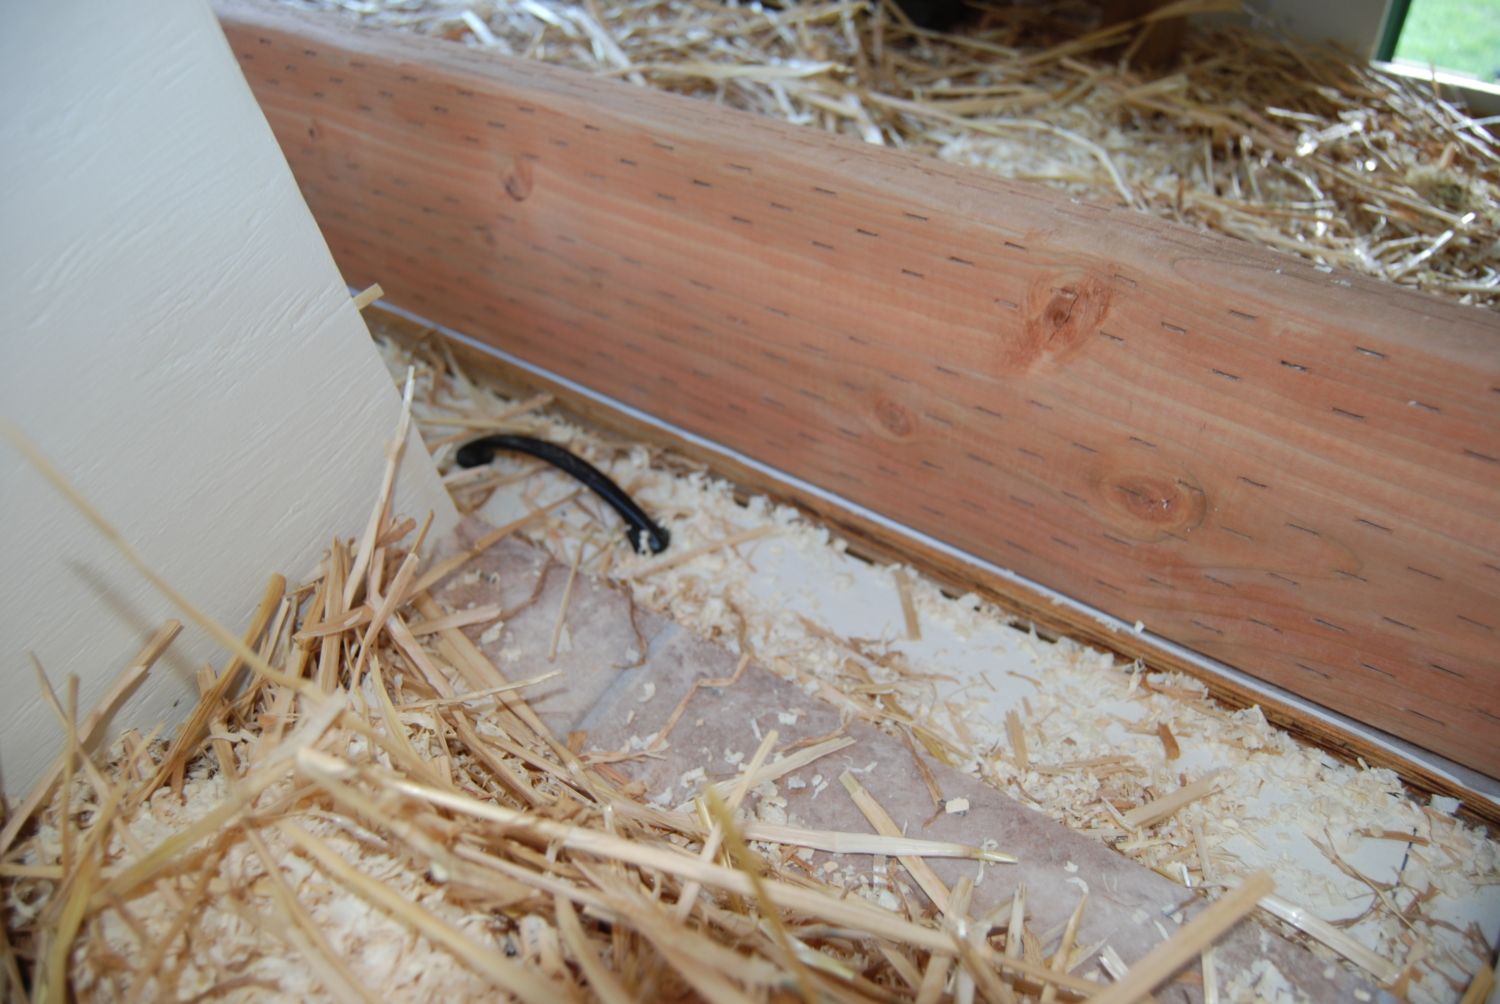
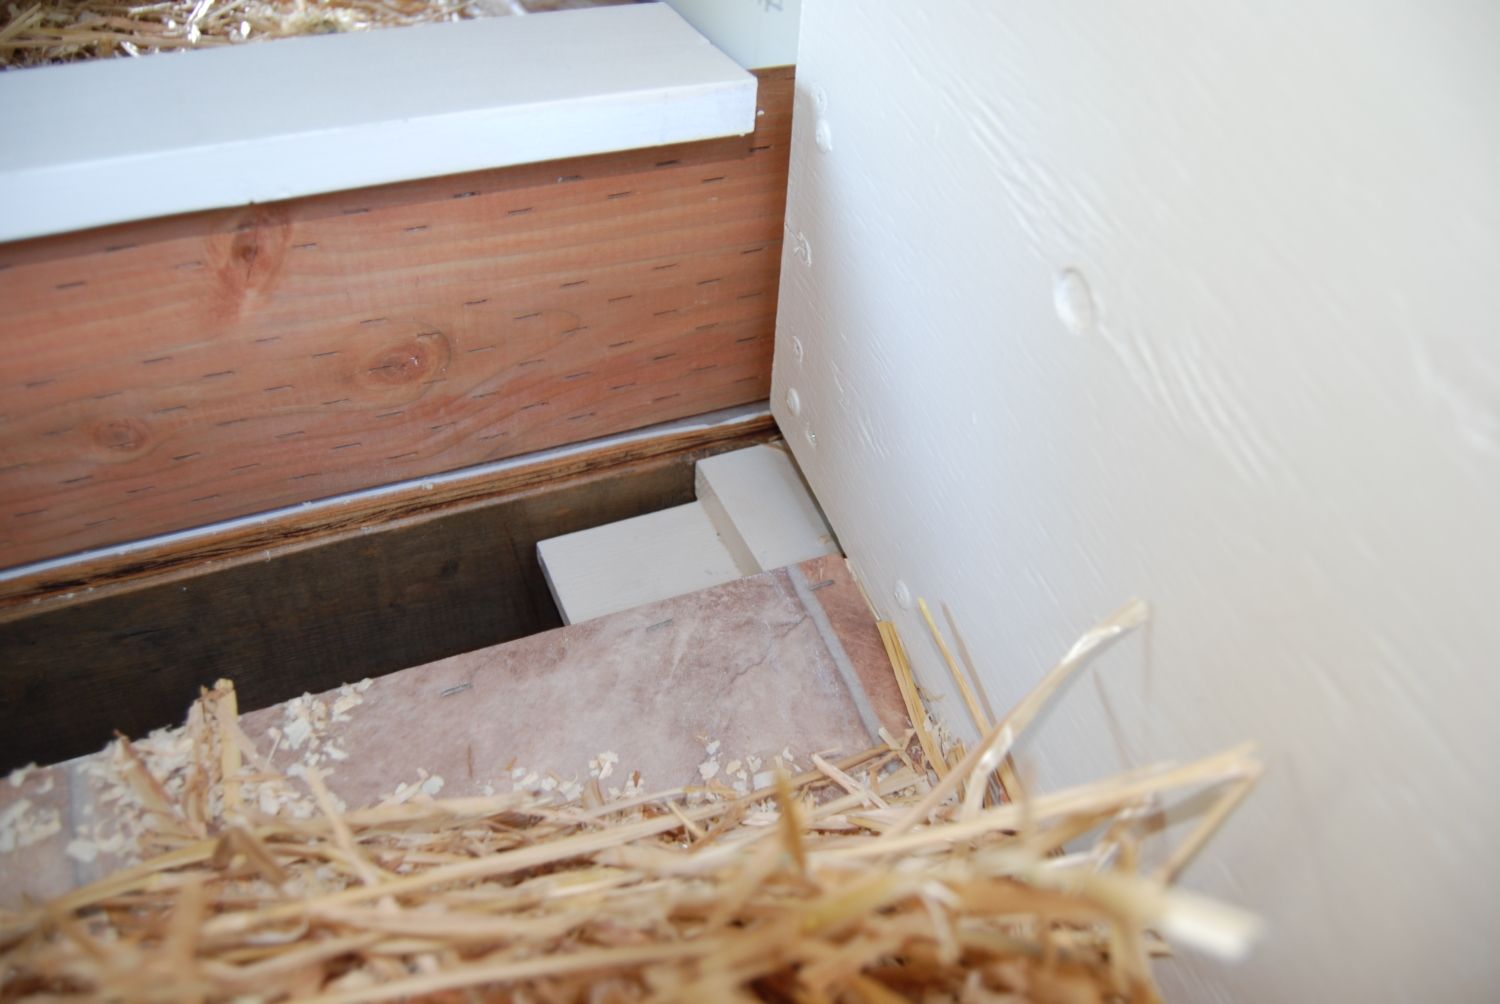
The treated 2 x 4 frame for the large window door has a 2 x 6 base to keep bedding in, and is completely removable via latch hooks on the inside. We can remove everything in the coop very easily and hose it out from one end to the other.
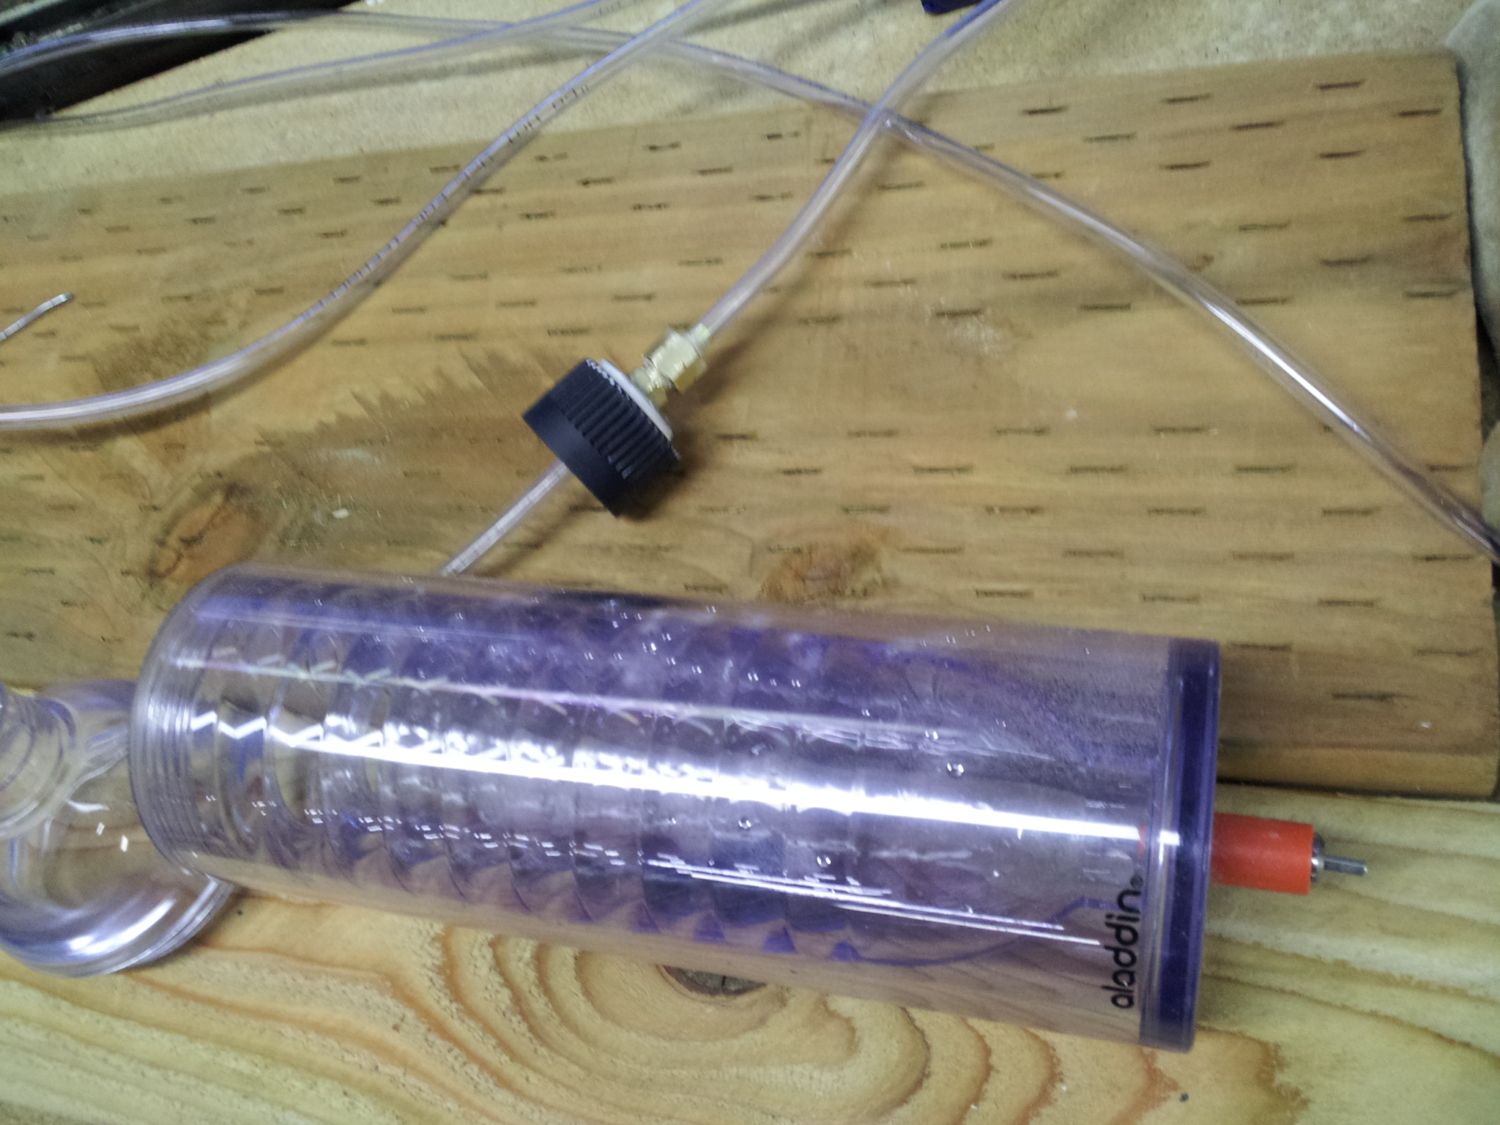
I made a nipple water bottle out of a 5$ water bottle from Target, 1/4 in tubing and remoted to the storage area for filling. My lovely wife reminded my to drill a hole in the lid to allow air to escape when filling. Thanks babe.
Then I built a mount for it and attached a bungy for access...
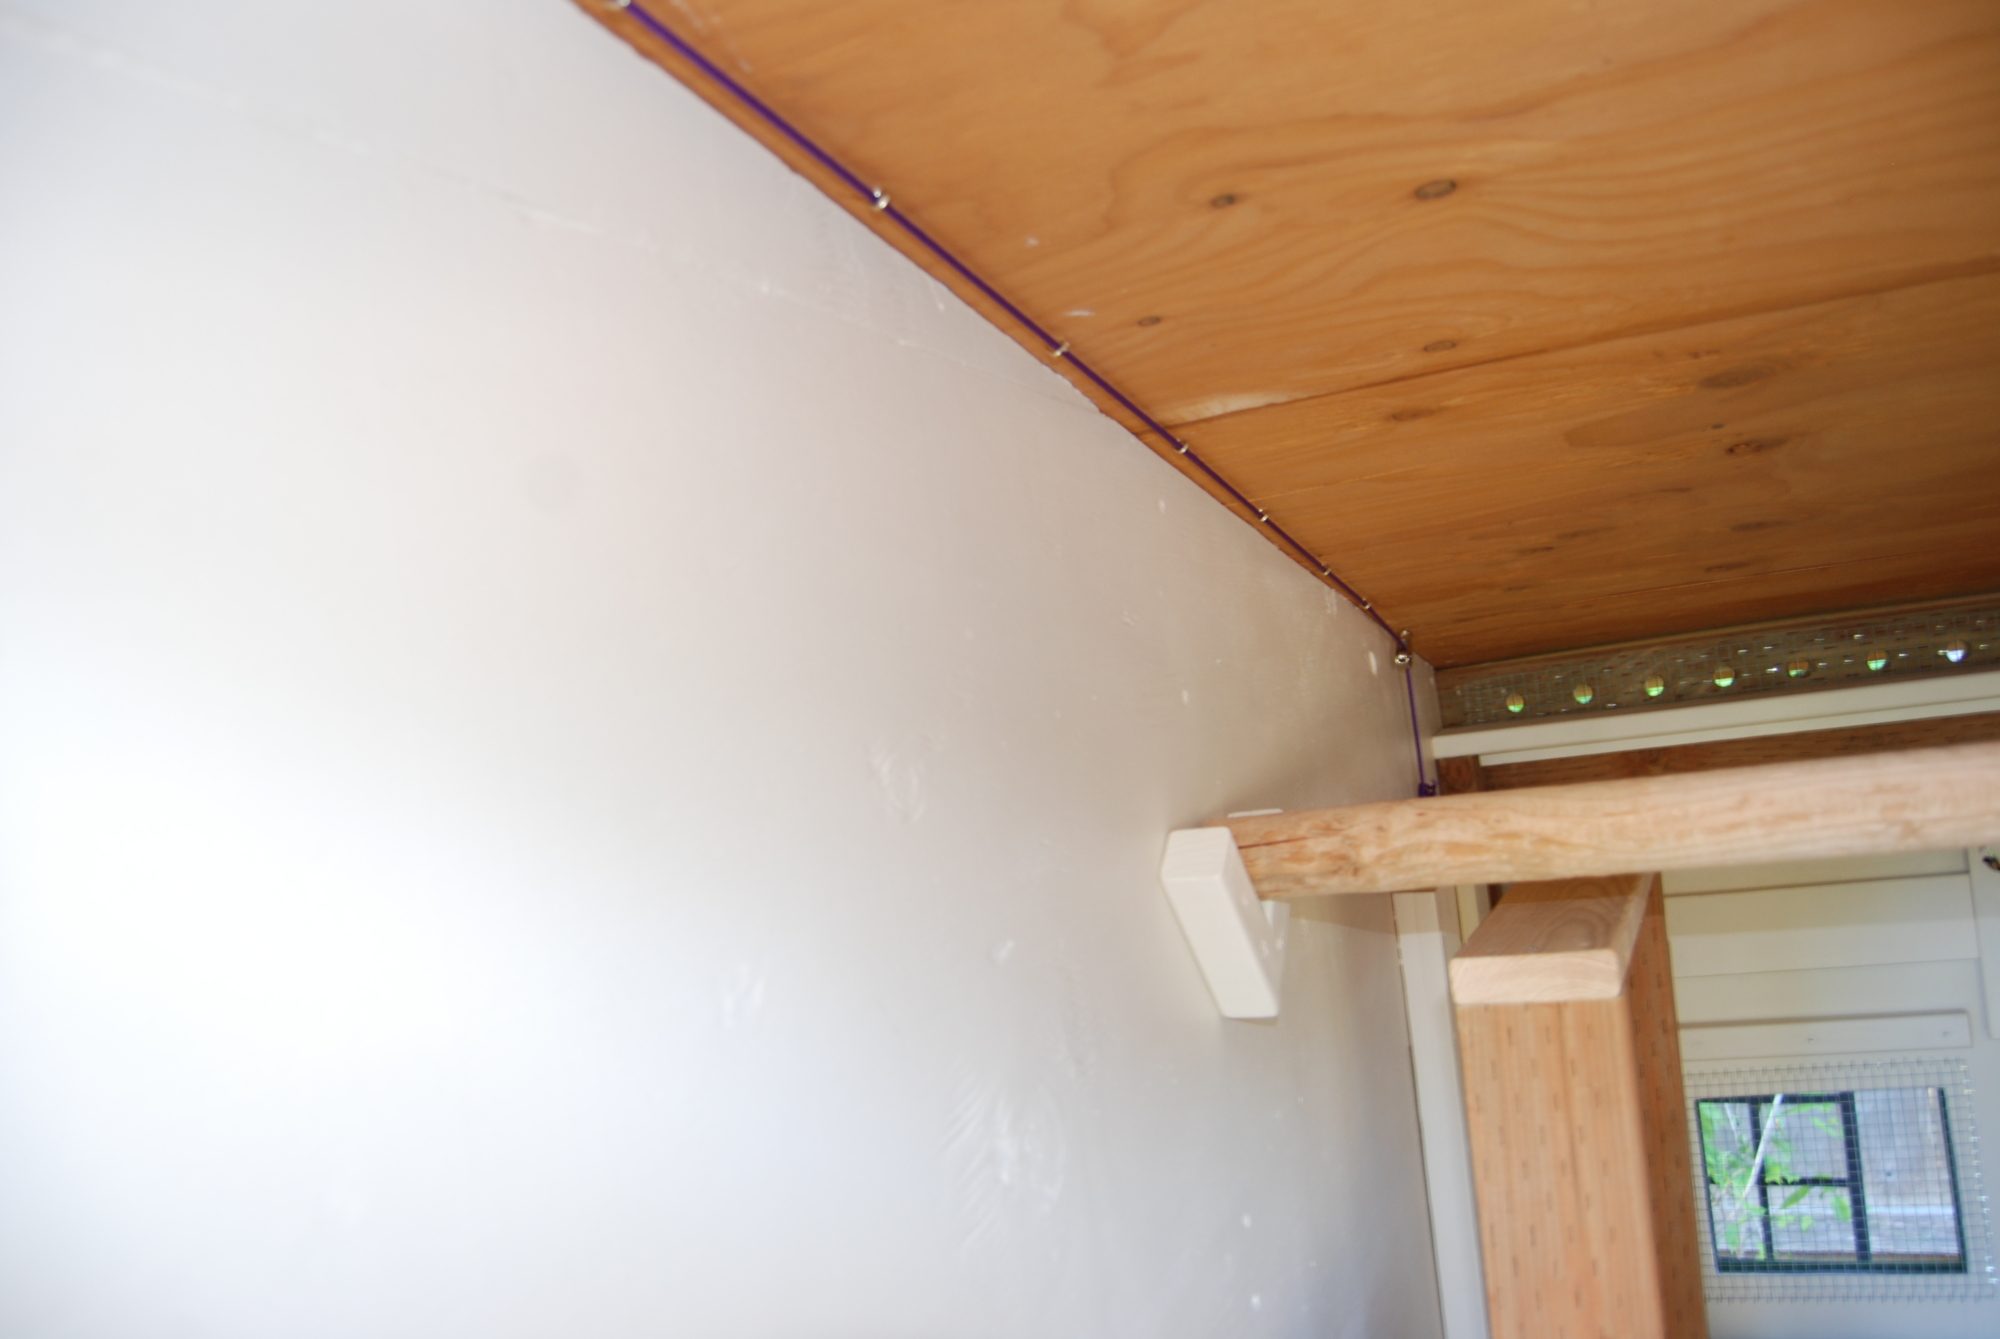
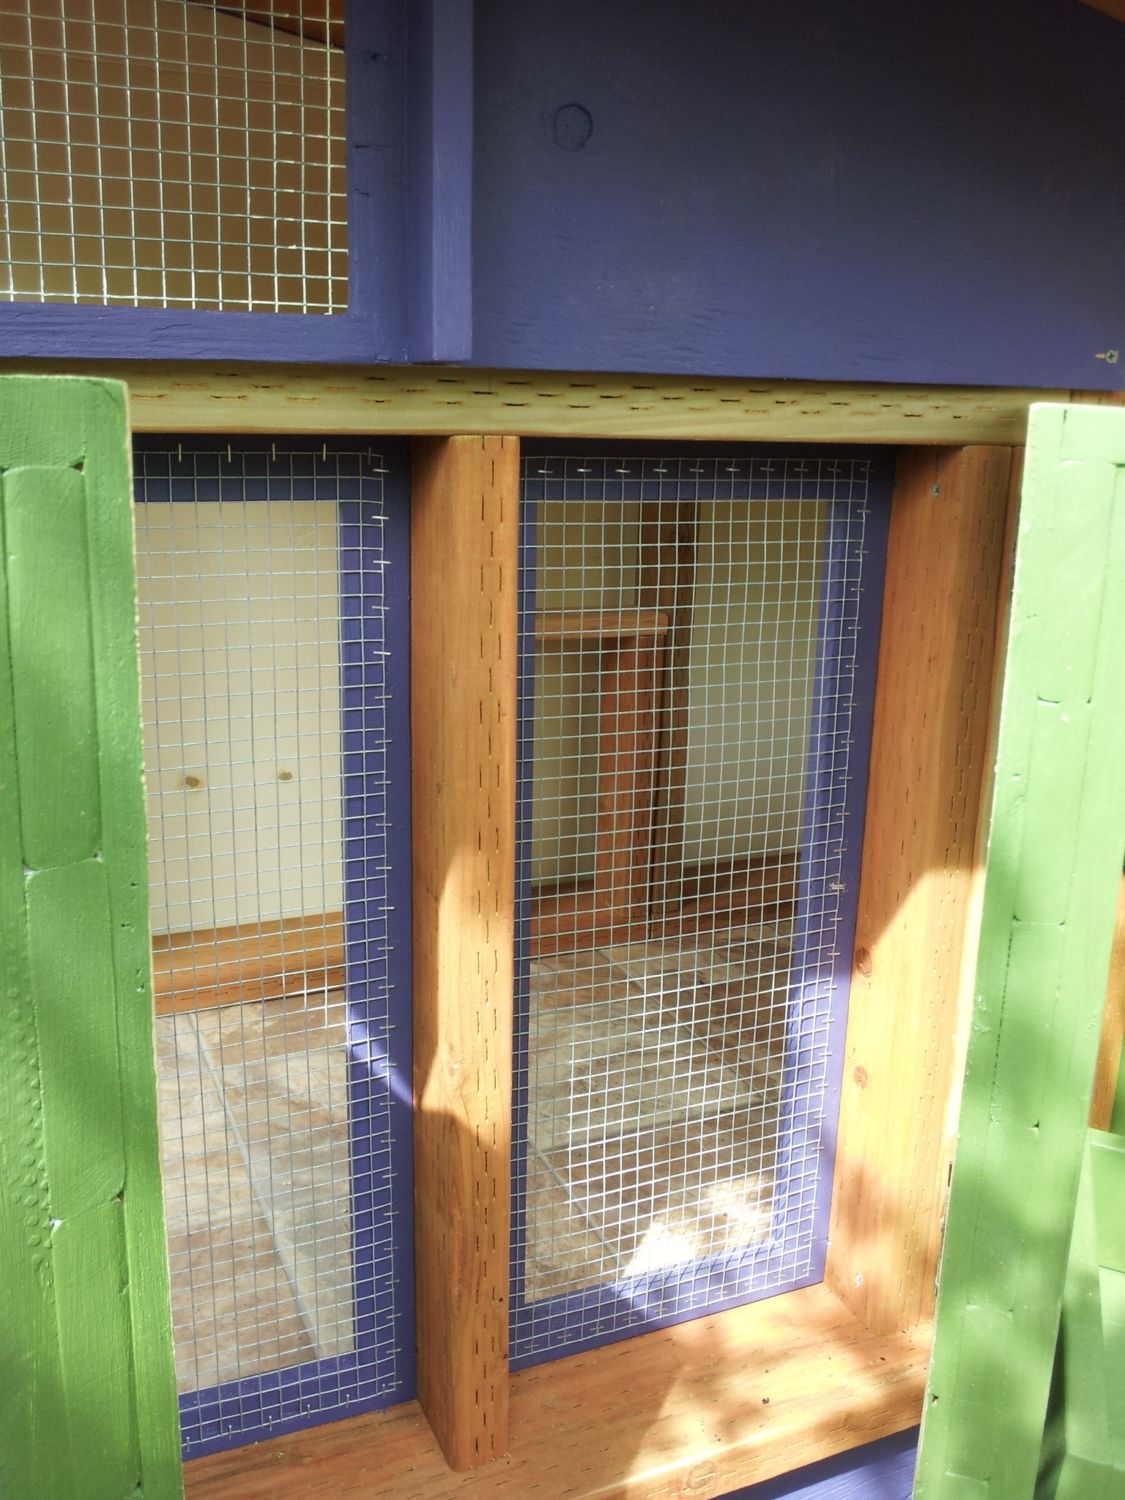
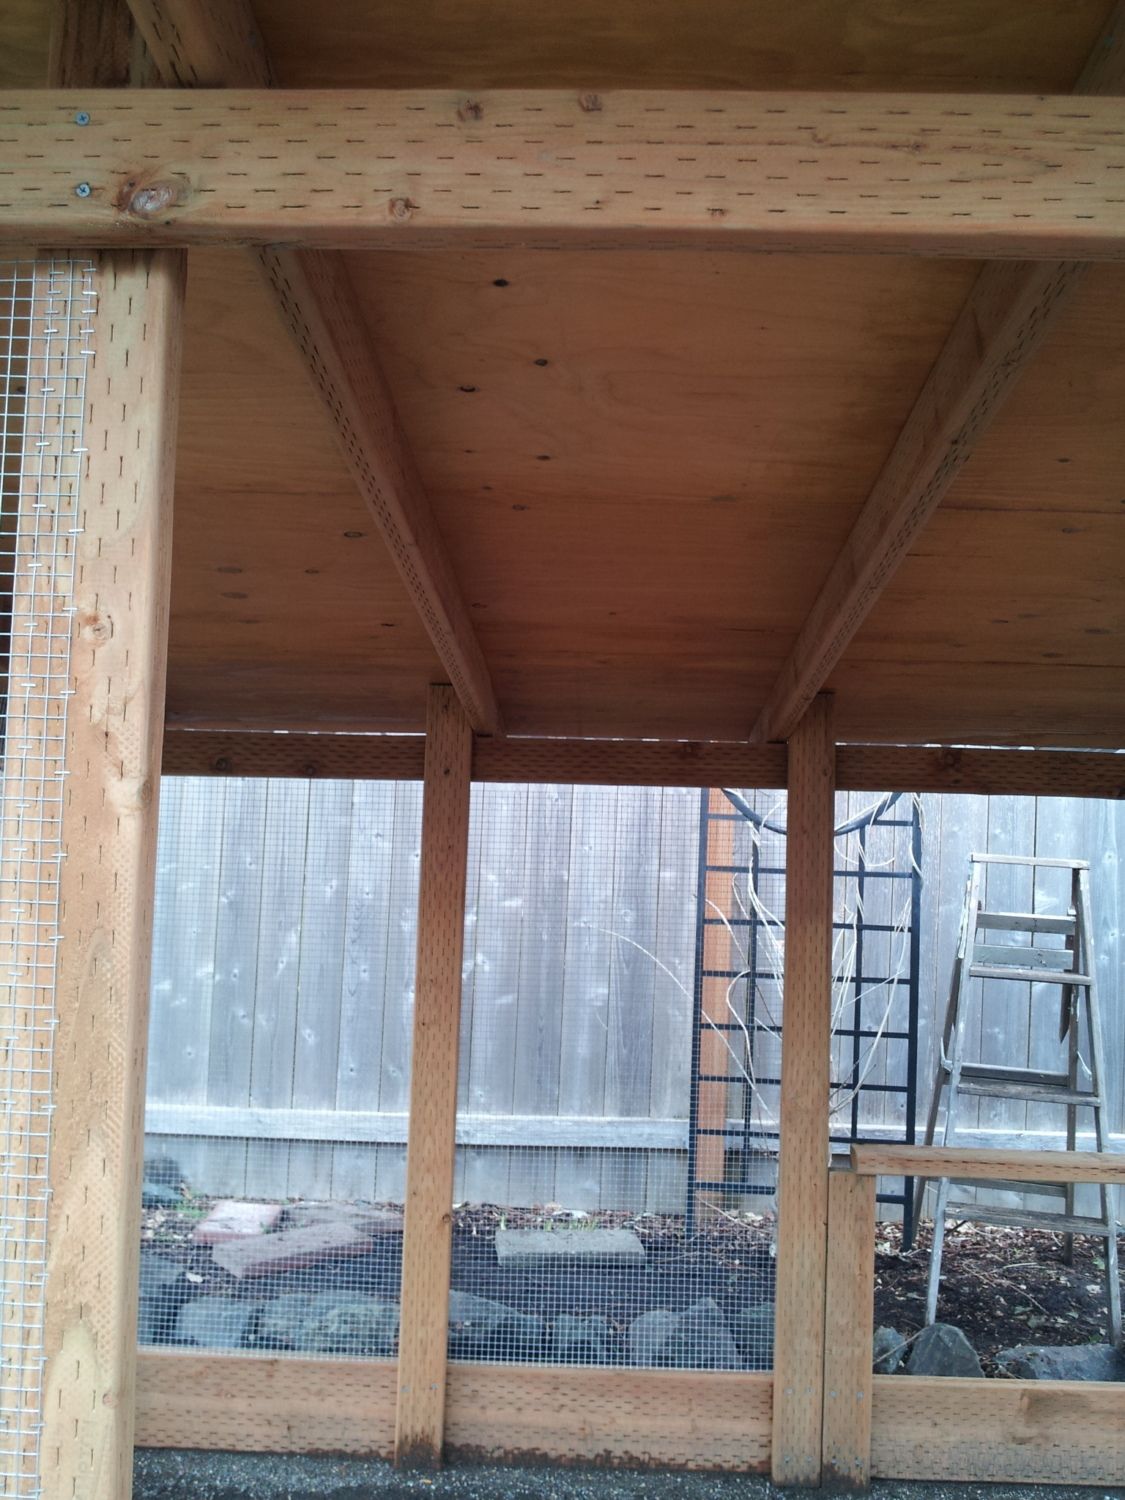
You can also see the ventilation holes cut in the 2x4 above. There are vent holes in both north and south ends of the coop open at all times. When all the screened doors and windows are open it gets nice and breezy.
Pop hole door set-up...
Ok that's about all I can post for one night. I had a blast building this thing and thanks for all the nice comments. I am not sure what I have invested in this thing, more time than money really. Used a lot of spare stuff we had around but definitely made my share of trips to Home Depot.
We LOVE our chickens and I had no idea they would be so fun. The sit on my wife's lap when she drinks her tea in the morning and provide endless humor chasing each other around. Our dogs shepherd the flock and let them crawl all over them. We still have very young silkies but they are the rodeo clowns of the chicken world for sure.
If anyone has questions feel free to comment!
A view of the front with two of our pullets, Harriet (left) and Blue.
The north side of the coop - you can see the ramp and pop hole door as well as the north smaller door with the flip up window open.
He found this great little chicken sign that fits perfectly next tot he pop hole door.
Looking into the cabin through the pop hole door.
Under the cabin, food bin and a cozy spot for the chickens to hang out.
An outdoor roost with decorated rocks below,
The outdoor roost with our chihuahua standing watch.
Pretty wind chimes
A view of the front side with the doors and windows open. The front door to the run, the door to the storage under the cabin and the big window to the cabin. We put 3 hanging flower baskets on the 3 sides visible from the house to add some color!
Big window closed
Snack time
Harriet on the outdoor perch.
Nesting boxes and north side door open

Nesting box with articulating roof.
Lower cleaning access door
... open
Inside the nesting boxes, shown is the removable panel for cleaning
... panel removed
A view of the indoor nipple waterer with the nesting boxes (with nightlight) in the background.

Eastern side of the coop - seen are the eastern side window boxes, the nesting boxes, northern door.
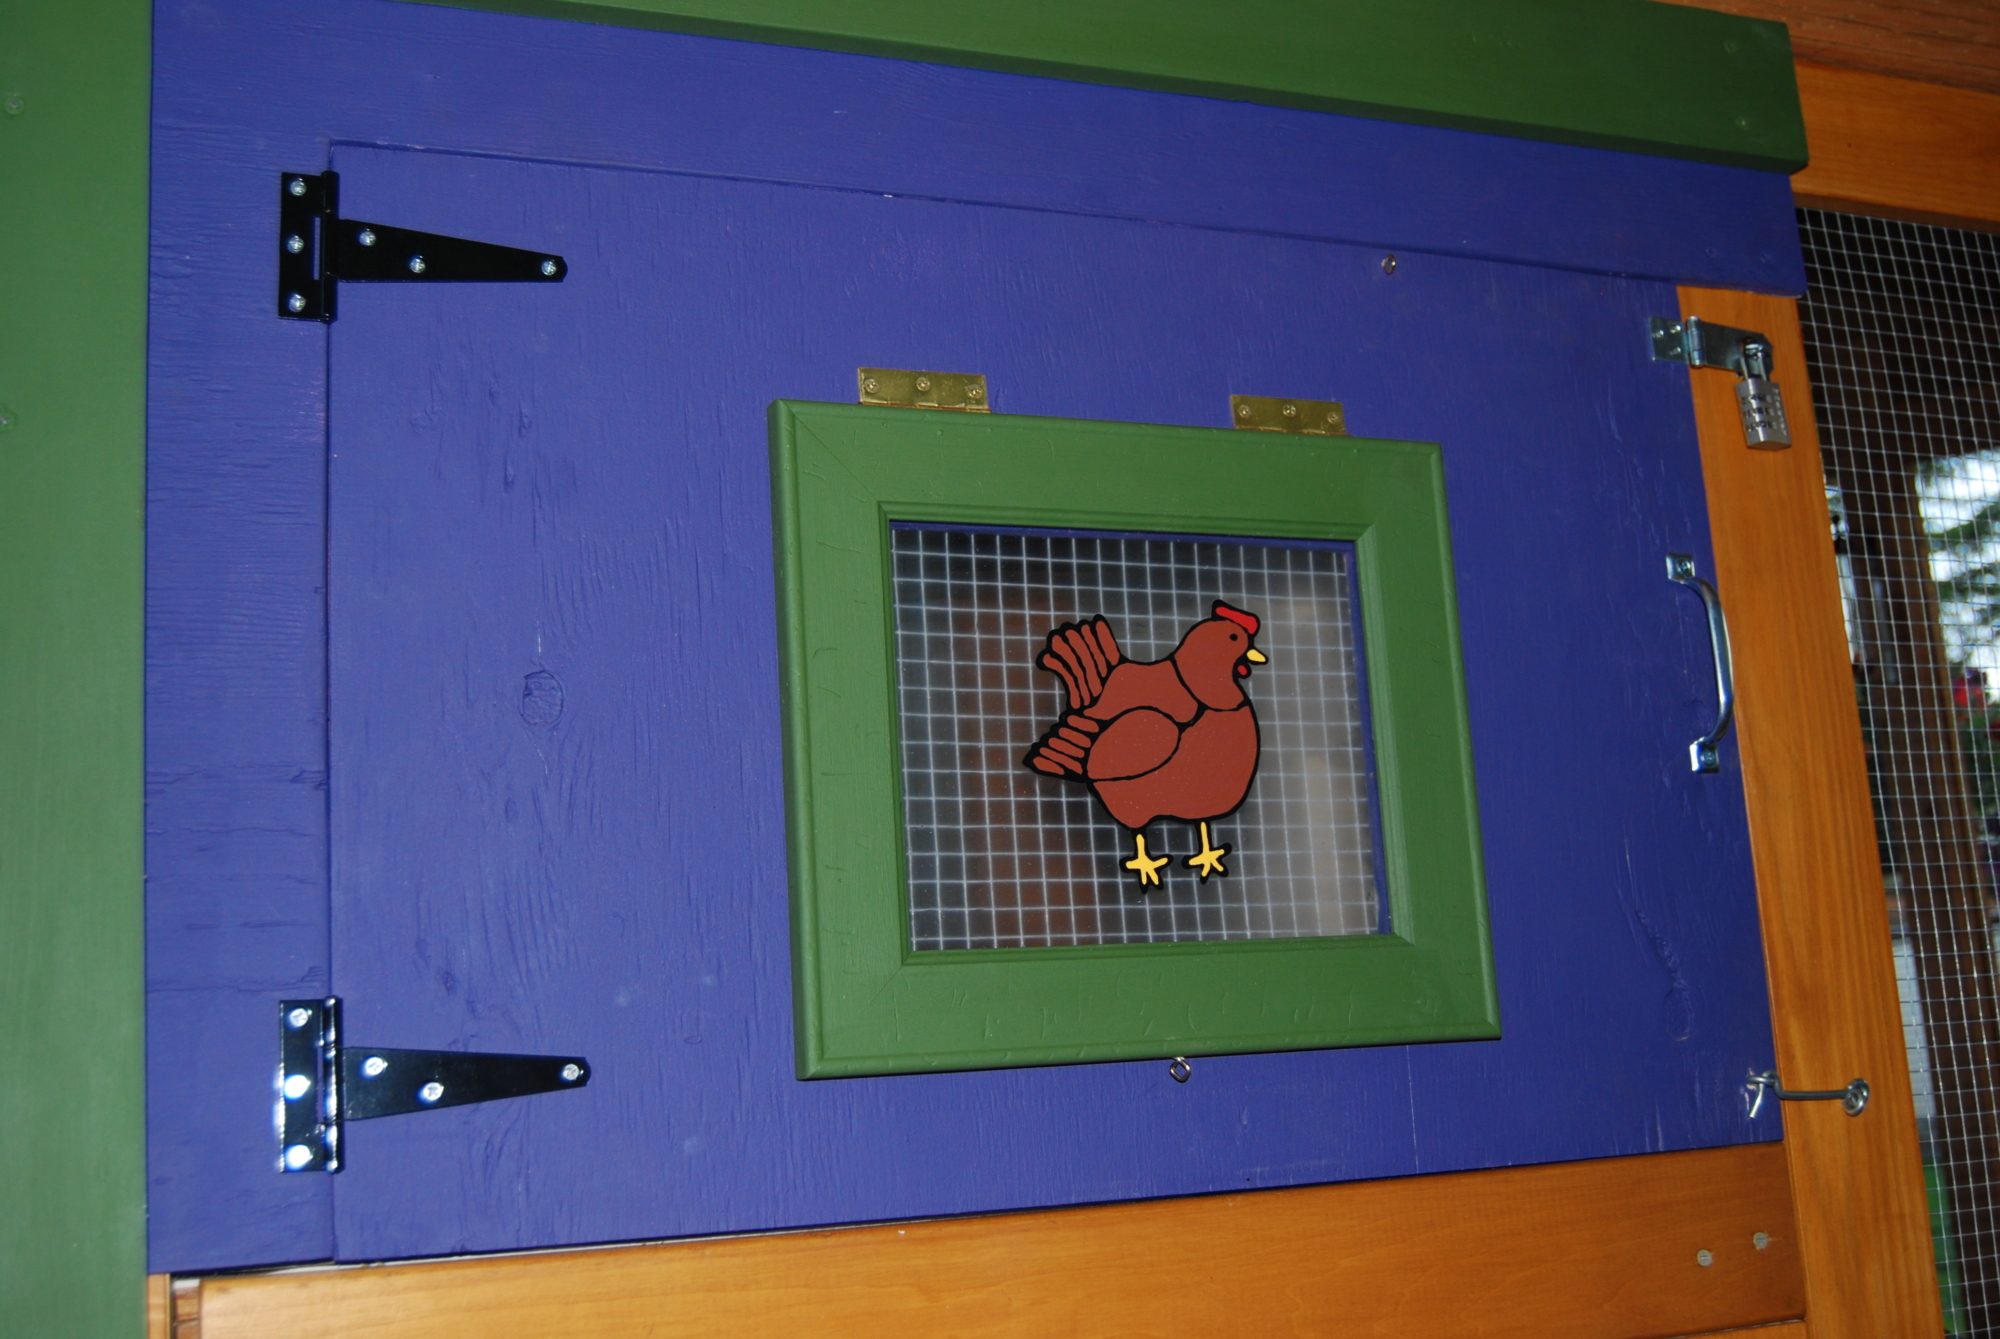
Northern door with the stained glass window I made of Blue, our Rhode Island Red. This window flips open for ventilation.
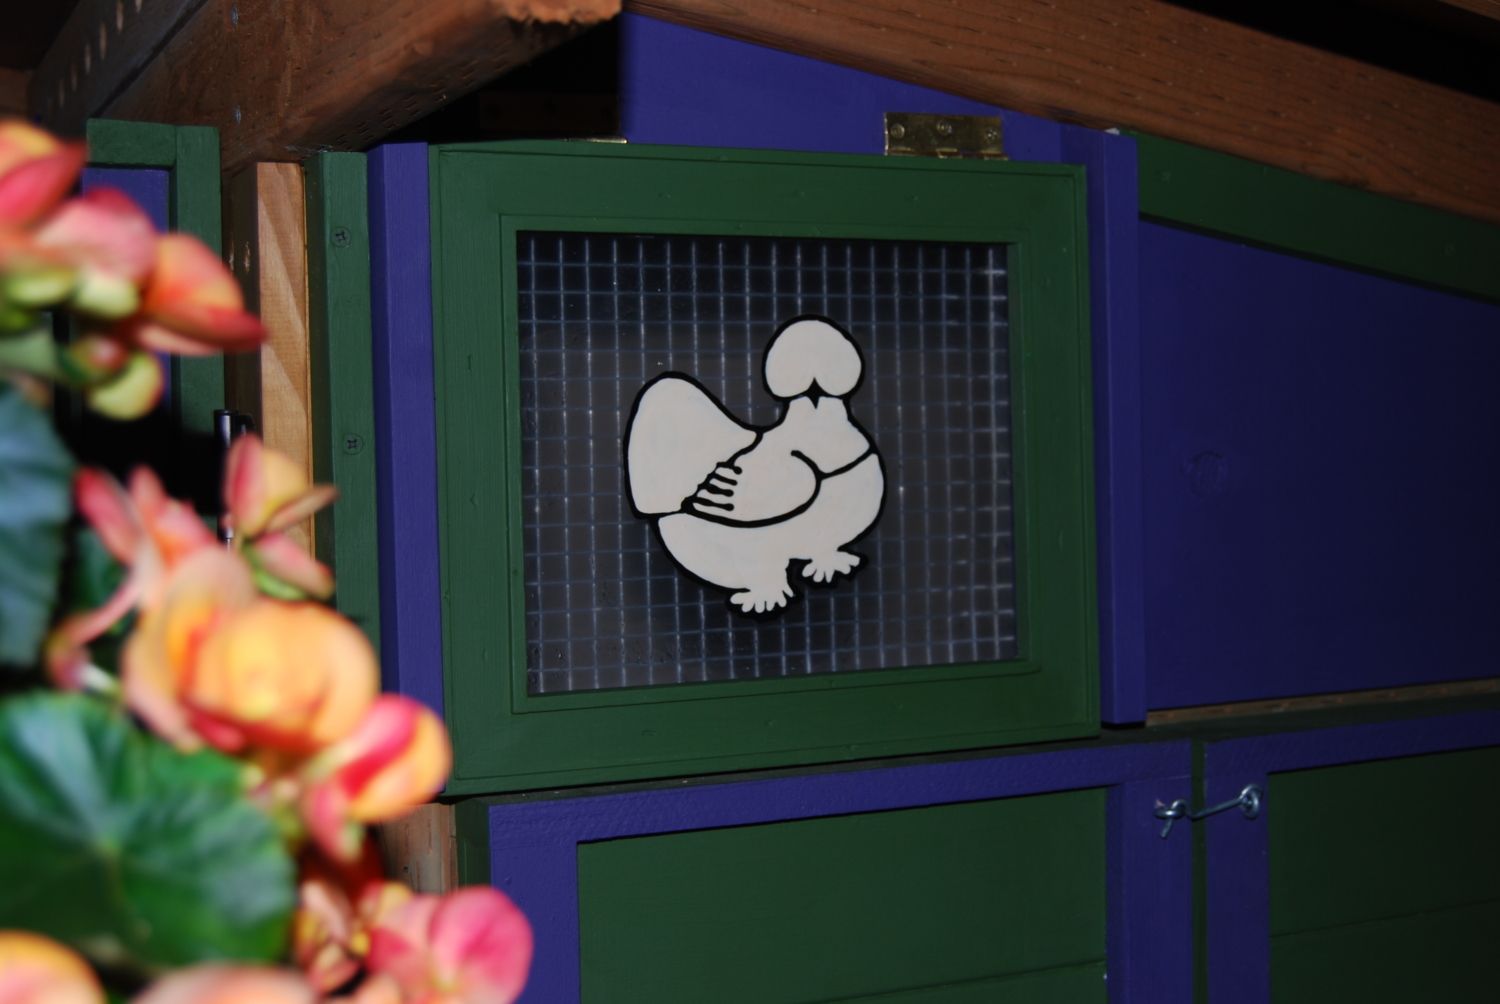
The stained glass window I made of our Silkie, Aretha. It also flips up for ventilation.
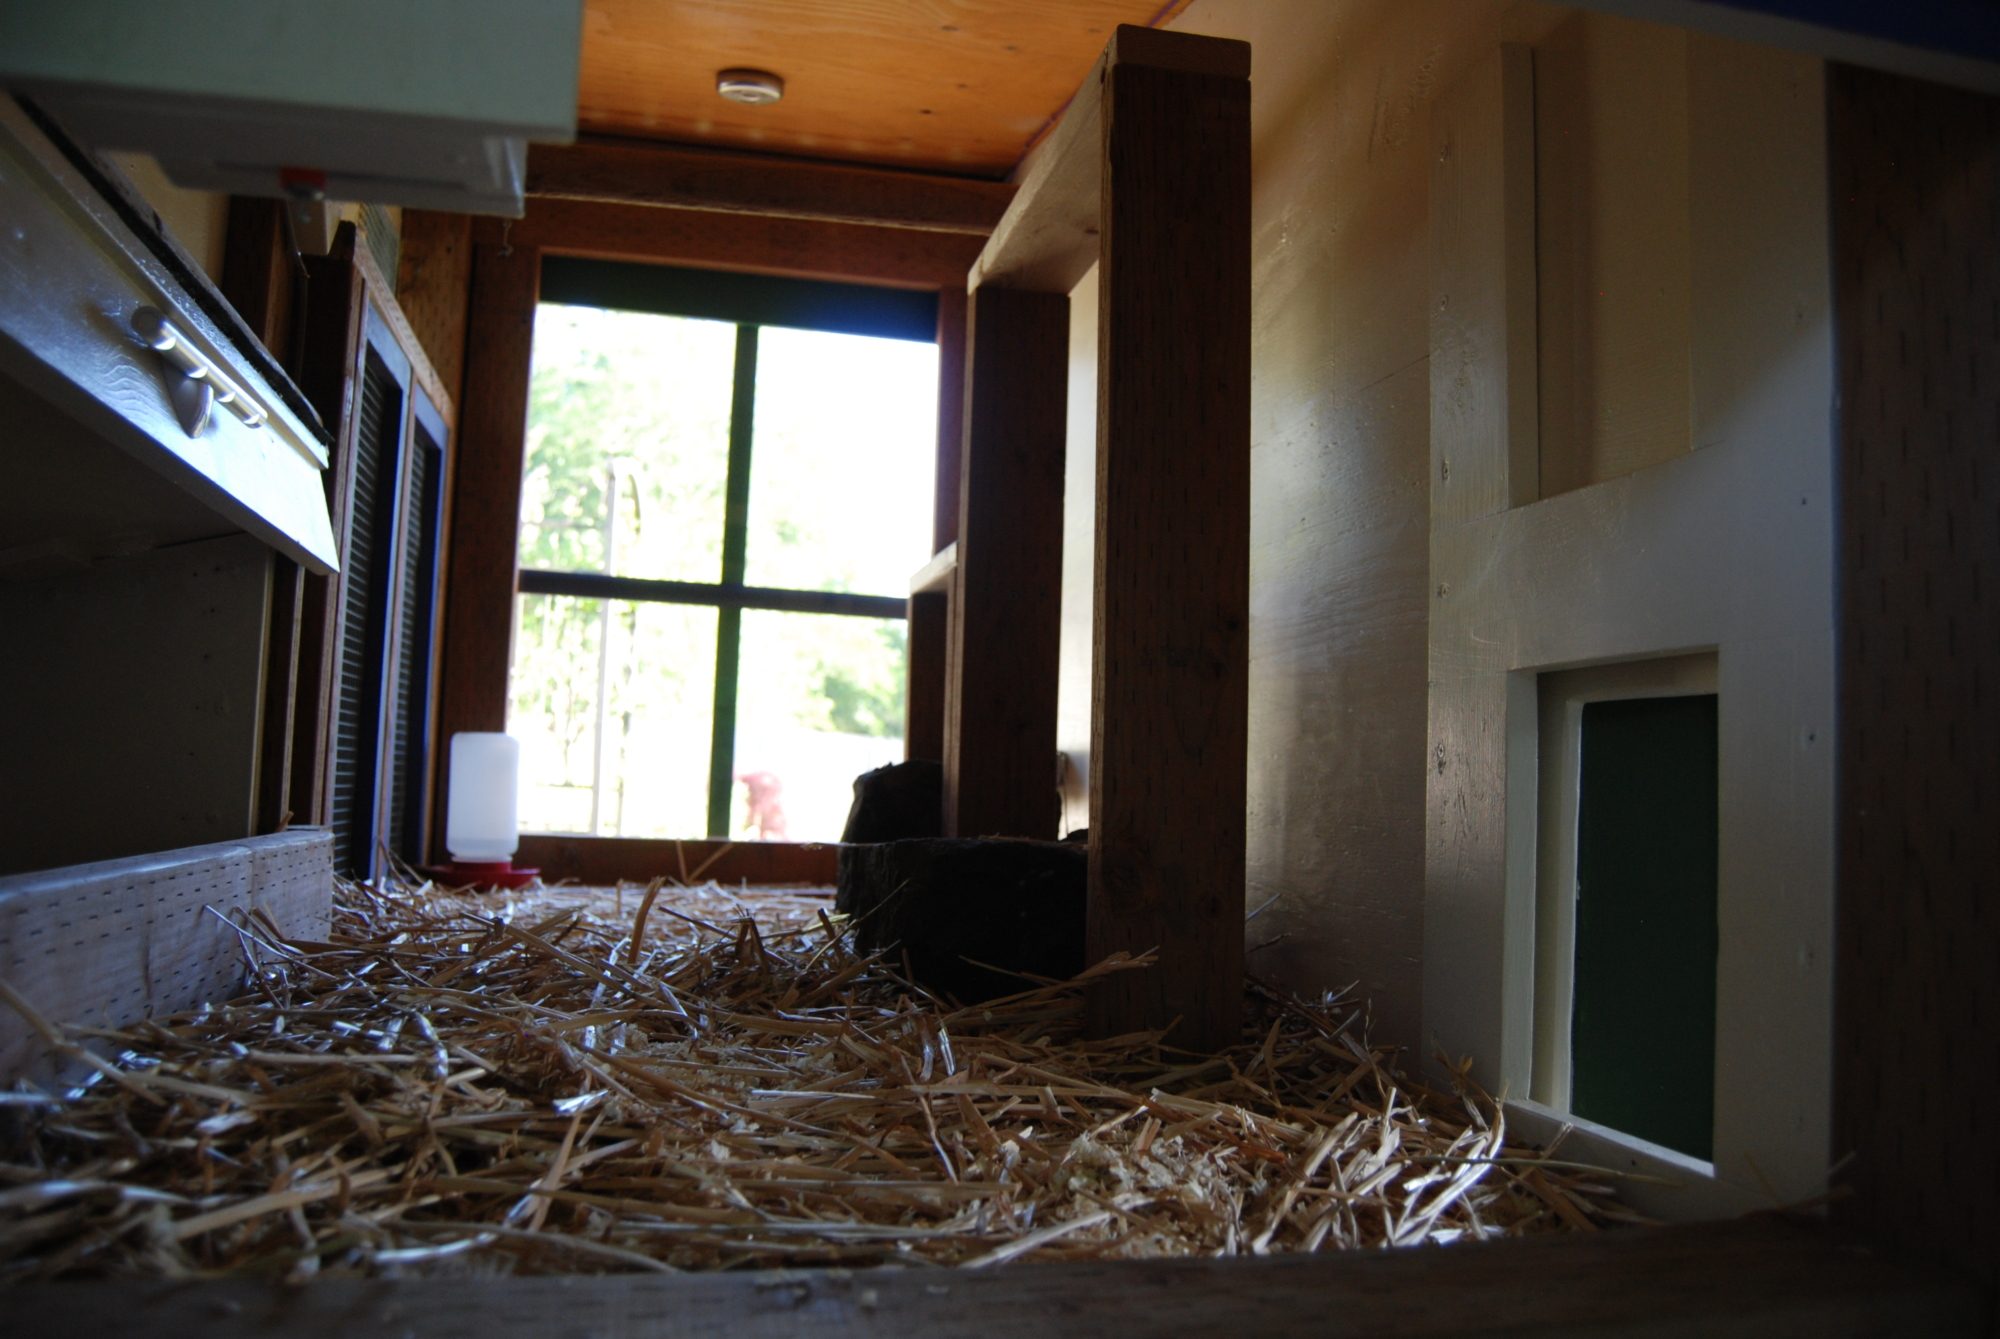
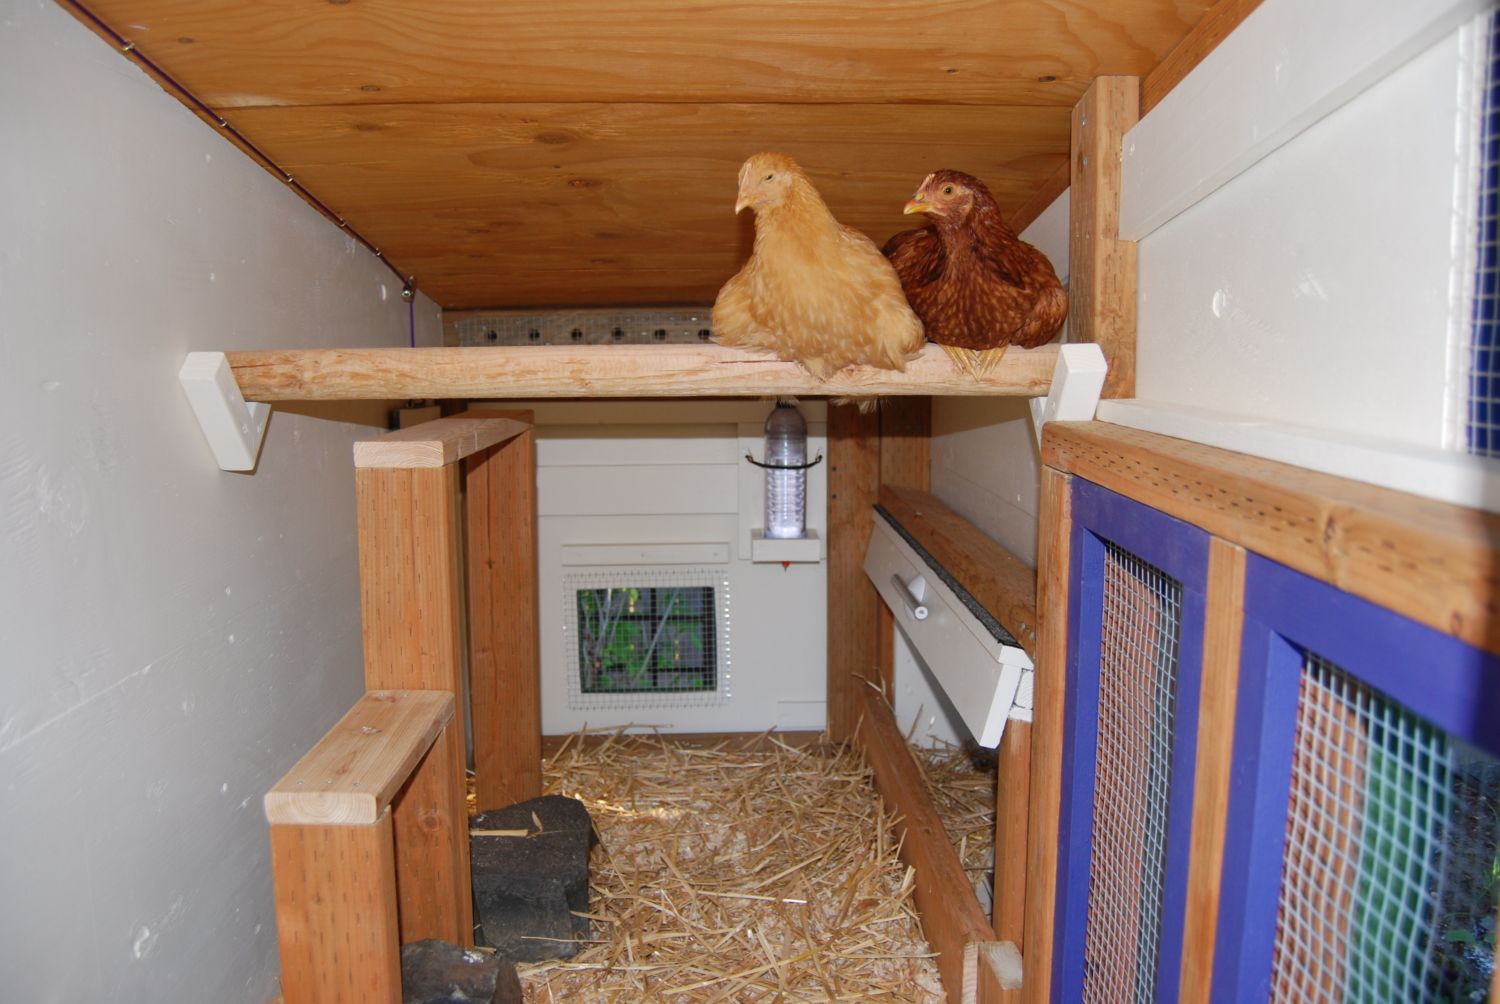
Inside the cabin
Northern window hooked open for ventilation.
Chicken playground, roosting bar, nipple waterer, nesting boxes with nightlight and windows with flower boxes.
Pop hole door cable running along the roof of the cabin.
Nipple waterer access hose. Hose is accessible though the storage compartment below the cabin.
Harriet and Blue checking out their new roosting bar.
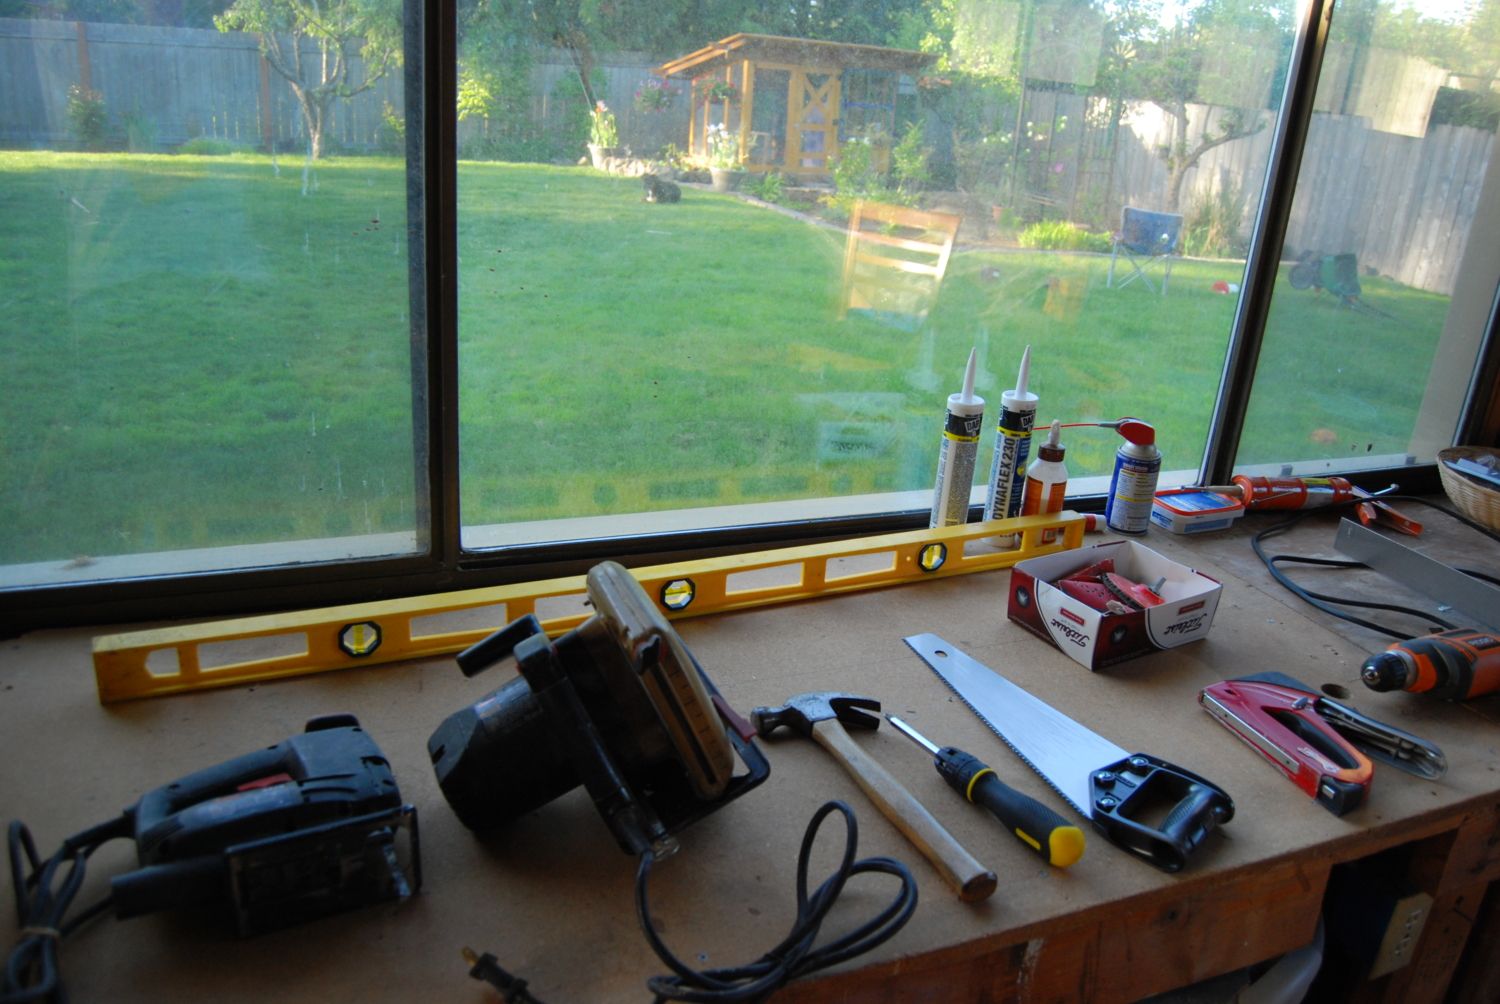
Work bench with the coop in the background.
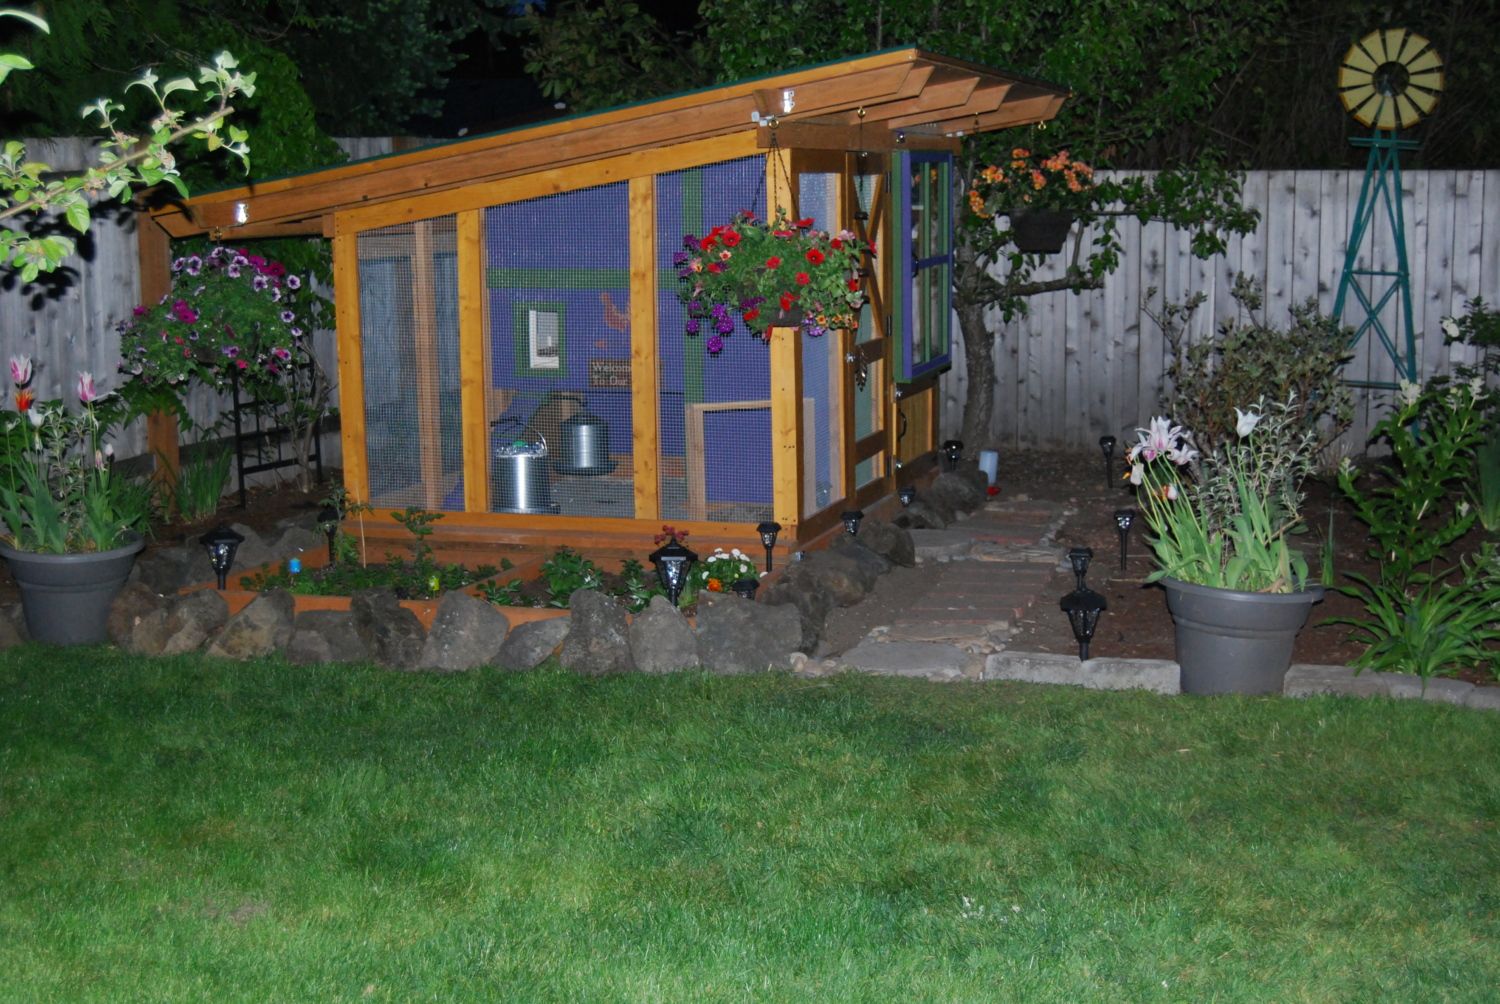
Nighttime shot. The exterior solar lights illuminate the cabin and run nicely.
And this is where it all began...
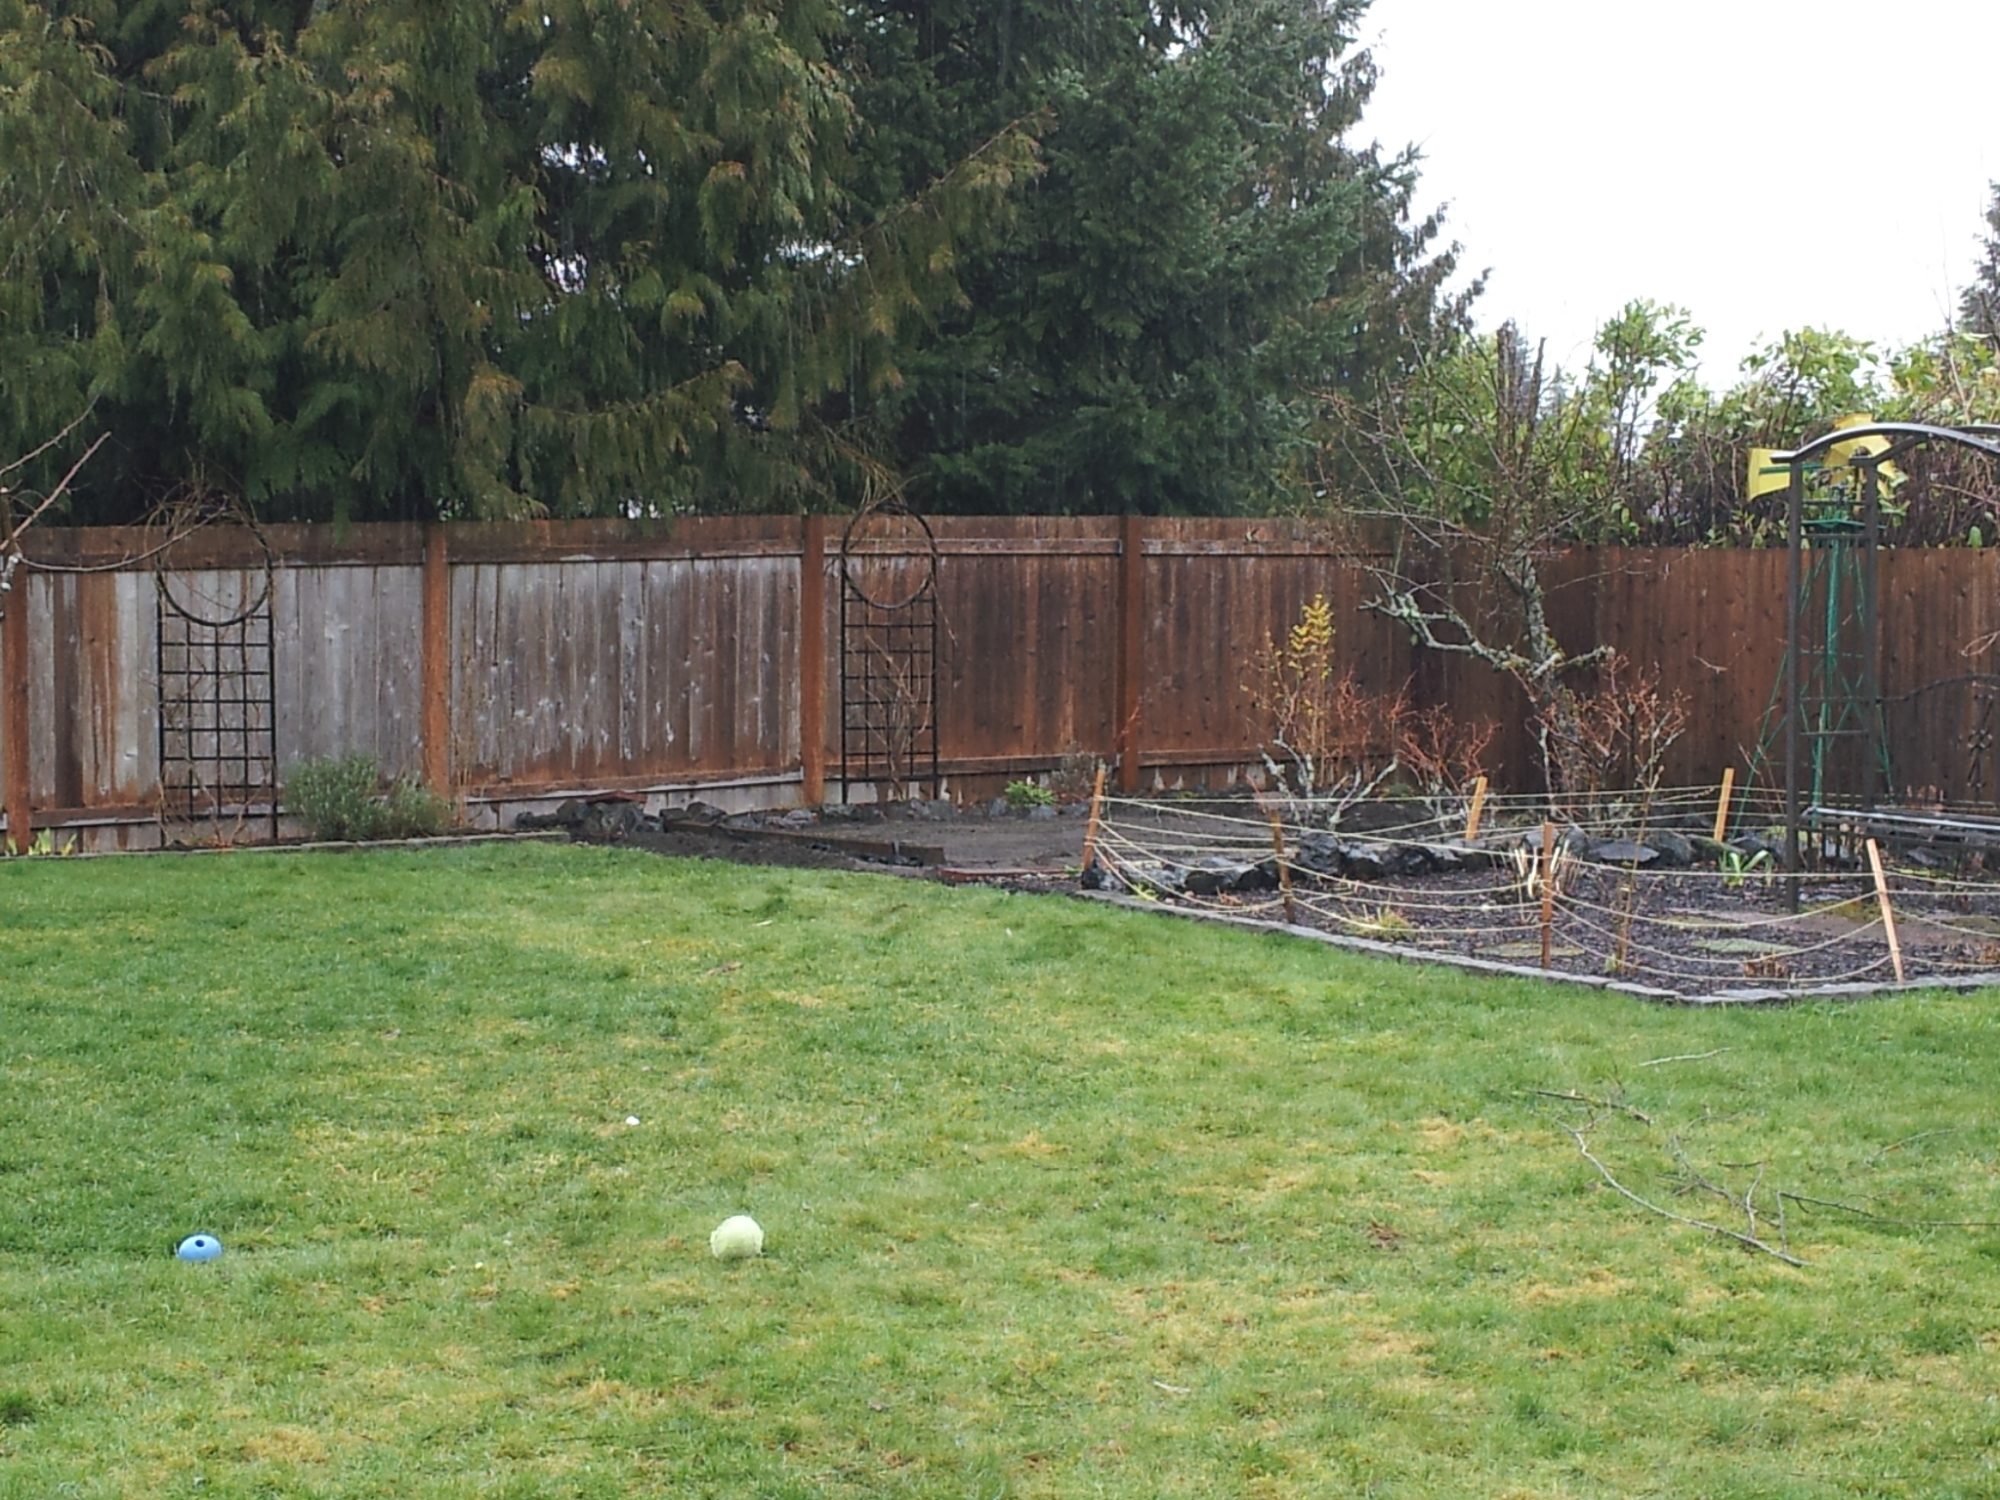
We have a beautiful yard with an open plot. I thought I would put a vegetable garden in there, but then we got the urban chicken bug. So the veggie garden was minimized and the coop construction began.
Let me point out that my husband built the entire thing unassisted. I did the painting but the construction was all him. And he is not a carpenter. He's an emergency veterinarian and I've never seen him really build anything. He built this beautiful coop all while working long, grueling hours in a 60 hour work week. With no plans. Mostly in the rain.
Digging for the foundation.
Laying the bricks and sand for the foundation.
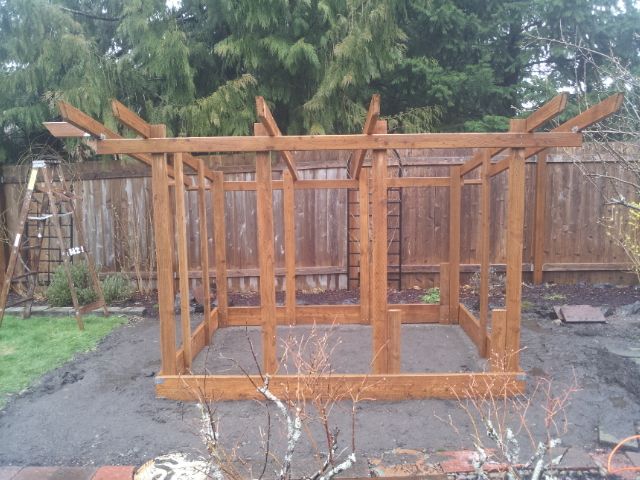
The frame was started in our shop.
The nice neighbors helped us move the frame outside. Heavy!

Meanwhile... these three little day-old chicks came home. We got a Rhode Island Red, a Buff Orpington and a Speckled Sussex.
Back to the hard work...
Securing the roof frame boards and the 1/4" fabric cloth along the run walls.
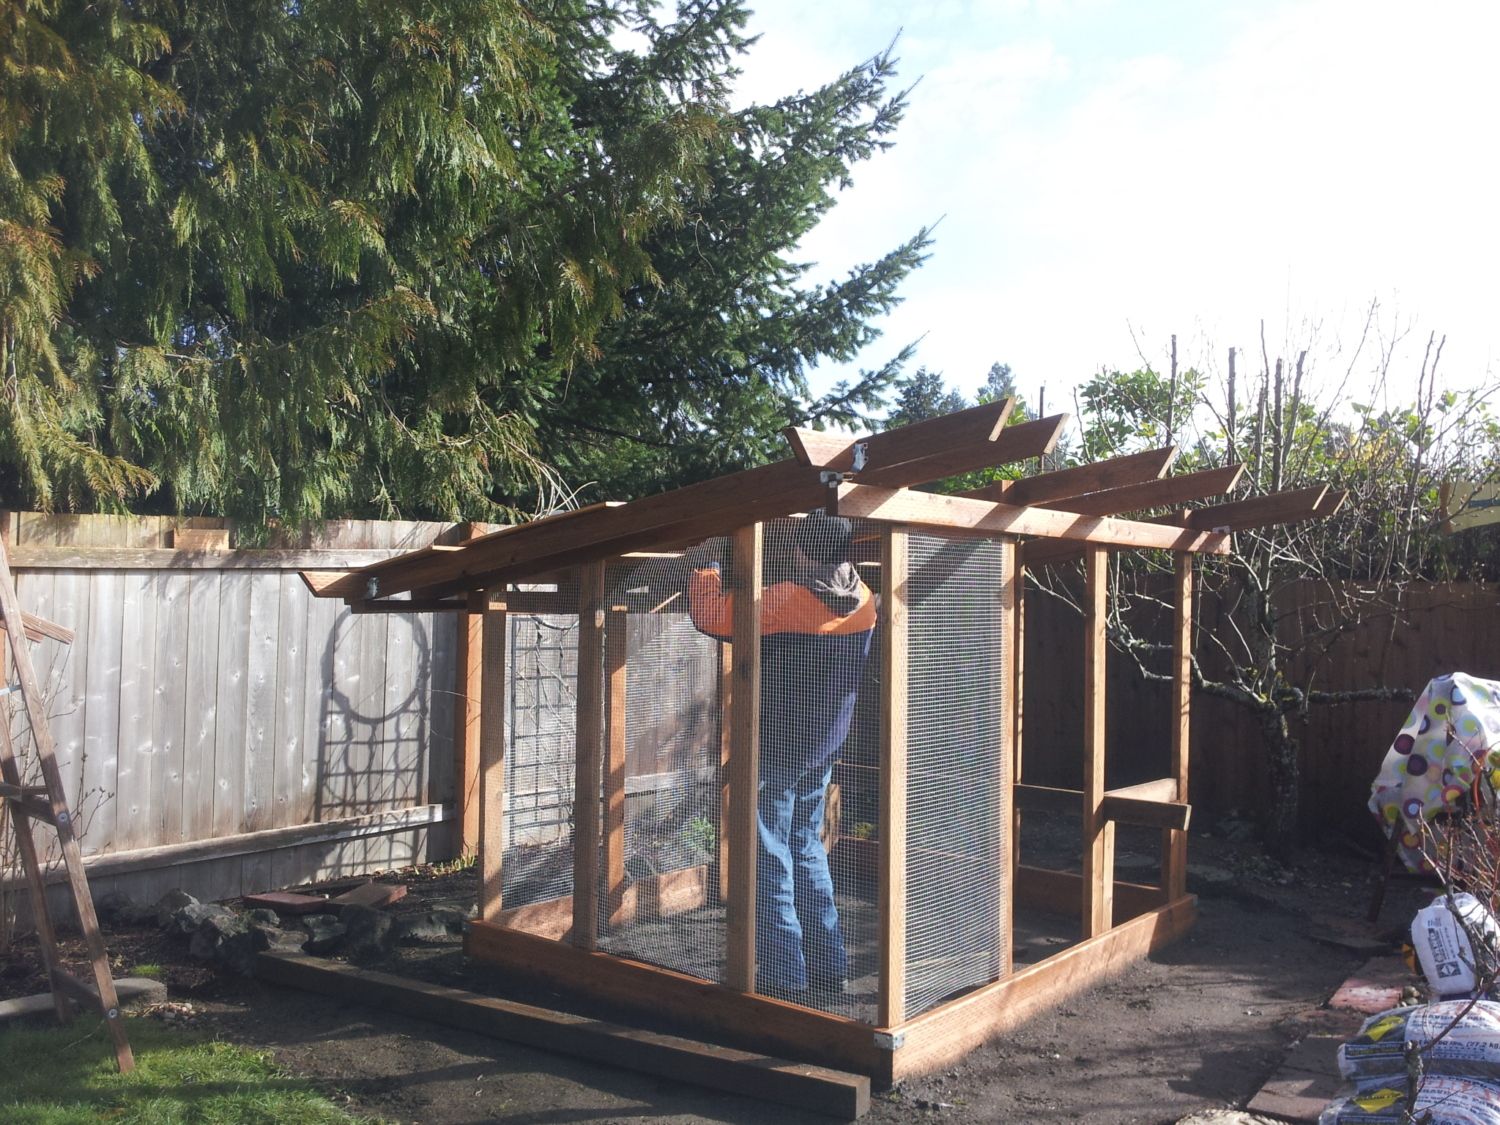
The forest green metal roof (which may have been the most challenging part) and fabric cloth walls complete.
He made me a micro garden along the west side of the run. Inside you can see the beginnings of the cabin.
We spent lots of quality time with the three chicks.

And tried to help as much as we could outside with the big project.
The gorgeous door is mounted and the storage compartment under the cabin is completed.
No one wants cold chickens! He insulated the main wall of the cabin so I'd stop worrying that they'd be cold.
We found this great big piece of glass and he made a window frame for it.
The pop hole door mounted.
One of their first days outside - they were nervous at first but got the hang of scratching and pecking around!
Soon to be flower window boxes, screens not installed yet.
Flower window boxes, screens installed.
Nesting boxes (with nightlight for wintertime). It's hard to see, but there is a cleaning release panel on the bottom of the outer wall of the boxes.

Eastern side completed! Flower window boxes (with plants that still need to be planted).
We chose plant hangers mounted on the run walls to hang our feeder and waterer. Nice and sturdy!
Also, we chose gravel with sand over it for the bottom of the run. Easy cleanup and low pest problems.
We sadly realized our Speckled Sussex, Aggie, was a roo, but we found a great permanent home for him (a local family with 5 pesticide free acres to free range with 17 hens)
And we adopted these 2 silkies. The white one is Aretha and the blue one is Georgia.

And we added Phyllis, a 10 month old Serama and Nelly, a 4 month old Barred Rock.
We have a gorgeous and very hardy, functional coop and run and some happy and healthy chickens!
From the builder: Ok so I am told to add some technical data. I have to say I had absolutely no idea what I was doing and used pics and ideas from here and other random ideas that just popped in my head after staring at a blank space for a while. If you are looking for great laid out plans...well I am unfortanately not going to be much help. I actually had fun just freestyling and making it up as I went along. Only pressure was the presence of growing chicks in our spare bedroom. It took me about 8 weeks to build and I admittedly spent hours doing a lot of laying out ideas in my shop before actually screwing in. We recently moved into a home with a very nice shop space to work in and I have always wanted to build something fun and creative. We wanted to make the coop look like part of the garden that just happened to house some chickens. I also tried hard to make it functional and easy to clean. All and all we are very happy with the final coop. Although I may add some touches like a gutter that feeds a rain barrel, we are ready for the summer and eggs to come! We have had a few already from our young Serama...yum!
I bought a miter saw that was the workhorse of the whole project...
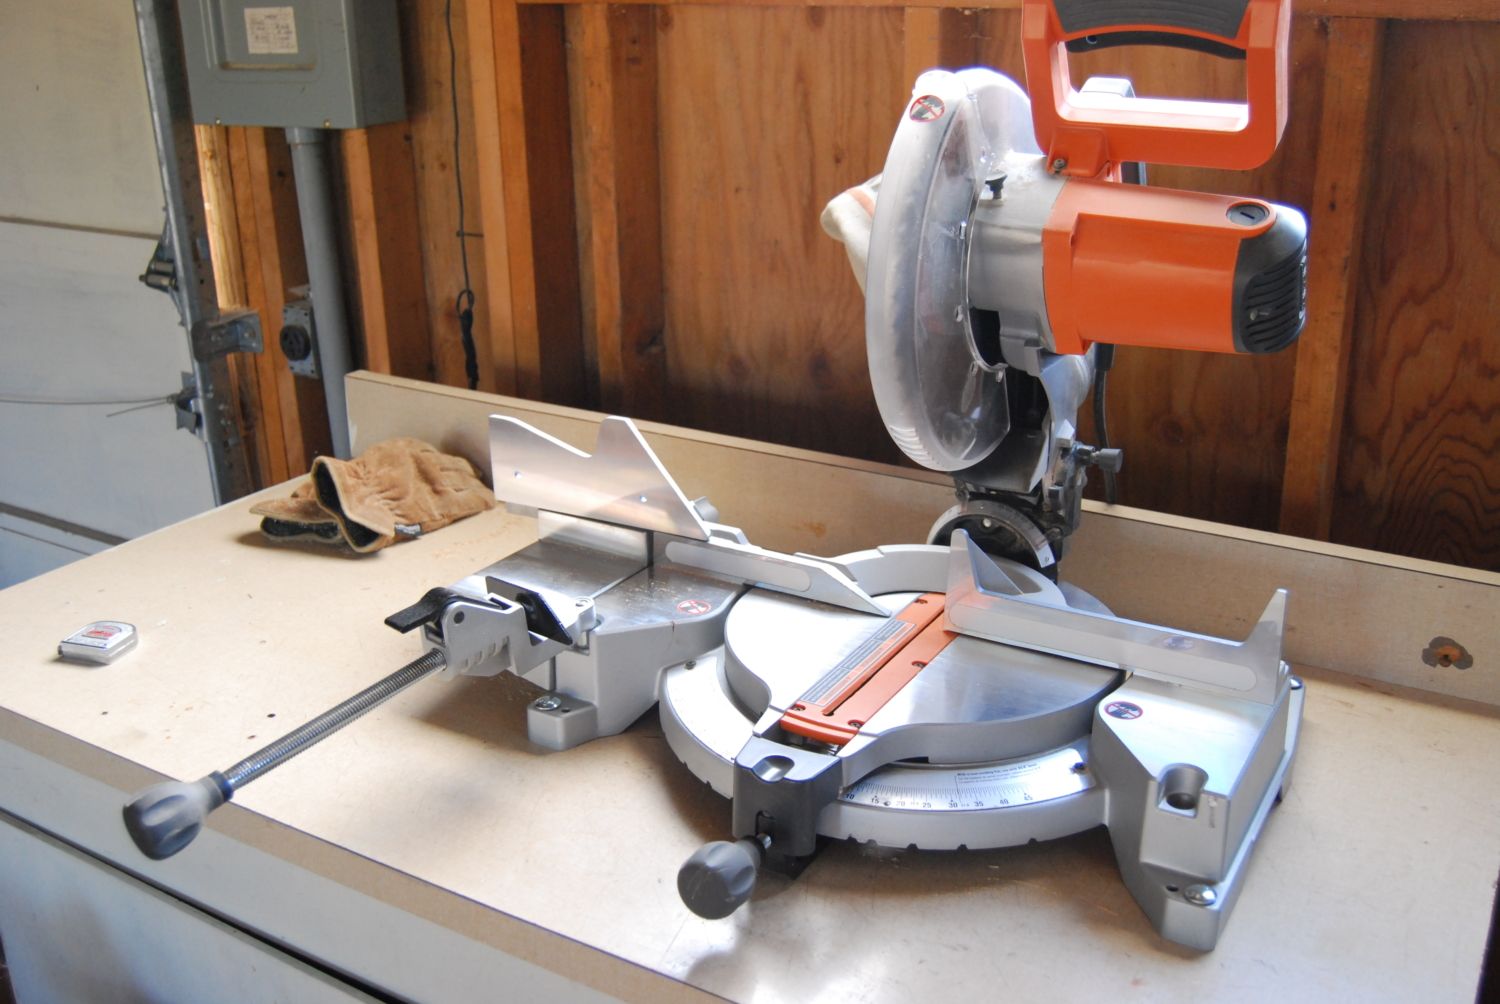
When I figured out my roof slope was 8 degrees it made future miter cuts a breeze. Just measure, line up with the laser, cut and sand... and repeat....I got kinda good at it for no experience.
The main coop is 6' x 8' and is covered by a 10' x 10' roof. I almost completely stole the framing of "Witchita Cabin Coop" and like everything else just put a little different spin on it. I had never done framing so I had to start somewhere! The cabin is 3' x 6'. I used treated 2 x 8 on the base because we basically live in a rain forest and get some mud splash. The big rocks cover the base and were in the yard when we moved in. The rest of the frame is basically 2 x 4 treated. I used some 1 x 4 to for framing pieces. All the non-pretreated stuff was coated with 4 thick coats of waterproofing stain. The frame was built in the shop when we were still getting freezing temps and then carried out by some helpful college kids next door. The foundation was made using thick yard bricks already on the property buried deep on sand over gravel. The floor ended up pretty darn level and we were lucky to have good soil to work with. The result is a very flat base that predators cannot get underneath.
I originally was going to put hardwire cloth all the way to floor level but it wasn't needed. I used waterproof stainless staples and bought a good staple gun for the hardwire cloth install. Be careful when you unroll that stuff as it can whip around and cut you (ahem').

Once the frame was built and put on top of the foundation, I added the roof. I used 3/4 plyboard, covered with roofing felt, then used blocks of 1/4 to raise slightly before covering with green metal roofing. Cutting that stuff was more than my little shears wanted to handle effectively. Tough! The roof comes with hex bolts that I put in by hand because I wanted the control of not going too deep. I then lined the front with a foam guard and 1x2 furring strips. The result is a very sturdy, waterproof cover that has worked like a charm. It runs rain off the back into our garden bed and rocks below so no more puddles. If I was to do it all over again I would have had a helper and a driver for install. I now have very buff forearms though! Lol.

I cut a lot of 3/4 in plyboard pieces with a hand saw after frying a friend's loaner then realized my neighbor had some goods to spare for some free vet advice. Oh I wish I lived in the days when you could just barter for stuff you needed. I then had a jigsaw and skill saw to work with. Much needed tools for a build this big.
I used some old pieces of wood house siding, lined with boards from an old futon for the walls of the storage door and the wall beneath the north access door.
I used more old futon boards to make faux shutter doors with removable planter boxes..
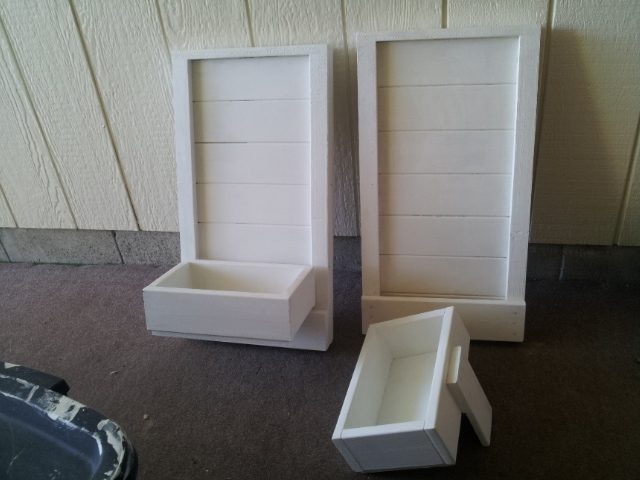
My first door!
I basically cut a bunch of spare plyboard pieces like a puzzle and framed them with leftover boards with contrasting color. My wife painted her tail off and helped make everything cute!
The nesting boxes were a lot of spare boards sanded down and the roof of the nesting boxes are insulated. The shingles are attached so they slide when it opens. It flexes just enough not to put too much stress and is 3 layers thick. This project took me a lot of time I will admit. It is slightly sloped so I can water it out the back flip door and is lined with lineleoum flooring, as is the whole cabin. Everything locks if desired.
The treated 2 x 4 frame for the large window door has a 2 x 6 base to keep bedding in, and is completely removable via latch hooks on the inside. We can remove everything in the coop very easily and hose it out from one end to the other.
I made a nipple water bottle out of a 5$ water bottle from Target, 1/4 in tubing and remoted to the storage area for filling. My lovely wife reminded my to drill a hole in the lid to allow air to escape when filling. Thanks babe.
Then I built a mount for it and attached a bungy for access...
You can also see the ventilation holes cut in the 2x4 above. There are vent holes in both north and south ends of the coop open at all times. When all the screened doors and windows are open it gets nice and breezy.
Pop hole door set-up...
Ok that's about all I can post for one night. I had a blast building this thing and thanks for all the nice comments. I am not sure what I have invested in this thing, more time than money really. Used a lot of spare stuff we had around but definitely made my share of trips to Home Depot.
We LOVE our chickens and I had no idea they would be so fun. The sit on my wife's lap when she drinks her tea in the morning and provide endless humor chasing each other around. Our dogs shepherd the flock and let them crawl all over them. We still have very young silkies but they are the rodeo clowns of the chicken world for sure.
If anyone has questions feel free to comment!