"Ready Coop"
Originally a city dweller, I worked there to be able to eventually live in the country. Once I moved to my small farm property I started keeping chickens. After 7 years keeping chickens and going through some trial and error, I used my experience to design a mid-sized family chicken coop that I call Ready Coop, and made the plans available to others. My intention was to save new chicken enthusiasts a lot of unecessary expense, hard work, and heartbreak by showing them how they could do it right the first time. I have since made plans available for a simpler, smaller coop which is ideal for a few hens in urban back yards. Both plans are available from my web site. Because of the many details in the full Ready Coop plans, I will give a glimps here to show the general building strategy of this mid-sized coop, however I suggest that the full plans be used to make it easier, and save you time and money. It took me building two of these to get it right for the consumer.
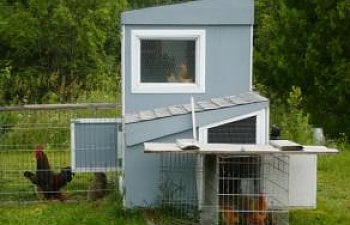
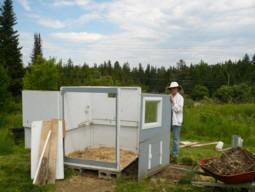
In my location we can have extremes of temperature... very high and down to 40 degrees below 0. We occasionally have tornados. We also have a full range of preditors including bears. I like to sustain my flock naturally instead of having to buy new chicks or use electric incubators. I didn't want to make a cement foundation for the coop. I value being able to move my coop to new ground every few years or so and can do this without tearing down an old coop or building a new one. Chickens are very comfortable in this coop even if I need to be away for a few days at a time. I took all of this into consideration when designing ReadyCoop. It is a luxury suite for 5 or 6 chickens and is able to hold a maximum of 12 standard sized (medium) hens.

In my location we can have extremes of temperature... very high and down to 40 degrees below 0. We occasionally have tornados. We also have a full range of preditors including bears. I like to sustain my flock naturally instead of having to buy new chicks or use electric incubators. I didn't want to make a cement foundation for the coop. I value being able to move my coop to new ground every few years or so and can do this without tearing down an old coop or building a new one. Chickens are very comfortable in this coop even if I need to be away for a few days at a time. I took all of this into consideration when designing ReadyCoop. It is a luxury suite for 5 or 6 chickens and is able to hold a maximum of 12 standard sized (medium) hens.

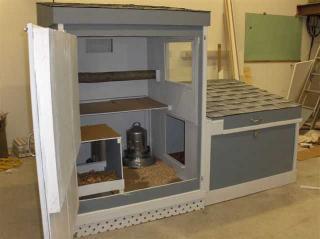
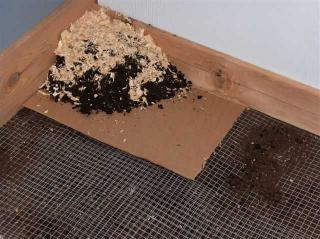 Steel mesh floor in brooder... cover with 4 " clean soil.
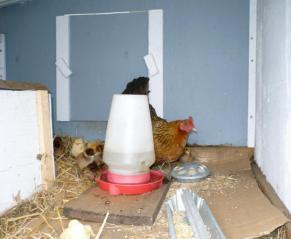
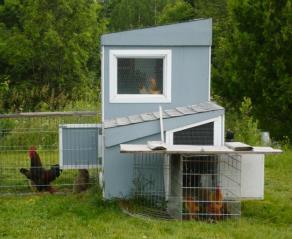 The easiest outdoor run for this coop is a 50 ft. roll of 5 ft. wide corn crib fencing.
The distinguishing features of my coop design are as follows:
- , insulated roosting areaimportant if temperatures fall below 0 degrees F. (-17 degrees Celcius)
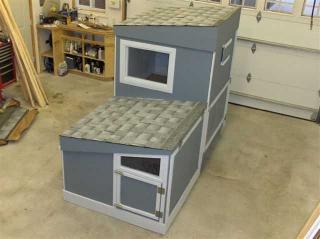
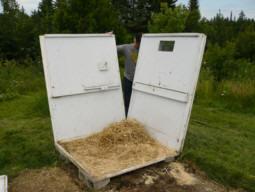
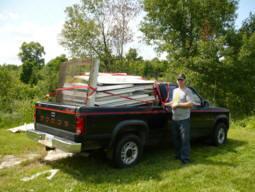
- portable. This coop is made up of stackable pannels that can be easily disassembled, disinfected, moved, and reassembled.
- protected indoor ground range area that can double as a introduction area, isolation area and natural brooder.
- sealed. Any joints/cracks that are permanent are sealed to prevent mites and such from settling in for good.
- large diameter roost. There is debate about the best size of roost but chickens rest their body there, so prevent deformed breast bone.
- droppings board can be cleaned through large front door, or through back door if it's very cold, keeping heat in the insulated area.
Other features include:
- multi-level roosting to accommpdate the pecking order... nest top, front of droppings tray, and the high roost.
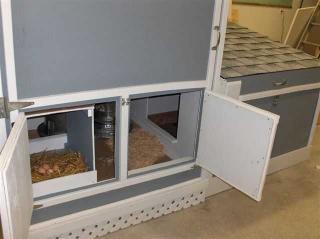
- single or double nest as well as a ground nest for spring to attract layers and a broody hen.
- no more than an 18 inch jump down so large chickens won't hurt their feet/legs.
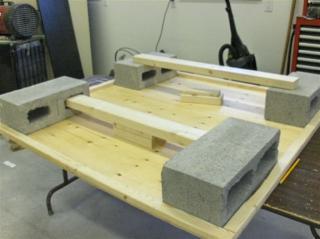
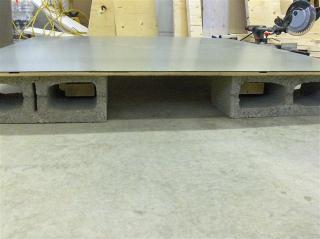
- braced through cement block foundation for extra stability against extreme high winds.
- cedar foundation for natural brooder / protected indoor ground range section.
- efficient use of standard building materials.
- easy to clean, maintain, and feed, water & manage chickens without needing to enter coop.
- cedar feed / water board can be raised as high as you need to help keep water clean of bedding.
- tight coop with no holes big enough for a mink or weasel to get through.
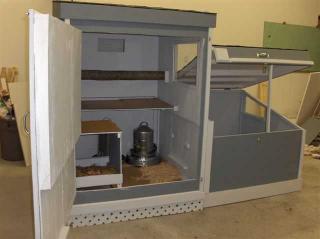
- covers a ground area of 4 feet by 8 feet with the high part about 6 feet tall. New materials should cost under $800.
Disassembly:
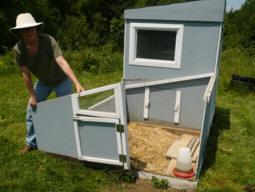

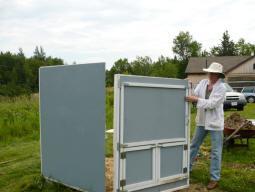
Above you can see me disassembling the coop, mostly by myself, although help is handy to take the roof off. The roof does not have an overhang because as it is, it can be moved more easily by rolling it along the ground on its side with no concern about breaking it.
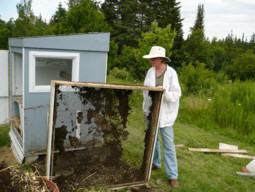
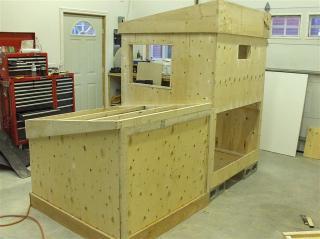
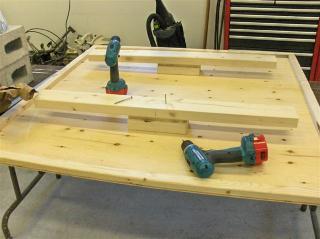
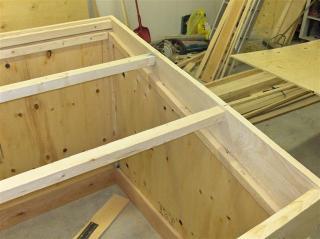
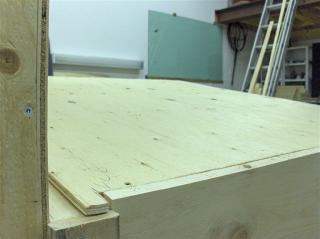
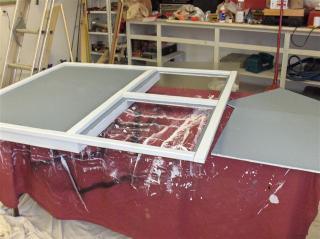
Construction Photos:
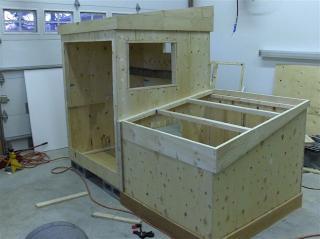
 < One change I would make here if I planned to keep more than 8 chickens would be to add another support bar for the droppings tray (next photo) across under the front where some hens may choose to use the second level roost.
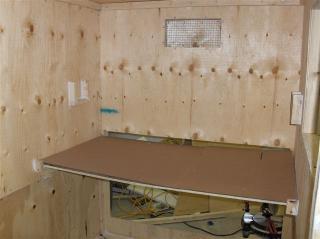
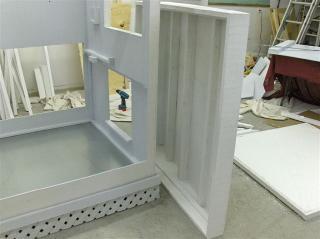


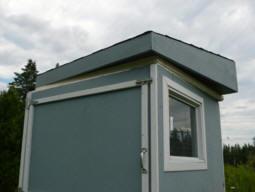
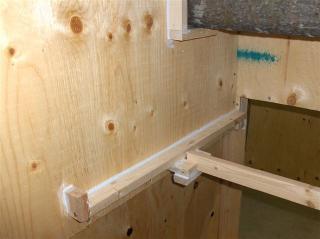
 < note double wall enclosing insulation in top portion of large front door, as with the walls. In my building plans I brought the insulated double wall a bit lower so the nest top (third roosting level) would be lower for chickens to jump down from (18" from floor) while still being in the warm insulated area. This brought the top of the small doors slightly lower.
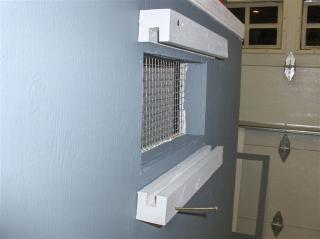 < high vent with sliding cover >
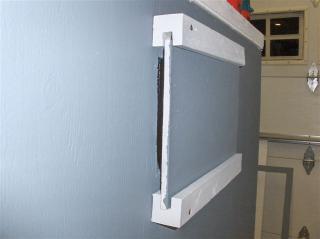
 < insulated high vent plug for cold winters.
 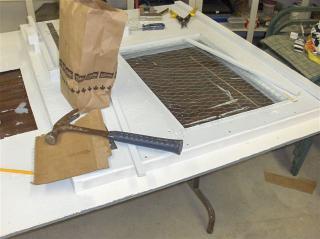 < An opaque insulated window plug (not shown) is also included in building instructions to be used for very cold winters, or layers of clear bubble wrap can work . The chicken wire over the window is meant to keep birds safe from trying to fly through.
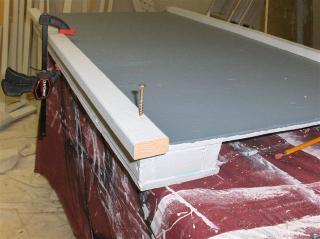 < back feeding access door with insulated double wall to match the rest of the insulated walls and keep warmth in. Trim is usually screwed on from the inside for single walled sections.
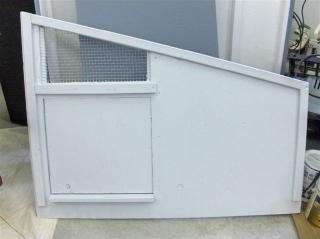 < low vent in this wall along with high vent (above) makes for convection ventilation.
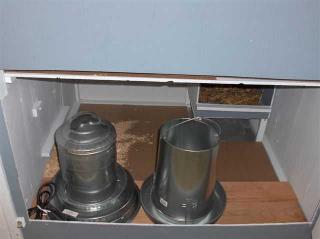
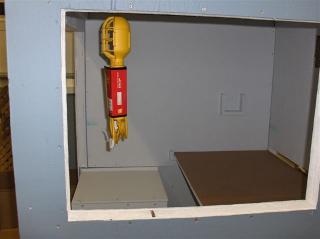 < day extending light with timer (and water de-icer seen above in first set of photos with waterer on top) can be powered electrically through the winter, either into the grid or with a simple solar power kit.plugged
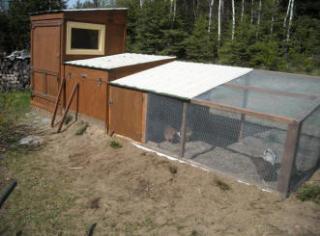
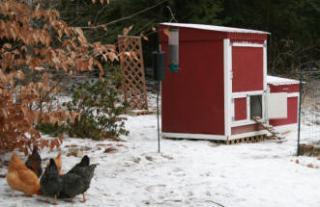
Here are a couple of customer built Ready Coops:
Here are some cute chick flicks of this year's hatch: