As my wife usually says, when I build, I usually go over the top. Building in a back yard that goes straight uphill makes a challenge for any builder, and this build was no exception. I tried to find the best spot for the least amount of pain in my back and eye appeal to myself and my neighbors. as you scroll through my pics, you will see my 10 week journey in which I was able to shed 30 pounds, and spent nearly $2000. Some of the details that I do not have pics for, but are installed are the vents located on the peaks of the coop. The interior light of the coop is on a timer set for 14 hours of daylight. When the timer turns the lights off for the evening, a light sensor kicks on the night light located on the rear wall which can be seen in one of the pics. The window, which is south facing receives the morning light, but is shaded by the overhang. I am thinking about adding a south/western facing window for afternoon light. I am still kicking around the idea of adding a poop board which can be accessed from outside the coop. The floor of the coop has sheet vinyl installed for easy cleanup. There is an outlet mounted in the floor for the heated water hookup. The water will be on an elevated stand with a hole in the top for the electric to be plugged into the floor.

And now the Journey begins
I wanted a coop that I could expand my flock, but you can downsize to fit your needs.
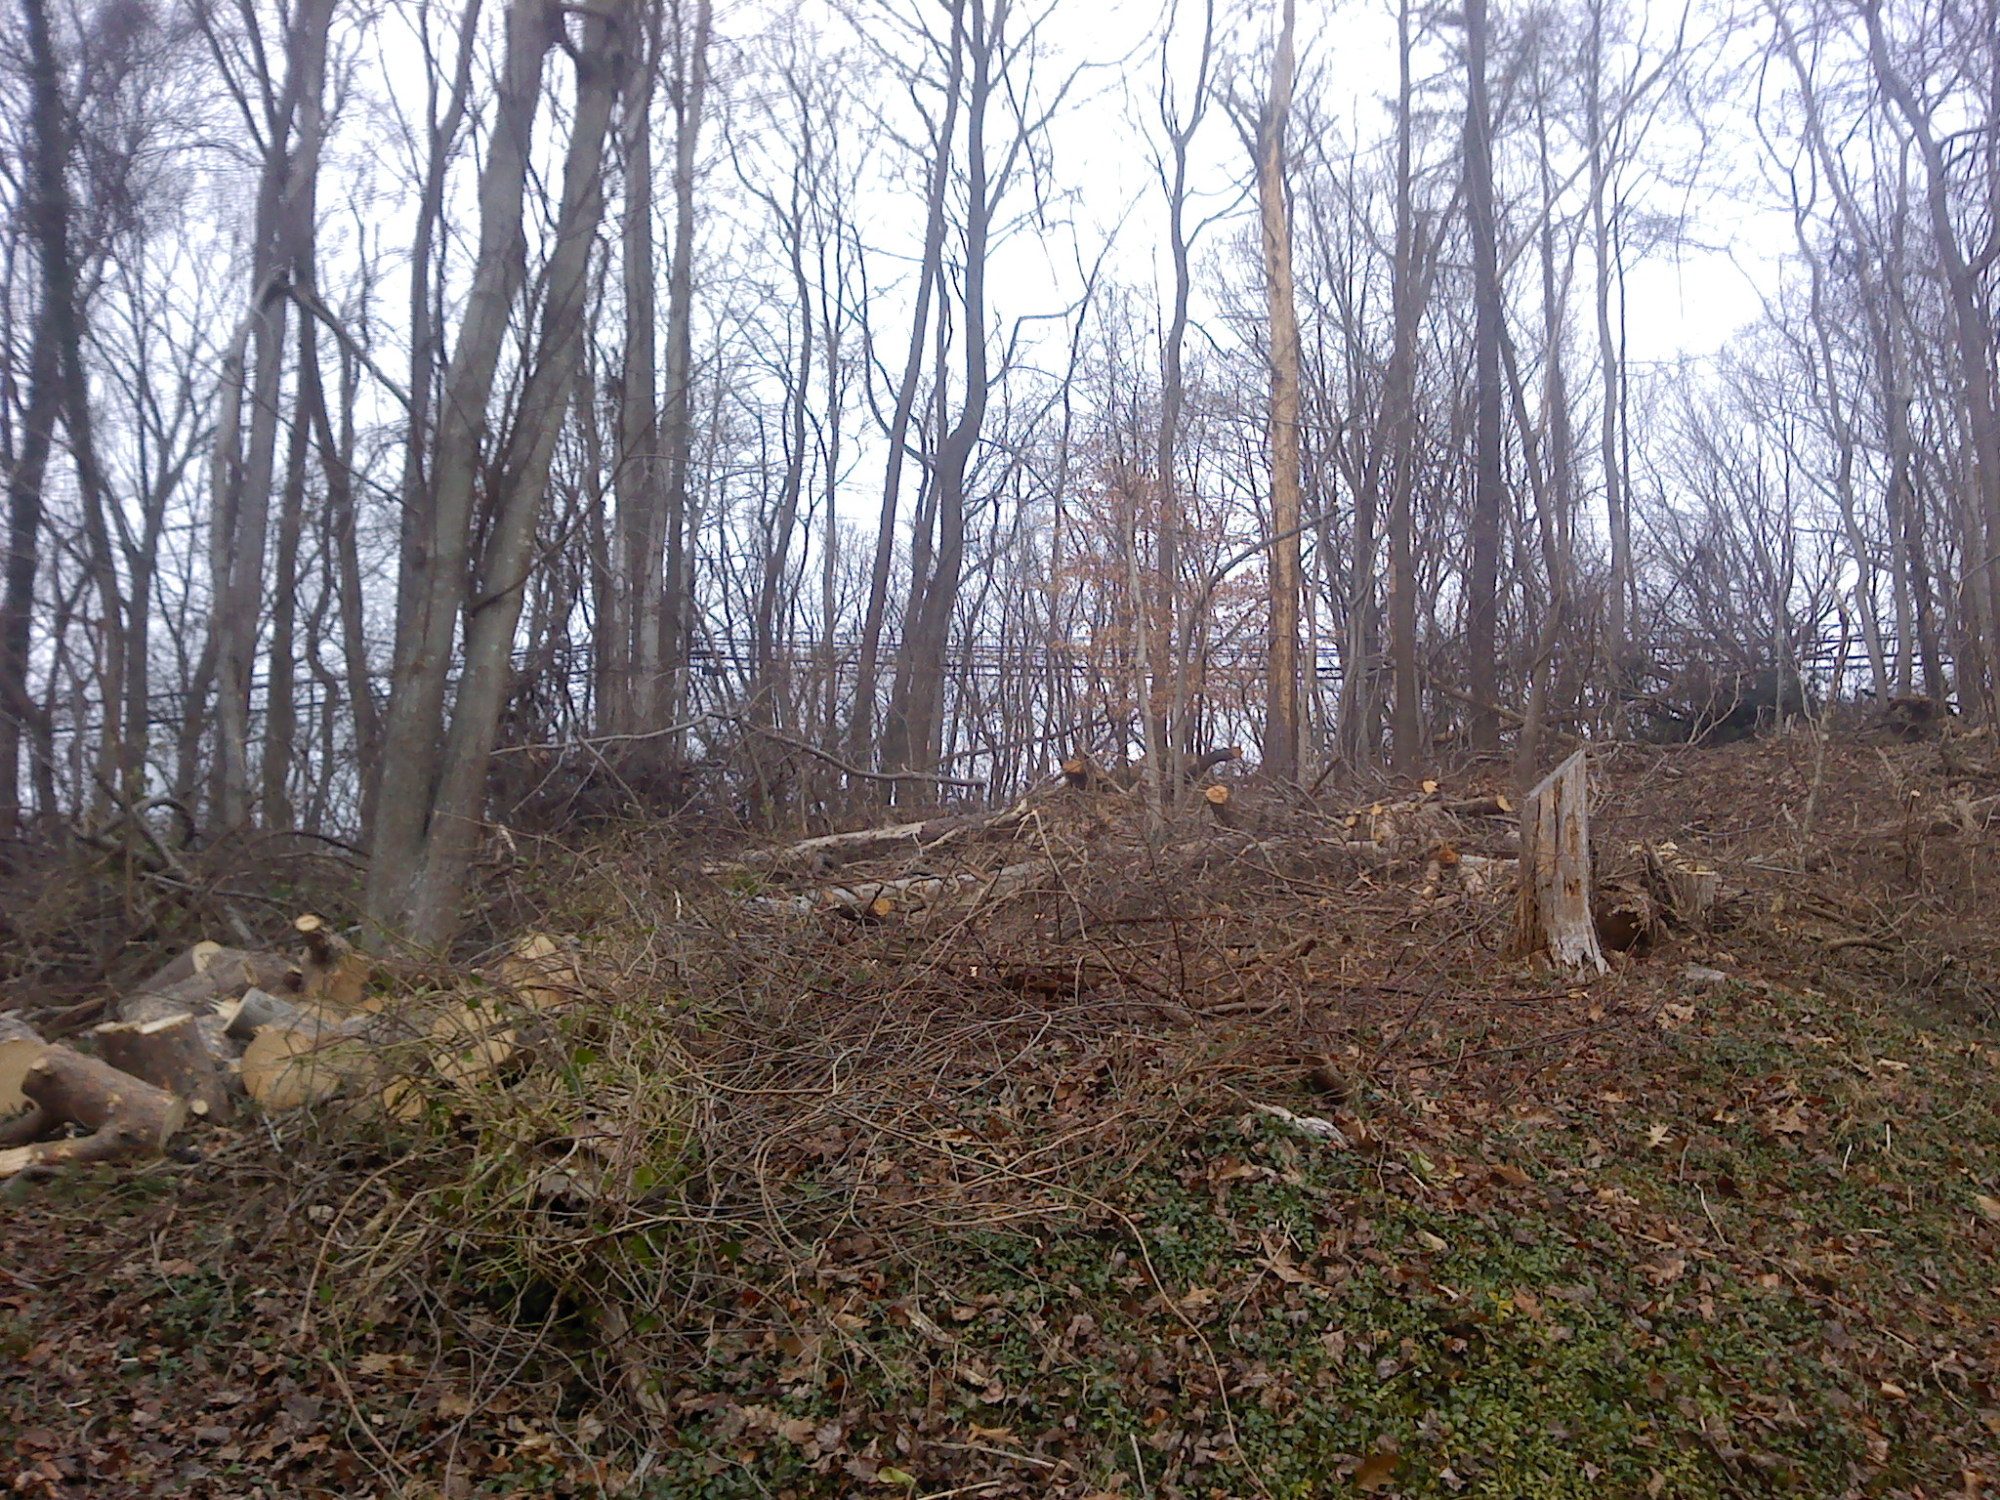
Scrub pines keep me busy cleaning up after storms. Luckily there are only a few more left that need to come down.
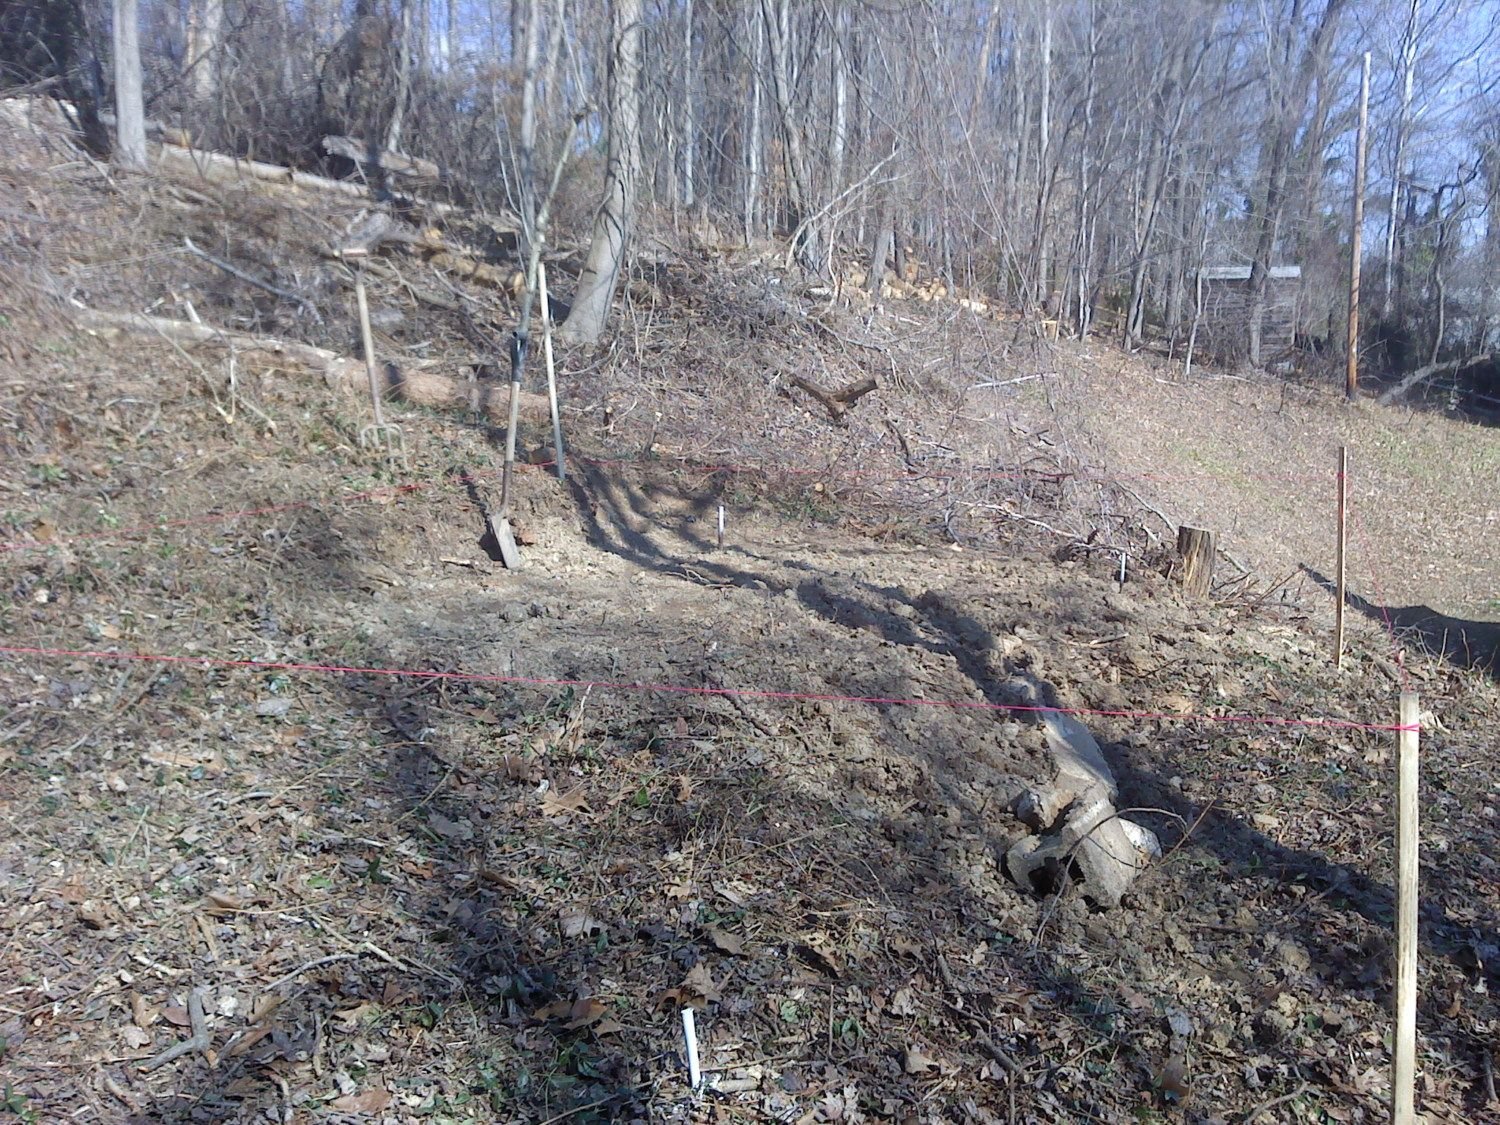
My backyard is nothing but hill! Finding a site that will work for me on the hill has been a real challenge. Start date 2/15/2012
Time to move dirt, and dirt, and more dirt. I hate dirt!
Started on the pen with retaining walls and anchors.
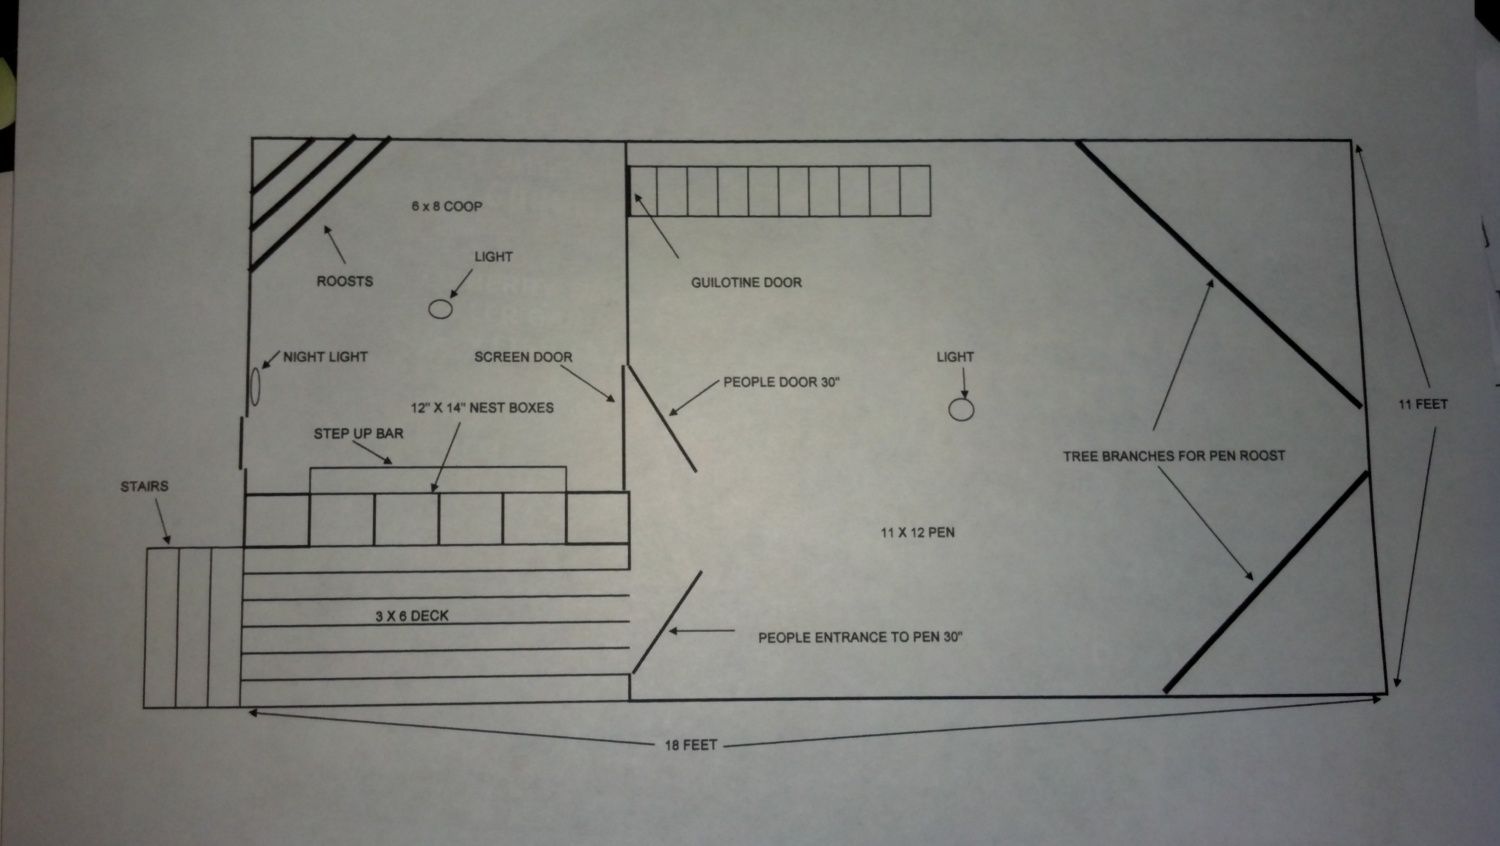
Retaining walls are in, pen is level with dirt. Pen size is 11' x 12'. Hardware cloth needs to be installed on outside perimeter and back filled at a later date.
Started on 6' x 8' coop. Added insulation to the floor. You can see how high up on the hill it is located. Bringing up materials from the back yard was back breaking.
Coop walls are going up.
Roof trusses installed.
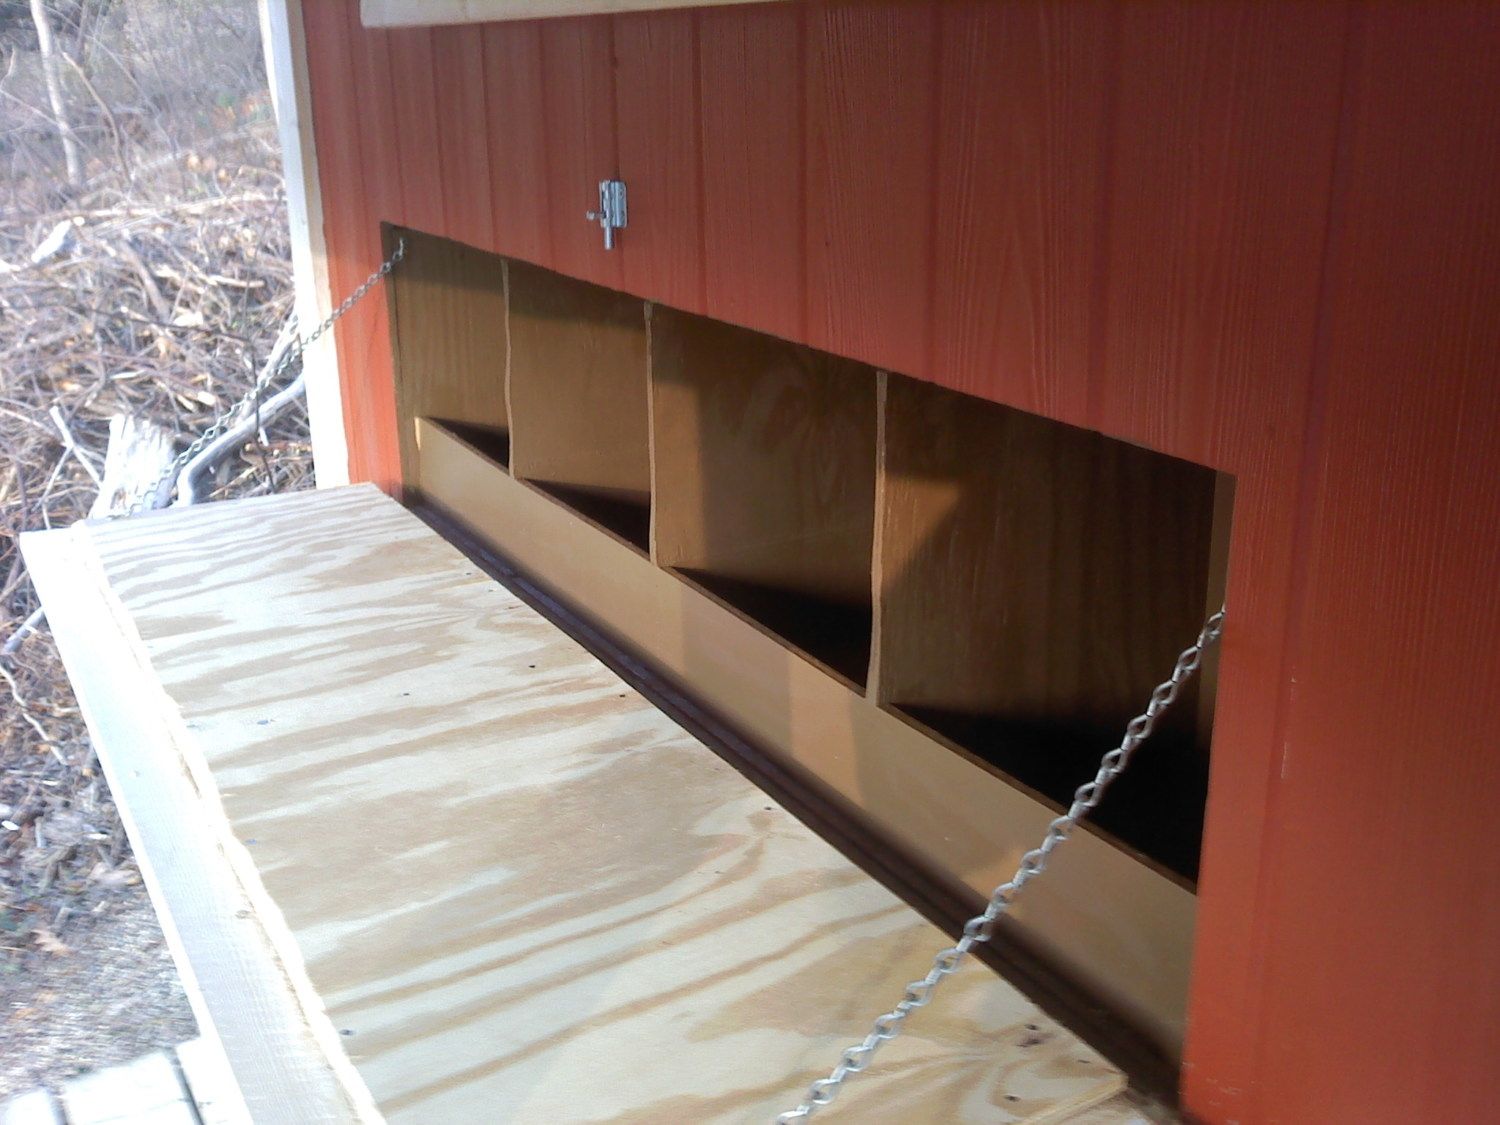
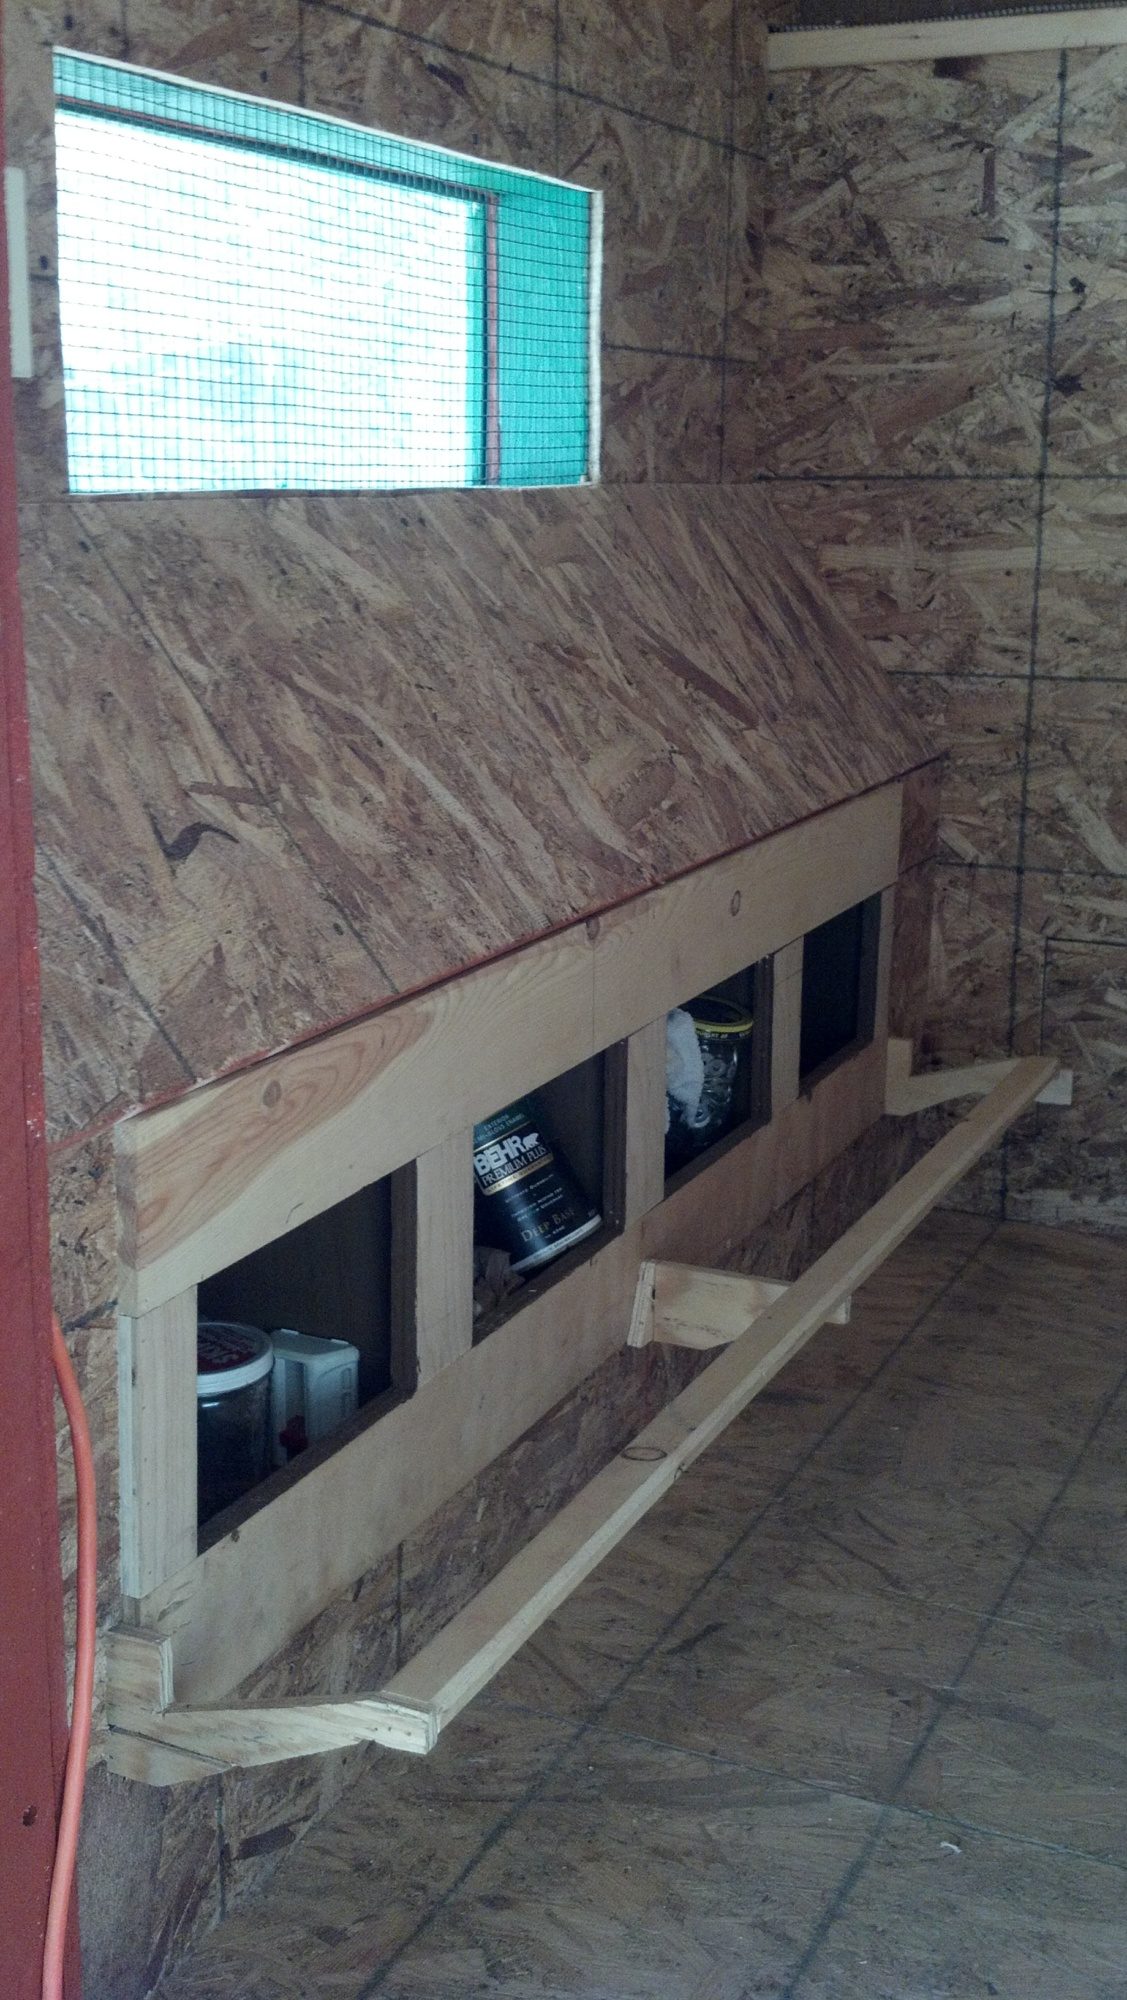
Installed 4 nest boxes. Boxes are 12" x 14" with an opening of 6" x 9".
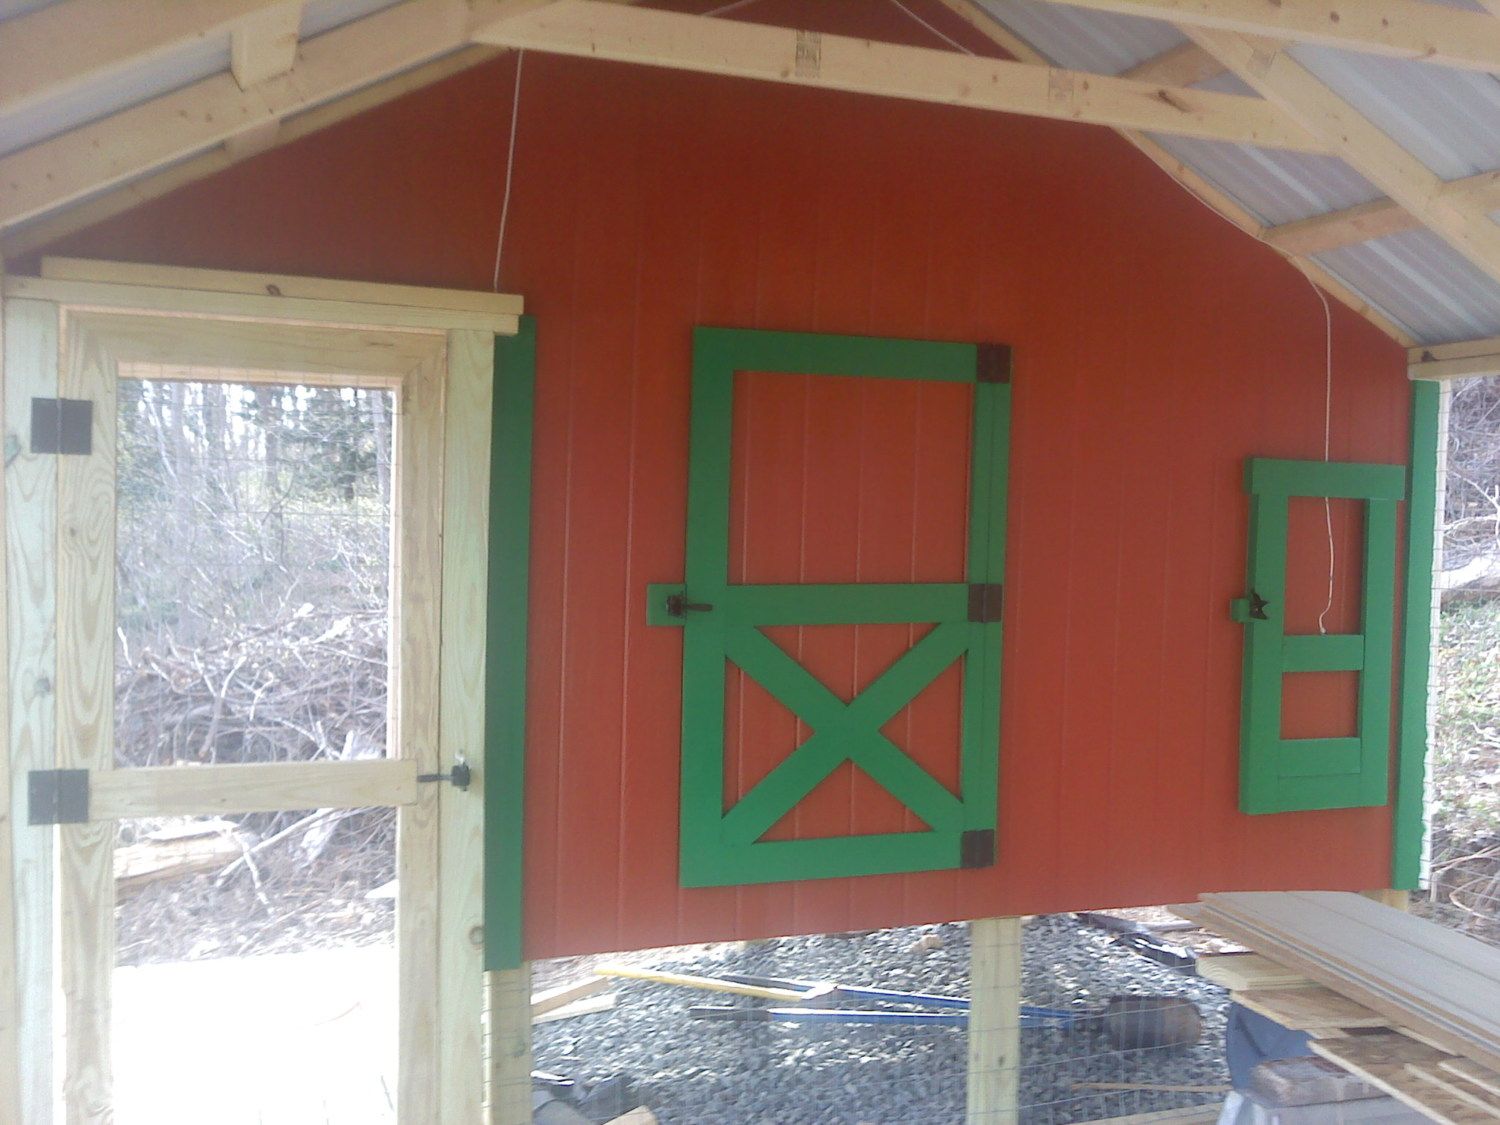
I framed in coated 1/2 inch hardware cloth for the screen door.
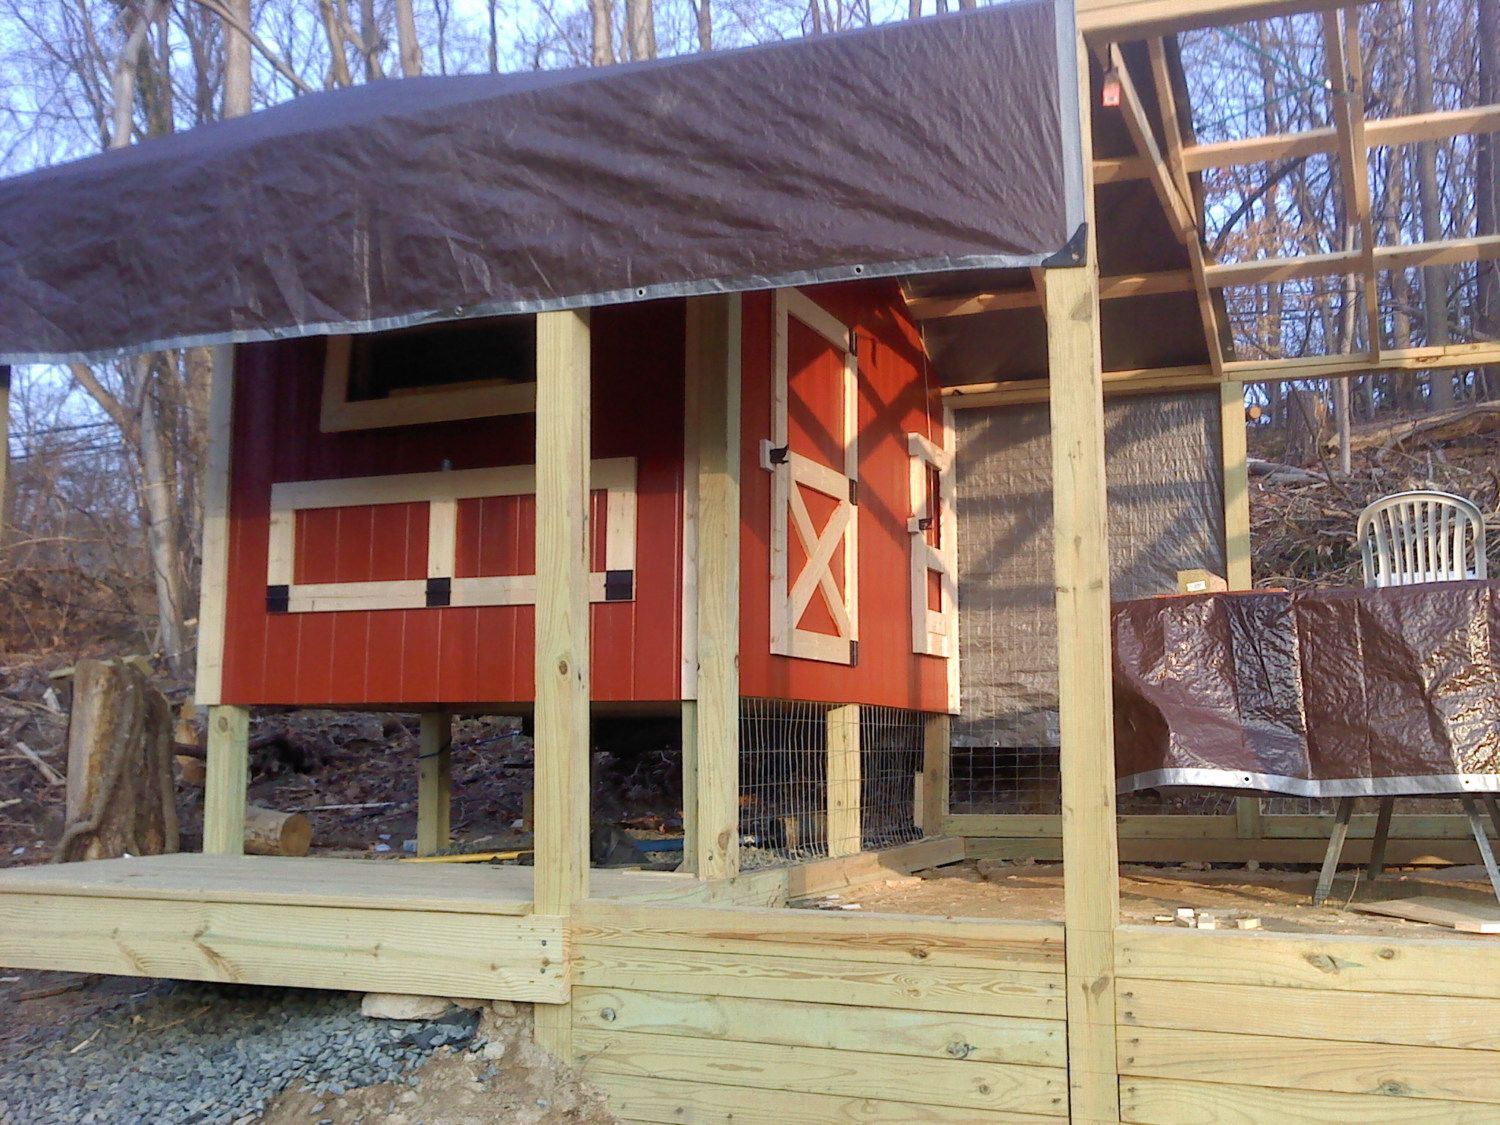
Metal roof is installed. Painting the trim, and moving more dirt. DIRT Again!?#%.
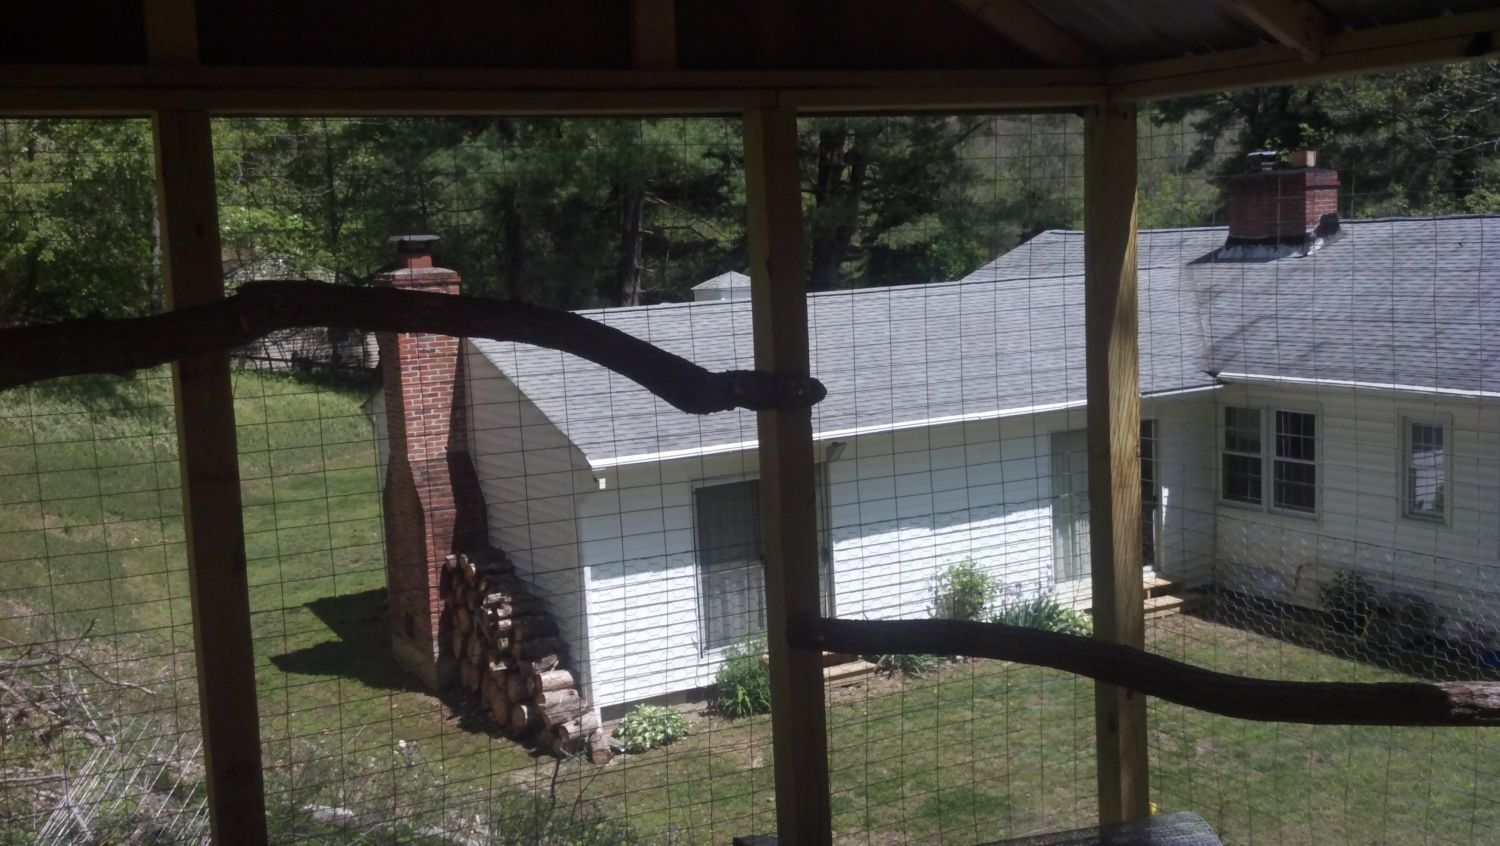
A look from inside the pen. The pen is covered with 2 x 4 screen with an overlay of chicken wire for the bottom half. To keep predators away, I am installing 2 strands of electric fence on the outside of the coop at 4 and 12 inches (5000 volts...OUCH).
A look inside. You can see the night light on the back wall.
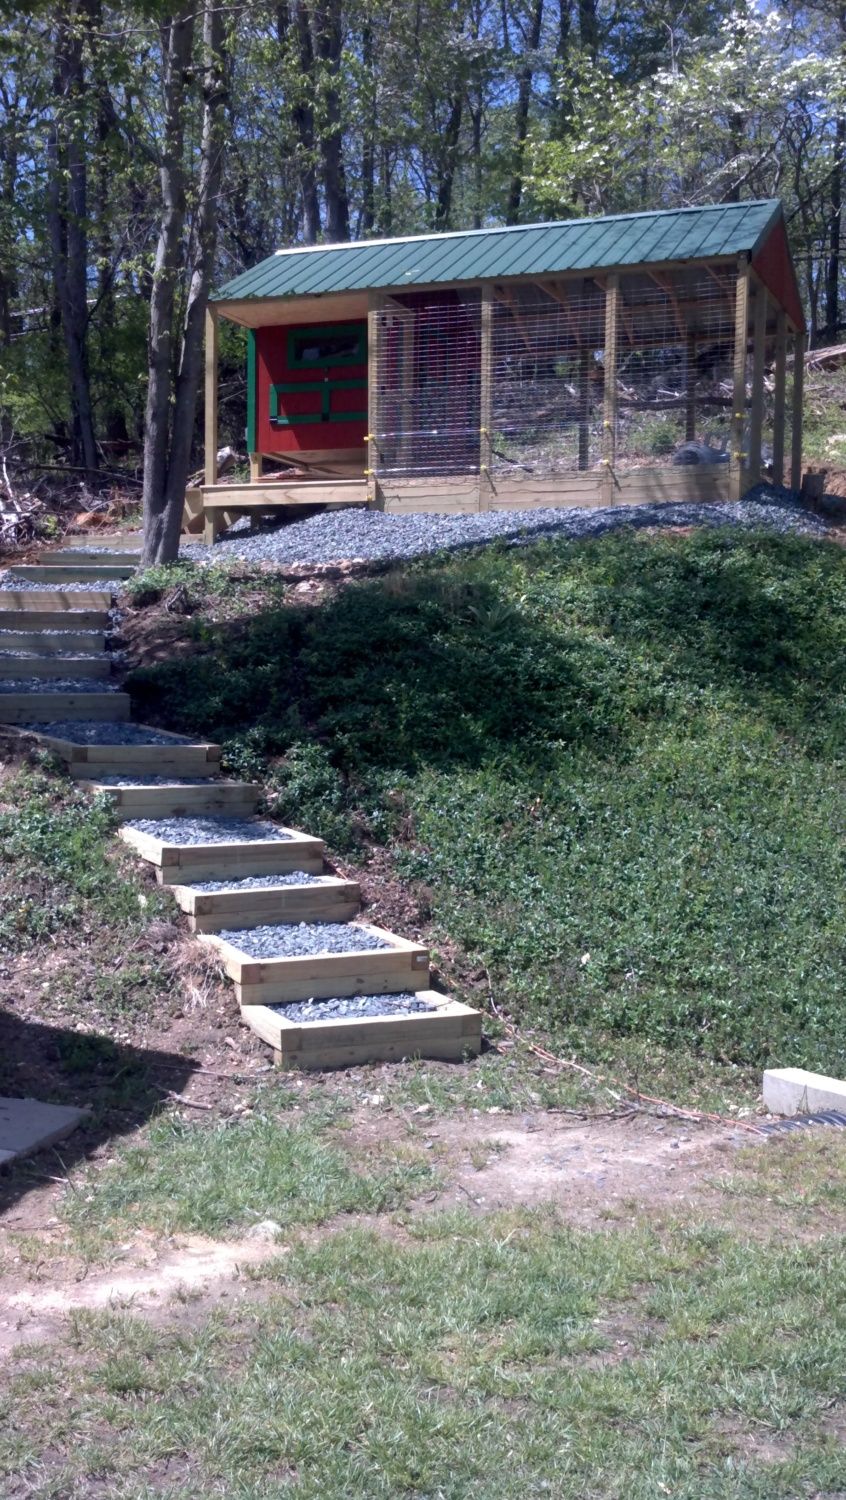
Getting the finishing touches completed. Digging out the steps to the coop and will back fill with gravel.
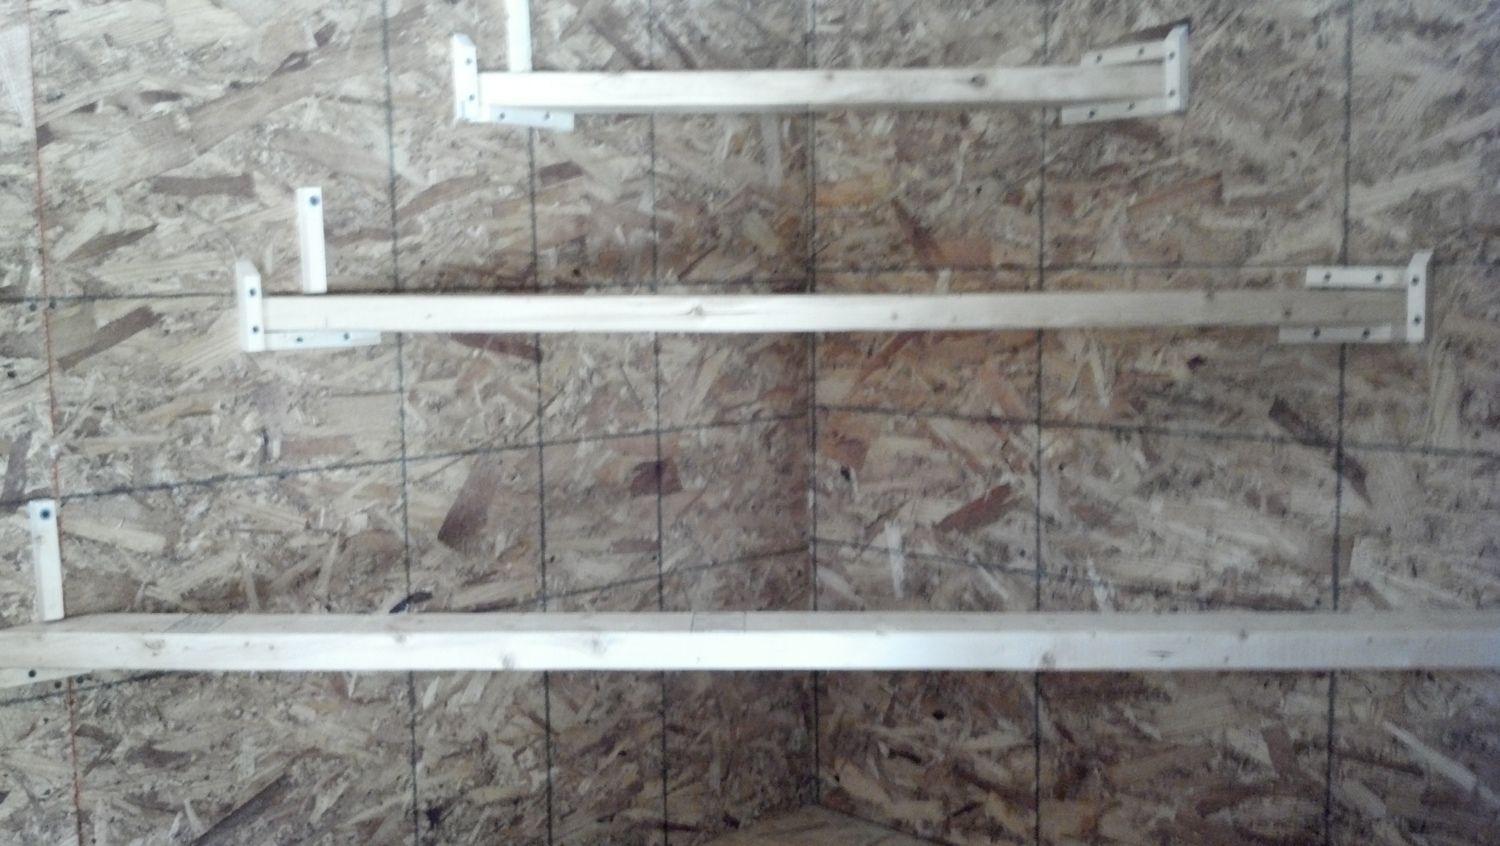
Installed 2 roosts in the pen so the chicks can keep an eye on me in the yard.
Guillotine door with ramp and you can see the compost bin in the background.
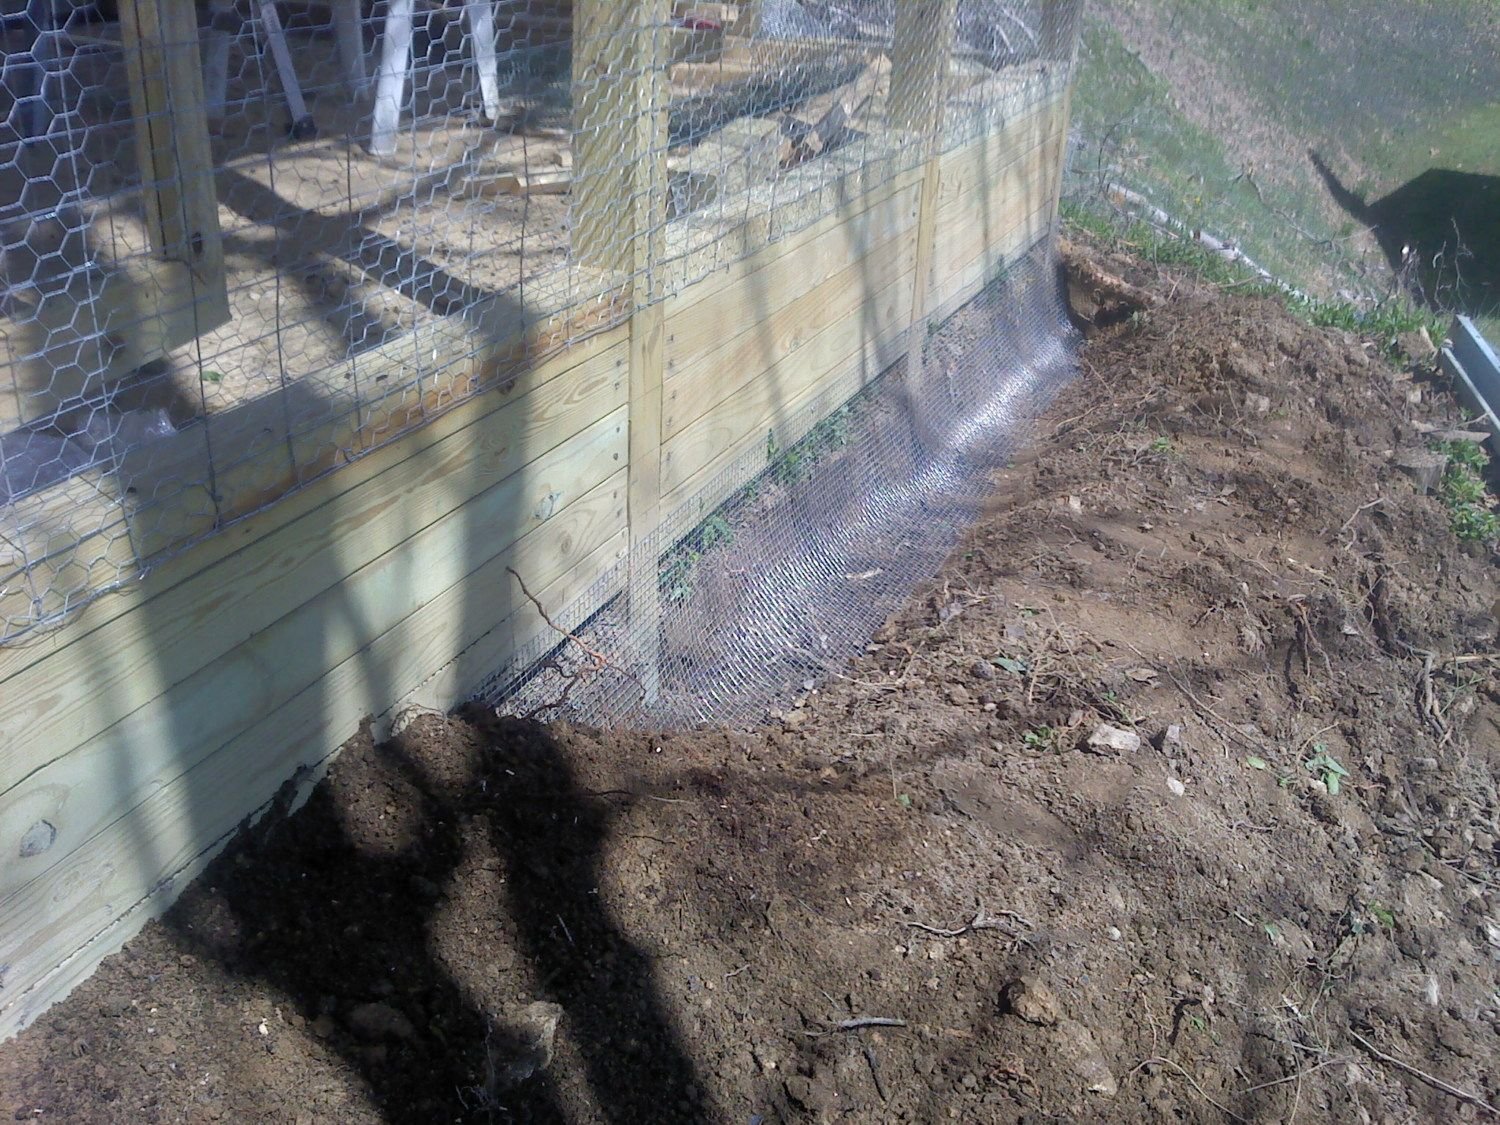
Hardware cloth installed, backfilled, stone down and electric fence is on.You can also see the clean-out door.
I still need to add sand to the pen, but since it was in the 80's today, I wanted to let the girls see their new yard for the first time. They are 24 days old in
this picture.
The girls are now 32 days old, moved into their new home, and are curiously inspecting every inch of the coop. I will keep them confined to the coop for the next week to get them used to this being their bedding area. One ton of sand has been added to the pen, and the girls will be able to explore the pen starting next Sunday (5/20/2012).
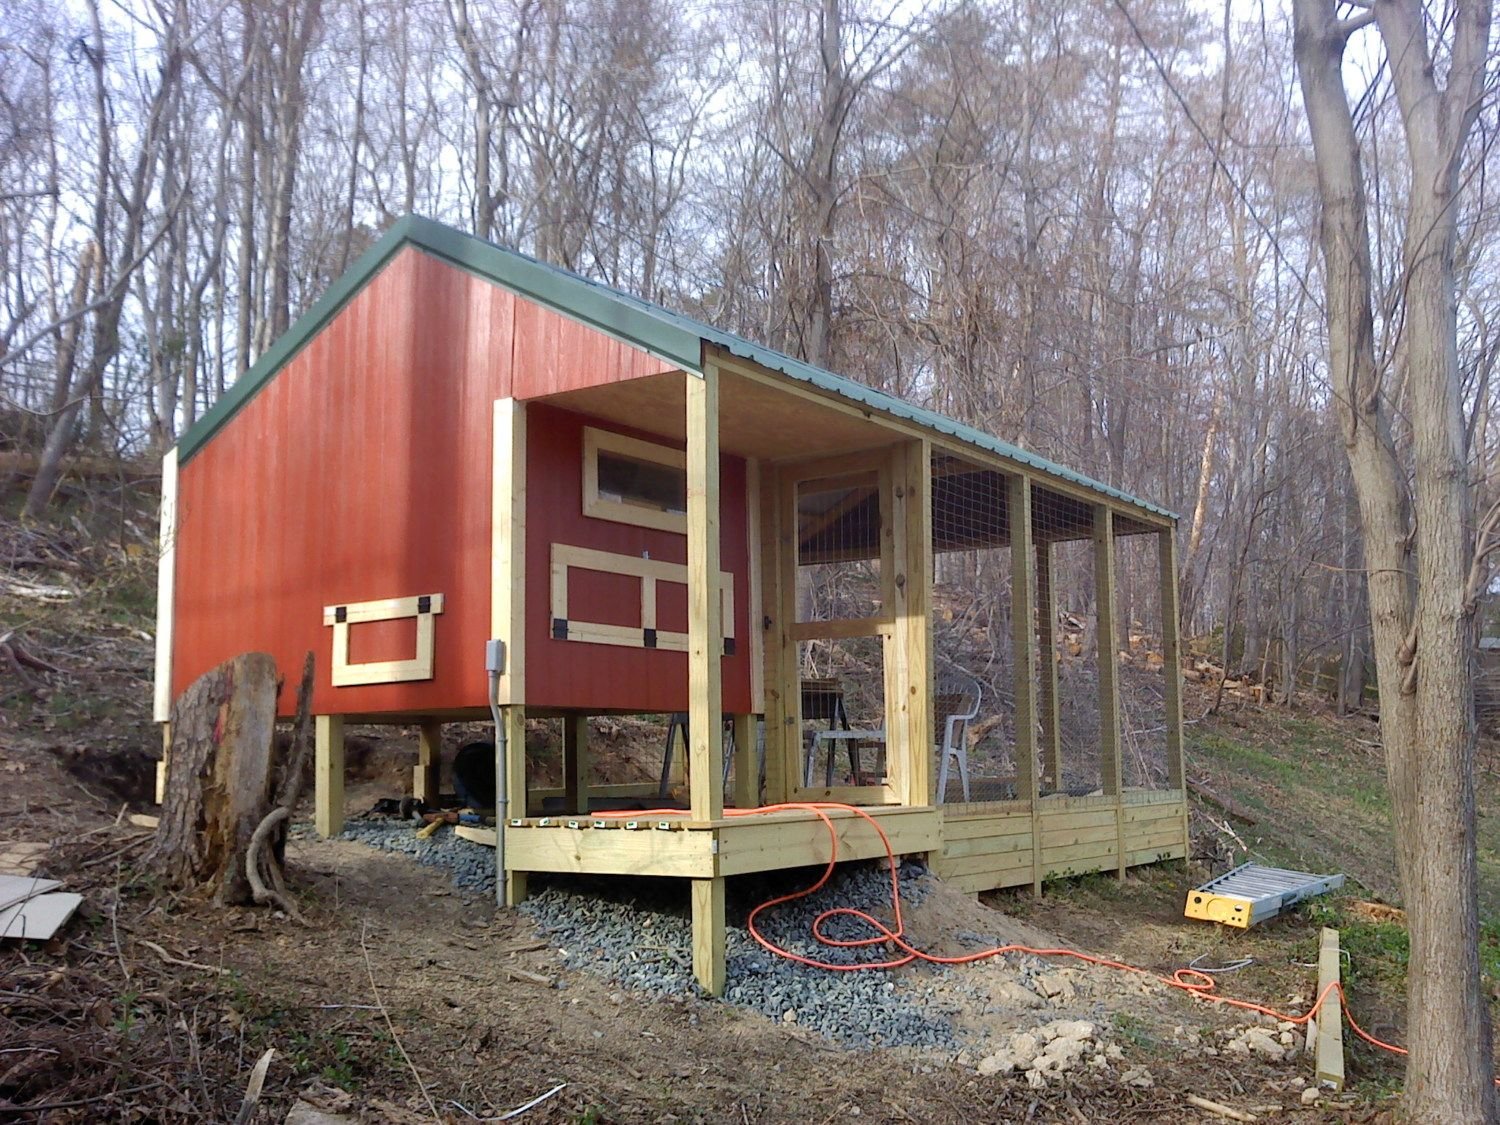
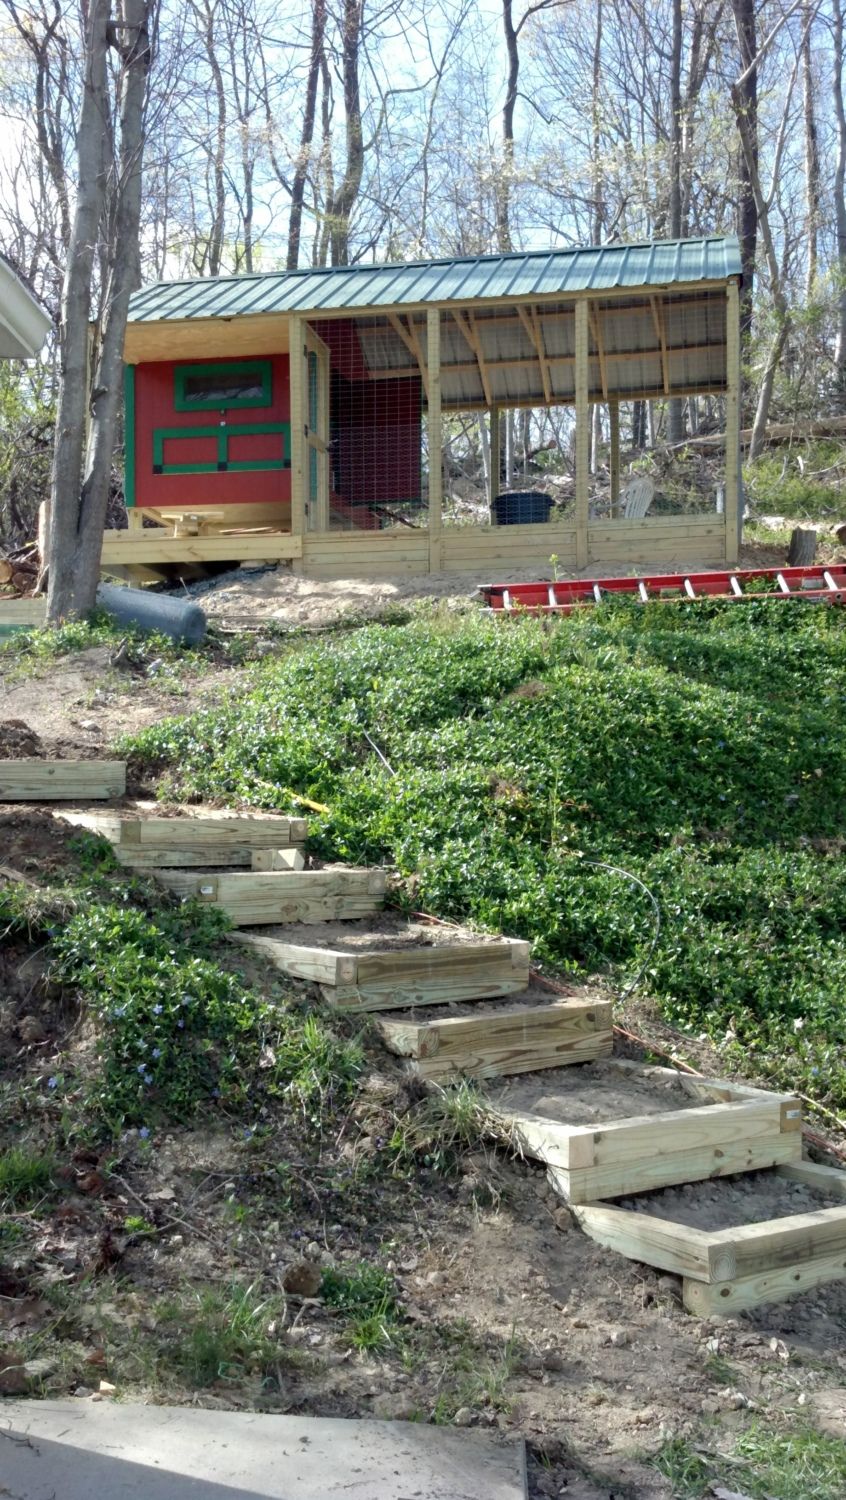
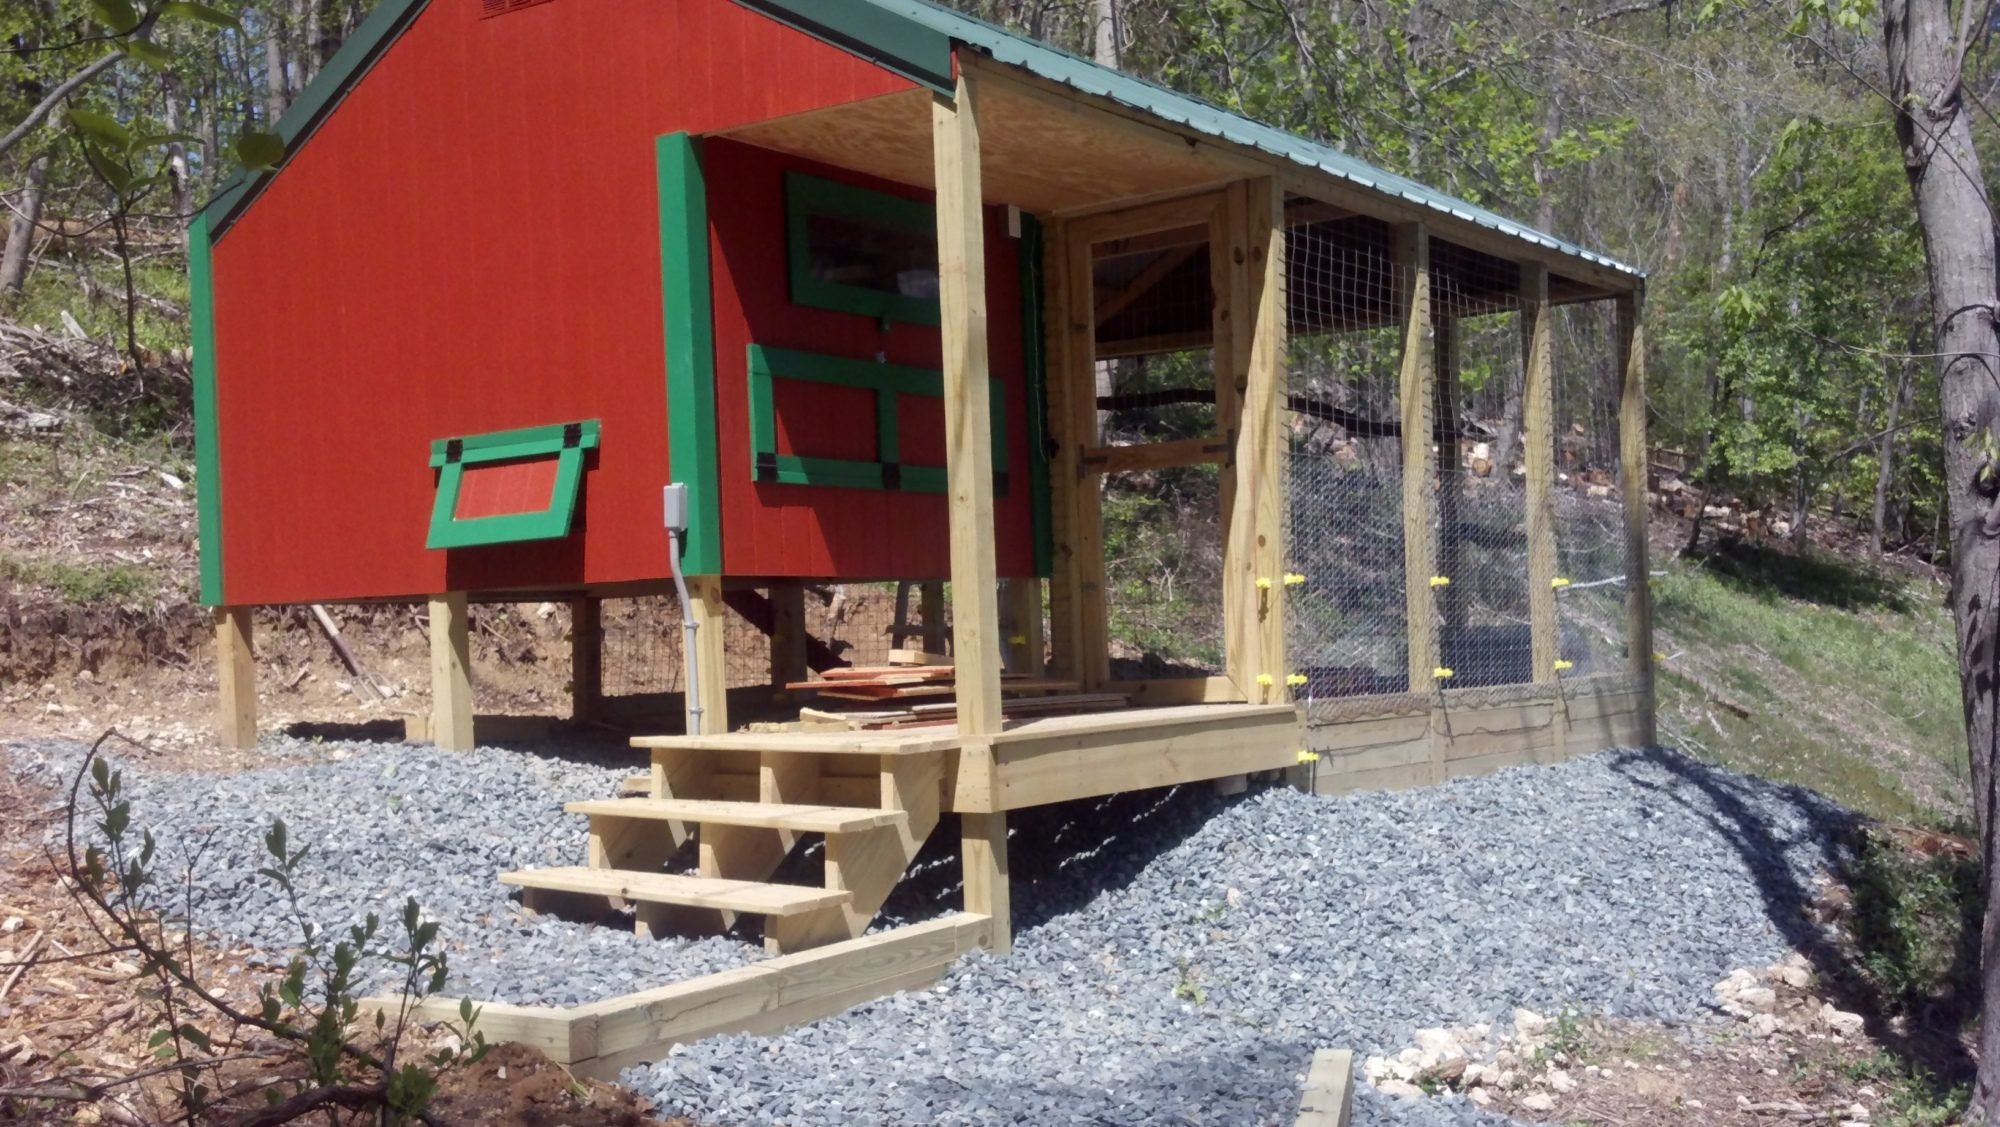
The finished project.
Besides adding a western facing window, I would have added some clear roofing to add light to the coop and pen. I believe the chicks will be happy to be out of the summer sun, but it might make it colder in the winter with the amount of shade that I incorporated in the build. I will probably add a roll up plastic screen to the northern wall of the pen during the winter to give the chicks a break from the wind. I will be adding some butterfly bushes close to the pen to give them an abundant supply of insects during the summer months.


And now the Journey begins
I wanted a coop that I could expand my flock, but you can downsize to fit your needs.
Scrub pines keep me busy cleaning up after storms. Luckily there are only a few more left that need to come down.
My backyard is nothing but hill! Finding a site that will work for me on the hill has been a real challenge. Start date 2/15/2012
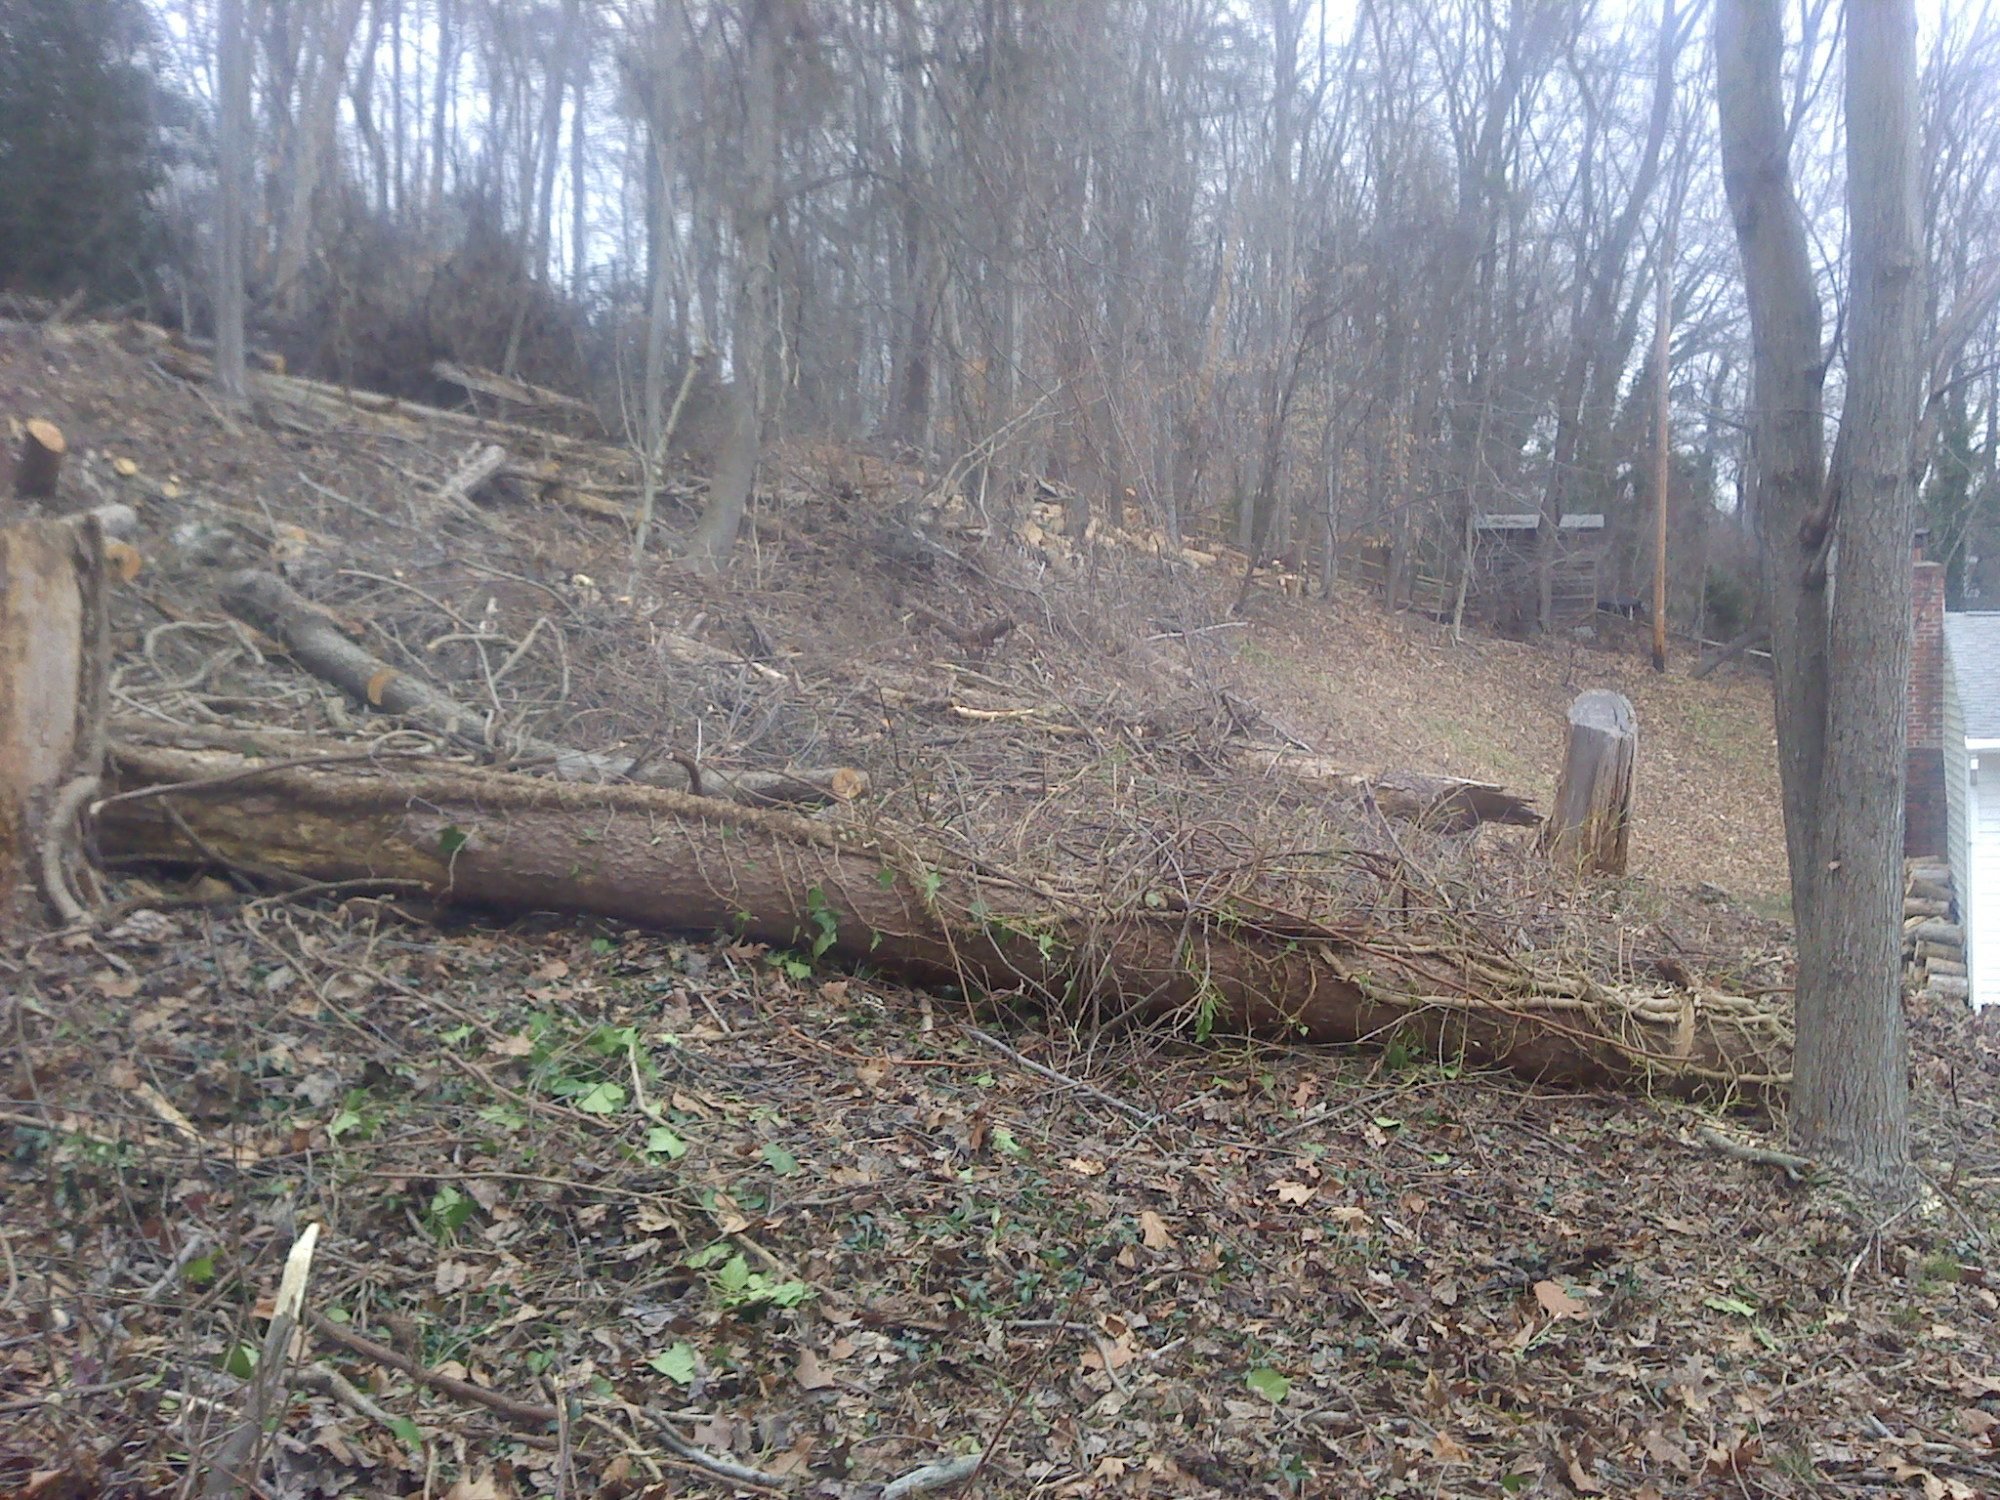
Clearing out the dead wood and underbrush.
Time to move dirt, and dirt, and more dirt. I hate dirt!
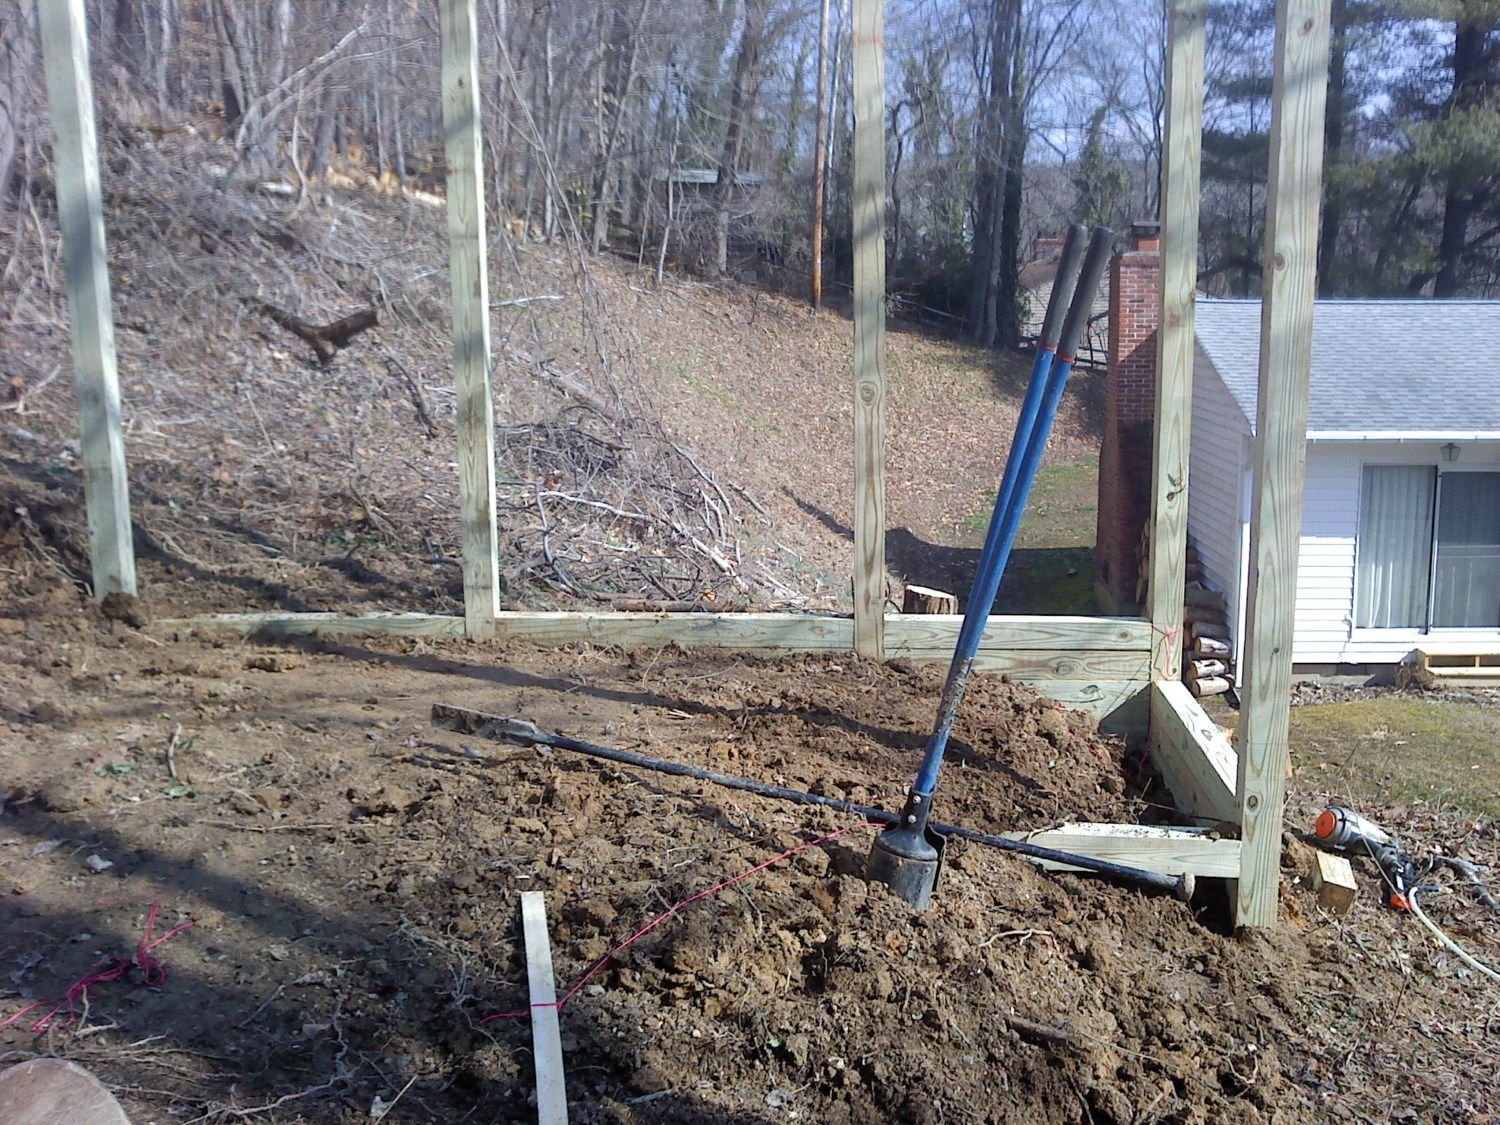
Started on the pen with retaining walls and anchors.
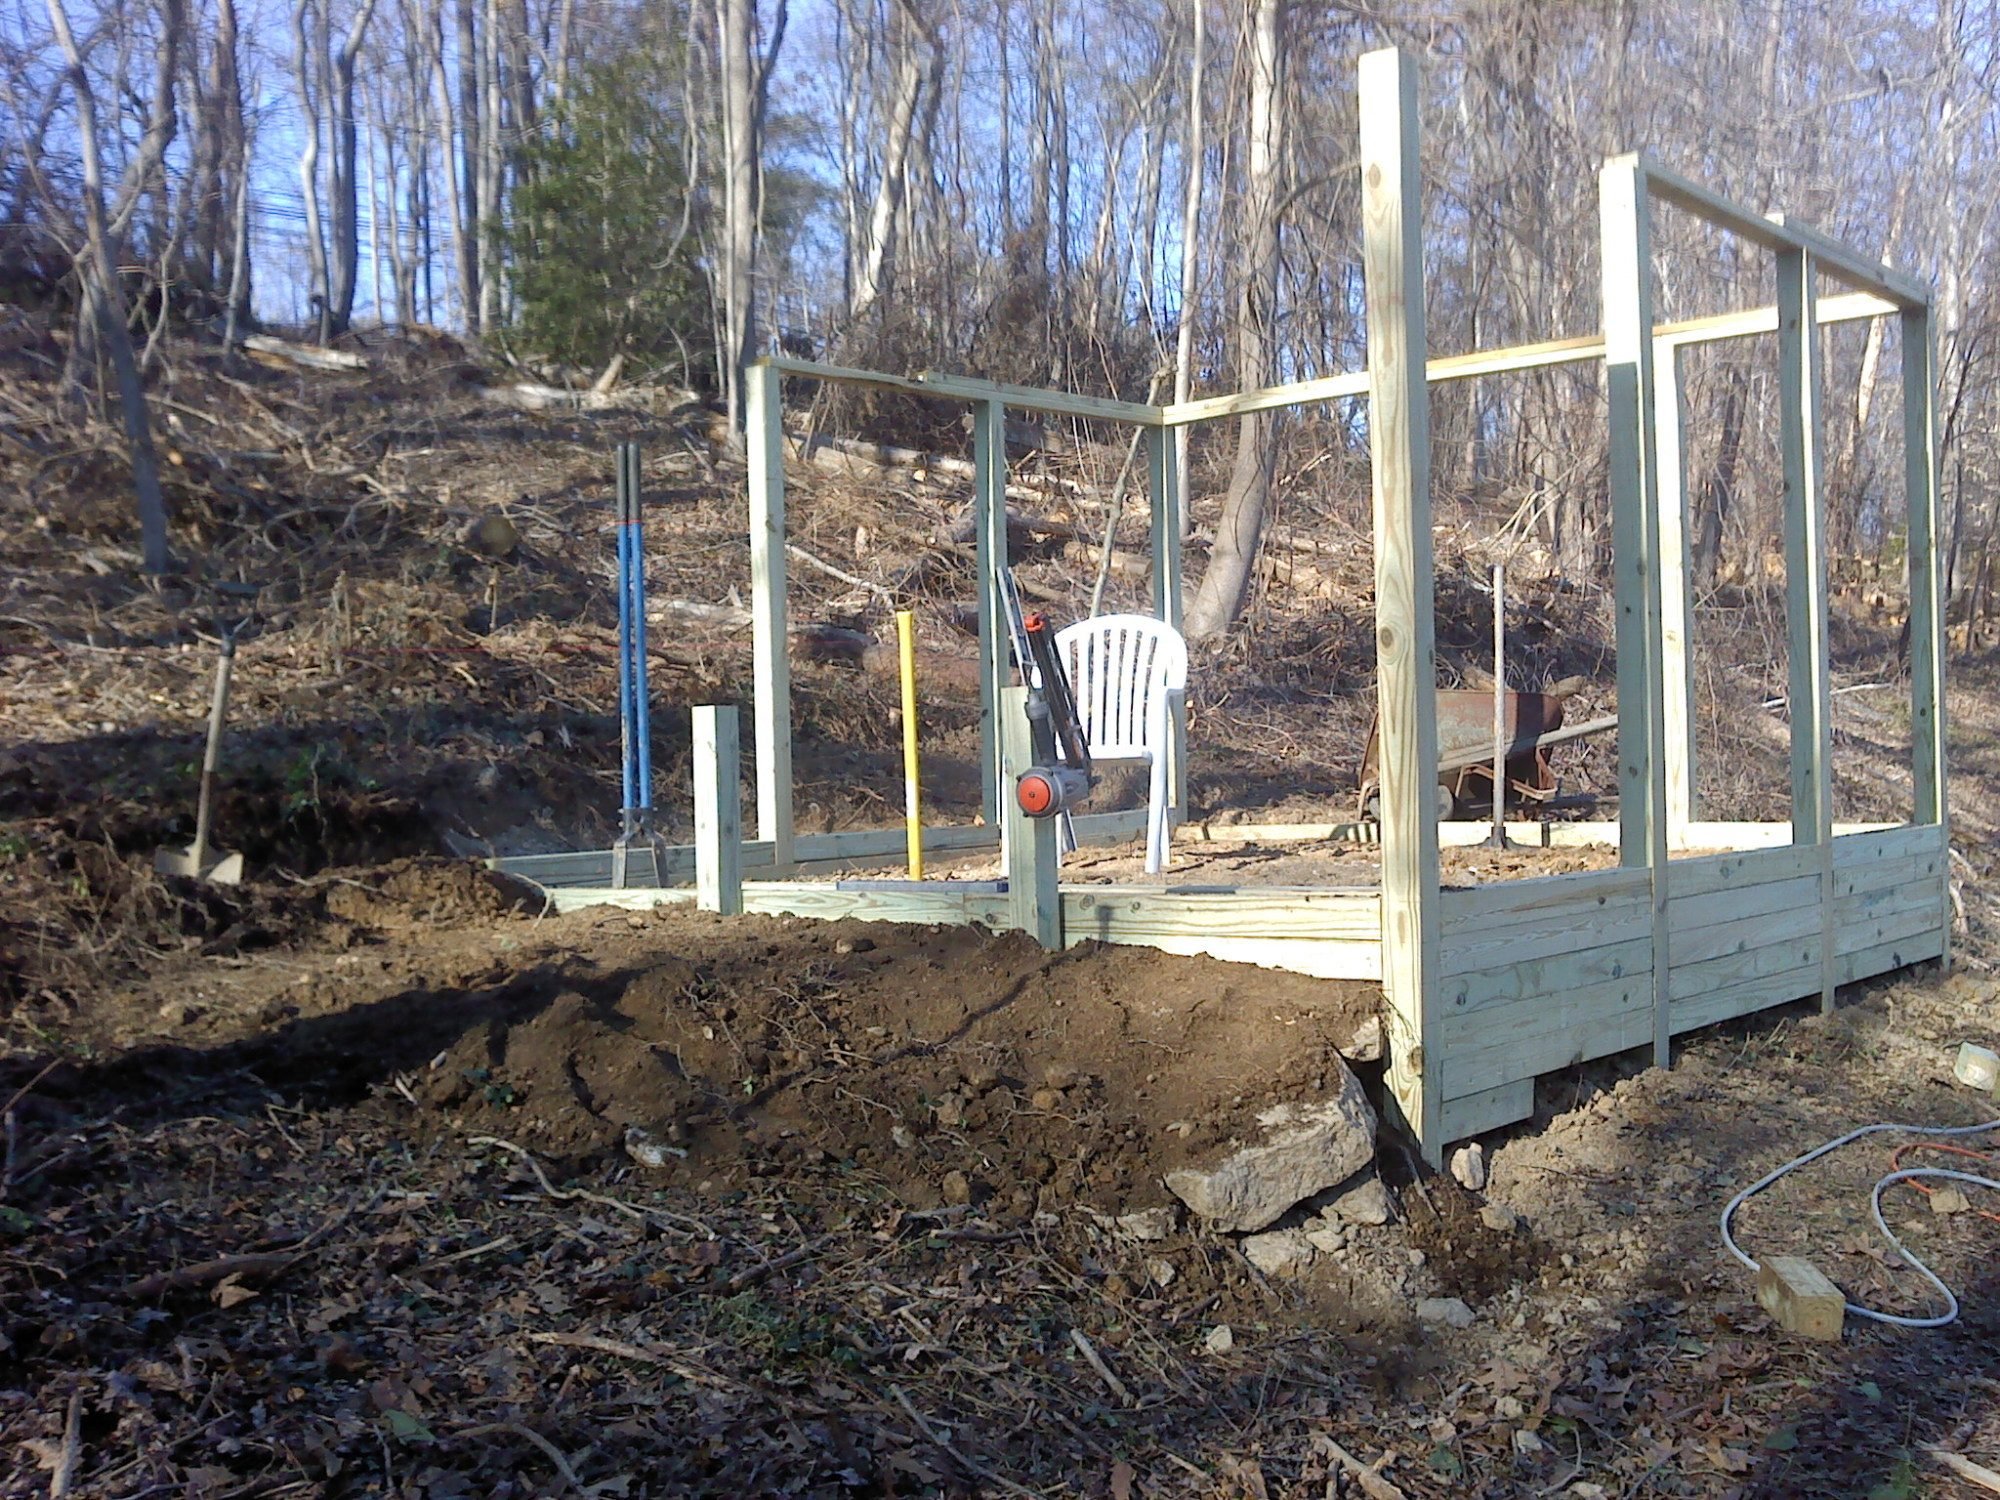
Retaining walls are in, pen is level with dirt. Pen size is 11' x 12'. Hardware cloth needs to be installed on outside perimeter and back filled at a later date.
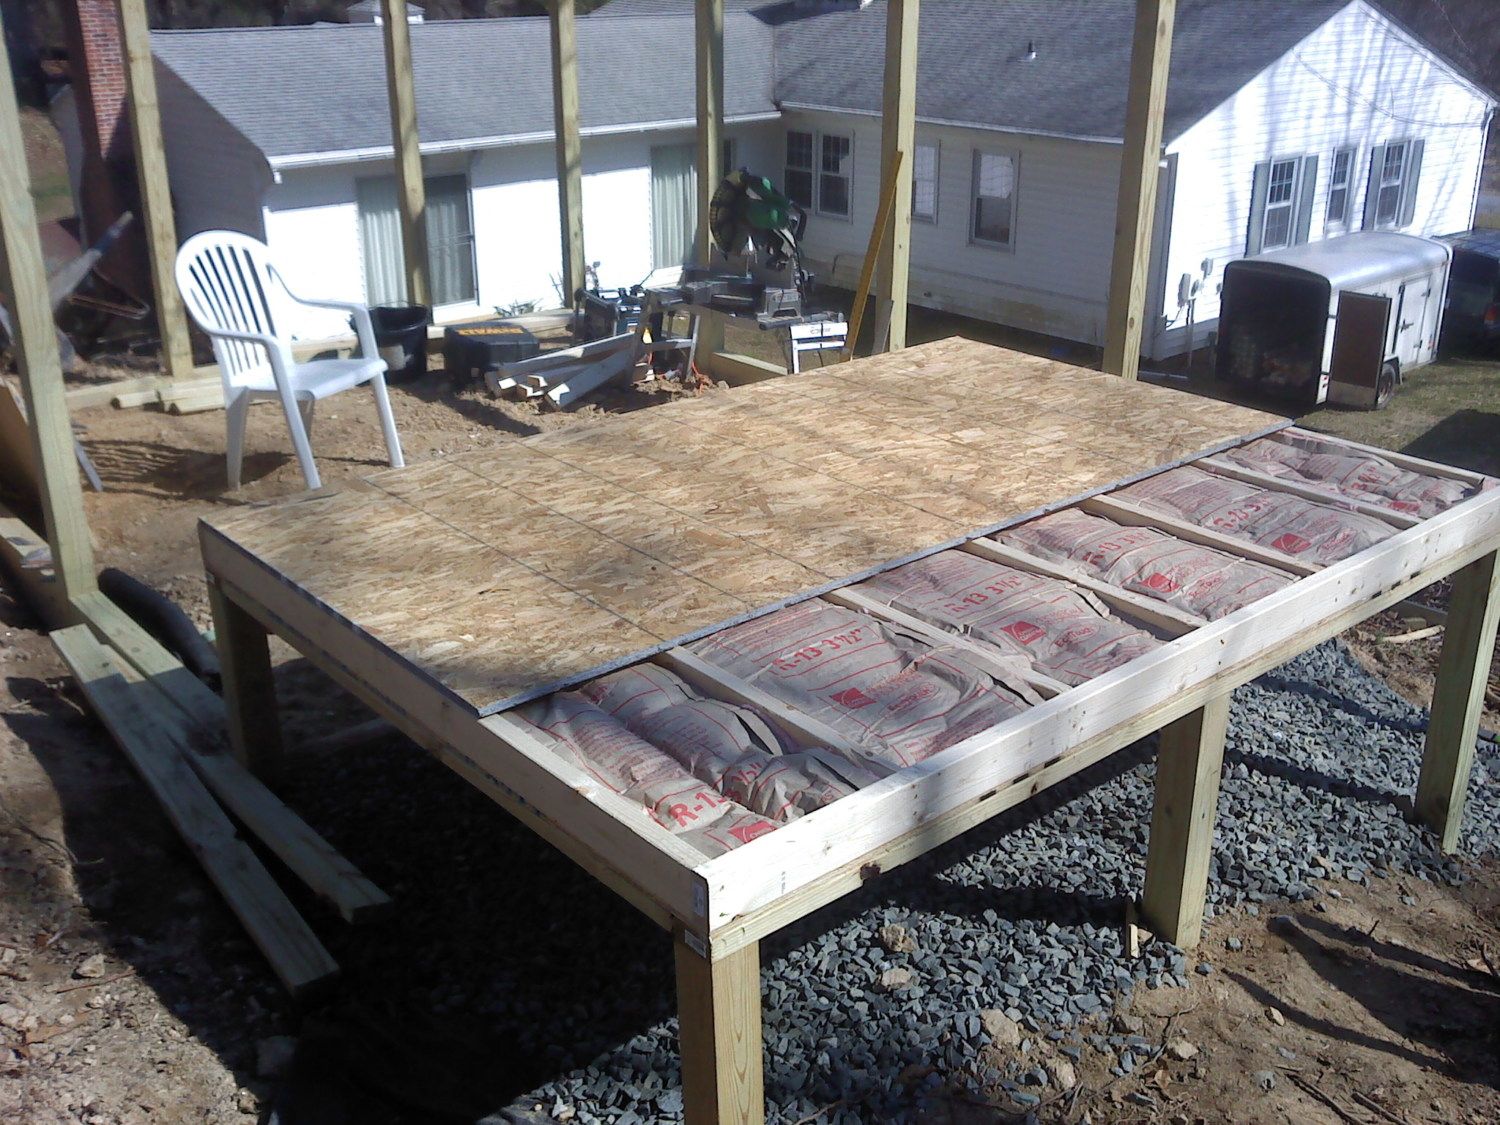
Started on 6' x 8' coop. Added insulation to the floor. You can see how high up on the hill it is located. Bringing up materials from the back yard was back breaking.
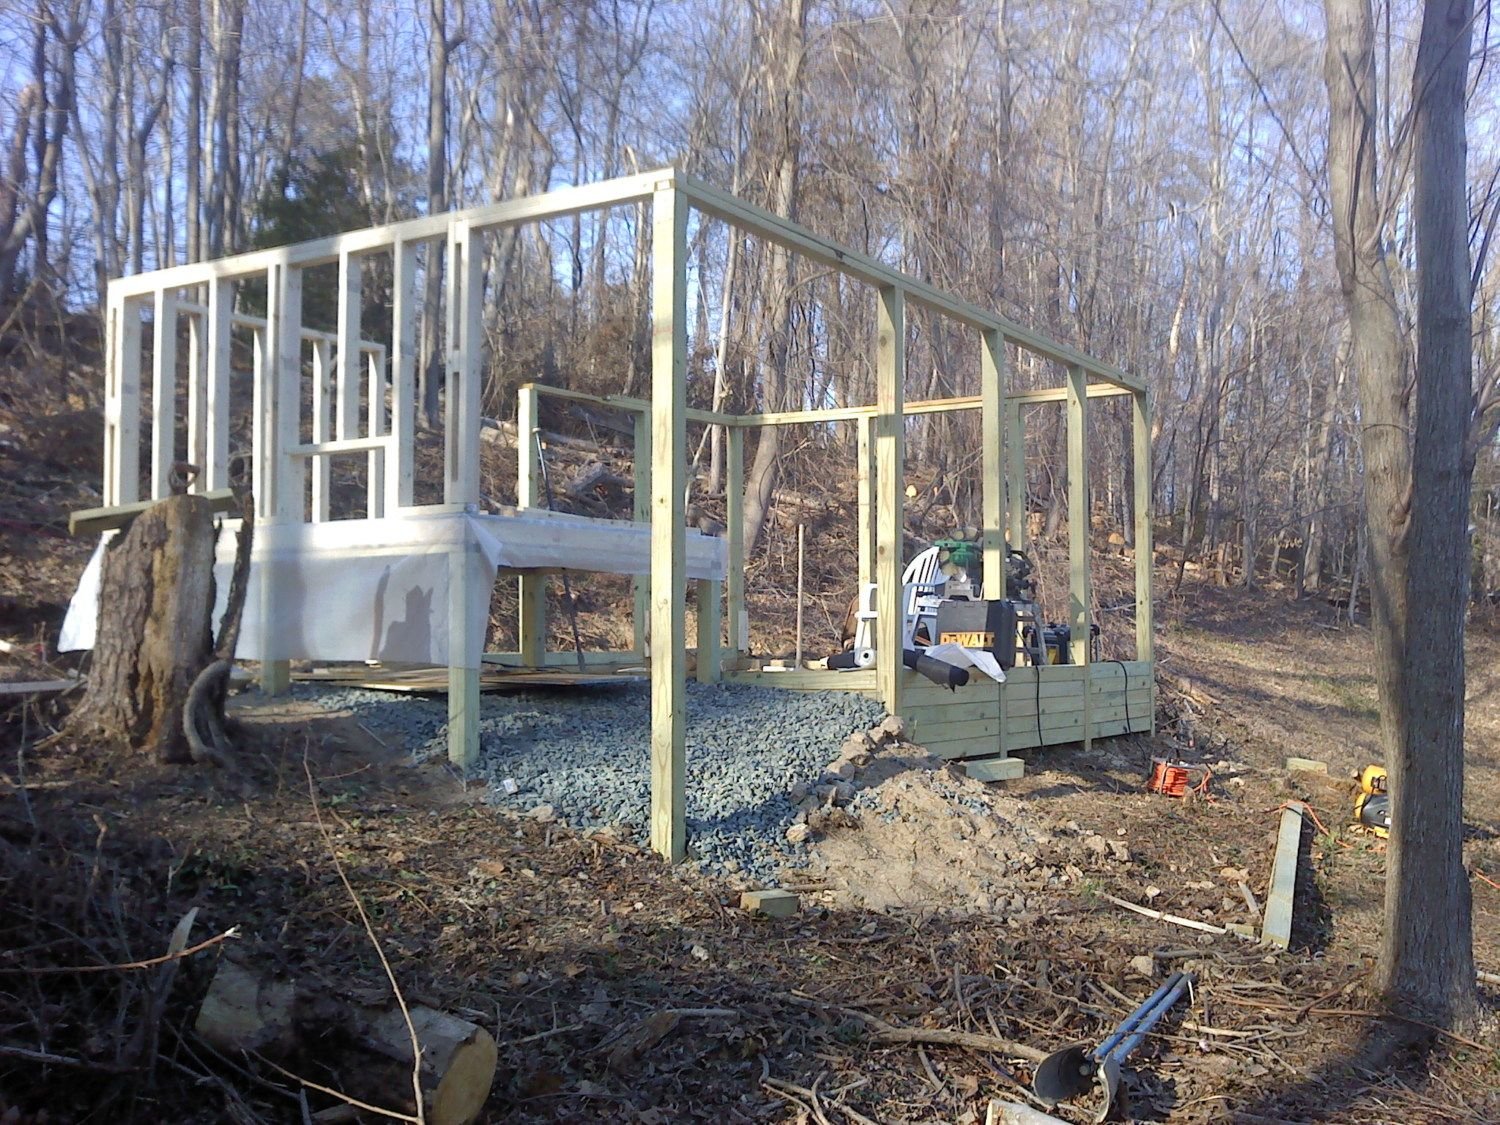
Coop walls are going up.
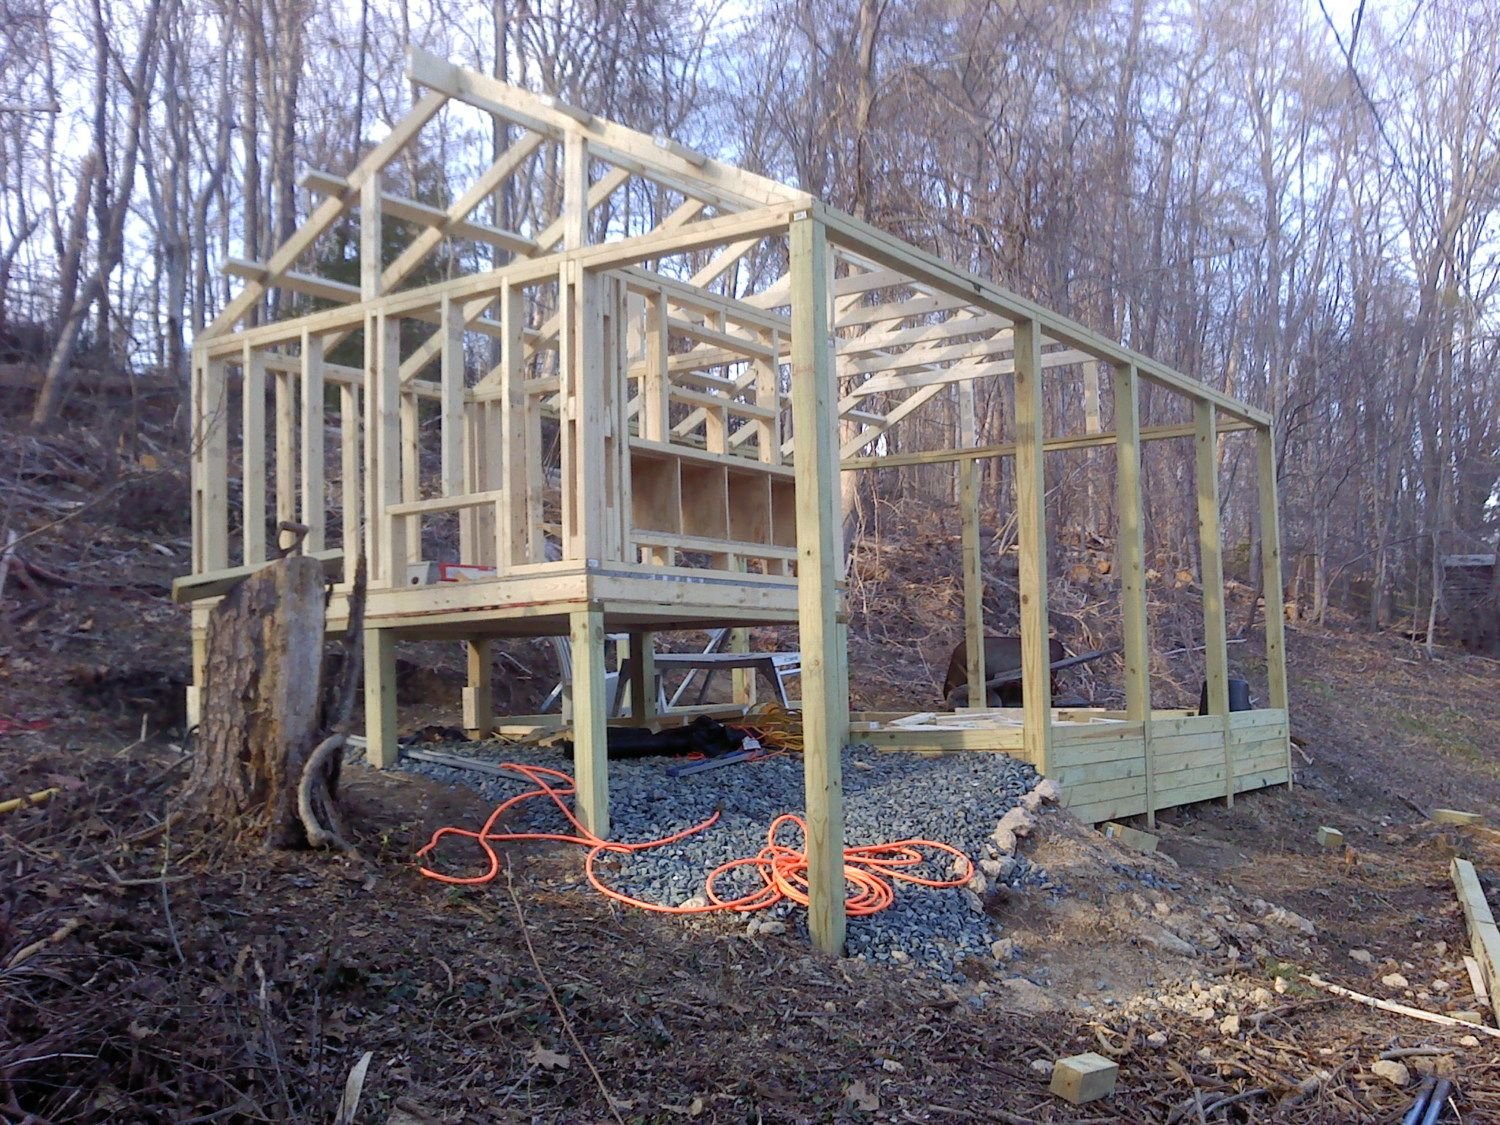
Roof trusses installed.
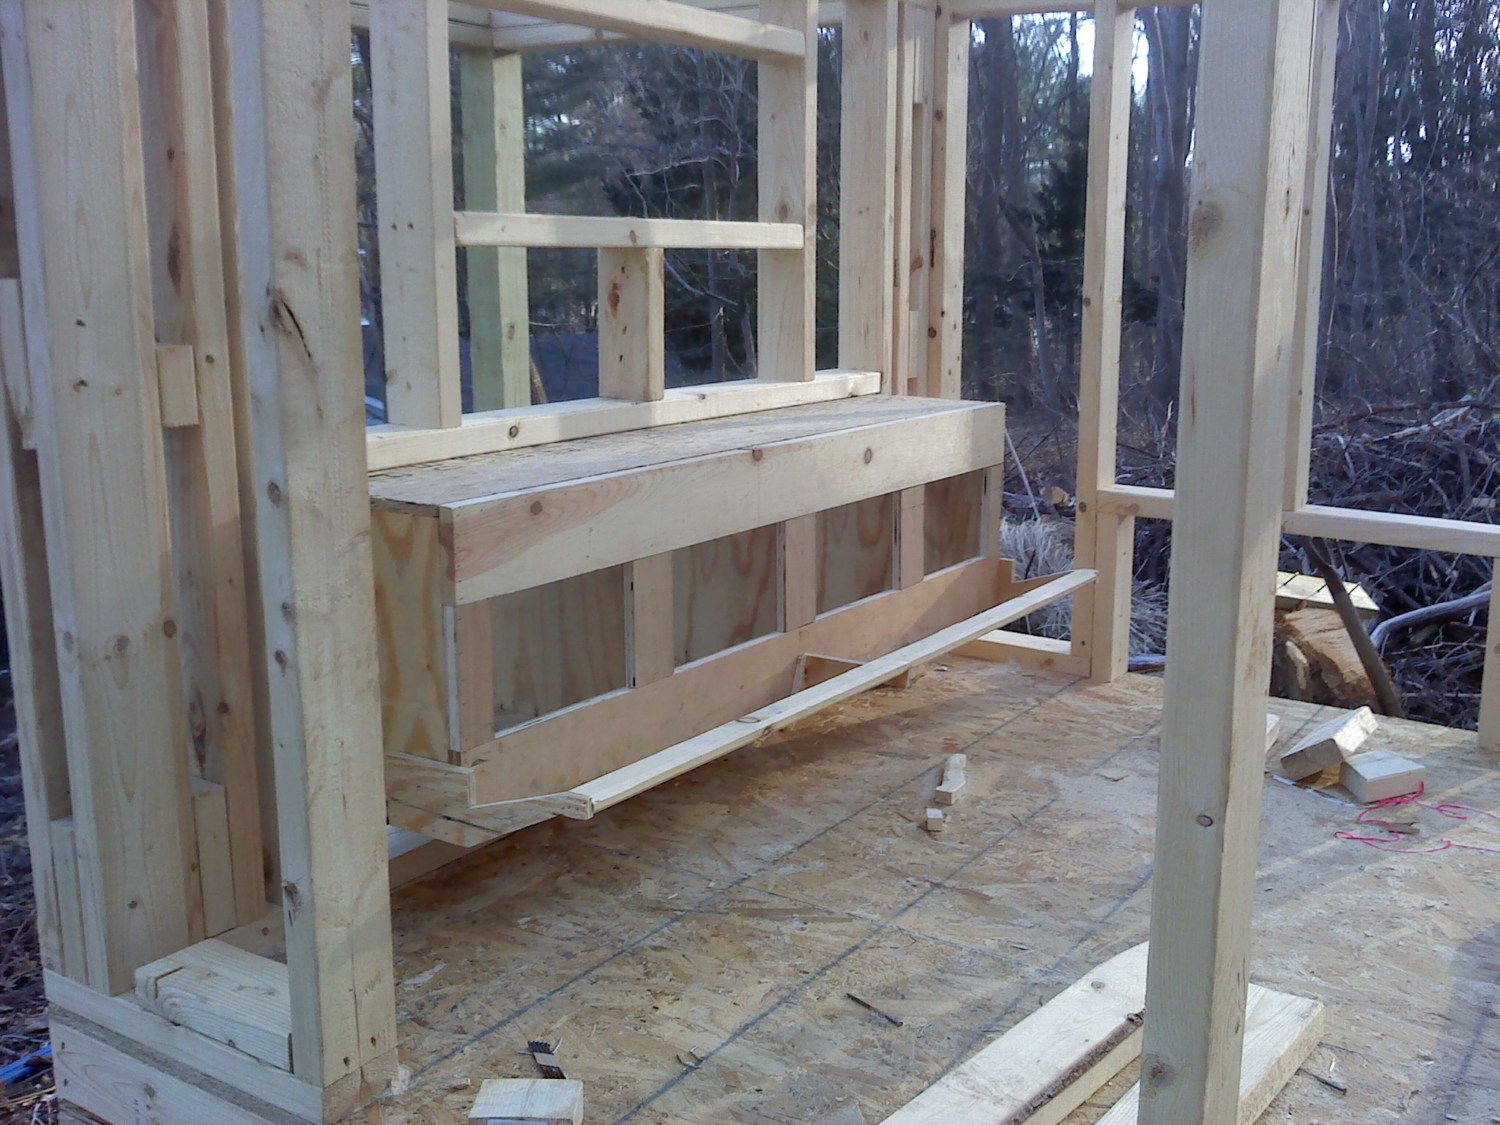
Installed 4 nest boxes. Boxes are 12" x 14" with an opening of 6" x 9".
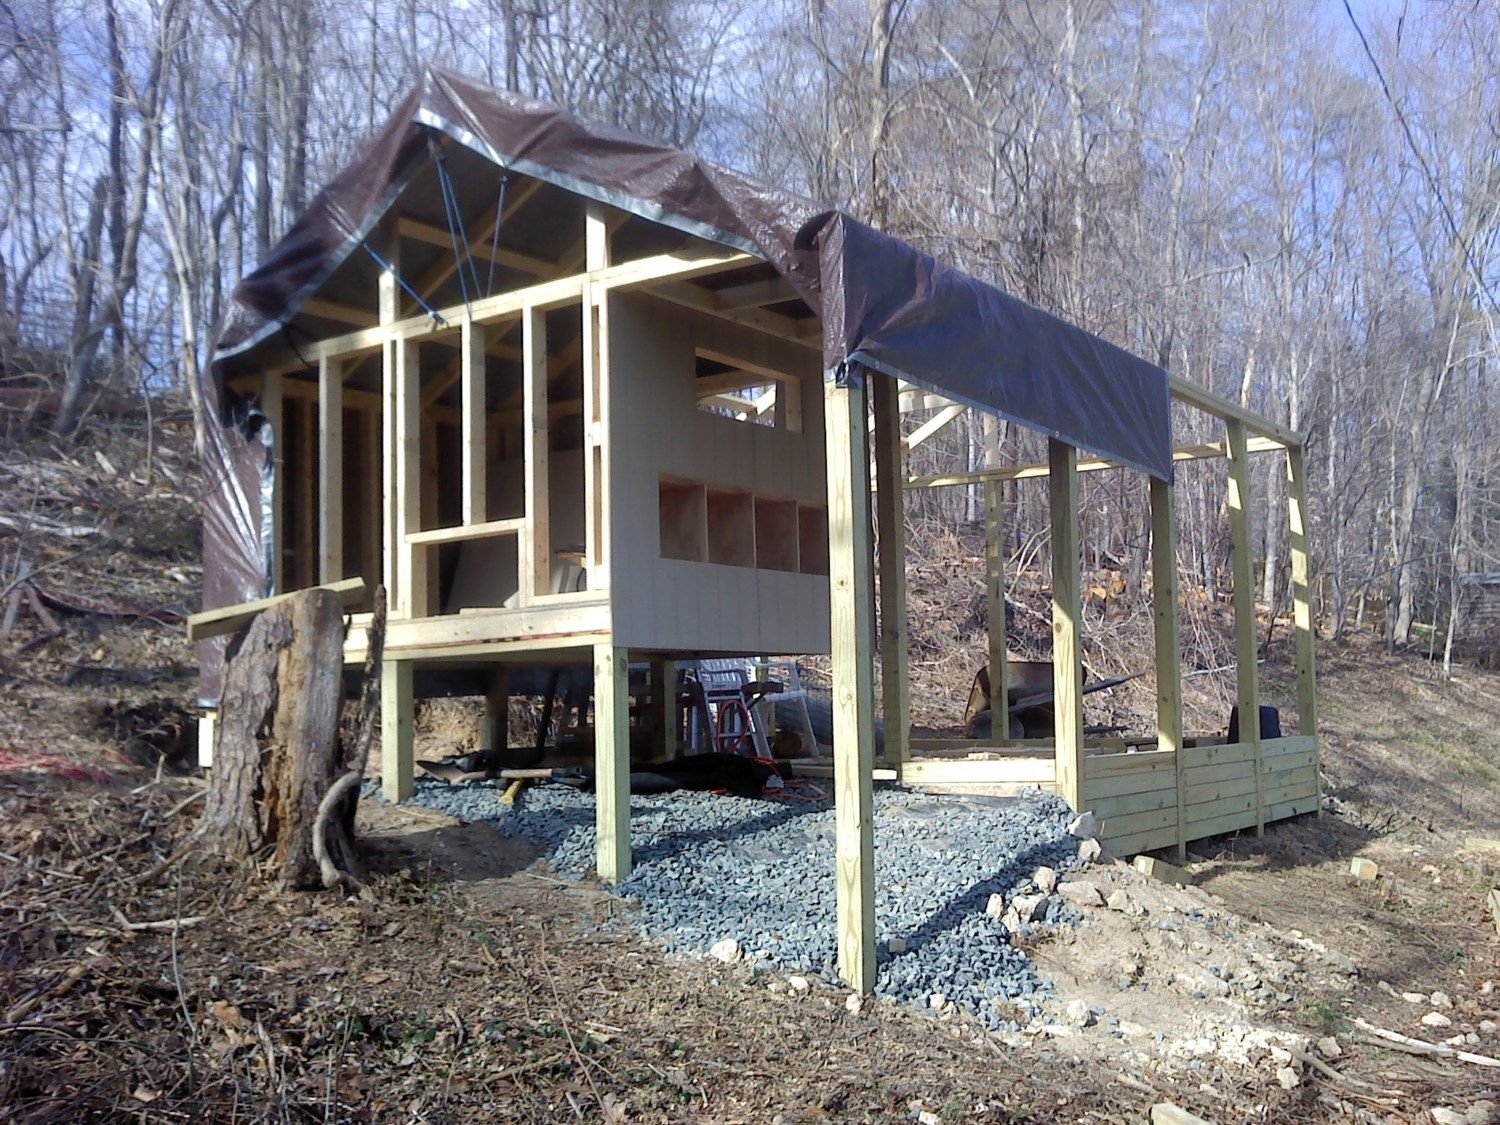
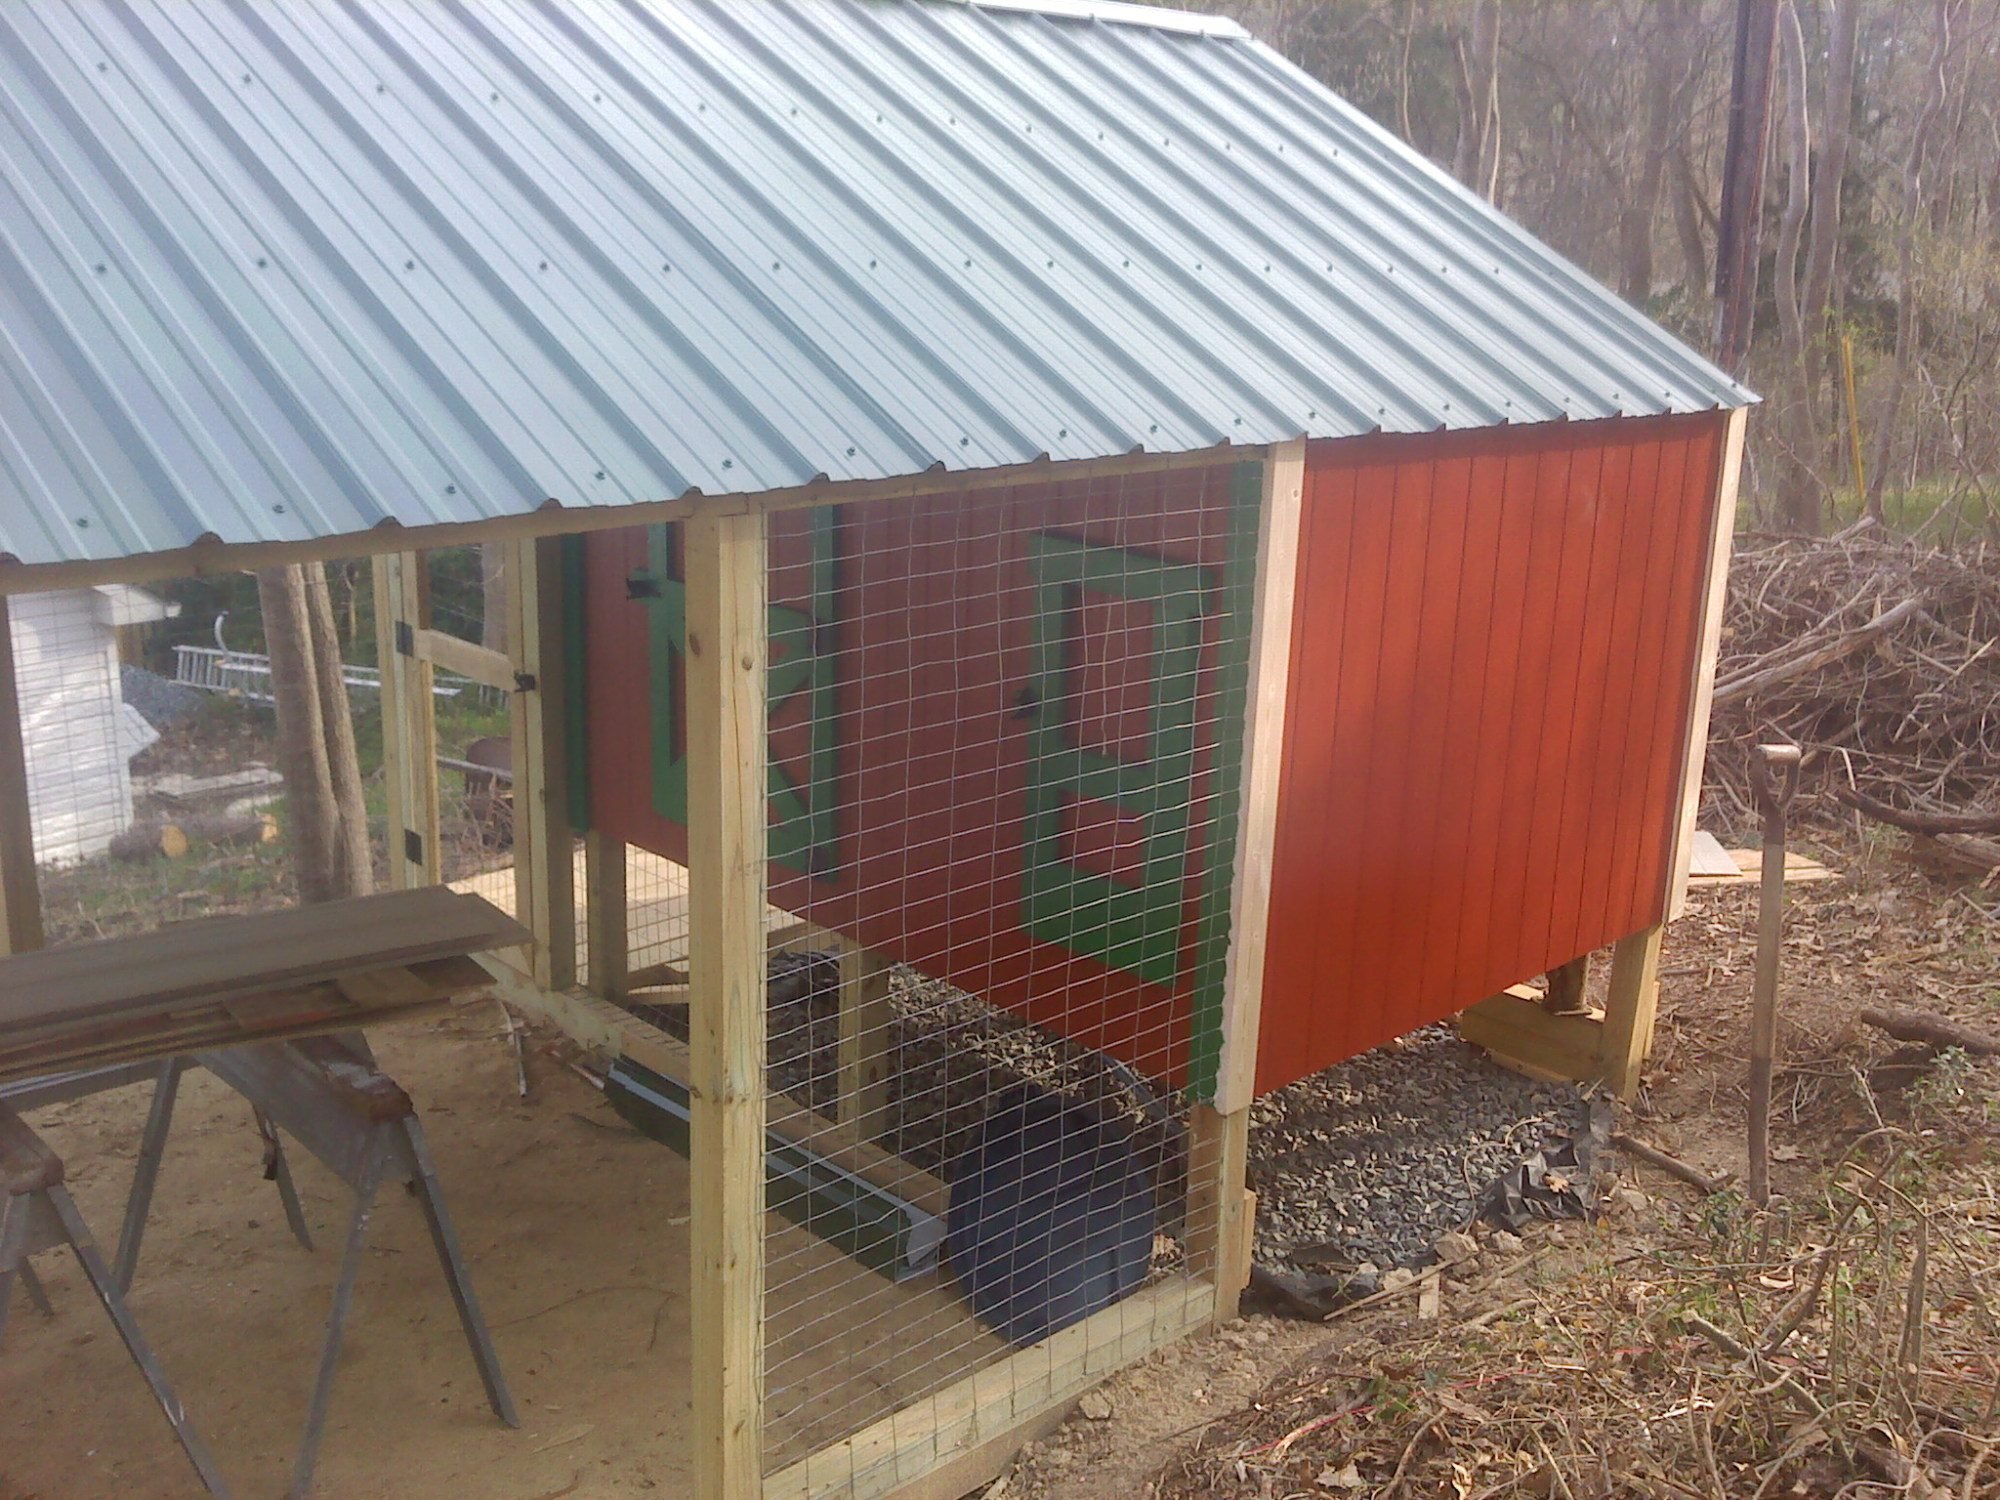
Installed redwood siding. The tarp is to keep things dry, and keep me from getting too much sun. Ordering metal roofing tomorrow. Chicks were ordered last night ( 3 Barred Rock, 3 Australorp, and 3 Golden Comets), they should arrive around the 2nd week in April. It is now 3/9/2012
I am able to access the nesting boxes from the covered deck. Good for collecting eggs in the rain.

Had to keep things dry until the metal roof arrives.
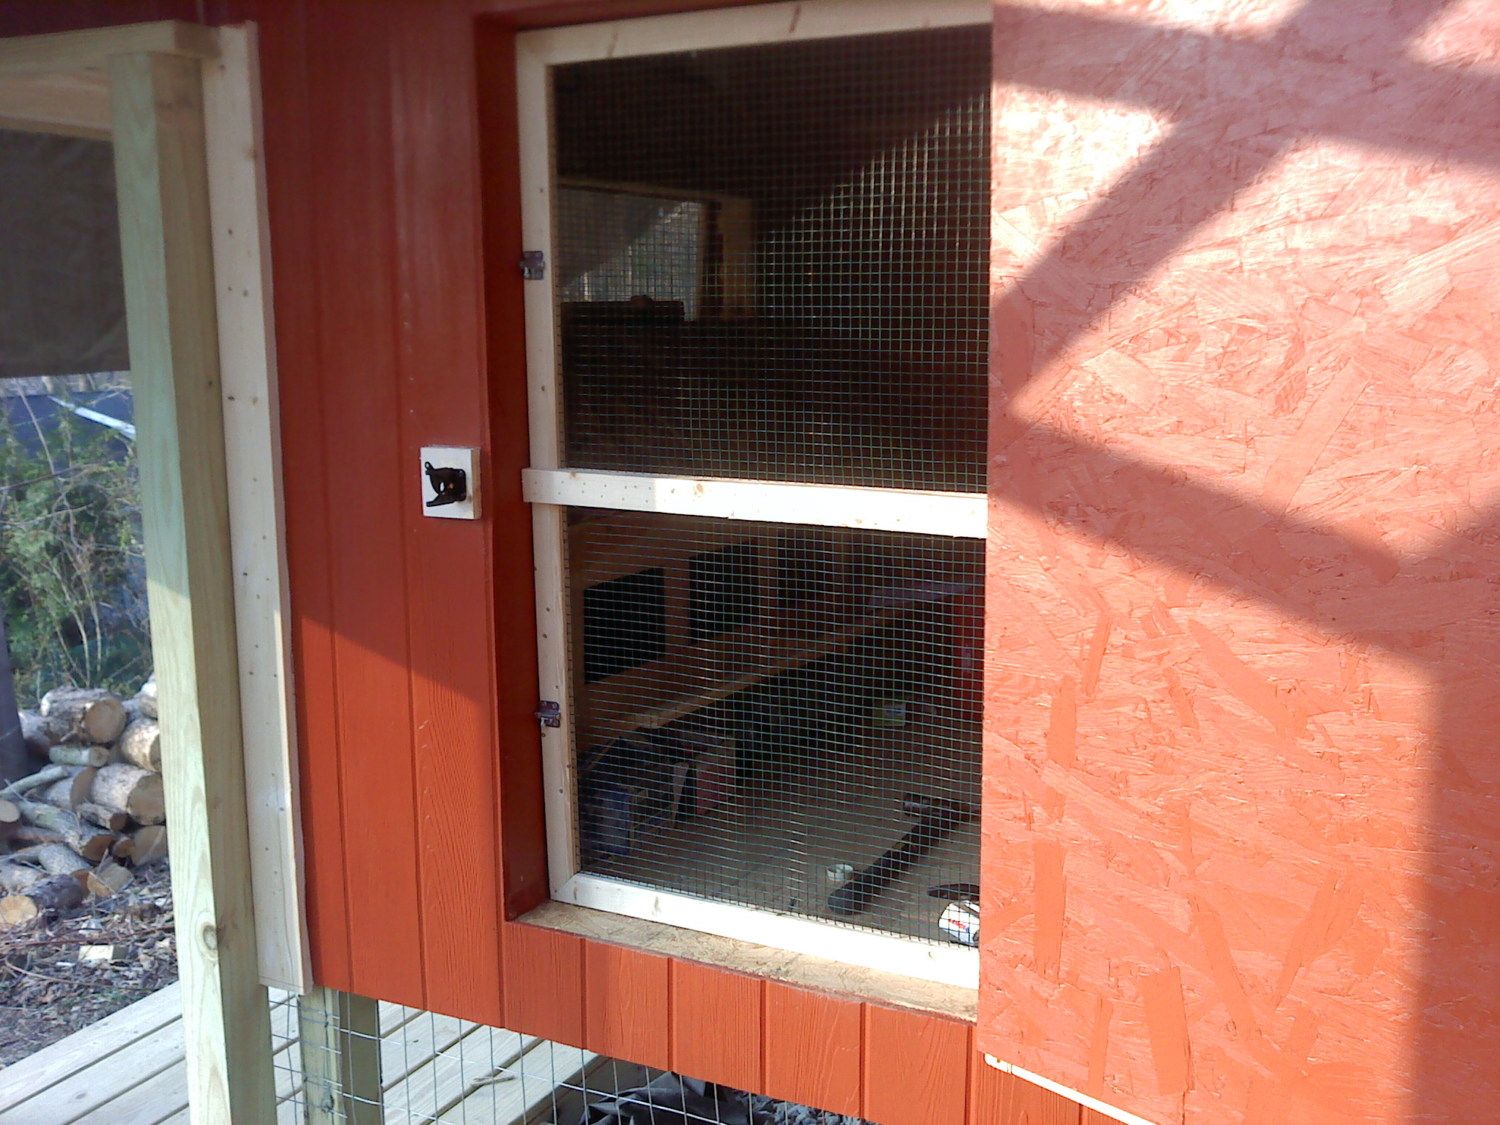
I framed in coated 1/2 inch hardware cloth for the screen door.
Metal roof is installed. Painting the trim, and moving more dirt. DIRT Again!?#%.

A look from inside the pen. The pen is covered with 2 x 4 screen with an overlay of chicken wire for the bottom half. To keep predators away, I am installing 2 strands of electric fence on the outside of the coop at 4 and 12 inches (5000 volts...OUCH).

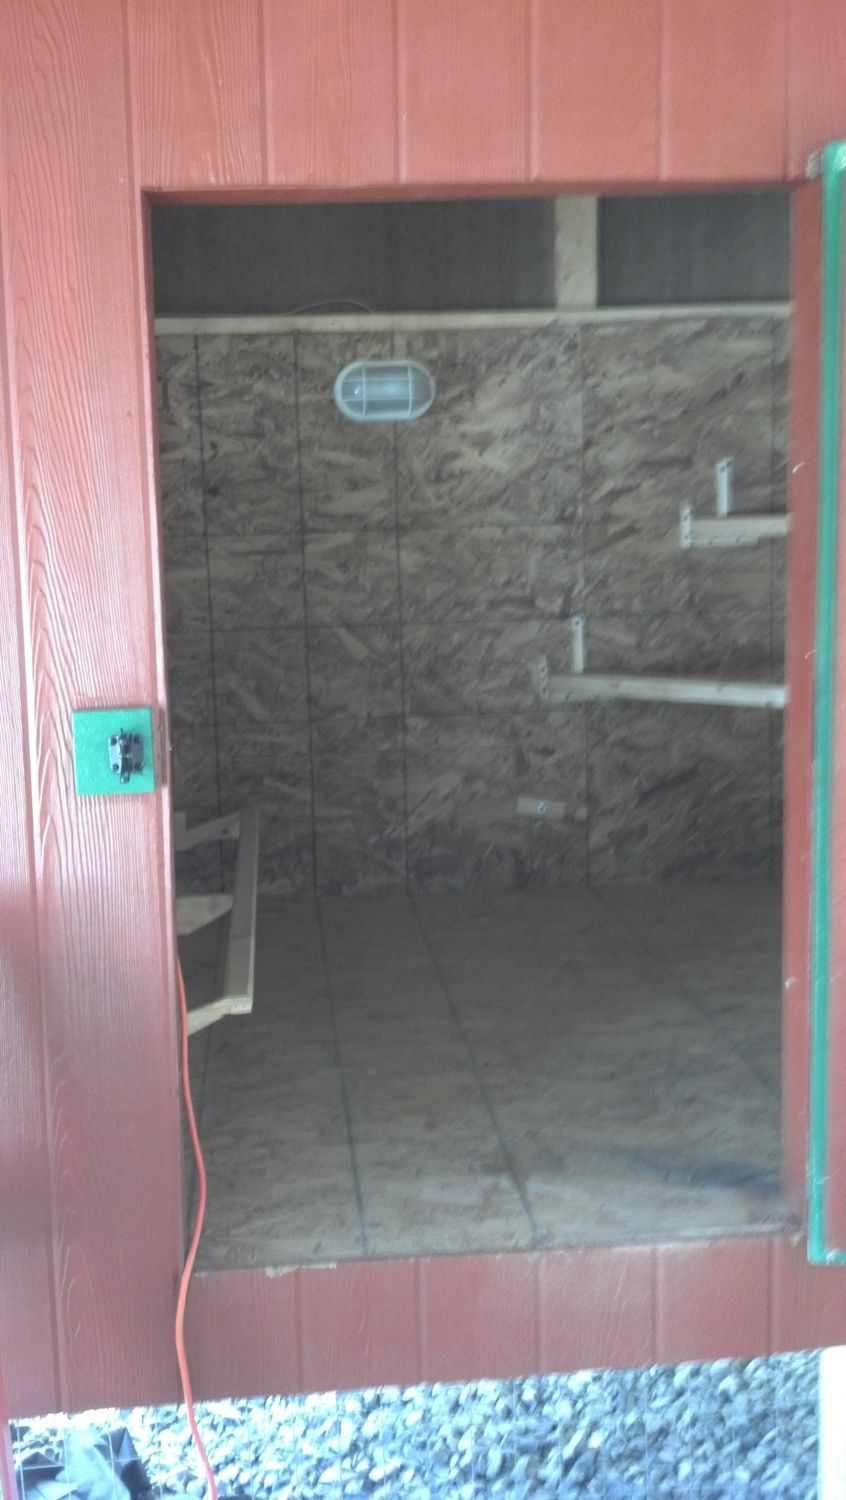
A look inside. You can see the night light on the back wall.
Getting the finishing touches completed. Digging out the steps to the coop and will back fill with gravel.
Installed 2 roosts in the pen so the chicks can keep an eye on me in the yard.
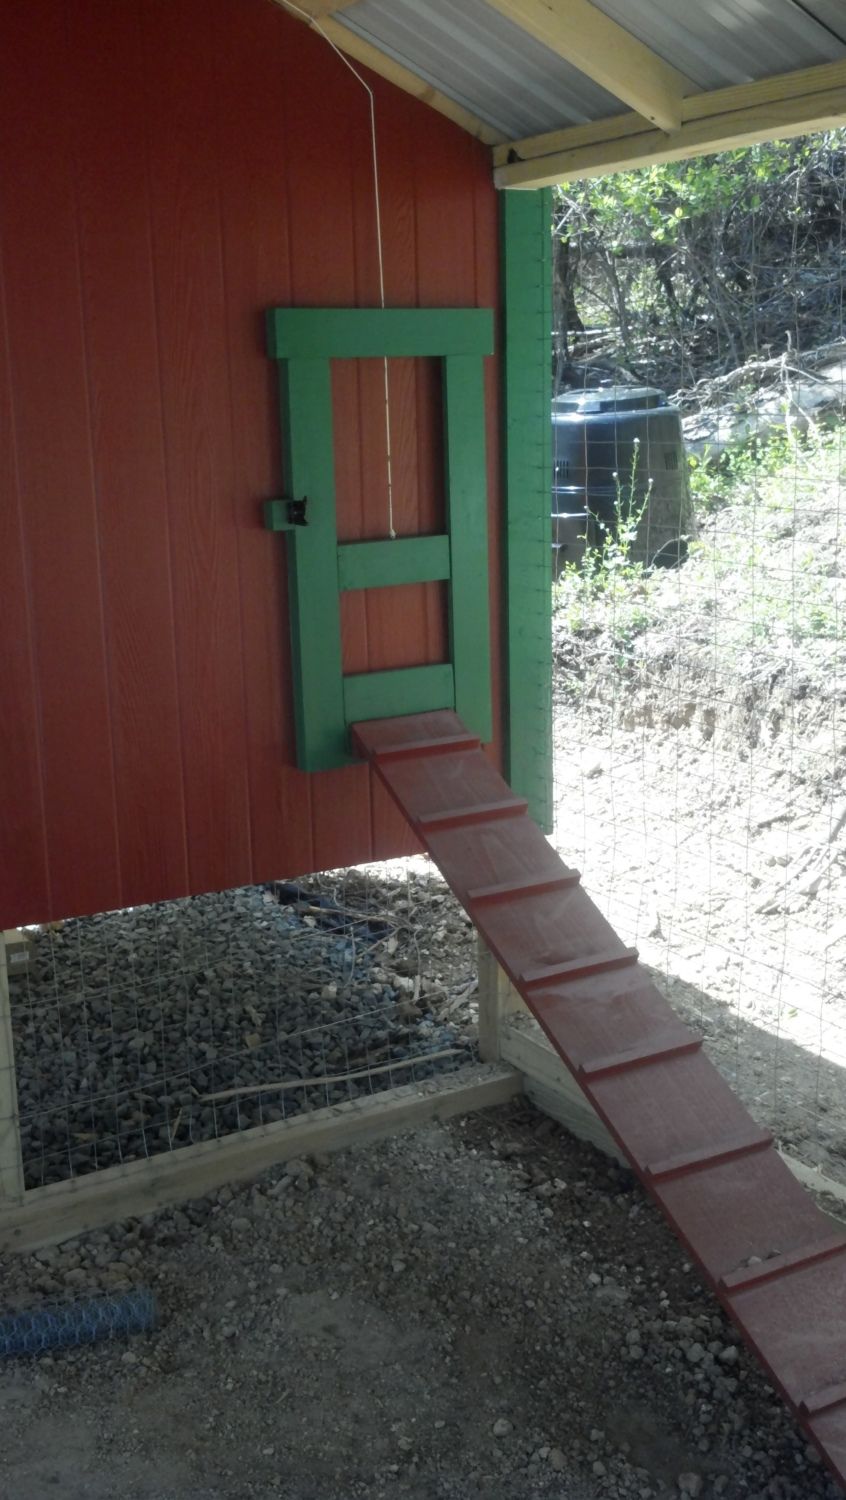
Guillotine door with ramp and you can see the compost bin in the background.
Hardware cloth installed, backfilled, stone down and electric fence is on.You can also see the clean-out door.
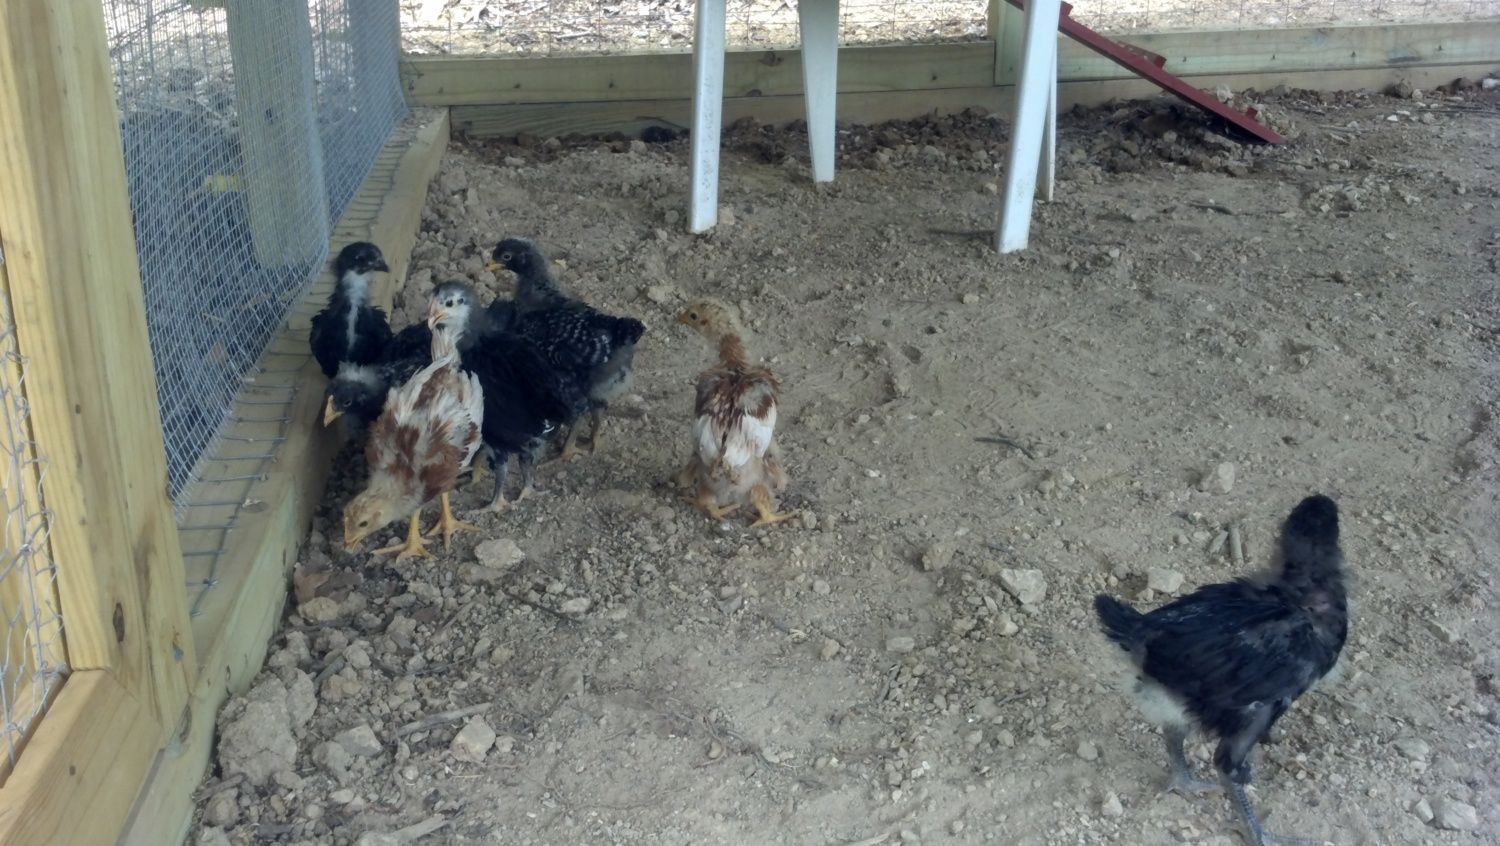
I still need to add sand to the pen, but since it was in the 80's today, I wanted to let the girls see their new yard for the first time. They are 24 days old in
this picture.
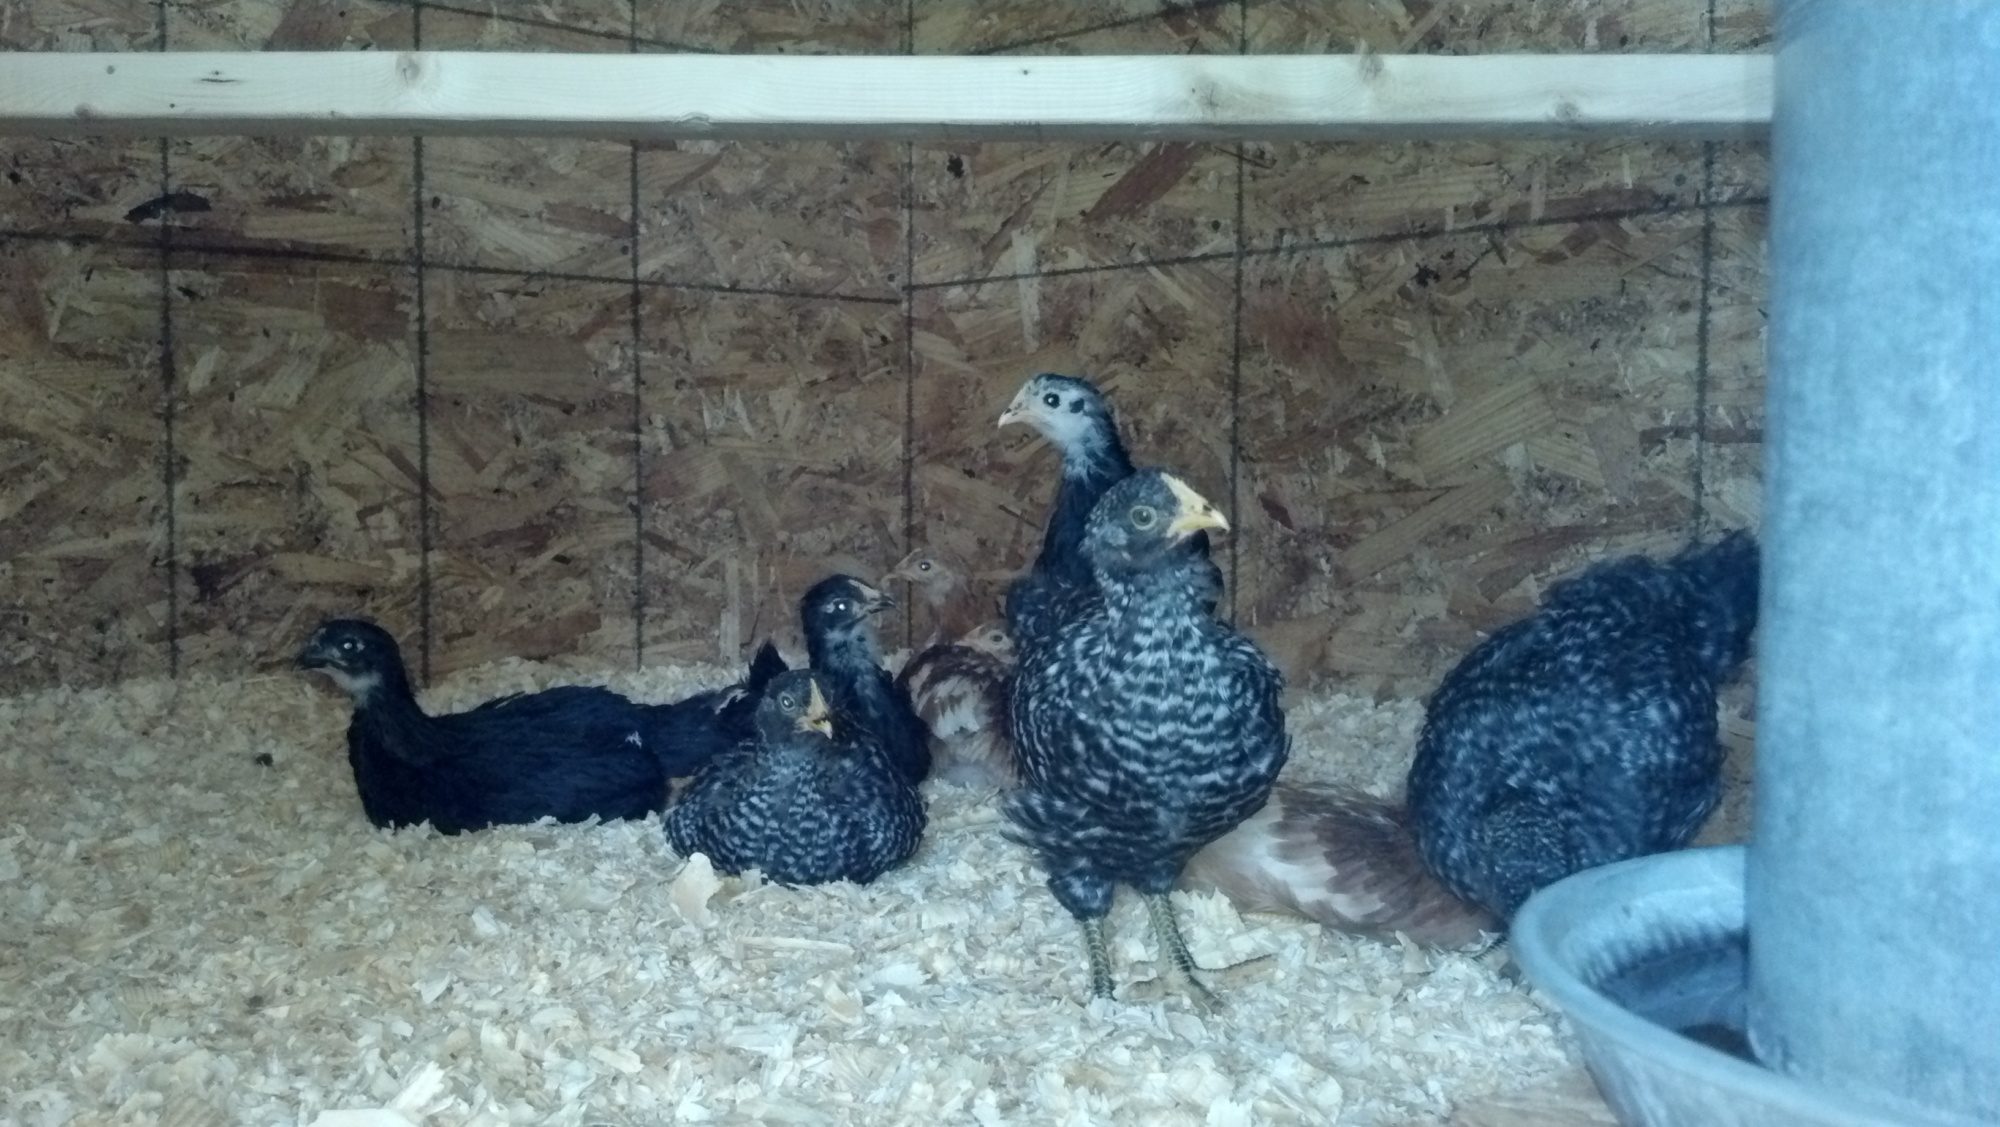
The girls are now 32 days old, moved into their new home, and are curiously inspecting every inch of the coop. I will keep them confined to the coop for the next week to get them used to this being their bedding area. One ton of sand has been added to the pen, and the girls will be able to explore the pen starting next Sunday (5/20/2012).
The finished project.
Besides adding a western facing window, I would have added some clear roofing to add light to the coop and pen. I believe the chicks will be happy to be out of the summer sun, but it might make it colder in the winter with the amount of shade that I incorporated in the build. I will probably add a roll up plastic screen to the northern wall of the pen during the winter to give the chicks a break from the wind. I will be adding some butterfly bushes close to the pen to give them an abundant supply of insects during the summer months.

