First time chicken owners:
This spring we decided to start on a new hobby and have some hens as "pets with perks"! we purchased Black Australorp, Silver Laced Wyandotte, and White Rocks. The chicks were a day old when they shipped and we received them from our local post office on March 22, 2010, All 25 doing very well, We are only keeping 8 to 10 the others will be placed with chicken keepers.
This spring we decided to start on a new hobby and have some hens as "pets with perks"! we purchased Black Australorp, Silver Laced Wyandotte, and White Rocks. The chicks were a day old when they shipped and we received them from our local post office on March 22, 2010, All 25 doing very well, We are only keeping 8 to 10 the others will be placed with chicken keepers.
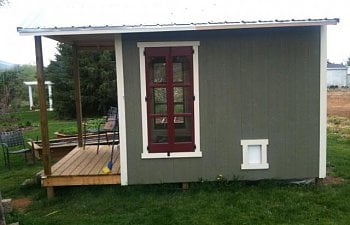
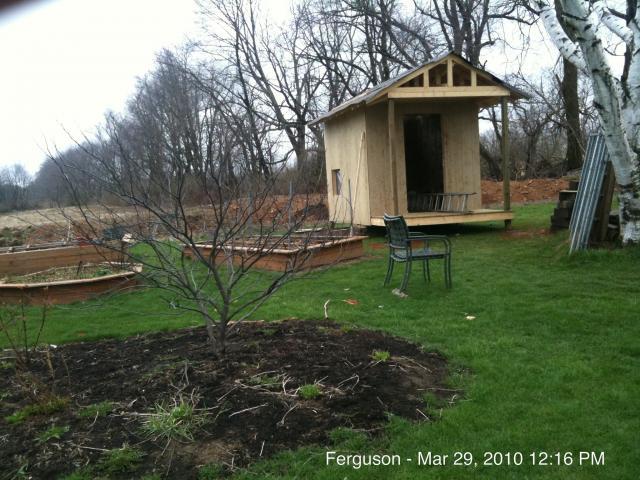
After studying books and of course the BYC forum for all the advice and tips and ideas my wife really like what CoopDelisle did where there coop they are listed here on BYC at https://www.backyardchickens.com/web/viewblog.php?id=6791 We liked the openess of the coop and how it would tie into our yard. So with that and everything cram into my brain, we started sketch of our plans. We are located in Central PA so our winter weather can get cold and summers can be hot so ventilation is a big concern for me. So have many hours on this site we came up with the coop overall dimensions will be 14' long X 8' wide. the actual coop wil be 10'X8' with a 4' porch.
ISSUES I NEEDED TO ADDRESS:
1. Aesthetics - Wanted something that went overall with our property and landscape of our home, Would be easy to keep clean so flies and odors would be minimal.
2. Security - We have 3 dogs and 2 cats and all of the normal wildlife predators including coyotes, raccoon, opossum, skunks and hawks
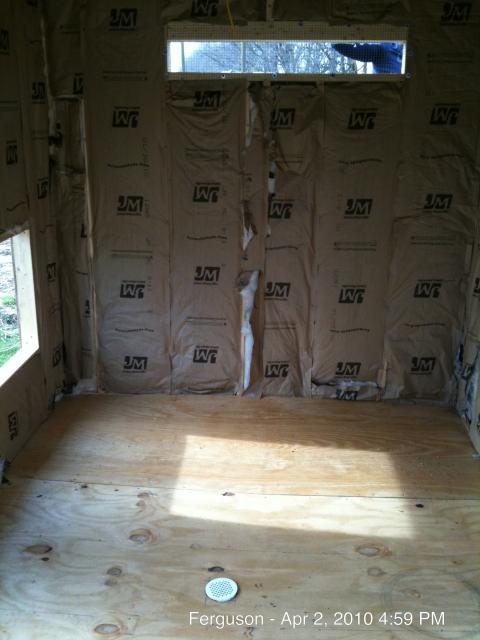
3. Ventilation - Becuase we live in Central PA we needed to address ventilation just as others did but we have to think about summers and winters. It can be pretty hot dduring the summer month and petty cold and snow during the winter months so we decided to insultate the coop.
4. Cleaning - The inside of the coop will have plywood covering the insulation and we are going to slope the floor to the center with a drain that goes into a sump. The entire inside of the coop will be painted with satin paint for easy cleaning.
2. Security - We have 3 dogs and 2 cats and all of the normal wildlife predators including coyotes, raccoon, opossum, skunks and hawks
3. Ventilation - Becuase we live in Central PA we needed to address ventilation just as others did but we have to think about summers and winters. It can be pretty hot dduring the summer month and petty cold and snow during the winter months so we decided to insultate the coop.
4. Cleaning - The inside of the coop will have plywood covering the insulation and we are going to slope the floor to the center with a drain that goes into a sump. The entire inside of the coop will be painted with satin paint for easy cleaning.
Construction begins: 3/20/2010
We started on Saturday all the walls and base were preassemble in our garage becuase of weather not being nice here on the east coast. But ths weekend was to be in the 60s and sunny so it was time to start the construction process.
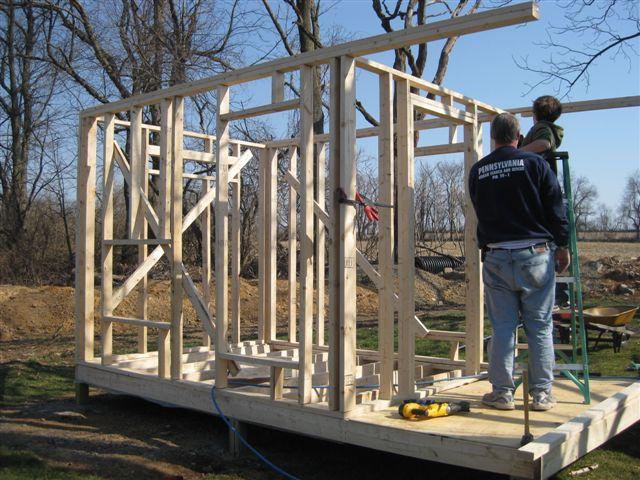
With the base installed we started framing and with lots of help from the family we made great progress
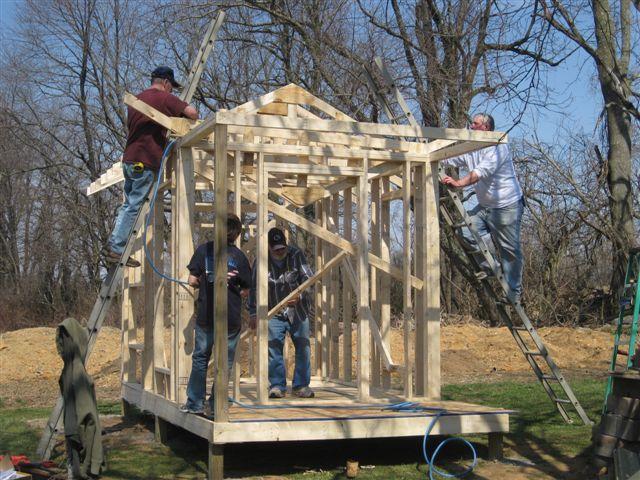
Now onto the truss we kind of was overkill here we went with truss 16" on center and 3/8 plywood sheeting. Should have went 24" on center and went with 3/4 plywood.
Ended the weekend with this overall a ver busy weekend but very pleased with the progress
Construction continues: 3/27/2010
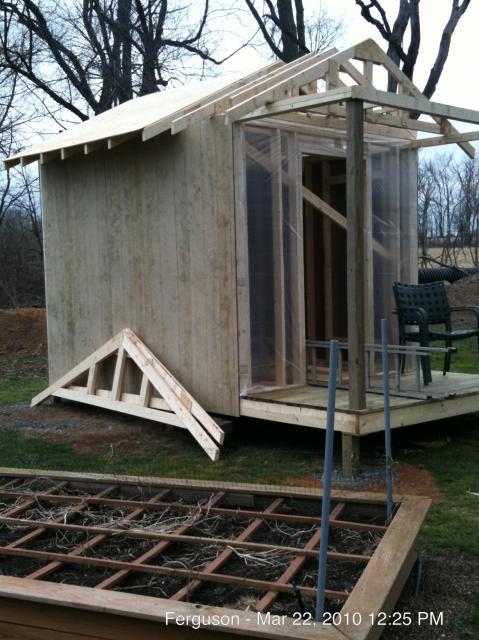
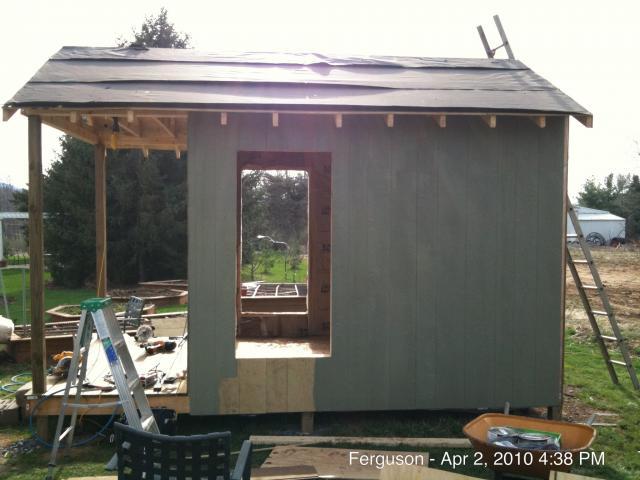
Weather was not as nice this weekend calling for rain and in the 40's so we wanted to get the roof finished with plywood and roofing felt to help protect with the changing weather. Get the rest of the siding done and start insultating and wiring also start nesting box
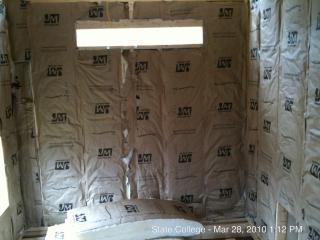
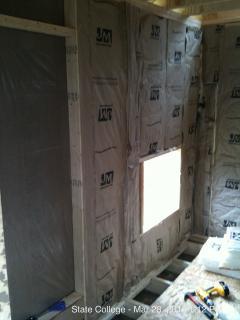
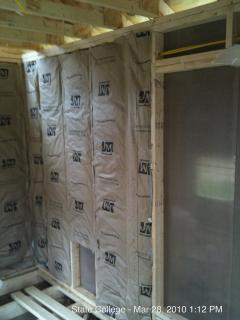
Made good progress with insultation in the walls next is the roof and floor. but will wait for nicer weather
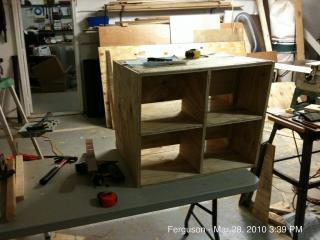
Started on nest box these will be roll away egg nestng box. Half the box will be inside the coop the other half outside with a sloping floor to allow eggs to roll to the back for removal. Still trying to figure out the egg access doors.
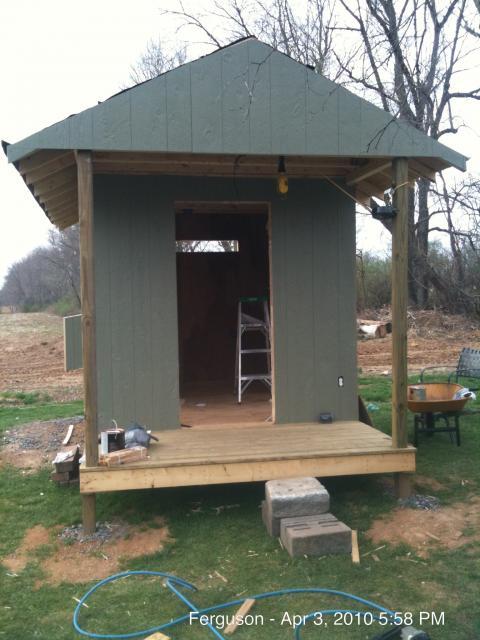
Construction continues: 4/3/2010
Well the progress continues becuase of being the Easter weekend we really did make some good progress.
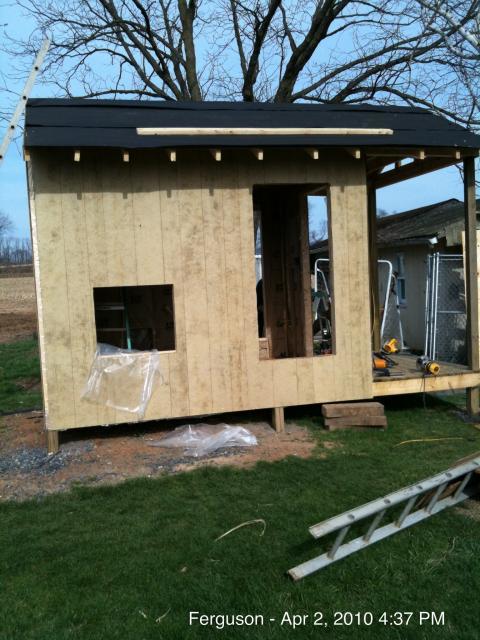
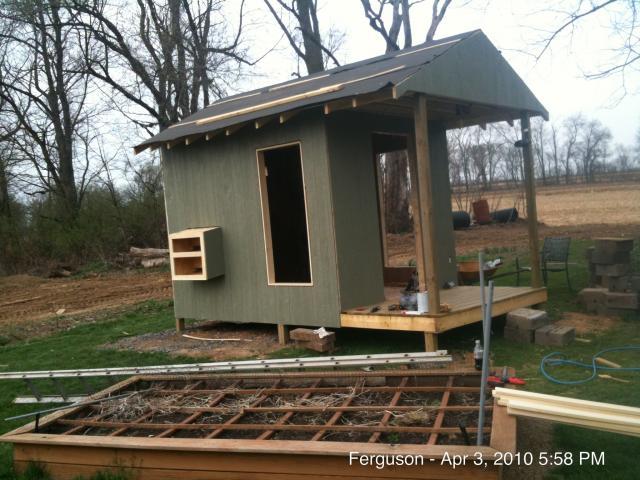
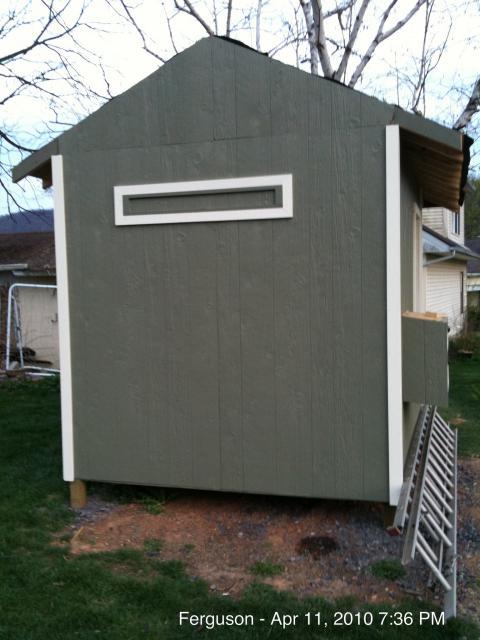
We started by cutting out the nesting box and side windows and finished the siding so we could get ready for paint and working on the inside.

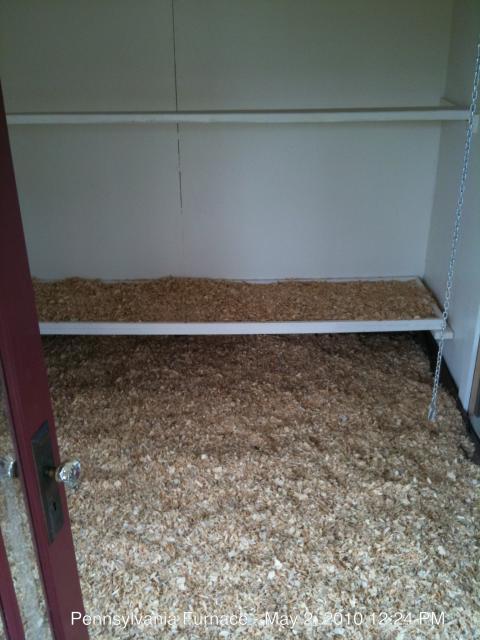
Floor installed then we started install the nestbox and inside walls. Yes you will see drain inn the floor from design and theroy it sounded like a great idea the floor slopes towards the drain so if we ever have to really clean we could use a hose to clean out the coop. Not sure about really how it will work will keep you posted. The nesting box is a 4 hole rollout design so we will not have to enter the coop for the egg's.
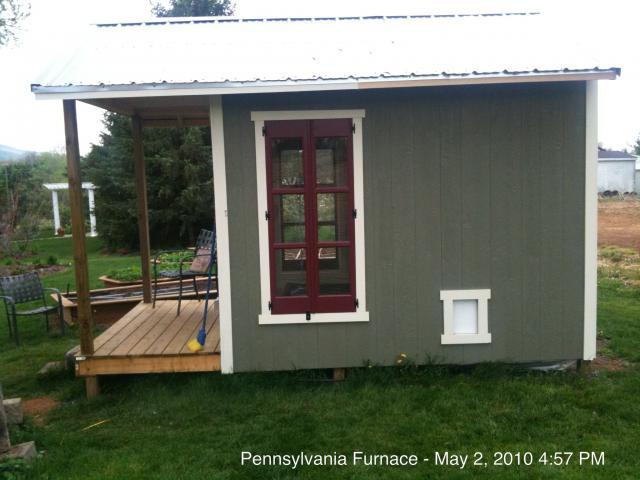
Paint going on we settled for a color of Smoke Olive from Lowes. The first pictures shows the two windows across from each other this should provide execellant ventilation during the summer months.
Construction continues: 4/10/2010
Well we made some good progress this weekend but not a much as we hoped for. We completed the inside painting and electrical work and started on the trim paint and started to build the windows.
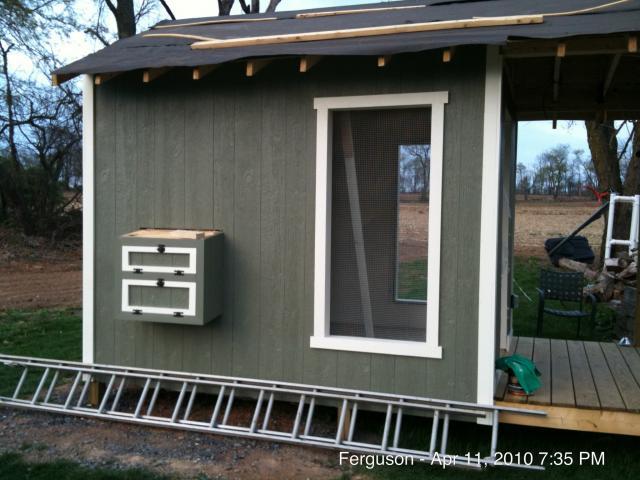
We took some rough cut wood and started to build the windows was pretty interesting becuase we have never made windows but this is what we came up with will get the glass cut this week and hopefully installed
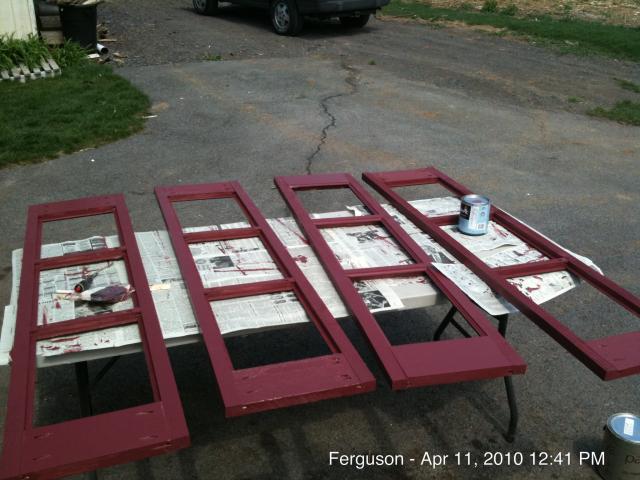
The widows came out very well and look great and most of all the cost was cheap 25.00 worth og glass some left over rough cut wood = nice windows.
Ok so we had to take a few weeks off becuase of weather and we had a litter up pups that came on 4/22/2010.
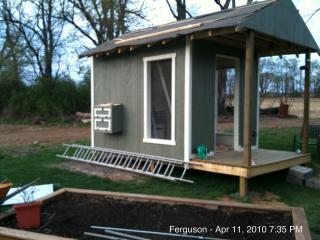
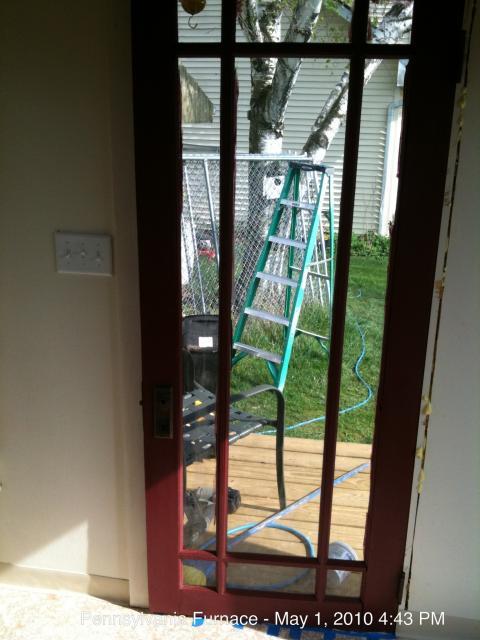
So we did a lot of work inside the coop painting trim work. Installed front door this is our $30.00 reclaimed door
Roost and dropping board (I know the board should be closer to underneath the roost but we got the nest box alittle close here).
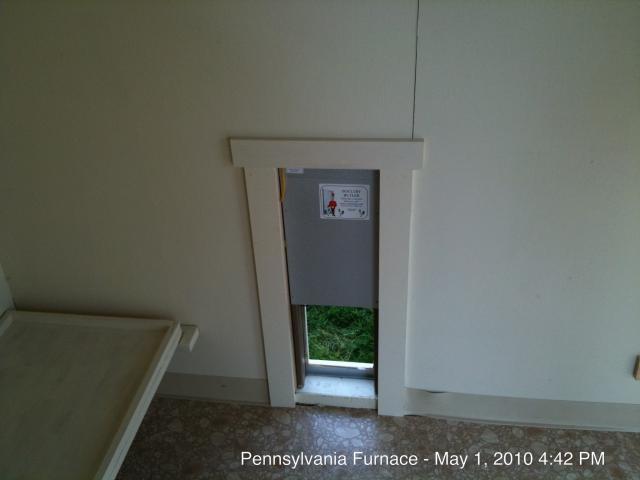
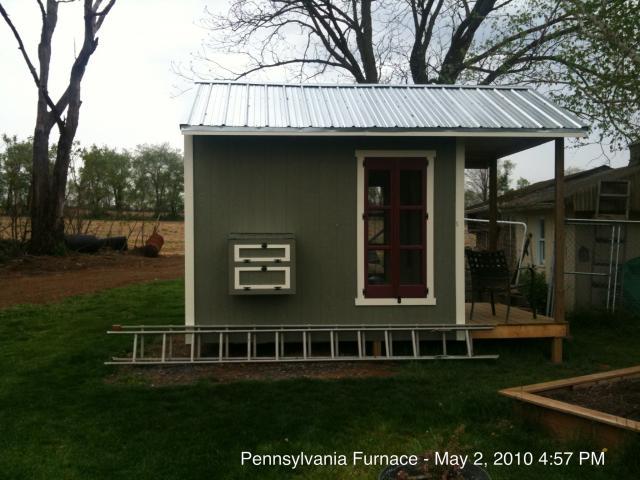
We really wanted a automatic chicken door and there are olny a few companies that make them so we decided on this one becuase of price and having a auto light dusk to dawn sensor. Will let you know if we like it or not
Metal roof on painting completed. This was the first time installing a metal roof and we are very pleased with how it came out.
Girls going into the coop for the first time and I think they really liked it
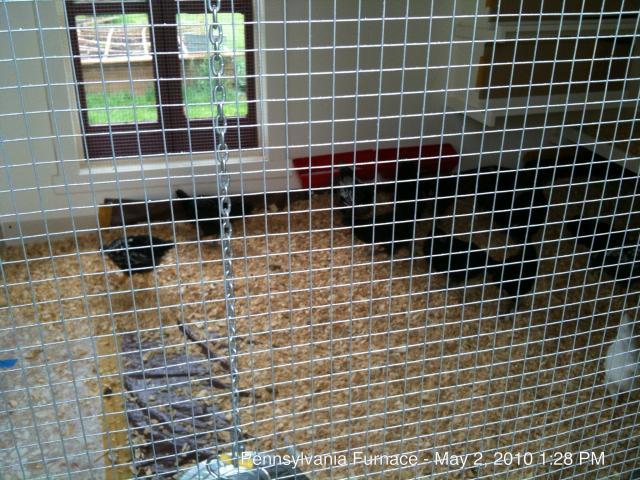
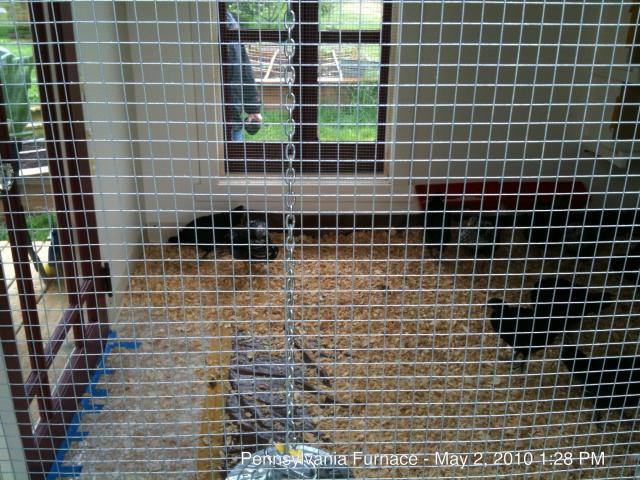
end of progress from weekend 5/1/2010 more updates to come!
Will get better pictures of the ladys now onto the run.