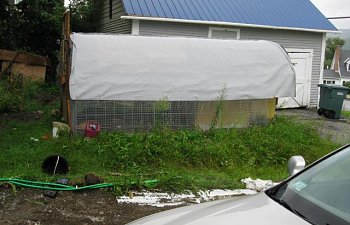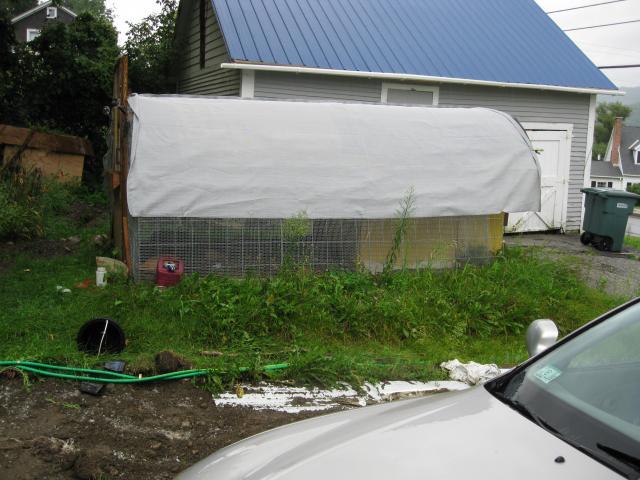
So here is our coop and run. I decided I wanted something unique because we all love something unique. I'm somewhat handy, but not a carpenter by any means. I like the hoop tractors and found a simple design from this post. While most hoops are built to be tractors, our will be stationary. It seems most people build a coop and then attach a run to it but we will be building a run and placing a coop inside it. After finishing the original plans, I did not like how the door were attached (they were too drafty) and decided I needed to fix them. In the process, I decided to add on to the coop and make it bigger. In addition to making the coop bigger, I had to increase the length of the hoop to cover the expanded coop. This makes the building of this particular coop much more complicated than it would be if I had planned it out better from the start.
Birds vs square footage.
Backyard Chickens use the figures of 4sq ft/bird of coop space and 10sq ft/bird of run space. Our coop was originally going to hold four birds and be 4x4ft but I decided to make the coop bigger and make it 4x6 giving us enough room for 6 birds. Our 4x6ft coop gives us 24 sq ft which is exactly enough room for 6 birds. Our run is 8x12 giving us 96sq ft. Our coop occupies space inside the run only giving us 80sq ft of run space. This gives us more than enough room for 6 birds. Our goal of 6 birds fits very nicely into these figures. As far as the current birds in our coop, we have four. We started with six but one died as a chick and one was a rooster.
Features of this coop.
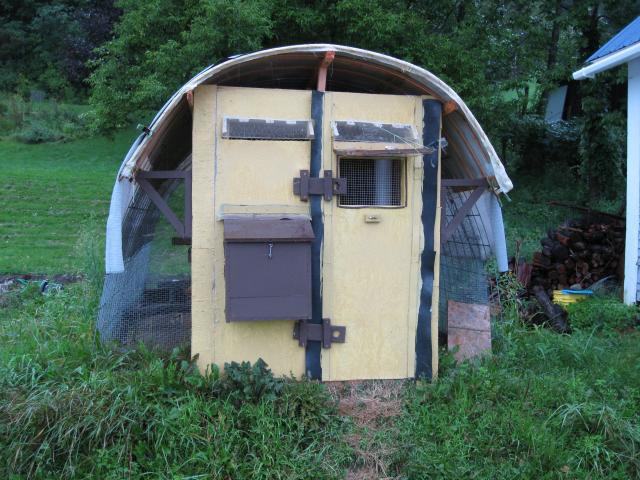
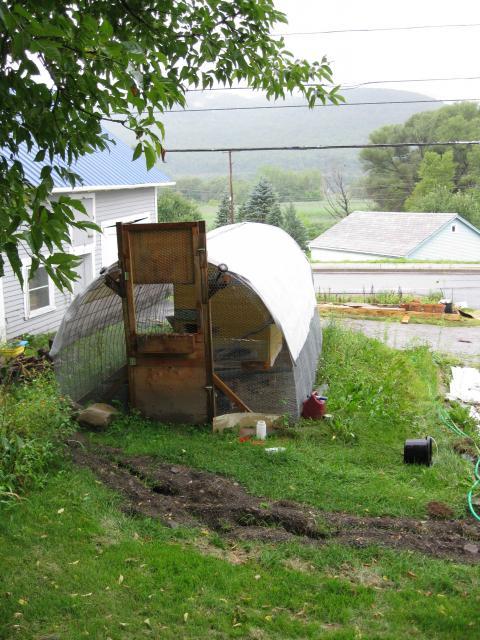
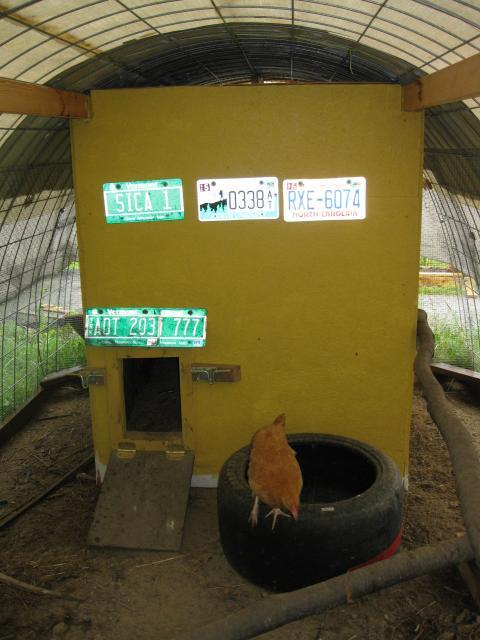
The basic idea is a solid structure with good ventilation. By building the coop under the hoop, I could make a sun roof for unlimited ventilation. A single door opens into the coop for cleaning. A nest box is build half way into the coop and half way out of the coop. The roof of the run is a large piece of polyester fabric that is coated with polyurethane to make it waterproof, form fitting, resistant to flapping in the wind and strong enough to hold snow. The coop is insulated as we live in Vermont. While insulating a coop is not necessary, it will help in the winters. Other than that the coop is pretty basic.
Purpose of this write-up.
The original purpose of this was to give detailed instruction on how to build our run and coop, but I quickly discovered my carpentry skills are seriously lacking. Therefore this write up will give semi-directions and show off ideas anyone could put into their own coop.
What I would do differently.
Aside from the obvious of using better building skills and techniques throughout the coop there are some things that would be much easier for someone using this design. The first thing I would do is attach the apron to the frame before attaching the cattle panels and the hoop. In addition, I would build the coop before attaching the cattle panels. The apron would be more secure if placed under the cattle panels and the coop would be easier to build if not built inside the hoop. Over all for a first time build, I quite happy with my finished product.
With all that being said... Here are the direction on how I would build another one, not how I built this one.
1. Assemble the frame out of preasure treated 2x4's to make a 12x8 rectangle. Stregthen the corners to make it solid.
2. Attach the apron now. The apron at this point in time does not need to be very securely attached to the frame because once you attach the cattle pannels the apron will be very solid. I used rabit fencing.
3. Attach one cattle pannel. I found some lashing straps makes this process much easier. Using one strap, loosely attach one side to the frame. Wrap strap to the other side but do not close it. Now flex the panel and attach it to the frame with the open strap and tighten it. Now that the cattle panel is shaped, hammer it into the frame with fencing staples.
4. Now that you have the exact dimensions of your hoop you can plan out the exact dimensions of your coop. By only putting up one cattle panel you have much easier access to the area. You could put up all three panels and build it under them (I did) but I am imagining it would be easier to add the cattle panels after coop is built.
5. Add the framing for the doorway leading into the hoop and hang a door in it. I used the cheapest door I could find and reinforced it with plywood and chicken wire. I found after installing the door that plywood will need to cover the top of the door to make a tight fit against the hoop. Just for fun, I added a planter to the door. To keep the door shut I added two slide bolts to keep the door shut when you are outside the run and one to the inside of the door to keep it shut when you are inside the run.
6. Unfortunately this is where my lack of carpentry skills comes in.... Build your coop. Yup... Sorry folks, thats all I can say about coop building. Its rectangular shape. One side will have a chicken door an the other side will have a human door. I put in a skylight opening for ventilation and added some more ventilation in the door. As far as how build your coop, I'm not skilled enough to show how. I chose to stregthen the hoop by using some 12ft 2x4's on either side of the coop lenthwise down the entire hoop.
7. Attach the last two cattle panels over the coop and attach them to the frame.
8. Attach fencing to the cattle panels. There is some debate as to what kind of fencing to use. Hardware cloth has smaller openings and stronger wire making it a better option. The only disadvantage is price. In my coop I had some left over chicken wire from another project and used both hardware cloth and chicken wire. I used screws and washers to attach the fencing to the frame and wire to attach the other end.
9. The canopy. I am using a technique I am stealing from another hobby of mine. I build skin on frame boats and am stealing the skinning part for my coop. Heavy and uncoated nylon or polyester are only available from two sources and both cater to boat builders. George Dyson and Spirit Line both offer uncoated fabric needed for this technique. I purchased 18ft of 8oz polyester and cut off 6ft. This 6ft was cut in half lengthwise and sew on to larger piece. This gave me a piece of fabric 12x7.5ft. This large piece of fabric is hand sewn over the hoop with masonary twine and a large needle normally used for knitting. Once tight, the fabric gets coated with polyurethane. Zar oil based exterior poly is the favorite amongst boat builders. At least three coats are needed to make it waterproof. I admit this is a very labor intensive technique. I'm using it because of my familiarity of it and it is a very permenent canopy. Since the coop has a sun roof and flat roof a solid leak-proof canopy is needed. I'm also hoping it will act as a greenhouse and help keep the coop warmer in the winter. So basically I'm hoping all the hard work will result in the best final product. The alternative would be securing a tarp over the hoop. I suspect most people would go with the alternative.
10. Shade cloth. During the summer shade cloth makes a major difference. Duriing the winter I plan on storing the shade cloth over the sun roof to help hold in the heat.
Pictures....
 flower box with dieing plants
  This is the best photo of the roof. It is under the shade cloth.
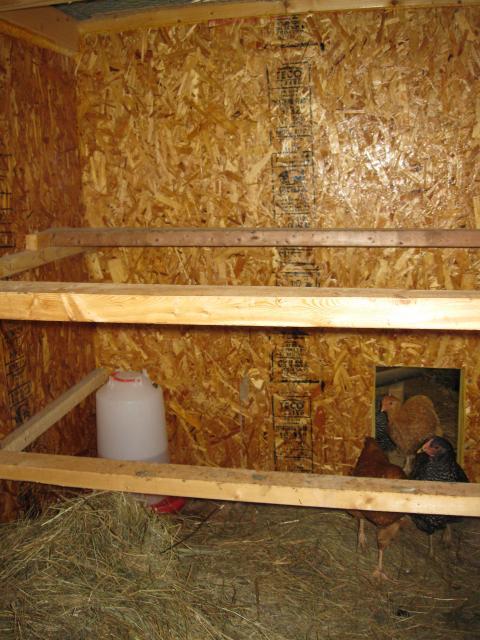
 next box from the inside
 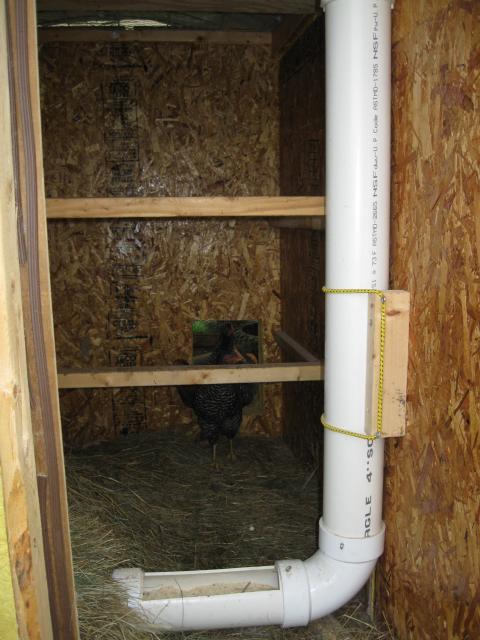 PVC pipe feeder
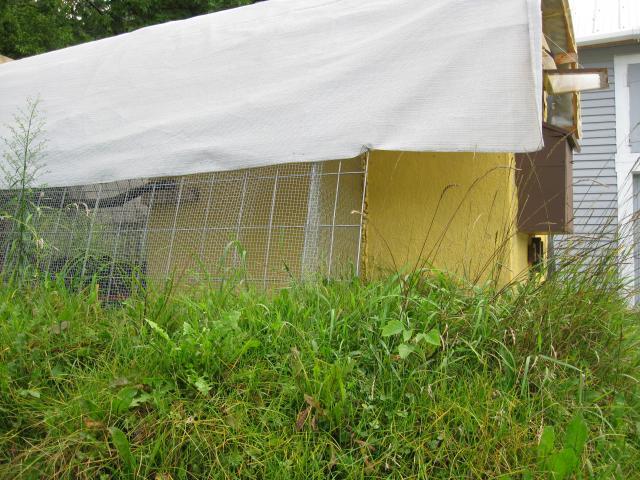

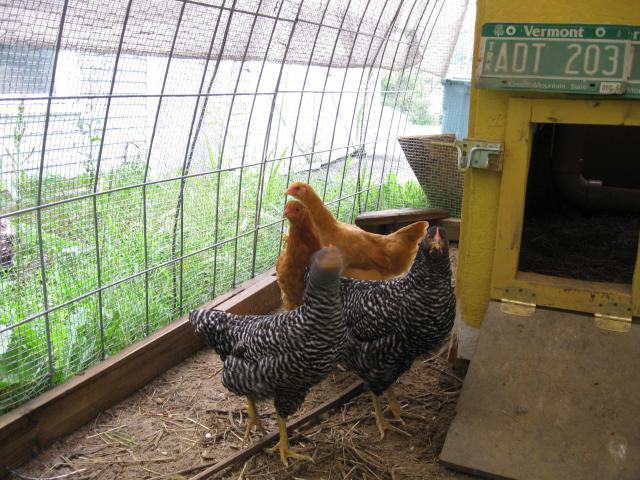 The Girls. Two Barred Rocks and two Buff Orphingtons.