Silk Creek Alpacas'
Homemade Incubator!!!
Homemade Incubator!!!
Well, Lilian and I have started building the incubator. We have it mostly done at this point, just don't have it all together. Here are some of the steps we have taken to build the incubator.
First off, an incubator is essentially a warm area that can keep a constant temperatur and steady humidity over time (21 days to be more precise). We could buy an incubator, but that would put us out anywhere from $100 - $2000+, and we don't want to do that so we decided to see what we could do a little bit more cheaply. First off we needed to get some supplies. The first thing (and fairly important item) is the ice chest. Any kind would do, so I put a posting out on the EugeneFreeCycle list that I was looking for one. I got two responses, one for a stryrofoam one and someone that had an old dorm fridge that doesn't work. I took both. We are going to use the stryrofoam one first as it is easier to work with, and then if we like incubating, we will transform the fridge in to one later. The ice chest is perfect, it is a large one that is used by Omaha Meats. It is THICK and heavy, and is perfect. Thank you to Toni who met me yesterday to let me have this.
Item Cost: $0.00
Total cost so far: $0.00
Next we needed the parts to get the incubator warm, and to keep it regulated. For this we went to Home Depot and purchased a No. 8125 Water Heater Thermostat

Total Cost so far: $7.57
Next we needed a lamp kit, so we purchased the Make a Lamp Kit at Home Depot since this not only had the lamp, but also the wire we would need. It was also cheaper than buying the parts separately.

Total Cost so far: $17.54
We will also need a fan to keep the air moving in the incubator. We have been keeping the old PC we purchased about 11 years ago for the girls. It hasn't worked for about 6, but we've kept it around. We took it apart and took out the power supply fan.

We also took out the cpu fan but I think this will be too small.

Total Cost so far: $17.54
Here is everything:

We'll also need a transformer to run the small fan, but I think we have one around that we are not using anymore so, our total cost will be (before we get eggs)
$17.54!! Not bad.
We'll be adding some hardware cloth for protection and a tray, but we have a large roll out in the shop that we can use.
I am currently using our remote Oregon Scientific thermometer to keep track of the temperature and humidity in the incubator.
HOOKING IT UP!!
We now needed to wire the light & thermostat. I had found some diagrams online at the BackYardChicken Forums (trust me, do not go to BYC unless you want to start having chickens, they are a bunch of enablers over there!! I started off only wanting 3-4 chickens, now I have 12 on the way and I'm building an incubator!!! Nuff said!!
") ). BYC has been incredibly helpful in building this incubator. I have taken the design from many of the posters over there.
). BYC has been incredibly helpful in building this incubator. I have taken the design from many of the posters over there. The thermostat will control when the light turns on and off, so I have wired it so the power goes through the thermostat.


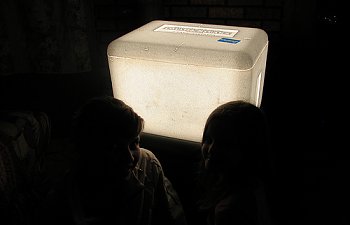
Well, IT WORKS!!!! Here is Lilian & Aislyn in front of the Great Glowing Incubator!!


") ). All in all I think Lilian and I did a pretty good job!! [/FONT]
). All in all I think Lilian and I did a pretty good job!! [/FONT][FONT=georgia,palatino]UPDATE AND COMPLETION OF INCUBATOR [/FONT]
Item Cost: $12.00
Total Cost so far: $29.54

Item Cost: $0.00
Total Cost so far: $29.54
I did this for 2 reasons. First was to cover up the exposed connection of the wires. It worried me a little bit. They are still slightly exposed (and I've been thinking of covering the box with some hardware cloth to protect it more) but not as bad as they were. Also, some reading I've done (and I'm sorry to the person who mentioned this before, but I don't remember where I read it), people have said that the hot water heater thermostat isn't really designed to test the ambient temperature, but the temperature of the water tank so attaching it to a metal box, will help regulate the thermostat some more (maybe, but that's the story I'm sticking with, I don't know anything about this stuff!!)
Here are some more pictures: 

Item Cost: $00.00
Total Cost so far: $29.54
I cut out a tray for the eggs to sit on so they are raised off the floor a little bit. I also added a wall between the tray and the light/fan side of the box to protect the chickens when they hatch so they won't go near the fan, water or light.


 (wish we had orange tape, but we only had old siver.
  )
) Item Cost: $00.00
Total Cost so far: $29.54


 [/FONT]