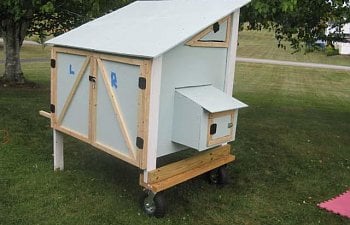
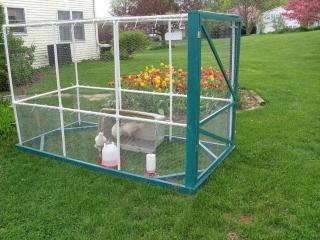
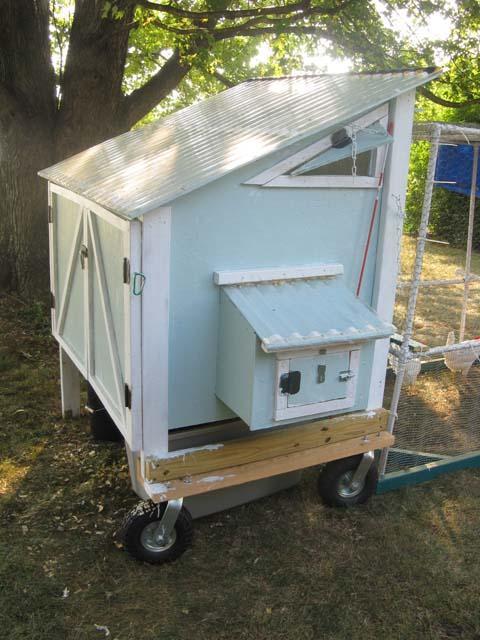
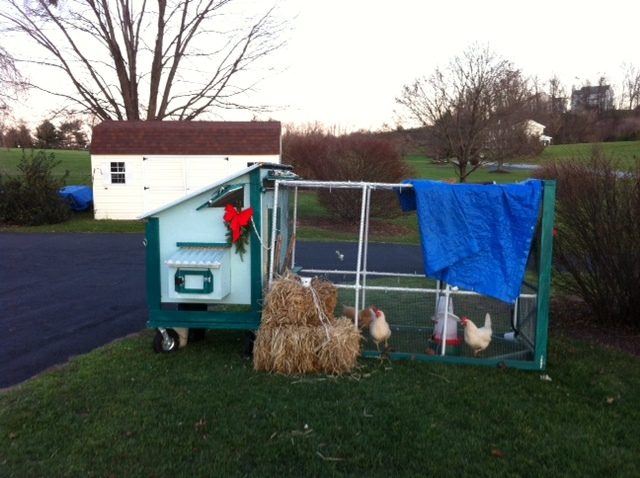
Drumroll, please, here's my coop! The chickens think it's done. They seem pleased with it.
Well, the coop is livable, but I'm still puttering with it. One of these days, I'll finish painting all the trim and replace the tarp with lovely green shade cloth, framed in a respectable-looking, removable way. Ok, I admit it. This thing will never be done. Guess having chickens will supply me with a life-long project!

Here's my story:
My chicken adventure began with a lesson in chicken math. I went to TSC for three chicks, and came home with the minimum of 6.
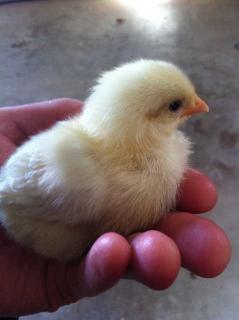
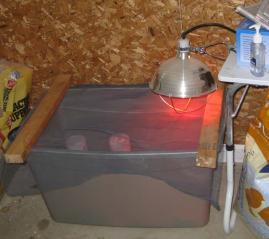
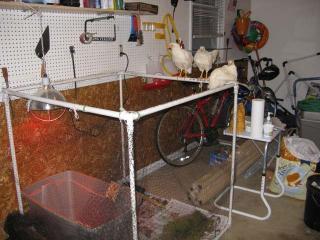
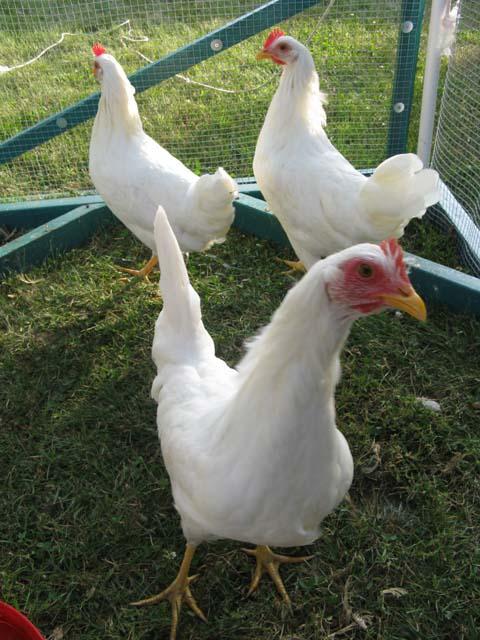
I quickly upgraded my brooder from a cardboard box to a rubbermaid tub. The chicks were five days old when they came home with me. I think they are Tetra Tints based on the recent deliveries at TSC. I don't know much about them, but a Tetra is produced with some kind of a cross with a white leghorn.
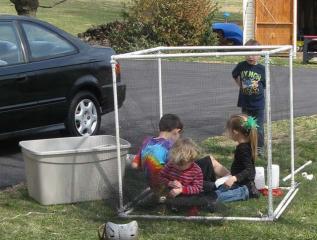
We had an unseasonably warm day when the chicks were 1.5 weeks old. I took them outside in a mini-run to enjoy the sun. My two boys and some neighborhood friends got a chance to baby the little chicks.
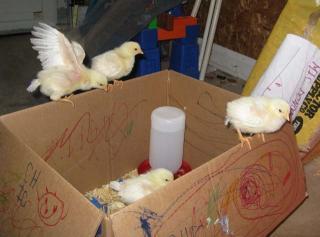
At two weeks old, the girls were hopping out of the box that I kept them in while I cleaned their brooder. It looked like they were going to need more space again soon.
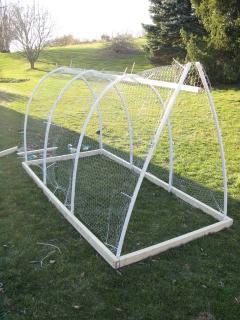
I worked on their hooped chicken run. I was planning to use it to expand the brooder space in my garage. The girls really needed a chance to stretch their wings. I figured when it got warmer out, I would move the run outdoors. It will be attached to a (future) tractor-style coop and move around the yard with the hens. Unfortunately, our cold Central PA weather didn't work out with hoops and pipes. The pipes burst on me, and I needed to re-design.
While I reconsidered the permanent chcken run, I revamped the mini-run to expand the brooder space. Around the same time, I found a home for three of the chicks. The three chicks who are left with me have plenty of space (for now).
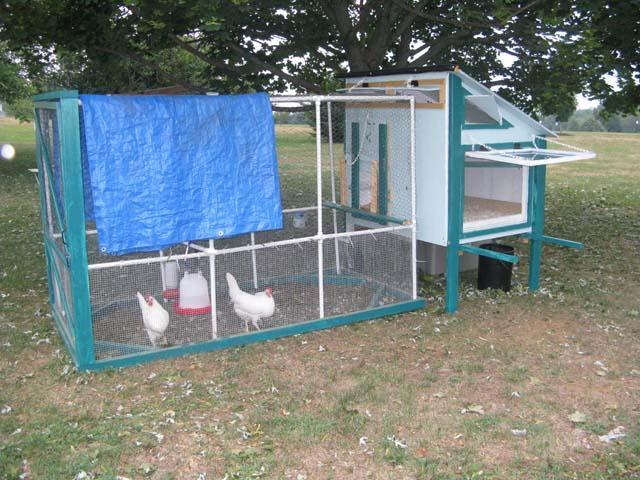
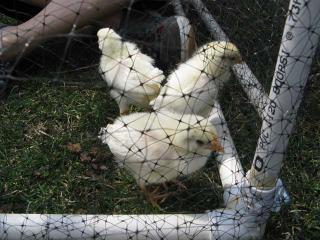
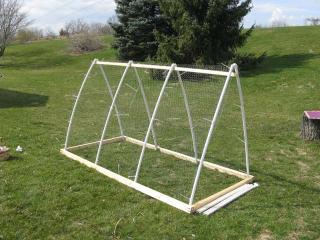
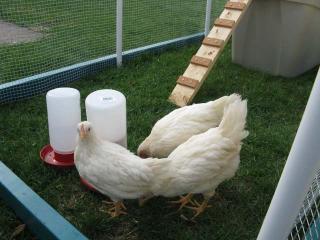
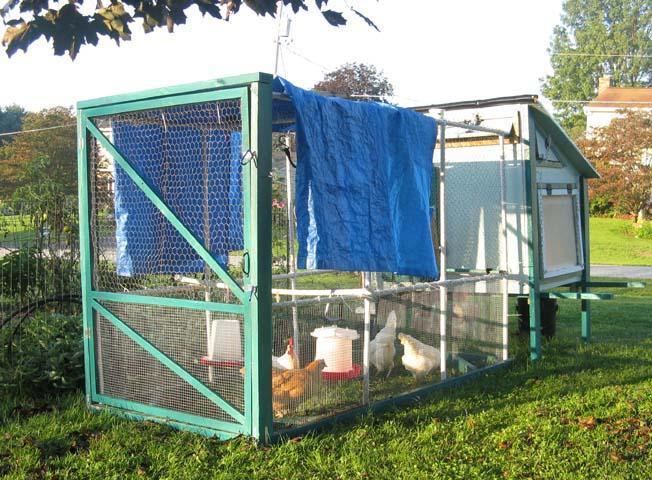
When the chicks were 5.5 weeks old, the run was done enough for the girls to go outside on nice afternoons. The run measures 8x4. It is 5' tall. The wood includes 2x3's on the bottom, and 1x2's on the door. The pipes are 3/4" wide. The pipes are secured to the wooden frame with screws, and use pvc connectors everywhere else. Most pipe connectors (T's, X's) are readily available at hardware stores. I ordered the 4-way connectors from an online greenhouse supply company. I used 1/2" hardware cloth for the bottome 2' and poultry wire for the roof and top 3'.
They enjoyed their outside adventure, but were happy to snuggle together when they got back inside the garage.
When the chicks were 6.5 weeks old, I finished the run, adding diagonal corner supports and a door frame. Now my chicks go outside (in nice weather) during the day. At night I carry them back into their bedroom in the garage. When the chicks started roosting on top of the bedroom walls, I had to add a roof. Gee, won't it be nice when their permanent coop is done?!! We'll be able to put the car back in the garage, and the chicks will be able to march themselves into their own beds...
Coop construction is going rather slowly. I've been piecing some things together in the spare 20 or 30 minutes I get in a day. I managed to make the floor frame and the ceiling frame out of 2x4s. I also cut the plywood.
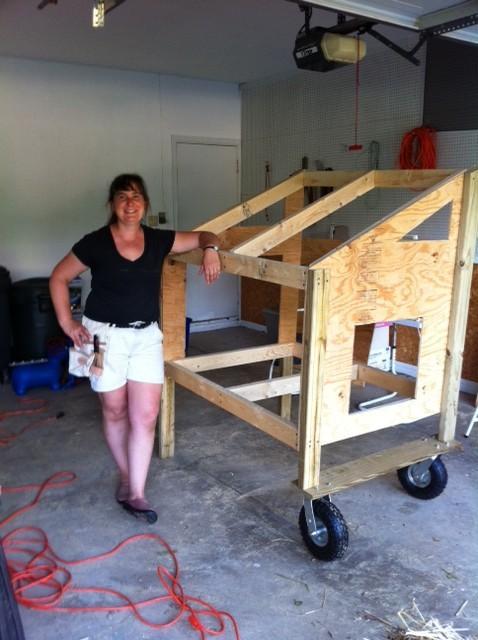
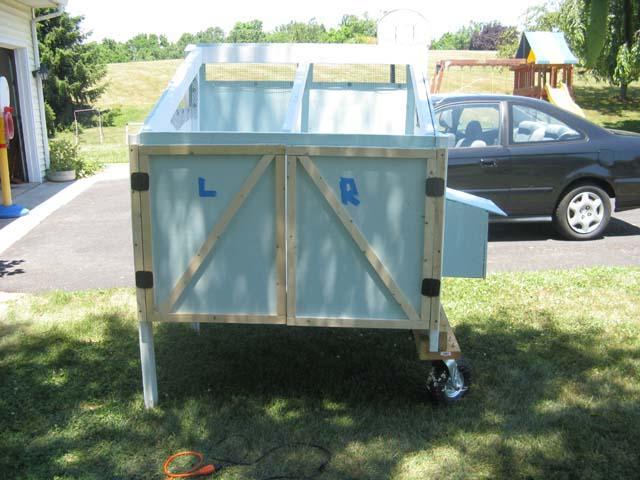
Then Grandma came out to babysit, so my husband and I could work together for a couple afternoons. What luxury! The coop is now taking shape in 3-D. The wheels are from Harbor Freight. They are 10 inches, and swivel. Don't look too closely at the wheels in this first photo. They fell off (twice) before I found a way to secure them properly.
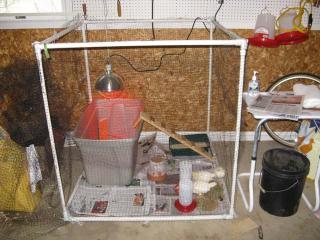
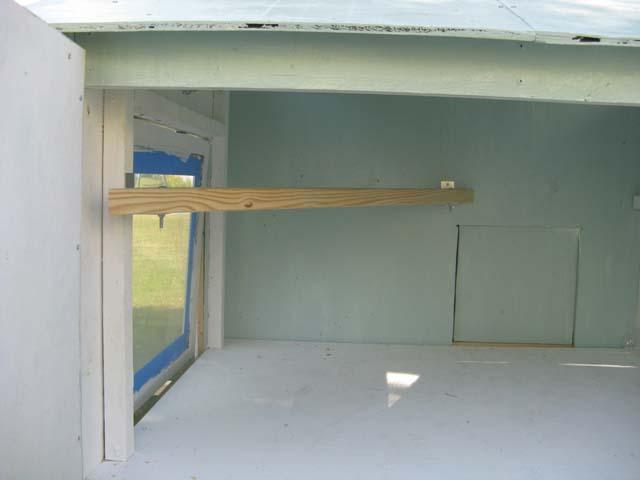
I've been putting the nest box together. It will have a little door on the side instead of a lift-up roof. I want my young kids to be able to reach it, and I read it was easier to weather-proof this way. Since I struggled to find details for how to do this, I took a minute to take some photos for my coop page.
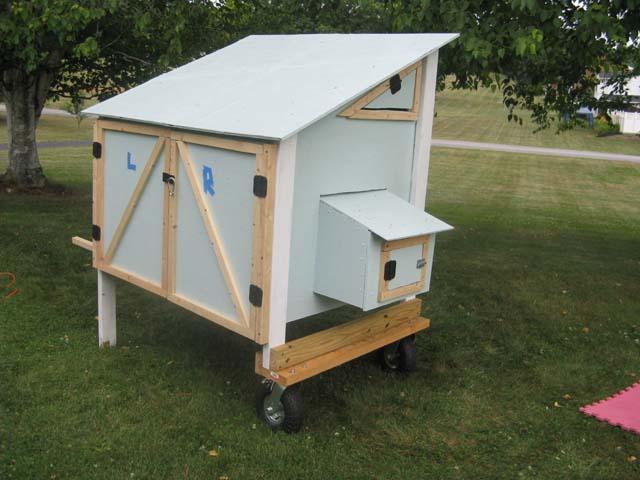
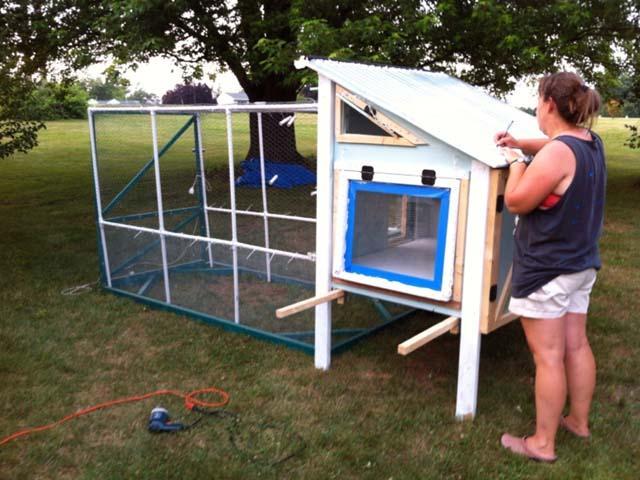
Although the wheels fell off (twice) I've been making some more progress. Now the nest box is attached, the hardware cloth is installed in the vents, the chicken door is mostly done, and some of coop is painted. My 3 year old son, Christopher, loves pretending to be a chicken.
Still TO DO: frame and attach cleanout doors, attach window and trim, add hardware cloth behind window, add a board to the bottom of the chicken door to prevent it from slipping inside coop, attach vent covers and trim, attach nest box door and trim, build roof, attach roofing to nest box, build roost, prime and paint all un-finished pieces, build docking station to connect coop and run, figure out a poop board, add handles to move the coop wheelbarrow style, and hang the feeders and waterer. Oh, and I also have to re-build the people door's frame on the run since it was damaged by a strong storm in May. Grandma's coming to the rescue again this week, so I hope I can knock the rest of this out by Sunday. The chickens will be 16 weeks old tomorrow 6/28. They will be laying soon!
I'm working to shrink that TO DO list while the boys are at Grandma's house. Now I have doors:
I'm getting closer. Now I have vent covers, a nest box door, "wheelbarrow" handles, and the plywood part of the roof.
Some details that I like:
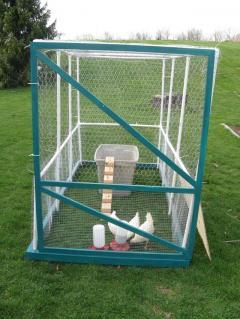
Even closer. The roof is done. It's clear polycorbonate roofing, with a black rain-gutter tube filled with "good stuff" sealant protecting the top edge. The docking station is functional (if not quite finished).
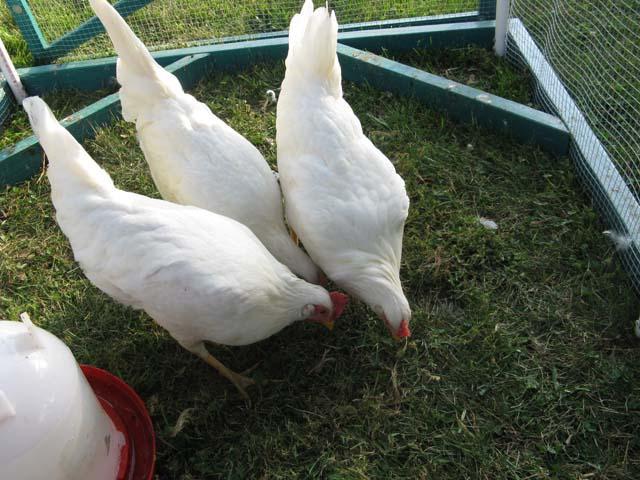
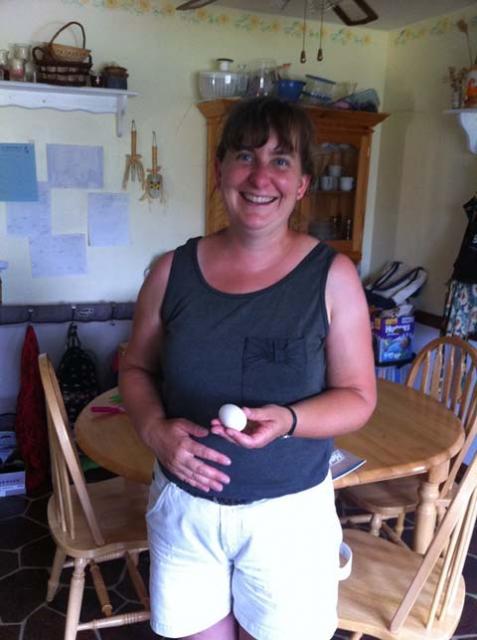
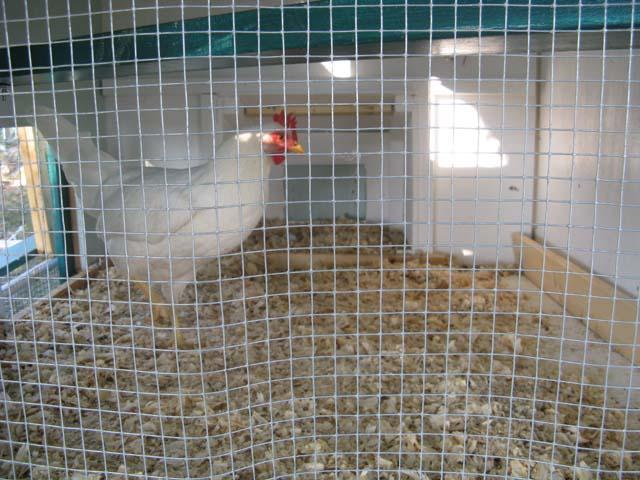
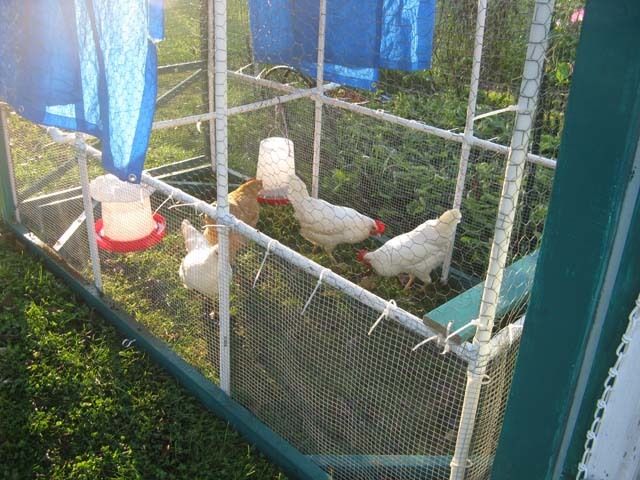
Since the inside of the coop was technically finished, the chickens moved in for the 4th of July fireworks. One of my hens is laying eggs now! She laid the first two eggs in the run this weekend before I had the coop built. Luckily, when one of her sisters started laying, she laid in the nest box. Now they all copy her and lay in the right place.
My little whipper-snappers were caught red-handed after they gathered a red egg from the nest box. Is it Easter yet?
Since, I'm calling this coop "done", here are some final photos of the coop from different angles. A couple of these photos are originals, as of 7/25. Since then I've done some painting and added a door frame to the run. Otherwise, not much has changed.
Two hens just didn't feel like enough. Instead of buying just one more lonely bird, I bought two new pullets so that they could keep each other company. I worry a little bit about having enough space for four girls. I always planned so specifically for three. I (gasp) ignored all the warnings about chicken math. We shall see how it goes. If they are too cramped, I'll just have to make more space. Maybe even something more permanent than this mobile setup I have now.
Here are my two new girls. I bought them from fellow BYC'er Moonkssd. They are about 17 weeks old (on 8/21). We re-named the Buff Orpington Peanut and the Amber Link is Fluff. This is their temporary quarantine quarters in a section of my vegetable garden. The outside fence is welded wire. Inside is poultry netting. I finally see our recent hail storm as a good thing. It knocked out all my zucchini. I only had to dig up my onions, and sacrifice one tomato plant to make room for the new pullets. I have their bedroom set up in the garage. I plan to introduce these girls to my flock in a couple weeks.
Everyone's pretty much settled in together now. I combined the flock after 2 weeks of separation. The new girls are not yet laying (They are 22 weeks old today 9/26). The older girls have resumed their laying. We had some weird-ness in their laying when the new girls moved into our yard. One hen stopped laying altogether, and we were getting a bunch of soft-shelled eggs from the other. Thank goodness things are back to normal. I was second-guessing every move I made for a while. I didn't really think it would be so stressful to have new sisters.
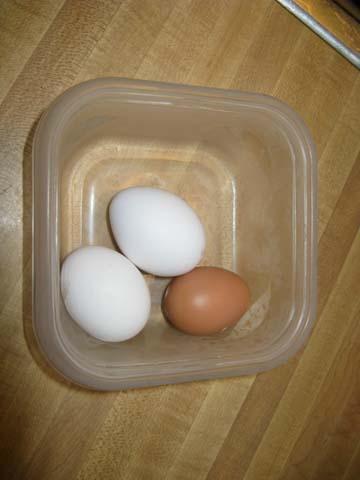
Here are the first eggs from my new chicks. I was so excited by the first brown egg. And then I was excited all over again by the first cream egg. I had expected my Amber Link to start laying before my BO. For a while, I thought she had started laying a white egg (and I thought one of my tetras had stopped laying) because I was getting pullet-sized white eggs. I was overjoyed to see the first cream egg. That meant EVERYONE was laying. Woo Woo!
Peanut Butter Cup and Fluff would like to sleep in the cool breeze. Every night I come out to close up the coop. This is what I find. They mutter amongst themselves as I gently persuade them to go inside for the night. Only one of my hens (Polly, the top girl) sleeps on the roost in the coop. The others cuddle together on the floor. Unfortunately, at least one usually ends up in the nest box. Right now, I'm just cleaning it out daily. Someday maybe I'll come up with a better solution.
I've been spending some time winterizing the coop. Nothing in my coop is quite "tight" and I'm trying to reduce the drafts. I was foolish when I attached my vents. Finally, I realized why everyone's coop looked different then mine. My trim was in the wrong place. It should have been used to cover up the cracks betwen the triangle and the coop.
Freak snow in October.
More winterizing (after the first snow. oops)
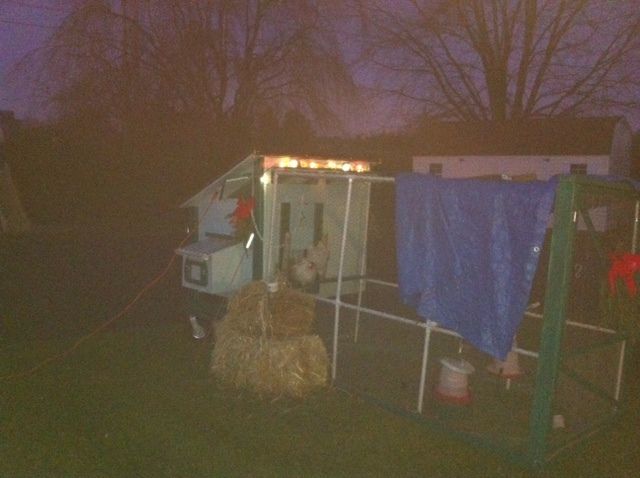
Christmas makes me smile. I hooked up a heated dog bowl to keep the water from freezing in this first December cold spell. It's been cold at nights, but this is the first weekend that was supposed to stay freezing all day. Well, with electricity going to the coop, there was only one thing to do:
Well, I found my limit. I was planning to only use the garage as a last resort in a blizzard, but I do have a heart after all. Last night was COLD. Single digits with gusty winds. I'm glad I sized and located the coop to have this option.
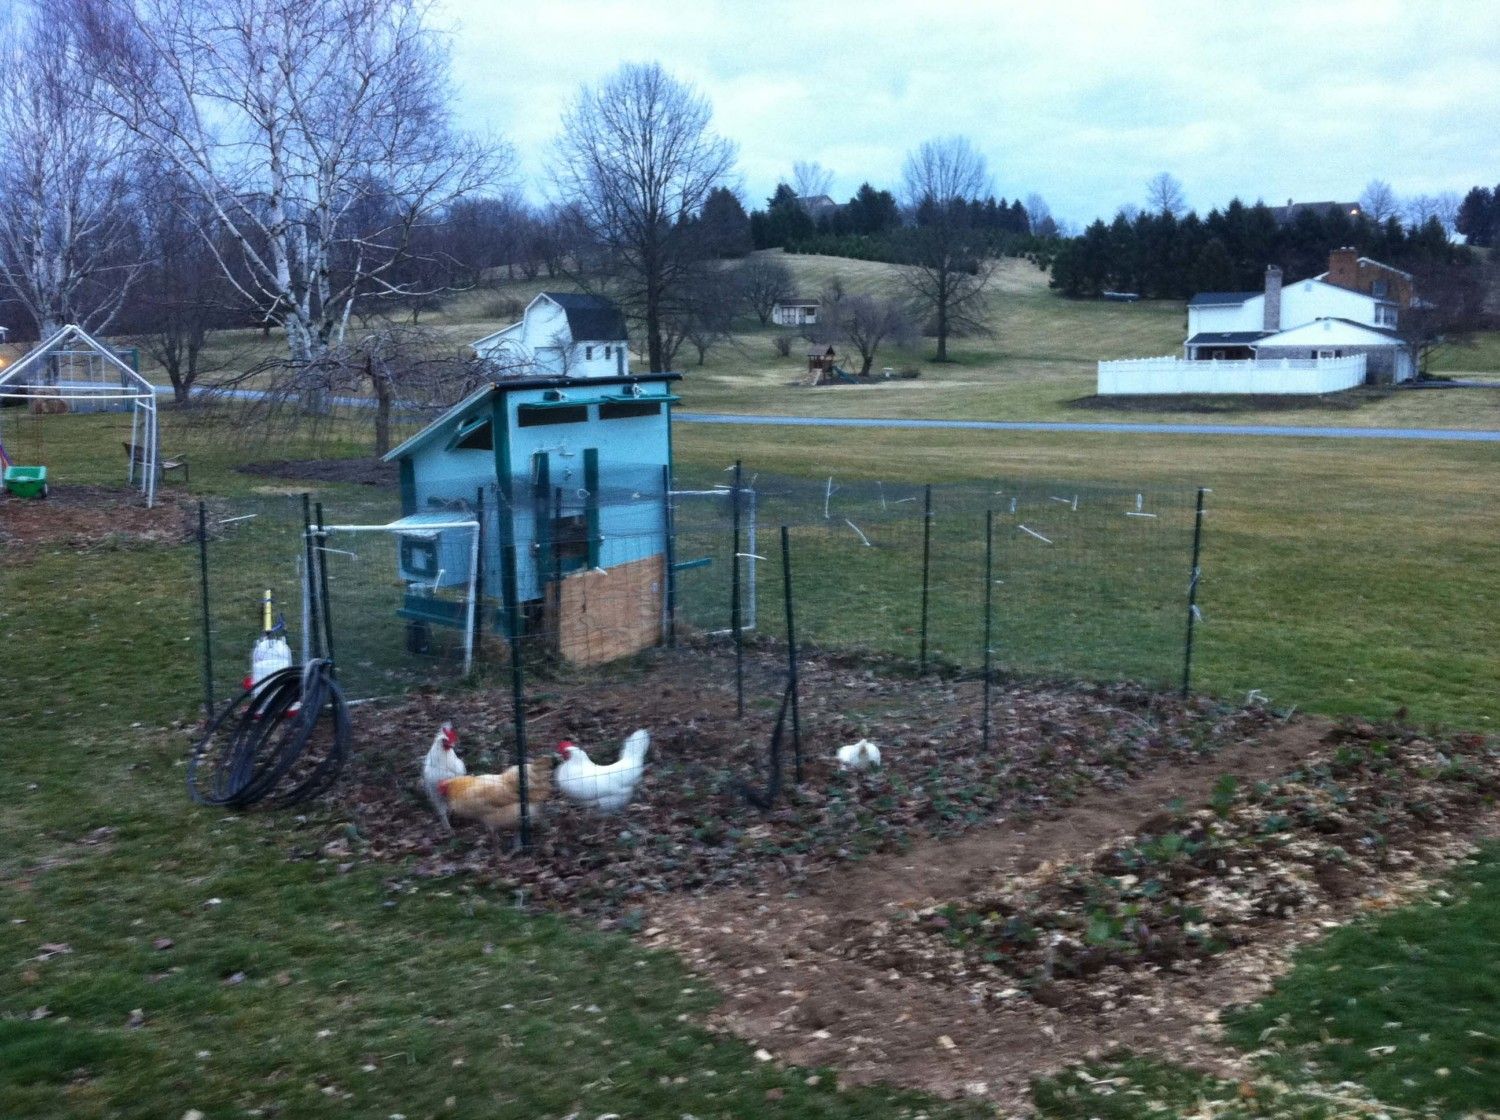
After a winter of hanging out close to electricity, the girls are on the move again. It's mid-March. They are taking up temporary quarters in my garden. I'm hoping to have them fertilize, eat weeds and weed seeds, and til in some compost for me in the next 6 weeks before our frost-free date in May.
3/7/2013
Nothing brings you back to backyardchickens.com like new baby chicks. I've been away for a long time. My chickens have become a part of my life. I love to get outside each morning to greet them. They are my calm when my children are my chaos.
Changes to the flock include losing deer Peanut Butter Cup in the fall. We're not sure why she died. She was just sick one morning, and didn't make it. I miss her. She was always the gentlest of them all.
But here we are in the Spring. And two new chicks are finding their way into my heart. Sunshine is a Buff Orpington and her buddy Night is an Americauna. Here they are as they looked yesterday - fresh from the pet store.
Still TODO: I still have to paint the trim and some other outside pieces.I have some work left to secure the docking station and lock the pop door. I need to replace my ugly tarp with shade cloth. I want to add some kind of a pulley system to make the pop door easier to open and close. I need to do some more winterizing - rectangle vents, nest box door, window, cleanout door. I need to add a board across the cleanout doors to secure them better when they are locked at night. I need to add additional roosting space for the new chicks. I need to add a window box. I need to expand the run for 5 hens to hold the new chicks when they grow. Somehow I envisioned having a grand celebration when the coop was done. I guess I still hope to be done some day...
Biggest mistakes so far:
1. Oops, the pvc pipes in my hoop-style run run burst in cold weather.
2. Oops, I tied a tarp to my run. A strong storm took it airborne, and crashed it back down. I was left with a broken door and broken door frame.
3. Oops, the chicken door is too low. I had wanted it to match up with the 2' part of the run. I wanted to connect the coop/run with a chicken door that hinged down into the run like a little chicken ramp.
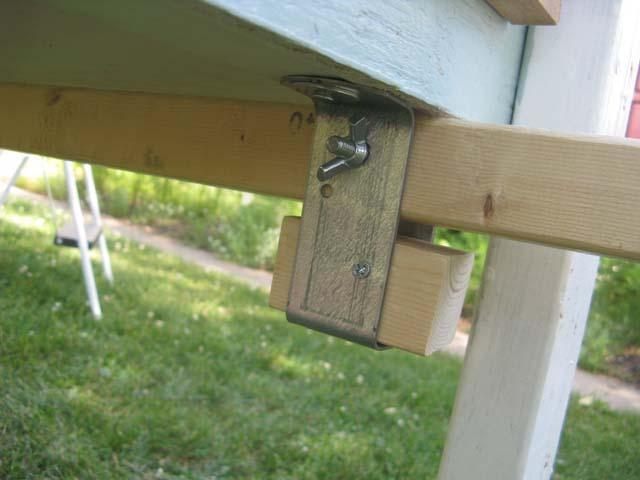
4. Oops, the wheels fell off (twice). Finally I listened to dogfish's advice and added horizontal support.
5. Oops, forgot about the bedding. Everything is built too close to the floor. I'm adding parts to hold the bedding in as best as I can.
6. Oops, there is no room for an arm to open the pop door, and the magnets don't hold the run and coop together very well. I really need a pulley system or something for the pop door. And I need a better way to connect the run and coop (while leaving me room to close/lock the pop door at night).
7. The chickens should not be in the run if the door is not secure. I lost Cathy when a dog attacked. The door was not secure, and the chickens ran out of the run where the dog caught and fatally wounded one hen.
8. Oops, the trim was in the wrong place. I built the vents and nest box door with trim attached to the coop. I hinged the plywood I had cut out of the coop onto the trim. This gave me a little more space to allow the plywood wiggle room to open and close. Oops. It also left cracks around the plywood. Come winter, I worried about drafts. I had to take these pieces apart, trim the plywood pieces so they'd fit back into their original holes, and attach the trim to the plywood so that it would cover the cracks when hinged to the coop.
Well, the coop is livable, but I'm still puttering with it. One of these days, I'll finish painting all the trim and replace the tarp with lovely green shade cloth, framed in a respectable-looking, removable way. Ok, I admit it. This thing will never be done. Guess having chickens will supply me with a life-long project!
Here's my story:
My chicken adventure began with a lesson in chicken math. I went to TSC for three chicks, and came home with the minimum of 6.
I quickly upgraded my brooder from a cardboard box to a rubbermaid tub. The chicks were five days old when they came home with me. I think they are Tetra Tints based on the recent deliveries at TSC. I don't know much about them, but a Tetra is produced with some kind of a cross with a white leghorn.

| 
|
| 
|
I worked on their hooped chicken run. I was planning to use it to expand the brooder space in my garage. The girls really needed a chance to stretch their wings. I figured when it got warmer out, I would move the run outdoors. It will be attached to a (future) tractor-style coop and move around the yard with the hens. Unfortunately, our cold Central PA weather didn't work out with hoops and pipes. The pipes burst on me, and I needed to re-design.
| 
|
When the chicks were 5.5 weeks old, the run was done enough for the girls to go outside on nice afternoons. The run measures 8x4. It is 5' tall. The wood includes 2x3's on the bottom, and 1x2's on the door. The pipes are 3/4" wide. The pipes are secured to the wooden frame with screws, and use pvc connectors everywhere else. Most pipe connectors (T's, X's) are readily available at hardware stores. I ordered the 4-way connectors from an online greenhouse supply company. I used 1/2" hardware cloth for the bottome 2' and poultry wire for the roof and top 3'.
| 
|
| 
|
| 
|
Sides: 4' tallest side 3' wide 25° angle | 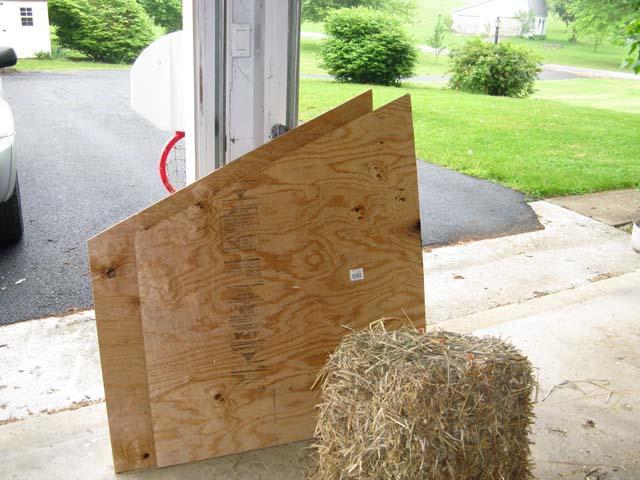
| Floor: (4x4) | 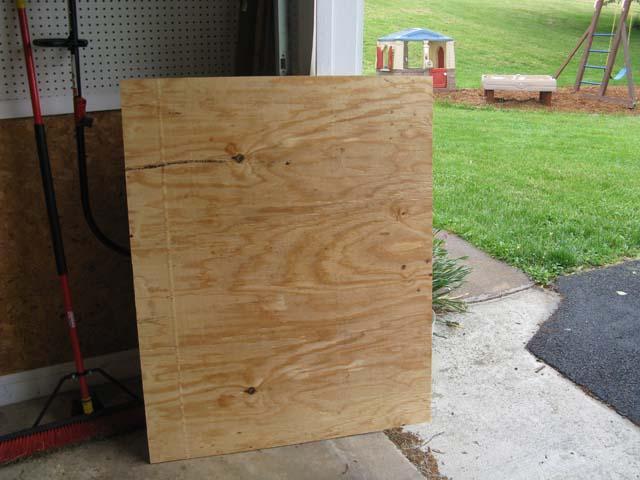
|
Tall Wall: (4x4) Chix door will go here. | 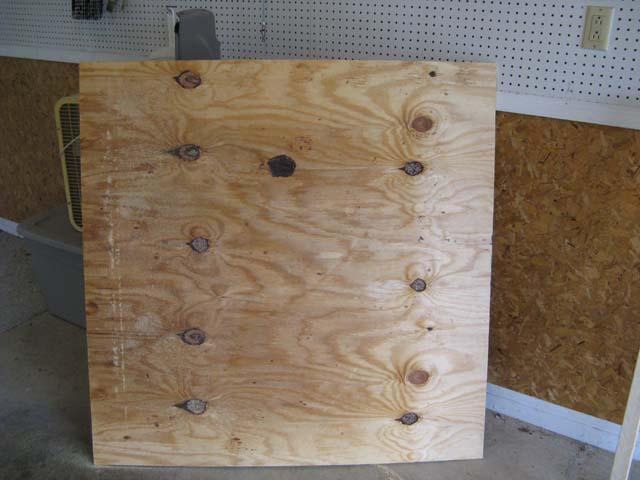
| Short Wall: 2 (2x3) These are the cleanout doors | 
|
I've been putting the nest box together. It will have a little door on the side instead of a lift-up roof. I want my young kids to be able to reach it, and I read it was easier to weather-proof this way. Since I struggled to find details for how to do this, I took a minute to take some photos for my coop page.
| Flat: | 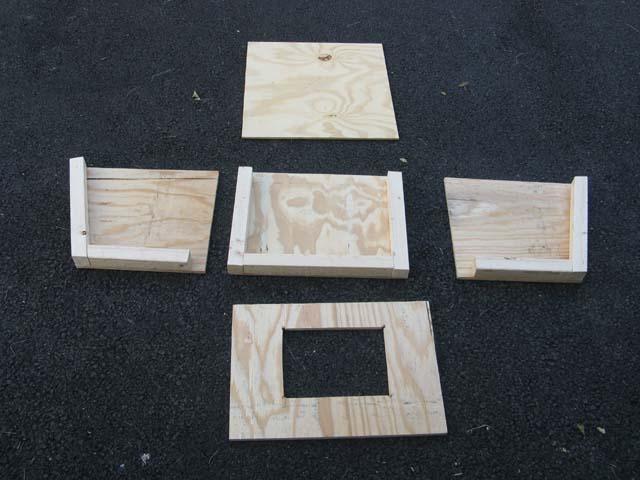
| ||
| Sides Up: | 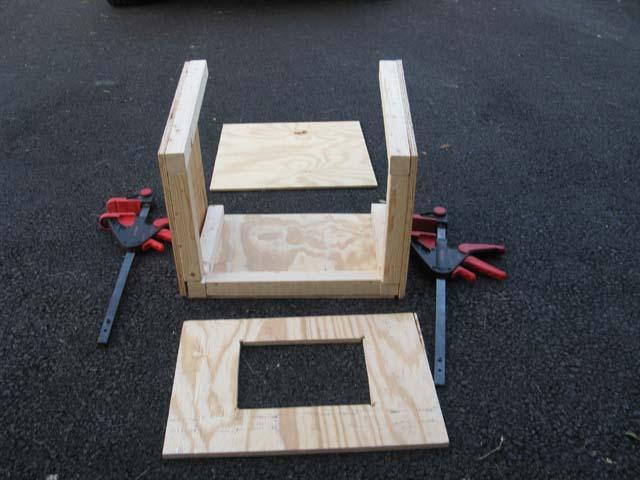
| Same layout from the side | 
|
Front Up (Door will go here) | 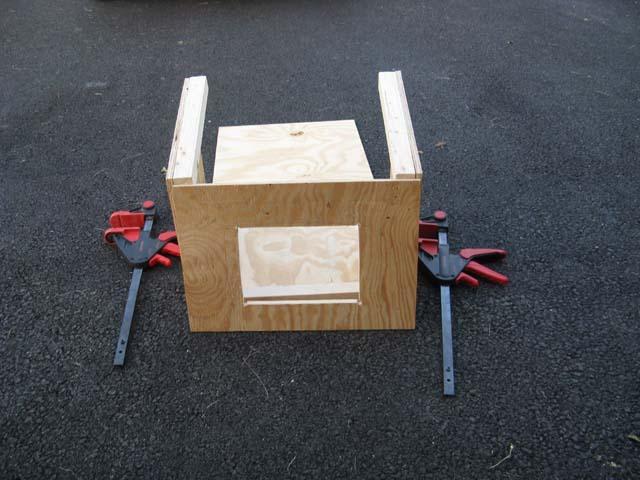
| ||
Roof on | 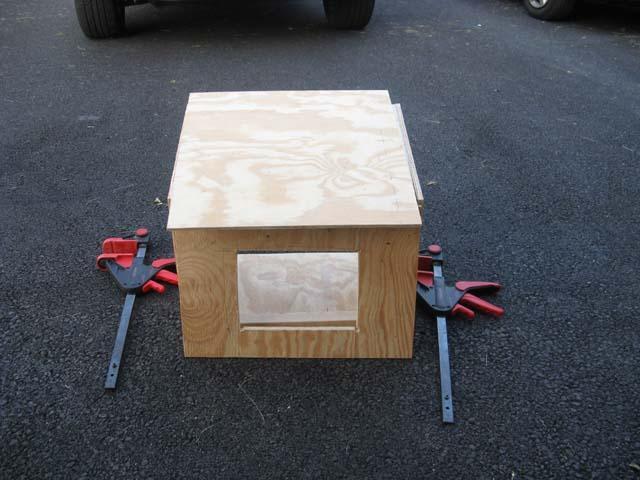
| Same layout from the side | 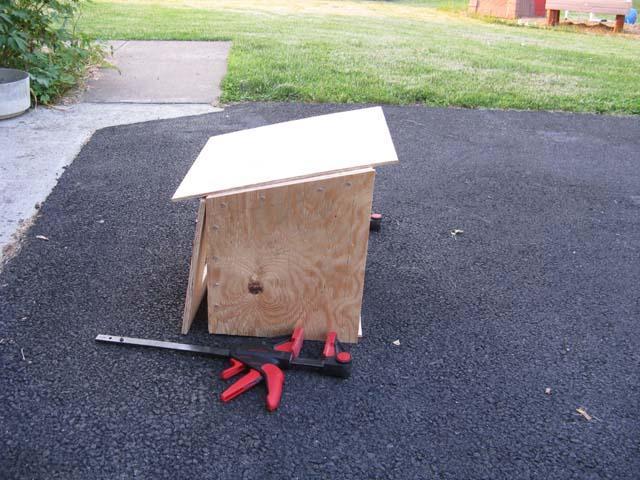
|
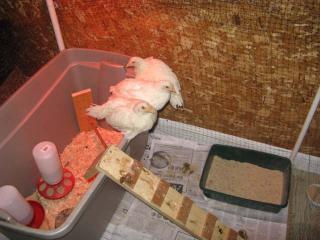
Although the wheels fell off (twice) I've been making some more progress. Now the nest box is attached, the hardware cloth is installed in the vents, the chicken door is mostly done, and some of coop is painted. My 3 year old son, Christopher, loves pretending to be a chicken.
Front of coop - Chicken door | 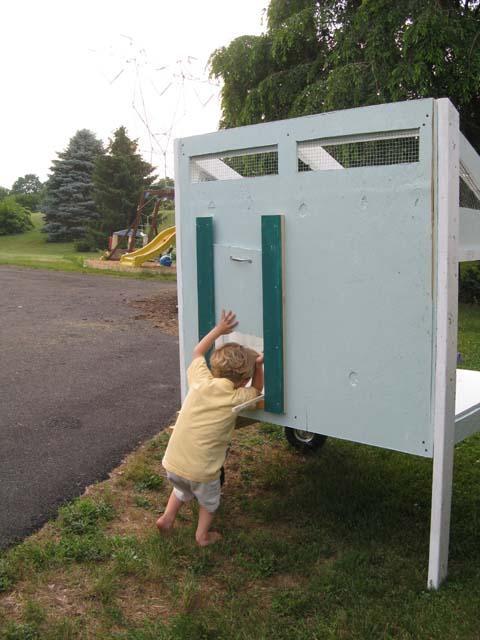
| Back of coop - Clean out doors will go here. | 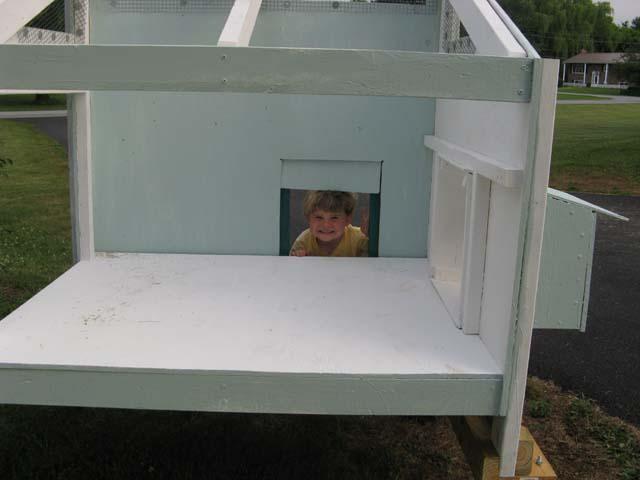
|
Right side of coop - window will go here. | 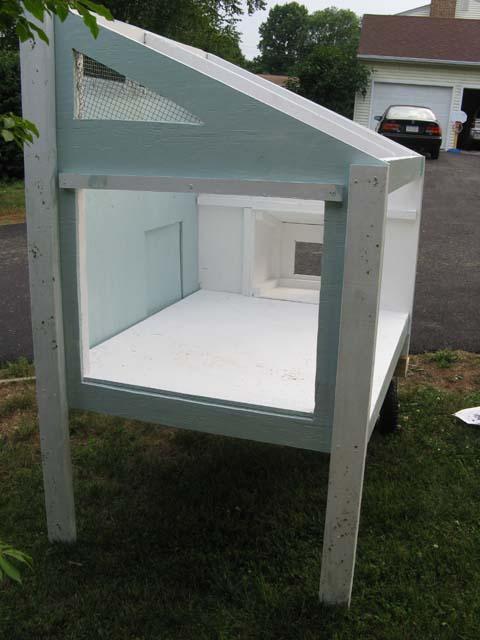
| Left side of coop - nest box | 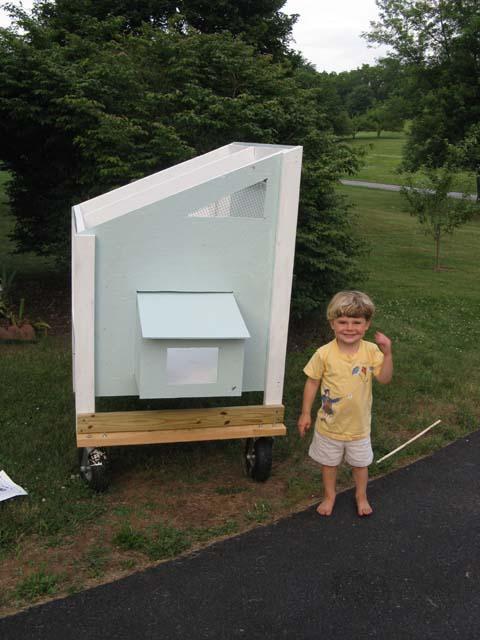
|
Close up of the wheels. Hope they stay on this time! | 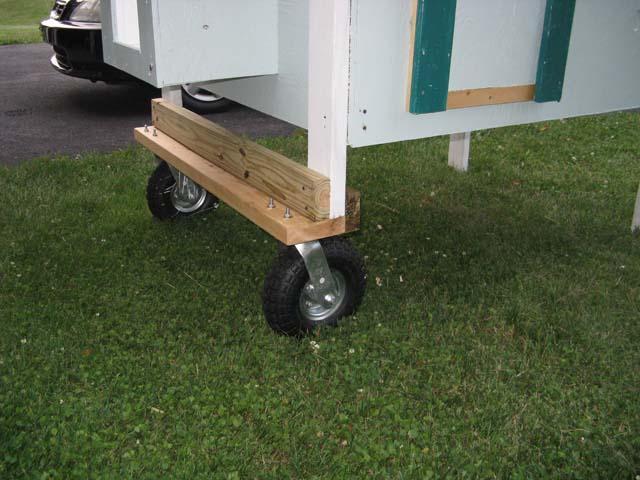
| Close up of the nest box from the inside. It's framed with 2x2s | 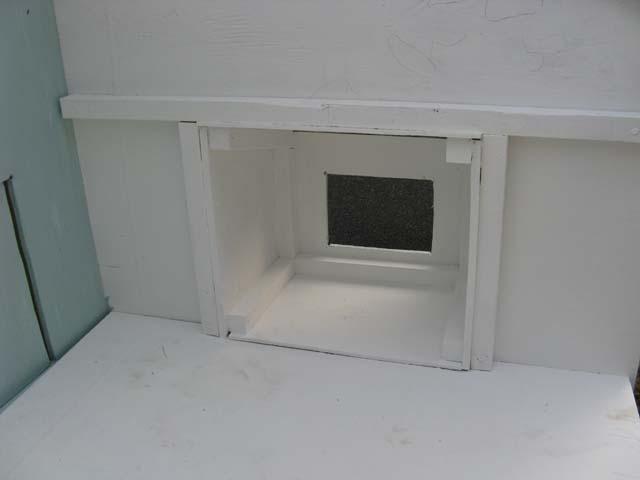
|
| Yum! Sunflower seeds are their favorite treat. | Checking out the camera. Is it food? |
| 
|
I'm working to shrink that TO DO list while the boys are at Grandma's house. Now I have doors:
I'm getting closer. Now I have vent covers, a nest box door, "wheelbarrow" handles, and the plywood part of the roof.
Some details that I like:
| 
| ||
| The roost is removable with a little bolt and wingnut | The "wheelbarrow" handles slide under the coop when they're in the way. I use bolts/wingnuts to adjust them. (No, I couldn't find the right size metal bracket. I ended up using 2x2 handles on a bracket built for 2x3's) |
Even closer. The roof is done. It's clear polycorbonate roofing, with a black rain-gutter tube filled with "good stuff" sealant protecting the top edge. The docking station is functional (if not quite finished).
| 
| ||
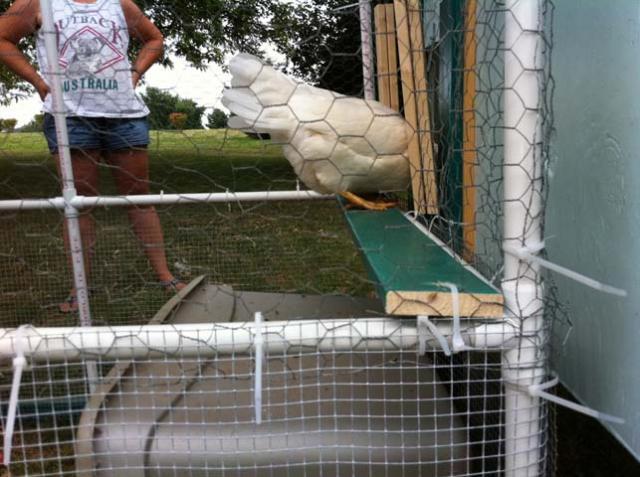
| I'm making my list for yet another trip to the hardware store. | Polly demonstrates how easy it is to jump up to the landing board and enter the coop through the chicken door. Phew, I was worried I'd need to build a chicken ladder. |
Since the inside of the coop was technically finished, the chickens moved in for the 4th of July fireworks. One of my hens is laying eggs now! She laid the first two eggs in the run this weekend before I had the coop built. Luckily, when one of her sisters started laying, she laid in the nest box. Now they all copy her and lay in the right place.

| 
| 
|
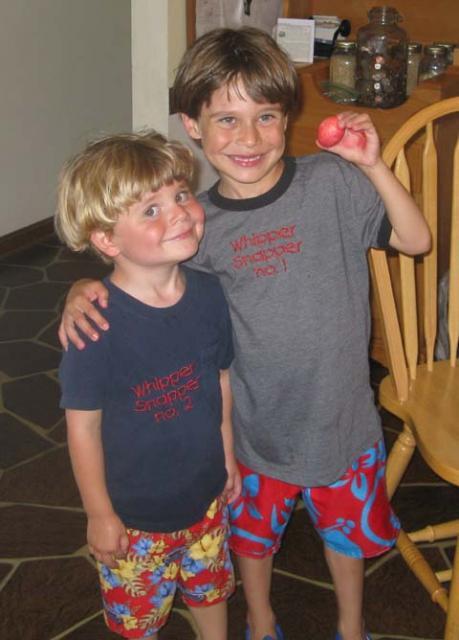
My little whipper-snappers were caught red-handed after they gathered a red egg from the nest box. Is it Easter yet?
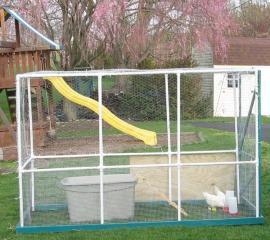
Since, I'm calling this coop "done", here are some final photos of the coop from different angles. A couple of these photos are originals, as of 7/25. Since then I've done some painting and added a door frame to the run. Otherwise, not much has changed.

The view from the nest box side. The tarp adds some shade, and protects the food from getting wet in rain. It is secured on top with a couple 2x4s. I learned my lesson about securing the tarp loosely. When I had the tarp secured with a rope through the wire, a stormy wind picked up the whole run, and crashed it. The door frame (and part of the door) broke apart from the force. | 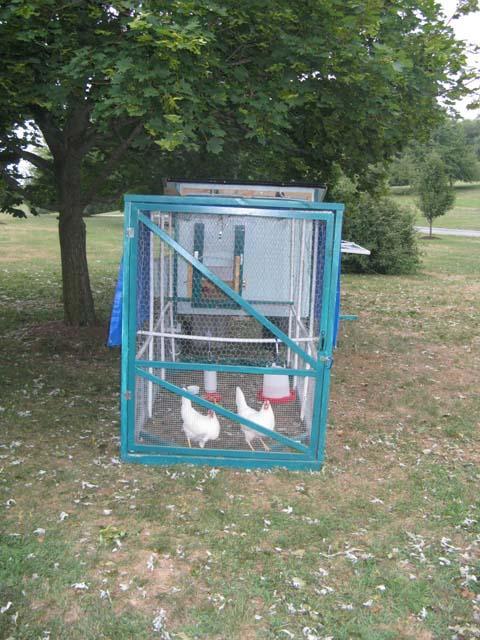
From the front. I hang the food and water from a little cross piece of removable pipe. This photo was taken after I re-framed the door. |
|
From the window side | 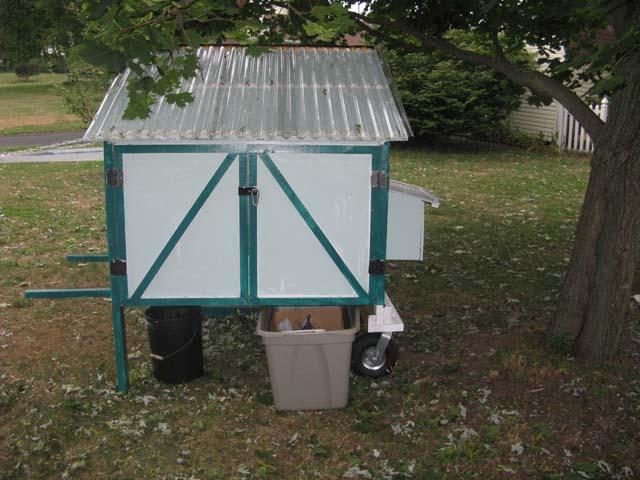
From the back. I store a bucket and cat litter scoop for cleaning under the roost in the morning. I keep grit, oyster shell, and a clean litter-carrying bucket in the rubbermaid tub. I'm thinking of moving the litter out here, too, but I'm afraid of critters. Probably a foolish fear. Right now, my litter and food is stored in the garage. |
Back again to the nest box side. At night, I lock the nest box with the grean clip that's hanging from the extra hook by the cleanout doors. During the day, we just use a slider to close the door. My boys love to go out to check for the eggs, and I want them to be able to open and close the nest box easily. | 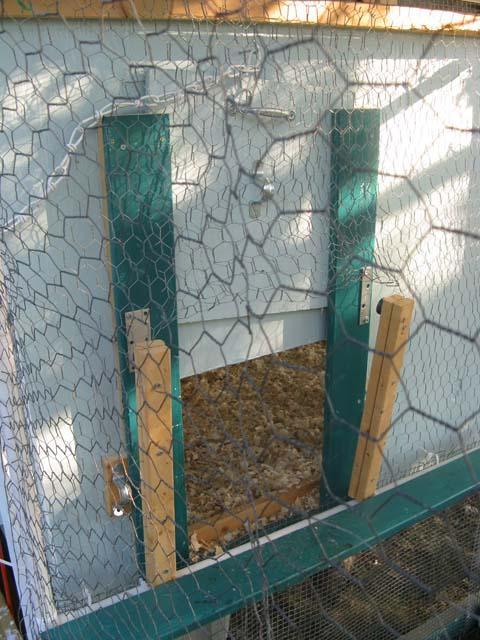
The docking station. Pop door in the coop meets up with the pop door in the run here. I'd like to think the magnets would hold the two together, but they don't really do that very well. This area still needs some work, but it does the job during the day. Thankfully, at night, I lock the girls up. Well, honestly, the "lock" on the pop door still needs some work. I push a stick through the little u-shaped pipe hardware to secure the door. I need to find a way to secure the stick, though. |
Inside the coop. This photo is taken through the window. You can see how I've added boards to try and keep the litter in. The boards are removable, so that helps me clean things. It's almost as if I planned them (instead of adding them after I noticed my big problem) | 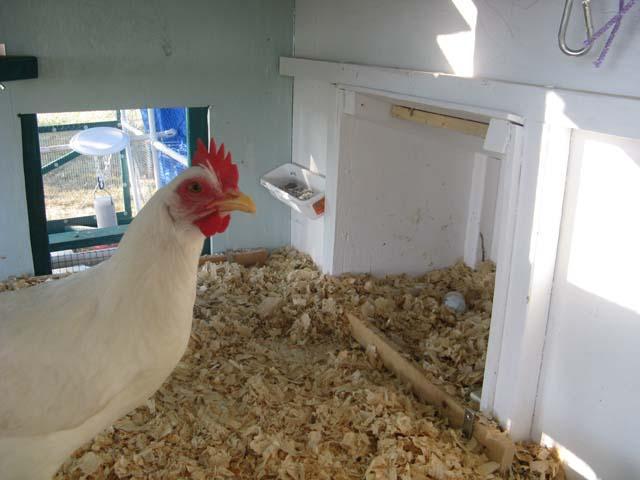
This is a photo taken from the cleanout doors. I have a little container of grit/oyster shell on the wall. Sometimes I hang food and water (both in modified chick-sized containers) overnight. They hang from the little clip with purple rope on the rafters. It's messy, so I usually keep the food/water in the run. I use it when it's really hot or I have a chicken-sitter opening the coop later than usual in the morning. |

This is where I keep my BOSS (black-oiled sunflower seeds) which is my girls' favorite treat. I toss some in when I visit, and at night to try to encourage them into the coop. We're still having issues with nighttime. I tell the girls to go sleep in the coop. They want to roost on the little cross-pipe that I use to hold the food/water in the run. One hen is cooperative. The others, I need to boost into the coop every night. Grrrr. At least I'm not carrying them into their bedroom in the garage anymore. But I'd like to stop boosting them every single night! | 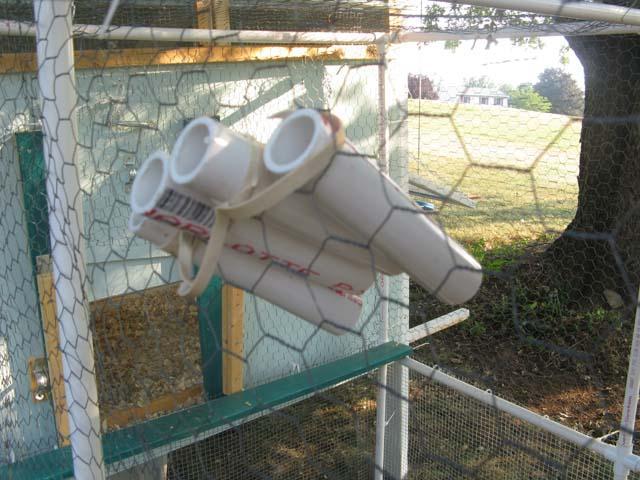
These are the treat-shooters my sons and their freinds use to give the chicks sunflower seeds. I just toss the seeds through the roof of the run, but my boys can reach. They like to angle the shooters so that the seeds land by their favorite hen. |
Well, it took a disaster, but I finally re-framed the people door. I had the pieces for the frame cut, primed, and painted over the weekend. Yesterday (8/2), I had a dog attack my run during the daytime. From what my husband told me, the dog bashed himself against the run. The run itself held, but was pushed into a slanted parallelogram shape. The people door no longer covered the opening, and two of my chickens ran outside of the run. One chicken found a hiding place in a forsythia bush. The other was badly wounded as she ran for cover under a holly bush. My husband chased the dog away. He thought dear little Cathy was dead under the holly bush. When he went to get her to burry her, she squawked to life. When I got home, I cleaned her wounds the best I could. She was standing, but not moving much. She drank only a small amount of water. She didn't make it through the night. So, now I've finally finished up that doorframe. Too late, of course, but hopefully the lesson has been learned. I still don't know if this setup will withstand another direct attack from a big dog, but it will be stronger this time. I wish I didn't have to learn things like this the hard way. | |
|
| |
Two hens just didn't feel like enough. Instead of buying just one more lonely bird, I bought two new pullets so that they could keep each other company. I worry a little bit about having enough space for four girls. I always planned so specifically for three. I (gasp) ignored all the warnings about chicken math. We shall see how it goes. If they are too cramped, I'll just have to make more space. Maybe even something more permanent than this mobile setup I have now.
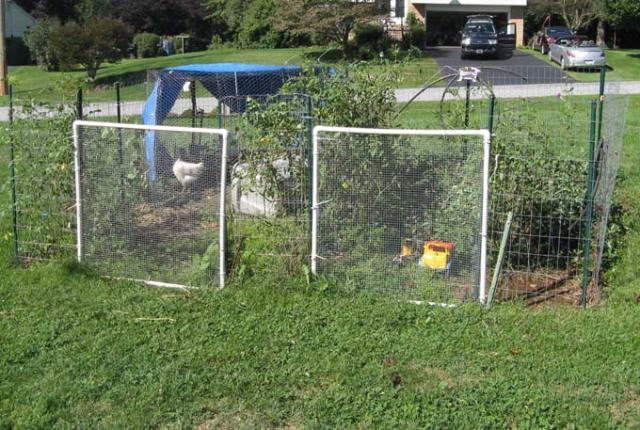
Here are my two new girls. I bought them from fellow BYC'er Moonkssd. They are about 17 weeks old (on 8/21). We re-named the Buff Orpington Peanut and the Amber Link is Fluff. This is their temporary quarantine quarters in a section of my vegetable garden. The outside fence is welded wire. Inside is poultry netting. I finally see our recent hail storm as a good thing. It knocked out all my zucchini. I only had to dig up my onions, and sacrifice one tomato plant to make room for the new pullets. I have their bedroom set up in the garage. I plan to introduce these girls to my flock in a couple weeks.
| 
| 
|
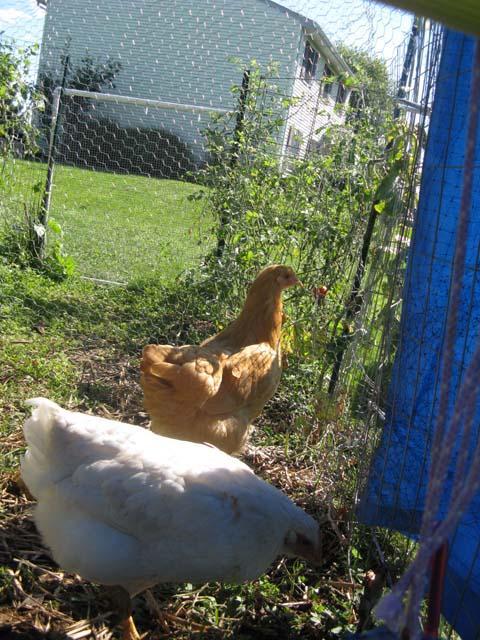
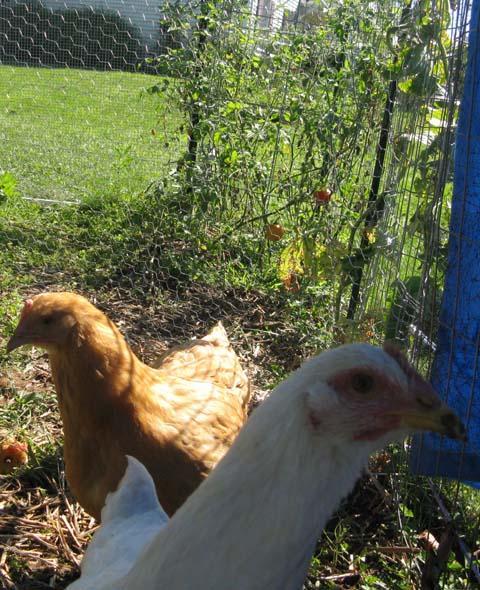
Everyone's pretty much settled in together now. I combined the flock after 2 weeks of separation. The new girls are not yet laying (They are 22 weeks old today 9/26). The older girls have resumed their laying. We had some weird-ness in their laying when the new girls moved into our yard. One hen stopped laying altogether, and we were getting a bunch of soft-shelled eggs from the other. Thank goodness things are back to normal. I was second-guessing every move I made for a while. I didn't really think it would be so stressful to have new sisters.
| 
| 
|
| Everyone's hanging out together now in the run | Except for Peanut Butter Cup. She prefers the vine house to the coop. No doors! No pecking. Everyone gets some free range time on weekend mornings. Peanut Butter Cup is so sweet, but is at the bottom of the pecking order. The other hens come running back into the run for sunflower seed treats. She would stay out all day if she could. |
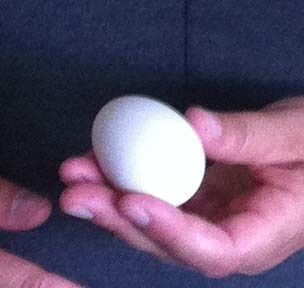
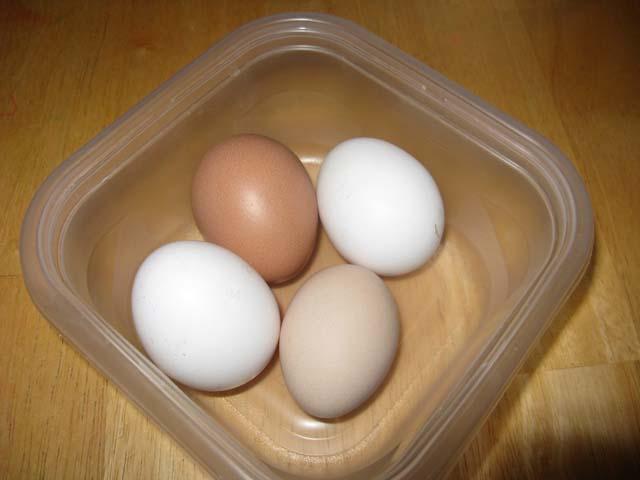
Here are the first eggs from my new chicks. I was so excited by the first brown egg. And then I was excited all over again by the first cream egg. I had expected my Amber Link to start laying before my BO. For a while, I thought she had started laying a white egg (and I thought one of my tetras had stopped laying) because I was getting pullet-sized white eggs. I was overjoyed to see the first cream egg. That meant EVERYONE was laying. Woo Woo!
| 
|
| Peanut Butter Cup's first (brown) egg on 10/5 | Fluff's first (cream) egg on 10/17 |
Peanut Butter Cup and Fluff would like to sleep in the cool breeze. Every night I come out to close up the coop. This is what I find. They mutter amongst themselves as I gently persuade them to go inside for the night. Only one of my hens (Polly, the top girl) sleeps on the roost in the coop. The others cuddle together on the floor. Unfortunately, at least one usually ends up in the nest box. Right now, I'm just cleaning it out daily. Someday maybe I'll come up with a better solution.
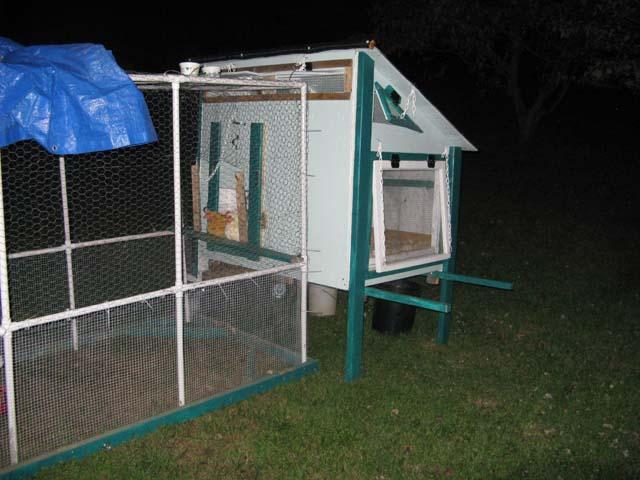
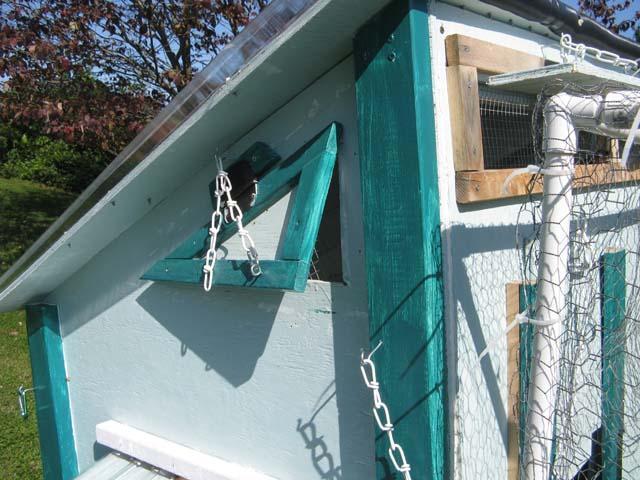
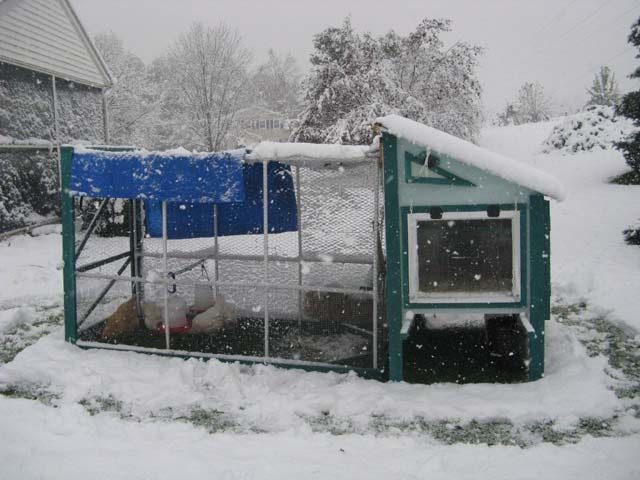
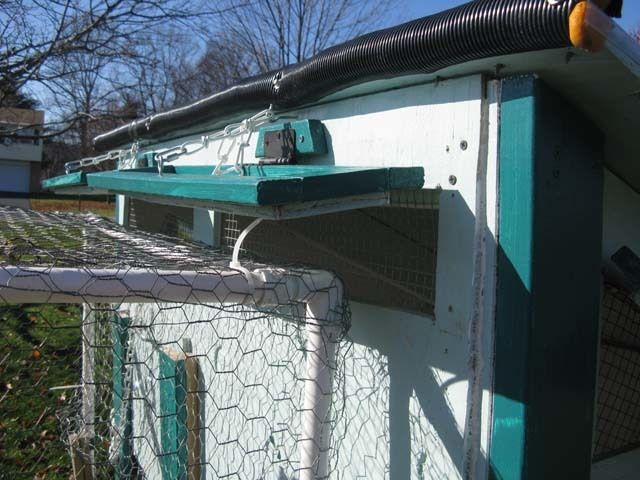
I've been spending some time winterizing the coop. Nothing in my coop is quite "tight" and I'm trying to reduce the drafts. I was foolish when I attached my vents. Finally, I realized why everyone's coop looked different then mine. My trim was in the wrong place. It should have been used to cover up the cracks betwen the triangle and the coop.
|
| 
|
| Before | After - no more cracks and drafts. (at least not on the triangle vents. I still have more to fix.) |
| 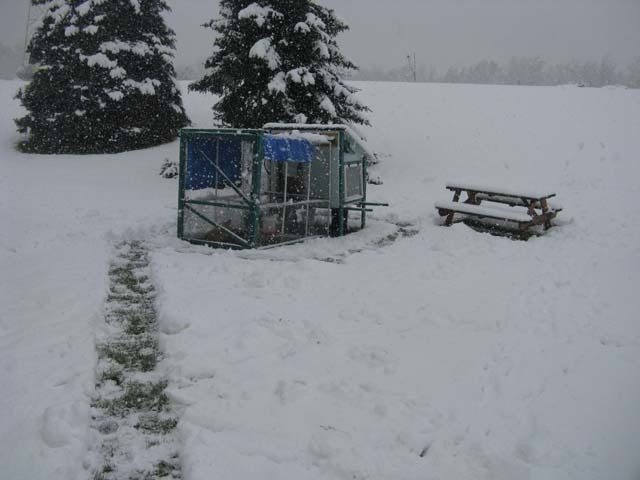
| 
|
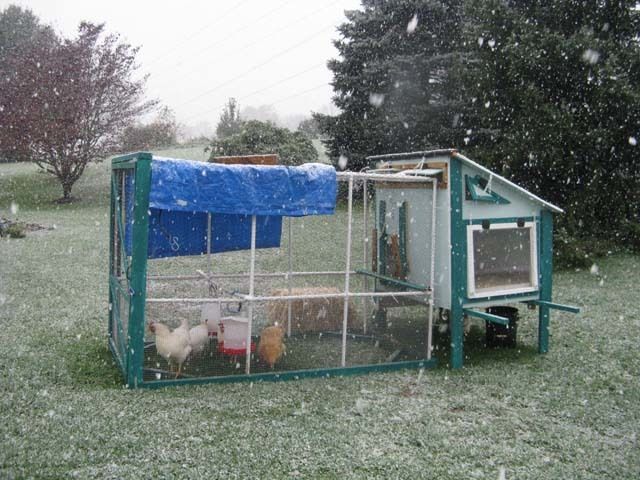
| Their first taste of snow. They don't seem to care. | Clearing a path to my girls. | They're pecking away. I'm lucky the snow was during the day. I had no idea what to expect, and was out checking on them every hour or so. |
| 
| 
|
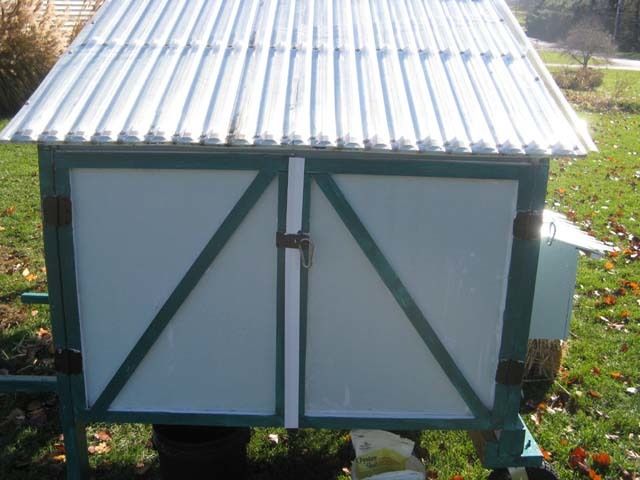
| Using trim to fill in the cracks on the rectangle vents | Now the nest box is snug. No more cracks here. | Some weather stripping closes the crack between the two cleanout doors. |
| 
|

|
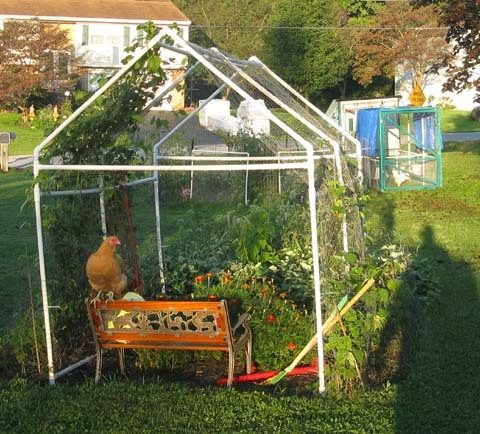
After a winter of hanging out close to electricity, the girls are on the move again. It's mid-March. They are taking up temporary quarters in my garden. I'm hoping to have them fertilize, eat weeds and weed seeds, and til in some compost for me in the next 6 weeks before our frost-free date in May.
3/7/2013
Nothing brings you back to backyardchickens.com like new baby chicks. I've been away for a long time. My chickens have become a part of my life. I love to get outside each morning to greet them. They are my calm when my children are my chaos.
Changes to the flock include losing deer Peanut Butter Cup in the fall. We're not sure why she died. She was just sick one morning, and didn't make it. I miss her. She was always the gentlest of them all.
But here we are in the Spring. And two new chicks are finding their way into my heart. Sunshine is a Buff Orpington and her buddy Night is an Americauna. Here they are as they looked yesterday - fresh from the pet store.
Still TODO: I still have to paint the trim and some other outside pieces.
Biggest mistakes so far:
1. Oops, the pvc pipes in my hoop-style run run burst in cold weather.
2. Oops, I tied a tarp to my run. A strong storm took it airborne, and crashed it back down. I was left with a broken door and broken door frame.
3. Oops, the chicken door is too low. I had wanted it to match up with the 2' part of the run. I wanted to connect the coop/run with a chicken door that hinged down into the run like a little chicken ramp.
4. Oops, the wheels fell off (twice). Finally I listened to dogfish's advice and added horizontal support.
5. Oops, forgot about the bedding. Everything is built too close to the floor. I'm adding parts to hold the bedding in as best as I can.
6. Oops, there is no room for an arm to open the pop door, and the magnets don't hold the run and coop together very well. I really need a pulley system or something for the pop door. And I need a better way to connect the run and coop (while leaving me room to close/lock the pop door at night).
7. The chickens should not be in the run if the door is not secure. I lost Cathy when a dog attacked. The door was not secure, and the chickens ran out of the run where the dog caught and fatally wounded one hen.
8. Oops, the trim was in the wrong place. I built the vents and nest box door with trim attached to the coop. I hinged the plywood I had cut out of the coop onto the trim. This gave me a little more space to allow the plywood wiggle room to open and close. Oops. It also left cracks around the plywood. Come winter, I worried about drafts. I had to take these pieces apart, trim the plywood pieces so they'd fit back into their original holes, and attach the trim to the plywood so that it would cover the cracks when hinged to the coop.