The Brooder Pen
After using plastic tubs last year I decided I wanted something a little easier to work with this year.
After using plastic tubs last year I decided I wanted something a little easier to work with this year.
items used:
(some of the prices are approximate)
4 - 8' 2 X 4s $9
3 - 8' 2 X 2s $5.70
3 - 6' 1 X 6 $15.00
2 - 2' X 2' luan $5.00
1 - 2' X 4'- 1/2" plywood $6.00
2 - 8' 1 X 2 $ 4.50
15' 1 X 1 cage wire $15.00
4 small hinges and 2 slide locks $9
4 - 8' 2 X 4s $9
3 - 8' 2 X 2s $5.70
3 - 6' 1 X 6 $15.00
2 - 2' X 2' luan $5.00
1 - 2' X 4'- 1/2" plywood $6.00
2 - 8' 1 X 2 $ 4.50
15' 1 X 1 cage wire $15.00
4 small hinges and 2 slide locks $9
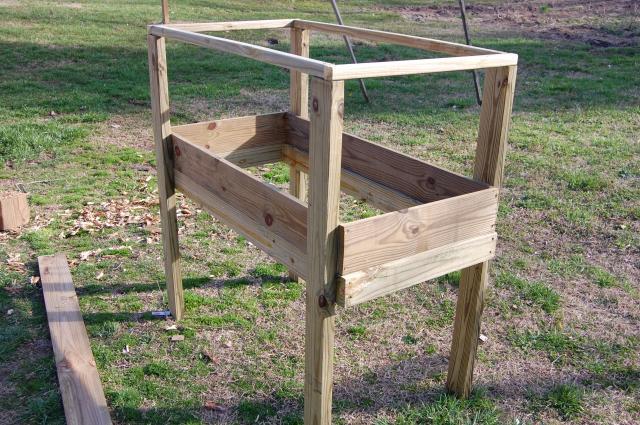
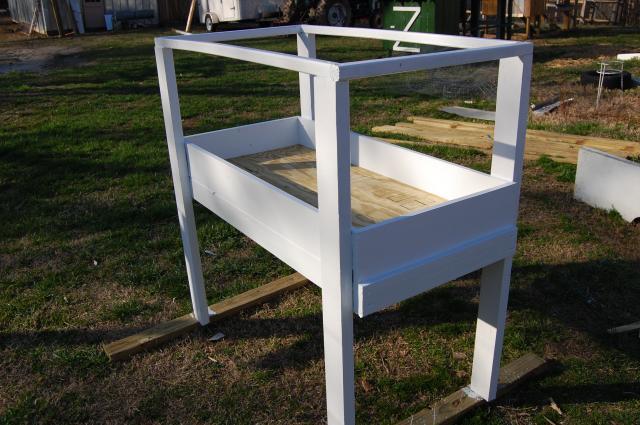
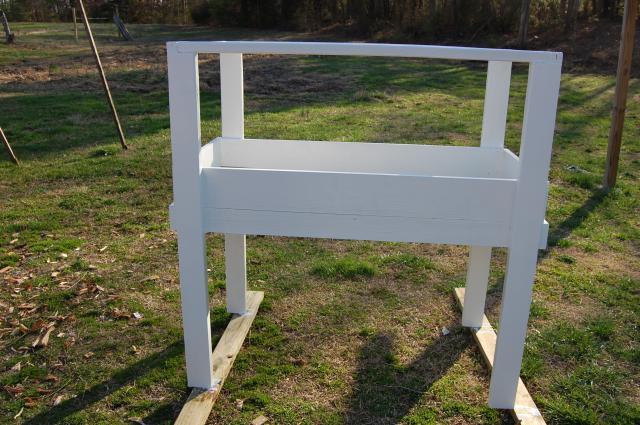
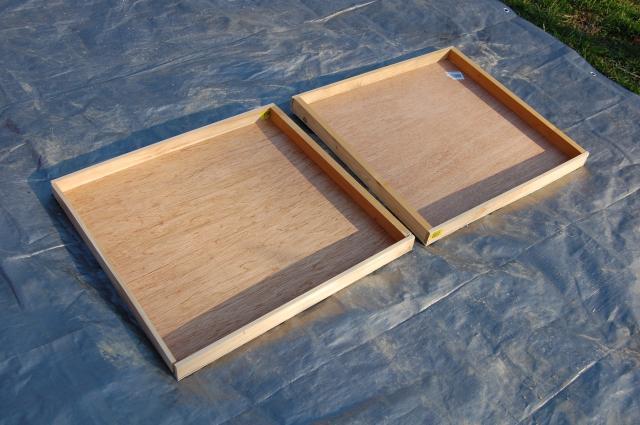
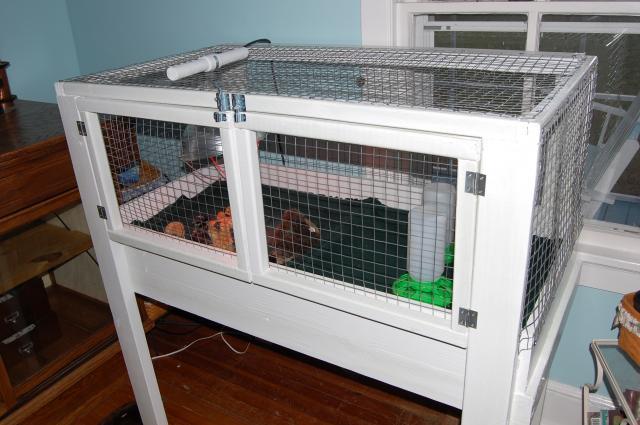
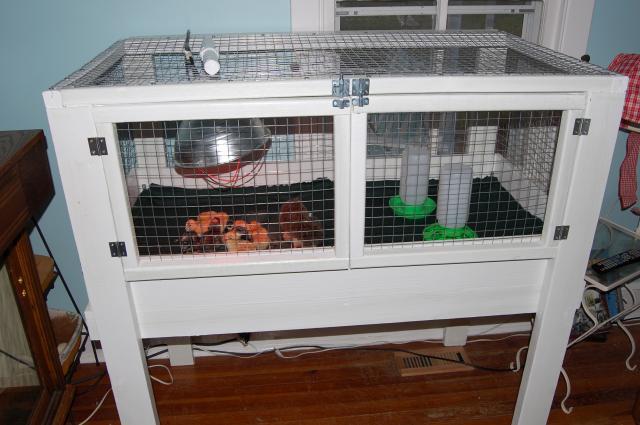
I cut the 2 X 4s in half for the legs and the frame. Then cut 2 more 2 X 4s to frame out the bottom 2' X 4'. I used 2 X 2s to frame the upper part of the frame (I wound up having to replace one 2 X 2 with a 2 X 4 to get the wire to fit). I then made 2 swing doors on the front to fit, out of 2 X 2s and wire. Cut the 2' X 4' plywood to fit for the bottom. I then built 2 (approx) 2' X 2' removable trays to fit in the bottom for easy cleaning. I then wrapped the entire frame with 15' 1 X 1 cage wire ( and it took every bit of it) I painted my frame and doors before putting the wire on since we're keeping it in our living room. Attached a brooder lamp to the top of the wire and everything is ready.
Added note: With 3 years using this brooder. It works wonderfully. Some things I've adapted and adjusted: I use red flood lamps for heat. The position of the lamp is too close for heat lamps. In cold months I'll hang a heat lamp just above the brooder itself for added heat since it stays in an outside shed now. The floor trays are the best part of this brooder. I now fill them with fine wood chips and dump them after the little poop machines move on to their next pen. If you're going to wrap it entirely in wire like I did make sure you keep it in a draft free environment. If I were to do anything different, I would use hardware cloth instead of the 1X1 cage wire. Small snakes and mice could possibly get through.