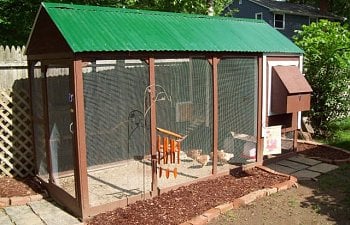
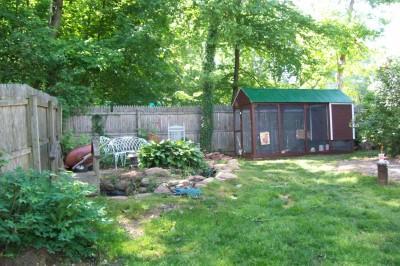
Our Garden Coop - 5'x12' coop for 6 chickens

I am new to chickens and I had no idea on what I needed or what I was doing. In fact I talked about getting some chicks for many years. Well it finally came to pass when I found a new tractor supply store and they had spring chickens (red-sex Links) for $1.00 each. I stopped in with my wife and kids in to see them for fun . They took one look and started handing me books, feed and then they handed me 6 chicks in a box. (Talk about jumping in, I didn’t even know if we could have them in town, but we did have someone who could take them if things went bad). Next thing I know I'm at home with 6 chickens.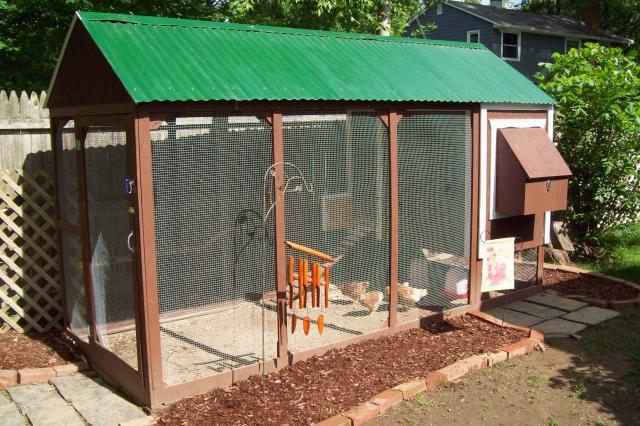
I called the town and asked about ordinances. They have a general ordnance about livestock and acreage (3 archers for any livestock horses etc) but they have a pseudo don’t ask don’t tell policy and told me there were pockets of chickens all over town. They stated if my neighbors don’t mind they won’t come looking but cautioned about roosters (nuisance ordnance). they also mentioned was if we get a complaint they have to enforce (that’s the serious one). So I started out going door to door speaking with neighbors and discussed what I wanted to do. We have a great neighborhood and everyone speaks and visits with everyone. One had three goats so I didn't worry about him
") . Two grew up with chickens and was wondering if I can share the poop (no issue there). Many more wanted to buy eggs. None had objections all were excited. Honestly we have wild turkeys, eagle’s hawks, falcons, bears etc all through the neighborhood. We are kinda isolated from the rest of the town by a wildlife reserve and a reservoir. I figured most people would’t notice a few chickens clucking.
. Two grew up with chickens and was wondering if I can share the poop (no issue there). Many more wanted to buy eggs. None had objections all were excited. Honestly we have wild turkeys, eagle’s hawks, falcons, bears etc all through the neighborhood. We are kinda isolated from the rest of the town by a wildlife reserve and a reservoir. I figured most people would’t notice a few chickens clucking. Now I got a green light from the neighbors it was time to build the coop. I looked as many pictures we could find and got an idea of what we wanted. The intent is to make the chickens part of the garden and design our planting around them and their traits. We wanted to be able to leave them in the run or let them loose in the yard (fenced in), the coop design had to blend into the overall plan. I wanted to Zen out in the yard and just watch them.
OK where did we start
We started out by looking at lots and lots of pictures of coops many on this site. After looking we started writing down the things we liked and would want on ours. We also bookmarked the pages for the coops we liked the best and looked at them over and over . I then drew a quick sketch of what I thought the coop looked like, (picture to come soon) and hung it up on the refrigerator door. I had basic dimensions and key pieces were marked.
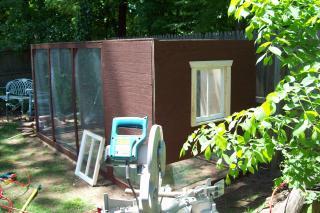
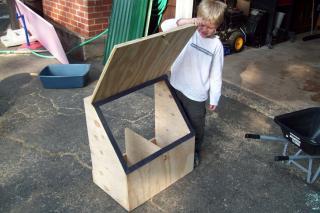
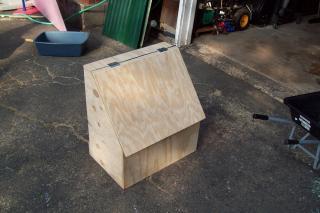
Our final decision was we wanted a playhouse style coop that was insulated and could utilize some material I already had. I am not a builder so we found some plans that look to be about what we wanted. We then made modifications|customized to size it for my yard and the number if chickens (plus a few extras I wanted). The type of construction (1x3 modular walled) is lightweight, inexpensive, and can be moved or disassembled.
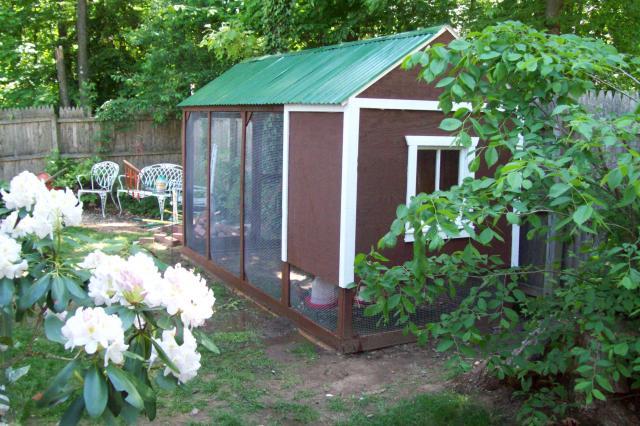
The dimension of this coop is 5’x12’ and is 7-1/2' high at the tallest point. It is made of 1x3x8 spruce strapping (60 boards to be exact). The plan recommended cedar (sealed) but I can't get it here cheaply in CT (Spruce is about $1.50 per board). I am also glad we didn't use cedar after reading reading posts on respiratory issues. This construction is VERY sturdy once assembled (far sturdier than I expected). I added a top and bottom chord of wood to tie it all together. When I added the roof I was able to hang from it with no give (I weigh 260 lbs or 18 stones 10 lbs for our friends from the UK) . We cut all the parts using our now modified cutting sheet provided with the plans. We stained them using a non toxic acrylic stain (making sure to get the end grains) before assembly.
Where to start building
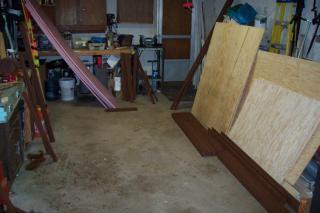
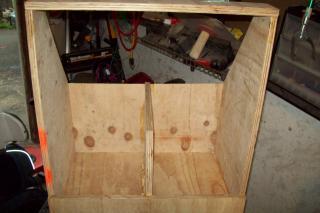
I started by running to the Home improvement stores and buying all the lumber and materials. I decided to have the plywood cut while I was there (the sides are 3x4 and 5x4 which is perfect 4x8 sheet). I cleaned out a flat spot in the garage to build. The first thing we did was dry built each side and cut all of pieces. We then decided to stain and seal all the parts before assembling. Its a personal choice and will take more paint but it gives 100% coverage. An additional benefit is once assembled, no painting
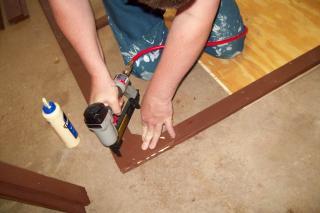
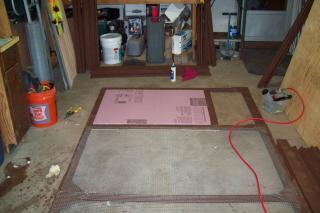
The parts are joined the parts together using gussets (the triangle pieces), Wood glue and 1-1/4" heavy Gage staples (You can use deck screws but didn't want to pre-drill and I own a staple gun). I decided to insulate by simply sandwiching 3/4” foam insulation between the outer sheeting and the inner sheeting filling the void. I picked 3/4” foam because it is the exact width of the 1x3 boards. I will be insulating the roof later. I stapled the hardware cloth fencing at this time too (easy to lay it out and staple on the floor). One word of caution when cutting hardware cloth. USE GLOVES

Here is one side completed. I used 1/2"x1/2" hardware cloth because 1"x1" was hard to find without a special order (lots of money). I also found out that raccoons cant get their little paws through it
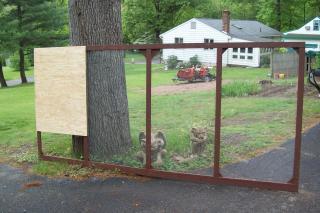
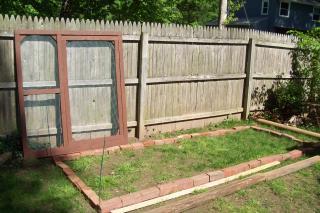
We set a pressure treated foundation level in the spot we picked (I had the wood sitting out in back for about 10 years unused). 12 inches of chicken wire will be attached to it and buried underground. My original Idea was I was going to use bricks (seen below. I suppose either would work but I could staple 12" of fence that I buried in the ground to the wood)
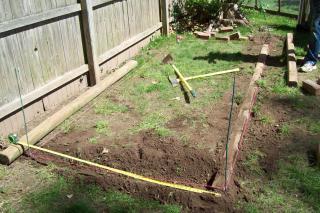
We assembled the sides pretty easily (I made sure the gussets were offset from the edges so the side came together cleanly). They are nailed one to another I then added the top cord of wood that locked the entire structure together.

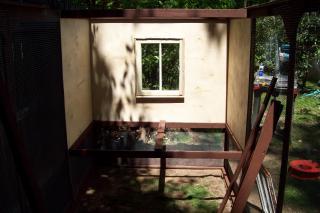
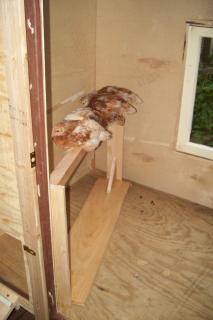
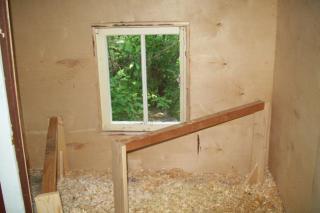
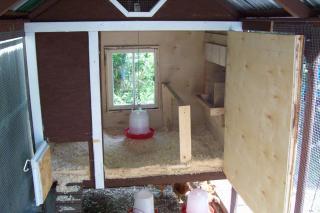
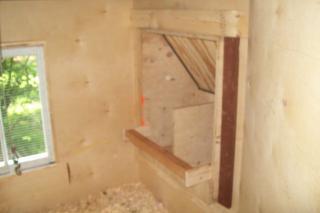
The roost area was totally custom built for my wants. The plans I bought was a bit sparse on detail on how to put this together. I added a window and a laying-box that would hang on the side (see below). I built them in before I assembled the sides
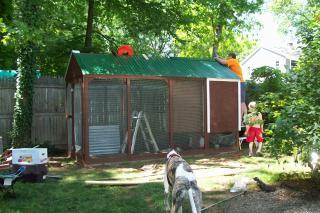
Time to build the roof.
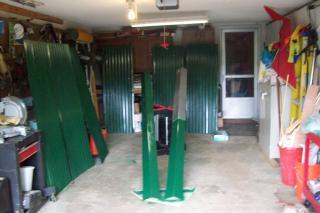
I used galvanized corrugated steel that I had on hand for roofing (it used to be a steel storage building on a local military base that was torn down). I painted the panels using cans of rust-oleum spray paint. I then cut 6' sections into 3' sections using a metal cutting blade on my circular saw. It cut like plywood only more sparks and smells I used flashing for the ridge vent
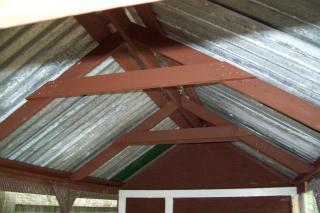
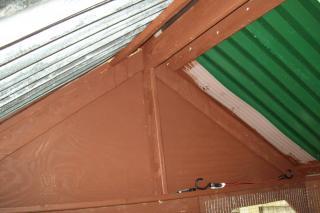
I deviated from the plans here to make sure it could hold up to the ice storms we get here in CT. The plan only had roof supports on each end with one purling for each side running the length (the plans coop was 7x4 mine is 5x12). I built 5 trusses to account for the 12' length (one every 3 ft) ,added a center 1x4 board running the entire length and purlines on the top and bottom. (This is a galvanized steel roof so it can span 3' with no issues, some plastic roofing can not (common is 2'), so check the manufacturers instructions).
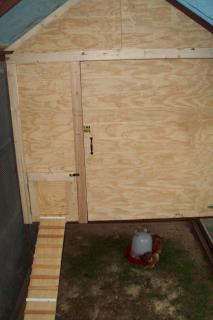
Now it was time to close up the hen house (roost? not sure what it actually called). and create the pop hole and human door. (for the longest time I was calling it a poop hole
)
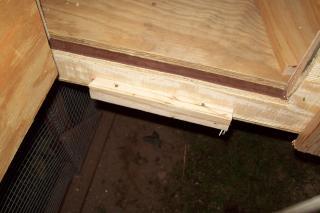
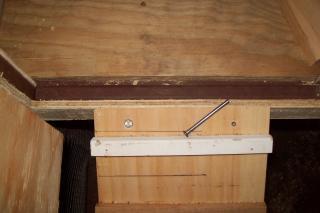
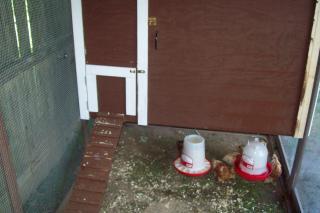
I created a chicken ladder and figured out how to attach it. I fastened a block to the hen house and the drilled two holes through the ladder into the block. I cut the tips off two nails to make pins. The rungs on the ladder are 3" apart.
I decided to make the peaches removable so I can clean them. I also decided not to use metal because someone told me it can get cold in winter
All I have to add is accessories (I got another waterer for inside)
After reading a lot of great post here on ventilation, I decided to add a 16" vent I made out of scrap (for those interested all the cuts are 22.5 deg)

I added a Laying box with Egg door that will hang off the side of the coop so it wont take up any floor space.

I decided to paint the inside after reading few posts discussing the topic. I had a gallon of paint I was going to throw away so ...
Final decision to paint:
1) I had a extra gallon of paint and would have thrown it away
2) I needed to caulk the corners and seams, to prevent unwanted drafts. Painting will keep them from pecking the caulk
3) it makes it easer to clean\disinfect now I can wash with water and a sponge
4) Mites cant hide in the grains
5) looks better
Before
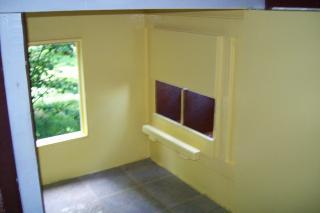
I added a "Hynie-Hyder" to the inside of the Laying Box (who knew a chicken could be bashful) and lowered the perch before I painted. I think it made a significant improvement.
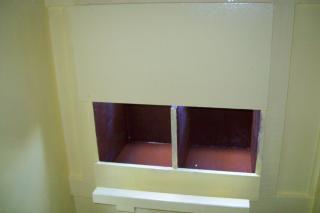
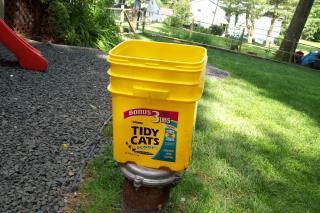
Now the painting was done I was on a creative role and feeling good about the results. I was reviewing some posts the night before about lining the Laying box to make it easy to clean. I started to look at a used kitty litter bucket and realized that if I cut it in half it would fit into the the boxes. SO here are my new Laying Box trays.


I cut it in half using my tablesaw but I am sure it could have been done with a hand saw too. I had to cut the peices to length too. I cant wait to see if the girls use them ( not till august)
One of the reasons I put so much effort into this these kids adore these girls.

Post project thoughts
Things I like
- One thing I like about the coop is the covered run. The chicks go outside even when it is raining heavy and the run floor stays dry.
- I also like having the nest boxes on the side giviing the girls more floor space.
- The vinel on the floor (thanks for that tip folks). It cleans easy and if it gets wet just wipe
- I would have made the hen house part of the coop, a little bigger.
- I would have doubled the budget.
- Added more ventilation earlier
- read more posts on this site (found it post construction)
- Added a lip on the pop door so the shaving dont fall out
- Add links to posts that helped me.