This One is Just Right
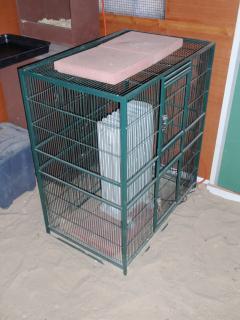
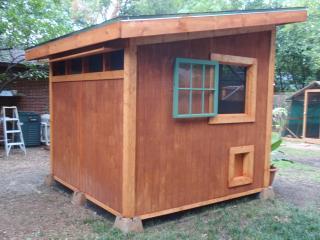
I think I know how Goldilocks felt. I tried several different housing arrangements (shown on my other page). One was too small, one was too hot, one was too cold....So this time, armed with my wish list and the lessons learned from my previous attempts (and hours absorbing the accumulated wisdom of others on this forum), I hired a professional builder to build me the coop of my dreams . To save some money and also because I enjoy puttering around with these kinds of things, I arranged to do the finish out myself (the insulation, interior paneling, securing the windows and vents, constructing the run, etc.). I'm very pleased with the outcome: this one’s just right for my nine bantam hens to live in year round.
Special thanks to my coop builder, Bob at The Custom Coop, for his excellent craftsmanship.
Design Features
Ventilation, Ventilation, Ventilation: At the top of the north and south walls are insect screened and hardware cloth covered vents. Each vent is nearly 8 feet wide by 12 inches deep, for a total of almost 16 square feet of ventilation. Each vent is covered by an adjustable hinged flap secured to the eaves by a chain so that I can open or close as needed.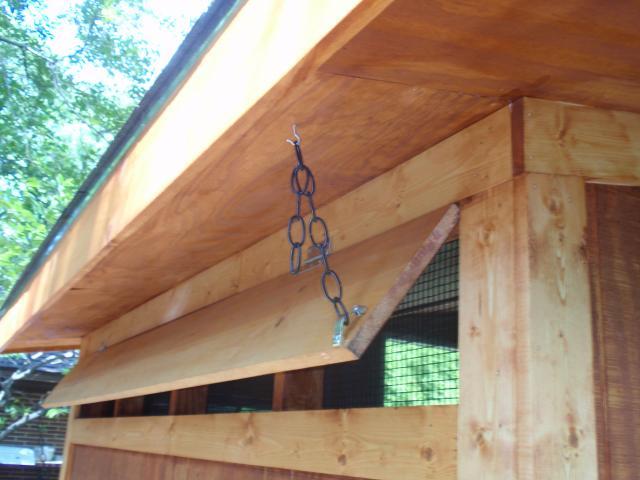
The hardware cloth is 16 gauge, ½” by ½” wire spacing, spray painted black, fastened to the frames on the inside with screws and washers (mounting the wire on the inside means the chickens won't be able to roost on the vent sill). 16 gauge wire is very hard to cut with hand tools. If you have much cutting to do, I've read a Dremel tool is handy for this.
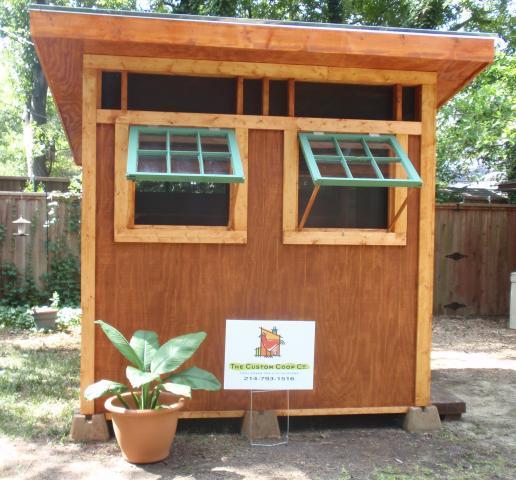
The coop has four recycled wood sash windows, hinged at the top and propped open awning style with sticks hinged to the window. The prop The windows are screened and covered with the same hardware cloth that secures the vents. The windows provide about 16 square feet of additional ventilation, for a combined total of nearly 32 square feet of adustable ventilation for a coop that houses 9 small bantams. sticks fold up and out of the way when the window is closed and latched.
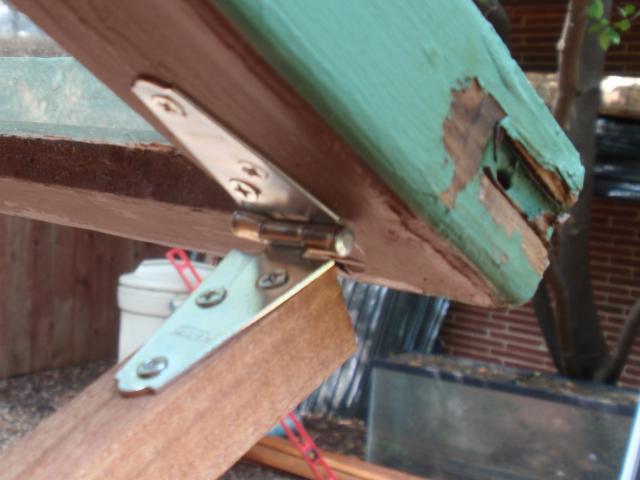
Detail of hinged stick propping up awning window. When I want to close the window, the sticks flip up and out of the way, yet are right there when I need them to prop the window open again.
In the summer, I leave the windows open all the time, but when nights begin to cool, I close the windows and the back vent down at night and open them up again in the morning. It's a quick process that takes less than 2 minutes.
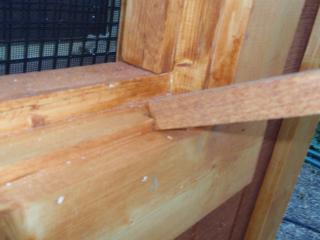
This end of the stick is not attached to the window frame, but fits into a small indentation in the sill.
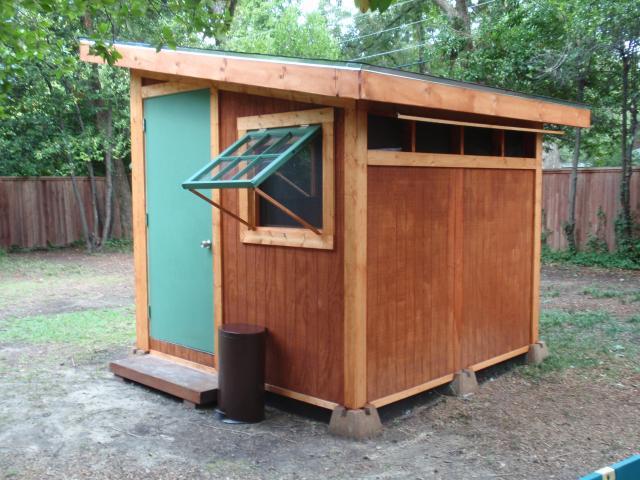
The window on the side of the coop where the run will be located is hinged on the side, conventionally, to avoid having chickens roosting on the top of an awning window.
The pop door is hinged on the inside and will lead (eventually) to the attached run. On the inside, I use a spring clip to latch the door closed.
The pop door is hinged on the inside and will lead (eventually) to the attached run. On the inside, I use a spring clip to latch the door closed.

There is also a hook on the wall so I can latch the pop door open so that it won't accidentally close and block the chickens out of the coop. I keep the water and feed inside the coop.
Mosquitoes Stay Out: The vents and windows are also covered with fiberglass insect screening that I had leftover from another project. Mosquitoes are a big problem here in the summer; this way, the chickens will be able to roost comfortably at night without being bothered by those pesky skeeters.
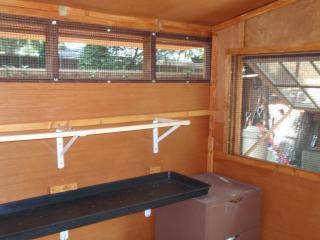
Roosts/Droppings trays: The roosts are made from 2" by 1" boards with the edges planed and sanded smooth, then fastened to the walls using shelf supports. Underneath is another shelf to hold the plastic boot trays that collect night time droppings. In the morning, I dump the contents of the trays out into the composter, hose the trays down and replace them.
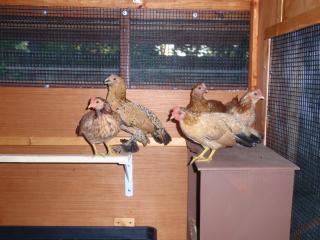
There is around 10 linear feet of roost width, plus around 6 more feet available on the tops of the shelf supports holding up the roosts (which I also covered with planed and sanded boards). I'm noticing that the hens really like to use the roosts on the shelf supports. It helps avoid some of the squabbling about "who gets to roost next to whom" as they settle in at night..
Yes, they do poop on the top sometimes when they sit and look out the window. I just scrape it off onto the floor and scoop it up. For stubborn stains on the top of the cabinet and the roosts, I use Poop Off: Storage: I recycled an old closet shelving unit to store supplies. http://www.petco.com/product/12828/Poop-Off-Bird-Poop-Remover.aspx Great stuff!
Nest boxes: I use two lidded plastic storage bins, plus an old recycled drawer. Portable nestboxes are handy for managing broodies, and I can put one out in each of my daytime tractors and move it back into the coop at night. When I want to replace bedding (which I do frequently in summer to try to avoid mite infestations), I can bring the nestboxes over to the composter, dump out the contents, dust with poultry powder and put in fresh bedding. I like the plastic lidded bins best, but that model is sadly now discontinued.

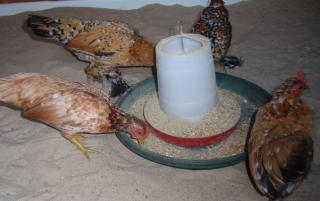
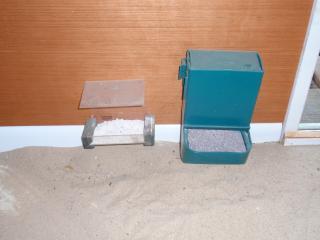
Bins for grit and oyster shell are screwed to the wall. I can easily refill them from supplies stored in the nearby cabinet.
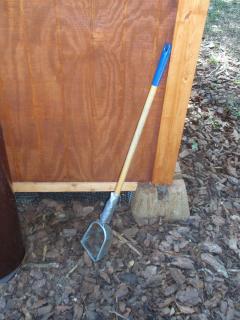
Bedding/Substrate: I use sand on the floor of my coop. The chickens like to dustbathe in it, and I like how easy it is to keep clean. I simply sift out the droppings with this reptile litter scoop duct taped to a long handle. Sand is a "cold" substrate but works fine for our mild North Texas winters.
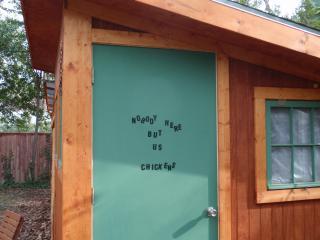
Coop Door: I paid extra to get a pre-hung door that opens outward, rather than inward. I was concerned that an inward opening door would always be scraping over the bedding inside, and worried about bopping chickens behind the door when I opened it up.
Insulation/Radiant roof sheathing: the roof of the coop is made with radiant roof sheathing covered with regular shingles. Inside, the coop was insulated with a combination of R-13 fiberglass batting and regular foam board insulation. I used thin plywood, stained to match the exterior of the coop, to cover up the insulation from pecking beaks, and trim board to cover up the seams where I patched several pieces of plywood together.
The coop's location in our yard will be almost completely shaded by trees in the summer; in the winter, when leaves are gone, the coop will get morning sun. So far this summer, the combination of shade and ventilation has kept the interior temperature of the coop no higher than the ambient temperature outside, critical for our sweltering summers.
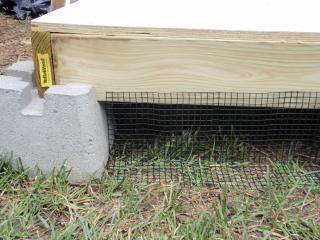
Hardware Cloth on foundation: In order to keep our small bantams (and any other critters) from scooting under the coop's foundation, I stapled hardware cloth to the frame covering the gap, and used landscape fabric staples to secure the wire skirt to the ground:
http://www.scribd.com/doc/37341453 East Elevation
http://www.scribd.com/doc/37342447 West Elevation
http://www.scribd.com/doc/37342428 South Elevation
http://www.scribd.com/doc/37342390 North Elevation
Materials List:
http://www.scribd.com/doc/37350512
The Run:
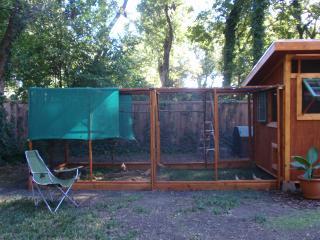
I constructed it by building five panels, 8' wide by about 6 1/2' tall, with a center support. Then I attached 48" wide vinyl coated hardware cloth to the panels running the wire vertically, using screws and washers to fasten the wire to the panels. Then I assembled the panels onto a baseboard frame constructed on the ground. Finally I added the roof panels, measuring and building them to fit (since my carpentry is not exactly exact).
After a few months, I realized I really needed to roof this run, too.

I think my hens would give their new digs two thumbs up...if they had any thumbs.
Winterizing:
I put foam insulation board in the back vent and secured it closed. I've adjusted the flap over the front vent so that air can still circulate out but wind won't blow in. I made insulating panels for the windows with 6 mil plastic and bubble wrap sandwiched between the hardware cloth and the closed and locked window frames. The run is now partially covered with 6 mil plastic to provide some windblock on cold days. To help keep the plastic from flapping around, I covered over the plastic with rolled reed fencing.
On especially cold nights, I use a DeLonghi oil filled heater to keep the temperature inside the coop above freezing for the comfort of my tiny bantams.